1. Welcome to Transactions User Guide
Transaction is a process of money transfer, typically for corporates by banks. It includes banking products, payments, international trade and other services. Every day there are more than several billions of transactions are made around the world. It is an extraordinary amount of money that is transferred from one account to another.
This section contains the following topics:
1.1 Internal Transfer
You can transfer funds from one virtual account to another account of the same corporate.
1.1.1 Internal Transfer Summary
The summary screen provides a list of configured internal transfer fund details for a customer. You can perform an internal transfer fund using the Internal Transfer Maintenance.
1.1.1.1 How to reach here:
Virtual Account Management > Transactions > Internal Transfer > View Internal Transfer
![]()
Field |
Description |
Real Customer Number |
Displays the number of the customer. |
Booking Date |
Displays the booking date associated with the internal transfer. |
Booking Reference Number |
Displays the booking reference number associated with the internal transfer. |
Transaction Virtual Account Number |
Displays the transaction virtual account number. |
Status |
Displays the status of the record. |
1.1.2 Internal Transfer Maintenance
The maintenance screen allows you to configure internal transfer of funds from one virtual account to another within the structure mapped to the same account of the corporate customer.
1.1.2.1 How to reach here:
Virtual Account Management > Transactions > Internal Transfer > Create Internal Transfer
![]()
1.1.2.2 How to add an internal transfer:
- In the Create Internal Transfer screen, provide the required details:
- Booking Reference Number: The system generates the booking reference number.
- Booking Date: Click Calendar to select a booking date from the dropdown calendar.
- Value Date: Click Calendar to select a value date from the dropdown calendar.
- Transaction Branch: Enter the transaction branch.
- Source Code: Enter the source code.
- Source Reference Number: Enter the reference number of the source.
- Customer Number: Click Search to view and select the customer number.
- Real Account Number: Click Search to view and select the account number.
- Original Reference Number: Enter the original reference number.
Transaction Details
- Virtual Account Number: Click Search to view and select the virtual account number.
- Currency: Click Search to view and select the currency.
- Amount: Enter the amount details.
- Transaction Code: Click Search to view and select the transaction code.
- Debit/Credit Indicator: Select one of the options.
Offset Details
- Virtual Account Number: Click Search to view and select the virtual account number.
- Currency: Click Search to view and select the currency.
- Amount: Enter the amount details.
- Transaction Code: Click Search to view and select the transaction code.
- Debit/Credit Indicator: Select one of the options.
Other Details
- Exchange Rate: Enter the exchange rate.
- Remarks: Enter any additional details about the internal transfer fund.
- Click Save. You can view the configured internal transfer details in the Internal Transfer Summary.
1.2 Journal Online
Journal online is used for posting debit and credit transactions to the virtual accounts. Any transaction posted on the virtual account is redirected to the underlying DDA for transaction posting into the real account.
1.2.1 Journal Online Summary
The summary screen provides a list of journal online transactions. You can post debit and credit transactions to the virtual accounts using the Journal Online Maintenance.
1.2.1.1 How to reach here:
Virtual Account Management > Transactions > Journal Online > View Journal Online
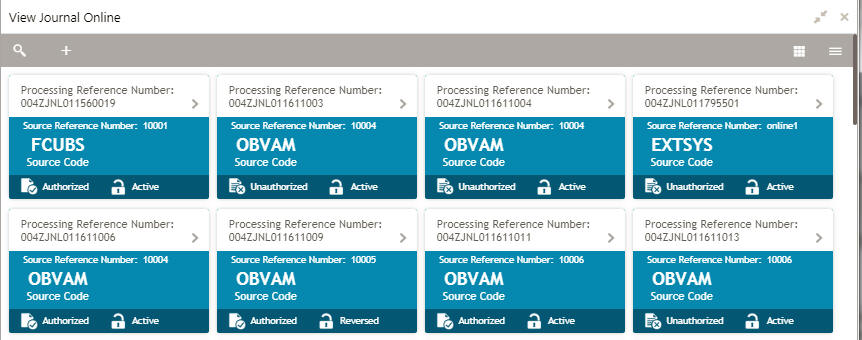
Field |
Description |
Processing Reference Number |
Displays the processing reference number details. |
Source Reference Number |
Displays the source reference number details. |
Source Code |
Displays the code of the source. |
Status |
Displays the status of the record. |
1.2.2 Journal Online Maintenance
The maintenance screen allows you to post debit and credit transaction for a virtual account.
1.2.2.1 How to reach here:
Virtual Account Management > Transactions > Journal Online > Create Journal Online

1.2.2.2 How to add a journal online:
- In the Create Journal Online screen, provide the required details:
- Source Code: Enter the source code of the transaction.
- Source Reference Number: Enter the source reference number.
- Booking Date: Select a booking date for the transaction from the dropdown calendar.
- Initiation Date: Select a initiation date for the journal online from the dropdown calendar.
- Processing Reference Number: The system generates an unique processing reference for the transaction.
- Original Reference Number: The system generates an original reference number for the transaction.
- Click + to add a row and provide the required details:
- Virtual Account: Click Search to view and select the required the virtual account.
- Virtual Account Currency: Displays the virtual account currency.
- Virtual Account Branch: Displays the virtual account branch.
- Debit/Credit: Select whether the account is debited/credited.
- Force Debit: If selected, the account is forced debited and no balance check is performed.
- Transaction Currency: Click Search to view and select the transaction currency.
- Transaction Amount: Enter the transaction amount.
- Value Date: Select a value date from the dropdown calendar.
- Transaction Code: Enter the transaction code.
- Value Date: Select a date on which the transaction is effective from the dropdown calendar.
- Exchange Rate: Enter the exchange rate.
- Additional Text: Enter additional information about the transaction, if any.
- Reconciliation Reference Number: Enter additional information about the transaction that is used for the reconciliation purpose, if any.
- ECA or Block Reference Number: Enter the block or ECA reference number.
- Reporting Information: Enter additional information about the transaction which must be reported.
- DDA Offset: Click Search to view and select the DDA offset details.
- Click Save. You can view the configured journal online details in the Journal Online Summary.
1.3 Amount Block
You can create an amount block for a virtual account.
1.3.1 Amount Block Summary
The summary screen provides a list of amount blocks for a virtual account. You can create an amount block using the Amount Block Maintenance.
1.3.1.1 How to reach here:
Virtual Account Management > Transactions > Amount Block > View Amount Block
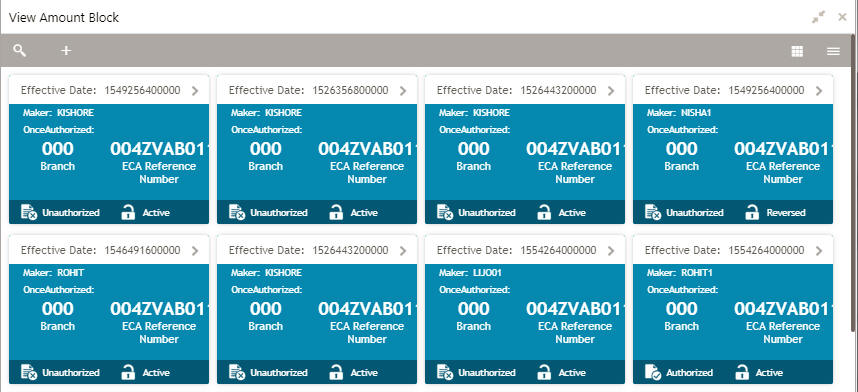
Field |
Description |
Effective Date |
Displays the start date of the amount block. |
Maker |
Displays the name of the user who created the record. |
Once Authorized |
Indicates if the record is authorized once or not. |
Branch |
Displays the name of the branch. |
ECA Reference Number |
Displays the ECA reference number. |
Status |
Displays the status of the record. |
1.3.2 Amount Block Maintenance
The maintenance screen allows you to create an amount block for a virtual account.
1.3.2.1 How to reach here:
Virtual Account Management > Transactions > Amount Block > Create Amount Block
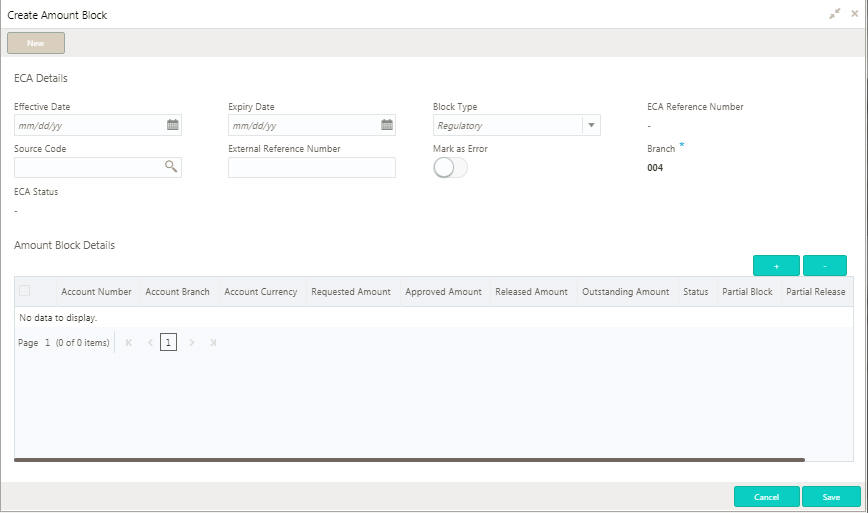
1.3.2.2 How to add an amount block:
- In the Create Amount Block screen, provide the required details:
ECA Details
- Effective Date: Select a start date for the amount block from the dropdown calendar.
- Expiry Date: Select an expiry date for the amount block from the dropdown calendar.
- Block Type: Select a block type from the dropdown list.
- ECA Reference Number: The system generates the ECA reference number.
- Source Code: Click Search to view and select the required source code.
- External Reference Number: Enter reference number from an external system requesting for the block.
- Mask as Error: By default, this is disabled. If enabled, the failed records are marked as error. If disabled, the failed records are not marked as error.
- Branch: Displays the name of the branch.
- ECA Status: The system generates the ECA status.
Amount Block Details
- Click + to add a row and provide the required details:
- Account Number: Click Search to view and select the account number.
- Account Branch: Based in the Account Number selected the information is auto-populated.
- Requested Amount: Enter the requested amount block.
- Approved Amount: The system generates the approved amount.
- Released Amount: The system generates the release amount.
- Outstanding Amount: The system generates the outstanding amount.
- Status: Displays the status of the block.
- Partial Block: By default, this is disabled. If selected, you can partially block the transaction account.
- Partial Release: By default, this is disabled. If selected, you can partially release the amount to the account.
- Remarks: Enter additional details of the amount block.
- Click Save. You can view the account block details in the Amount Block Summary.
1.4 Account Transaction Enquiry
You can view the transaction details for a virtual account. The transactions include both journal transactions and internal transfers.
1.4.1 Account Transaction Enquiry Query
The query screen provides a list of transaction on a virtual account.
1.4.1.1 How to reach here:
Virtual Account Management > Queries > Account Transaction Enquiry
![]()
1.4.1.2 How to query an amount transaction enquiry:
- In the Create Amount Transaction Enquiry screen, provide the required details:
- Virtual Account Number: Click Search to view and select a virtual account number.
- Virtual Account Name: Displays a virtual account name.
- Transaction Start Date: Select a transaction start date from the dropdown calendar.
- Transaction End Date: Select a transaction end date from the dropdown calendar.
- Click Query to view the columns with the updated details:
Column |
Description |
Debit/Credit |
Indicates if its a debit/credit transaction. |
Transaction Narration |
Displays the transaction narration. |
Transaction Code |
Displays the transaction code. |
Transaction Reference Number |
Displays the transaction reference number. |
Transaction Currency |
Displays the transaction currency. |
Transaction Amount |
Displays the transaction amount. |
Exchange Rate |
Displays the exchange rate. |
Value Date |
Displays the value date. |
Reconciliation Reference Number |
Displays the reconciliation reference number. |
Additional Information |
Displays additional information about the transactions. |
Source Code |
Displays the source code. |
Source Reference Number |
Displays the source reference number. |