Working with the Manage Claims Page
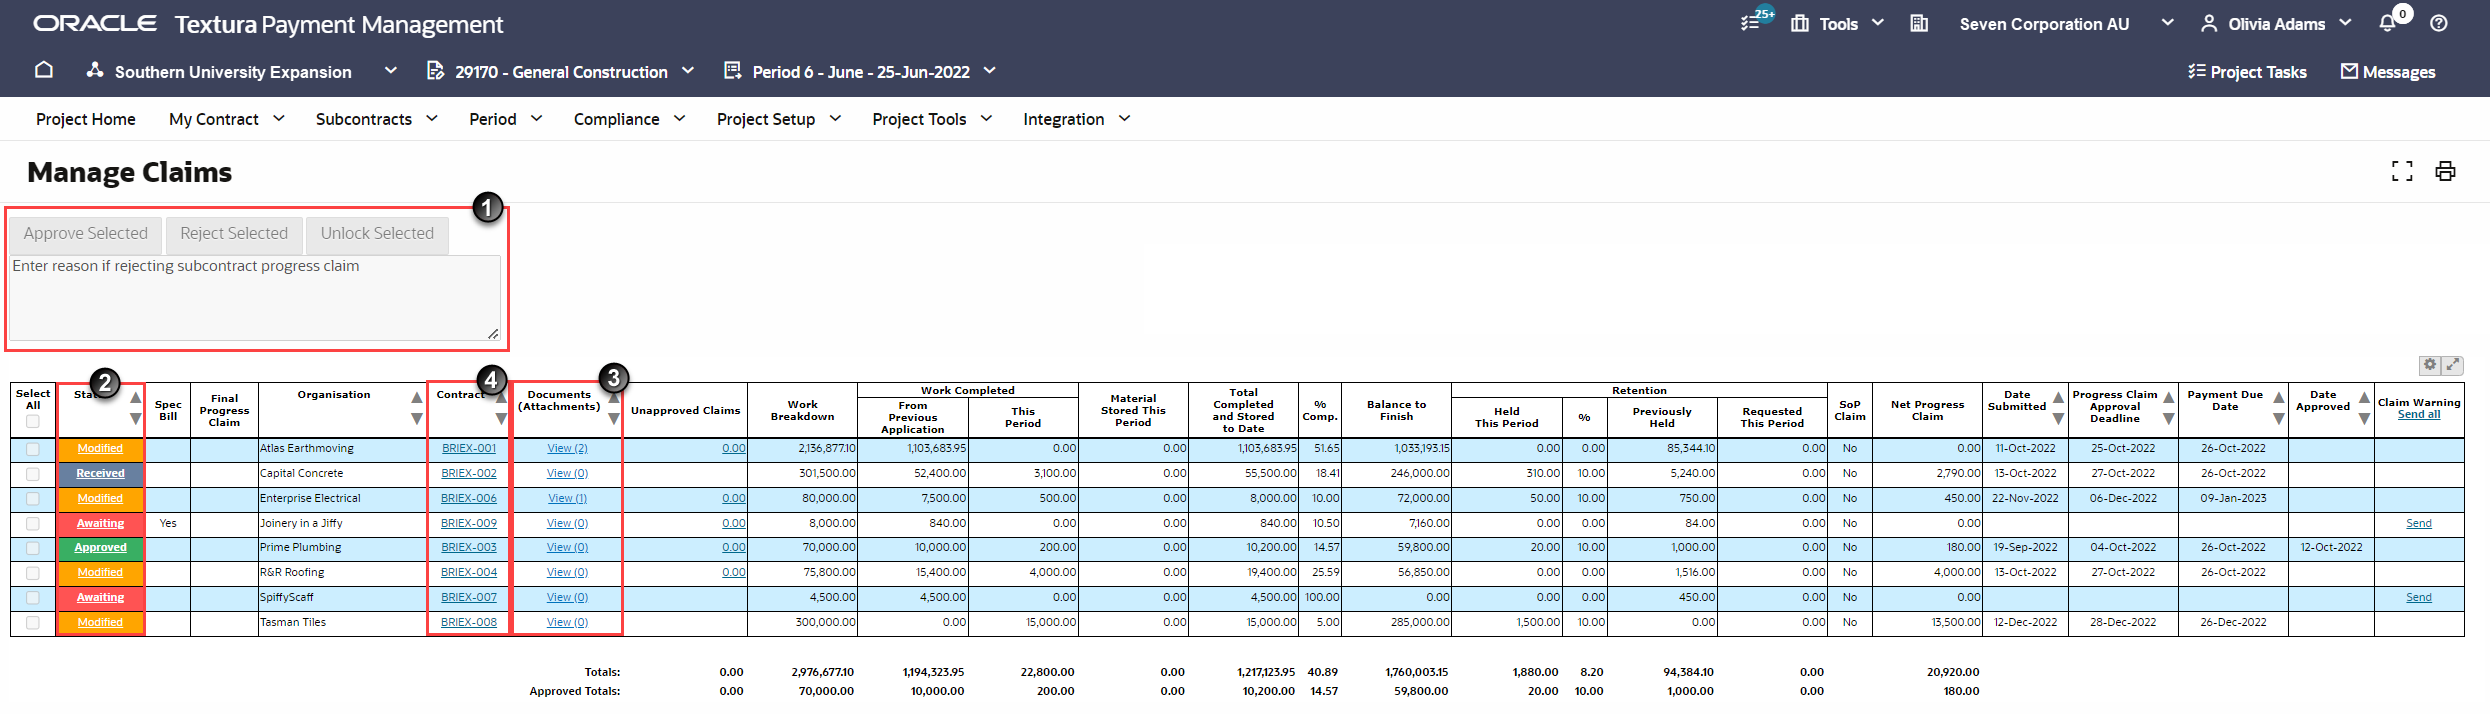
- Progress Claim Buttons:
- (Optional) Add a Comment: Use the text box to add the reason you are rejecting the progress claim. This message is included in the rejection email sent to the Subcontractor. If multiple progress claims are selected for rejection, all selected organisations receive this comment.
- (Optional) Reject Selected: Choose to reject selected invoices.
- Status column: The progress claim status.
- Awaiting: Claim has not been received
- Received: Claim has been received and can be modified and approved
- Editing: Progress claim is being modified by an approver
- Approved: Progress claim has been approved.
For projects using the Request Variations feature, there are two additional statuses:
- Unmatched: Claim has been received and there are claims against variations that have been requested, but are not accounted for in your ERP
- Overbilled: Claim has been received and there are claims against variations that exceed the approved value of the variation.
Hover over the Status column and choose the Edit Progress Claim Details link in the dialogue to go to the Modify Contractor Progress Claim page to make changes to claimed amounts.
Note: If the claim does not need to be modified and you are the next Approver, use the Approve Payment Schedule X of Y link to go straight to the Sign Documents page.
See the Signing Claims and Period Documents topic.
- View Period Documents
Hover over the View link in the Documents column to see period documents for a claim.
Links to the documents display in a dialogue box.
- Progress Claim, Payment Schedule, Statement, and Statutory Declaration links open another dialog page to download PDF versions of the document.
- The Attachments link opens the Attachments page.
- The Progress Claim Log link opens the Progress Claim Log page.
- View Contract: Choose the contract number, listed in the Contract column, to see the Contract Status page. View comments associated with the contract from the Contract Comments column.
Other Actions
- Sort: Sort claims on the Status, Organisation, Contract, Documents (Attachments), or Date Submitted columns. From the column heading choose ∇ to see the claims sort in descending order or choose Δ to see the claims sort in ascending order. For the Documents (Attachments) column, you can sort by the number of attachments.
Sorting claims by Date Received can help track when Security of Payment responses are due.
- View Contract: Choose the contract number, listed in the Contract column, to see the Contract Status page.
- Projects with Textura Payment Accelerator programs: When a project is included in an Textura Payment Accelerator programa Textura Payment Accelerator program (TPA), the Manage Progress Claim page indicates which progress claims use the TPA Payment Type.
See Manage Textura Payment Accelerator programs for Head Contractors or contact your implementation team to learn more about Textura Payment Accelerator programs.
- Projects with the Request Variations feature: When a project is using the Request Variations feature, the Manage Progress Claim page indicates the amount claimed against unapproved variations.
See Variation Register Tab for more information about managing requested variations.
- Resend Invite: You can resend the email prompting a subcontractor to submit a claim. Choose the Send link from Period Warning column. Choose Send All from the column heading to resend the invitation to all Awaiting Subcontractors in the period.