| Oracle® Retail Enterprise Inventory Cloud Service Administration Guide Release 22.1.103.0 F52084-02 |
|

 Previous |
 Next |
| Oracle® Retail Enterprise Inventory Cloud Service Administration Guide Release 22.1.103.0 F52084-02 |
|
Previous |
Next |
This section covers the following topics:
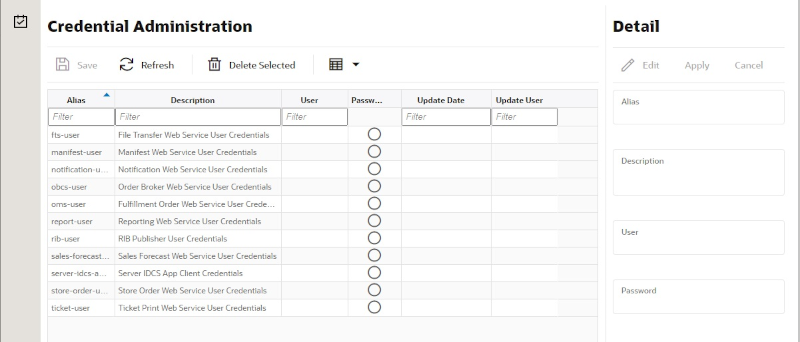
The Credential Administration screen is used to setup integration credentials to connecting with external/third party systems.
To access this screen, user need to be assigned followings:
IDCS or OCI IAM app roles: <SIOCS Primary APP>.admin_users
Security Permission: Access Credential Administration
List Buttons
Save: Persists currently altered information.
Refresh: Refreshes the screen with currently persisted information.
Delete Selected: Deletes the user and password value for the records selected from database.
Filter: Enabled are disabled the filtering row in the table.
List Attributes
Alias: The alias for the user.
Description: The description of the user.
User: The user name.
Password: Displays whether a password has been set currently for the user.
Update Date: The last update date.
Update User: The user who updated the record last.
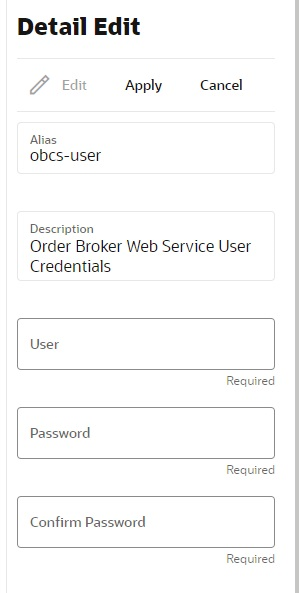
Detail Buttons
Edit: Places the detail information displayed into edit mode.
Apply: Applies the current data to the credential admin record and updates the list information.
Cancel: Places the panel back into display mode without applying the information.
Detail Attributes
Alias: Shows the alias for the user. Pre-defined read only field.
Description: displays the user description. Pre-defined read only field.
User: Field to enter user name.
Password: Field to enter password for the user.
Confirm Password: Field to enter password one more time in order to make sure the user has entered the right password.
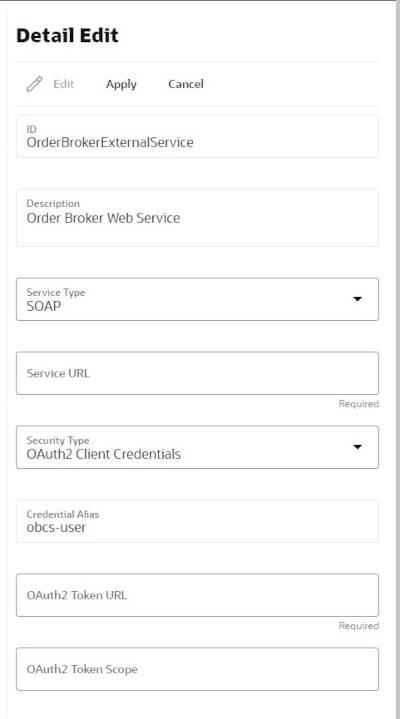
The External Administration screen is used to setup integration information to connect with external/third party systems, such as specific the URL for external web service connection.
To access this screen, user need to be assigned followings:
Security Permission: Access Credential Administration
List Buttons
Save: Persists currently altered information.
Refresh: Refreshes the screen with currently persisted information.
Reset:
Filter: Enabled are disabled the filtering row in the table.
List Attributes
ID: An identifier for the external service.
Description: A description of the external service.
Service Type: The type of web service (for example, SOAP, ReST).
Service URL: The URL of the service location to access.
Security Type: The type of security the service uses.
Update Date: The last update date.
Update User: The user who updated the record last.
Detail Buttons
Edit: Places the detail information displayed into edit mode.
Apply: Applies the entered data to the record and updates the list information.
Cancel: Places the panel back into display mode without applying the information.
Detail Attributes
ID: An identifier for the external service.
Description: A description for the external service.
Service Type: The type of service.
Service URL: The URL used to connect to the service.
Security Type: The type of security associated with the service. Selection will lead to more fields to populate.
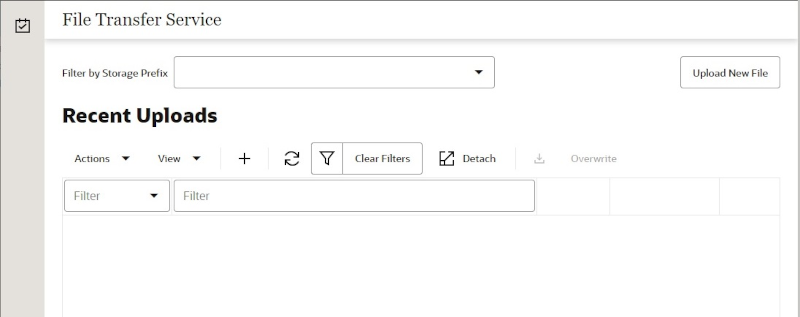
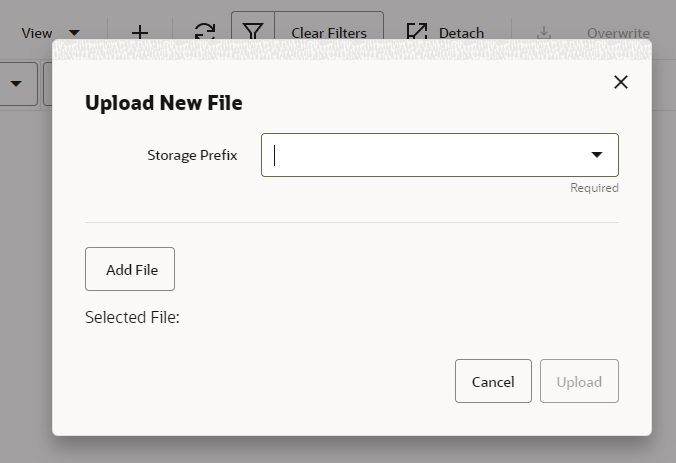
The File Transfer Service screen allows the user to upload data files into a location within EICS to be processed. This supports access to CFS object storage through the file transfer service. The UI allows users to browse previous uploads, upload new files, overwrite previously uploaded files, and download files.
Security Permission: Access File Transfer Service
Screen Elements
Filter By Storage Prefix:
Upload New File:
Refresh:
Detach:
List Attributes
Unknown:
Documentation for the Batch Job Administration screen can be found in the Batches chapter within this guide.
Documentation for the Batch Job Scheduler screen can be found in the Batches chapter within this guide.
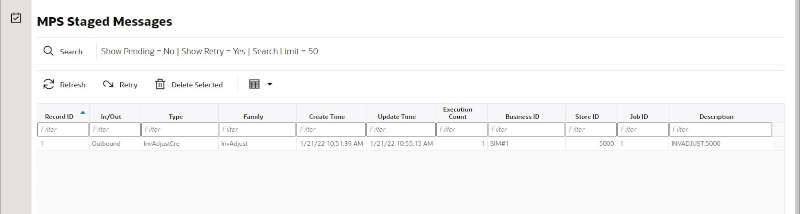
The MPS Staged Message administration form is used to monitor the messages in the Message Processing System queue. Each message contains the detailed information being transmitted between EICS and an external system.
Filter Bar
Search: This is a button that displays a filtering dialog.
Description: A non-labeled text field follows the Filter button that displays what criteria are currently selected to filter the staged message table.
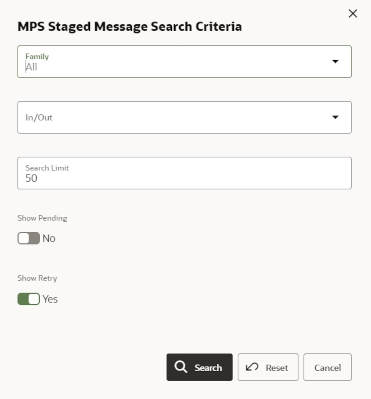
Filter Dialog Attributes
Family: Limits the search results to only those messages in the specified family.
In/Out: Indicates if the message is inbound to EICS or outbound to an external system.
Search Limit: Limits the number of messages found to the specified limit or less.
Show Pending: If true, only messages that are pending will be displayed.
Show Retry: If true, only messages that are in retry will be displayed.
Filter Dialog Buttons
Search: Executes a search for staged messages based on the selected criteria and refreshes the list table with that information.
Reset: Results the filter dialog back to its default settings.
Cancel: Closes the dialog without taking any action.
List Buttons
Refresh: Refreshes the staged message list with current information.
Retry: If a staged message is selected, selecting this button will retry the processing of the staged message.
Delete Selected: If a stage message is selected, selecting this button will attempt to delete the message.
Filter: Activates the filter dialog allowing the user to filter information.
List Attributes
Record Id: A unique identifier assigned to the stage message.
In/Out: Indicates if the message is inbound to EICS or outbound to an external system.
Type: Type of message within a family. For example, most families of messages have a create, modify, and delete type of message.
Family: Describes the family that the message belongs to. This will align with a MPS Work Type scheduled to process this family of messages.
Create Time: The timestamp of the first time the message was created.
Update Time: The timestamp of the last time the message was updated.
Execution Count: The number of times the system has attempted to process the message.
Business ID: A business identifier associated to the message. More than one message may carry a business identifier, and so this can be used to associate messages that may be related to the same activity.
Store ID: The identifier of the store associated to the message.
Job ID: The job identifier is a server-generated sequence number used for grouping related messages. If a message is singular with no other related messages, then its record identifier and job identifier will be identical. For messages, that must be executed sequentially together as a group, they will be assigned the same job identifier but different record identifiers.
Description: A brief formatted description of the staged message that gives some indication of the contents within.
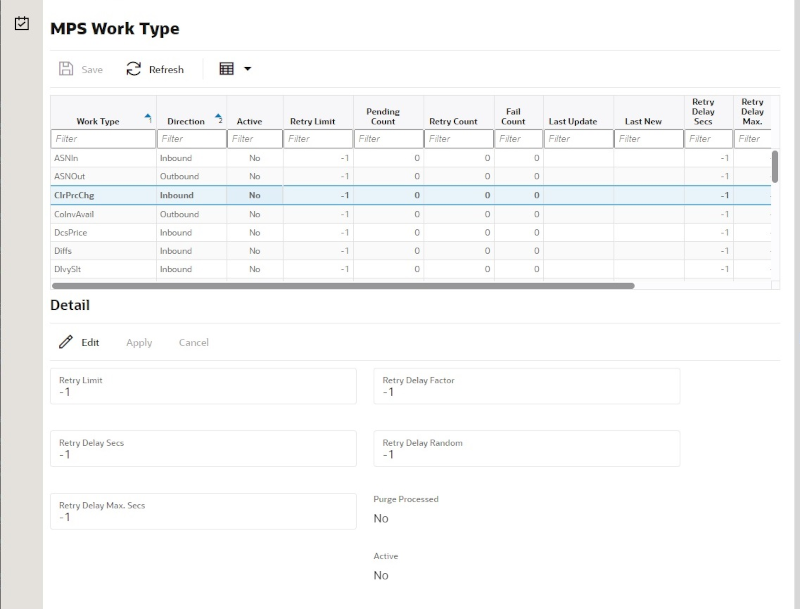
The MPS Work Type administration form is used to configure the MPS work types. MPS stands for Message Processing System and each work type represents an external inbound or outbound message family or grouping to be delivered to another system. These work types do not represent the messages themselves (see MPS Staged Message) but the working queue that handles the processing of these external messages.
List Buttons
Save: Persists currently altered information.
Refresh: Refreshes the screen with currently persisted information.
Filter: Enabled are disabled the filtering row in the table.
List Attributes
Work Type: The work type is the name of the message queue being worked on.
Direction: Indicates if the message queues is inbound to EICS or outbound to an external system.
Active: Yes indicates the work type is currently active and attempting to process messages. No indicates it has been disabled.
Retry Limit: The number of times to attempt to process a single message before marking it as failed.
Pending Count: Number of message pending processing.
Retry Count: Number of times the system as attempted to process the message. Zero times means processing has not been attempted yet.
Fail Count: Number of messages that have failed to be processed.
Last Update: The timestamp of the last time a staged message record was updated in the database for this specific work type.
Last New: The timestamp of the last time a staged message record was created in the database for this specific work type.
Retry Delay Secs: The delay in seconds between retries.
Retry Delay Max Secs: The maximum delay in seconds between retries.
Retry Delay Random: The factor used to limit the range of retry delay randomization.
Purge Processed: Indicates if automatic purging of messages that are processed successfully is enabled.
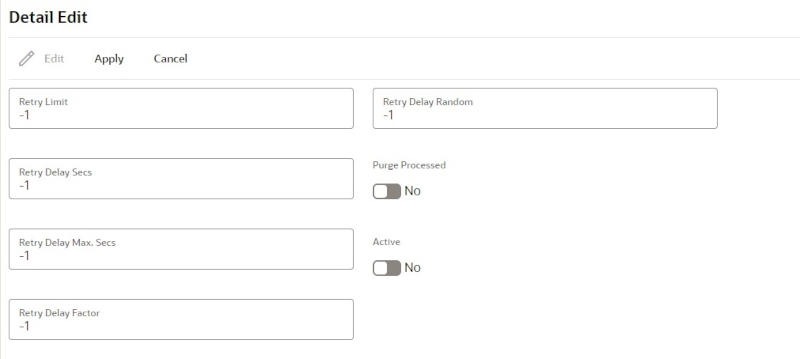
Detail Buttons
Edit: Places the detail information displayed into edit mode.
Apply: Applies the current data to the work type and updates the list information.
Cancel: Places the panel back into display mode without applying the information.
Detail Attributes
Retry Limit: The number of times to attempt to process a single message before marking it as failed. Zero indicates it should only be attempted once and will not be retried. A positive value indicates how many attempts to process the message should be made in addition to the original attempt.
Retry Delay Seconds: The number of seconds between attempts to process a message. Zero indicates no delay whereas a value of 30 indicates 30 seconds between attempting to process the message. This value does not represent an absolute value as it used with other parameters below to produce a calculated message time delay.
Retry Delay Max Seconds: This is the maximum number of seconds for a delay between processing messages. This caps the maximum value for the calculated delay.
Retry Delay Factor: This attribute produces an increased delay between each retry of a failed message in the queue. It is a decimal value starting at 1.0 and increasing. If you enter 1.0, it means there will be no increase in the retry delay seconds during repeated attempts to process a message. A value of 1.5 indicates that the retry delay seconds will be 150% of the retry delay seconds on retry.
A linear delay of 1.0 can be used but may result in messages reaching their retry limit prior to any issues being resolved. A value of 1.5 or larger will produce an increased delay that may allow time for other dependent messages that could be holding up execution to arrive.
Retry Delay Random: Defines the amount of the delay to increase or decrease by a random amount. It accepts values from 0.0 to 1.0. A value of 0.0 disables random variation of the delay. A value of 0.5 indicates the calculated delay may be randomly altered by up to 50% of its value whereas 1.0 indicates it could be randomly altered up to 100% of its value. It is recommended to use at least some small random variation to improve message throughout as this will reduce resource convention and help avoid timing issues.
Notes: The parameters are applied to retries in the following manner. The retry delay seconds is first increased by the retry delay factor, then the retry delay max seconds is applied, and finally the random delay is added or subtracted to determine the final number of seconds to wait between message processing attempts.
Purge Processed: Switch to enable/disable automatic purge of messages that are processed successfully.
Active: Switch to enable/disable a work type.
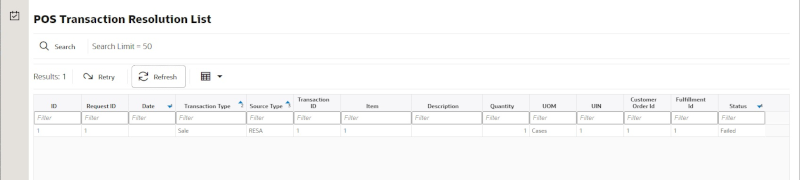
The POS Transaction Resolution screen allows viewing and maintenance of point-of-sale transactions that failed processing and all retry attempts have failed:
Security Permission: Troubled POS Transaction Resolution
List Buttons
Search: Navigates to the resolution search criteria screen.
Retry: Will reset and retry processing for the selected POS transaction.
Refresh: Will refresh the screen with current up to date information.
List Attributes
ID: An internally generated unique transaction identifier. Clicking on the ID link will navigate to the POS Transaction Resolution Detail screen.
Request ID: A request identifier indicating the processing group it was executed with.
Date: The date of the transaction.
Transaction Type: The type of transaction that occurred.
Source Type: The source of the transaction.
Transaction Id: The full sale transaction that this item sale is a part of.
Item: The item.
Description: The description of the item.
Quantity: The quantity of item that was processed.
UIN: A universal identifiable number (such as Serial number). If this is present, the quantity of the transaction is 1.
Co ID: Customer Order identifier.
Fulfillment ID: Fulfillment Order identifier.
Process Status: The current state of processing for this item transaction.
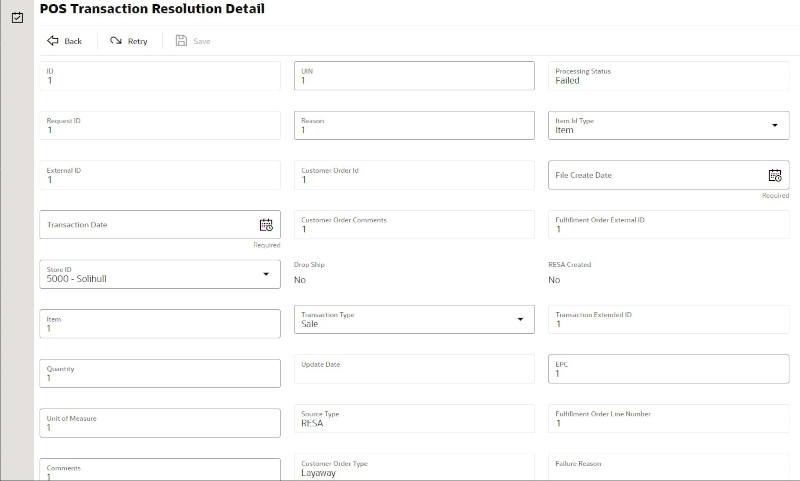
Detail Buttons
Edit: Places the detail information displayed into edit mode.
Apply: Applies the entered data to the record and updates the list information.
Cancel: Places the panel back into display mode without applying the information.
Detail Attributes
ID: An internally generated unique transaction identifier.
Request ID: A request identifier indicating the processing group it was executed with.
External ID: The external sale transaction that this item sale is a part of.
Transaction Date: The date of the transaction.
Store ID: The identifier of the store the transaction took place item.
Item: The item number.
Quantity: The quantity of the transaction.
Unit Of Measure: The unit of measure of the quantity.
Comments: Comments associated to the point-of-sale transaction.
UIN: A unique number, such as a serial number, associated with the transaction.
Reason: A reason associated with the transaction.
Customer Order Id: A customer order identifier if a customer order is associated to the transaction.
Customer Order Comments: Comments associated with a customer order.
Drop Ship: Yes indicates drop ship.
Transaction Type: The type of transaction: sale, return, void sale, void return, customer order, customer order cancelation, customer order fulfillment.
Update Date: The timestamp of the last update of this transaction record.
Source Type: The source type of the transaction: RESA or POS.
Customer Order Type: The type of customer order: Layaway, Pickup, Customer Order, Pending Purchase, Special Order, Web Order, or On Hold.
Processing Status: The status of the POS transaction: New, Processed, Failed, Retry, or Reverted.
Item Id Type: The type of item identifier: ITEM or UPC.
File Create Date: The date the file the data came from was created.
Fulfillment Order External Id: The external order system identifier for the fulfillment order.
RESA Created: Yes if the record was created in RESA.
Transaction Extended ID: A full generated unique transaction identifier.
EPC: An EPC if one exists.
Fulfillment Order Line Number: The
Failure Reason: The reason the POS transaction is in a failed state.
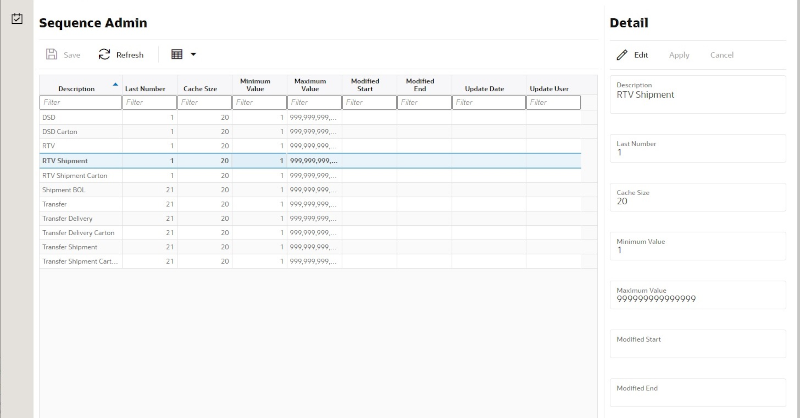
The Sequence Administration screen is used to setup database sequence information for a specific set of tables. This can be used to prevent overlapping sequence generation between multiple database tables.
To access this screen, user need to be assigned followings:
Security Permission: Access Sequence Administration
List Buttons
Save: Persists currently altered information and refreshes the screen.
Refresh: Refreshes the screen with currently persisted information.
Filter: Enabled are disabled the filtering row in the table.
List Attributes
Description: A description of the sequence.
Last Number: The last currently used sequence number.
Cache Size: The number of sequence number to keep in the database cache.
Minimum Value: The minimum value the sequence can become.
Maximum Value: The maximum value the sequence can become.
Modified Start: Retailer specified starting number for the sequence.
Modified End: Retailer specified ending number for the sequence.
Update Date: The timestamp of the last update of the record.
Update User: The user associated with the last update of the record.
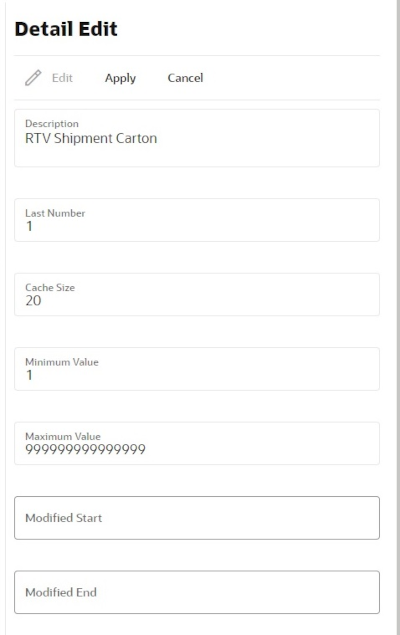
Detail Buttons
Edit: Places the detail information displayed into edit mode.
Apply: Applies the entered data to the record and updates the list information.
Cancel: Places the panel back into display mode without applying the information.
Detail Attributes
Description: The description of the sequence administration record. This can only be changed through translation administration (view only).
Last Number: The last number written to the database disk (view only).
Cache Size: The number of sequences kept in the database cache (view only).
Minimum Value: The minimum value the sequence can become (view only).
Modified Start: The retailer modified starting sequence number. It must be greater than minimum value and less than modified end.
Modified End: The retailer modified ending sequence number. It must be less than the maximum value and greater than modified start.