Create a BI Publisher Cluster
A local cluster consists of two or more identical standalone installations on separate servers. All identifying information, such as the user name, password, and database prefix, must be identical between the two servers.
- After running the installer, click Next on the Welcome window.
- In the Install Software Updates window, select Skip Software Updates and click Next.
-
In the
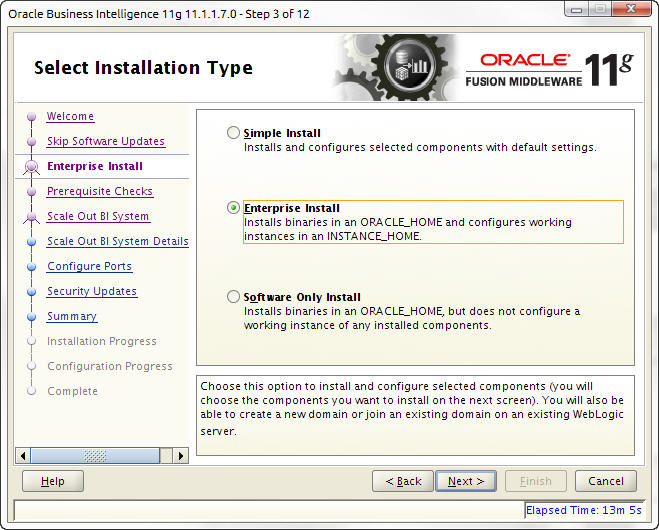
Select Installation Type window, select
Enterprise Install and click
Next.

- In the Prerequisite Checks window, several system prerequisite checks are made, click Next when they are completed.
-
In the
Create or Scale Out BI System window, select
the
Create New BI System option if you are
creating this system for the first time and complete the following fields to
create the administration server. Click
Next when you are finished.
User Name field Enter the new user name for the system administrator. User Password field Enter the password. Confirm Password field Reenter the password to confirm it. Domain Name field Enter the domain name of the administrator server. For example: bifoundation_domain. If you have already created this server and are building out a cluster, select Scale Out BI System and complete the following fields for the administration server. Click Next when you are finished.Note:
When building out local clusters, make sure SDM has previously been installed on each system.Host Name field Enter the host name of the administrative server. Port field Enter the port of the administrative server. For example: 7001 User Name field Enter the user name of the administrative server. For example: weblogic Domain Name field Enter the user password of the administrator server. Managed servers are created that mirror the configuration details of the administration server and point to the administration server. -
In the
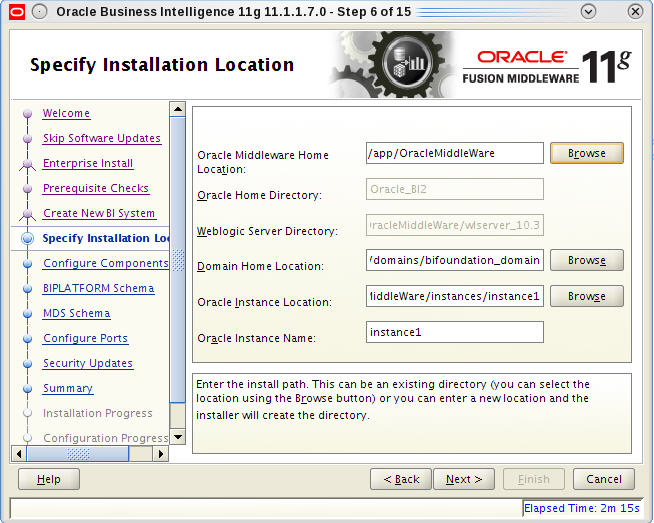
Specify Installation Location window, browse
to the OracleMiddleWare directory you created
(/app/OracleMiddleWare) and click
Next. Other fields are not used or populated
by default. For example:

- In the Configure Components window, check the Business Intelligence Publisher checkbox.
-
In the
BIPLATFORM Schema window, complete the
following fields and click
Next.
Database Type drop-down list (Default) Oracle Database Connect String field host:port:instance For example: vm:1521:AcmeBIPublisher
BIPLATFORM Schema Username field <prefix>_BIPLATFORM The Oracle Communications BI Publisher Platform Schema Username. The default schema prefix is DEV. For example: DEV_BIPLATFORM
BIPLATFORM schema password field The Oracle Communications BI Publisher platform schema password. -
In the
MDS Schema window, complete the following
fields and click
Next.
Database Type drop-down list (Default) Oracle Database Connect String field hostname:port:instance For example: vm:1521:AcmeBIPublisher
BIPLATFORM Schema Username field <prefix>_MDS
The Oracle Communications BI Publisher MDS Schema Username. The default schema prefix is DEV. For example: DEV_MDS
MDS schema password field The Oracle Communications BI Publisher MDS schema password. - In the Configure Ports window, select Auto Port Configuration and click Next.
- In the Specify Security Updates window, enter your email address and click Next.
- In the Summary window, click Install.
- In the Configuration Progress window, when the processes are complete, click Next.
- In the Complete window, click Finish.
See the Troubleshooting section for running scheduled reports when the active server is down.


