INSTALLATION
This chapter consists of following topics:
Purpose of the Document
The purpose of the OBDX Installation Manual is to provide a step by step overview on the installation process of the solution.
It includes:
- Reference to prerequisites software installation required for OBDX & OBDX installer
- Setup of OBDX with Oracle’s own Core Banking and Origination Products along with Third-party HOST system.
- Running the installation in silent mode
- Advanced Configurations (Post installation)
- Installation Verification
- Multi-Entity Installation and configuration
Pre-requisites
OBDX pre-requisite software should be installed and available before proceeding.
For OBDX pre-requisite software setup refers document “Oracle Banking Digital Experience Installer Pre-Requisite Setup Manual” mentioned in section 1.5 Related Information Sources.
Installer Pre-requisite verification
Post installation of OBDX Installer prerequisite software’s, verification can be done using below steps.
Note: Verification should be performed on Server where Oracle Weblogic is locally installed and by OS user (which is owner for Oracle Weblogic home directory) for non-root steps. The same user will be used to execute installer.
Oracle Instant client
Step 1: Login using root user.
Step 2 : Run below command to verify if Oracle Instant client is installed.
rpm –qa | grep oracle

Note: Above package verification command is specific to Oracle Linux and RHEL distributions only. For other Linux distributions or OS please refer to OS specific package manager documentation.
Python
Step 1: Execute python –V command
python -V

Note: Ensure Python 2.7.5 supported version is installed. Above command should reflect the same.
cx_Oracle & Urwid
Step 1: Execute python command
python
Note: Ensure Python 2.7.5 version should be available in PATH variable. Above execution should be done using Python 2.7.5.
Step 2: Import Urwid and check version
import urwid (Press Enter)
urwid.__version__

If version is displayed, then Urwid is installed and available for use.
Note: Ensure Urwid 1.3.1 supported version is installed. Above command should reflect the same.
Step 3: Similarly import cx_Oracle and check version
import cx_Oracle (Press Enter)
cx_Oracle.version

If version is displayed, then cx_Oracle is installed and available for use.
Note: Ensure cx_Oracle 5.2.1 supported version is installed. Above command should reflect the same.
Installation
Pre-Installation
- Install all the prerequisite software and packages mentioned above
Steps of Installation
- Download and extract the installer zip file (Base – non localization version).
- Navigate to “<OBDX INSTALLER DIR> /core/config”
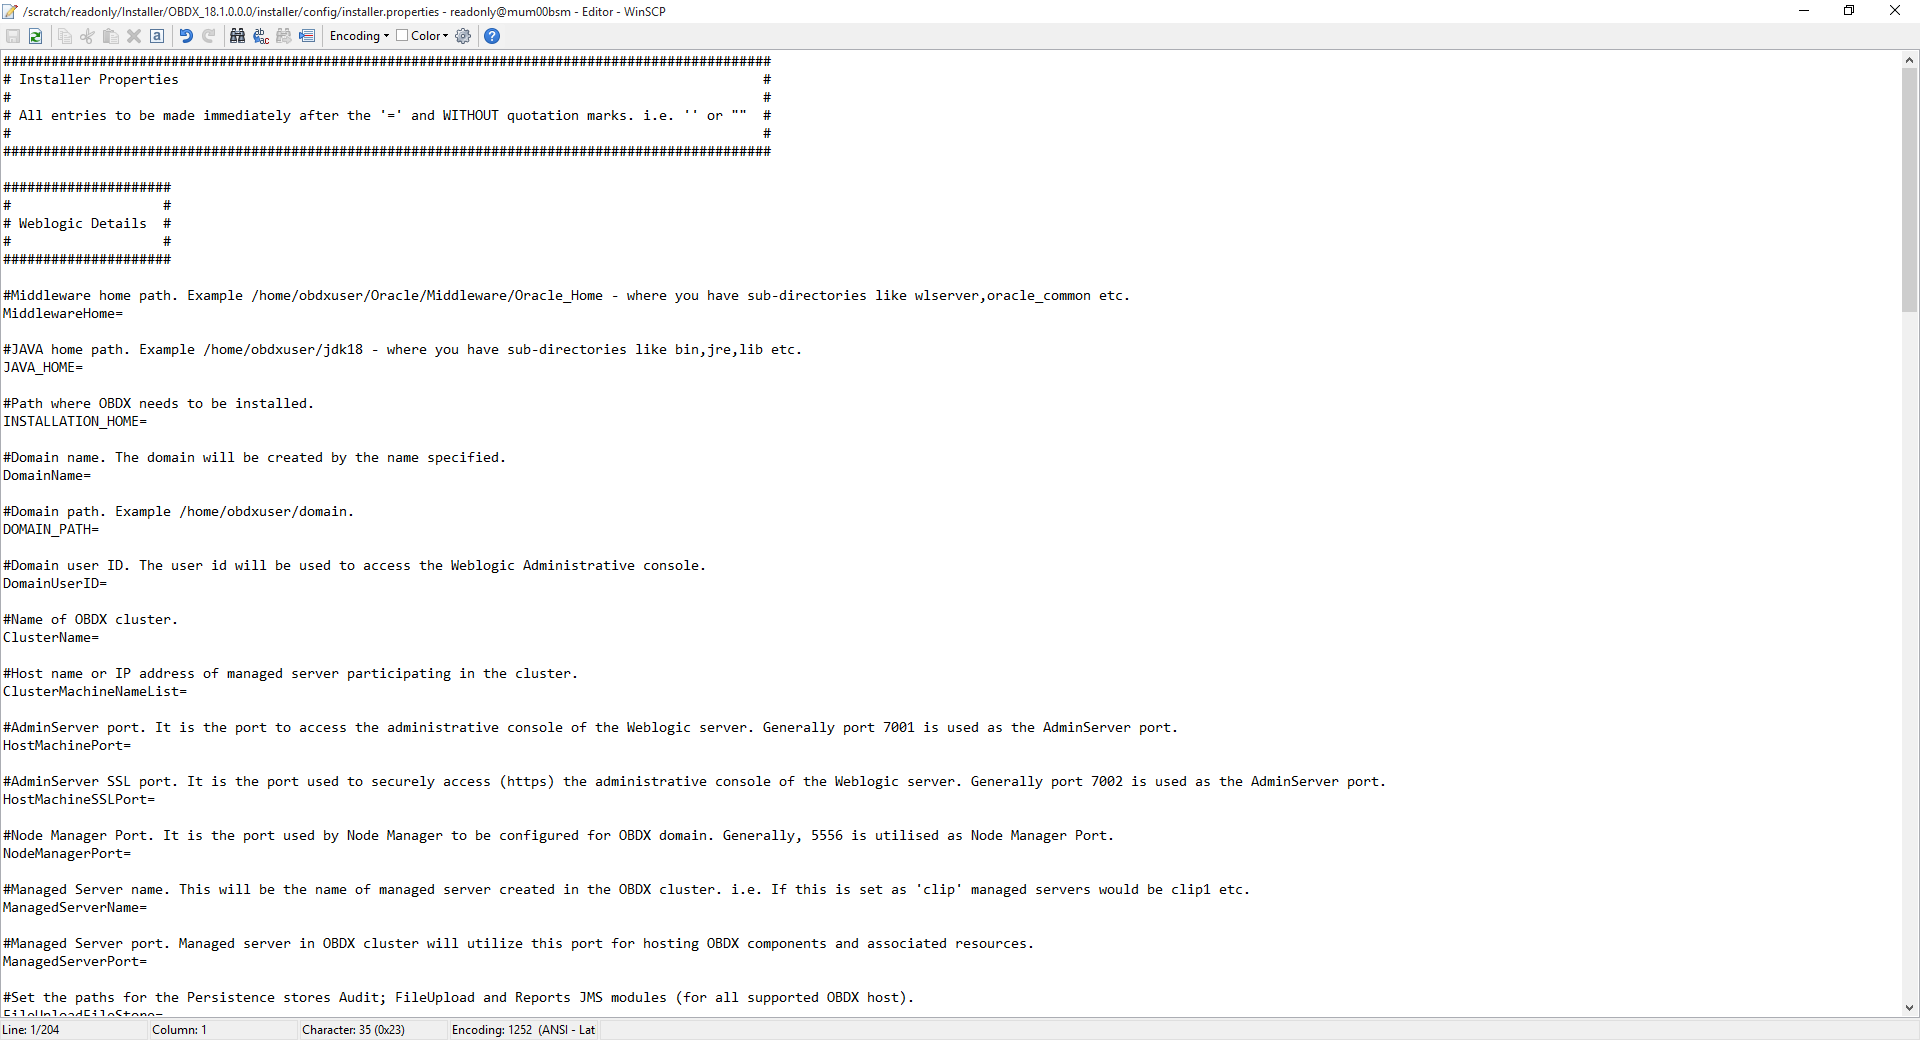
- Open the “installer.properties” file to maintain key configurations for BASE ENTITY (OBDX_BU)
IMPORTANT:
- Enter the values right after the “=” sign
- DO NOT change anything to the left of the “=”
- DO NOT change any of the flag values or pre-filled values (such as DataSourceName, DataSourceJNDI, Flag values etc) available post “Factory Shipped” section.
- Ensure there is no blank space after “=” sign
Only below parameters should be set in installer.properties file.
|
Component |
Parameter |
Description |
Example |
|---|---|---|---|
|
DB details (for Weblogic RCU and OBDX schema) |
DatabaseHostName |
Enter the hostname of the database server which would host the database schema for OBDX and RCU |
ofss310759 |
|
DatabaseHostPort |
Enter the port number of the database listener |
1521 |
|
|
DatabaseHostSID |
Enter the Oracle Service Name for database instance. |
OBDXSID |
|
|
DB_SYS_USER |
Enter the username with 'sys' privileges |
sys |
|
|
POST_FIX |
For OBDX schema name like "OBDX_DEV" POST FIX is 'DEV'. SHOULD BE |
DEV |
|
|
DIRECTORY_NAME |
Enter the directory name in which you want the OBDX schema tablespace datafile to be created. Enter Logical name (i.e. DIRECTORY_NAME column) from DBA_DIRECTORIES table NOT the physical path. |
OPATCH_LOG_DIR |
|
|
UBS DB details (to be configured only in-case of FLAVOR as UBS) |
DatabaseHostNameUBS |
Enter the hostname for the UBS HOST database host server |
ofss310759 |
|
DatabaseHostPortUBS |
Enter the port number of the UBS database listener |
1521 |
|
|
SCHEMA_NAME_UBS |
Enter the Complete OBDX-EXT (B1A1)HostInterfaceschema name you want installer to create as new schema. SHOULD BE IN UPPERCASE ONLY. |
UBSSCHEMA123 |
|
|
DIRECTORY_NAME_UBS |
Enter the directory name in which you want the OBDX-EXT (B1A1) schema tablespace datafile to be created. Enter Logical name (i.e. DIRECTORY_NAME column) from DBA_DIRECTORIES table NOT the physical path. |
OPATCH_LOG_DIR |
|
|
DB_SYS_USER_UBS |
Enter the username with 'sys' privileges |
sys |
|
|
DatabaseHostSID_UBS |
Enter the UBS Host database Service Name |
UBSSID |
|
|
UBS_SCHEMA |
Enter the EXISTING UBS Host schema name |
OBDXUBS |
|
|
UBS_CCY |
Enter the Country code for UBS HOME Branch |
GB |
|
|
|
UBS_HB |
Enter the Branch code for code for UBS HOME Branch |
AT3 |
|
WEBLOGIC server details
|
MiddlewareHome |
Middleware home path. Example /home/obdxuser/Oracle/Middleware/Oracle_Home - where you have directories like wlserver,oracle_common etc. |
/home/obdxuser/Oracle/Middleware/Oracle_Home |
|
JAVA_HOME |
Path where JAVA (JDK) is installed. |
/home/obdxuser/jdk18 |
|
|
INSTALLATION_HOME |
Path where OBDX is to be installed. All configuration files will be copied as a sub-directory “config” under this directory. DO NOT KEEP INSTALLATION_HOME AS MiddlewareHome. |
/home/obdxuser/obdx |
|
|
DOMAIN_PATH |
Path where OBDX Weblogic domain should be created. Users can now enter custom path as per their requirements. |
/home/obdxuser/domains |
|
|
ClusterName |
Name of cluster; this cluster would have one single managed server. |
obdx_cluster |
|
|
NoofMachine |
Number of machines in the cluster. Currently only single node is supported. |
1 |
|
|
ClusterMachineNameList |
Host name or IP address of managed server participating in the cluster. Currently only single node is supported. |
ofss310759 |
|
|
HostMachinePort |
AdminServer port. It is the port to access the administrative console of the Weblogic server. Generally port 7001 is used as the AdminServer port. |
7001 |
|
|
HostMachineSSLPort |
AdminServer SSL port. It is the port used to securely access (https) the administrative console of the Weblogic server. Generally port 7002 is used as the AdminServer port. |
7002 |
|
|
NodeManagerPort |
Node Manager Port. It is the port used by Node Manager to be configured for OBDX domain. Generally, 5556 is utilized as Node Manager Port. Custom ports are supported. |
5556 |
|
|
ManagedServerName |
Managed server name. This will be the name of the managed server created in the cluster followed by indexes. eg- If this is set as 'clip' managed servers would be clip1etc. |
clip |
|
|
ManagedServerPort |
Managed Server Port. Managed server will utilize this port for hosting OBDX components and associated resources. |
9001 |
|
|
DomainName |
Enter Weblogic Domain name. |
obdx_domain1 |
|
|
DomainUserID |
Domain user ID. The user id will be used to access the Weblogic Administrative console. |
weblogic |
|
| FileUploadFileStore (to be configured for all OBDX supported HOST) |
Set the paths for the persistence stores of the FileUpload JMS modules. DO NOT KEEP path as INSTALLATION_HOME or as sub directory inside INSTALLATION_HOME. |
/scratch/obdx/ FileUpload |
|
| AuditFileStore (to be configured for all OBDX supported HOST) |
Set the paths for the persistence stores of the Audit JMS modules. DO NOT KEEP path as INSTALLATION_HOME or as sub directory inside INSTALLATION_HOME. |
/scratch/obdx/Audit |
|
| ReportsFileStore (to be configured for all OBDX supported HOST) |
Set the paths for the persistence stores of the Reports JMS modules. DO NOT KEEP path as INSTALLATION_HOME or as sub directory inside INSTALLATION_HOME. |
/scratch/obdx/Reports |
|
| ExtSystemReceiverFileStore (to be configured for Third-party OBDX host only) |
Set the paths for the persistence stores of the ExtSystemReceiver JMS modules. DO NOT KEEP path as INSTALLATION_HOME or as sub directory inside INSTALLATION_HOME. |
/scratch/obdx/Receiver |
|
| ExtSystemSenderFileStore (to be configured for Third-party OBDX host only) |
Set the paths for the persistence stores of the ExtSystemSender JMS modules. DO NOT KEEP path as INSTALLATION_HOME or as sub directory inside INSTALLATION_HOME. |
/scratch/obdx/Sender |
|
| JMSForeignServerURL (to be configured for UBS host only) |
Set the IP and port for UBS Managed server where JMS queue are available (Specific to OBDX – UBS flavor) |
10.184.135.59:7860 |
|
|
RCU |
STBSchemaPrefix |
STB schema name prefix. If schema pre-fix is 'OBDX' then 'OBDX_STB' would be the STB schema name. |
OBDX_STB |
|
OBDXAuthenticator Admin user details
|
DBAuthUser |
Set username for OBDX application Admin user. USERNAME IS CASE SENSITIVE. In-case of OUD as provider username should be the User ID mentioned during user creation steps mentioned in pre-requisite document (refer To create User and mapping it to the Group section). |
superadmin |
|
DBAuthMailID |
Enter the Email ID for OBDX application admin user. |
superadmin@oracle.com |
|
|
DBAuthPhoneNo |
Enter the mobile number for OBDX application admin user. COUNTRY CODE IS MUST. |
+911234567890 |
Note: Apart from above any other property values should not be modified.
Ensure ORACLE_HOME, JAVA_HOME variable are set and their binaries are available in PATH variable before proceeding.
Login with OS user which was used to perform OBDX pre-requisite software installation (or has ownership on Oracle Weblogic home directory)
Ensure OBDX Installation home and filestore path maintained in installer.properties exists and user running the installer has read-write permissions.
Installation Steps:
- From your terminal navigate to <OBDX INSTALLER DIR>/

- Enter the following command
python runInstaller.py
Select the appropriate type of Installation
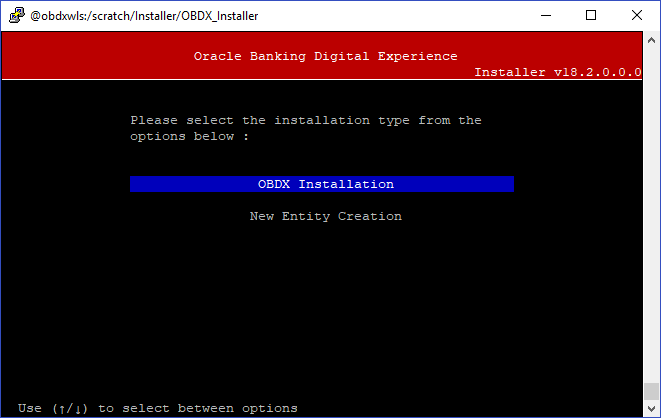
- OBDX Installation: This option should be used for first-time installation or for first entity only. Existing installation should not utilize this option unless performing “Clean and Install” on already installed environment.
- New Entity Creation: This option should be used for multi-entity installation only.
Post selection of installation type.
Select the appropriate host system for Installation
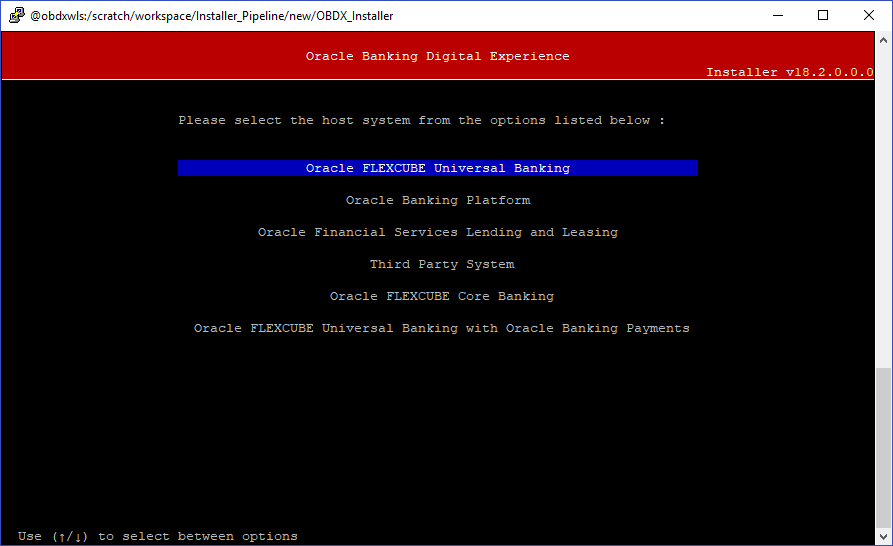
Oracle FLEXCUBE Universal Banking (OBDX with UBS)
Select the version of UBS HOST system from available options.
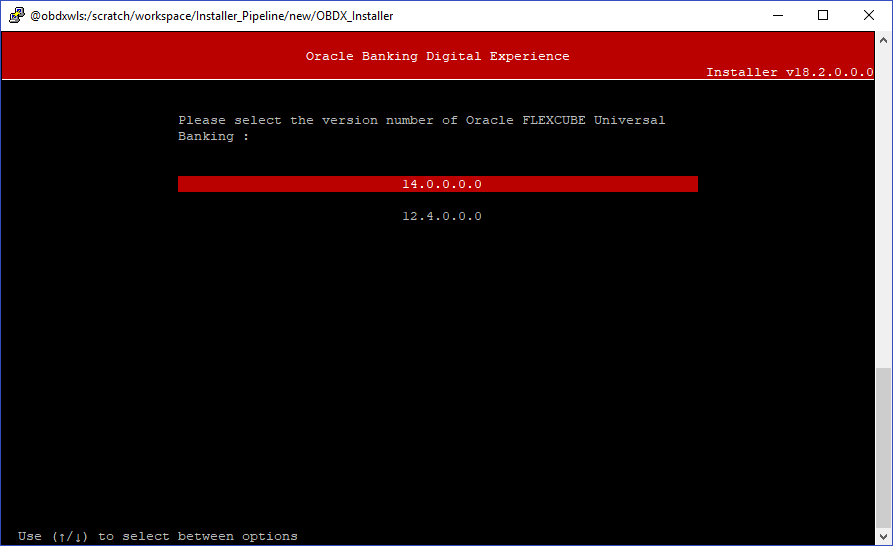
Post UBS HOST version selection, Select Installation mode
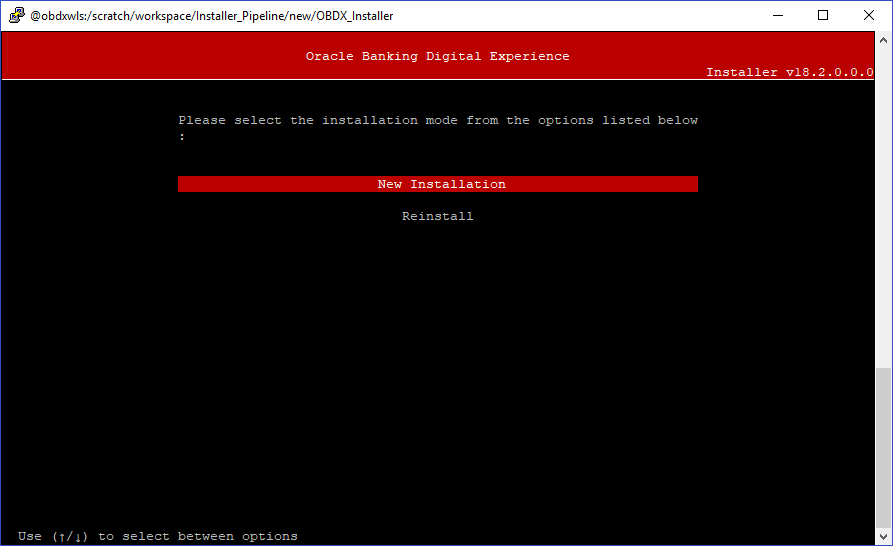
Mode of Installation - New Installation
- New installation
In-case of a fresh installation of OBDX with appropriate host system for the first run on server.
Below screens would appear to taken end-user input
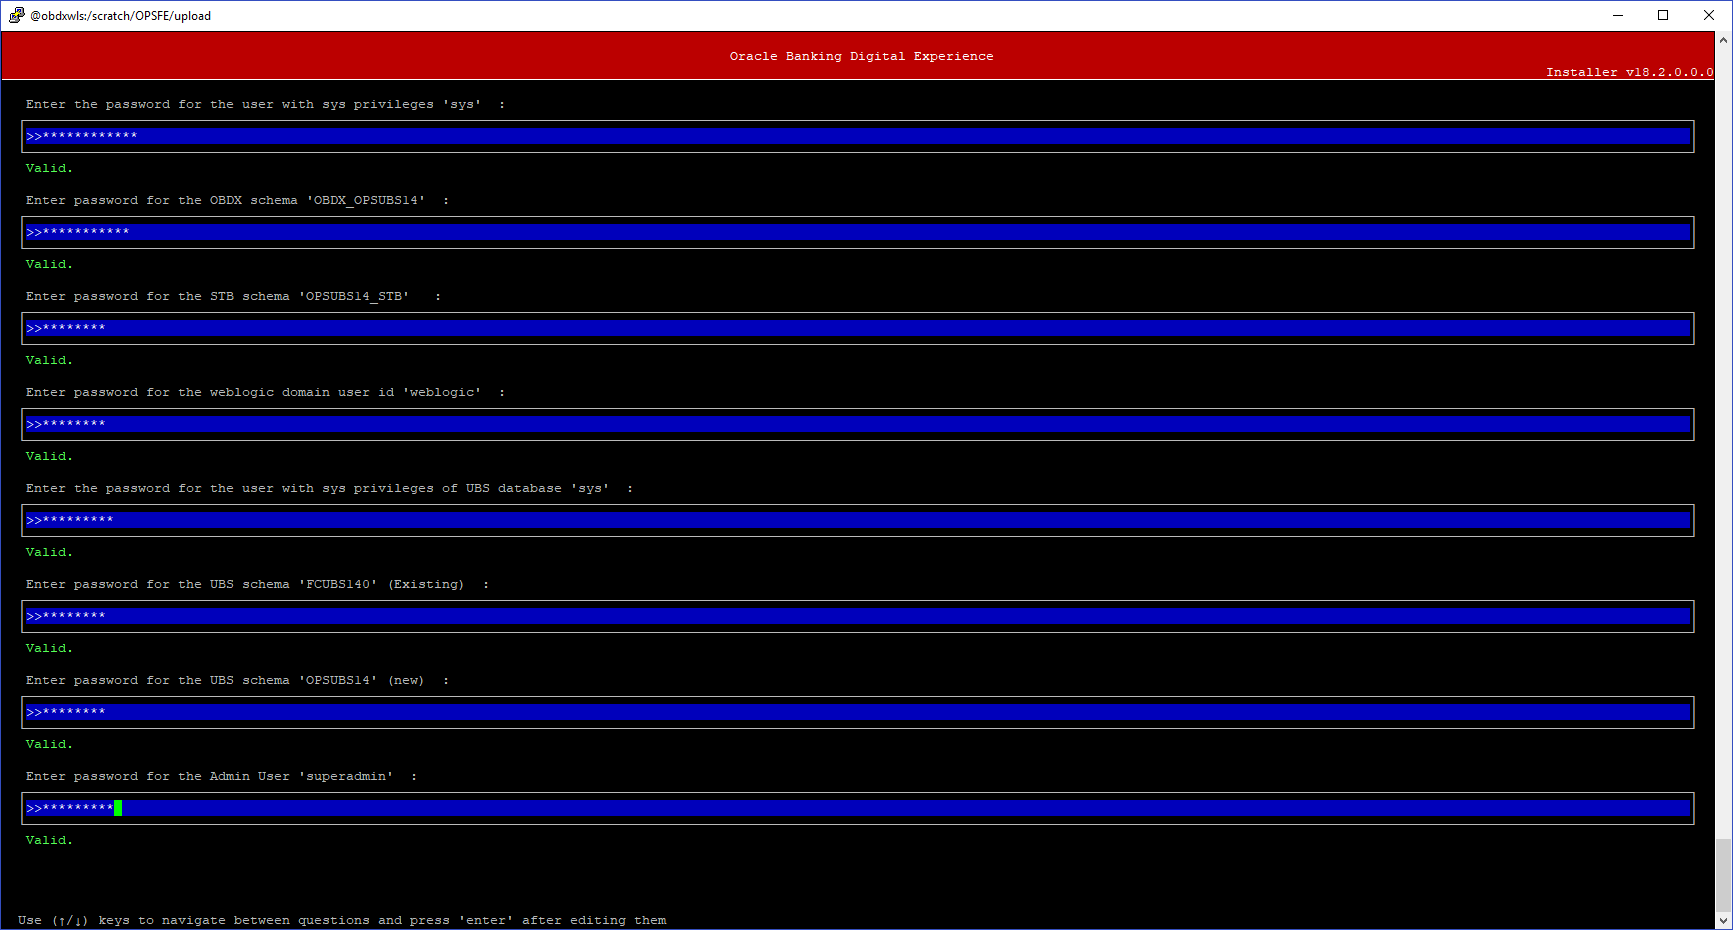
Enter below passwords:
- SYS privilege user password where OBDX schema would be created
- OBDX schema password
- OBDX STB schema password
- Weblogic console administrator user password
- SYS privilege user password where UBS host schema exists
- Existing UBS HOST schema password
- New OBDX EHMS schema password
- Password for OBDX application administrative user (In-case of OUD as provider, password should be similar to one used while user creation in OUD (or User Password field))
Oracle Banking Platform (OBDX with OBP![]() Oracle Banking Platform)
Oracle Banking Platform)
No additional input required. Screen is same as available in Third Party![]() A party is any individual or business entity having a banking relationship with the bank. System.
A party is any individual or business entity having a banking relationship with the bank. System.
Oracle Financial Services Lending and Leasing (OBDX with OFSLL)
No additional input required. Screen is same as available in Third Party System.
Third Party System (OBDX with THP)
Post Third Party System selection, enter the required credentials details
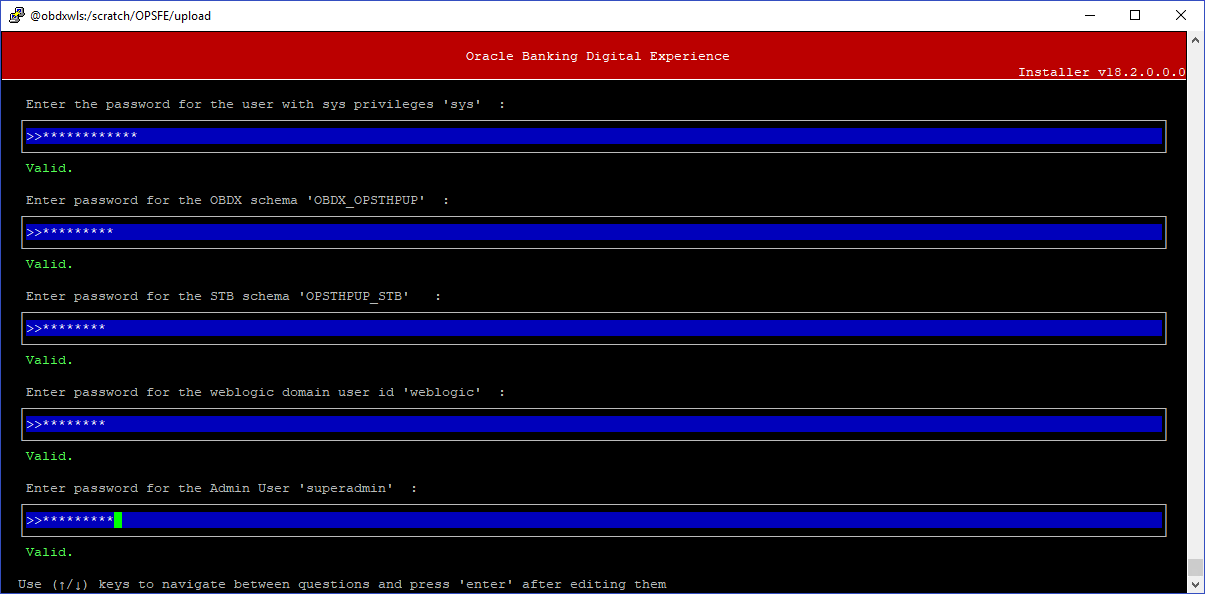
Enter below passwords:
- SYS privilege user password where OBDX schema would be created
- OBDX schema password
- OBDX STB schema password
- Weblogic console administrator user password
- OBDX application admin user password (In-case of OUD as provider, password should similar to one used while user creation in OUD (or User Password field))
Oracle FLEXCUBE Core Banking (OBDX with FCORE)
Post Oracle FLEXCUBE Core Banking, enter the required credentials details.
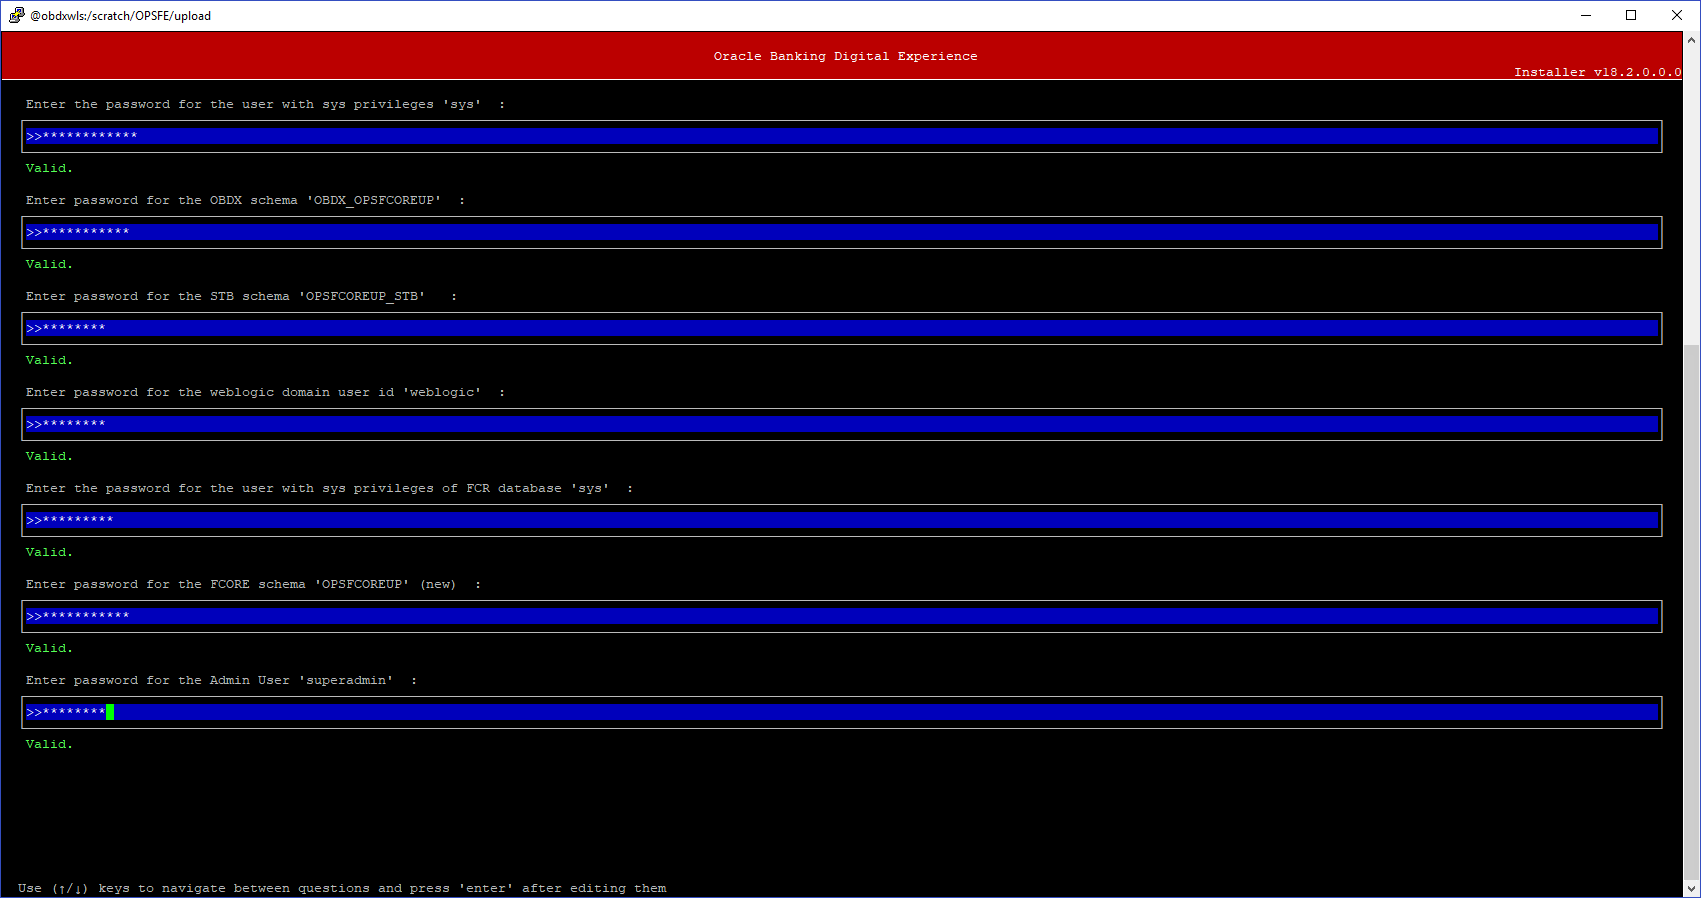
Enter below passwords:
- SYS privilege user password where OBDX schema would be created
- OBDX schema password
- OBDX STB schema password
- Weblogic console administrator user password
- SYS privilege user password where FCORE host schema exists
- New OBDX EHMS schema password
- Password for OBDX application administrative user (In-case of OUD as provider, password should be similar to one used while user creation in OUD (or User Password field))
Oracle FLEXCUBE Universal Banking with Oracle Banking Payments (OBDX with OBPM)
Post Oracle FLEXCUBE Universal Banking with Oracle Banking Payments, enter the required credentials details.
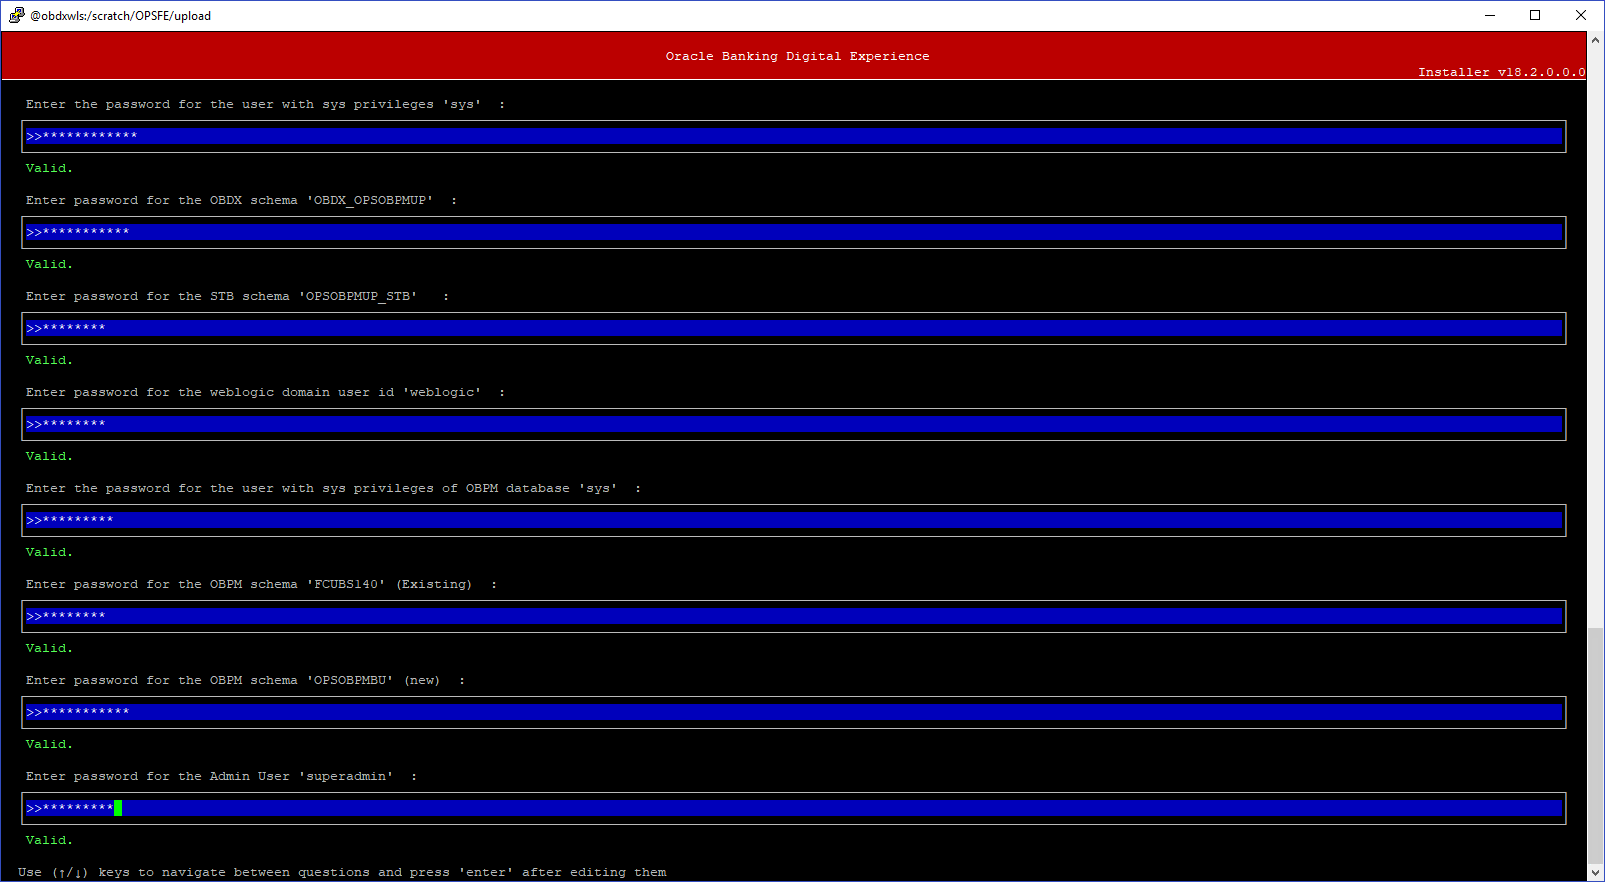
Enter below passwords:
- SYS privilege user password where OBDX schema would be created
- OBDX schema password
- OBDX STB schema password
- Weblogic console administrator user password
- SYS privilege user password where OBPM host schema exists
- Existing OBPM HOST schema password
- New OBDX EHMS schema password
- Password for OBDX application administrative user (In-case of OUD as provider, password should be similar to one used while user creation in OUD (or User Password field))
Mode of Installation - Reinstall
In-case of an existing OBDX installation that you want to overwrite OR in case of a previously failed installation user can opt for this option.
Pre-requisites
- Weblogic domain processes should be down (i.e. AdminServer, NodeManager, Managed Servers, Derby etc)
- No open session (user should not be logged-in) with OBDX database schema (and OBDX EHMS schema in-case of OBDX UBS, OBPM and FCORE flavor) and RCU schema.
Key pointers
- OBDX schema (and OBDX EHMS schema in-case of OBDX UBS flavor) and RCU schema would be dropped and recreated (as per installer.properties). Tablespace would be re-used.
- Weblogic domain (as per installer.properties) would be deleted and created again.
- Installation Home would be cleaned up and (all files/ sub-directories would be deleted) and re-created again.
Note: All input screens are similar to new installation option and as per the host system opted.
Installation Status
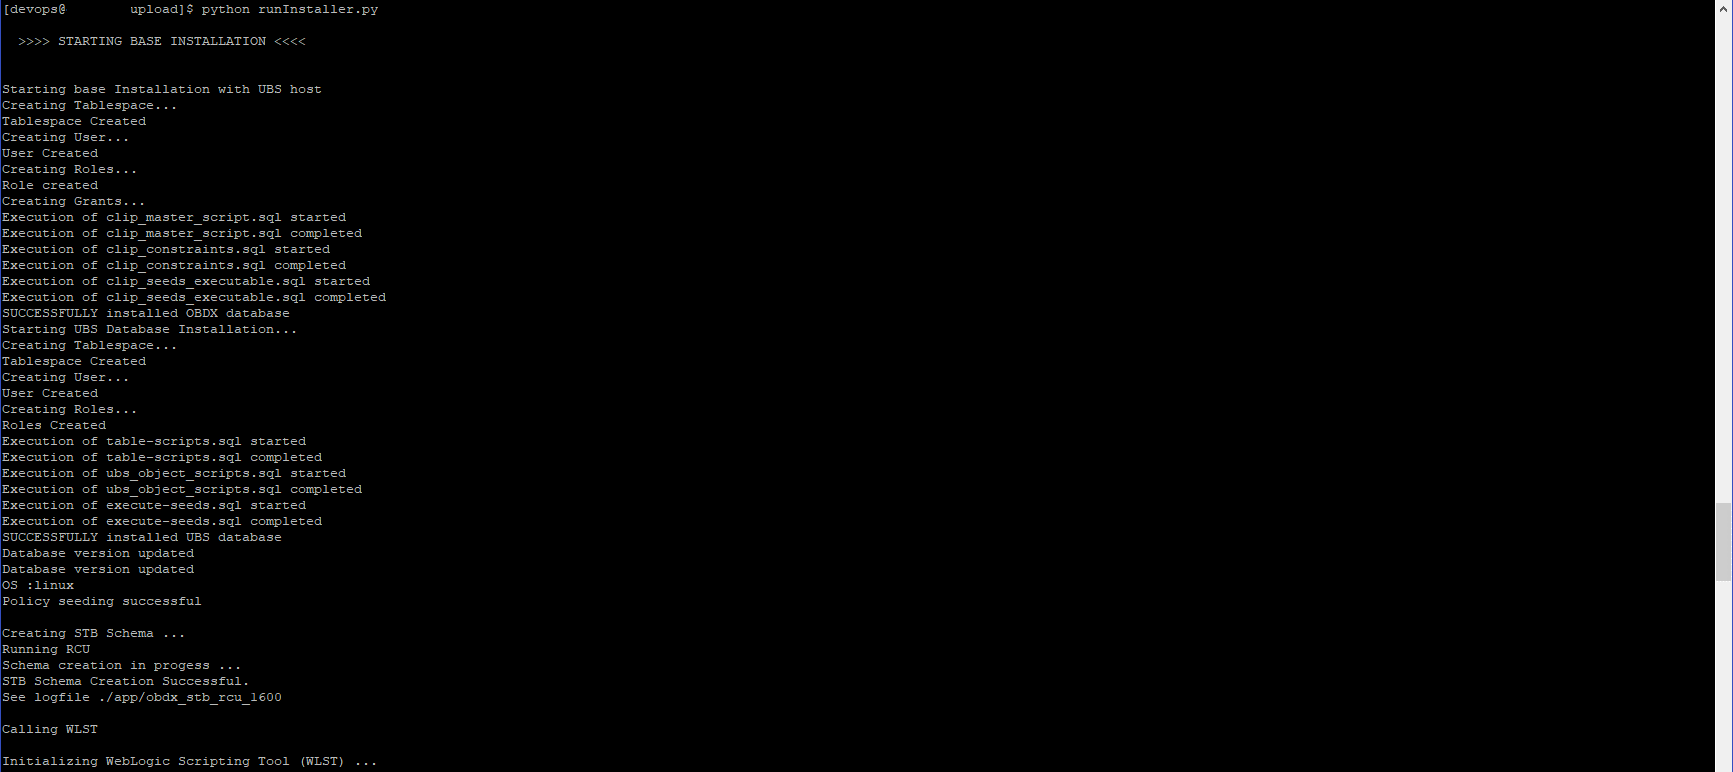
After selecting the mode and entering all required details, the status is displayed (as shown below) on the terminal to indicate the progress of the installation.
When the installation completes, the below message is displayed
