SYSTEM CONFIGURATION - UBS
System configuration is an administrative maintenance to define the details required to set up the system.
Post successful installation of OBAPIs, the system administrator will have an option to define if the bank has multi entity setup enabled and whether data sharing is allowed between entities
Currently, the system supports only data sharing enabled and does not support data sharing as disabled
If multi entity is enabled, then the system administrator can create new entities along with definition of details. Once the entities are created, administrator can define system configuration details for each of the entities.
Following are the components that can be defined as part of system configuration.
- Basic Details
- Host Details
- Bank Details
- Branch Details
- Currency Payments
- SMTP
- Dynamic Module Details
As part of module details, the set of modules listed will be based on the host system selected.
Features supported in application
System Configuration allows the System Administrator![]() Administrator is a set of individuals that administer the applicant/Affiliate entity. For example, Accountants, Authorized Signatories for organizations, Power of Attorney for individuals. to:
Administrator is a set of individuals that administer the applicant/Affiliate entity. For example, Accountants, Authorized Signatories for organizations, Power of Attorney for individuals. to:
- Define System Configuration
- View System Configuration
- Edit System Configuration
![]() How to reach here:
How to reach here:
Administrator Dashboard > Common Services >System Configuration
System Configuration – Entity Definition
To set-up the system configuration:
- The Administrator logs into the application using valid login credentials.
The System Configuration screen to configure multi entity set up appears.
System Configuration - Entity Setup
|
Field Name |
Description |
|---|---|
|
Does your set up has Multi Entity? |
Option to decide whether the setup has multi entity or not. |
|
Entity Id |
Current entity id defined as part of the setup |
|
Entity Name |
Current entity name defined as part of the setup. |
- In the Does your set up has Multi Entity? field, select Yes to configure if the bank has multi entity implementation applicable.
OR
Select if the bank does not have multi entity setup applicable. - Click . The System Configuration - Multi Entity Setup details screen appear.
System Configuration - Multi Entity Setup
|
Field Name |
Description |
|---|---|
|
Does your set up has Multi Entity? |
Option to select whether the setup has multi entity enabled or not. |
|
Does your setup has data sharing |
Option to select whether the setup has data sharing enabled between entities. |
|
Entity Id |
Unique Identification mapped to the default Entity. |
|
Entity Name |
Name of the default entity. |
|
Time Zone |
Time zone of the default entity. |
- In the Does your setup has data sharing field, select an appropriate option for data sharing between entities. Currently the system only supports an option of data sharing between entities as ‘Yes'.
- Click
 to edit the details of the default entity if required.
OR
Select an appropriate Time zone from the list for the default entity. - Click Add Entity create a new entity. An additional row/section to enter the new entity details i.e. Entity ID, Entity Name and Time zone appears.
|
Field Name |
Description |
|---|---|
|
Does your set up has Multi Entity? |
Option to select whether the setup has multi entity enabled or not. |
|
Does your setup has data sharing |
Option to select whether the setup has data sharing enabled between entities. |
|
Entity Id |
Enter the unique ID of the new entity being created |
|
Entity Name |
Enter the name of the new entity being created. |
|
Time Zone |
Select the Time zone from the list for the new entity being created. |
- In the Entity Id field, enter the entity id for the new entity being created.
- In the Entity Name field, enter the entity name for the new entity being created.
- From the Time Zone list, select the appropriate time zone for the new entity being created.
- Click
 to save the entity details.
 - Click
 to edit the already added entity details.
OR
Click to delete the entity details.
 - Click . The System Configuration Setup details screen appear.
OR
Click Add Entity to add more entities.
System Configuration - Basic Details
|
Field Name |
Description |
|---|---|
|
Entity Name |
Name of the entities added to the setup. |
|
Select Host |
You need to select the host system for the channel banking platform. |
|
Web Server Host |
Enter the address of the web-server host. |
|
Web Server Port |
Enter the web server port number. |
|
Application Server Host |
Enter the address of the application server host. |
|
Application Server Port |
Enter the application server port number |
- Select the Host System as UBS and start the UBS configuration.
- In the Web Server Host field, enter the host name of the web server.
- In the Web Server Port field, enter the port number of the web server.
- In the Application Server Hostfield, enter the address of the application server.
- In the Application Server Port field, enter the port number of the application server.
- Click . The System Configuration – Host Details screen appears.
OR
Click to cancel the setup process.
System Configuration – Host Details
|
Field Name |
Description |
|---|---|
|
Host Name |
The host system as selected for the channel banking platform is displayed. |
|
Host Version |
Select the version number of the host system. |
|
Gateway IP |
Enter the Gateway IP of the selected host system. |
|
Port |
Enter the port number for the host system. |
|
Channel |
Specify the channel as ‘IB |
- From the Host Version list, select the version of the host.
- In the Gateway IP field, enter the gateway IP address of the host system.
- In the Port field, enter the port number.
- In the Channel field, enter the channel as ‘IB’ to access the application.
- In the Host Date field, enter the posting date of the selected host system
- Click the Check Host Availability link to check the host availability. The message of successful testing appears if the connection is established on the specified details.
- Click . The System Configuration – Bank Details screen appears.
OR
Click to go to the previous screen.
OR
Click to cancel the setup process.
System Configuration – Bank Details
|
Field Name |
Description |
|---|---|
|
Bank Code |
Enter unique code to identify the bank. |
|
Bank Group Code |
Enter the bank group code. |
|
Bank Name |
Enter the name of the bank. |
|
Bank Short Name |
Enter the short name of the bank. |
|
Address - Line 1 - 3 |
Enter the address of the bank. |
|
Country |
Enter the country in which the bank is located/ headquartered. |
|
ZIP Code |
Enter the ZIP code of the bank. |
|
Allowed Account Types |
Select the allowed account types applicable for the bank. The options can be:
|
|
Bank Currency |
Specify the default currency applicable for the bank. |
- In the Bank Code field, enter the code of the bank.
- In the Bank Group Code field, enter the group code of the bank.
- In the Bank Name field, enter the name of the bank.
- In the Bank Short Name field, enter the short name of the bank.
- In the Address Line 1 - 3 field, enter the address details of the bank.
- From the Country list, select the country in which the bank is located.
- In the ZIP Code field, enter the city/ zip code where bank is located.
- Select the Allowed Account Types check box. You can select Conventional / Islamic / Both.
- Click . The System Configuration – Branch Details screen appears.
OR
Click to go to the previous screen.
OR
Click to cancel the setup process.
System Configuration – Branch Details
|
Field Name |
Description |
|---|---|
|
Bank Code |
Enter the unique code to identify the bank. You should specify the same bank code as specified in the previous section. |
|
Branch Code |
Enter the branch code. |
|
Home Branch |
Specify the home branch for the bank. |
|
Local Currency |
Select the local currency applicable for the branch. |
|
Calculation Currency |
Select the calculation currency applicable. |
|
Region |
Select the region of bank payments. The options are:
|
- In the Bank Code field, enter the code of the bank.
- In the Branch Code field, enter the code of the bank branch.
- In the Home Branch field, enter the code of the home branch of the bank.
- From the Local Currency list, select the local currency of the bank branch.
- From the Calculation Currency list, select the calculation currency.
- From the Region list, select the appropriate region for payments.
- Click . The System Configuration – Currency Payments screen appears.
OR
Click to go to the previous screen.
OR
Click to cancel the setup process.
System Configuration – Currency![]() A generally accepted form of money, including coins and paper notes, which is issued by a government and circulated with in an economy. Payments
A generally accepted form of money, including coins and paper notes, which is issued by a government and circulated with in an economy. Payments
|
Field Name |
Description |
|---|---|
|
International Fund Transfer |
Specify the currencies that are applicable for international fund transfer transactions. |
|
International Draft |
Specify the currencies that are applicable for international draft transactions. |
- For the International Fund Transfer list, select the required currency.
- For the International Draft list, select the required currency.
- Click . The System Configuration – SMTP screen appears.
OR
Click to go to the previous screen.
OR
Click to cancel the setup process.
|
Field Name |
Description |
|---|---|
|
Server Name |
Enter the address of the mail server. |
|
Port |
Enter the port number |
|
Sender Email Address |
Enter the email address of the sender. |
|
Recipient Email Address |
Enter the email address of the recipient. |
|
Authentication Required |
Select the check box, if authentication is required. |
|
Username |
Enter the user name. |
|
Password |
Enter the password. |
- In the Server Name field, enter the address of the mail server.
- In the Port field, enter the port number.
- In the Sender Email Address, enter the email address of the sender.
- In the Recipient Email Address, enter the email address of the recipient.
- In the Username, enter user name.
- In the Password field, enter the password.
- Click . The System Configuration – Dynamic Module – BRAND screen appears.
OR
Click to go to the previous screen.
OR
Click to cancel the setup process.
System Configuration – Dynamic Module - BRAND
|
Field Name |
Description |
|---|---|
|
Content Publisher URL |
Specify the URL of the content publisher. |
|
Content Server URL |
Specify the URL of the content server. |
- In the Content Publisher URL field, enter the URL of content publisher.
- In the Content Server URL field, enter the URL of content server.
- Click . The System Configuration – Dynamic Module – Payments screen appears.
OR
Click to go to the previous screen.
OR
Click to cancel the setup process.
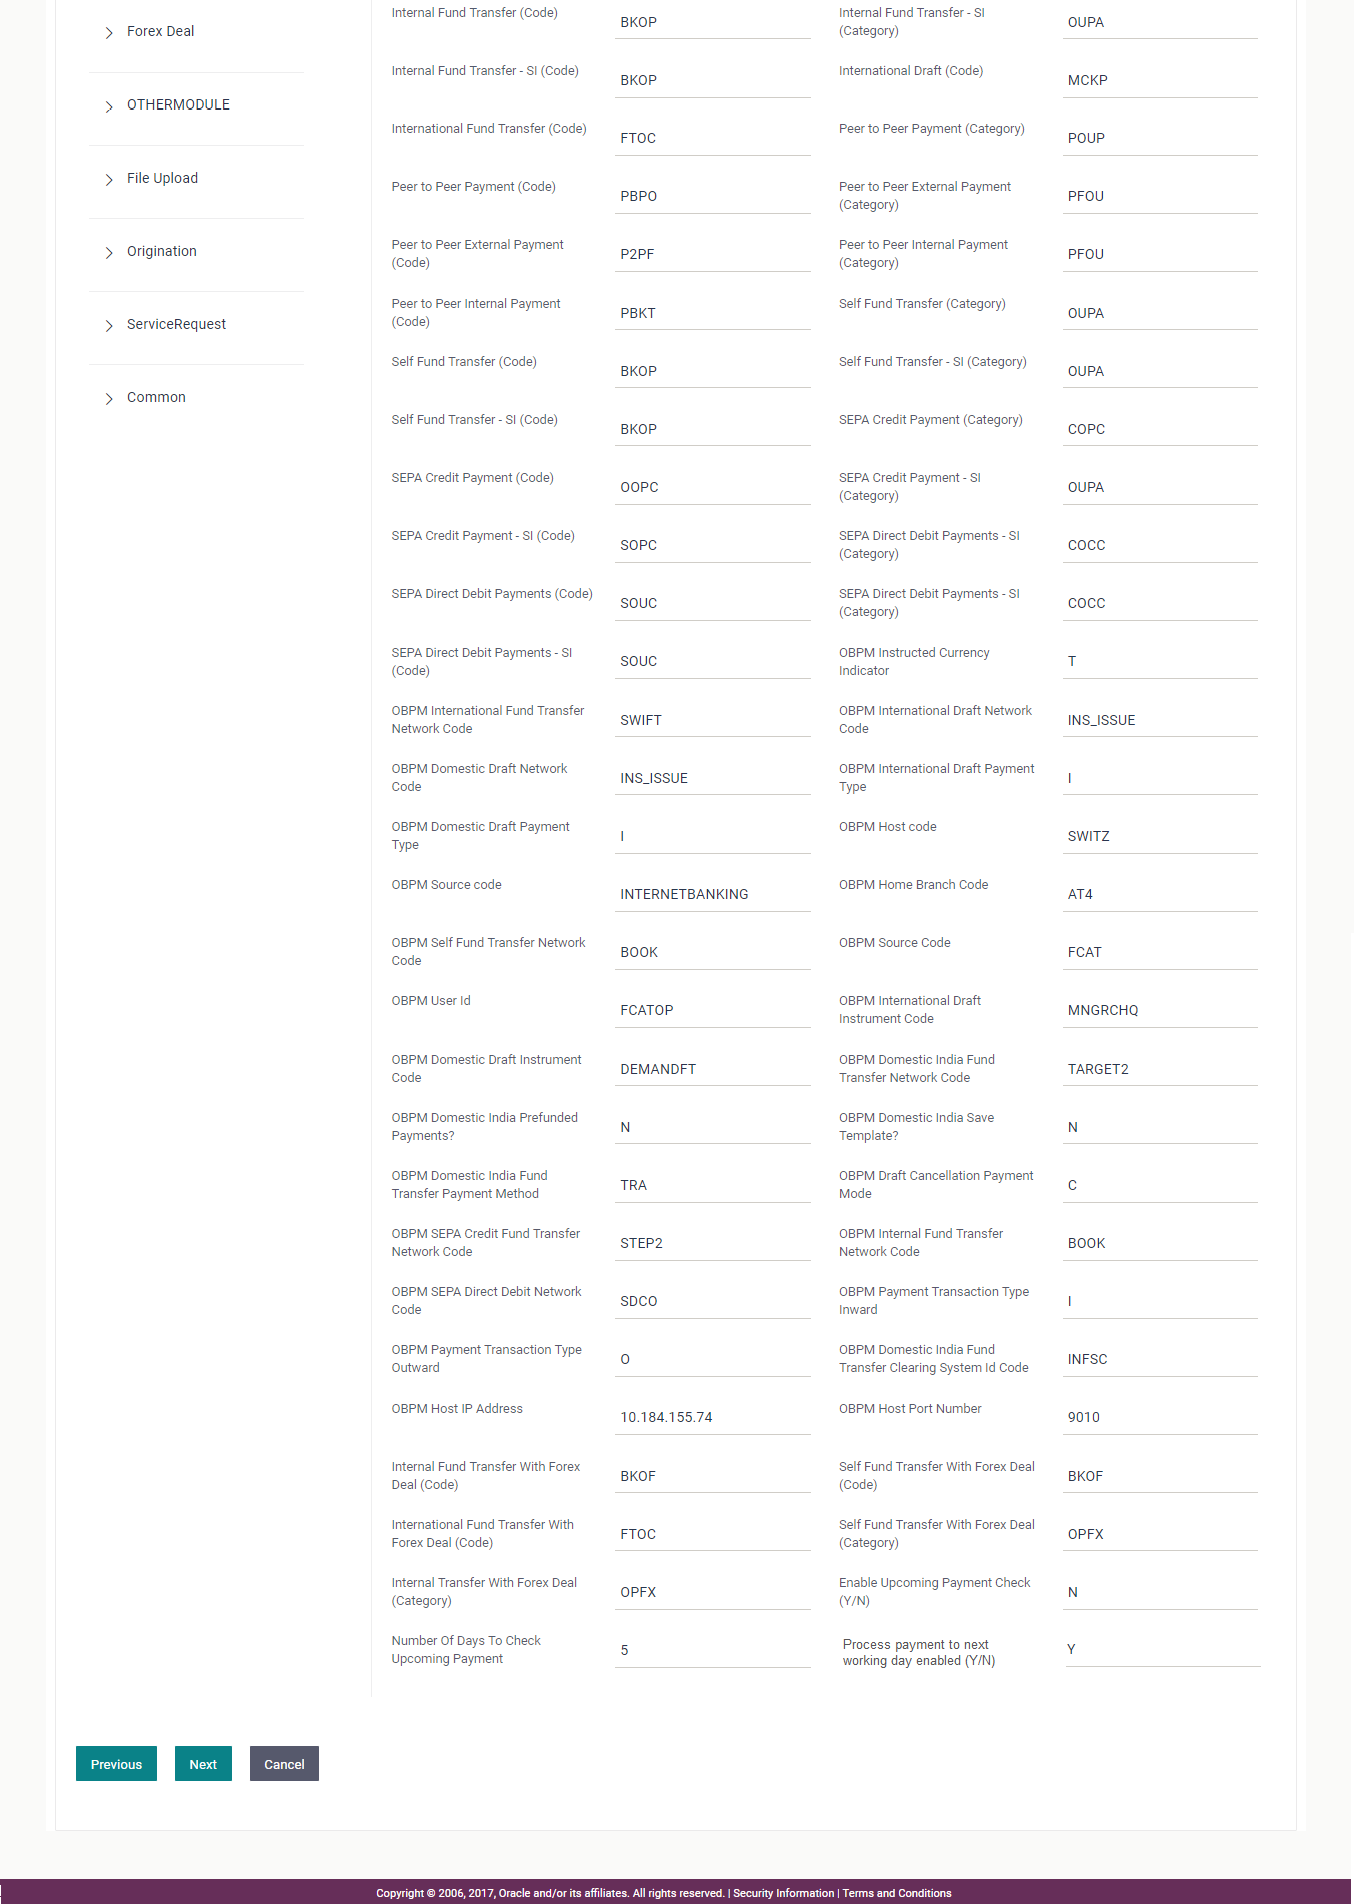
System Configuration – Dynamic Module – Payments
|
Field Name |
Description |
|---|---|
|
Bill Payment (Category) |
Enter the product category for bill payments. |
|
Bill Payment (Code) |
Enter the product code for bill payments. |
|
Claim Payment URL |
Enter the claim payment URL for the beneficiary to claim money transferred by the initiator. |
|
External Fund Transfer(Category) |
Enter the product category for external fund transfer. |
|
External Payment Redirection URL |
Enter the URL for the external payments. |
|
Domestic Fund Transfer (Category) |
Enter the product category for domestic fund transfer. |
|
Max Multiple Bill Payment Limit for Corporate Users |
Enter the maximum number of bill payments that a corporate user can initiate in one go. |
|
Max Multiple Bill Payment Limit for Retail Users |
Enter the maximum number of bill payments that a retail user can initiate in one go. |
|
Max Multiple Transfer Limit for Corporate Users |
Enter the maximum number of fund transfer that a corporate user can initiate in one go. |
|
Max Multiple Transfer Limit for Retail Users |
Enter the maximum number of fund transfer that a retail user can initiate in one go. |
|
Domestic Fund Transfer (Code) |
Enter the product code for domestic fund transfer. |
|
Domestic Fund Transfer NEFT (Category) |
Enter the product category for domestic fund transfer with network type as NEFT. |
|
Domestic Fund Transfer NEFT (Code) |
Enter the product code for domestic fund transfer with network type as NEFT. |
|
Domestic Fund Transfer-SI- NEFT (Category) |
Enter the product category for domestic fund transfer with standing instructions and network type as NEFT. |
|
Domestic Fund Transfer-SI- NEFT (Code) |
Enter the product code for domestic fund transfer with standing instructions and network type NEFT. |
|
Domestic Fund Transfer- RTGS (Category) |
Enter the product category for domestic fund transfer with network type as RTGS. |
|
Domestic Fund Transfer- RTGS (Code) |
Enter the product code for domestic fund transfer with network type as RTGS. |
|
Domestic Fund Transfer- RTGS - SI (Category) |
Enter the product category for domestic fund transfer with standing instructions and network type as RTGS. |
|
Domestic Fund Transfer- RTGS - SI (Code) |
Enter the product code for domestic fund transfer with standing instructions and network type as RTGS. |
|
Internal Fund Transfer(Category) |
Enter the product category for internal fund transfer. |
|
Internal Fund Transfer(Code) |
Enter the product code for internal fund transfer. |
|
Internal Fund Transfer - SI (Category) |
Enter the product category for internal transfer with standing instructions. |
|
Internal Fund Transfer - SI (Code) |
Enter the product code for internal transfer with standing instructions. |
|
International Draft (Code) |
Enter the product code for international draft transaction. |
|
International Fund Transfer (Code) |
Enter the product code for international fund transfer transaction. |
|
Peer to Peer Payment (Category) |
Enter the product category for peer to peer payments. |
|
Peer to Peer Payment (Code) |
Enter the product code for peer to peer payments. |
|
Peer to Peer External Payment (Category) |
Enter the product category for peer to peer external payments. |
|
Peer to Peer External Payment (Code) |
Enter the product code for peer to peer external payments. |
|
Peer to Peer Internal Payment (Category) |
Enter the product category for peer to peer internal payments. |
|
Peer to Peer Internal Payment (Code) |
Enter the product code for peer to peer internal payments. |
|
Self Fund Transfer (Category) |
Enter the product category for self fund transfer. |
|
Self Fund Transfer (Code) |
Enter the product code for self fund transfer. |
|
Self Fund Transfer - SI (Category) |
Enter the product category for self fund transfer with standing instructions. |
|
Self Fund Transfer - SI(Code) |
Enter the product code for self fund transfer with standing instructions. |
|
SEPA Credit Payment (Category) |
Enter the product category for SEPA credit payments. |
|
SEPA Credit Payment (Code) |
Enter the product code for SEPA credit payments. |
|
SEPA Credit Payment - SI (Category) |
Enter the product category for SEPA credit payments with standing instructions. |
|
SEPA Credit Payment - SI (Code) |
Enter the product code for SEPA credit payments with standing instructions. |
|
SEPA Direct Debit Payments -SI (Category) |
Enter the product category for SEPA direct debit payments with standing instructions. |
|
SEPA Direct Debit Payments - SI (Code) |
Enter the product code for SEPA direct debit payments with standing instructions. |
|
OBPM Instructed Currency Indicator |
Specify whether the OBPM instructed currency indicator is available or not. |
|
OBPM International Fund Transfer Network Code |
Enter the network code for OBPM international fund transfer. |
|
OBPM International Draft Network Code |
Enter the network code for OBPM international draft. |
|
OBPM Domestic Draft Network Code |
Enter the network code for OBPM domestic draft. |
|
OBPM International Draft Payment Type |
Enter the OBPM Payment for international draft type of transaction. |
|
OBPM Domestic Draft Payment Type |
Enter the OBPM Payment for domestic draft type of transaction. |
|
OBPM Host Code |
Enter the host code for OBPM. |
|
OBPM Source Code |
Enter the source code for OBPM. |
|
OBPM Home Branch Code |
Enter the OBPM home branch code. |
|
OBPM Self Fund Transfer Network Code |
Enter the network code for OBPM self fund transfer. |
|
OBPM Source Code |
Enter the source code for OBPM. |
|
OBPM User Id |
Enter the user id for OBPM. |
|
OBPM International Draft Instrument Code |
Enter the instrument code for OBPM international draft. |
|
OBPM Domestic Draft Instrument Code |
Enter the instrument code for OBPM domestic draft. |
|
OBPM Domestic India Fund Transfer Network Code |
Enter the network code for OBPM domestic India fund transfer. |
|
OBPM Domestic India Prefunded Payments? |
Specify whether the prefunded payments for OBPM domestic India is available for edit. |
|
OBPM Domestic India Save Template? |
Specify whether the OBPM domestic India template is saved or not. |
|
OBPM Domestic India Fund Transfer Payment Method |
Specify the mode of fund transfer and payment method for OBPM domestic India. |
|
OBPM Draft Cancellation Payment Mode |
Enter the payment mode for OBPM after draft cancellation. |
|
OBPM SEPA Credit Fund Transfer Network Code |
Enter the network code for OBPM SEPA credit fund transfer. |
|
OBPM Internal Fund Transfer Network Code |
Enter the network code for OBPM internal fund transfer. |
|
OBPM SEPA Direct Debit Network Code |
Enter network code for OBPM SEPA direct debit. |
|
OBPM Payment Transaction Type Inward |
Enter the OBPM Payment for inward type of transaction. |
|
OBPM Payment Transaction Type Outward |
Enter the OBPM Payment for outward type of transaction. |
|
OBPM Domestic India Fund Transfer Clearing System Id Code |
Enter the clearing system Id code for OBPM Domestic India fund transfer. |
|
OBPM Host IP Address |
Enter the host IP address for OBPM. |
|
OBPM Host port Number |
Enter the OBPM host port number. |
|
Internal Fund Transfer with Forex Deal (Code) |
Enter the product code for internal fund transfer with forex deal. |
|
Self Fund Transfer with Forex Deal (Code) |
Enter the product code for self fund transfer with forex deal. |
|
International Fund Transfer with Forex Deal (Code) |
Enter the product code for international fund transfer with forex deal. |
|
Self Fund Transfer with Forex Deal (Category) |
Enter the product category for self fund transfer with forex deal. |
|
Internal Fund Transfer with Forex Deal (Category) |
Enter the product category for internal fund transfer with forex deal. |
|
Enable Upcoming Payment Check (Y/N) |
Via this parameter, the administrator is able to specify whether the system is to check for upcoming scheduled transfers (via Standing Instructions or Pay Later) due to a payee within the next 'N' days for transfers Internal and Domestic at the time of transfer initiation towards a registered payee. |
|
Number of Days to Check Upcoming Payments |
Via this parameter, the administrator is able to define the number of days 'N' within which the upcoming payment is due to a payee in which case a warning message is to be displayed on the review page of transfer initiation. |
|
Process payment to next working (Y/N) |
Bank Administrator can set the parameter as when the payment is to be processed if initiated with date as holiday (for Pay Later or Repeat Transfer). By default the flag will be set as ‘Y’. If the flag is set as ‘Y’, the payment gets processed on ‘Next Value Date’ available in the Core Application If the flag is set as ‘N’, the payment gets processed as per instruction available in the Core Application. |
Note: The fields appearing in the System Configuration – Dynamic Module – Payments tab depends on the settings done at the back end and is dynamic in nature.
- In the Bill Payment (Category) / Bill Payment (Code) fields, enter the appropriate product category and code for bill payment transaction.
- In the Claim Payment URL field, enter the URL to claim the payments by the beneficiary.
- In the External Fund Transfer (Category) field, enter the product category.
- In the External Payment Redirection URL field, enter the web address.
- In the Domestic Fund Transfer (Category) fields, enter the appropriate product category.
- In the Max Multiple Payment Limit for Corporate Users / Max Multiple Payment Limit for Retail Users fields, enter the maximum number of bill payments that retail and corporate users can initiate in one go.
- In the Max Multiple Transfer Limit for Corporate Users / Max Multiple Transfer Limit for Retail Users fields, enter the maximum fund transfer that the retail and corporate users can initiate in one go.
- In the Domestic Fund Transfer (Code) fields, enter the appropriate product code.
- In the Domestic Fund Transfer NEFT (Category)/ Domestic Fund Transfer NEFT (Code) fields, enter the appropriate product category and product code.
- In the Domestic Fund Transfer - SI - NEFT (Category) / Domestic Fund Transfer - SI - NEFT (Code) fields, enter the appropriate product category and product code.
- In the Domestic Fund Transfer - SI - RTGS (Category)/ Domestic Fund Transfer - SI - RTGS (Code) fields, enter the appropriate product category and product code.
- In the Internal Fund Transfer (Category)/ Internal Fund Transfer (Code) fields, enter the appropriate product category and product code.
- In the Internal Fund Transfer - SI (Category)/ Internal Fund Transfer - SI (Code) fields, enter the appropriate product category and product code.
- In the International Draft (Code) / International Fund Transfer (Code) fields, enter the appropriate product codes.
- In the Peer to Peer Payment (Category)/ Peer to Peer Payment (Code) fields, enter the appropriate product category and product code.
- In the Peer to Peer External Payment (Category)/ Peer to Peer External Payment (Code) fields, enter the appropriate product category and product code.
- In the Peer to Peer to Peer Internal Payment (Category)/ Peer to Peer Internal Payment (Code) fields, enter the appropriate product category and product code.
- In the Self Fund Transfer (Category) / Self Fund Transfer (Code) fields, enter the appropriate product category and product code.
- In the Self Fund Transfer - SI (Category) / Self Fund Transfer - SI (Code) fields, enter the appropriate product category and product code.
- In the SEPA Credit Payment (Category) / SEPA Credit Payment (Code) fields, enter the appropriate product category and product code.
- In the SEPA Credit Payment - SI (Category) / SEPA Credit Payment - SI (Code) fields, enter the appropriate product category and product code.
- In the SEPA Direct Debit Payments - SI (Category) / SEPA Direct Debit Payments - SI (Code) fields, enter the appropriate product category and product code.
- In the OBPM Instructed Currency Indicator field, enter the appropriate value.
- In the OBPM International Fund Transfer Network Code, OBPM International Draft Network Code and OBPM Domestic Draft Network Code fields, enter the appropriate network codes.
- In the OBPM International Draft Payment Type/ OBPM Domestic Draft Payment Type fields, enter the appropriate values.
- In the OBPM Host Code, OBPM Source Code and OBPM Home Branch Code fields, enter the appropriate host, source and home branch codes.
- In the OBPM Self Fund Transfer Network Code field, enter the appropriate network code.
- In the OBPM User ID field, enter the OBPM user id.
- In the OBPM International Draft Instrument Code/ OBPM Domestic Draft Instrument Code fields, enter the appropriate instrument codes.
- In the OBPM India Fund Transfer Network Code field, enter the appropriate network code.
- In the Domestic India Prefunded Payment field, enter 'Y', if prefunded payment is allowed or 'N' if not allowed.
- In the Domestic India Save Template field, enter 'Y', if domestic India template save is allowed or 'N' if not allowed.
- In the Domestic India Fund Transfer Payment Method field, enter the payment method for domestic India fund transfer .
- In the Draft Cancellation Payment Mode field, enter the mode of payment after draft cancellation
- In the OBPM SEPA credit Fund Transfer Network Code, OBPM Internal Fund Transfer Network Code and OBPM SEPA Direct Debit Network Code fields, enter the appropriate network codes.
- In the OBPM Payment Transaction Type Inward/ OBPM Payment Transaction Type Outward fields, enter the appropriate values.
- In the OBPM Domestic India Fund Transfer Clearing System Id Code field, enter the appropriate code.
- In the OBPM Host IP Address/ OBPM Host Port No fields, enter the host ip address and host port number.
- In the Internal Fund Transfer with Forex Deal (Code), Self Fund Transfer with Forex Deal (Code) and International Fund Transfer with Forex Deal (Code) fields, enter the appropriate forex deal codes.
- In the Self Fund Transfer with Forex Deal (Category), Internal Fund Transfer with Forex Deal (Category) fields, enter the appropriate forex deal categories.
- In the Enable Upcoming Payment Check (Y/N) field, enter 'Y', if upcoming payment check is allowed or 'N' if not allowed.
- In the Number of Days to Check Upcoming Payments field, enter the number of days within which the upcoming payment is due to a payee in which case a warning message is to be displayed on the review page of transfer initiation.
- In the Process payment to next working (Y/N) field, enter 'Y', if upcoming payment holiday check is allowed to or 'N' if not allowed.
- Click . The System Configuration – Dynamic Module – Forex Deal screen appears.
OR
Click to go to the previous screen.
OR
Click to cancel the setup process.
System Configuration – Dynamic Module – Forex![]() Foreign Exchange Currency Deal
Foreign Exchange Currency Deal
|
Field Name |
Description |
|---|---|
|
Forex Deal Forward (Code) |
Enter the product code in which forward forex deals will be booked. |
|
Forex Deal Spot (Desc) |
Enter the product description in which spot forex deals will be booked. |
|
Forex Deal Forward (Desc) |
Enter the product description in which forward forex deals will be booked. |
|
Forex Deal Spot(Code) |
Enter the product code in which spot forex deals will be booked. |
- In the Forex Deal Forward (Code) field, enter the product code in which forward forex deals will be booked.
- In the Forex Deal Spot (Desc) field, enter the product description in which spot forex deals will be booked.
- In the Forex Deal Forward (Desc) field, enter the product description in which forward forex deals will be booked.
- In the Forex Deal Spot (Code) field, enter the product code in which spot forex deals will be booked.
- Click . The System Configuration – Dynamic Module – Other Module screen appears.
OR
Click to go to the previous screen.
OR
Click to cancel the setup process.
System Configuration – Dynamic Module – Other Module
|
Field Name |
Description |
|---|---|
|
Application Server Port |
Enter the application server port number. |
|
Application Server Host |
Enter the address of the application server host. |
|
Host IP |
Specify the Host IP of the selected host system. |
|
Port |
Specify the port for the host system. |
|
Channel |
Specify the channel as ‘IB’ to access the application. |
|
Host Date |
Enter the posting date of the host system. |
|
Identification Types |
Select the identification type whether it is from local or remote. |
|
Date Default |
Specify the default date for the system. |
|
Application Server Port |
Enter the application server port number |
|
Web Server Host |
Enter the address of the web server host. |
|
Supported Auth Type |
Enter the supported authorization type. |
|
Supported Soft Token |
Enter the supported soft token type. |
|
TD Pool Code |
Specify the pool code for TD |
|
Host WSDL Version |
Enter the host WSDL version number. |
|
Administrator Supported Auth Type |
Enter the authorization type supported by the application for administrator users. |
|
Corporate User Supported Auth Type |
Enter the authorization type supported by the application for corporate users. |
|
Retail User Supported Auth Type |
Enter the authorization type supported by the application for retail users. |
|
Limits Effective from Same Day (Y/N) |
Specify if limits are effective from the same day or next day. |
|
Bank Code |
Enter the unique identification code for the bank. |
|
Host Name |
Enter the host system for the channel banking platform. |
|
Branch Code |
Enter the bank branch code. |
|
Currency Support In Approval Rules |
Specify if currency as a parameter is supported in approval rules. |
|
Region |
Select the region of bank payments. The options are:
|
|
Flag to enable SSL |
Specify if the flag for SSL needs to be enabled. |
|
Anonymous Security Policy |
Specify the security policy that is applicable for anonymous users i.e. users not logged in. |
|
Anonymous Security Key Name |
Specify the security key name for anonymous users. |
|
IDCS Host IP |
Specify the Host IP of the IDCS system. |
|
IDCS Host Port |
Specify the port for the IDCS system. |
|
IDCS OBAPIs Client Id |
Specify the IDCS OBAPIs client unique identification number. |
|
IDCS OBAPIs Client Secret |
Specify the IDCS OBAPIs client secret number. |
|
IDCS Connection Scheme |
Specify the IDCS connection scheme. |
|
IPM Host IP address |
Specify the IP address for the IPM |
|
IPM Host port |
Enter the IPM host port. |
|
IPM Host username |
Specify the IPM host username. |
|
IPM Host password |
Specify the password for the IPM host system. |
|
IPM Host application name |
Enter the IPM host application name. |
|
Allows Touch Point Level Limit Definition (Y/N) |
Specify whether the touch point level limit definition is allowed or not. |
|
OAM OAuth IP |
Enter the IP address for the OAM OAuth system. |
|
OAM OAuth Port |
Enter the port number for OAM authorization. |
|
Deposit Installment Amount Limit |
Specify the Recurring Deposit installment amount limit for PAN validation. |
|
Deposit Cumulative Amount Limit |
Specify the consolidated limit for fixed deposit and recurring deposit together for PAN. |
|
Feedback for a Transaction |
Specify if feedback capture for the same transaction needs to be enabled only once or always. |
|
Open Term Deposit Threshold Amount |
Specify the term deposit booking amount limit for PAN validation. |
|
Allow Multiple Goods (Y/N) |
Specify if multiple goods are allowed for capture in Trade Finance as part of LC, Bills Initiation and Amendment. |
|
Fetch Guarantee Type from Host (Y/ N) |
Specify if the guarantee types need to be fetched from host system. |
Note: The fields appearing in the System Configuration – Dynamic Module – Other Module tab depends on the settings done at the back end and is dynamic in nature.
- Enter the relevant details in the Dynamic Module - Other Module tab.
- Click . The System Configuration – Dynamic Module – File Upload screen appears.
OR
Click to go to the previous screen.
OR
Click to cancel the setup process.
System Configuration – Dynamic Module – File Upload
|
Field Name |
Description |
|---|---|
|
Work Area Path |
Specify the work area path for bulk transactions. |
|
Response File Path |
Specify the response file path for bulk transactions. |
- In the Work Area Path field, enter the path on the server where the uploaded files will reside.
- In the Response File Path field, enter the path of the server where the response file will reside.
- Click . The System Configuration – Dynamic Module – Origination screen appears.
OR
Click to go to the previous screen.
OR
Click to cancel the setup process.
System Configuration – Dynamic Module - Origination
|
Field Name |
Description |
|---|---|
|
Co- Applicant Registration URL |
Specify the URL for registration of the co-applicant. |
|
Origination Date of Birth Limit Check |
Select the option for validating the date of birth limit i.e. Local / Remote. |
|
Savings Second Body Header Function |
Specify the host system code for savings account initiation stage. |
|
Personal Loan Location |
Specify the default location for personal loan account. |
|
Personal Loan Process Code |
Specify the host system process code for personal loan. |
|
Personal Loan Product Code |
Specify the host system product code for personal loan. |
|
Preferred Mode of Offer Document Delivery |
Specify the preferred mode of delivery for the documents. |
|
Savings Account Class |
Specify the host system account class for savings account. |
|
Savings App State |
Specify the host system code for savings account application state. |
|
Savings App Status |
Specify the host system code for savings account application status. |
|
Savings Application Category |
Specify the savings account application category. |
|
Savings First Body Header Additional Name |
Specify the name for additional parameter for savings account. |
|
Savings First Body Header Additional Value |
Specify the value for additional parameter for savings account. |
|
Savings First Body Header Function |
Specify the host system stage code for savings account. |
|
Savings Header Function |
Specify the host system code for savings account initiation stage. |
|
Savings Header Module |
Specify the identifier of the module for savings account. |
|
Savings Location |
Specify the default location for savings account. |
|
Savings Second Body Header Additional Values |
Specify the value for additional parameter for savings account. |
|
Savings Second Body Header Additional Name |
Specify the name for additional parameter for savings account. |
|
Default Employer |
Specify the value of default employer. |
|
Savings Process Code |
Specify the host system process code for savings account. |
|
Auto Loan Account Class |
Specify the host system account class for auto loans. |
|
Auto Loan Application Category |
Specify the auto loan application category. |
|
Auto Loan First Body Header Action |
Specify the host system code to start new auto loan application. |
|
Auto Loan First Body Header Additional Value |
Specify the value for additional parameter for auto loan. |
|
Auto Loan First Body Header Additional Name |
Specify the name for additional parameter for auto loan. |
|
Auto Loan First Body Header Function |
Specify the host system stage code for auto loans initiation stage. |
|
Auto Loan Header Function |
Specify the host system stage code for auto loan. |
|
Auto Loan Header Module |
Specify the identifier of module for auto loan account. |
|
Auto Loan Location |
Specify the default location for auto loan account. |
|
Auto Loan Process Code |
Specify the host system process code for auto loans. |
|
Auto Loan Product Code |
Specify the host system product code for auto loans. |
|
CASA Bundle Id |
Specify the bundle Id for current and savings account. |
|
Current Account Class |
Specify the host system account class for current account. |
|
Current Application Category |
Specify the host system application category for current account. |
|
Current First Body Header Additional Name |
Specify the name of the additional parameter for current account. |
|
Current First Body Header Additional Value |
Specify the value of the additional parameter for current account. |
|
Current First Body Header Function |
Specify the host system code for current account initiation stage. |
|
Current Header Function |
Specify the host system code for current account initiation stage. |
|
Current Header Module |
Specify the module identifier for current account. |
|
Current Location |
Specify the default location for current loan account. |
|
Current Process Code |
Specify the host system process code for current account. |
|
Current Second Body Header Action |
Specify the identifier to indicate modification of current account application. |
|
Current Second Body Header Additional Name |
Specify the name of the additional parameter for current account. |
|
Current Second Body Header Additional Value |
Specify the value of the additional parameter for current account. |
|
Current Second Body Header Function |
Specify the host system code for current account initiation stage. |
|
Personal Loan Account Class |
Specify the host system account class for personal loan. |
|
Personal Loan Application Category |
Specify the host system application category for personal loan. |
|
Personal Loan First Body Header Additional Value |
Specify the value for the additional parameter for personal loan account. |
|
Personal Loan First Body Header Additional Name |
Specify the value of the additional parameter for personal loan account. |
|
Personal Loan First body Header Function |
Specify the host system stage code for personal loans. |
|
Personal Loan Header Function |
Specify the host system code for personal loan initiation stage. |
|
Personal Loan Header Module |
Specify the module identifier for personal loan account. |
Note: The fields appearing in the System Configuration – Dynamic Module – Origination tab depends on the configuration done at the back end and is dynamic in nature.
- Enter the relevant details in the Dynamic Module - Originations tab.
- Click . The System Configuration – Dynamic Module – Service Request screen appears.
OR
Click to go to the previous screen.
OR
Click to cancel the setup process.
System Configuration – Dynamic Module - Service Request
|
Field Name |
Description |
|---|---|
|
Service Request Turnaround Time |
Specify predefined processing time within which the administrator should take action on a raised Service Request. If the service request processing time has passed this turnaround time, then an exclamation flag starts appearing against the raised Service Request in Request processing screen. This flag helps administrator in understanding that these service requests have already passed the turnaround time and should be actioned at the earliest. |
|
Request Expiration duration (in days) |
Specify the number of days post which the raised Service Request data will not be available for business user. For e.g. If this field is defined as 180 days, then the business user can view his raised service requests for last 180 days. |
|
Service Request Persistent Type |
This is to decide if the raised service request data has to be persisted locally in OBAPIs database or it has to be sent to a third party CRM The options available in this field are :
Note: There is no out of the box integration available for a third party system for persisting the raised service request data. |
- In the Service Request Turnaround Time field, specify the processing time within which administrator should take action on the request.
- In the Request Expiration duration (in days) field, specify the number of days post which the raised service request will not be available to business user.
- In the Service Request Persistent Type field, specify if persisted data needs to locally stored or to third party system.
- Click . The System Configuration – Dynamic Module – Common screen appears.
OR
Click to go to the previous screen.
OR
Click to cancel the setup process.
- Click . The System Configuration – Dynamic Module – Common screen appears.
OR
Click to go to the previous screen.
OR
Click to cancel the setup process.
System Configuration – Dynamic Module - Common
|
Field Name |
Description |
|---|---|
|
Batch Request URL |
Specify the URL for batch request processing. |
- Enter the Batch Request URL.
- Click to save the entered details.
OR
Click to go to the previous screen.
OR
Click to cancel the transaction. - The success message along with the reference number and status appears.
Click to complete the process.
System Configuration – View and Edit
Using this option the system administrator can view and edit the system configuration details that have already been created.
- The System Administrator logs in to the application using valid login credentials.
The System Configuration screen along with details as setup for multi entity appears. If the setup is multi-entity enabled then the system will display the entity details and the same can be edited.
- Click against the respective entity to edit the details i.e. Entity Name and Time Zone.
- Click to save the entity details.
- Click . The System Configuration - Basic Details screen with mapped entities appear.
- Select the entity for which you wish to edit the system configuration details.
- Select the Host System for which you wish to view the system configuration details and edit as required.
- Click to edit the Basic Details. The System Configuration - Basic Details screen appears in editable form.
OR
Click to cancel the transaction.
|
Field Name |
Description |
|---|---|
|
Web Server Host |
Displays the web server host details and available for edit. |
|
Web Server Port |
Displays the port of the web server and available for edit. |
|
Application Server Host |
Displays the application server host details and available for edit. |
|
Application Server Port |
Displays the port of the application server and available for edit. |
- In the Web Server Host field, edit the address of the web server if required.
- In the Web Server Port field, edit the port number of the web server if required.
- In the Application Server Host field, edit the host name of the application server if required.
- In the Application Server Port field, edit the port number of the application server port if required.
- Click to save the changes.
OR
Click to cancel the transaction. - The System Configuration - Basic Details - Review screen appears. Verify the details, and click .
OR
Click to cancel the transaction.
OR
Click the Basic Details, Branch Details, Host Details, Currency Payments, SMTP or Dynamic Module tabs to view and edit the respective details if required. - The screen with success message along with the reference number and status appears. Click OK to complete the transaction.
System Configuration - Host Details - View and Edit
Using this option System Administrator can view the maintained host details and also edit the required details.
To view and edit the host details:
- Click on System Configuration option on the dashboard and navigate to the host details tab. The default option is ‘View’
- Click to edit the Host Details. The System Configuration - Host Details screen appears in editable form.
OR
Click to cancel the transaction.
|
Field Name |
Description |
|---|---|
|
Host Name |
Displays the host name defined for the channel banking platform. |
|
Host Version |
Displays the host version defined for the channel platform and available for edit. The user can select the version from the list. |
|
Gateway IP |
Displays the Gateway IP of the selected host system and available for edit. |
|
Port |
Displays the port number of the host system and available for edit. |
|
Channel |
Displays the channel to access the application. |
|
Check Host Availability |
Click to check the Host availability for the new details entered. |
- From the Host Version list, select the version of the host, if required.
- In the Gateway IP field, edit the gateway IP address of the host.
- In the Port field, edit the port number of the server.
- In the Channel field, edit the channel to access the application.
- Click the Check Host Availability link to check the host availability. The message of successful testing appears.
- Click to save the changes.
OR
Click to cancel the transaction. - The System Configuration - Host Details - Review screen appears. Verify the details, and click .
OR
Click to cancel the transaction.
OR
Click the Basic Details, Bank Details, Branch Details, Currency Payments, SMTP or Dynamic Module tabs to view and edit the respective details if required. - The screen with success message along with the reference number and status appears. Click to complete the transaction.
System Configuration - Bank Details View and Edit
Using this option System Administrator maintains the bank details. These details once defined can be viewed and edited using this transaction.
To view and edit the bank details:
- Click on System Configuration option on the dashboard and navigate to the bank details tab. The default option is ‘View’.
- Click to edit the Bank Details. The System Configuration - Bank Details screen appears in editable form.
|
Field Name |
Description |
|---|---|
|
Bank Code |
Displays the bank code as defined and available for edit. |
|
Bank Group Code |
Displays the bank group code as defined and available for edit. |
|
Bank Name |
Displays the name of the bank as defined and available for edit. |
|
Bank Short Name |
Displays the short name of the bank as defined and available for edit. |
|
Address - Line 1 - 3 |
Displays the address of the bank as defined and available for edit. |
|
Country |
Displays the country of the bank and available for edit. |
|
ZIP Code |
Displays the ZIP code of the bank. |
|
Allowed Account Types |
Displays the allowed account types as defined and available for edit. The options are:
|
|
Bank Currency |
Displays the applicable bank currency and available for edit. |
- In the Bank Code field, edit the code of the bank.
- In the Bank Group Code field, edit the group code of the bank.
- In the Bank Name field, edit the name of the bank.
- In the Bank Short Name field, edit the short name of the bank.
- In the Address Line 1 - 3 field, edit the address of the bank if required.
- From the Country list, edit the country of the bank if required.
- In the City and ZIP Code field, edit the city/ zip code of the bank if required.
- From the Bank Currency list, edit the currency of the bank if required.
- Select/ de-select the Allowed Account Types check box, to edit the selection, if required.
- Click to save the changes.
OR
Click to cancel the transaction. - The System Configuration - Bank Details - Review screen appears. Verify the details, and click .
OR
Click to cancel the transaction.
OR - Click the Basic Detail, Host Details, Branch Details, Host Details, Currency Payments, SMTP or Dynamic Module tabs to view and edit the respective details.
- The screen with success message along with the reference number and status appears. Click to complete the transaction.
System Configuration - Branch Details - View and Edit
Using this option System Administrator maintains the branch details. These details once defined can be viewed and edited using this transaction.
To view and edit the branch details:
- Click on System Configuration option on the dashboard and navigate to the branch details tab. The default option is ‘View’.
- Click to edit the Branch Details. The System Configuration - Branch Details screen appears in editable form.
|
Field Name |
Description |
|---|---|
|
Bank Code |
Displays the unique code of the bank as defined. |
|
Branch Code |
Displays the bank branch code as defined and available for edit. |
|
Home Branch |
Displays the home branch code as defined and available for edit. |
|
Local Currency |
Displays the local currency as defined and available for edit. |
|
Calculation Currency |
Displays the calculation currency as defined and available for edit. |
|
Region |
Displays the region of bank payments as defined and available for edit. The options are:
|
- In the Bank Code field, edit the code of the bank.
- In the Branch Code field, edit the branch code of the bank.
- In the Home Branch field, edit the name of the home branch of the bank.
- From the Local Currency list, select the local currency of the bank branch.
- From the Calculation Currency list, select the calculation currency of the bank branch.
- From the Region list, select the appropriate region.
- Click to save the changes.
OR
Click to cancel the transaction. - The System Configuration - Branch Details - Review screen appears. Verify the details, and click .
OR
Click to cancel the transaction.
OR
Click the Basic Details, Host Details, Bank Details, Currency Payments, SMTP or Dynamic Module tabs to view and edit the respective details if required. - The screen with success message along with the reference number and status appears. Click OK to complete the transaction.
System Configuration - Currency Payments - View and Edit
Using this option, the system administrator maintains the currency for international payment transactions. These details once defined can be viewed and edited using this transaction.
To view and edit the System Configuration - Currency Payments details
- Click on System Configuration option on the dashboard and navigate to the currency payments tab. The default option is ‘View’.
- Click to edit the Currency Payments. The System Configuration - Currency Payments screen appears in editable form.
|
Field Name |
Description |
|---|---|
|
International Fund Transfer |
Displays the currencies that are applicable for international fund transfer transactions and available for edit. |
|
International Draft |
Displays the currencies that are applicable for international draft transactions and available for edit. |
- For the International Fund Transfer transaction, select the appropriate currency.
- For the International Fund Transfer Later transaction, select the appropriate currency.
- For the International Draft transaction, select the appropriate currency.
- Click to save the changes.
OR
Click to cancel the transaction. - The System Configuration - Currency Payments - Review screen appears. Verify the details, and click .
OR
Click to cancel the transaction.
OR
Click the Basic Details, Host Details, Bank Details, Branch Details, SMTP or Dynamic Module tabs to view and edit the respective details if required. - The screen with success message along with the reference number and status appears. Click OK to complete the transaction.
System Configuration – SMTP - View and Edit
Using this option, the system administrator maintains the SMTP configurations. These details once defined can be viewed and edited using this transaction.
To view and edit the SMTP details:
- Click on System Configuration option on the dashboard and navigate to the SMTP tab. The default option is ‘View’.
- Click to edit the SMTP. The System Configuration – SMTP screen appears in editable form.
|
Field Name |
Description |
|---|---|
|
Server Name |
Displays the name of the server and available for edit. |
|
Port |
Displays the port number and available for edit. |
|
Sender Email Address |
Displays the email address of the sender and available for edit. |
|
Recipient Email Address |
Displays the email address of the recipient and available for edit. |
|
Username |
Displays the user name and available for edit. |
|
Password |
Edit the password if required. |
|
Authentication Required |
Select the check box, if authentication is required. |
- In the Server Name field, edit the name of the mail server if required.
- In the Port field, edit the port number if required.
- In the Sender Email Address, edit the email address of the sender if required.
- In the Recipient Email Address, edit the email address of the recipient if required.
- In the Username, edit the user name if required.
- In the Password field, edit the password if required.
- Click the Send Test Email link to send a test mail. The message of successful testing appears.
- Click to save the changes.
OR
Click to cancel the transaction. - The System Configuration – SMTP - Review screen appears. Verify the details, and click .
OR
Click to cancel the transaction.
OR
Click the Basic Details, Host Details, Bank Details, Branch Details, Currency Details or Dynamic Module tabs to view and edit the respective details if required. - The screen with success message along with the reference number and status appears. Click OK to complete the transaction.
System Configuration – Dynamic Module
The dynamic modules corresponding to the selected host, which is required to run the application are defined and configured by system administrator.
The modules are included depending on the type of host selected.
Following modules are configured:
System Configuration – Dynamic Module – BRAND
Using this option, the system administrator maintains the BRAND module configurations. These configurations once defined can be viewed and edited.
To view and edit the BRAND module details:
- Click on System Configuration option on the dashboard and navigate to the dynamic module – BRAND tab. The default option is ‘View’.
- Click to edit the Dynamic Module – BRAND. The System Configuration - Dynamic Module – BRAND screen appears in editable form.
|
Field Name |
Description |
|---|---|
|
Content Server URL |
Displays the content server URL and is available for edit. |
|
Content Publisher URL |
Displays the content publisher URL and is available for edit. |
- In the Content Server URL field, edit the web address if required.
- In the Content Publisher URL field, edit the URL defined for content publishing.
- Click the Send Test Email link to send a test mail. The message of successful testing appears.
- Click to save the changes.
OR
Click to cancel the transaction. - The System Configuration - Dynamic Module – BRAND - Review screen appears. Verify the details, and click .
OR
Click to cancel the transaction.
OR
Click theBasic Details, Host Details, Bank Details, Branch Details, Currency Details, SMTP or Dynamic Module tabs to view and edit the respective details if required. - The screen with success message along with the reference number and status appears. Click OK to complete the transaction.
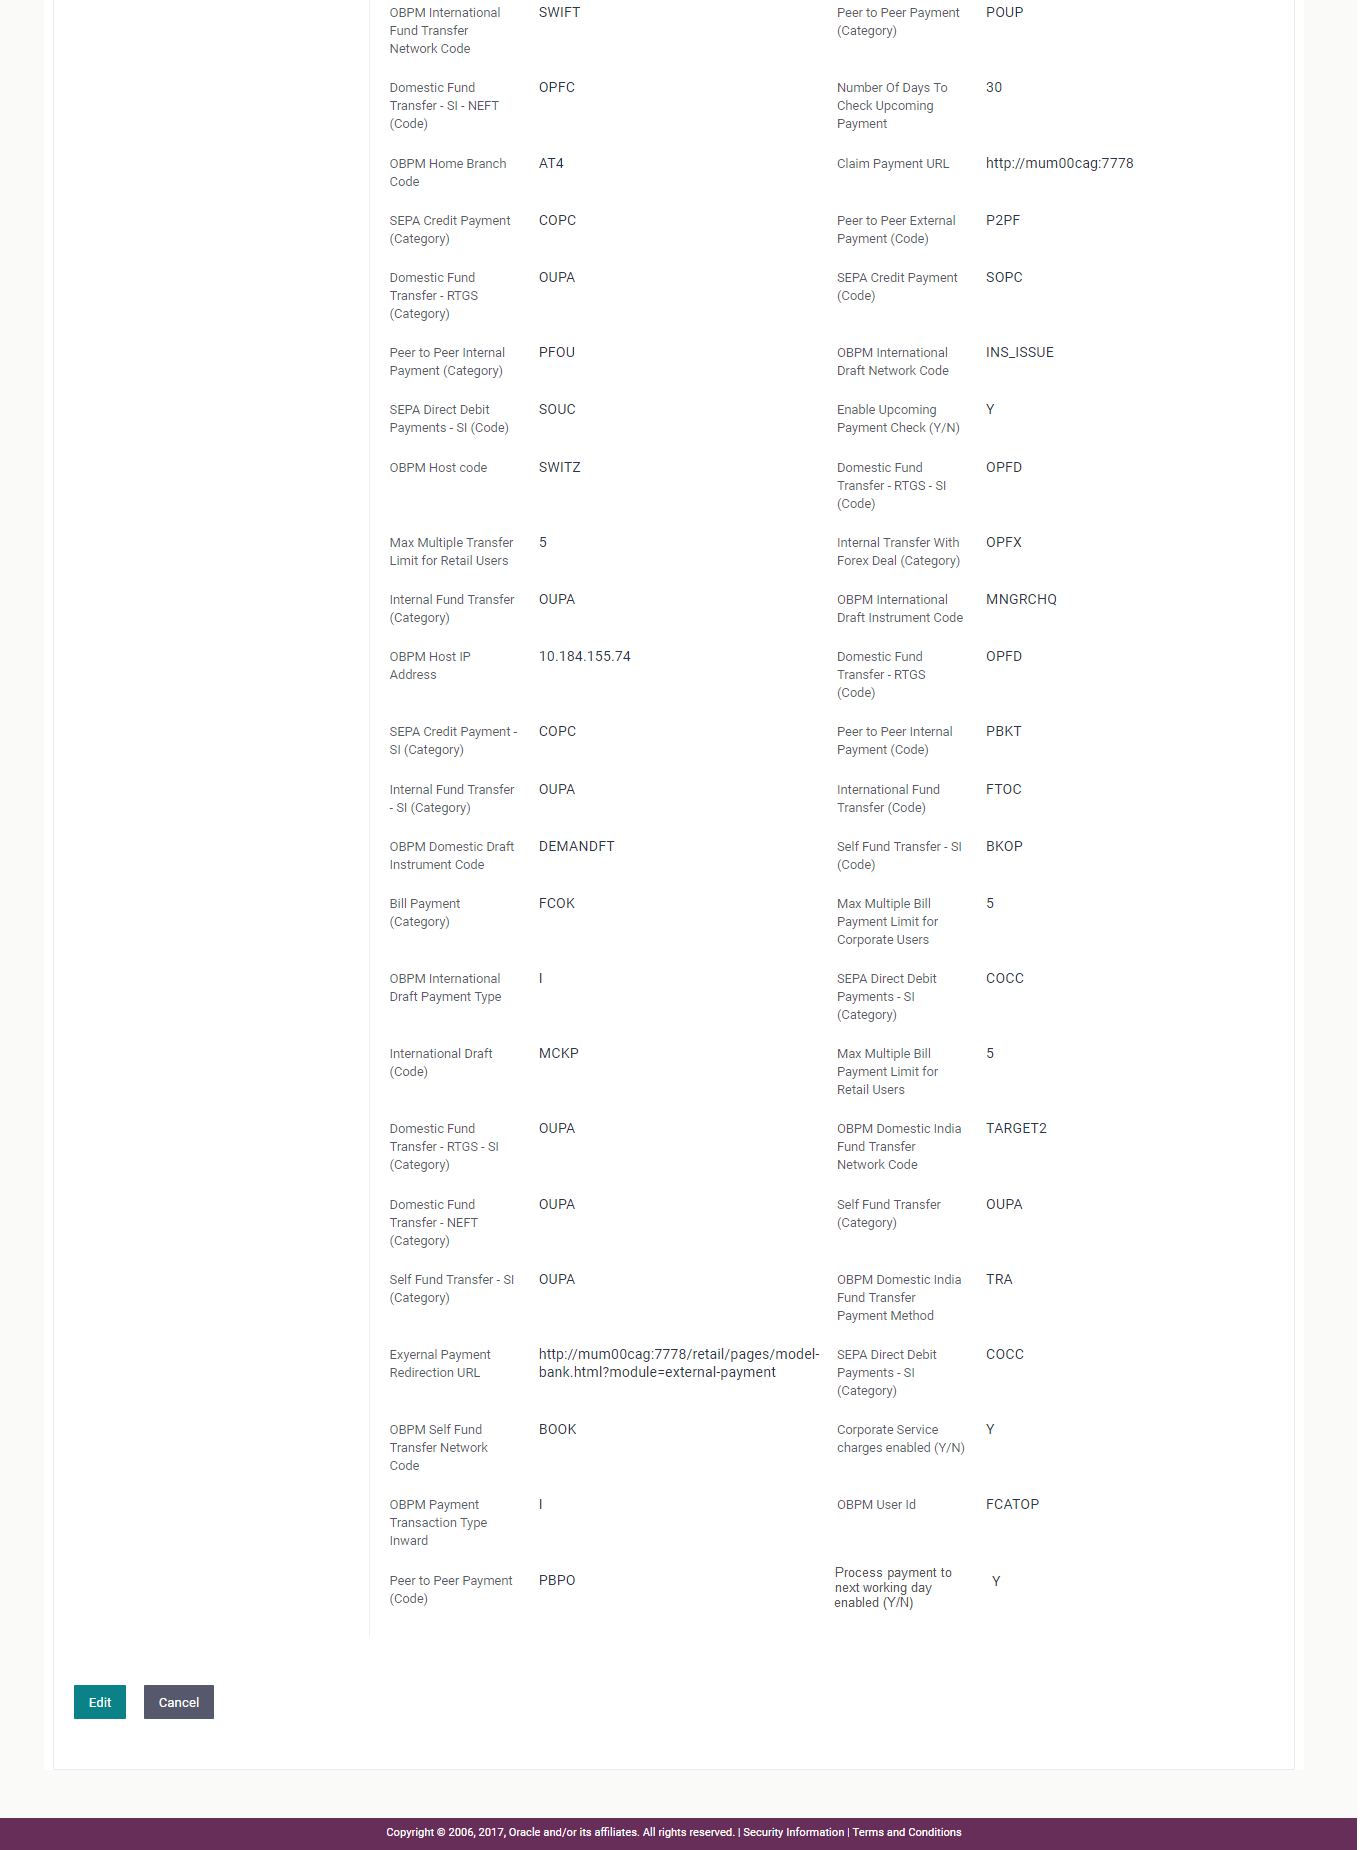
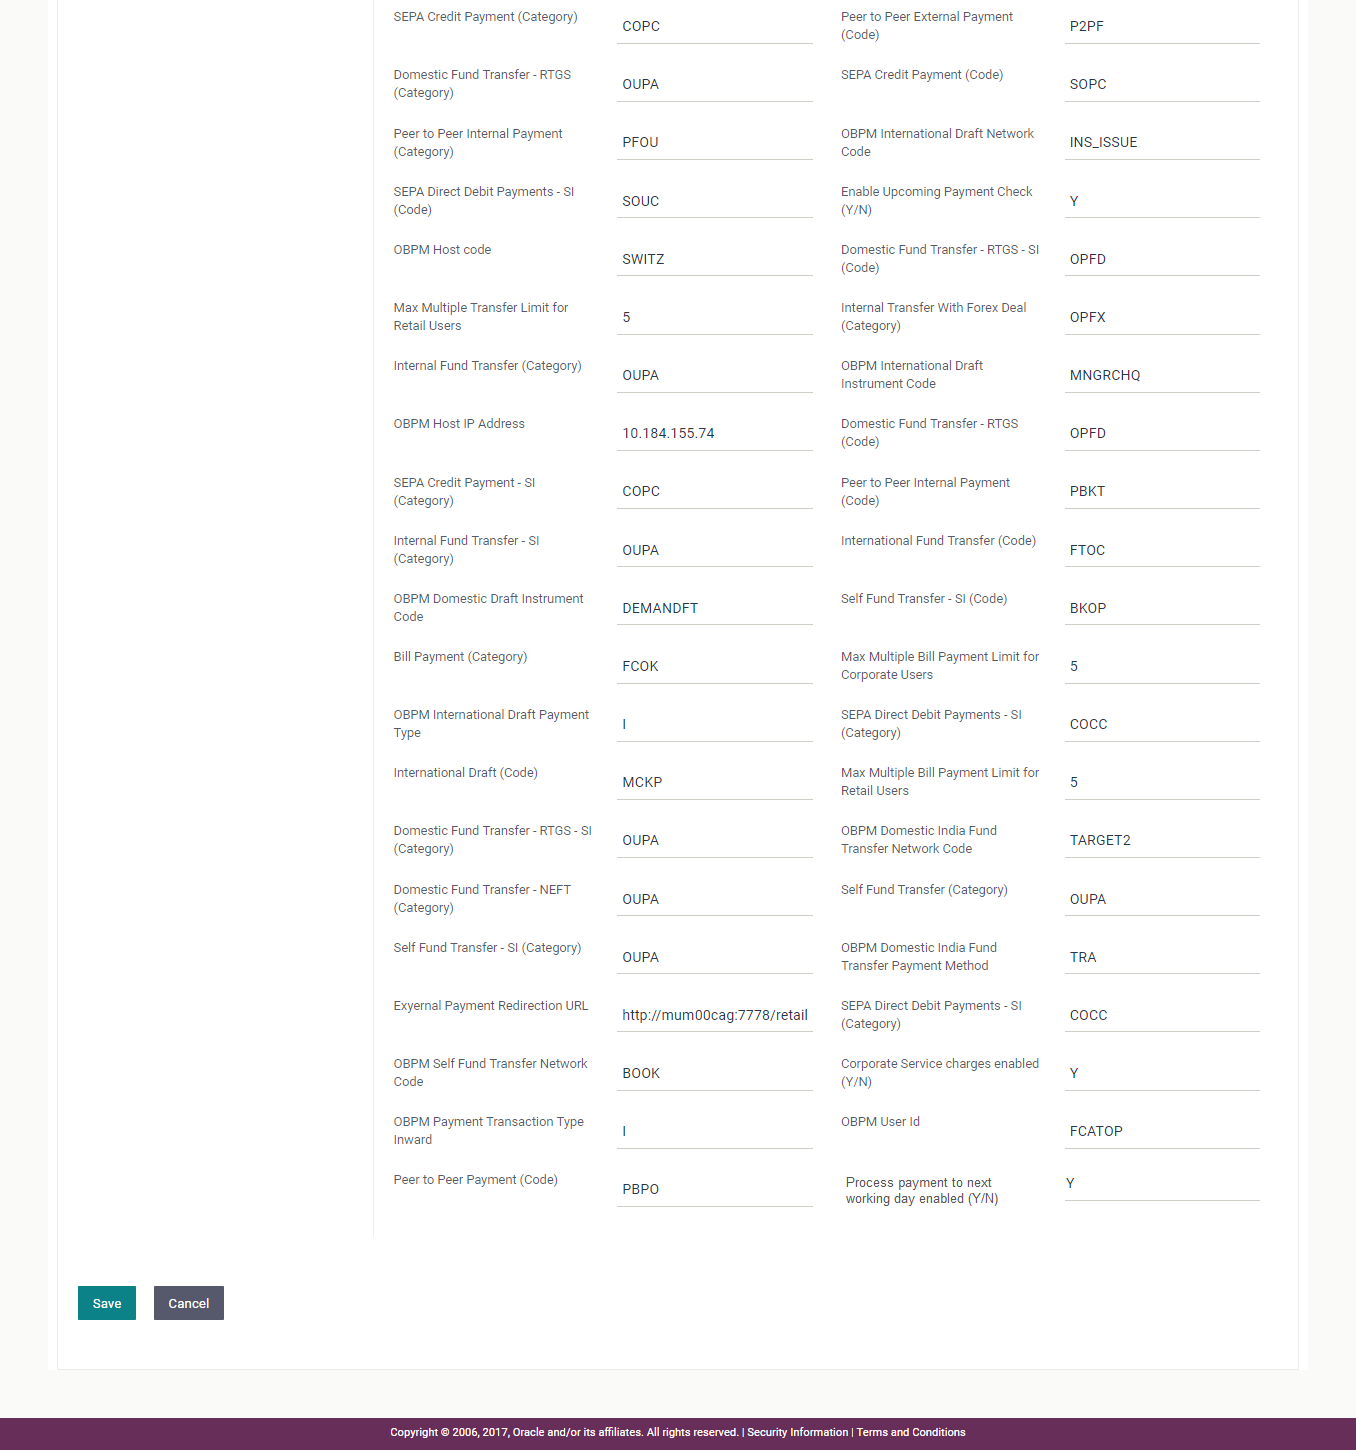
System Configuration - Dynamic Module - Payments - View and Edit
Using this option, system administrator can edit the payment module details.
To view and edit the Dynamic Module - Payments details:
- Click on System Configuration option on the dashboard and navigate to the dynamic module – Payments tab. The default option is ‘View’.
- Click to edit the Dynamic Module – Payments. The System Configuration - Dynamic Module – Payments screen appears in editable form.
|
Field Name |
Description |
|---|---|
|
OBPM Domestic India Prefunded Payments? |
Displays whether there is a prefunded payments for OBPM domestic India and available for edit. |
|
OBPM Payment -Transaction Type Outward |
Displays the OBPM Payment for outward type of transaction and available for edit. |
|
Max Multiple Payment Limit for Corporate Users |
Displays the maximum number of bill payments that a corporate user can initiate in one go and available for edit. |
|
OBPM Source Code |
Displays the source code for OBPM and available for edit. |
|
OBPM Domestic Draft Payment Type |
Displays the OBPM Payment for domestic draft type of transaction and available for edit. |
|
Self Fund Transfer with Forex Deal (Category) |
Displays the product category for self fund transfer with forex deal and available for edit. |
|
Peer to Peer External Payment (Category) |
Displays the category for peer to peer external payments and available for edit. |
|
OBPM SEPA Direct Debit Network Code |
Displays network code for OBPM SEPA direct debit and available for edit. |
|
Domestic Fund Transfer (Category) |
Displays the product category for domestic fund transfer and available for edit. |
|
Domestic Fund Transfer (Code) |
Displays the product code for domestic fund transfer and available for edit. |
|
Domestic Fund Transfer- NEFT (Code) |
Displays the product code for domestic fund transfer with network type NEFTand available for edit. |
|
OBPM Domestic India Save Template? |
Displays whether the OBPM domestic India template is saved or not and available for edit. |
|
Self Fund Transfer (Code) |
Displays the product code for self fund transfer and available for edit and available for edit. |
|
OBPM Source Code |
Displays the source code for OBPM and available for edit. |
|
International Fund Transfer with Forex Deal (Code) |
Displays the product code for international fund transfer with forex deal and available for edit. |
|
OBPM Host port Number |
Displays the OBPM host port number and available for edit. |
|
Internal Fund Transfer (Code) |
Displays the product code for internal fund transfer and available for edit. |
|
SEPA Direct Debit Payments (Code) |
Displays the product code for SEPA direct debit payments and available for edit. |
|
Bill Payment (Code) |
Displays the product code for bill payments and available for edit. |
|
SEPA Credit Payment -SI (Code) |
Displays the product code for SEPA credit payments with standing instructions and available for edit. |
|
OBPM SEPA Credit Fund Transfer Network Code |
Displays the network code for OBPM SEPA credit fund transfer and available for edit. |
|
OBPM Draft Cancellation Payment Mode |
Displays the payment mode for OBPM draft cancellation and available for edit. |
|
OBPM Domestic Draft Network Code |
Displays the network code for OBPM domestic draft and available for edit. |
|
External Fund Transfer (Category) |
Displays the product category for external fund transfer and available for edit. |
|
Self Fund Transfer with Forex Deal (Code) |
Displays the product code for self fund transfer with forex deal and available for edit. |
|
Internal Fund Transfer -SI (Code) |
Displays the product code for internal transfer with standing instructions and available for edit. |
|
OBPM Domestic India Fund Transfer Clearing System Id Code |
Displays the clearing system Id code for OBPM Domestic India fund transfer and available for edit. |
|
OBPM Instructed Currency Indicator |
Displays the OBPM instructed currency indicator and available for edit. |
|
Internal Fund Transfer with Forex Deal (Code) |
Displays the product code for internal fund transfer with forex deal and available for edit. |
|
Domestic Fund Transfer-SI- NEFT (Category) |
Displays the product category for domestic fund transfer with standing instructions and network type NEFT and available for edit. |
|
OBPM Internal Fund Transfer Network Code |
Displays the network code for OBPM internal fund transfer and available for edit. |
|
OBPM International Fund Transfer Network Code |
Displays the network code for OBPM international fund transfer and available for edit. |
|
Peer to Peer Payment (Category) |
Enter the product category for peer to peer payments and available for edit. |
|
Domestic Fund Transfer-SI- NEFT (Code) |
Displays the product code for domestic fund transfer with standing instructions and network type NEFT and available for edit. |
|
Number of Days to Check Upcoming Payments |
Displays the number of days within which upcoming payments are due to a payee and available for edit. |
|
OBPM Home Branch Code |
Displays the code for OBPM home branch and available for edit. |
|
Claim Payment URL |
Displays the claim payment URL for the beneficiary to claim money and available for edit. |
|
SEPA Credit Payment (Category) |
Displays the product category for SEPA credit payments and available for edit. |
|
Peer to Peer External Payment (Code) |
Displays the product code for peer to peer external payments and available for edit. |
|
Domestic Fund Transfer- RTGS (Category) |
Displays the product category for domestic fund transfer with network type as RTGS and available for edit. |
|
SEPA Credit Payment (Code) |
Displays the product code for SEPA credit payments and available for edit. |
|
Peer to Peer Internal Payment (Category) |
Displays the product category for peer to peer internal payments and available for edit. |
|
OBPM International Draft Network Code |
Displays the network code for OBPM international draft and available for edit. |
|
SEPA Direct Debit Payments SI- (Code) |
Displays product code for SEPA direct debit payments and available for edit. |
|
Enable Upcoming Payment Check (Y/N) |
Displays if the system needs to check for upcoming scheduled transfers (via Standing Instructions or Pay Later) due to a payee. |
|
OBPM Host Code |
Displays the host code for OBPM and available for edit. |
|
Domestic Fund Transfer- RTGS - SI (Code) |
Displays the product code for domestic fund transfer with standing instructions and network type as RTGS and available for edit. |
|
Max Multiple Transfer Limit for Retail Users |
Displays the maximum number of fund transfer that a retail user can initiate in one go and available for edit. |
|
Internal Transfer with Forex Deal (Category) |
Displays the product category for internal fund transfer with forex deal and available for edit. |
|
Internal Fund Transfer(Category) |
Displays the product category for internal fund transfer and available for edit. |
|
OBPM International Draft Instrument Code |
Displays the instrument code for OBPM international draft and available for edit. |
|
OBPM Host IP Address |
Displays the host IP address for OBPM and available for edit. |
|
Domestic Fund Transfer- RTGS (Code) |
Displays the product code for domestic fund transfer with network type as RTGS and available for edit. |
|
SEPA Credit Payment -SI(Category) |
Displays the product category for SEPA credit payments with standing instructions and available for edit. |
|
Peer to Peer Internal Payment (Code) |
Displays the product code for peer to peer internal payments and available for edit. |
|
Internal Fund Transfer - SI (Category) |
Displays the product category for internal transfer with standing instructions and available for edit. |
|
International Fund Transfer (Code) |
Displays the product code for international fund transfer transaction and available for edit. |
|
OBPM Domestic Draft Instrument Code |
Displays the instrument code for OBPM domestic draft and available for edit. |
|
Self Fund Transfer - SI(Code) |
Displays the product code for self fund transfer with standing instructions and available for edit. |
|
Bill Payment (Category) |
Displays the product category for bill payments and available for edit. |
|
Max Multiple Bill Payment Limit for Corporate Users |
Displays the maximum number of bill payments that a corporate user can initiate in one go and available for edit. |
|
OBPM International Draft Payment Type |
Displays the OBPM Payment for international draft type of transaction and available for edit. |
|
SEPA Direct Debit Payments -SI (Category) |
Displays the product category for SEPA direct debit payments with standing instructions and available for edit. |
|
International Draft (Code) |
Displays the product code for international draft and available for edit. |
|
Max Multiple Bill Payment Limit for Retail Users |
Displays the maximum number of bill payments that a retail user can initiate in one go and available for edit. |
|
Domestic Fund Transfer RTGS -SI (Category) |
Displays the product category for domestic fund transfer with standing instructions and network type as RTGS and available for edit. |
|
OBPM Domestic India Fund Transfer Network Code |
Displays the network code for OBPM domestic India fund transfer and available for edit. |
|
Domestic Fund Transfer NEFT (Category) |
Displays the product category for domestic fund transfer with network type as NEFT and available for edit. |
|
Self Fund Transfer (Category) |
Displays the product category for self fund transfer and available for edit. |
|
Self Fund Transfer - SI (Category) |
Displays the product category for self fund transfer with standing instructions and available for edit. |
|
OBPM Domestic India Fund Transfer Payment Method |
Displays the mode of fund transfer and payment method for OBPM domestic India and available for edit. |
|
External Payment Redirection URL |
Displays the URL for the external payments and available for edit. |
|
SEPA Direct Debit Payments -SI (Category) |
Displays the product category for SEPA direct debit payments with standing instructions and available for edit. |
|
OBPM Self Fund Transfer Network Code |
Displays the network code for OBPM self fund transfer and available for edit. |
|
OBPM Payment -Transaction Type Inward |
Displays the OBPM Payment for inward type of transaction and available for edit. |
|
OBPM User Id |
Displays the user id for OBPM and available for edit. |
|
Peer to Peer Payment (Code) |
Displays the product code for peer to peer payments and available for edit. |
|
Process payment to next working (Y/N) |
Displays the parameter set as when the payment is to be processed if initiated with date as holiday (for Pay Later or Repeat Transfer) and available for edit. If the flag is set as ‘Y’, the payment gets processed on ‘Next Value Date’ available in the Core Application If the flag is set as ‘N’, the payment gets processed as per instruction available in the Core Application. |
Note: The fields appearing in the System Configuration – Dynamic Module – Payments tab depends on the settings done at the back end and is dynamic in nature.
- Edit the required Payments detail.
- Click to save the changes.
OR
Click to cancel the transaction. - The System Configuration - Dynamic Module – Payments - Review screen appears. Verify the details, and click .
OR
Click to cancel the transaction.
OR
Click the Basic Details, Host Details, Bank Details, Branch Details, Currency Details, SMTP or Dynamic Module tabs to view and edit the respective details if required. - The screen with success message along with the reference number and status appears. Click OK to complete the transaction.
System Configuration – Dynamic Module – Forex Deal- View and Edit
Using this option, system administrator can view and edit the Forex Deal module details.
To view and edit the Dynamic Module – Forex Deal details:
- Click on System Configuration option on the dashboard and navigate to the dynamic module – Forex Deal tab. The default option is ‘View’.
- Click to edit the Dynamic Module – Forex Deal. The System Configuration - Dynamic Module – Forex Deal screen appears in editable form.
|
Field Name |
Description |
|---|---|
|
Forex Deal Forward (Desc) |
Displays the product description for forward deal booking and available for edit. |
|
Forex Deal Spot (Desc) |
Displays the product description for spot forex deal booking and available for edit. |
|
Forex Deal Forward (Code) |
Displays the product code for forward deal booking and available for edit. |
|
Forex Deal Spot(Code) |
Displays the product code for spot deal booking and available for edit. |
- In the Forex Deal Forward (Desc) field, edit the description if required.
- In the Forex Deal Spot (Desc) field, edit the description if required.
- In the Forex Deal Forward (Code) field, edit the code if required.
- In the Forex Deal Spot (Code) field, edit the code if required.
- Click to save the changes.
OR
Click to cancel the transaction. - The System Configuration - Dynamic Module – Forex Deal - Review screen appears. Verify the details, and click .
OR
Click to cancel the transaction.
OR
Click the Basic Details, Host Details, Bank Details, Branch Details, Currency Details, SMTP or Dynamic Module tabs to view and edit the respective details if required. - The screen with success message along with the reference number and status appears. Click OK to complete the transaction.
System Configuration – Dynamic Module – Other Module - View and Edit
Using this option, system administrator can view and edit the other module details.
To view and edit the Dynamic Module – Other Module details:
- Click on System Configuration option on the dashboard and navigate to the dynamic module – Other Module tab. The default option is ‘View’.
- Click to edit the Dynamic Module – Other Module. The System Configuration - Dynamic Module – Other Module screen appears in editable form.
|
Field Name |
Description |
|---|---|
|
FATCA Compliance check required (Y/ N) |
Displays whether the FATCA and CRS compliance check is required or not for business users and available for edit. |
|
IDCS OBAPIs Client Secret |
Displays the secret key for OBAPIs as the client as defined in IDCS. |
|
Allow Multiple Goods (Y/N) |
Displays whether multiple goods are allowed or not as part of trade finance transactions and available for edit. |
|
Anonymous Security Key Name |
Displays the security key name for anonymous users and available for edit. |
|
IPM Host username |
Displays thee IPM host user name and available for edit. |
|
Anonymous Security Policy |
Displays the security policy fthat is applicable for anonymous users i.e. users not logged in and available for edit. |
|
Branch Code |
Displays the bank branch code and available for edit. |
|
Application Server Host |
Displays the address of the application server host and available for edit. |
|
OAM OAuth Port |
Displays the port number for OAM authorization and available for edit. |
|
Port |
Displays the port for the host system and available for edit. |
|
Open Term Deposit Threshold Amount |
Displays the threshold amount for PAN validation for term deposit opening and available for edit. |
|
Region |
Displays the region of bank payments and available for edit. |
|
Administrator Supported Auth Type |
Displays the authorization type supported by the application for administrator users and available for edit. |
|
Application Server Host |
Displays the address of the application server host and available for edit. |
|
Application Server Port |
Displays the application server port number and available for edit. |
|
IPM Host application name |
Displays the IPM host application name and available for edit. |
|
Port |
Displays the port for the host system and available for edit. |
|
Supported Auth Type |
Displays the authorization type supported by the application and available for edit. |
|
Feedback for a Transaction |
Displays whether feedback needs to be enabled always for a transaction and available for edit. |
|
Host IP |
Displays the Host IP of the selected host system and available for edit. |
|
Fetch Guarantee Type from Host (Y/ N) |
Displays whether the fetching of guarantee type from host is required or not and available for edit. |
|
IPM Host password |
Displays the password for the IPM host system and available for edit. |
|
IDCS OBAPIs Client ID |
Displays the IDCS OBAPIs client unique identification number and available for edit. |
|
Deposit Installment Amount Limit |
Displays the deposit installment amount for PAN validation and available for edit. |
|
IDCS Connection Scheme |
Displays the IDCS connection scheme and available for edit. |
|
Corporate User Supported Auth Type |
Displays the authorization type supported by the application for corporate users and available for edit. |
|
Host Date |
Displays the Host date of the selected host system and available for edit. |
|
IPM Host IP Address |
Displays the IP address of the IPM host system and available for edit. |
|
Allows Touch Point Level Limit Definition (Y/N) |
Displays whether the touch point level limit definition is allowed or not and available for edit. |
|
Currency Support In Approval Rules |
Displays if currency as a parameter is supported in approval rules and available for edit. |
|
Host Name |
Displays the host system for the channel banking platform and available for edit. |
|
Web Server Host |
Displays the address of web server host and available for edit. |
|
Date Default |
Displays the default date for the system and available for edit. |
|
Supported Auth Type |
Displays the authorization type supported by the application and available for edit. |
|
Host IP |
Displays the Host IP of the selected host system and available for edit. |
|
TD Pool Code |
Displays the pool code for TD account type and available for edit. |
|
IDCS Host Port |
Displays the port number of the IDCS host system and available for edit. |
|
Application Server Port |
Displays the application server port number and available for edit. |
|
Identification Types |
Displays the identification type whether it is from local or remote and available for edit. |
|
Host WSDL Version |
Displays the host WSDL version number and available for edit. |
|
Port |
Displays the port for the host system and available for edit. |
|
Channel |
Displays the channel to access the application and available for edit. |
|
Limits Effective from Same Day (Y/N) |
Displays whether the limits are effective from the same day or next day and available for edit. |
|
IDCS Host IP |
Displays the Host IP of the IDCS host system and available for edit. |
|
IDCS Host Port |
Displays the port number of the IDCS host system and available for edit. |
|
Supported Soft Token |
Displays the supported soft token type and available for edit. |
|
OAM OAuth IP |
Displays the IP address for OAM authorization and available for edit. |
|
Bank Code |
Displays the unique code to identify the bank and available for edit. |
|
Retail User Supported Auth Type |
Displays the authorization type supported by the application for retail users and available for edit. |
|
Flag to enable SSL |
Displays the flag to enable SSL and available for edit. |
|
Application Server Port |
Displays the application server port number and available for edit. |
|
Deposit Cumulative Amount Limit |
Displays the cumulative amount for PAN validation for fixed deposits and recurring deposits and available for edit. |
Note: The fields appearing in the System Configuration – Dynamic Module – Other Module tab depends on the settings done at the back end and is dynamic in nature.
- Edit the required Other Module details.
- Click to save the changes.
OR
Click to cancel the transaction. - The System Configuration - Dynamic Module – Other Module - Review screen appears. Verify the details, and click .
OR
Click to cancel the transaction.
OR
Click the Basic Details, Host Details, Bank Details, Branch Details, Currency Details, SMTP or Dynamic Module tabs to view and edit the respective details if required. - The screen with success message along with the reference number and status appears.
Click OK to complete the transaction.
System Configuration - Dynamic Module - File Upload - View and Edit
As part of bulk transactions option, the work area path and response file path of bulk transactions are defined.
To view and edit the File Upload module details:
- Click on System Configuration option on the dashboard and navigate to the dynamic module – File Upload tab. The default option is ‘View’.
- Click to edit the Dynamic Module – File Upload. The System Configuration - Dynamic Module – File Upload screen appears in editable form.
|
Field Name |
Description |
|---|---|
|
Work Area Path |
Displays the work area path of files for bulk transactions and is available for edit. |
|
Response File Path |
Displays the response file path for bulk transactions and is available for edit. |
- In the Work Area Path field, edit the path of the working area, if required.
- In the Response File Path field, edit the path of the response file, if required.
- Click to save the changes.
OR
Click to cancel the transaction. - The System Configuration - Dynamic Module – File Upload - Review screen appears. Verify the details, and click .
OR
Click to cancel the transaction.
OR
Click the Basic Details, Host Details, Bank Details, Branch Details, Currency Details, SMTP or Dynamic Module tabs to view and edit the respective details if required. - The screen with success message along with the reference number and status appears. Click OK to complete the transaction.
System Configuration - Dynamic Module - Origination - View and Edit
Using this option, the system administrator maintains the details required for Originations. These configurations once defined can be viewed and edited.
To view and edit the origination module details:
- Click on System Configuration option on the dashboard and navigate to the dynamic module – Origination tab. The default option is ‘View’.
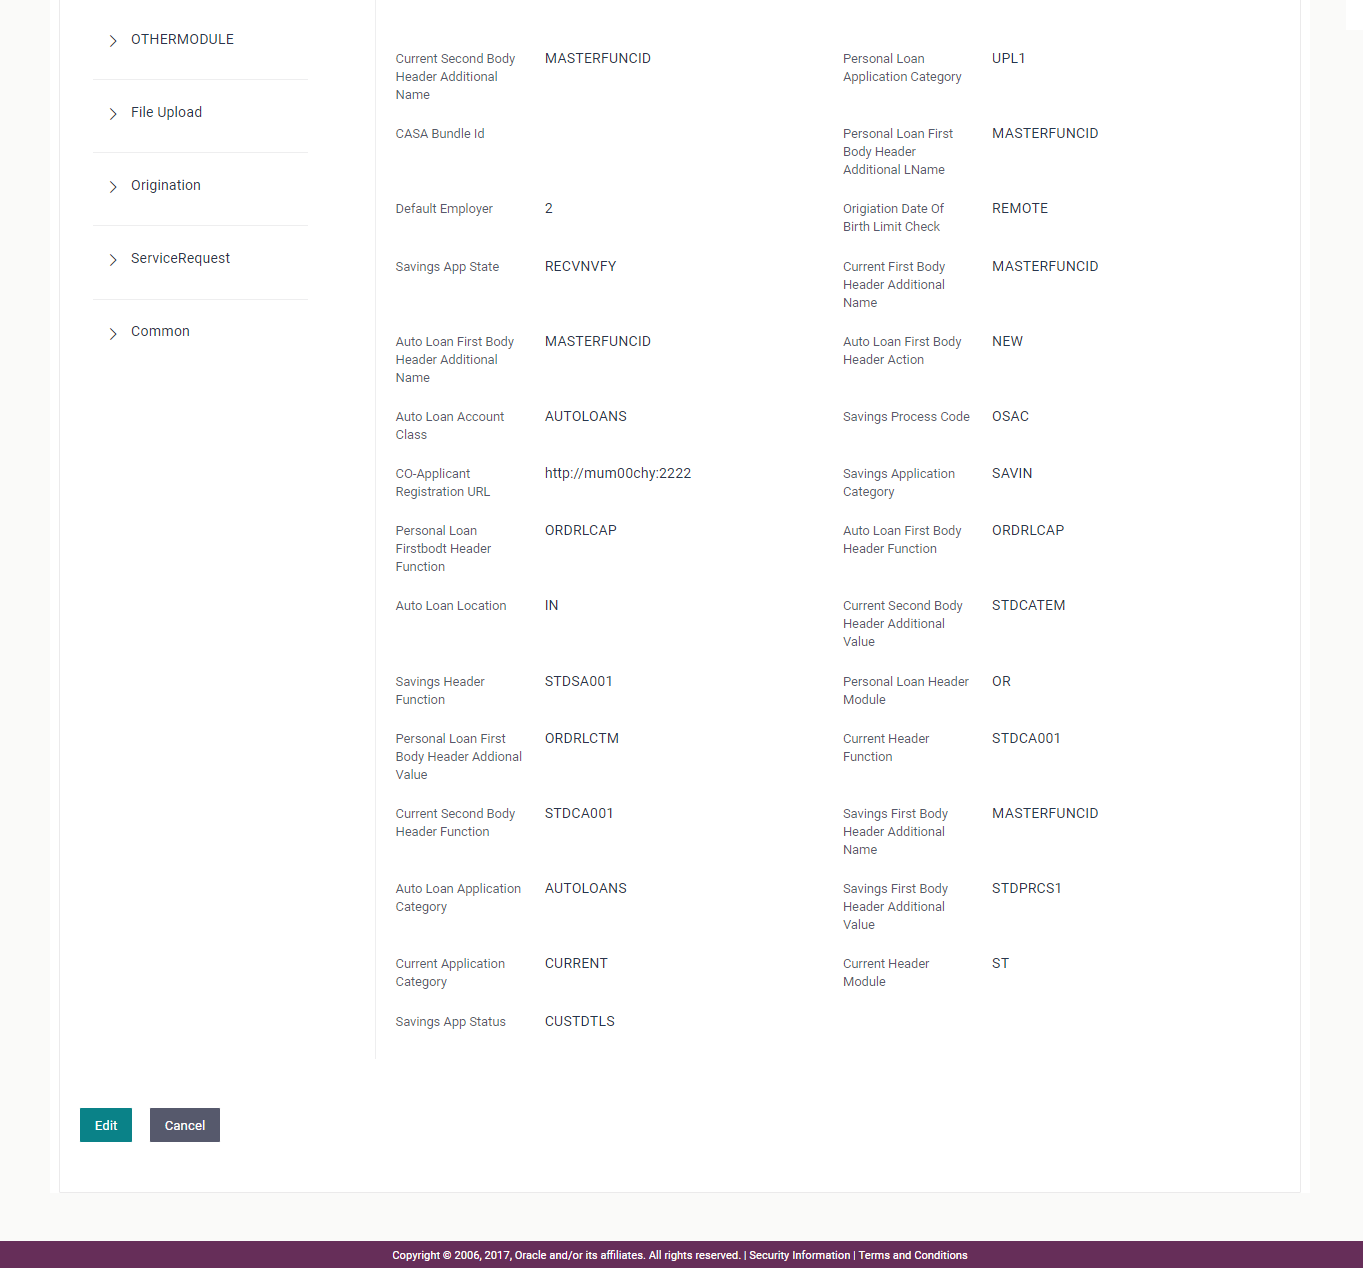
- Click to edit the Dynamic Module – Origination. The System Configuration - Dynamic Module – Origination screen appears in editable form.
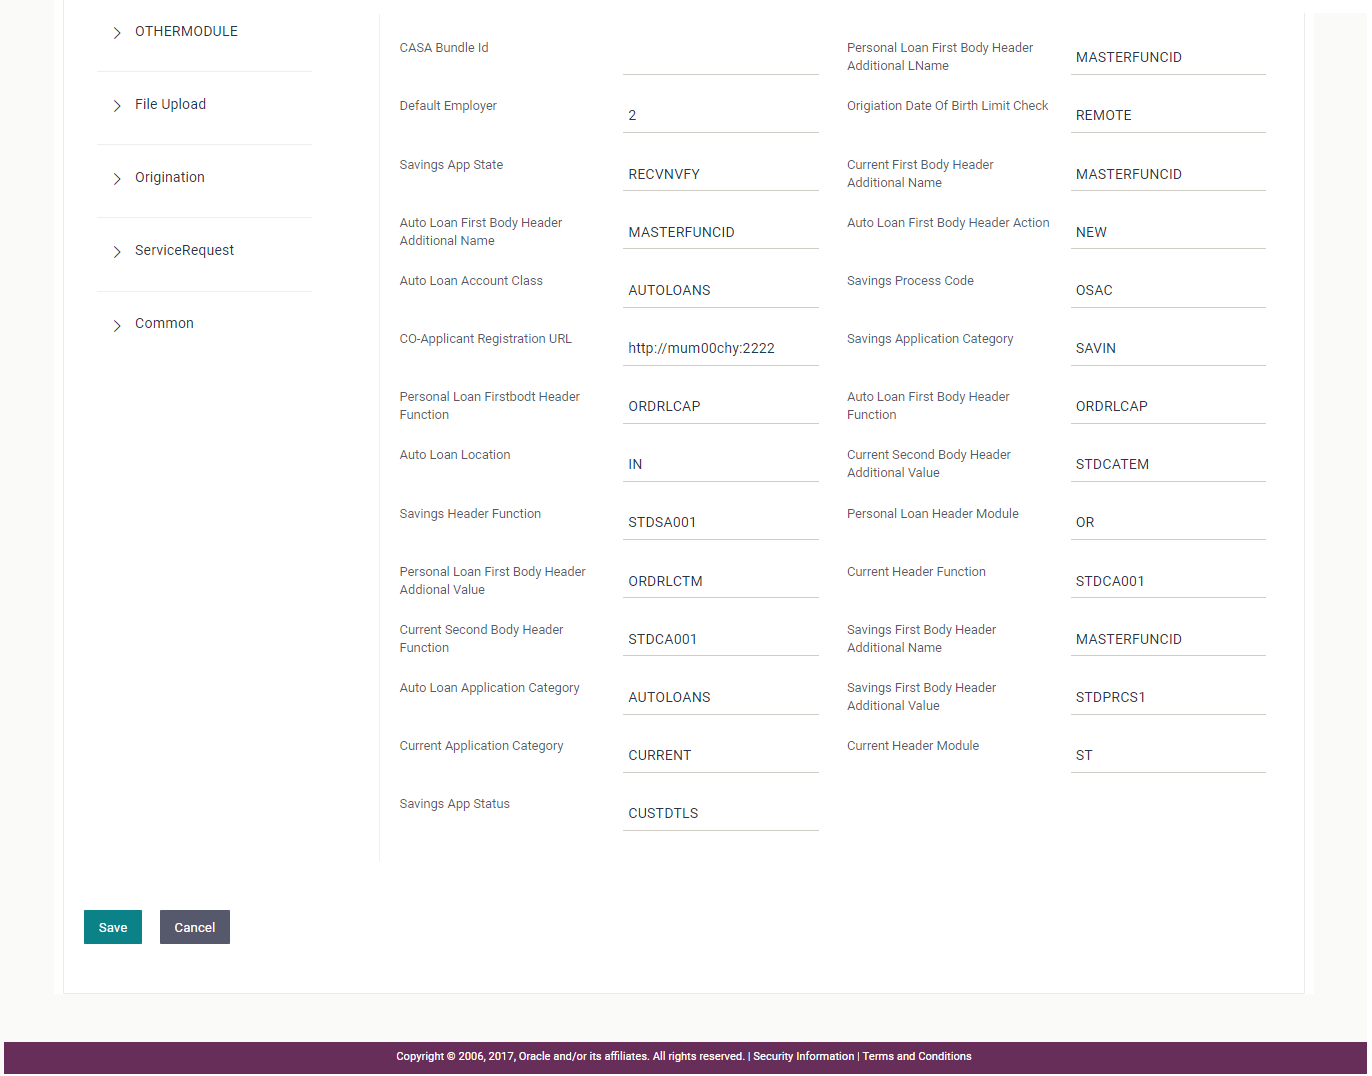
|
Field Name |
Description |
|---|---|
|
Auto Loan First Body Header Additional Value |
Displays the value for additional parameter for auto loan and available for edit. |
|
Savings Account Class |
Displays the host system account class for savings account and is available for edit. |
|
Personal Loan Process Code |
Displays the host system process code for personal loan and is available for edit. |
|
Current Location |
Displays the default location for current loan account and available for edit. |
|
Auto Loan Header Function |
Displays the host system stage code for auto loan and available for edit. |
|
Preferred Mode of Offer Document Delivery |
Displays the preferred mode of delivery for the documents and available for edit. |
|
Current First Body Header Additional Value |
Displays the value of the additional parameter for current account and available for edit. |
|
Personal Loan Product Code |
Displays the host system product code for personal loan and available for edit. |
|
Current First Body Header Function |
Displays the host system code for current account initiation stage and available for edit. |
|
Savings First Body Header Function |
Displays the host system stage code for savings account and available for edit. |
|
Savings Second Body Header Additional Values |
Displays the value for additional parameter for savings account and available for edit. |
|
Auto loan Process Code |
Displays the host system process code for auto loan account and available for edit. |
|
Savings Second Body Header Additional Name |
Displays the name for additional parameter for savings account and available for edit. |
|
Savings Location |
Displays the default location for savings account and available for edit. |
|
Savings Second Body Header Function |
Displays the host system code for savings account initiation stage and available for edit. |
|
Current Second Body Header Action |
Displays the identifier to indicate modification of current account application and available for edit. |
|
Personal Loan Account Class |
Displays the host system account class for personal loan and available for edit. |
|
Personal Loan Header Function |
Displays the host system code for personal loan initiation stage and available for edit. |
|
Current Account Class |
Displays the host system account class for current account and available for edit. |
|
Auto Loan Product Code |
Displays the host system product code for auto loans and available for edit. |
|
Current Process Code |
Displays the host system process code for current account and available for edit. |
|
Auto loan Header Module |
Displays the module identifier for auto loan account and available for edit. |
|
Personal Loan Location |
Displays the default location for personal loan account and available for edit. |
|
Savings Header Module |
Displays the identifier of the module for savings account and available for edit. |
|
Current Second Body Header Additional Name |
Displays the name of the additional parameter for current account and available for edit. |
|
Personal Loan Application Category |
Displays the host system application category for personal loan and available for edit. |
|
CASA Bundle Id |
Displays the bundle Id for current and savings account and available for edit. |
|
Personal Loan First Body Header Additional Name |
Displays the value of the additional parameter for personal loan account and available for edit. |
|
Default Employer |
Displays the value of default employer and available for edit. |
|
Origination Date of Birth Limit Check |
Displays the option for validating the date of birth limit i.e. Local / Remote and available for edit. |
|
Savings App State |
Displays the host system code for savings account application state and available for edit. |
|
Current First Body Header Additional Name |
Displays the name of the additional parameter for current account and available for edit. |
|
Auto Loan First Body Header Additional Name |
Displays the name for additional parameter for auto loan and available for edit. |
|
Auto loan First Body Header Action |
Displays the host system code to start new auto loan application and available for edit. |
|
Auto Loan Account Class |
Displays the host system account class for auto loans. |
|
Savings Process Code |
Displays the host system process code for savings account and available for edit. |
|
Co- Applicant Registration URL |
Displays the URL for registration of the co-applicant and available for edit. |
|
Savings Application Category |
Displays the savings account application category and available for edit. |
|
Personal Loan First body Header Function |
Displays the host system stage code for personal loans and available for edit. |
|
Auto Loan First Body Header Function |
Displays the host system stage code for auto loans and available for edit. |
|
Auto Loan Location |
Displays the default location for auto loan account and available for edit. |
|
Current Second Body Header Additional Value |
Displays the value of the additional parameter for current account and available for edit. |
|
Savings Header Function |
Displays the host system code for savings account initiation stage and available for edit. |
|
Personal Loan Header Module |
Displays the module identifier for personal loan account and available for edit. |
|
Personal Loan First Body Header Additional Value |
Displays the value of the additional parameter for personal loan account and available for edit |
|
Current Header Function |
Displays the host system code for current account initiation stage and available for edit. |
|
Current Second Body Header Function |
Displays the host system code for current account initiation stage and available for edit. |
|
Savings First Body Header Additional Name |
Displays the name for additional parameter for savings account and available for edit. |
|
Auto loan Application Category |
Displays the host system application category for auto loan account and available for edit. |
|
Savings First Body Header Additional Value |
Displays the value for additional parameter for savings account and available for edit. |
|
Current Application Category |
Displays the host system application category for current account and available for edit. |
|
Current Header Module |
Displays the module identifier for current account and available for edit. |
|
Savings App Status |
Displays the host system code for savings account application status and available for edit. |
Note: The fields appearing in the System Configuration – Dynamic Module – Originations tab depends on the settings done at the back end and is dynamic in nature.
- Edit the required Origination module details.
- Click to save the changes.
OR
Click to cancel the transaction. - The System Configuration - Dynamic Module – Origination - Review screen appears. Verify the details, and click .
OR
Click to cancel the transaction.
OR
Click the Basic Details, Host Details, Bank Details, Branch Details, Currency Details, SMTP or Dynamic Module tabs to view and edit the respective details if required. - The screen with success message along with the reference number and status appears. Click OK to complete the transaction.
System Configuration - Dynamic Module - Service Request - View and Edit
Using this option, the system administrator maintains the service request module details. These configurations once defined can be viewed and edited.
To view and edit the system configuration - dynamic module - service request details:
- Click on System Configuration option on the dashboard and navigate to the dynamic module – Service Request tab. The default option is ‘View’.
- Click to edit the Dynamic Module – Service Request details. The System Configuration - Dynamic Module – Service Request screen appears in editable form.
|
Field Name |
Description |
|---|---|
|
Request Expiration duration (in days) |
Displays the number of days after which service requests will not be available to business users and is available for edit. |
|
Service Request Persistent Type |
Displays the persistent type for service request whether service request needs to be stored locally or sent to third party CRM and available for edit. |
|
Service Request Turnaround Time |
Displays the processing time within which the administrator should take action on a raised Service Request and is available for edit. |
- In the Request Expiration duration (in days) field, edit the values for expiry duration, if required.
- In the Service Request Persistent Type field, edit the persistent type for service request, if required.
- In the Service Request Turnaround Time field, edit the values, if required.
- Click to save the changes.
OR
Click to cancel the transaction. - The System Configuration - Dynamic Module – Service Request - Review screen appears. Verify the details, and click .
OR
Click to cancel the transaction.
OR
Click the Basic Details, Host Details, Bank Details, Branch Details, Currency Details, SMTP or Dynamic Module tabs to view and edit the respective details if required. - The screen with success message along with the reference number and status appears. Click OK to complete the transaction.
System Configuration - Dynamic Module - Common - View and Edit
Using this option, the system administrator maintains the common module details. These configurations once defined can be viewed and edited.
To view and edit the system configuration - dynamic module - common details:
- Click on System Configuration option on the dashboard and navigate to the dynamic module – Common tab. The default option is ‘View’.
- Click to edit the Dynamic Module – Common Module details. The System Configuration - Dynamic Module – Common screen appears in editable form.
|
Field Name |
Description |
|---|---|
|
Batch Request URL |
Displays the URL for the batch request and is available for edit. |
- In the Batch Request URL field, edit the web address if required.
- Click to save the changes.
OR
Click to cancel the transaction. - The System Configuration - Dynamic Module – Common - Review screen appears. Verify the details, and click .
OR
Click to cancel the transaction.
OR
Click the Basic Details, Host Details, Bank Details, Branch Details, Currency Details, SMTP or Dynamic Module tabs to view and edit the respective details if required. - The screen with success message along with the reference number and status appears. Click OK to complete the transaction.