Configuring Membership Points as Payment
When membership points are available for payment, the Membership Award Payment screen displays these points and allows them to be redeemed and applied towards the balance of the guest's bill. However, the membership must be a primary membership and the member must have a points balance equal to or greater than the bill amount.
This topic describes the steps for configuring the membership points to be used as payment.
Part 1: ORS Configuration
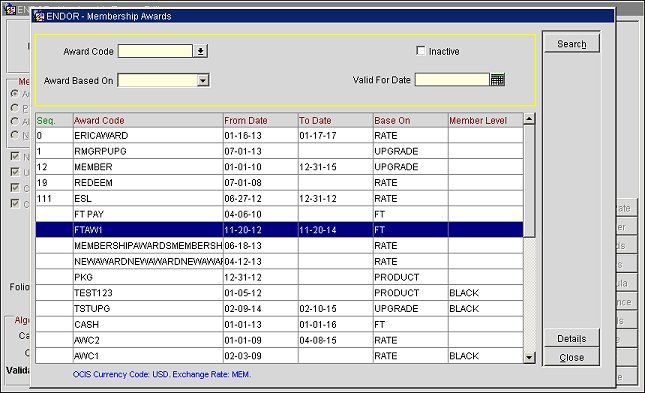
- In ORS, go to Configuration > Profiles > Membership Types > Awards > New. The Membership Awards screen opens.
From this screen, configure a new award that will be issued to the member to be used as the payment in PMS.
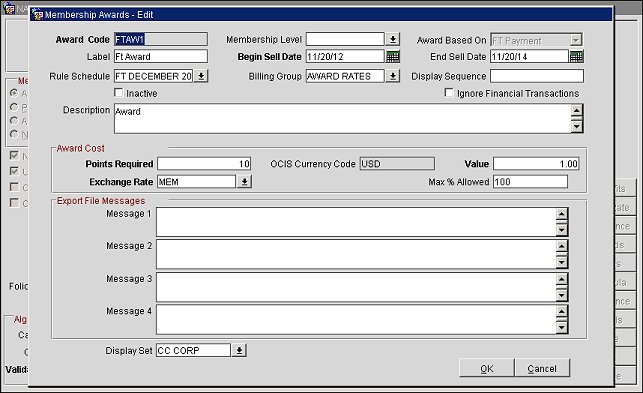
- In the Award Code field, enter a code for the award.
- In the Begin Sell Date field, select the calendar button and choose a date when this award becomes available for use.
- The Award Based On field must be "FT Payment."
- Membership Levels, although not mandatory, can be specified for different levels.
- In the Points Required field, enter the amount of points required to deduct the amount specified in the Value field.
- In the Value field, enter the amount of money that will be deducted per the "Points Required" value. In the screen above, 10 points is required to deduct 1 USD.
- In the Exchange Rate field, select the down arrow and choose the exchange rate for converting to the central currency.
- In the Max % Allowed field, enter a maximum threshold that can be used towards the bill’s balance. For example, 50% will indicate the guest can only use up to 50% of his or her bill by payment with points.
- Select OK to save the award configuration.
The award can now be distributed to other properties by selecting the Distribute button on the Membership Awards screen.
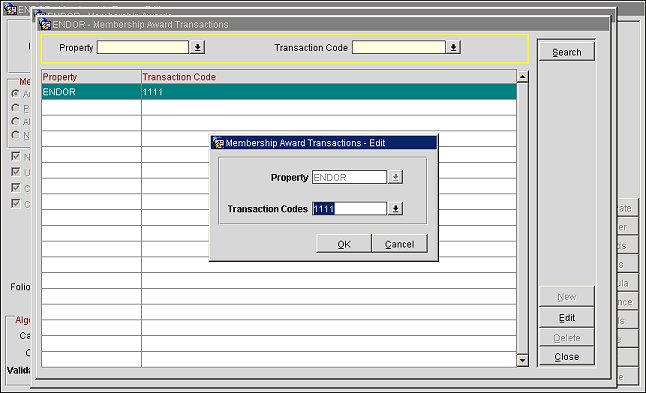
Note: If the property is integrated, the transaction code for the award can be edited in OCIS (Setup > System Configuration). If the properties are interfaced, the award transaction code will need to be edited from PMS.
Part 2: PMS Configuration
In PMS, set the following application parameters:
Membership > Award Redemption = Y
Membership > OCIS Membership Configuration = Y
Membership > Membership Award Payment = Y
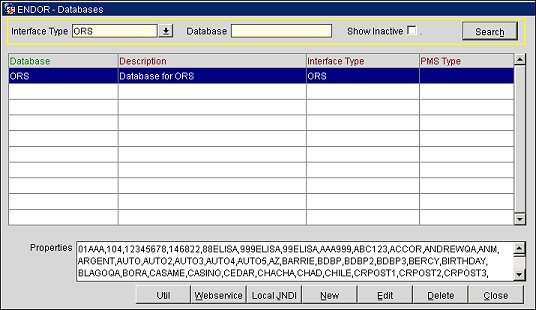
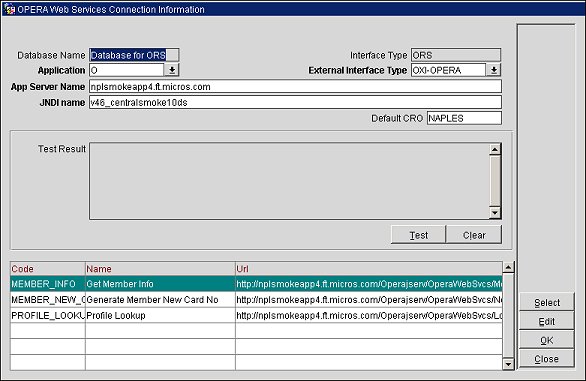
- In PMS, go to Setup > Configuration > Setup > External Databases. From the Interface Type LOV, choose the ORS interface type and select the Search button. Highlight the ORS database in the grid and select the Webservice button. The OPERA Web Services Connection Information screen opens.
- Verify the "Get Member Info" and "Profile Lookup" web services are working correctly by highlighting the service in the grid and selecting the Test button. A test result message will display in the "Test Result" pane.
- Configuration > Cashiering > Codes > Transaction Codes > New. The Transaction Codes screen opens.
Create a transaction code for the award.
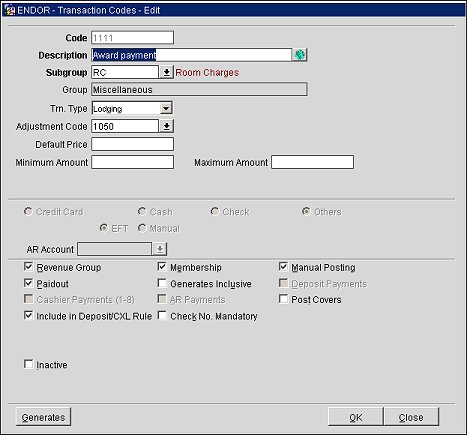
- In the Code field, enter a code to identify the transaction code.
- In the Description field, enter a brief description for the transaction code.
- Select the Subgroup LOV and choose a subgroup to which the current transaction code belongs.
- Select OK to save the transaction code.
- Configuration > Profiles > Membership Type > Awards. The Membership Awards screen opens.
Highlight the award type created in ORS and select the Details button.
- Select the Edit button and add the transaction code that was created in step 3.
- Cashiering > Foreign Currency > Exchange Rate > New.
Set the Central currency and the exchange rate with the Local currency.
This will be one of the determining factors of how much the points are worth to the dollar amount of the bill.
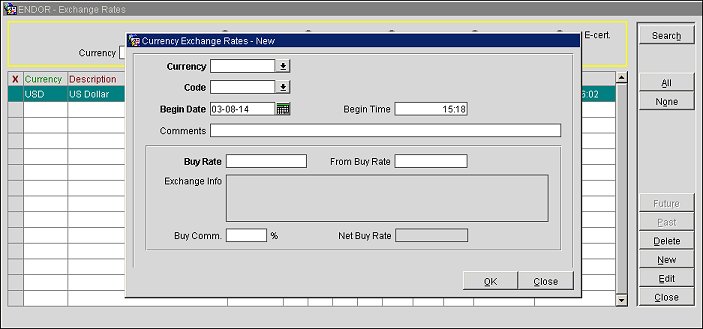
- Select the Currency field down arrow and choose the type of currency to set up for the exchange rate.
- Select the Code down arrow and choose the currency exchange code for this type of exchange.
- In the Begin Date field, select the calendar button and choose the date when the exchange rate becomes effective.
- In the Buy Rate field, enter the Buy Rate or the From Buy Rate. OPERA will calculate the complementary exchange rate and display both exchange transactions in the Exchange Info area.
- Select OK to save the exchange rate.
Membership Award Payment
