|
|
|
Using the Diagnosis and Repair Tool
Upon first launch of the tool, whether from the menu or from the toolbar button, copy the generated PIN from the popup Log screen and paste it into the OHDR Login screen. Alternatively, you can note the PIN and type it into the OHDR Login screen.
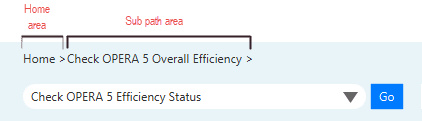
The Home screen consists of dropdown menus and submenus.
To Select a Diagnosis Area
To Change the Diagnosis Area (to back out of an area)
To run a diagnosis, select the diagnosis area and submenu area(s), and then click Go.
The tool reviews the area and returns a diagnostic analysis, showing the tests performed, the status, and a corresponding solution.
Options to download the report in PDF format or to create a service request with the support team are available below the diagnostic analysis.
Diagnostic Example for Printing Issues
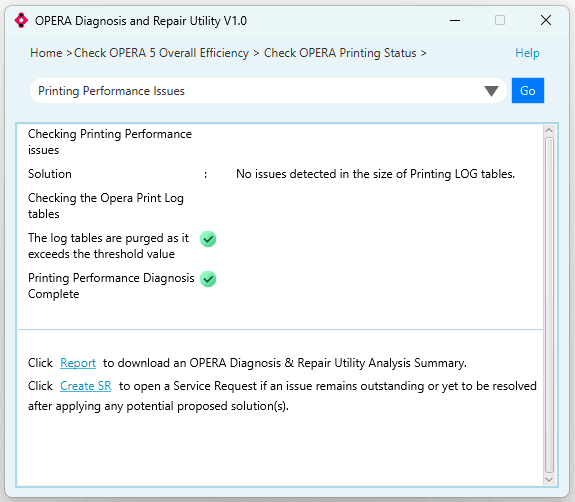
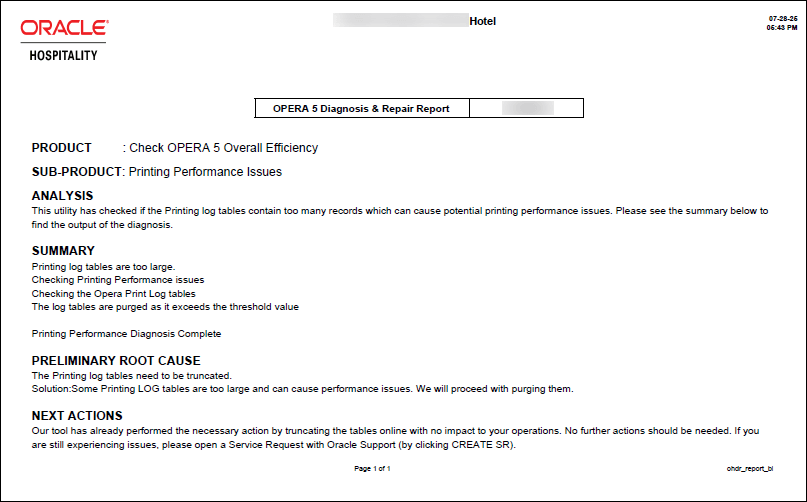
Click Report at the bottom of the analysis to download an OPERA Diagnosis & Repair Utility Analysis Summary to capture the diagnosis output in a Report format.
Sample Diagnostic PDF Report
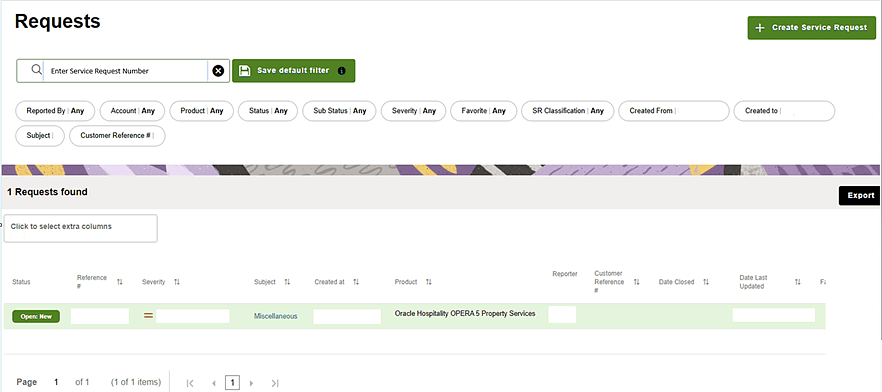
With the Diagnosis and Repair Tool Create SR option you can easily create a Service Request (SR) with our Support team.
Create SR Sample Form
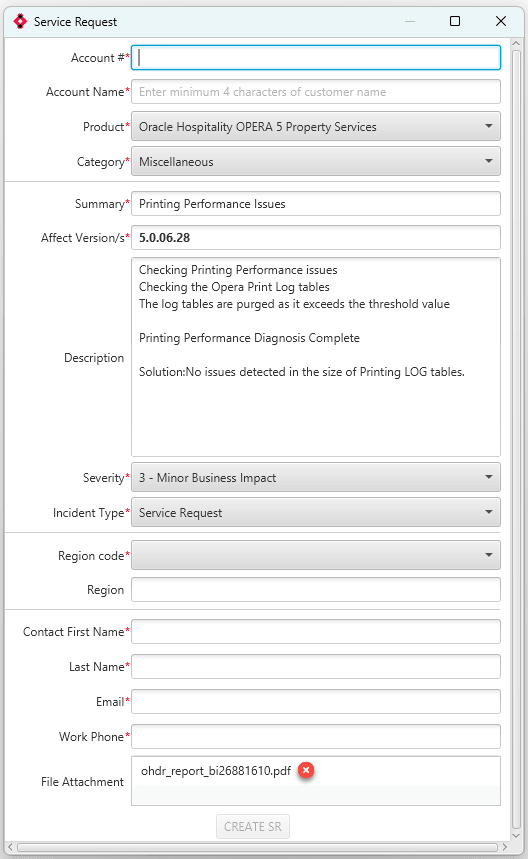
Note: The file attachment ohdr_report_biXXXXXXX.pdf is the OPERA Diagnosis & Repair Utility Analysis Summary Report attached automatically to the SR when created from within the OPERA Diagnosis & Repair Utility.
You can view the newly created SR in the Customer Portal.
Sample of the Customer Portal Service Request (SR) search.