5. Operations
This chapter elaborates the operations you can perform through the Safe Deposit Box module. These include creating contracts when customers request lockers, maintaining visitor information, collecting details of customers requiring lockers and requests for duplicate key issues. You can also query and view the records created for each operation through the respective summary screens. All these have been explained in detail in the subsequent sections of this manual.
This chapter contains the following sections:
- Section 5.1, "Contract Details"
- Section 5.2, "Safe Deposit Box Authorize Contract Details"
- Section 5.3, "PreClosure of Contracts"
- Section 5.4, "Safe Deposit Box Payment Input"
- Section 5.5, "Safe Deposit Box Break Open Operation"
- Section 5.6, "Safe Deposit Box Visitors Log"
- Section 5.7, "Safe Deposits Box Customer Waitlist Log"
- Section 5.8, "Safe Deposit Duplicate Key Issuance Detailed"
5.1 Contract Details
This section contains the following topics:
- Section 5.1.1, "Maintaining Safe Deposit Box Contract Details"
- Section 5.1.2, "Main Tab"
- Section 5.1.3, "Parties Tab"
- Section 5.1.4, "Tracers Tab"
- Section 5.1.5, "Advices Tab"
- Section 5.1.6, "Linkage Details Button"
- Section 5.1.7, "Viewing Safe Deposit Box Contract Details"
5.1.1 Maintaining Safe Deposit Box Contract Details
Whenever a customer requests for a locker, you need to log in the relevant details in the system. You can do this in the ‘Safe Deposit Box Contract Detailed’ screen. To invoke this screen, type ‘DLDTRONL’ in the field at the top right corner of the Application Toolbar and then click the adjoining arrow button.
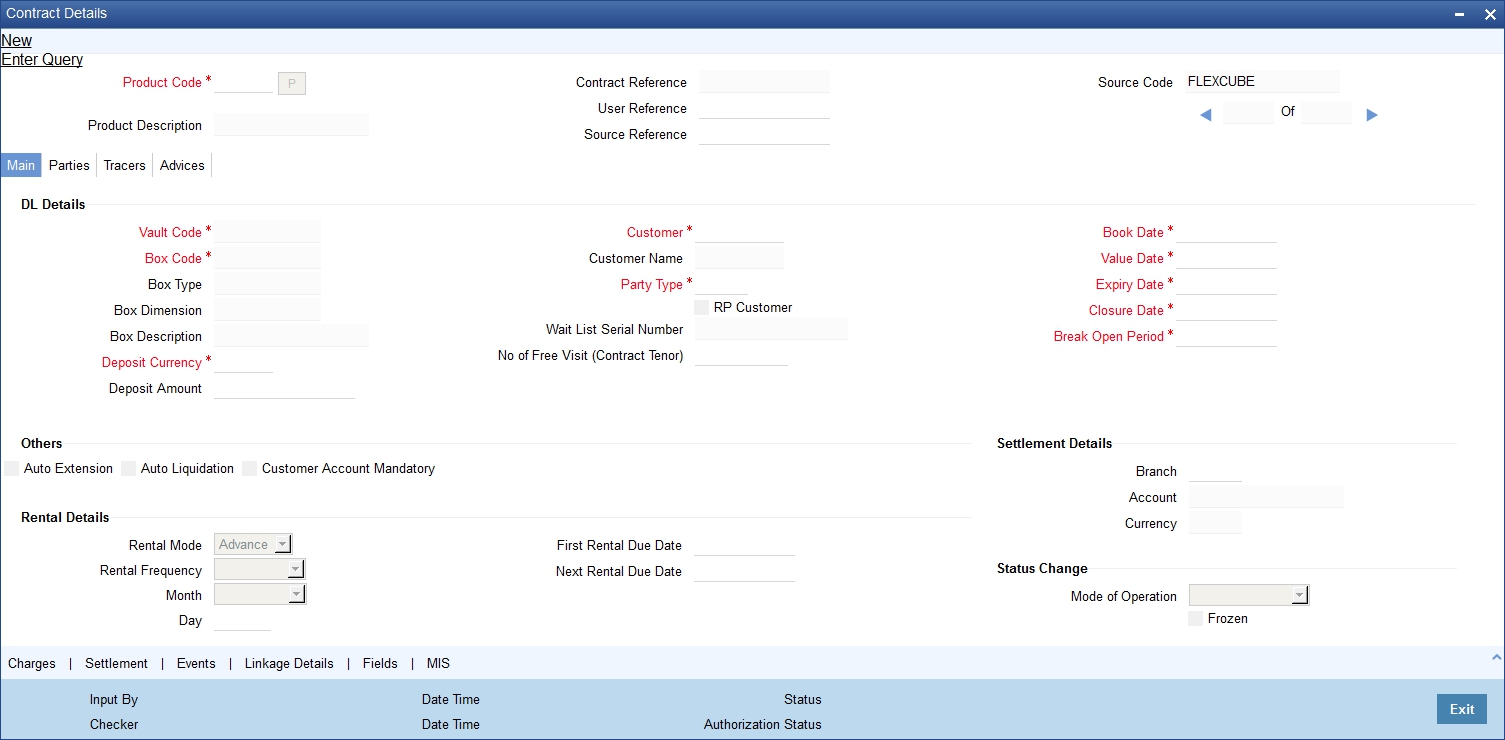
The locker details in this screen are as follows:
Product Code
Enter the product you wish to use for this contract. You can also select the product from the adjoining option list. The list has all the product codes maintained in the system.
Click ‘P’ (Populate) button. The system will display the relevant details in the screen.
Product Description
The system will display the description of the product you have selected.
Contract Reference
This unique reference number is generated and displayed by the system.
User Reference
The system displays the Contract Reference number generated here. You can change it to one that uniquely identifies this contract.
Source Reference
The system defaults the source reference number for the contract. .
Source Code
The system will default ‘FLEXCUBE’ here.
5.1.2 Main Tab
You can enter the following details for the contract:
DL Details
Enter the following deposit locker details
Vault Code
Specify the vault code required. You can also select it from the adjoining option list. The list contains all the codes maintained in the system.
Box Code
Enter the code of the deposit box you wish to associate for the contract. You can also select it from the adjoining option list. The list contains all the available boxes for the vault selected.
Box Type
The system will display the type for the box selected.
Box Dimension
The system will display the dimensions of the box.
Box Description
The system will display the description for the box you have selected.
Deposit Ccy
The system will display the deposit currency for the vault code selected. You can modify this if required.
Deposit Amount
The system will display the deposit amount for the vault code selected. You can modify this if required.
Customer
Specify the customer who has requested a safe deposit box. You can also select the customer code from the adjoining option list. The list contains all the customers maintained in the system.
Customer Name
The system will display the name of the customer you have selected.
Party Type
The system will default the party type based on the type of operation selected in the ‘Mode Of Operation’ field.
RP Customer
Check this option to indicate that the customer is relationship pricing customer. This ensures that the system will take into account any scheme linked to this customer at the time of calculating charges.
Refer the chapter ‘Customer Relationship Pricing’ in the Relationship Pricing User Manual for more details.
Wait List Serial No.
If the customer has already requested for a safe deposit box and is on the waiting list, you can enter the appropriate waitlist number here. When you authorize the locker request for the customer here, the system will change the allocation status of the waitlist to ‘Allocated’ from ‘Waitlisted’ in the ‘Deposit Lockers customer Waitlist Log’ screen.
No. of free visits (Contract Tenor)
This value will be defaulted from the product level. You will be allowed to change it.
Book Date
The system will default the application date.
Value Date
The system will default the application date here. You can change it if required.
Expiry Date
The system will default the date of expiry based on the tenor maintained at the product level. You can modify it, if required.
Closure Date
The system will default the expiry date here. If you have maintained closure days for the product then the closure date will be computed taking into account the closure days specified (Expiry Date + Closure Days). You can modify it, if required.
Break Open Period
The system will compute and display the value for the field. This will include the break open days specified for the product (Closure Date + Break Open Period). You can modify it if required. However, the date you provide should be greater than the closure date for the contract.
Others
Enter the following details:
Auto Extension
The system defaults the preference maintained at the product level. You can modify it if required. Check this option to automatically extend the contract when it expires.
Auto Liquidation
The system will default the preference maintained at the product level. You can change it if required. Check this option to indicate the system should automatically debit the account of the customer for the subsequent rentals on the dates each falls due.
CASA Account Mandatory
The system defaults the preference maintained at the product level. Additionally, if you have chosen the ‘Auto Extension’ or ‘Auto Liquidation’ options, this option needs to be selected. If this option is checked, then you are required to provide settlement details in the contract screen. At the time of closure of an account, the system will ensure that the account is not linked to any contract for deposit lockers.
Rental Details
The system will display the rental details, based on your product selection. You can modify the following:
Rental Mode
Select, from the drop-down list, the mode of rental payment required. The options are:
- Advance
- Arrears
Rental Frequency
Select, from the drop-down list, the frequency at which the customer will have to pay the safe deposit box rental. You have the following options:
- Monthly
- Quarterly
- Half Yearly
- Annual
Month
Select, from the drop-down list, the month in which the rental payment should be made. The list, which contains all the months of the year, will be enabled only if the rental frequency is any of the following:
- Quarterly
- Half Yearly
- Annual
Day
Specify, from the drop-down list, the day of the month on which the rental payment should be made. The list contains all the days of the month.
First Rental Due Date
The system will display the date on which the first rental is due based on the details provided for rent and the contract value date.
Next Rental Due Date
The system will display the date on which the subsequent rent is due.
Settlement Details
You can detail the following information on settlement which will be used to collect the initial locker fee and the rentals for the locker:
Branch
Specify the branch of the customer account. You can also select the branch from the option list. The list contains all the branches maintained in the system.
Account
Specify the customer account. You can also select the account from the option list. The list contains all the accounts maintained for the customer in the branch selected.
To view the joint holder’s details of an account and the mode of operation maintained at the account level, place the cursor on the Account field and press Ctrl+J. The system displays the ‘Joint Holder’ screen.
For more information on the ‘Joint Holder’ screen refer to the section ‘Joint Holder Maintenance’ in the Core User Manual.
Ccy
The system displays the currency of the account selected.
Note
- The details you specify in the contract screen will be made available in the ‘Settlement’ screen which you can invoke by clicking the ‘Settlement’ button in the contract screen. You can change these details if required.
- If no details are specified in the contract screen, the system will pick up the account maintained for the customer and display the details in the ‘Settlement’ screen. You will be not be allowed to modify these details
- After the contract has come into force, you can change the settlement details only in the ‘Settlement’ screen, not in the ‘Safe Deposit Box Contract Detailed’ screen.
Status Change Details
Specify the following information for operating the locker and freezing the locker:
Mode of Operation
Select, from the drop-down list, the mode of operating the locker. You have the following options:
- Single – For single operation, the system will default ‘APP’
(Applicant – this is the primary customer) in the ‘Party
Type’ field and you can add any of the following as parties (in
the ‘Parties’ tab)
- CAP(Co-applicant – this is the secondary customer)
- AUT (Authorized User)
- NOM (Nominee)
- Jointly – For joint operation, the system will default ‘APP’ in the ‘Party Type’ field and you can add CAP/AUT/NOM as parties (in the ‘Parties’ tab).
- Mandate Holder – For a mandate holder operation, the system will default ‘APP’ in the ‘Party Type’ field and will not allow you to specify any other party type for instance nominee or co-applicant.
Frozen
Check this option to freeze the contract during amendment.
5.1.3 Parties Tab
In this screen, you specify the parties other than the customer/primary applicant who are authorized to operate the safe deposit box.
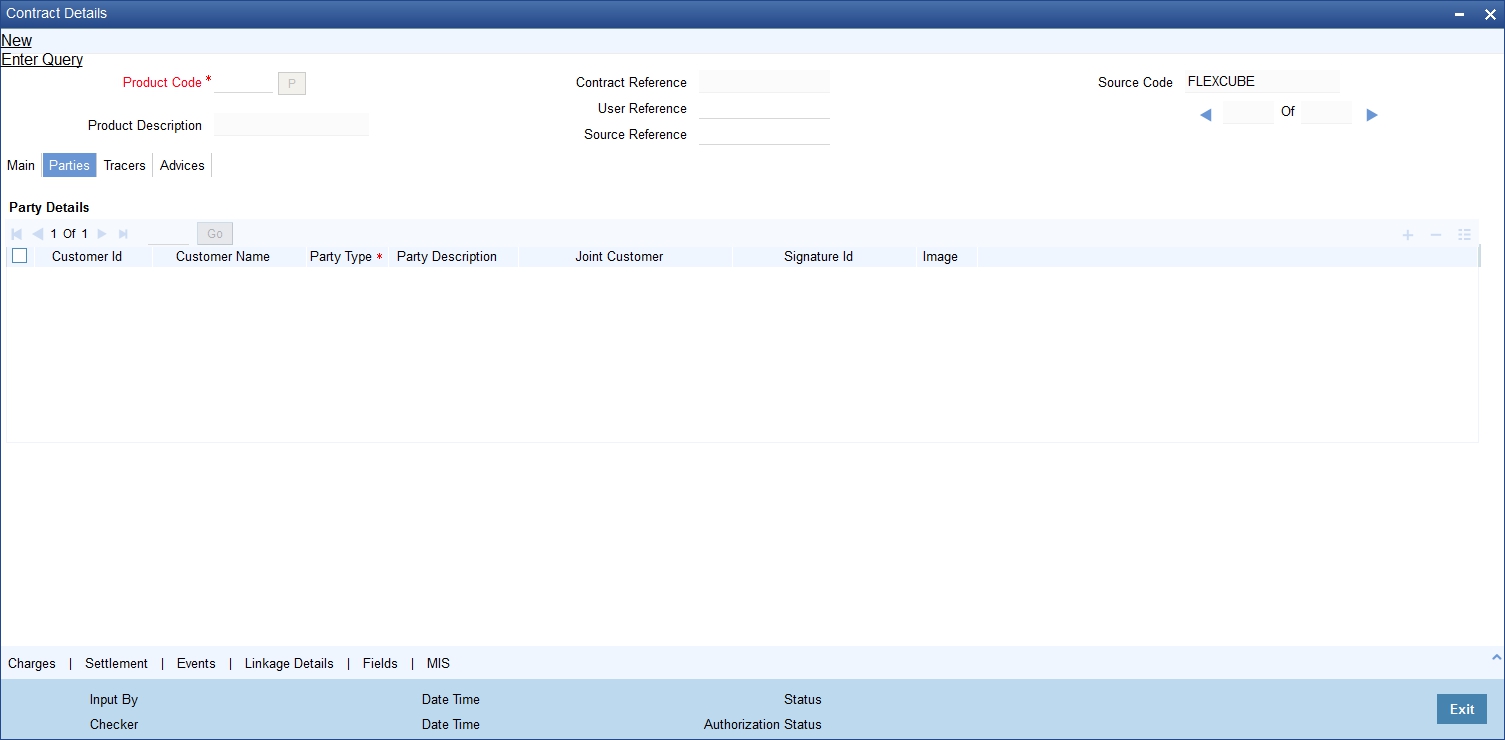
You can enter the following details for parties:
Customer Id
The system will default the ID of the customer initially. You can add the customer IDs of other parties if you wish. You can select the required ID from the adjoining option list. The list contains all the customer codes maintained in the system.
Customer Name
The system will display the name of the customer selected.
Party Type
Enter the party type for the customer. You can also select the party type from the adjoining option list. The list contains all the party codes maintained.
Party Description
The system will display the description of the party selected.
Joint Customer
Enter the joint customer for the customer ID selected earlier. You can also select the joint customer from the adjoining option list. The list contains all the joint customers associated for the customer.
Signature ID
Specify the signature Id maintained for the customer. You can also select the ID from the adjoining option list. The list contains all the signature IDs maintained in the system.
Image
You can capture the signatures for all the parties that are authorized to operate the locker.
5.1.4 Tracers Tab
Tracers are reminders sent to customers at different stages of the safe deposit contract. Details of tracers that have been associated at the product level will be displayed here. You can change only a few details.
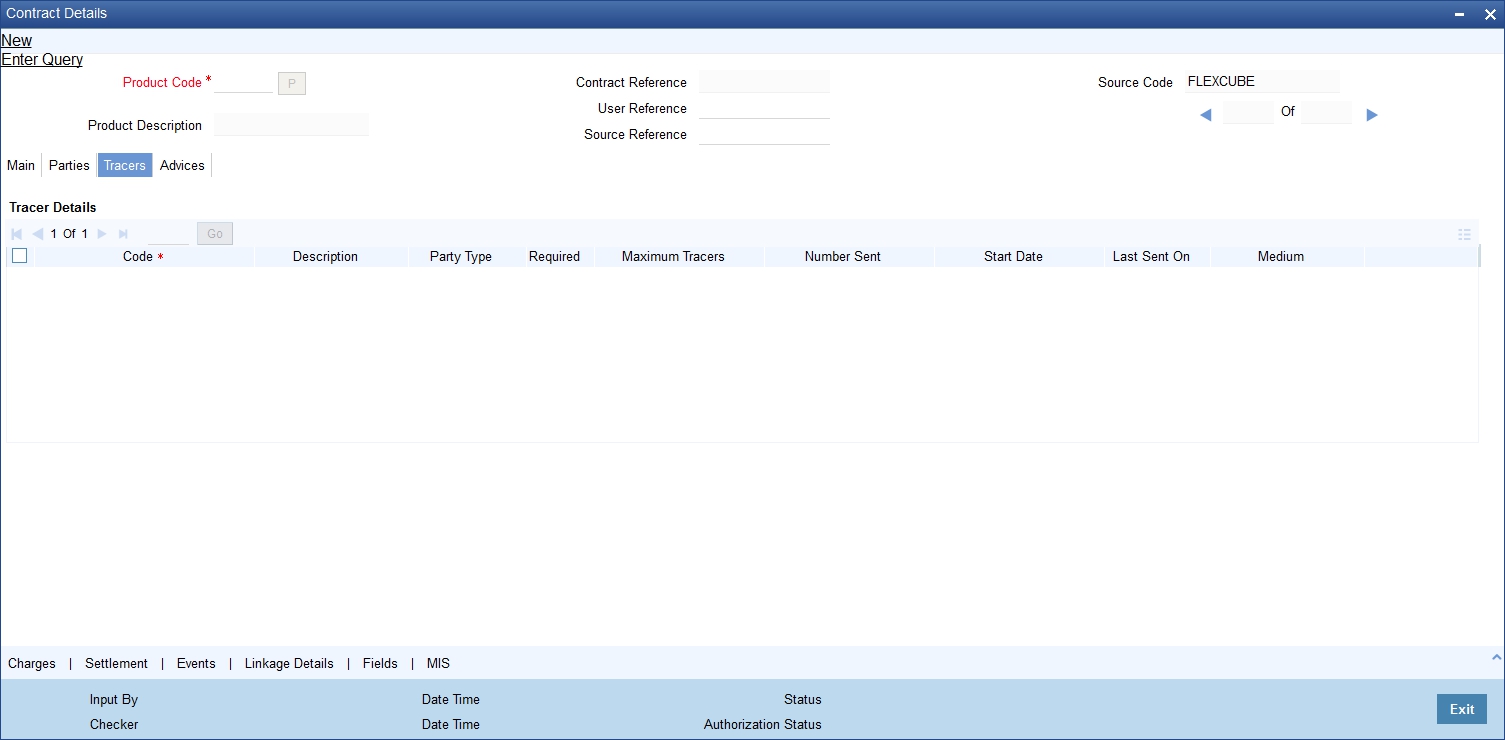
You can modify the following tracer details:
Tracer Required
Check this option against each tracer that you would like to generate for this contract.
Maximum Tracers
Specify the maximum number of times you would like to send the particular tracer.
Numbers Sent
The system will default the number of tracers sent. You cannot modify it.
Start Date
Specify the date from which you would like the tracers to be sent.
5.1.5 Advices Tab
The system defaults all the advices associated at the product level for the triggered event at the contract level. You can modify only selected details in this screen.
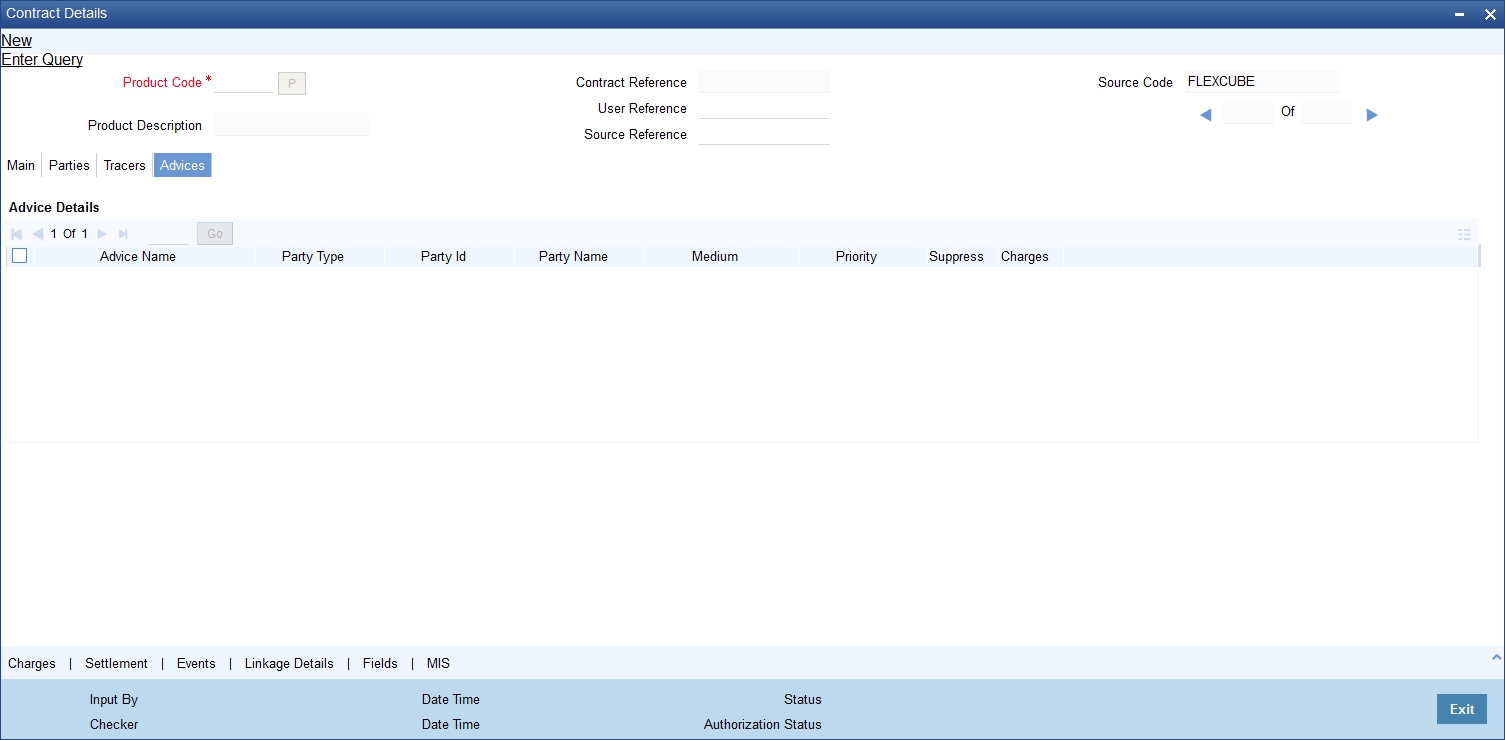
You can change only the following details for advices:
Medium
The system will default the preference maintained at the product level for the advice. You can select the option ‘Mail’.
Priority
The system will default the preference maintained at the product level for the advice. You can retain it or modify it.
Suppress
The system will default the preference maintained at the product level for the advice. You can change the preference here by checking the option to indicate that the advice should not be generated. Uncheck it to generate the advice.
5.1.6 Linkage Details Button
In the contract screen, for an existing customer who has deposits with the bank, you can link any number of deposits to the safe deposit contract by clicking the ‘Linkage Details’ button. The system will allow you to select TDs for the contract amount entered.
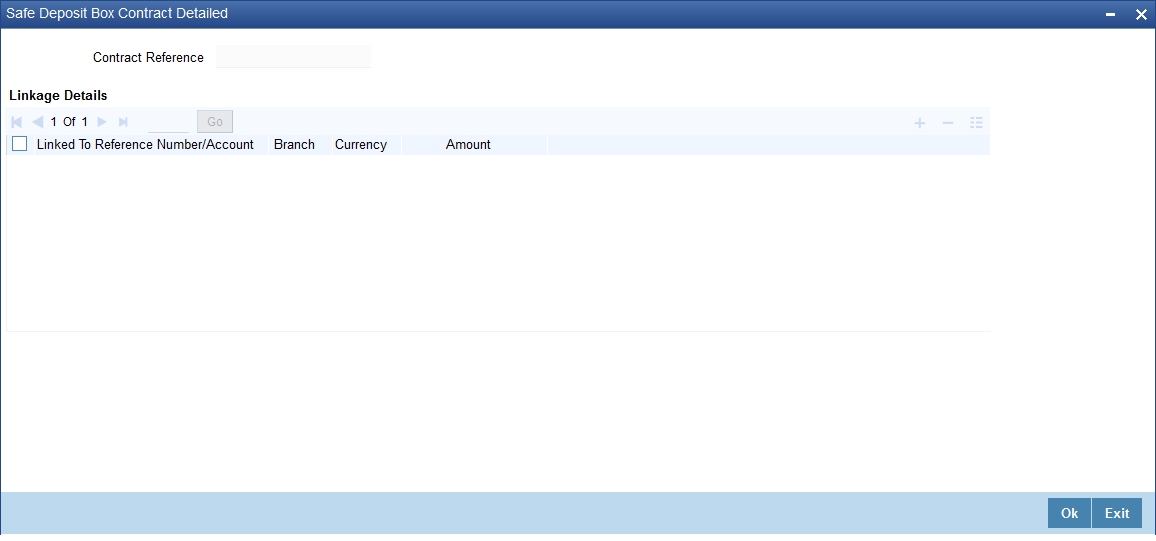
In the screen, enter the following details to complete the linkage:
Linked To Reference Number/Account
Enter the reference number for the deposit. You can also select it from the adjoining option list. The list contains all the deposits in the branch for the customer of the contract.
Branch
The system will display the branch of the fixed deposit.
Currency
The system will display the currency of the deposit selected.
Amount
The system will display the deposit amount for the deposit reference you have selected.
Whenever a TD linked here is closed, the system will display an override to indicate the linkage.
For further information refer the following Oracle FLEXCUBE User Manuals:
- Products
- Charges and Fees
- MIS
- User Defined Fields
- Settlements
5.1.7 Viewing Safe Deposit Box Contract Details
You can query and view the details of the safe deposit locker contracts in the system in the ‘Safe Deposit Box Contract Summary’ screen. To invoke this screen, type ‘DLSTRONL’ in the field at the top right corner of the Application Toolbar and then click the adjoining arrow button.

In this screen, you can query on any combination of the following parameters:
- Authorization Status
- Contract Reference
- Currency
- Box Code
- Contract Status
- Product Code
- Customer
After specifying the parameters for the query, click ‘Search’. The system displays all the records matching the parameters specified. If you do not specify any parameter for the query before clicking ‘Search’, the system will display all the available safe deposit locker records.
5.2 Safe Deposit Box Authorize Contract Details
This section contains the following topics:
- Section 5.2.1, "Authorizing Contracts"
- Section 5.2.2, "Reversing Contracts"
- Section 5.2.3, "Amending Contracts"
- Section 5.2.4, "Closing Contracts"
- Section 5.2.5, "Deleting Contracts"
- Section 5.2.6, "Rolling over Contracts"
5.2.1 Authorizing Contracts
You can perform the following operations for a safe deposit locker contract:
- Authorization
- Reversal
- Amendment
- Closure
- Delete
- Rollover
- Pre-closure
These operations are explained in detail in the following sections.
You can authorize contracts in the ‘Safe Deposit Box Authorize Contract’ screen which you can invoke by typing ‘DLDTRAUT in the field at the top right corner of the Application Toolbar and clicking the adjoining arrow button.
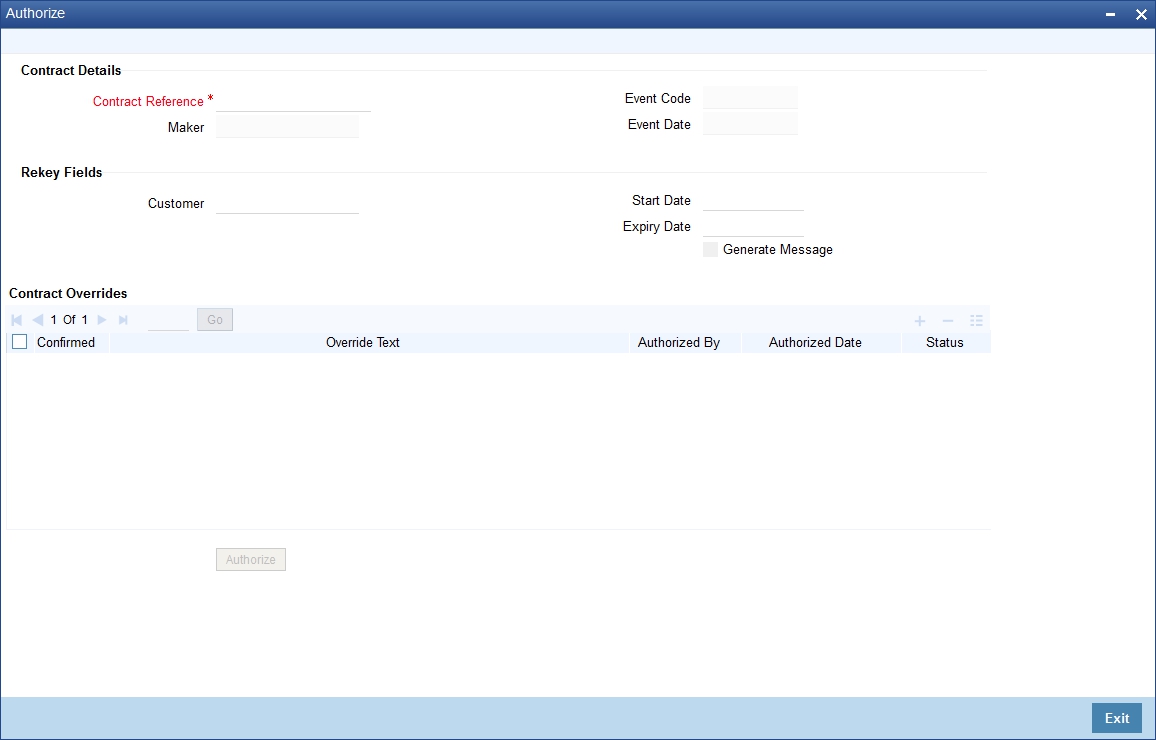
In this screen, you can do the following:
- Verify that the details input are valid
- Check Overrides displayed by the system
- Re-key data for fields which require re-keying
Subsequently, enter the contract reference of the contract you wish to authorize and click the ‘Authorize’ button to authorize this contract.
5.2.2 Reversing Contracts
You can reverse a contract by clicking the reverse icon in the toolbar or selecting Reverse from the Actions menu. You can reverse only those contracts which have financial impact and where the contract expiry date is later than the application date.
5.2.3 Amending Contracts
For contracts which have been authorized and which have not yet expired, you can modify details by clicking the unlock icon in the toolbar or selecting Unlock from the Actions menu. The details that are amendable are:
- Party details
- Max No of Free Visits
- Break Open Period Date
- Settlement Details
- Frozen
5.2.4 Closing Contracts
You can close contracts by clicking the close icon in the toolbar or selecting Close from the Actions menu. Closure of contracts is possible only where the subscription date in the contracts is earlier or the same as the application date. When you close a contract, the system will change the status of the locker from ‘Rented’ to ‘Available’.
5.2.5 Deleting Contracts
To delete a contract, click the delete icon in the toolbar or select Delete from the Actions menu. For a new, unauthorized contract, the system will delete the contract itself. For an existing unauthorized contract, the system will delete only the last event saved for the contract.
5.2.6 Rolling over Contracts
You can extend an existing contract for the same period as specified in the current contract. To rollover a contract, click the rollover icon in the toolbar or select Rollover from the Actions menu. The following validations are applicable while rolling-over a contract:
- For an automatic rollover (‘Auto Extension’ option checked in the SDB contract screen), the contract will be extended by the same period as the tenor of the original contract. For manual rollover, you can specify the desired tenor. The rental payment schedule will be re-calculated for the new tenor.
- Similarly, for an automatic rollover, the system will compute the break-open period and contract closure date based on the new tenor. You can modify these details in case of a manual roll-over.
- The system will default the following details which are not amendable:
- Value Date
- Party Details
- Rental Details
- Vault and Box Details
- Free Visit count (reset to the value applicable to the earlier tenor)
Note
The system will not allow rolling-over of contracts where payment is outstanding from the customer or where the record is closed.
5.3 PreClosure of Contracts
This section contains the following topic:
5.3.1 Closing Contracts Prematurely
You can close contracts before the expiry date in the ‘Safe Deposit Box Pre Closure’ screen. To invoke this screen, type ‘DLDPCLOS’ in the field at the top right corner of the Application Toolbar and then click the adjoining arrow button.
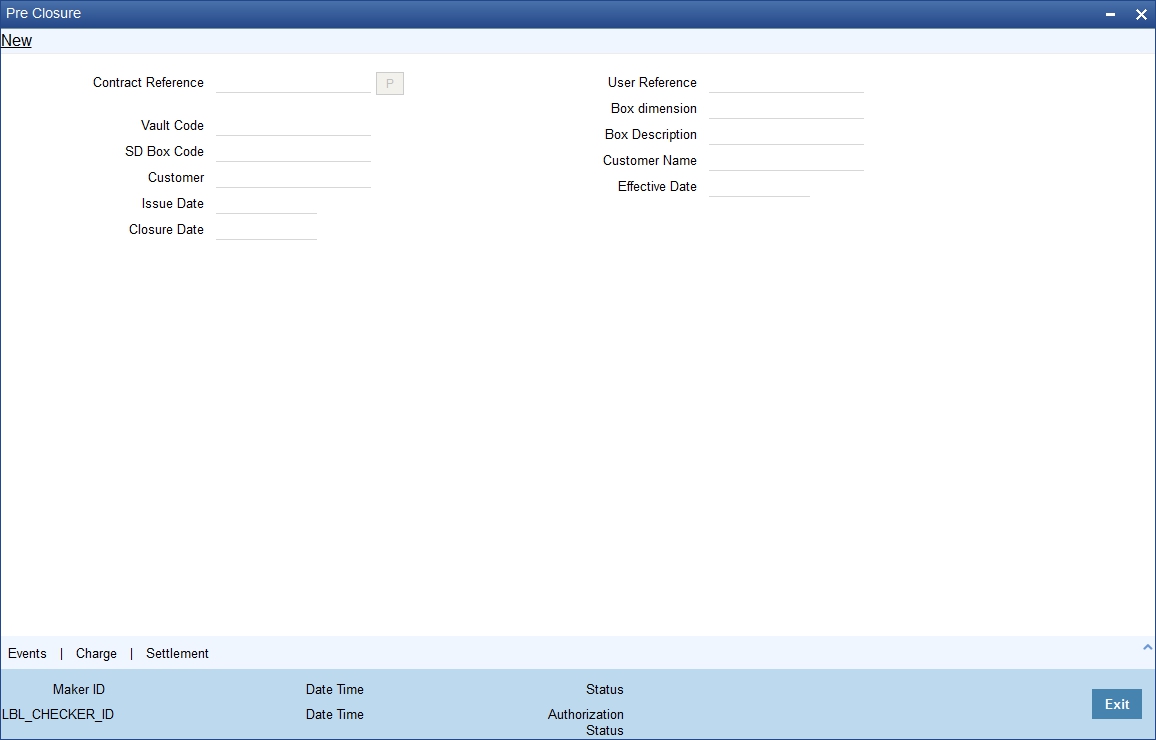
In this screen, enter the reference number of the contract for which payment is being processed. Click on ‘P’ button. The system will display the following details of the contract:
- User Reference No
- Vault code
- Box Code
- Customer
- Value Date
- Closure Date
- Box Dimension
- Box Description
- Customer Name
- Effective Date
Click the save button. The system will close the record pre-maturely.
As part of the pre-closure, if you wish to collect rental arrears or penalty charges, you can do so by associating the required charge class to the PCLS event. The system will debit the customer account for the amount when pre-closure happens.
You can also return any advance rent collected from the customer by associating the charge class to PCLS event. The charge amount is calculated by taking into account the difference between the original date of closure and the date on which pre-closure is done. You can modify the amount to be returned in the ‘Charges’ screen by clicking the charges button.
The system will trigger the pre-closure event and modify the status of the box from ‘Rented’ to ‘Available.
5.4 Safe Deposit Box Payment Input
This section contains the following topics:
- Section 5.4.1, "Processing Safe Deposit Box Payments"
- Section 5.4.2, "Viewing Safe Deposit Box Payment Details"
5.4.1 Processing Safe Deposit Box Payments
Payments from the customer (initial fees or rentals) can be collected either automatically or manually. The automatic payment is enabled by selecting the ‘Auto Liquidation’ option and linking a current account or savings account to the contract. Here, the system will automatically calculate and collect the rental(s) due as part of the EOD operations.
In case of manual payments, you have the option of collecting the rental either in cash or from the account of the customer. You can collect the payment from the account of the customer in the ‘Safe Deposit Box Payment Input’ screen. To invoke this screen, type ‘DLDPAMNT’ in the field at the top right corner of the Application Toolbar and then click the adjoining arrow button.
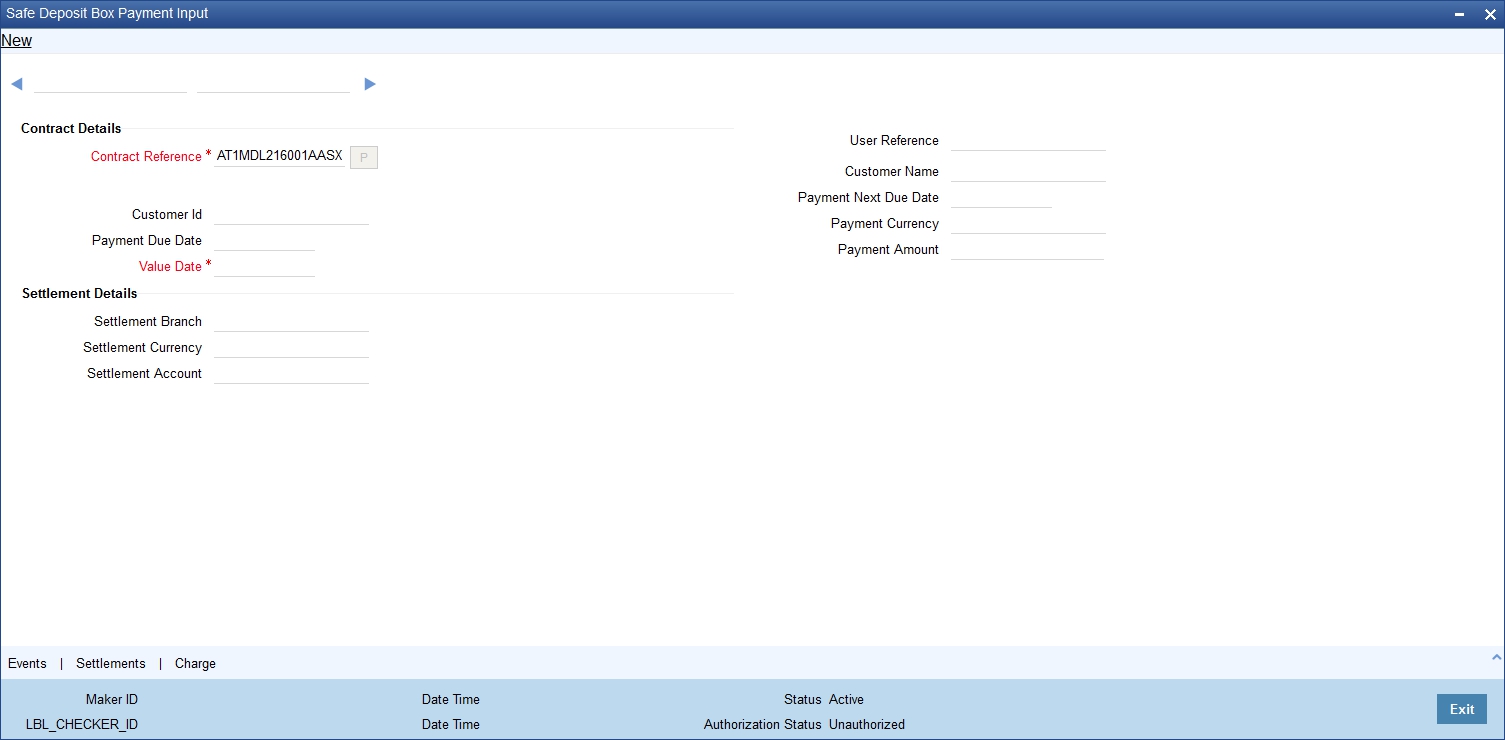
In this screen, enter the reference number of the contract for which payment is being processed. Click on ‘P’ button. The system will display the following details of the contract:
- User Reference No
- Customer ID
- Payment Due Date
- Value Date
- Customer Name
- Payment Next due Date
- Payment Currency
- Payment Amount
- Settlement Branch
- Settlement Currency
- Settlement Account
You can modify the value date, settlement branch, currency and account details, if required. All the other fields will retain the original values.
Click the save button. The system will process the payment.
Refer the chapter ‘Cash Transactions’ in the Savings User Manual for details on payments to be done by cash
To view the joint holder’s details of an account and the mode of operation maintained at the account level, place the cursor on the Settlement Account field and press Ctrl+J. The system displays the ‘Joint Holder’ screen.
For more information on the ‘Joint Holder’ screen refer to the section ‘Joint Holder Maintenance’ in the Core User Manual.
5.4.2 Viewing Safe Deposit Box Payment Details
You can query and view the details of the payments made for the safe deposit lockers in the ‘Safe Deposit Box Payment Summary’ screen. To invoke this screen, type ‘DLSPAMNT’ in the field at the top right corner of the Application Toolbar and then click the adjoining arrow button.
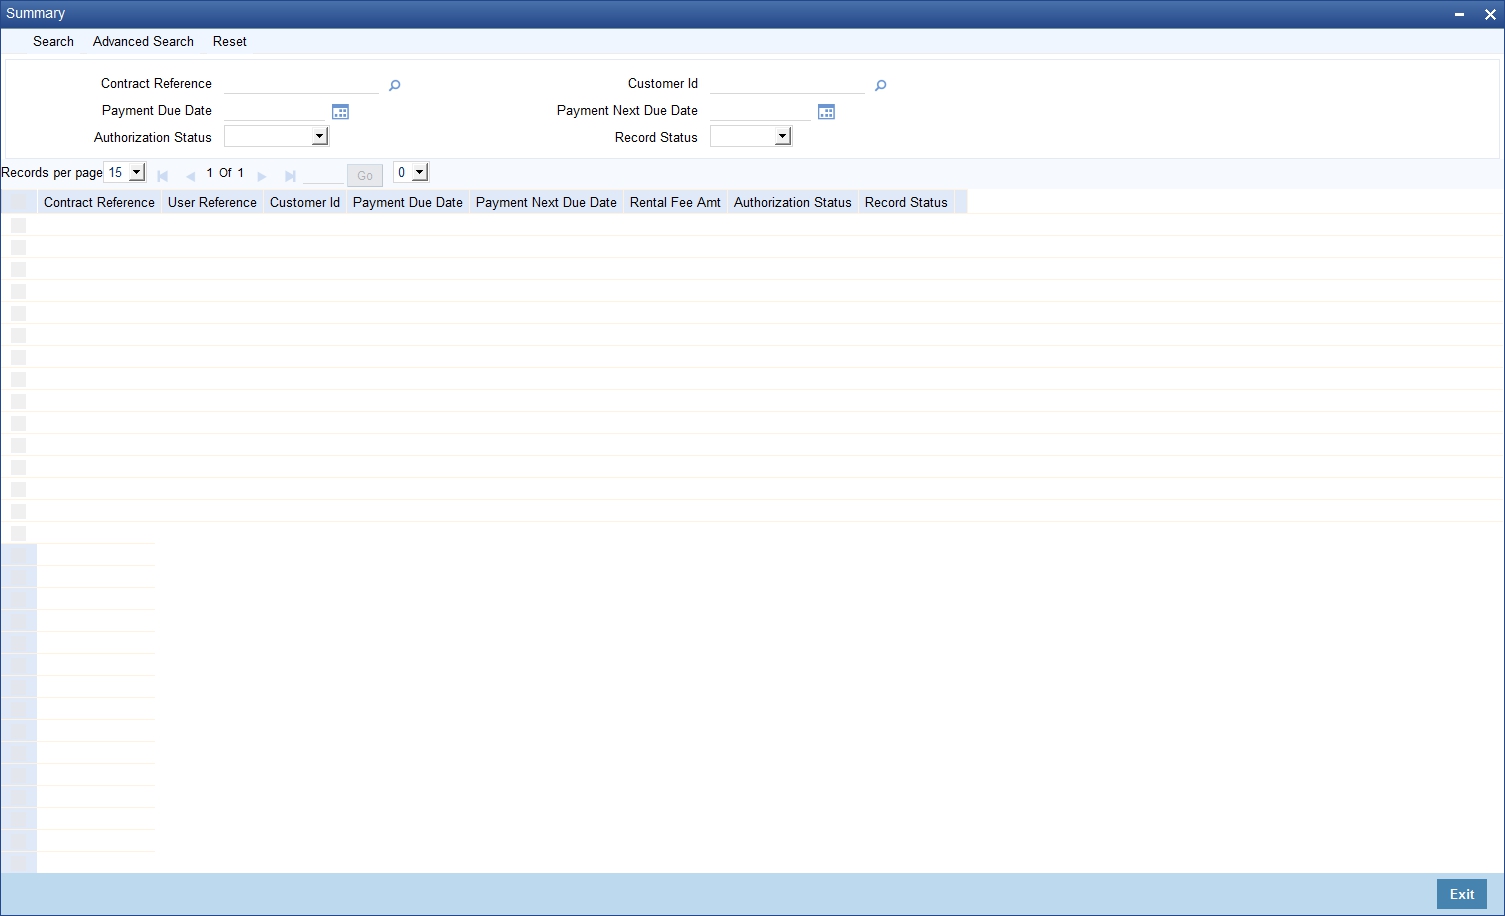
In this screen, you can query on any combination of the following parameters:
- Contract Reference No
- Payment Due Date
- Authorization Status
- Customer ID
- Payment Next Due Date
- Record Status
After specifying the parameters for the query, click ‘Search’. The system displays all the records matching the parameters specified. If you do not specify any parameter for the query before clicking ‘Search’, the system will display all the available payment records for safe deposit lockers.
5.5 Safe Deposit Box Break Open Operation
This section contains the following topics:
- Section 5.5.1, "Breaking Open Safe Deposit Boxes"
- Section 5.5.2, "Viewing Safe Deposit Box Break Open Details"
5.5.1 Breaking Open Safe Deposit Boxes
Under certain circumstances like where the customer has not paid the rental or not visited the locker for a long time, you can break open the safe deposit locker. As part of this operation, you are required to maintain certain information in the ‘Safe Deposit Box Break Open Operation’ screen. To invoke this screen, type ‘DLDBRKOP’ in the field at the top right corner of the Application Toolbar and then click the adjoining arrow button.
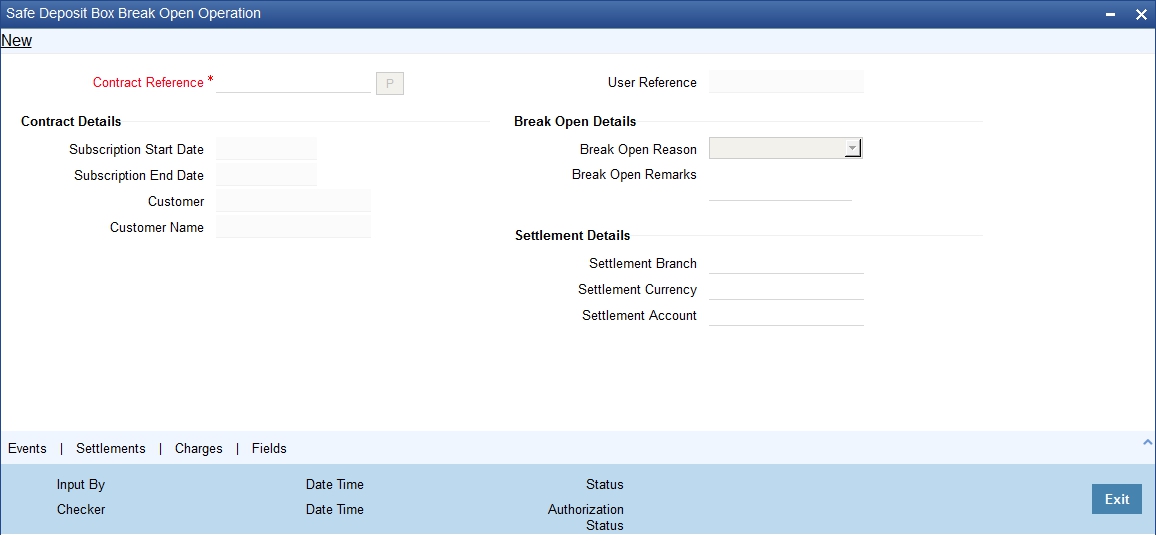
In this screen, specify the following details:
Contract Reference
Enter or select from the adjoining option list, the reference number of the contract corresponding to the safe deposit locker that you wish to break open.
The system will display the following values:
- User Reference No
- Subscription Start Date
- Subscription End Date
- Customer
- Customer Name
- Settlement Branch
- Settlement Currency
- Settlement Account
Break Open Reason
Select, from the drop-down list, the reason for breaking open the safe deposit locker. The reasons are:
- Customer Not Visited
- Others
Break Open Remarks
Enter any additional information that you would like to maintain for breaking-open the locker.
5.5.2 Viewing Safe Deposit Box Break Open Details
You can query and view the details of the safe deposit lockers which have been broken open in the ‘Safe Deposit Box Break Open Operation Summary’ screen. To invoke this screen, type ‘DLSBRKOP’ in the field at the top right corner of the Application Toolbar and then click the adjoining arrow button.
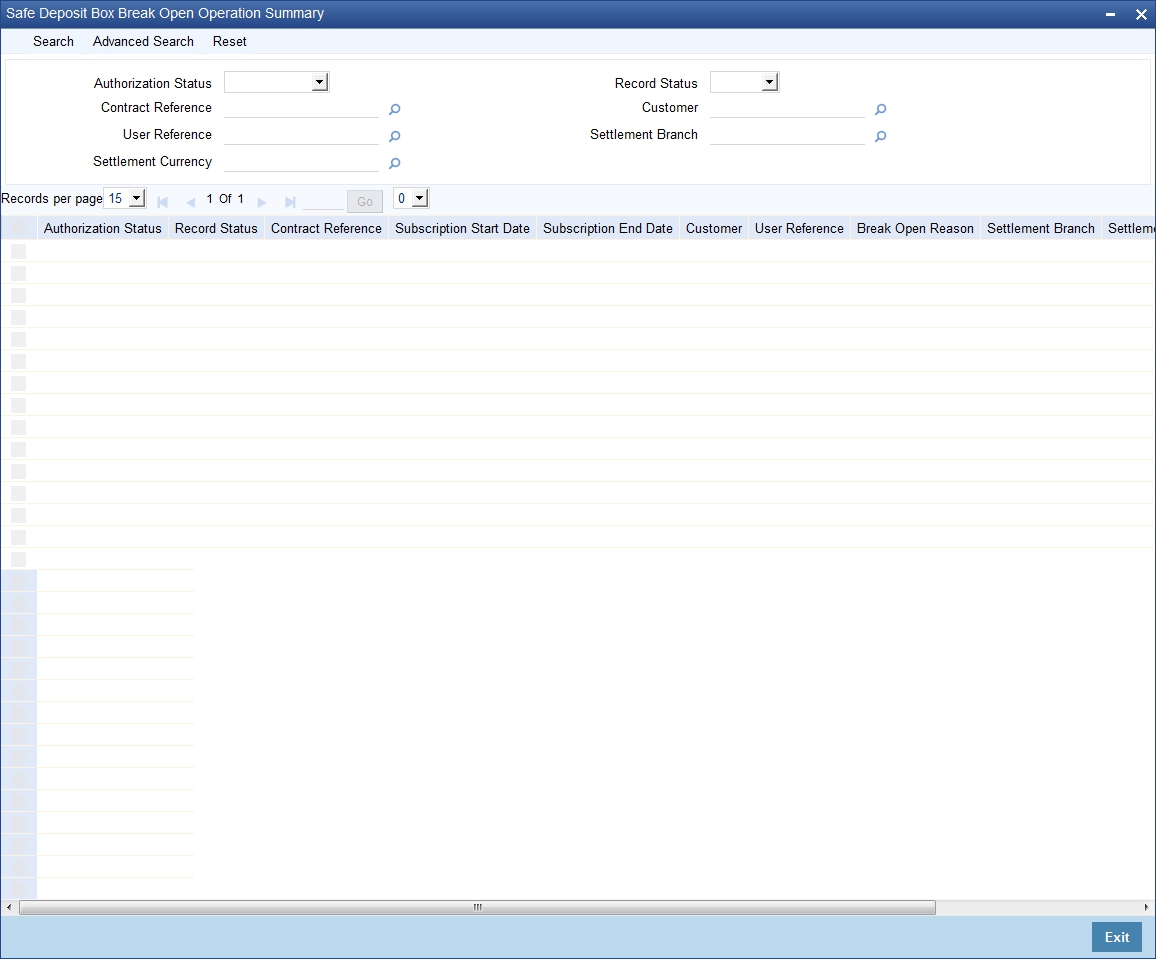
In this screen, you can query on any combination of the following parameters:
- Contract Reference No
- User Reference No
- Settlement Currency
- Customer
- Settlement Branch
- Settlement Account
After specifying the parameters for the query, click ‘Search’. The system displays all the records matching the parameters specified. If you do not specify any parameter for the query before clicking ‘Search’, the system will display all the available safe deposit locker records for which the break-open operation has been done.
5.6 Safe Deposit Box Visitors Log
This section contains the following topics:
- Section 5.6.1, "Maintaining Safe Deposit Box Visitor Information"
- Section 5.6.2, "Viewing Safe Deposit Box Visitor Information"
5.6.1 Maintaining Safe Deposit Box Visitor Information
You can maintain details of customer or visitors who have visited the lockers in the ‘Safe Deposit Box Visitors Log’ screen. To invoke this screen, type ‘DLDVINFO’ in the field at the top right corner of the Application Toolbar and then click the adjoining arrow button.
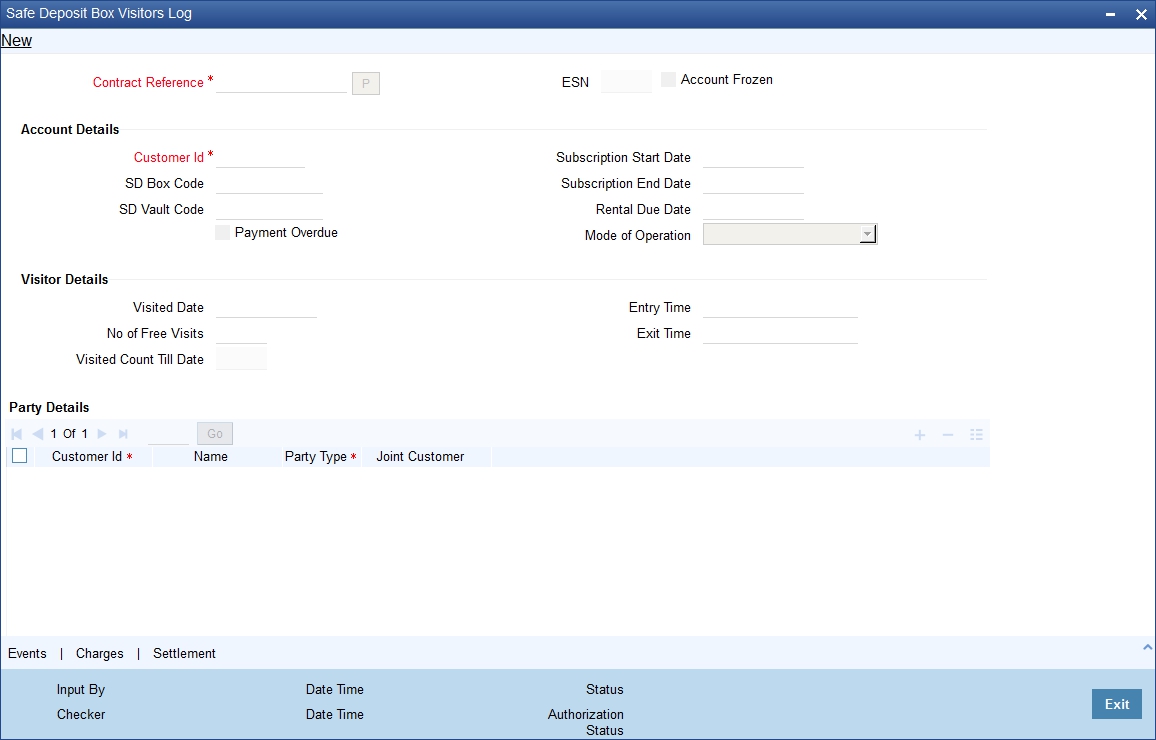
In this screen, enter or select the contract reference number and click on the ‘P’ button adjoining the ‘Contract Reference No.’ The system will populate the following details:
- Event Sequence No
- Customer ID
- Box Code
- SD Vault Code
- Subscription Start and End Dates
- Mode Of Operation
- No. of Free Visits
- Visited Count Till Date
In addition to the above, the system will also indicate if:
- Payment is overdue from the customer in the ‘Payment Overdue’ field
- The contract is ‘Frozen’ in the ‘Account Frozen’ field. For a frozen contract, you will not be allowed to add or save any visitor information in this screen.
You can enter the following information:
Visitor Details
Specify the following details about the visit:
Visited Date
Select, from the adjoining calendar, the date of the customer visit.
Entry Time
Enter the check-in time for the visit to the locker.
Exit Time
Enter the check-out time for the visit.
Party Details
Here, you can enter details of additional persons who visited the locker:
Customer Id
Specify the customer code of the visitor. You can also select it from the adjoining option list.
Name
The system displays the customer name depending on the customer ID selected.
Party Type
The system displays the party type and will validate the visit to the deposit locker based on the ‘Mode of Operation’ you have selected for the contract.
- If the mode is ‘Single’, any of the following party types
can visit the locker:
- APP
- CAP
- AUT
- NOM
- If the mode is ‘Jointly’, then any of the following party
types will be allowed to visit, provided they are accompanied by the
applicant holder:
- CAP
- AUT
- NOM
If the mode is ‘Mandate Holder’, then the system will allow visit only from the primary applicant.
Joint Customer
The system displays the name of the joint customer.
While saving the contract, apart from checking for party type, the system will also check if, for the given period, the customer has exceeded the maximum number of free visits allowed for the contract. If so, the system will debit the customer account for the corresponding charges.
Note
If you wish to change the charges or settlement details, you can do so by clicking the ‘Charges’ and ‘Settlement’ screens respectively.
5.6.2 Viewing Safe Deposit Box Visitor Information
You can query and view the details of visitors who have visited the lockers through the ‘Safe Deposit Box Visitor Summary’ screen. To invoke this screen, type ‘DLSVINFO’ in the field at the top right corner of the Application Toolbar and then click the adjoining arrow button.
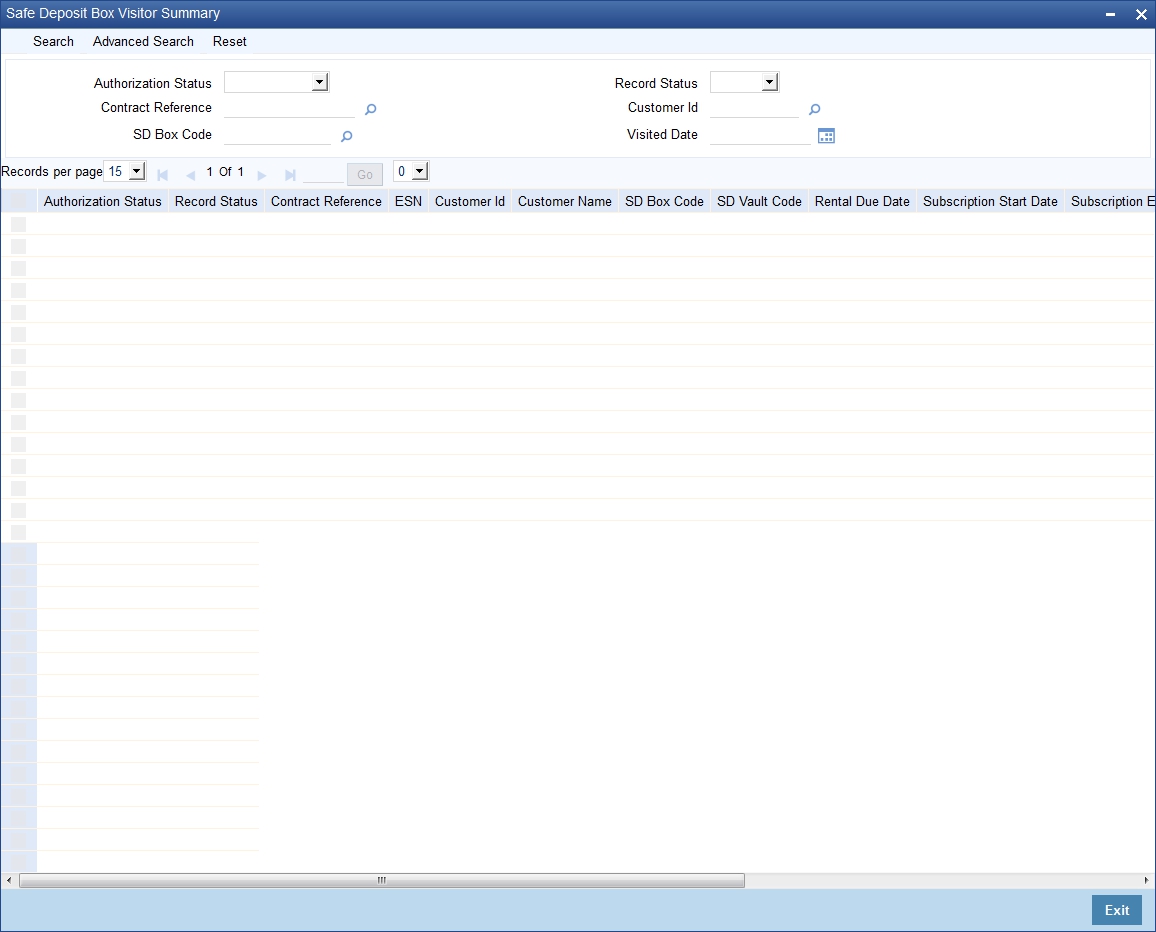
In this screen, you can query on any combination of the following parameters:
- Contract Reference No
- SD Box Code
- Customer ID
- Visited Date
After specifying the parameters for the query, click ‘Search’. The system displays all the records matching the parameters specified. If you do not specify any parameter for the query before clicking ‘Search’, the system will display all the available records for visitors to the safe deposit lockers.
5.7 Safe Deposits Box Customer Waitlist Log
This section contains the following topics:
- Section 5.7.1, "Creating Safe Deposit Box Waitlists for Customers"
- Section 5.7.2, "Viewing Safe Deposit Box Waitlist Details"
5.7.1 Creating Safe Deposit Box Waitlists for Customers
Waitlists for customers can be created within the system for customers who wish to avail the safe deposit facility offered by your bank. As and when a box becomes available, the customer can be contacted and offered the box. You can maintain these details in the ‘Safe Deposit Box Customer Waitlist Log’ screen. To invoke this screen, type ‘DLDCUSWL’ in the field at the top right corner of the Application Toolbar and then click the adjoining arrow button.
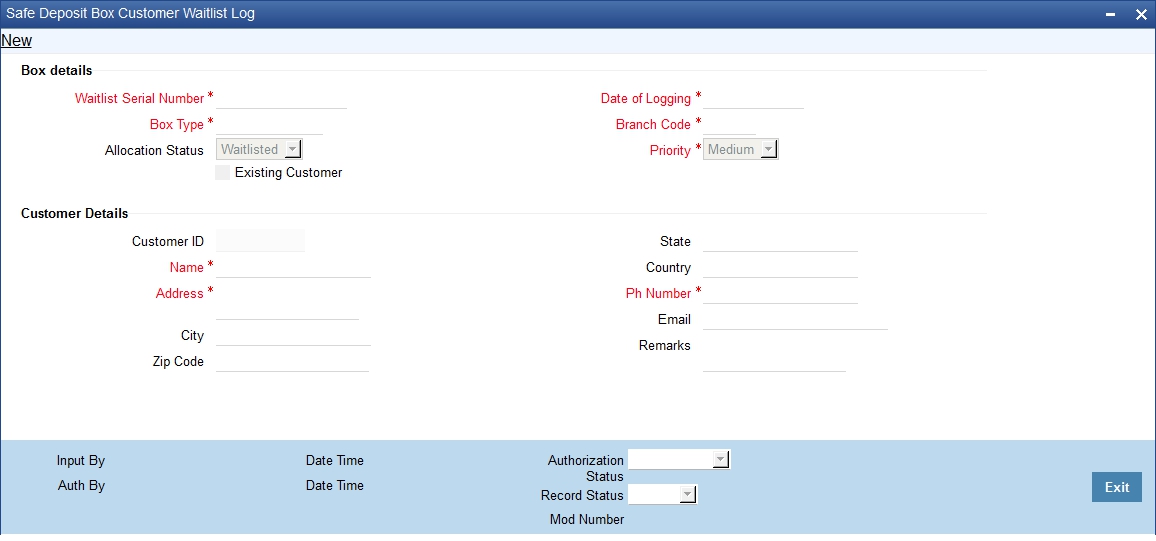
Enter the following details for a customer who wishes to avail the facility:
Box Details
Waitlist Serial Number
The system generates this number automatically for each new record.
Box Type
Specify the box type required by the customer. You can also select the type from the adjoining option list. The list contains all the box types maintained in the system.
Allocation Status
The system will display the status for the customer. The status can be either of the following:
- Waitlisted
- Allocated
Existing Customer
Check this option to indicate that the customer requiring the safety box is an existing customer of your bank.
Date of Logging
The system displays the application date here.
Branch Code
Specify the branch where the box is requested. You can also select the code from the adjoining option list. The list contains all the branches maintained in the system.
Priority
Select, from the adjoining drop-down list, the priority with which the request has been made. You have the following options:
- High
- Medium
- Low
Customer Details
Customer ID
Specify the customer code. If the customer is an existing one, you can select the ID from the adjoining option list. The list contains all the customer IDs maintained in the system. You can enter the name of the customer or leave this field blank if the customer is a new one.
Name
The system will display the name of the customer, if the customer is an existing one. You are required to specify the details for a new customer.
Address
The system will display the address of the customer, if the customer is an existing one. You are required to specify the details for a new customer.
City
The system will display the city, if the customer is an existing one. You are required to specify the details for a new customer.
Zip Code
The system will display the zip code, if the customer is an existing one. You are required to specify the details for a new customer.
State
The system will display the state to which the customer belongs, if the customer is an existing one. You are required to specify the details for a new customer.
Country
The system will display the country of the customer, if the customer is an existing one. You are required to specify the details for a new customer.
Ph Number
The system will display the phone number, if the customer is an existing one. You are required to specify the details for a new customer.
The system will display the email address of the customer, if the customer is an existing one. You are required to specify the details for a new customer.
Remarks
Enter any additional information that you wish to maintain for the request.
5.7.2 Viewing Safe Deposit Box Waitlist Details
You can query and view the details of customers who are waitlisted for the box facility through the ‘SDB Customer Waitlist Log Summary’ screen. To invoke this screen, type ‘DLSCUSWL’ in the field at the top right corner of the Application Toolbar and then click the adjoining arrow button.
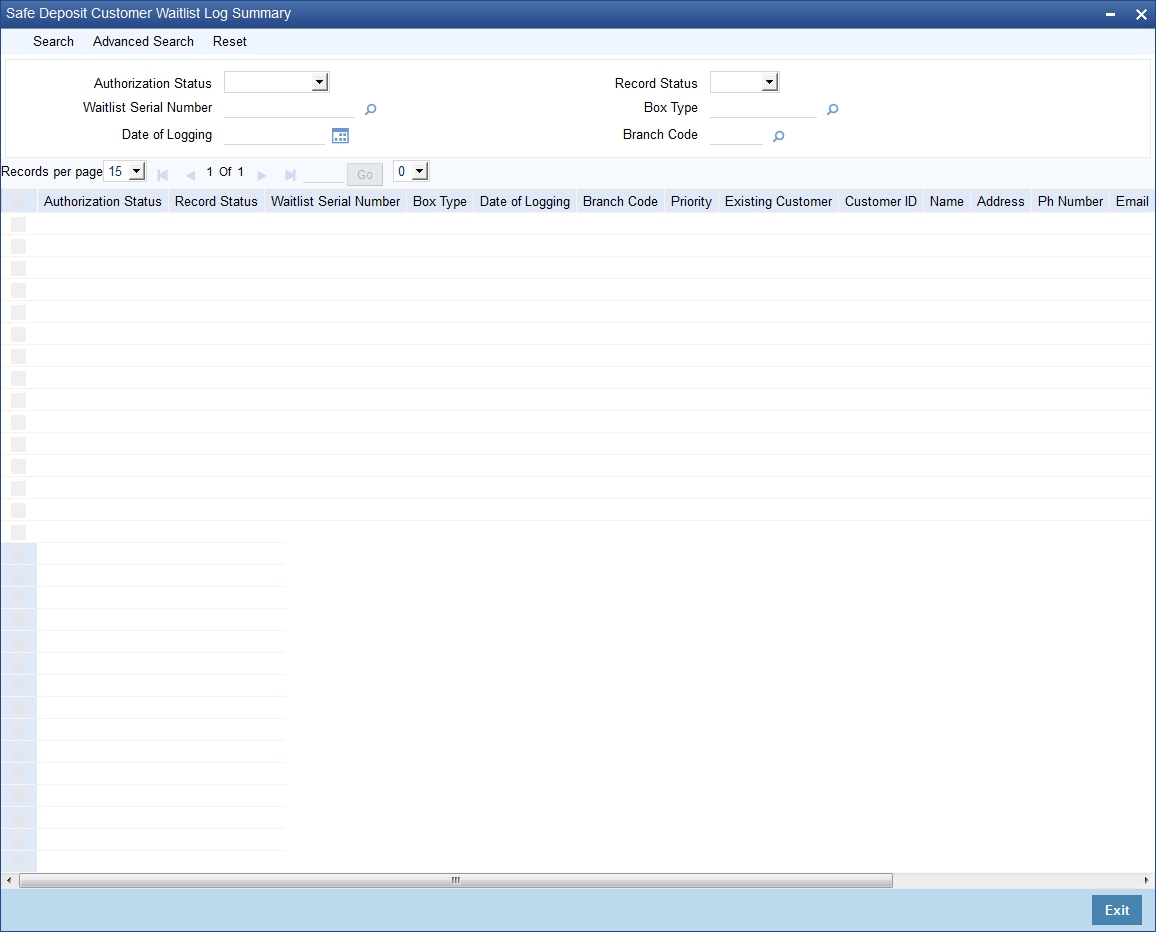
In this screen, you can query on any combination of the following parameters:
- Authorization Status
- Waitlist Serial Number
- Date Of Logging
- Record Status
- Box Type
- Branch Code
After specifying the parameters for the query, click ‘Search’. The system displays all the records matching the parameters specified. If you do not specify any parameter for the query before clicking ‘Search’, the system will display all the available records for waitlisted customers.
5.8 Safe Deposit Duplicate Key Issuance Detailed
This section contains the following topics:
- Section 5.8.1, "Handling Safe Deposit Duplicate Key Requests"
- Section 5.8.2, "Viewing Safe Deposit Duplicate Key Details"
5.8.1 Handling Safe Deposit Duplicate Key Requests
In case a customer requests for a duplicate key, you can process it through the ‘SDB Duplicate Key Issuance Detailed’ screen. To invoke this screen, type ‘DLDDUKEY’ in the field at the top right corner of the Application Toolbar and then click the adjoining arrow button.
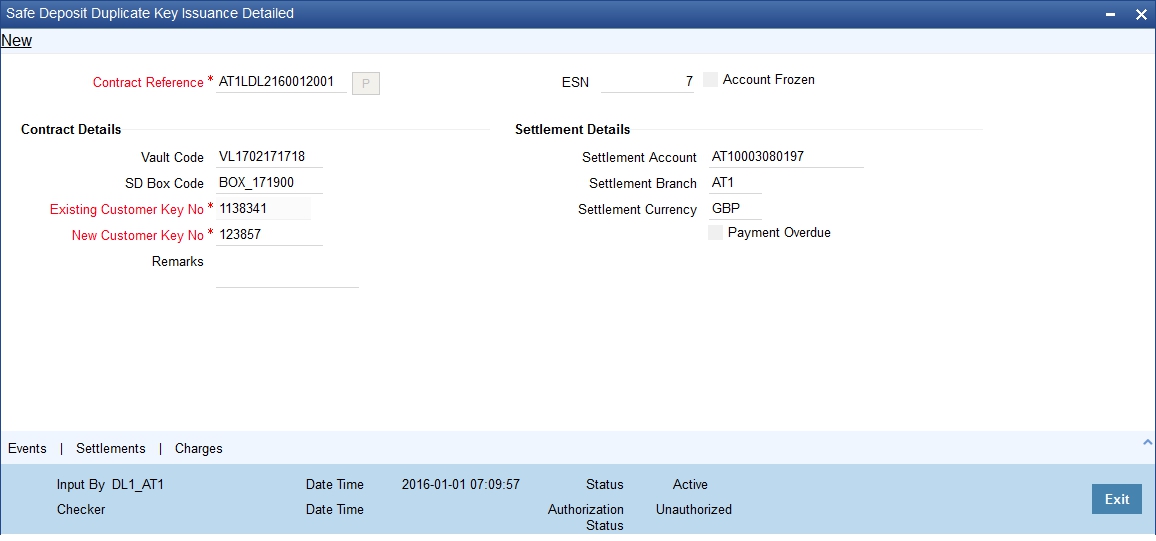
Enter the following details for the duplicate key request:
Contract Reference No
Enter the contract reference number against which you are issuing the duplicate key and click the ‘P’ button.
The system will default the following details:
- Account Frozen
- Vault Code
- SD Box Code
- Settlement Details
- Payment Overdue
You can now specify the following:
Existing Customer Key No.
Select the existing key number from the adjoining option list.
New Customer Key No.
Enter the new key number for the customer.
Remarks
Enter any additional information that you wish to maintain for the record.
Note
You can also assign the existing key number instead of a new one.
5.8.2 Viewing Safe Deposit Duplicate Key Details
You can query and view the details of duplicate keys issued through the ‘SDB Duplicate Key Issuance Summary’ screen. To invoke this screen, type ‘DLSDUKEY’ in the field at the top right corner of the Application Toolbar and then click the adjoining arrow button.
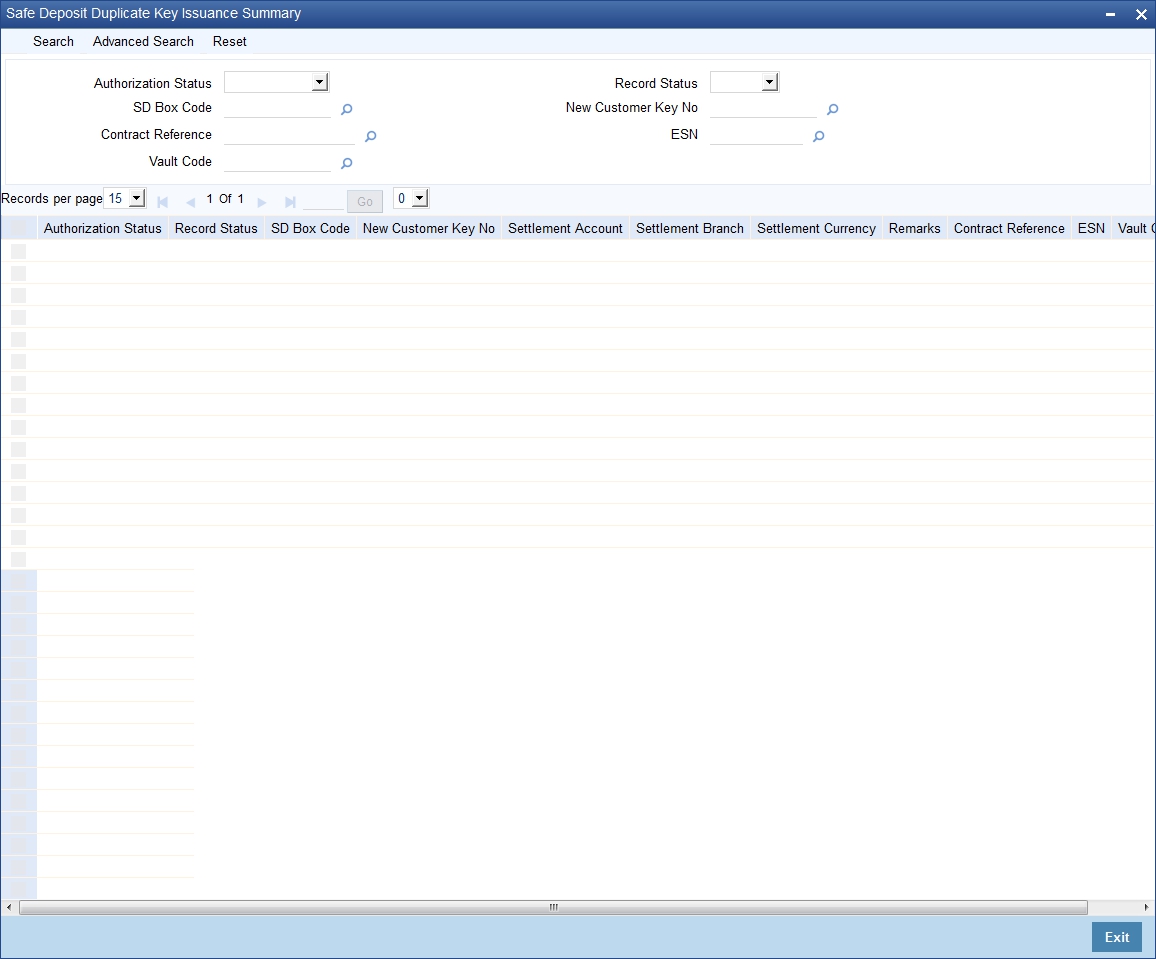
In this screen, you can query on any combination of the following parameters:
- SD Box Code
- Contract Reference No
- Vault Code
- New Customer Key No
- Event Sequence No
After specifying the parameters for the query, click ‘Search’. The system displays all the records matching the parameters specified. If you do not specify any parameter for the query before clicking ‘Search’, the system will display all the available records for duplicate key requests.