5. Processing a Derivatives Contract
You can capture the details of the contract through the ‘Contract Input Details’ screen. Before we proceed to discuss the details of the ‘Derivatives Contract Input’ screen, we shall briefly recall the workflow in the Derivatives module.
First of all you need to maintain the basic information that is necessary for the successful functioning of the module. This information includes the maintenance of:
- Derivative Types
- Bank and Branch Parameter details
- Revaluation details
- Messaging party details
- Counterparty details
- Interest, Tax and Charge class details
The next step in the process is the creation of products for the derivatives module. Products help you group together or categorize contracts, which share broad similarities. You have to associate a derivative type with each of the products that you create. Thus the product inherits all the attributes of the type. Subsequently you associate the various interest, charge and tax classes with the product.
Under each product that you define, you can enter specific contracts for this module. By default, a contract inherits the attributes of the product to which it is associated. This means that you do not have to define the attributes that default from the product every time you input a contract involving the product. However you can change some of the attributes to suit the product you are defining.
This chapter contains the following sections:
- Section 5.1, "Derivatives Contract Input"
- Section 5.2, "Contract Upload"
- Section 5.3, "Schedule Confirmation"
- Section 5.4, "Derivatives Contract Reassign"
5.1 Derivatives Contract Input
This section contains the following topics:
- Section 5.1.1, "Maintaining the Derivative Contract Input Screen"
- Section 5.1.2, "Main Tab"
- Section 5.1.3, "Details Tab"
- Section 5.1.4, "Additional Tab"
- Section 5.1.5, "Termination Details Tab"
- Section 5.1.6, "Event Button"
- Section 5.1.7, "Brokerage Button"
- Section 5.1.8, "Settlements Button"
- Section 5.1.9, "Advice Button"
- Section 5.1.10, "Interest Button"
- Section 5.1.11, "Charges Button"
- Section 5.1.12, "Tax Button"
- Section 5.1.13, "Fields Button"
- Section 5.1.14, "Principal Button"
- Section 5.1.15, "Saving the Details of a Contract"
5.1.1 Maintaining the Derivative Contract Input Screen
You can invoke the ‘Contract Input’ screen by typing ‘DVDTRONL’ in the field at the top right corner of the Application tool bar and clicking on the adjoining arrow button.
To specify the details of a new contract, select ‘New’ from the Actions Menu in the Application tool bar or click new icon. If you are calling a contract that has already been created, choose the ‘Contract Input Summary’ option. The details of all the contracts that you entered earlier will be displayed in a tabular form. From the ‘Summary’ screen, you can open an existing deal by double clicking it.
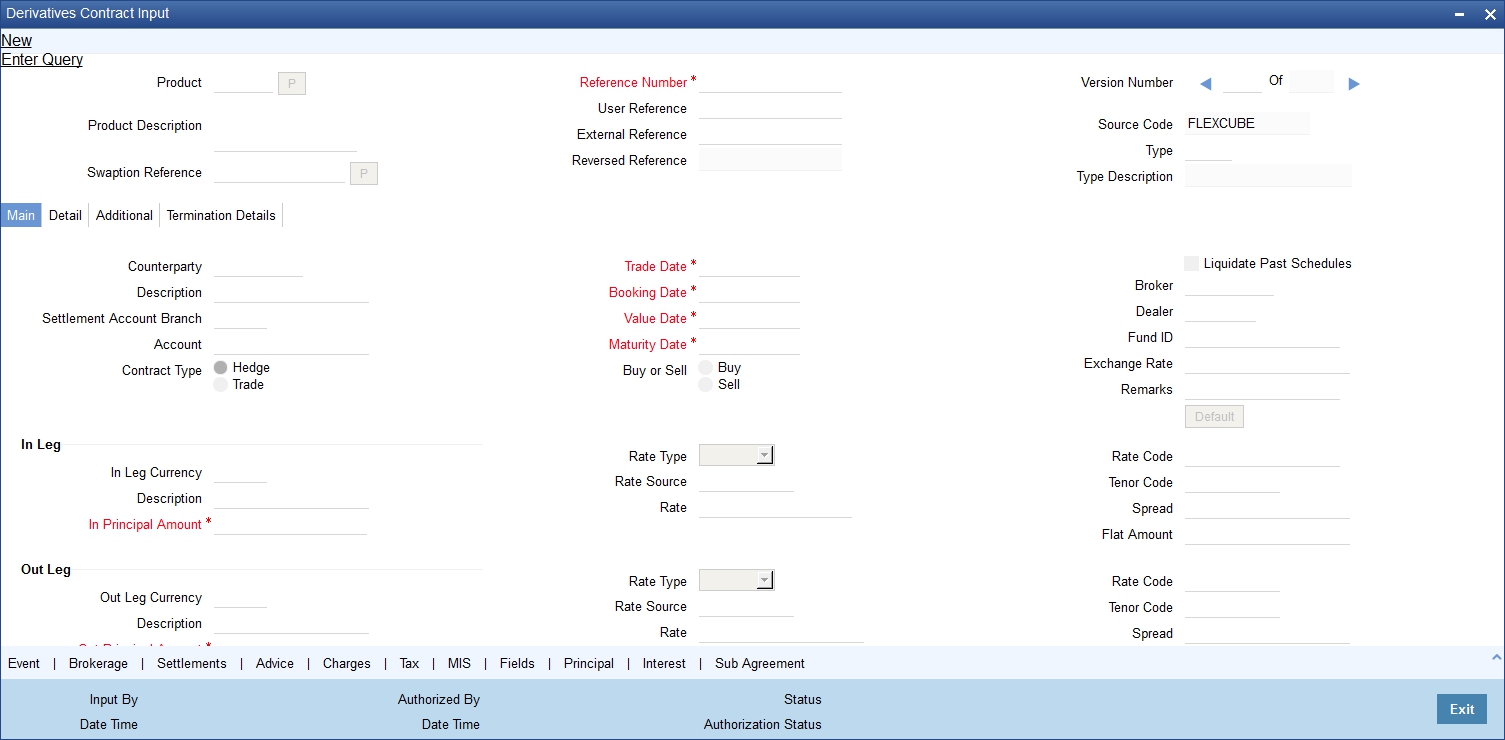
The ‘Contract On-line’ screen contains a header, footer, and a body of fields that capture information specific to the contract that you are maintaining. You need to capture these details in addition to the attributes that the contract acquires as a result of being linked to the product.
The body of fields, in this screen, is divided into two tabs. Firstly you need to capture the main details of the derivative contract such as the Contract Type, Counterparty and the In and Out Leg interest and principal details. You can specify the Contract Principal Schedules for both the in and out legs separately by clicking ‘Principal’ button. Click ‘Interest’ button to indicate the interest details for both the legs of the contract.
Next you can start capturing additional information relating to the derivative such as the Revaluation details, Inception and Termination details and so on by moving to the Detail tab.
Besides the existing fields in the ‘Derivative Contract On-line’ screen, you will also notice a vertical array of icons. Clicking on an icon launches a screen that captures details specific to an attribute, Settlement Message details, for example.
These buttons are briefly described below:
Buttons |
Description |
Brokerage |
Click this icon to indicate brokerage details applicable to the contract. |
Advice |
Click on this button to enter the leg advices. You can view suppress and prioritize the advices that are to be generated for each leg of the transaction. |
Event |
Click this icon to view details of the events and accounting entries that the contract involves. The screen also displays the overrides that were encountered for the contract. |
Fields |
Click this icon to invoke the ‘User Defined Fields’ screen. You can indicate the user-defined fields for which information needs to be captured. |
Charges |
This button invokes the Charge service of Oracle FLEXCUBE. On invoking this function you will be presented with a screen where the charge rate, amount, and the waive charge parameters can be specified. |
MIS |
Click on this button to enter the transaction MIS details. |
Settlements |
Click this icon to invoke the ‘Settlement’ screens. Based on the details that you enter in the ‘Settlement’ screens, the contract will be settled. The details of these screens have been discussed in the Settlements manual. |
Tax |
This icon invokes the Tax services. The application of tax on a deal is discussed under the head Levying tax on a contract. |
Interest |
This icon invokes Interest screen. The application of interest is discussed in this chapter. |
Principal |
This icon invokes Principal screen. The application of principal is discussed in this chapter. |
Sub Agreement |
This icon invokes Sub Agreement screen. |
Through the ‘Derivatives Contract Input’ screen, you can process all types of derivative contracts.
You can enter the details of a contract using a derivative product. Based on the type of contract you are entering, you can select a product from the option list available at the Product field.
Once you link a product with a contract, the attributes defined for the product and consequently the derivative type associated with the product will be inherited by the contract automatically. You are allowed to change a few of these details such as revaluation details, the in and out leg interest details, before saving the contract.
Reference Number
In Oracle FLEXCUBE, reference numbers are generated automatically and sequentially by the system. This number tag is used to identify the contract you are entering, it is also used in all the accounting entries and transactions related to this contract. Hence the system generates a unique number for each contract.
The contract reference number is a combination of a three-digit branch code, a four-character product code, a five-digit Julian Date and a four-digit serial number. The Julian Date has the following format:
“YYDDD”
Here, YY stands for the last two digits of the year and DDD for the number of day (s) that has/have elapsed in the year.
User Reference
You can enter a reference number for the contract. A contract will be identified by this number in addition to the Contract Reference No. generated by the system. This number should be unique and cannot be used to identify any other contract. By default, the Contract Reference Number generated by the system will be taken as the User Reference No.
External Reference
If the transaction is being uploaded from an external source, you can specify the identification for the transaction in the external source, as the external reference number.
Reversed Reference
The reference number of the contract that is being reversed and rebooked will be displayed here.
Source Code
You have to indicate the source from which contracts have to be uploaded.
Swaption Reference
Specify the swaption reference number to associate this contract with an options contract. The option list displays all valid option contract reference numbers maintained in the system. Choose the appropriate one.
You can use ‘P’ button to have the details populated by the system. The system will default the following details based on the product code or the swaption reference number.
- Product Code
- Product Type
- Counter Party
- Value Date
- Maturity Date
- In Leg currency
- In Leg Principal Amount
- Settlement Account Branch
- Settlement Account
The system triggers DBOK event when you save the contract. In this case, the system updates the status of the new contract as ‘Yet to be initiated’. On authorization, the system links this contract to the corresponding swaption deal. On ‘Options Contract Input’ screen, you can view the contract reference number of the linked DV contract under ‘Interest Rate Options’ tab.
The system allows reversal of the swaption contract only after reversing the IRS contract linked to it.
During manual/auto exercise of OT contract, the system will initiate the corresponding DV contract. The system will trigger DOPT event as part of this process.
While performing auto exercise during EOD operations, if an OT swaption contract is not linked to any DV contract, the system will move that particular OT contract to process exception. However, the EOD process will not fail for process exceptions. For such contracts, the contract status will continue to be active even after the maturity date of the swaption deal. You can manually control it by reversing or terminating the swaption contract.
5.1.2 Main Tab
Specify the following details.
Counterparty
When you are entering the details of a derivative contract you should specify the customer with whom the derivative contract is being entered into. Specify the code of an authorized customer who falls into a category allowed for the product linked to the contract.
Settl. Account Branch
You might want to settle these components in an account existing at a branch other than the one where the contract was initiated. Therefore you have to indicate the branch code of the branch where the account resides. Subsequently indicate the account number of the settlement account.
If Settlement Instructions have been defined for the customer, the settlement accounts will be picked up from those instructions. While entering the details of the contract, you can change the Settlement Instructions for the derivative contract.
Note
- If a settlement account has been specified in the settlement instructions for the customer, and a different account has been specified for the derivative contract, the account specified for the contract will take precedence.
- If you have specified Debit or Credit settlement accounts that use an account class that is restricted for the product, an override is sought.
Account
You have to specify the settlement account if Settlement Instructions have not been defined for the customer. The settlement account that you specify is the account through which the various components linked to the contract get settled.
Contract Type
All derivative contracts must be designated at inception either as Trade or as Hedge contracts. At the time of product definition you would have indicated whether the product being defined is meant for trade deals or hedge deals. When you associate a contract with a product the specification you made for the product will be defaulted to the contract. You can however change this specification.
The specification you make for the Contract Type will determine the accounting entries that will be passed for processing the particular contract. The system will identify all trade contracts and revalue them according to the revaluation preferences you have specified. For hedge type of contracts interest accruals will be carried out at periodic intervals.
In addition you also have to indicate whether the contract is a Buy type or Sell type of contract.
Trade Date
The system defaults the current date as the trade date.This is the date on which the deal is agreed with the counter party. Trade date cannot be amended once authorized.
The system will display error messages under the following conditions:
- Trade date is greater than current system date
- Trade date is holiday as per the deal currency
- Trade date is blank
- Trade date is later than the value date
- Trade date is earlier than the product start date
Booking Date
The date on which the deal details were entered will be displayed here. This defaults to the system date (today’s date). This date is for information purposes only. The accounting entries are passed as of the Value Date of the deal (initiation date of the deal).
Value Date
If you are entering the details of interest/cross currency swap you have to indicate the date on which the swap takes effect. In the case of an FRA, the value date would typically be the date on which the deal settles.
The accounting entries for the initiation of the deal will be passed as of the value date. The tenor of the deal will begin from this date and all calculations for interest and all the other components based on tenor will be made from this date onwards.
The system defaults to today’s date. You can also enter the Value Date of your choice here, and it can be any one of the following:
- Today’s date
- A date in the past
- A date in the future
The Value Date should not be earlier than the Start Date or later than the End Date of the product involved in the deal.
If the liquidation date for any of the deal components falls before today’s date, the liquidation entries (as defined by you for the product) will be passed if you have specified the same for the product.
Maturity Date
While maintaining the details of a swap you have to indicate the date on which the swap matures. If you are maintaining details of an FRA the maturity date would typically be the last date for the computation period.
Buy or Sell
You need to indicate whether the contract is a Buy type or Sell type of contract.
In/Out Leg
As part of maintaining the In and Out leg details of the contract, you are required to indicate the currency, amount, rate code, rate source, the principal schedules and interest details for both the in as well as the out legs of the contract.
Currency and Amount
You are required to indicate the currency in which interest amount should be calculated for both the inward as well as the outward legs of the contract. You can select the currency code from the option list available.
In addition you are also required to indicate the principal amount (Actual/ Notional) for both the legs of the contract. The amount that you specify will be taken in the currency indicated for the particular leg of the contract.
Liquidate Past Schedules
You can choose to liquidate past schedules of back dated contracts. If you specify that back dated schedules should be liquidated the system will liquidate these schedules irrespective of the availability of funds.
Example
A derivative contract can be initiated as of today, a date in the future, or as a date in the past.
Today’s date is October 15, 2000. Suppose you initiate hedge swap today, of 15,000 USD with the Value Date (date on which the swap comes into effect) as September 15, 2000, the system will pass accounting entries for initiation as of September 15.
But if there had been an interest payment schedule for September 30, 2000, for 500 USD, then if you specify that back valued schedules should be liquidated, you can make the system pass accounting entries to liquidate this schedule also when the loan is initiated.
If you specify that back dated schedules are not to be liquidated, only accrual entries will be passed till today.
Note
The entries associated with each event (initiation and liquidation in this case) will be passed only if they have been defined for the product. Further, the accounts used will be the ones defined for each entry.
Broker
If you are processing a deal that involves brokerage, indicate the ID of the broker through whom the deal was brokered. The adjoining option list displays a list of valid brokers with whom you can enter deals. You can choose the appropriate one.
You will be allowed to enter details of a broker only if brokerage is allowed for the product to which the deal is associated.
Dealer
Select the name of the dealer involved in the transaction.
Exchange Rate
While maintaining details of Cross Currency Swaps you are required to indicate the Exchange Rate for exchange of principal. The rate that you indicate will be used for determining the Out leg amount for the initial exchange in principal, given the In Leg amount.
Note
The exchange rate that you indicate will be validated against the exchange rate variance limits (Override Limit, Stop Limit) that you have specified at the time of defining the product. If the exchange rate variance exceeds the Override Limit the system will display an appropriate override message. If the rate variance exceeds the Stop Limit then you will not be allowed to save the contract until you change the rate.
Remarks
Free format information pertaining to the details of the contract can be captured in this field. The remarks that you enter here will not be reflected in any of the advices sent to the customer.
You can capture the relevant information in the window that gets displayed. Once you capture the necessary information click the OK button.
Default Details
At the time of input of a contract in different currencies, after you have specified the currency and amount of the first leg and the currency of the second leg, you must click the ‘Default’ button. The system then displays the equivalent amount for the second leg in the currency specified for that leg.
In case of contracts with both legs in the same currency, you can use the Default button or manually input the amount and currency for both legs.
Note
If you wish to specify the Principal and Interest details for a contract, you must use the ‘Default’ button irrespective of whether both legs of a contract are in the same currency or in different currencies. The system displays an error if you try to access the ‘Principal’ and ‘Interest’ screens without having visited the ‘Default’ button.
Rate Type
The interest paid on both the legs of the contract can either be a fixed amount or an interest rate that changes periodically. For special cases you are also allowed to maintain a flat amount.
If you specify that the interest rate for either of the legs is fixed then you have to indicate the rate of interest for the particular leg of the contract. When the rate type is floating you have to indicate the rate code based on which the interest rate should be calculated. Similarly when the rate type is special you have to indicate the flat amount that is to be used to calculate interest.
Rate Code
If the contract involves a product defined with floating interest, this is the Rate Code that links the contract to the Floating Rate table. As is the case with the Rate Type so also the Rate Code linked to the product will be displayed in this field. You can choose to change it.
Rate Source
For all contracts with a floating interest rate leg, apart from specifying the Rate Code you are also required to indicate the Rate Source. The rate source that you indicate here (such as Telerate, Reuters) will be used to pick up the floating rate for the outward/inward leg of the contract.
Tenor Code
The tenor code refers to the tenor of the floating rate code and currency combination that is to be associated with this leg of the contract.
Once you select the Rate Code, the code assigned to the tenor linked to the particular Rate Code will be displayed in this field. You can choose to change it by selecting another code from the available option list.
Spread (on a floating interest rate)
When the Rate Type of the particular leg of a contract is floating you can choose to specify a spread that is to be applied over the rate maintained in the ‘Floating Rate’ screen.
The Spread that you enter should be greater than or equal to the Minimum Spread and less than or equal to the Maximum Spread defined for the product that the contract involves.
If the spread you apply happens to be greater than the Maximum Spread, then the Maximum Spread will be applied on the rate. On the other hand, if it is less than the Minimum Spread defined for the product, the Minimum Spread will be picked up.
Rate
If you specify that the interest rate for this leg of the contract is ‘Fixed’, then you have to enter the actual rate of interest.
Flat Amount
If you have indicated the Rate Type is Special for this leg of the contract then you need to specify the Flat Amount
5.1.3 Details Tab
Once you enter the essential details of the derivative contract you have to enter the additional details that are required to process the contract. Click on the tab that corresponds to Detail.
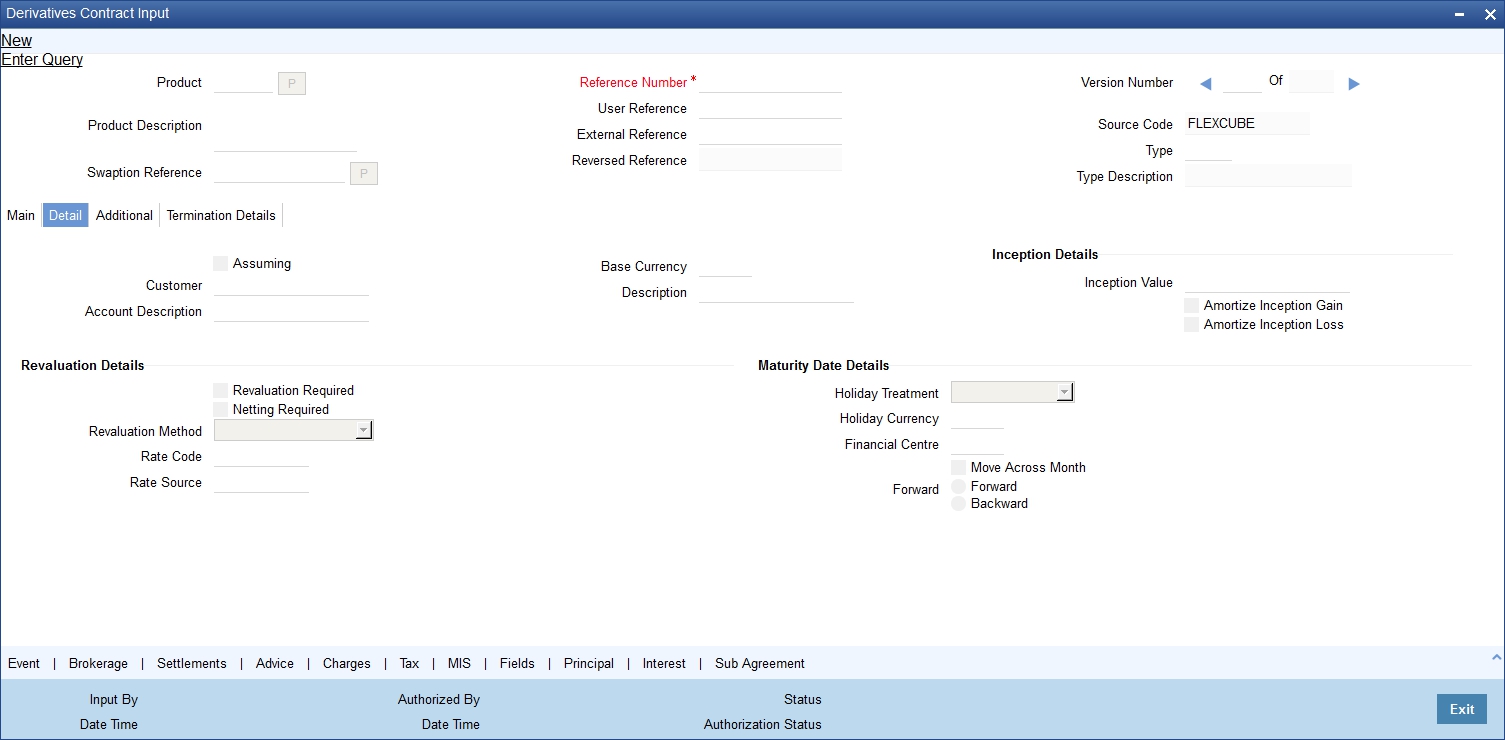
Specify the following details.
Assuming
If the contract you are processing has been assumed from another counterparty you are required to indicate so before you begin to specify the other details. Uncheck the box if you are processing a fresh contract. Currently this functionality not supported. But the check box is available in the screen. The functionality will be supported in future release.
Customer
If the counterparty from whom you are assuming the contract is a customer of your bank, indicate the name of the customer. When the counterparty is not in any way connected to your bank you need not specify the name.
Base Currency
Since you can maintain different currencies for both the in and out legs of the contract, you have to identify one single currency as the Base Currency of the contract. The base currency you specify will be used to compute the contract fair value to be used for revaluation purposes.
Revision Schedules
Revaluation is typically applicable to trade deals. The revaluation preferences that you made at the product level will be defaulted to the contract. You may change these preferences while processing the contracts.
If indeed revaluation is required for the contract being processed, it will be done according to revaluation method that you choose.
Note
Each of the revaluation methods have been thoroughly explained in the chapter on Defining the Fair Price revaluation methods.
Netting Required
This field indicates whether contracts with positive and negative MTM values can be netted for computing credit limit utilization.
After you specify the MA Code the other details linked to the code such as Limits Tracking Required, Netting Required and so on get defaulted to the contract.
Note
At the MA level if you have indicated that Netting is required and while entering the details of the contract you decide that netting is not required for that particular contract, then you will be allowed to uncheck this box.
However at the MA level if you have specified that netting is not required, then you will not be allowed to change this default at the time of entering the contract details.
Similarly, the way in which revaluation entries should be passed, whether at the leg level or at the contract level will also be defaulted from the ‘Product Preference’ screen.
At the product level if you have specified that revaluation netting is not required then you will not be allowed to change this at the contract level. However at the product level if you have indicated that revaluation netting is required, then you can change this to ‘Not Required’ at the contract level.
Rate Code
If you indicate that the revaluation should be based either on the Contract Specific Rate or on the Branch Specific Rate, then you have to indicate the Rate Code which should be used for the same purpose.
Rate Source
This is the Rate Source to which the Rate Code belongs. Select from the adjoining option list and indicate the Rate Source to which the Rate Code is to be linked.
Maturity Date Details
Specify the following details.
Holiday Treatment
As part of specifying the maturity date details you have to select the holiday handling treatment if the Maturity Date were to fall due on a holiday. You can specify that the holiday should be treated according to one of the following:
- Ignore the holiday
- Branch Holiday
- Currency Holiday
- Financial Center
Holiday Movement
You can also choose to move the maturity date falling due on a holiday either forward or backward to the next or the previous working day respectively. If not, the maturity date will be kept in the same month, on the last or first working day of the month, depending on whether the maturity date is over the month-end or the beginning of the month.
Holiday CCY
If you have specified that the Holiday Treatment should be as per your specifications in the Currency Holiday Calendar then you have to indicate the currency for which the holiday table should be checked.
Financial Centre
If you have indicated that the Holiday Treatment should be governed by the holiday calendar of the Financial Center then you have to indicate the code assigned to the Financial Center.
Inception Details
Specify the following details.
Inception Value
The inception value refers to the value of the contract at inception. This is applicable only in the of trade deals. You can either choose to amortize the gain/loss at inception or you can choose to ignore the same.
Note
Your preference at the product level regarding the amortization of inception gain and/or loss will be will be made applicable to the contract as well. However if you do not want to allow amortization for inception gain/loss for this particular contract you will be allowed to do so.
5.1.4 Additional Tab
You can capture the additional details of the contract by clicking the ‘Additional’ button.
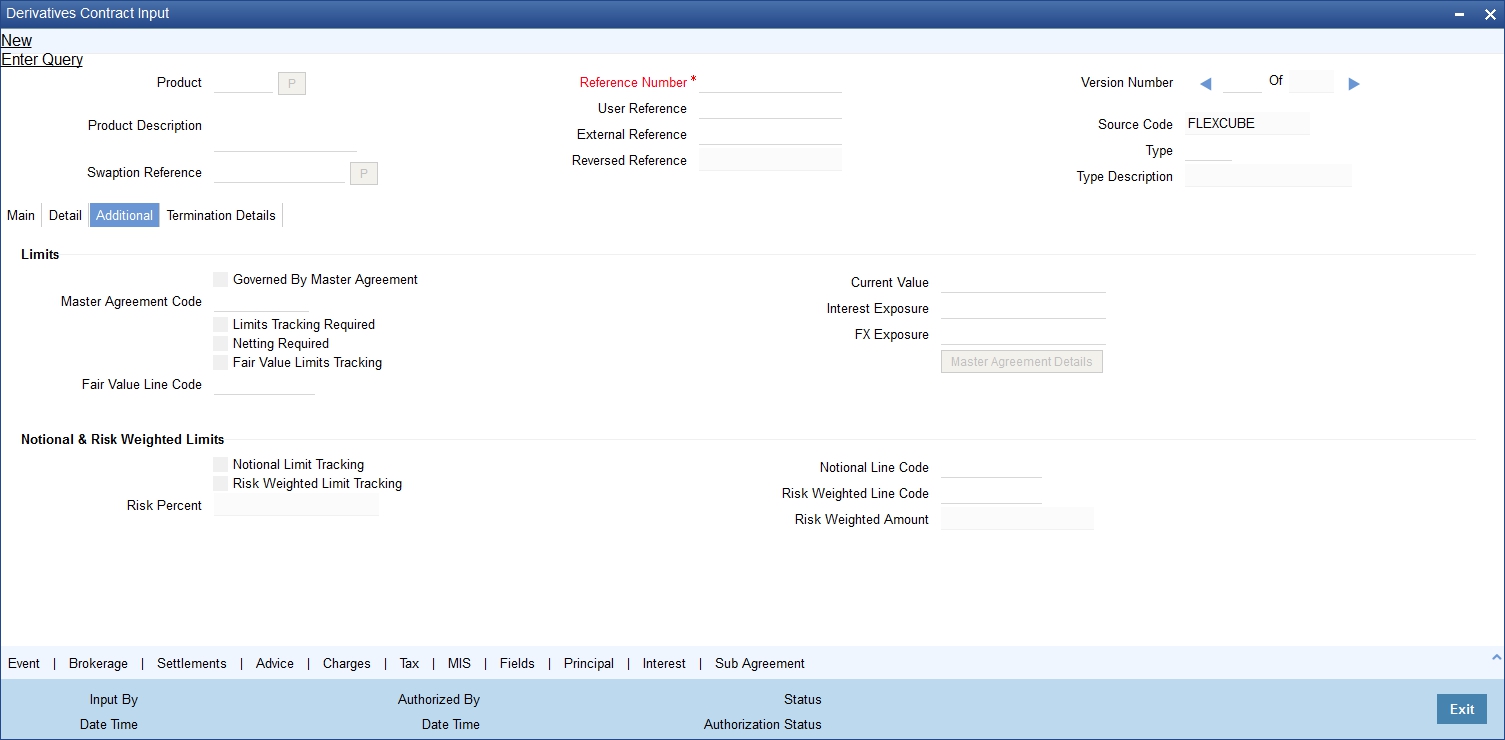
Specify the following details:
Limits
Governed By Master Agreement
Check this box to indicate that the contract for which you are capturing details comes under the purview of a master agreement that exists between your bank and the counterparty.
MA Code
If you have specified that the contract is governed by a master agreement then you have to indicate the code assigned to the Master Agreement in the ‘Master Agreement Maintenance’ screen.
After you choose the MA Code, the other details linked to the MA code, such as Limits Tracking Required, Netting Required and so on will get defaulted to the contract.
Note
If you input the MA Code, click ‘MA Details’ button. The system displays the related details for the MA code specified.
Limits Tracking Required
At the MA level if you have indicated that limit tracking is required and while entering the details of the contract you decide that tracking is not required then you will be allowed to uncheck this box.
However at the MA level if you have specified that limit tracking is not required then you will not be allowed to change this default at the time of entering the contract details.
Fair Value Limits Tracking
Check this option for fair value limit tracking is required.
Fair Value Line Code
This field is the Line Code for the Fair Value Limits tracking and will be defaulted from the master agreement maintenance once the master agreement is chosen.
This field is mandatory if the Fair Value Limits Tracking option is checked.
Current Value
The Current Value represents the current Mark-to-Market value of the contract. This value will change as and when the contract is revalued.
When you are entering a contract you may enter the inception value in this field. This will be taken as the current value of the contract.
Interest and FX Exposure
The likely increase in value in a contract during the contract tenor may be attributed to two factors:
- Interest Exposure - Exposure to fluctuation in interest rates.
- FX Exposure - Exposure to fluctuations in exchange rates only when foreign currency is involved.
Specify the interest and FX Exposure amounts.
Netting Required
Indicate whether contracts with positive and negative MTM values can be netted for computing credit limit utilization.
Notional & Risk Weighted Limits
You can specify whether Limit Tracking is required for the particular contract. The fields Fair Value Limit Tracking, Notional Limits Tracking and Risk Weighted Limits Tracking will be enabled only if Limit Tracking option is enabled. If the contract is governed by a Master agreement then if any of the three fields (Fair Value Limit Tracking, Notional Limits Tracking and Risk Weighted Limits Tracking) are checked in the Master Agreement, the Limit Tracking Required option will be checked at contract level.
The fields Notional Limits Tracking, Notional Line Code, Risk Weighted Limits Tracking and Risk Weighted Line Code are defaulted from the Master agreement maintenance if the contract comes under the preview of a Master agreement.
The Notional Line Code and Risk Weighted Line Code are mandatory if the Notional Limits Tracking and Risk Weighted Limits Tracking options are enabled, respectively.
For the line code, all valid lines for the counterparty and the product will be displayed in the option list.
On saving the contract, all the three lines selected will be validated for any restrictions based on product and currency. Oracle FLEXCUBE will also ensure that all line codes selected are distinct from each other.
Risk % and Risk Weighted amount will be calculated and shown in the screen as soon as the Risk Weighted Limits Tracking option is selected. These fields will be recalculated if the value date or the maturity date is amended.
Risk Weighted Amount will be calculated as follows:
Risk percent will be computed by comparing the tenor (Maturity date – Value date) of the contract with the tenor slabs in risk percent maintenance. Risk category used for comparison will be the risk category defined in customer maintenance for the counterparty of the derivatives and options contract. Product used for comparison will be the product for the contract. If there is no risk maintenance for the particular category and product, product will be replaced by ‘ALL’ and risk percent for contract tenor, customer category and product ‘ALL’ will be arrived at. Module used for find out the risk percent will be ‘DV’ for derivatives.
Various combinations possible for find out risk percentage in order of preference are:
DV + Customer Category + Product
DV + Customer Category + ALL
An error message will be raised if Risk Weighted Limit Tracking is checked and risk percentage cannot be arrived at.
Risk percent, once arrived at, will be stored and the contract level and will be used to compute the risk weighted amount for limit tracking. Any future amendment of risk percentage in risk percentage maintenance will not affect the risk weighted amount of the contract and it will remain the same throughout the life cycle of the contract.
Limits Utilization for the Notional Amount and the Risk Weighted amount will be done against the in leg currency for FRA, IRS and CCS.
5.1.5 Termination Details Tab
You can capture the termination details of the contract by clicking the ‘Termination Details’ button.
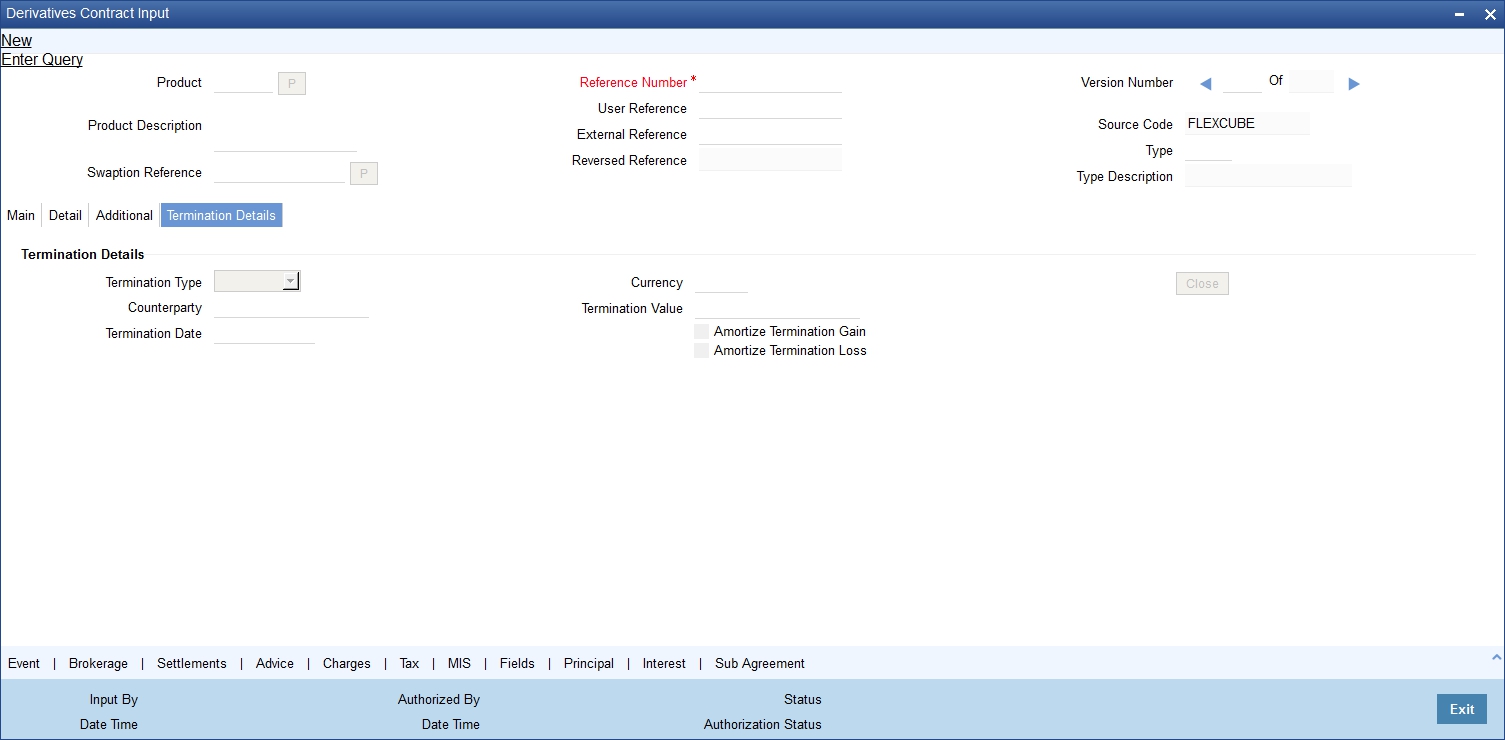
Specifying the following details:
Termination Type
When you are terminating a particular contract you have to indicate whether it s a normal termination or whether the contract is going to be assigned to another counterparty. In the latter case, you have to indicate the counterparty to which the contract is to be assigned.
Note
This would not be applicable when you are entering a new contract.
Counterparty
If the contract is to be assigned to another counterparty then you can indicate the ID of the counterparty to whom the contract is to be assigned.
Termination Value and Currency
If there has been any gain or loss due to termination you have to indicate the gain or loss in value by specifying a positive or negative amount and the currency in which the termination gain or loss should be settled.
You can either choose to amortize the termination gain/loss or you can choose to ignore the same.
Termination Date
You must specify the Termination Date. Termination can either be back-valued, current dated or future-valued. The date that you specify should adhere to the following conditions:
- For FRA contracts, the termination date should be between the Booking Date (inclusive) and the Value Date (exclusive). For IRS/CCS contracts the termination date can be anywhere between the Booking Date (inclusive) and Maturity Date (exclusive). Any deviation from these conditions will result in an error message.
- If you are specifying a back-dated termination for an IRS/CCS contract, ensure that the termination date is not greater than the most recent schedule settlement date that has been executed.
- The termination date is defaulted as the System date. You can modify this date. Ensure that you do not leave this field blank.
- When you save the contract after specifying the Termination Date, DTRB event is triggered. No accounting entries are passed for this event. The contract status remains active after DTRB and a new version is created.
- For FRA contracts, if Settlement Message generation (SGEN) for liquidation has been triggered before Termination Booking (DTRB), an override is displayed while saving the contract after entering the Termination Date.
- If the DTRB event has been triggered for a contract, you cannot terminate the contact again.
- For a back-valued termination, or termination on application date, the Termination event (DTER) is triggered along with the event DTRB when you save the contract. The SGEN for Termination is fired on authorization.
- For future-dated termination, the termination event (DTER) is triggered during EOD/BOD on the respective date.
Note
Your specification in the ‘Product Preferences’ screen about the amortization of termination gain/loss the will be defaulted on to the contract. At the product level if you have set this preference as No then you will not be allowed to change this to Yes at the contract level. However, if you have set the preference as Yes then you can change this to No at the contract level.
5.1.6 Event Button
Click ‘Event’ button from the ‘Contract Input Details’ screen, to view details of events involved in the transaction.
The details of events that have already taken place for the transaction leg will be displayed, along with the date on which the event took place.
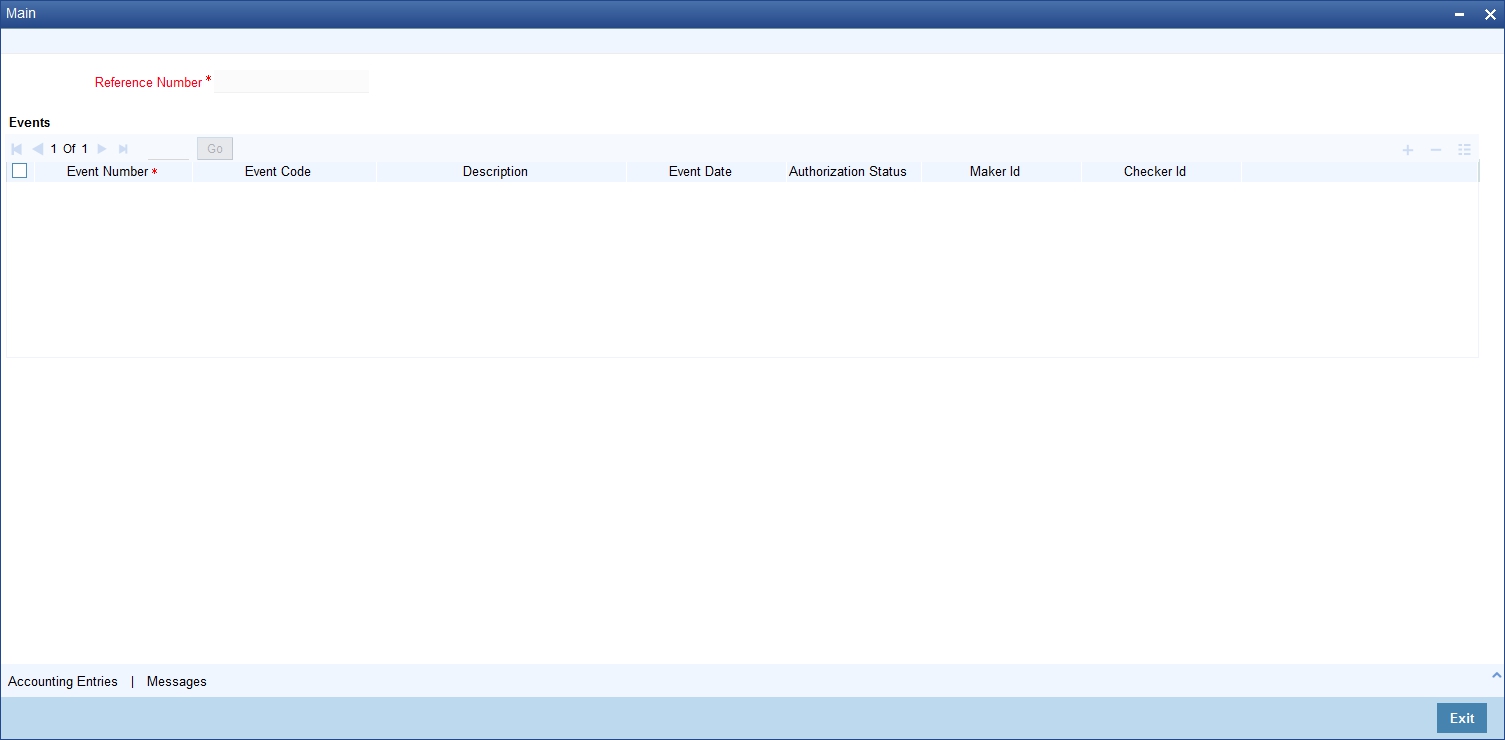
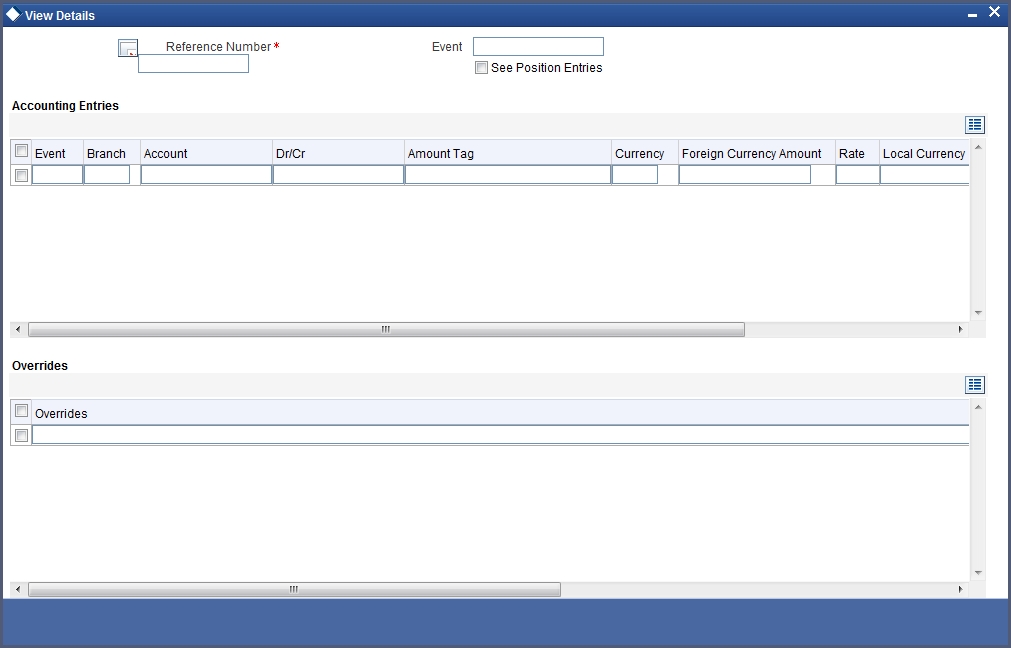
You can view the accounting entries details for a specific event by choosing the event and clicking ‘Accounting Entries’ button.
5.1.7 Brokerage Button
When capturing the details of a contract that involves brokerage, you will have to specify the brokerage details applicable to the contract. To recall, you have already specified the name of the broker through whom the contract was brokered in the ‘Derivatives Contract Input’ screen. The details specified for the broker including the brokerage rule linked to the broker, is defaulted. However, you can change some details, like - whether brokerage should be booked in advance, in arrears or whether it should be waived altogether.
Click ‘Brokerage’ button to define the brokerage details that are applicable to the contract leg you are processing. You will be allowed to enter details of a broker only if brokerage was allowed for the product to which the contract is associated.
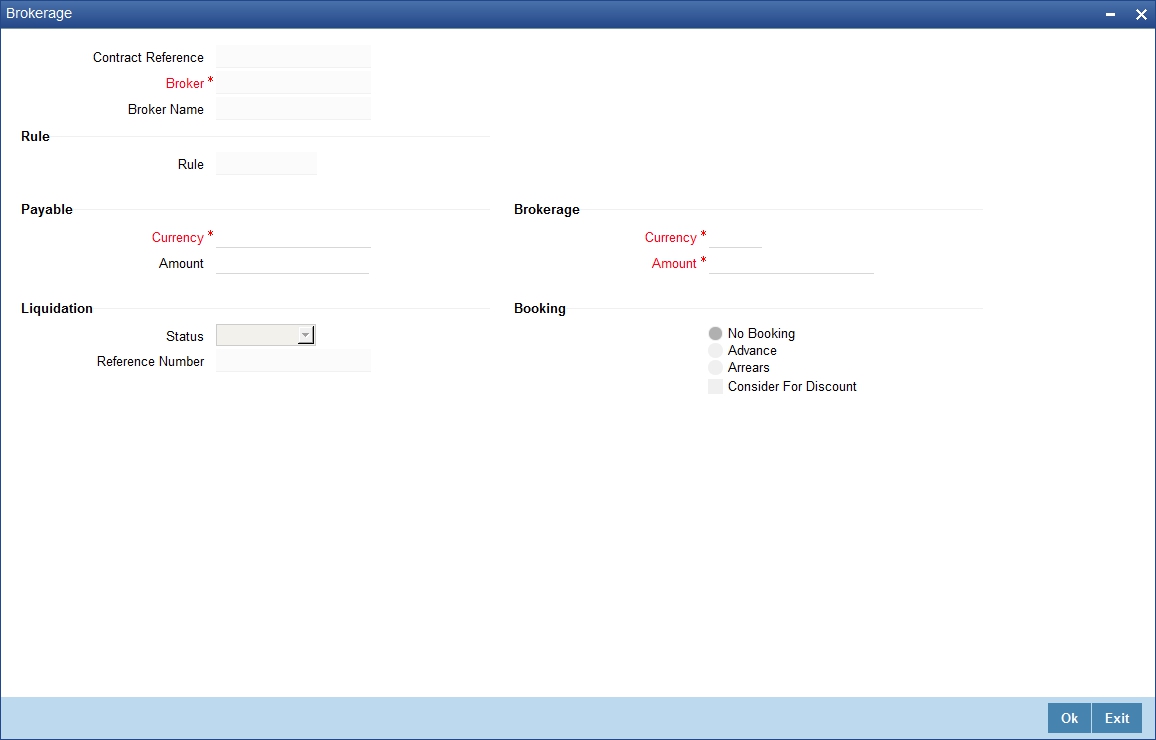
The code assigned to the broker through whom the deal was brokered is displayed along with the broker’s name.
Payable/Brokerage
Currency
If the brokerage payable currency is the same as the brokerage paid currency, then the same amounts (brokerage paid and brokerage payable) are displayed against the currencies. You have the option to change these currencies.
Amount
While you cannot input the brokerage payable amount, the brokerage paid amount can be changed.
The following brokerage details are displayed:
- The brokerage liquidation status. If it has been liquidated, the liquidation reference number is also displayed.
- The rule code and description that has been linked to the broker.
Booking
You can indicate preferences as to when the brokerage applicable to the contract should be linked. The options available are:
- No Booking
- Advance
- Arrears
Consider for Discount
Check this option if the brokerage charges are considered for discount.
The preference specified for the broker will be displayed. You can change it in this screen, say, from advance to arrears or vice-versa.
You have a third option. That is, of waiving brokerage. If you opt for no booking, no accounting entries will be passed for brokerage for this deal.
Note
If you invoke the ‘Contract Brokerage Details’ screen for operations like delete, change, authorize, liquidate and detailed view, this screen will only display brokerage details. You can change brokerage details for a deal only if you have clicked the Modify option from the Actions Menu.
5.1.8 Settlements Button
In order to capture the details of a contract successfully you have to capture the following details as well.
- The accounts to be debited for charges, if there are any.
- The accounts to be debited for interest that the contract involves.
- The method in which the contract is to be settled - whether it is an instrument or a Message (as in a SWIFT or TELEX message).
- Details about the route through which the money settlement should take place.
The information that is related to the settlement method and route applicable for a transfer is referred to as Settlement Instructions.
The Settlement Instructions are captured through four different screens. Click ‘Settlements’ button in the ‘Contract Input Details’ screen to invoke the ‘Settlement Instructions’ screen. Through the four screens you can capture the following information:
- Account details (details about the accounts involved in the contract that have to be either debited or credited in your branch)
- Message details
- Party details (details about the various parties involved in the
contract)
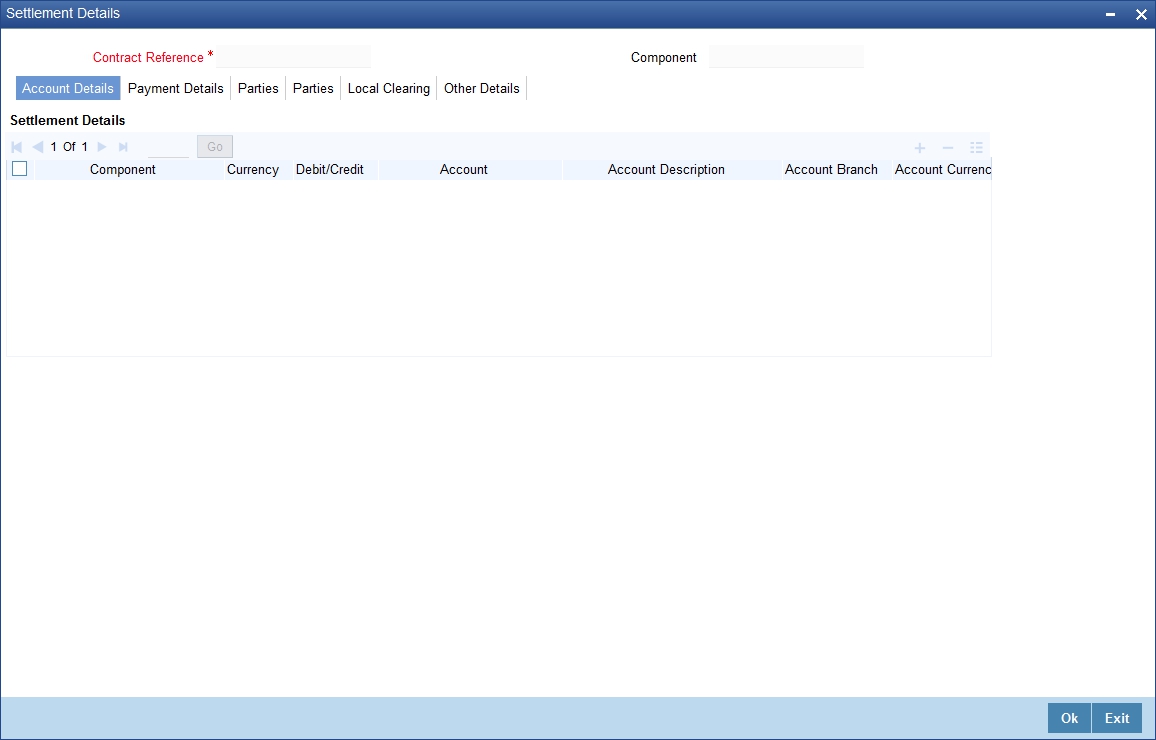
5.1.8.1 Account Details Tab
For the various components involved in a transaction like charges etc you have to specify the account details in this screen. These details include the component, the currency in which it is paid, the payment account and its currency, the branch of your bank to which the account belongs, the exchange rate (in the case of the component currency being different from the account currency).
Depending on the component, the system will also display whether the account involved in an entry has to be debited or credited:
- P indicates you credit (Pay to) the account involved.
- R indicates you debit (Receive from) the account involved.
5.1.8.2 Message Details Tab
A transaction can be settled either in the form of an instrument (a Demand Draft, a Manager’s Check or a Check) or a Message (a S.W.I.F.T, TELEX or Mail message to be sent to the receiver). The details regarding the instrument or message have to be specified in the ‘Message Details’ screen.
The message details that you specify here are applicable only for S.W.I.F.T. The type of S.W.I.F.T. message that is generated depends on the parties involved in the contract.
Depending on the method in which you want to settle the transaction, you should input either Instrument or Message details.
Specifying Instrument Details
For a transaction that is being settled through an instrument, you should specify the type of instrument being used. It could be Manager’s Check, Check or a Demand Draft. You should also specify the number that will identify the instrument. This number will be printed on the instrument.
If the settlement is through an instrument, you cannot specify party details for the transaction.
Specifying Message Details
For a SWIFT message, you have to specify:
- Whether a Cover has to be sent to the Reimbursement Bank, along with the payment message to the receiver.
- Bank to bank payment details, (these can be in the form of instructions or additional information to any of the parties involved in the transaction).
- Information from the sender to the receiver.
5.1.8.3 Party Details Tab
To effect a transaction, you may have to pass on funds through a series of banks before it actually reaches the ultimate beneficiary. Through the two ‘Parties’ screens you can capture details of all the parties that will be involved in settlement of the transaction.
These screens contain fields that explore the possible routes in which the transaction components can be transferred.
Intermediary Reimbursement Institution
An Intermediary Reimbursement Institution is the financial institution between the Sender’s Correspondent and the Receiver’s Correspondent, through which the reimbursement of the transaction will take place.
Intermediary
The Intermediary in a transaction refers to the financial institution, between the Receiver and the Account With Institution, through which the transaction component must pass.
The Intermediary may be a branch or affiliate of the Receiver or the account with Institution, or an entirely different financial institution. This field corresponds to field 56a of S.W.I.F.T.
Here you can enter either the:
- ISO Bank Identifier Code of the bank or the
- Name and address of the Bank.
Receiver’s Correspondent
The Receiver’s Correspondent is the branch of the Receiver or another financial institution at which the funds will be made available to the Receiver. This field corresponds to field 54a of S.W.I.F.T. You can enter one of the following:
- ISO Bank Identifier Code of the bank
- The branch of the Receiver’s Correspondent
- Name and address of the Receiver’s Correspondent
Account With Institution
An Account With Institution refers to the financial institution, at which the ordering party requests the Beneficiary to be paid. The Account With Institution may be a branch or affiliate of the Receiver, or of the Intermediary, or of the Beneficiary Institution, or an entirely different financial institution.
This field corresponds to field 57a of S.W.I.F.T. You can enter one of the following:
- ISO Bank Identifier Code of the bank
- The branch of the Receiver’s Correspondent
- Name and address of the Receiver’s Correspondent
- Other identification codes (for example, account number)
Ordering Institution
The Ordering Institution is the financial institution, which is acting on behalf of itself, or a customer, to initiate the transaction. This field corresponds to 52a of S.W.I.F.T.
In this field you can enter one of the following:
- The ISO Bank Identifier Code of the Ordering Institution.
- The branch or city of the Ordering Institution.
- The Name and address of the Bank.
Ordering Customer
The Ordering Customer refers to the ordering customer of the transaction. Here you can enter the name and address or the account number of the Customer, ordering the transaction. This field corresponds to field 50 of S.W.I.F.T. You will be allowed to enter details in this field only if you have initiated a customer transfer (MT 100 and MT 202).
Beneficiary Institution
Here, you can enter details of the institution in favor of which the payment is made. It is in reality the bank that services the account of the Ultimate Beneficiary. This field corresponds to field 58a of S.W.I.F.T.
You will be allowed to make entries into this field only for Bank Transfers (when the remitter and beneficiary of the transfer are financial institutions - MT 100 or MT 202). Here you can enter either:
- The ISO Bank Identifier Code of the Beneficiary Institution; or
- The Name and Address of the Beneficiary Institution.
Ultimate Beneficiary
The Ultimate Beneficiary refers to the Customer to whom the transaction amount is to be paid. This field refers to field 59 of S.W.I.F.T. You can make entries into this field only for a customer transfer (MT 100 and MT 202).
The number of banks involved in the transfer would depend on the:
- Relationships and arrangements between the sending and receiving banks
- Customer instructions
- Location of parties
- The banking regulations of a country
Refer to the Settlements User Manual of Oracle FLEXCUBE for more details.
5.1.9 Advice Button
Click ‘Advice’ button from the ‘Contract Input Details’ screen. The ‘Advices’ screen will be displayed. To recall, the advices that can be generated for the events that occur during the life-cycle of a contract are defined for the product to which the contract is associated and are generated after the authorization of the product.
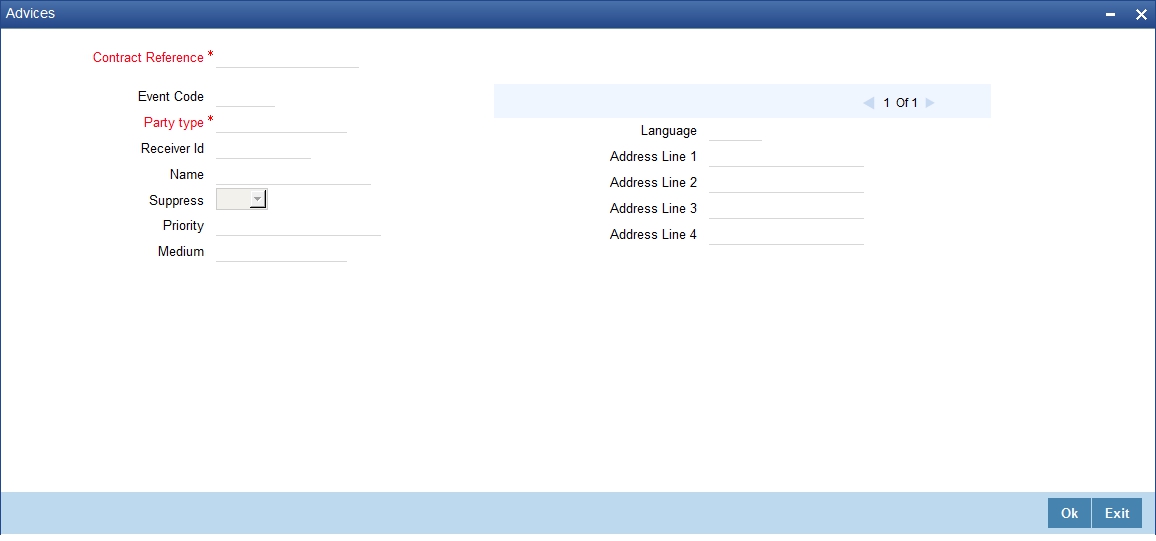
The details of the advices applicable for an event are displayed in the ‘Advices’ screen.
Party Type
The party type to whom a specific advice should be sent is picked up automatically based on the type of contract you are entering and the parties specified in the contract.
The address of the party who is the recipient of the message will be picked up by default, based on the media and address maintenance for the party. You can change either of them.
For a payment message by SWIFT, you also have the option to change the priority of the message.
Receiver ID
Specify the Customer to whom the Advice is being dispatched.
Suppress
By default, all the advices defined for a product will be generated for contracts involving it. If any of the advices are not applicable to contract you are processing, you can suppress its generation.
Priority
For a payment message by SWIFT, you also have the option to change the priority with which the message should be generated. By default, the priority of all advices is marked as Normal.
You have the option to prioritize a payment message to one of the following options:
- Normal
- Medium
- High
Medium
The medium through which an advice is transmitted and the corresponding address will be picked up based on the address and media maintained for the customer who is the recipient of the message.
You can, however, change either of these while processing the contract. Typically, if changed, both of them will be changed.
5.1.10 Interest Button
Just as you maintain principal schedule details for the in and out legs of the contract so also you are required to indicate the interest schedule, interest revision schedule and accrual related details for every contract that you process.
Click ‘Interest’ button while maintaining details of either the in leg or the out leg. The ‘Contract Interest Schedules’ screen will be displayed.
As a result of linking a product to a contract all the product specific preferences defined at the product level will be inherited by the contract. These preferences include the interest accrual preferences, liquidation preferences and the schedules for the various interest and revision interest components.
Note
Except for the interest accrual frequency, which you have defined at the product level you will be allowed to modify all the other preferences (accrual as well as liquidation) to suit the contract you are processing.
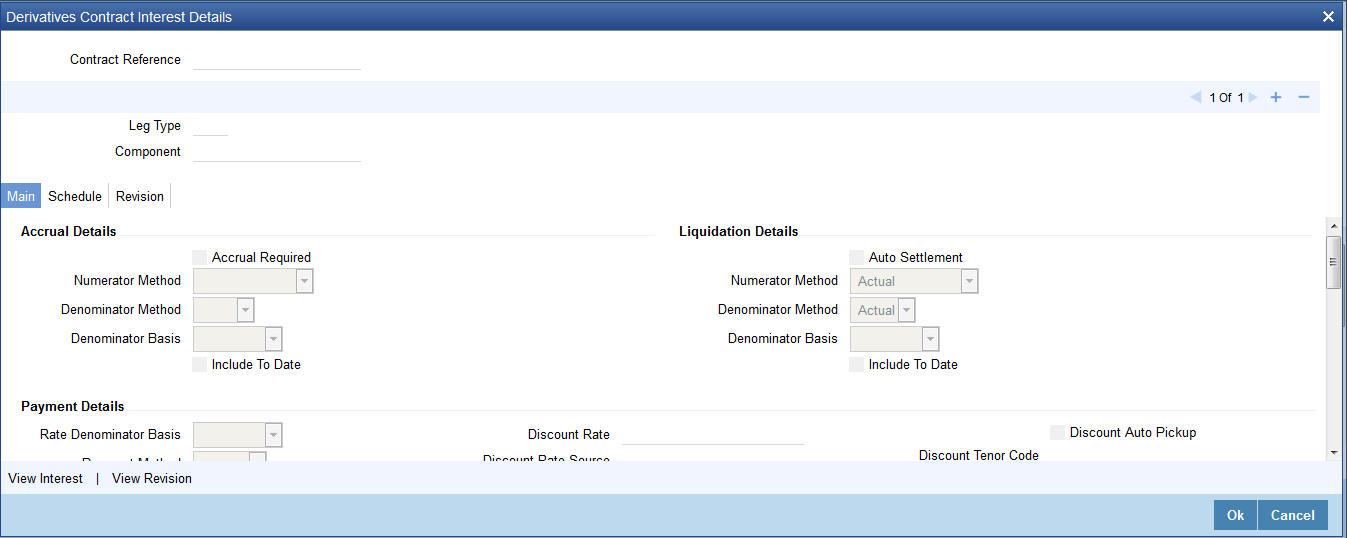
5.1.10.1 Main Details Tab
Accrual and Liquidation Details
Specify the following details:
Accrual Required
You can choose not to accrue interest for a particular contract although you have indicated this preference at the product level.
For instance when you are processing a trade deal interest accrual details are not required since trade deals are always revalued. In the ‘Interest Details’ screen you can indicate that interest accrual is not required for the specific contract by disabling the option.
However if indeed interest accrual is required for the contract you are processing and you merely want to change the accrual related details such as the interest calculation method, the basis on which interest is to be calculated for the accrual period, you will be allowed to do so.
The accrual function when run as part of the batch process run at EOD, calculates the accrual amount and passes accrual accounting entries for the accruable interest components of a derivative contract. The function will pick up derivative contracts for processing on the following criterion:
- Active and authorized contracts which are yet to be liquidated.
- Contracts whose accrual date falls on the current processing date or contracts whose accrual date falls between the current processing date and the next working date.
The date on which accrual is due for a contract is calculated based on the accrual date and accrual frequency defined for the product associated with the contract. .
If the accrual date of a bill falls on a holiday, the accruals are done as per your holiday handling specifications for automatic processes.
Denominator Method
Indicate the denominator type to be used.
Denominator Basis
You need to indicate the basis on which the denominator has to be computed. The options available are:
- Per annum
- Per period
Auto Settlement
When setting up a product you specify the whether the mode of liquidation should be automatic or manual for the different components of contracts linked to that product. In this case only automatic settlement is supported.
Include To Date
While calculating interest for the accrual period you have to indicate whether you would like to take into account the last day in an accrual period, for arriving at the accrual days both for the in and out legs of the contract.
Similarly you have to indicate whether the last day in a liquidation period should be considered for liquidation.
Refer the Chapter ‘Defining Attributes specific to Derivative Products’ for details on Numerator and Denominator Methods
Payment Details
Specify the following details.
Rate Denominator Basis
You need to indicate the basis on which rate denominator has to be computed. The options available are:
- Per annum
- Per period
Note
If you are specifying in leg details then indicate the in leg rate denominator basis. While defining out leg details indicate the out leg rate denominator basis.
Payment Method
You can indicate the method in which interest components for both the in as well as the out legs of the contract should be paid. You can indicate one of the following:
- Arrears - interest is liquidated at the end of each interest period.
- Advance - interest is paid at the start of each interest period.
Discount Rate Basis
When you decide to pay interest in Advance, you have to indicate the basis on which the interest rate should be picked up to compute the discounted amount. You can select any one of the following options:
- Direct Input
- Contract Floating Component
- Other Floating Component
If you select the first option then you have to manually enter the rate at which interest is to be discounted. When the discount rate basis is the Floating Component you have to specify the Floating Component based on which interest is to be discounted
If your choice to discount the rate basis is the Other Floating Component, you have to indicate the rate source linked to the rate, the tenor associated with the rate, as well as the spread that is to be applied over the rate maintained in the ‘Floating Rates’ screen. Based on these parameters the discount rate will be calculated.
Discount Rate
Specify the rate at which interest is to be discounted, if the discount rate basis is Direct Input.
Floating Component
Indicate the Floating Component based on which interest is to be discounted, if you have indicated that the discount rate basis is Contract Floating Component.
Discount Auto Pickup
Check this box to indicate whether the discount rate should be automatically picked up by the system from the ‘Floating Rates’ screen depending on the other parameters you have specified such as the discount rate source, rate code, tenor code and the rate spread.
Discount Rate Source
If your choice for the discount rate basis is the Other Floating Component, then you have to indicate the Rate Source linked to the Rate Code based on which the discount rate is to be calculated.
Discount Rate Code
Specify the discount rate code. You can also select the rate code from the adjoining option list. The list displays all the valid codes maintained in the system.
Discount Tenor Code
If your choice for the discount rate basis is the Other Floating Component, then you have to indicate the tenor code associated with the rate Code based on which the discount rate is to be calculated.
Discount Rate Spread
For the floating component you can specify the Spread that you want to apply over the rate maintained in the ‘Floating Rates’ screen.
Note
The Spread you apply should always be greater than or equal to the Minimum Spread and less than or equal to the Maximum Spread defined for the product involved in the contract. If the spread happens to be greater than the Maximum Spread, then the Maximum Spread will be applied on the rate. On the other hand, if it is less than the Minimum Spread defined for the product, the Minimum Spread will be picked up.
For a floating rate, the spread will be applied over the market rate applicable for the day.
Interest Rate Details
Specify the following details.
Rate Type
The interest rate type paid on derivative settlements can be any one of the following types:
- Fixed
- Floating
- Special
Interest Rate
When you maintain a fixed interest rate for a particular component of the interest leg of a contract it is necessary that you specify the rate.
Flat Amount
When the interest rate is special you have to indicate the Flat Amount. Moreover if the derivative you are processing happens to be a commodity type of derivative instrument you have to indicate whether the flat amount specified is per unit of the derivative.
Waiver
Check this box if you would like to waive this component. Else leave this box unchecked.
Rate Source
Indicate the Source from which the Rate Code is to be taken. The Rate Code option list is populated depending on your selection of the rate source.
Rate Code
If the Rate Type you have specified is ‘Floating’, then indicate the Rate Code that is to be associated (from the ‘Floating Rates’ screen) with the interest leg of the contract.
Tenor Code
Once you specify the Rate Code, you have to indicate the Tenor Code that is to be linked to the particular Rate Code.
Interest Spread
You can choose to apply a spread over and above the rate maintained in the ‘Floating Rates’ screen.
This Spread should be greater than or equal to the Minimum Spread and less than or equal to the Maximum Spread defined for the product that the contract involves.
If the spread you apply happens to be greater than the Maximum Spread, then the Maximum Spread will be applied on the rate. On the other hand, if it is less than the Minimum Spread defined for the product, the Minimum Spread will be picked up.
Main Component
In Oracle FLEXCUBE you can define any number of tenor based interest components for every contract that you process. Therefore it is essential that you identify one interest component as the Main Component. This component will be used for amortization purposes.
Note
For the main component the Rate Type will be defaulted from the ‘Contract Input Maintenance’ screen. For all the other components the Rate type that you indicate will determine whether the particular in or out leg interest component (depending on which leg details you are specifying) is fixed, floating or special.
External Pricing
If the interest class linked at the product is enabled for external pricing, then during Contract input external pricing will be checked for that particular interest component in interest call form.
For the interest component enabled for external pricing, system will fetch either fixed rate or spread (where rate code is maintained) from external pricing and billing system and the same will be displayed in the External Pricing multi grid.
5.1.10.2 Schedule Details Tab
The schedule preferences that you specify at the time of creating the product like the frequency of schedules, the unit of frequency and so on, will be defaulted to the contract. You will be allowed to change these preferences for the contract you are processing.
Interest liquidation process will pass netted entries for in leg and out leg schedules only if the in leg interest liquidation date matches with the out leg liquidation date. To facilitate netting for asynchronous schedules netting amount tags should be separately maintained at the product level.
Please refer to the Annexure A – Accounting Entries and Advices manual for details on maintaining the netting amount tags.
Note
Netting for Asynchronous schedules is possible only for Interest Rate Swaps (IRAs) and not FRAs and CCS.
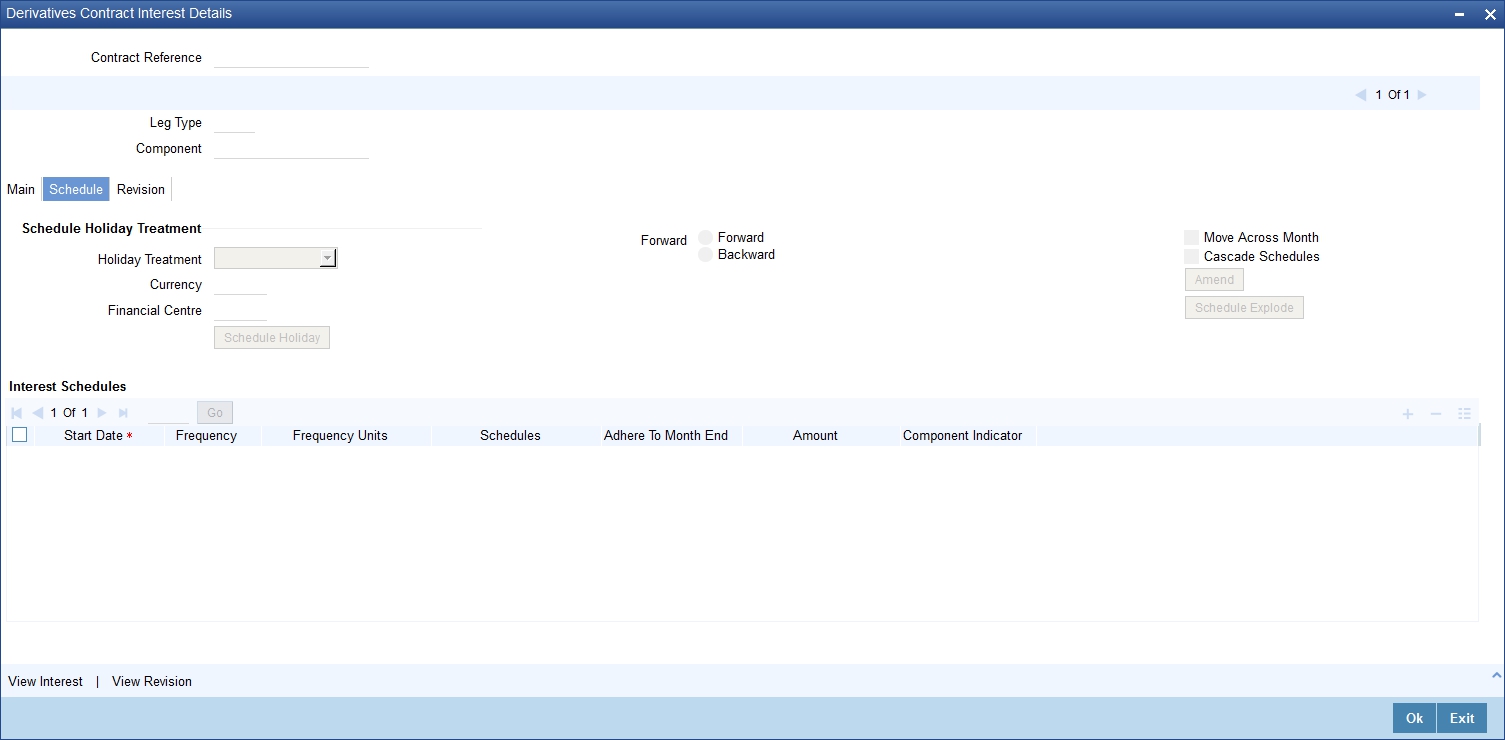
Schedule Holiday Treatment
You have to specify the holiday treatment that has to be followed when schedules fall due on a holiday. The holiday treatment method has been explained at length in the earlier section on Indicating Principal Schedule Details.
Interest Schedules
Specify the following details.
Start Date
Enter the date on which the particular interest schedule should start.
Frequency
If you want to define periodic interest schedules, you should indicate the frequency of the schedules for a particular interest component. From the option list provided, you can select one of the following by clicking on the option:
- Daily
- Weekly
- Monthly
- Quarterly
- Half-yearly
- Yearly
- Bullet
Note
You can choose to have a bullet schedule for a particular interest component in which case liquidation for the component will happen only as of the Maturity Date.
Frequency Units
You can specify the number of units of the frequency in this field. The number that you specify here will determine the actual schedule frequency.
For instance for a particular schedule you want to have a bi-weekly frequency. The option list available for Frequency does not have this option. In the Frequency field, indicate the option ‘Weekly’ and in the Frequency Unit field if you enter 2, the particular schedule will be due every once in two weeks.
Number of Schedules
For a particular Frequency and Frequency Unit combination you can choose to have a number of schedules depending on how many you want to define for the particular interest component.
For instance, for a particular schedule you have indicated that the Frequency should be Weekly and the Frequency Unit as 2. Subsequently you indicate that the Number of Schedules as 12. This particular schedule will be run once in two weeks twelve times.
Adhere To Month End
If the interest liquidation schedule is in terms of a month, you can choose to indicate whether the schedule days should adhere to Month-Ends.
Check this box to indicate that interest schedules should adhere to month ends.
Amount
If the interest schedules you are defining are for a special type of interest component then you have to indicate the interest amount for the particular special component.
Compounding Indicator
Check this box to indicate that the interest amount should not be repaid but should be added on to the principal amount at the end of the contract period.
Leave it unchecked to indicate that the interest repayment should be liquidated on the schedule end date.
5.1.10.3 Revision Details Tab
The revision schedules are maintained in the ‘REVISION’ tab of the screen.
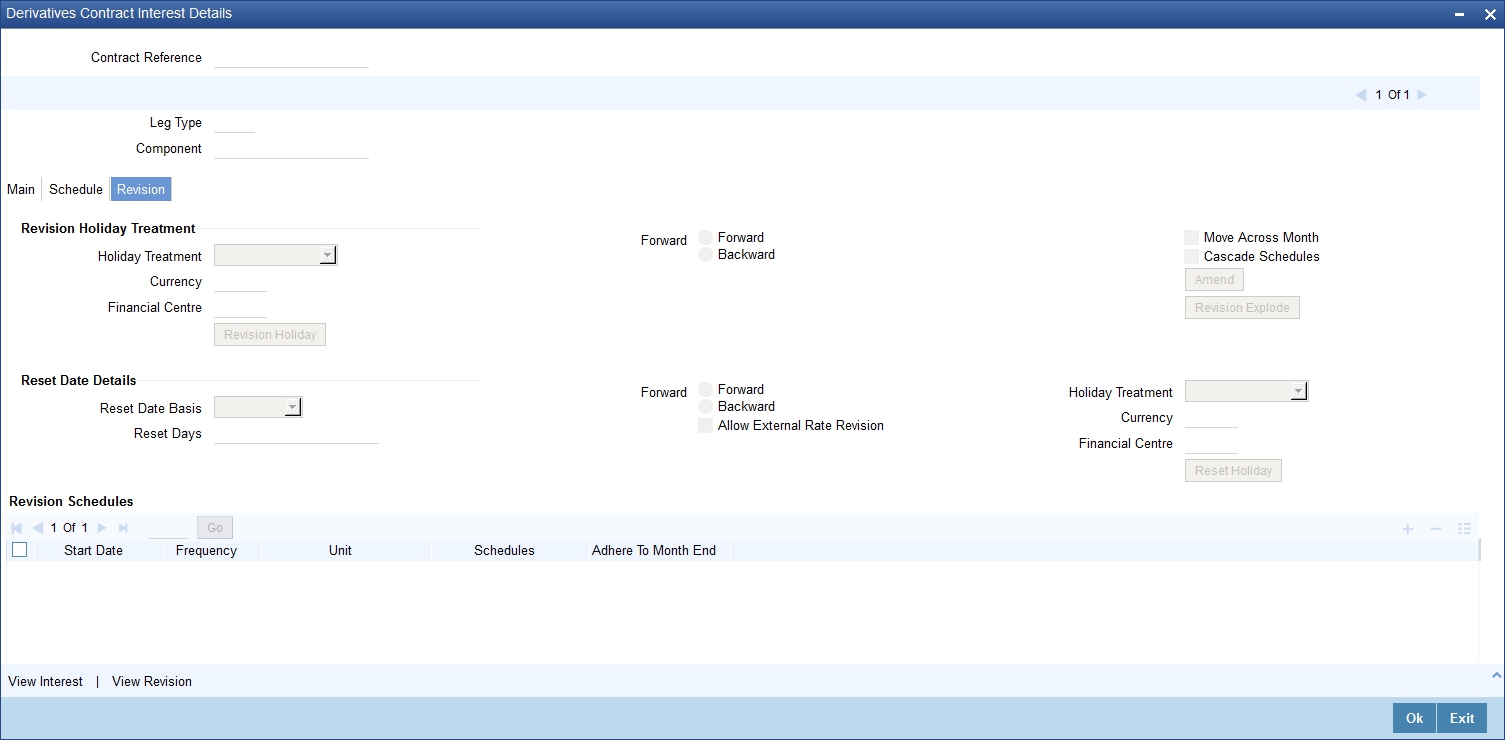
Revision Holiday Treatment
You have to specify the holiday treatment that has to be followed when schedules fall due on a holiday. The holiday treatment method has been explained at length in the earlier section on Indicating Principal Schedule DetailsHoliday Treatment
Reset Date Details
Specify the following details.
Reset Date Basis
Since the floating interest rates are entirely dependent on the market conditions you can periodically reset the floating rate for each interest component over the tenor of the contract.
For this purpose you need to specify the date basis on which interest rates should be reset. The following options are available:
- Start Date - the rate will be refreshed as of the start date of the schedule depending in the reset movement and the reset days.
- End Date.- the rate will be refreshed as of the start date of the schedule depending in the reset movement and the reset days indicated.
- Other - you can also specify any other date basis as the reset date basis.
Reset Date Movement
After you specify the basis on which rate should be reset you have to indicate whether the reset movement should be backward or forward from the schedule Start/ End Date or any other date.
Allow External Rate Revision
Checking this option indicates that for a contract, you can allow rate revision based on the rates uploaded from an external system. If the option is checked but no rate is uploaded for the contract, the rate would be picked up from the maintenance.
Reset Days
For the reset basis and reset date movement specified you have to indicate the number of days before or after the start/end or any other date that should be used to determine the rate reset date.
For example,
Scenario 1:
The Start Date of a revision schedule is 01 Jan 2000. The other specifications you make are as follows:
Specifications |
|
Details |
Reset Date Movement |
: |
Forward. |
Reset Days |
: |
2. |
As per your specifications the floating rate will be reset two day after the start date of the schedule, This will be on the 3rd of January 2000.
Scenario 2:
The End Date of a revision schedule is 31 Jan 2000. The other specifications you make are as follows:
Specifications |
|
Details |
Reset Date Movement |
: |
Backward. |
Reset Days |
: |
5. |
As per your specifications the floating rate will be reset five days before the start date of the schedule, This will be on the 26th of January 2000.
Scenario 3:
The revision schedule for a particular component is from 1st January 2000 to 1st February 2000. The other specifications you make are as follows:
Specifications |
|
Details |
Reset Date |
: |
16th Jan 2000. |
Reset Date Movement |
: |
Backward. |
Reset Days |
: |
1. |
The floating rate will be reset on the 15th of January 2000.
Note
If a particular reset date falls on a holiday then you are required to indicate the way in which the holiday should be treated.
Revision Schedules
Specify the following details.
Start Date
Specify the date on which the particular interest revision schedule should start
Frequency
If you want to define periodic interest revision schedules, you should indicate the frequency of the revision schedules for a particular interest component. The options are:
- Daily
- Weekly
- Monthly
- Quarterly
- Half-yearly
- Yearly
- Bullet
If you prefer to keep the revision schedules as bullet then the particular interest component will be liquidated only as of the Maturity Date.
Frequency Units
You can specify the number of units of the frequency in this field. The number that you specify here will determine the actual schedule frequency.
For instance for a particular schedule you want to have a bi-weekly frequency. The option list available for Frequency does not have this option. In the Frequency field indicate the option Weekly and in the Frequency Unit field if you enter 2, the particular schedule will be due every once in two weeks.
Number Of Schedules
For a particular Frequency and Frequency Unit combination you can choose to have a number of schedules depending on how many you want to define for the particular revision component.
For instance, for a particular schedule you have indicated that the Frequency should be Weekly and the Frequency Unit as 2. Subsequently you indicate that the Number of Schedules as 12. This particular schedule will be run every two weeks twelve times.
Adhere To Month End
If the interest revision schedule is in terms of a month, you can choose to indicate whether the schedule days should adhere to Month-Ends by checking this option.
Contract Rate Revision
During rate revision, the system picks up the floating rate applicable on the contract. If the ‘Related Component’ (spread) is not zero, the interest rate of the related component is also picked up as part of rate revision. This floating rate along with the spread is then compared with Cap or Floor rate depending on the Interest Type specified for the contract, to arrive at the final rate.
The manner in which the system determines the final rate for each of the four interest types is given below:
- For Interest Type ‘Cap’, if the total floating rate arrived at by the system plus interest rate of related component is greater than Cap Rate, the final rate is taken as the Cap Rate minus interest rate of related component, if the same is specified. If related component is not selected, the final rate will be Cap Rate minus the spread part. Rate of related component cannot be more than the Cap Rate.
- For Interest Type ‘Floor’, if the total floating rate is less than the Floor Rate and if Related Component is specified, the final rate will be taken as Floor Rate minus interest rate of the Related Component. If Related Component is not maintained, final rate will be the Floor Rate minus the spread component.
- If Interest Type is ‘Corridor’ then, final rate will lie between the Floor Rate and Cap Rate. If the final rate is above Cap Rate, then final rate is decided as in the case explained for Cap interest type (where spread is zero). Similarly, if the final rate is below Floor Rate, final rate is decided as explained for the Floor interest type above.
- If the interest type is ‘Normal’, both final rate as well as the spread will be taken as it is. Also, Related Component will not be applicable in this case.
5.1.11 Charges Button
For each leg of the transaction you can specify the charges that you levy. Charges are applicable only the for customer legs of a transaction.
The characteristic feature of a charge is that it is always booked in advance and is not accrued, as a charge is collected only when it is due.
To recall, you have defined the attributes of a charge by defining a Charge Rule in the ‘ICCF Rule Definition’ screen. A rule identifies the basic nature of the charge. You have further defined a Charge class in the ‘Charge Class Maintenance’ screen where you have enriched the attributes of a rule. We shall refer to these classes as components.
Each charge component in turn is linked to a product. All the charge components linked to a product are defaulted to the contracts associated with it. Thus each time you enter a contract, you need not specify when and how charges should be collected.
However, while capturing the details of a transaction, you can choose to associate a component to the transaction. Further, you can modify some of the attributes defined for the applicable component.
From the ‘Contract Input Detail’ screen, click ‘Charges’ button. The ‘Charge Detail’ screen will be displayed.
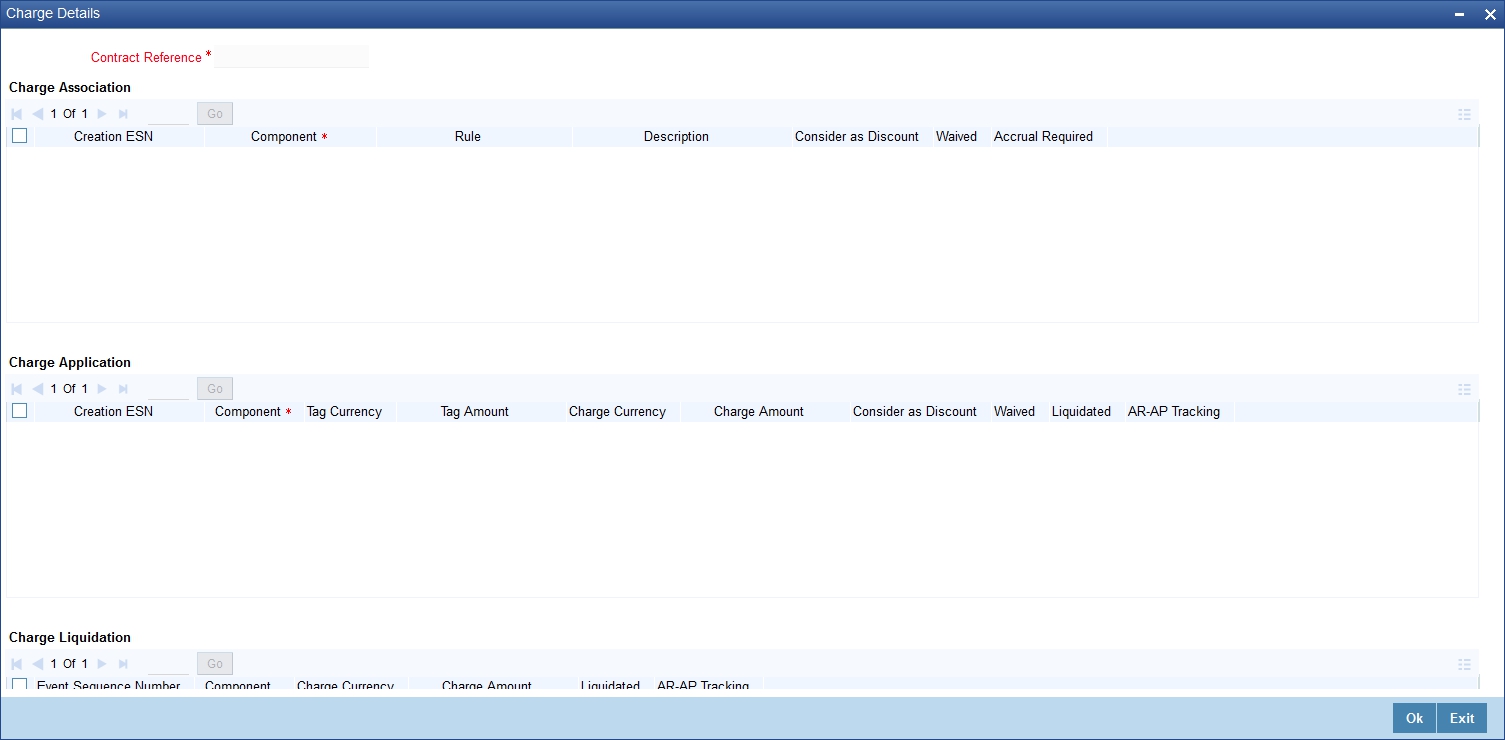
The reference number of the transaction leg for which you are defining charge details will be displayed. The screen will contain a list of all the charge components applicable to the transaction leg.
Charge Association
All the charge components applicable to the transaction leg you are processing will be displayed together with the rule that is linked to the component.
In this section of the screen you can:
- Change the charge rule linked to the component
- Disassociate a charge component from the transaction leg
Changing the charge rule linked to a component
The rule that is linked to a charge component will be displayed next to the component. Select a new rule to link to the component from the adjoining option list. A list of all the charge rules maintained will be displayed. Choose the appropriate one. The new rule will be made applicable to the charge component.
Disassociating a charge component from the transaction leg
You can disassociate a charge component from the transaction leg. In the Association section of the ‘Contract Charge Details’ screen, click against the waive option positioned next to the component.
In this case, the charge component is attached to the transaction leg but is not calculated.
Charge Application
In the application section of the screen, you can indicate the charge components that should be applied to the transaction leg. The list of components that is displayed depends on the charge components that you have associated to the transaction leg. The following details of the component are also displayed:
- The basis component on which the charge is levied
- The currency of the basis amount
- The basis amount
- The charge amount
- The currency in which the charge amount is defined
You can change the charge amount that is calculated using the class applicable to the component.
Waiving a charge on a transaction leg
You also have the option to waive the component for the transaction leg that you are processing. If, for some reason you want to waive the charge on the transaction you are processing, you can do so by checking against the waiver option in the application section of the screen. The charge will be calculated but not applied.
Note
You can waive a charge only if it is yet to be liquidated.
Charge Liquidation
When a charge component that is applied to a transaction is liquidated, the relevant accounting entries are passed. The ‘Contract Charge Details’ screen will be displayed:
- The charge components that have already been liquidated.
- The amount that was liquidated.
- The currency in which it was liquidated.
For further details on the fields and sections of Charges Details sub screen refer Charges and Fees user manual.
5.1.12 Tax Button
The tax details specified for the product to which the contract is associated will be automatically applied to the contract. However, while processing a contract, you can waive the application of tax on the contract.
You can invoke the contract ‘Tax Details’ screen by clicking ‘Tax’ button from the ‘Contract On-line’ screen.
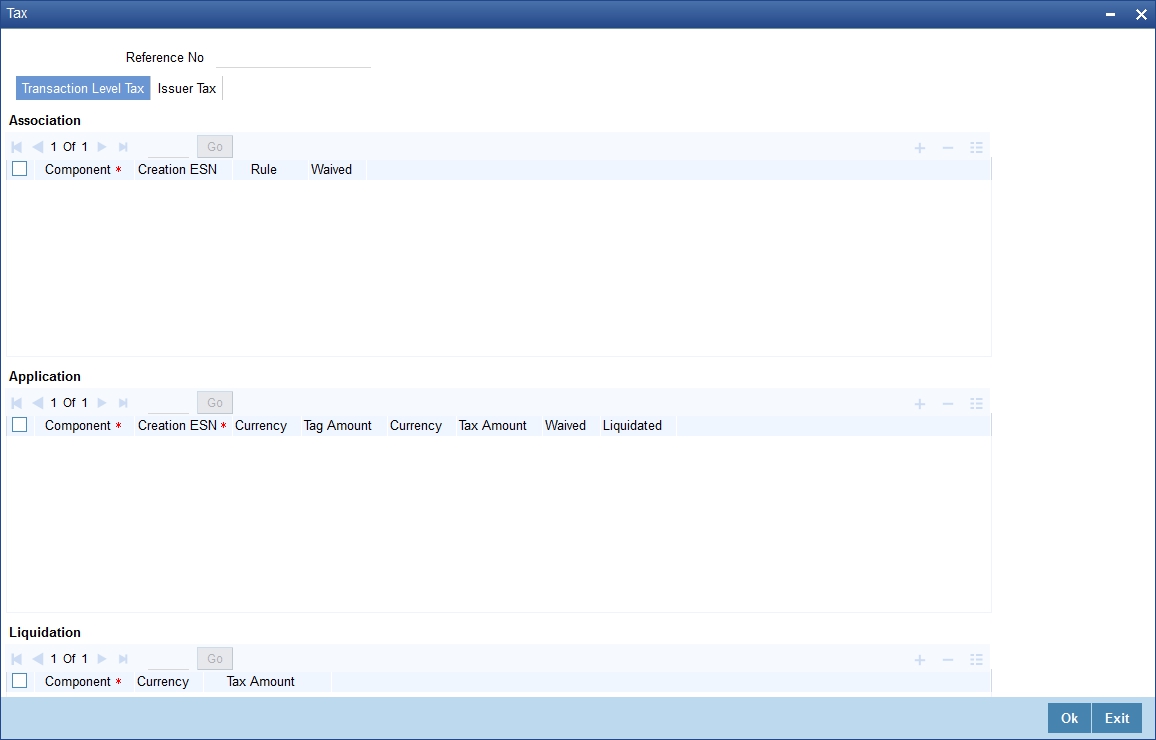
Refer to the Tax User Manual of Oracle FLEXCUBE for more details.
5.1.13 Fields Button
The user-defined fields that have been linked to the product will be defaulted to the contract. You need to capture the relevant information pertaining to these fields. Click ‘Fields’ button in the ‘Contract Input’ screen. The ‘User Defined Fields’ screen will display fields for which information needs to be captured.
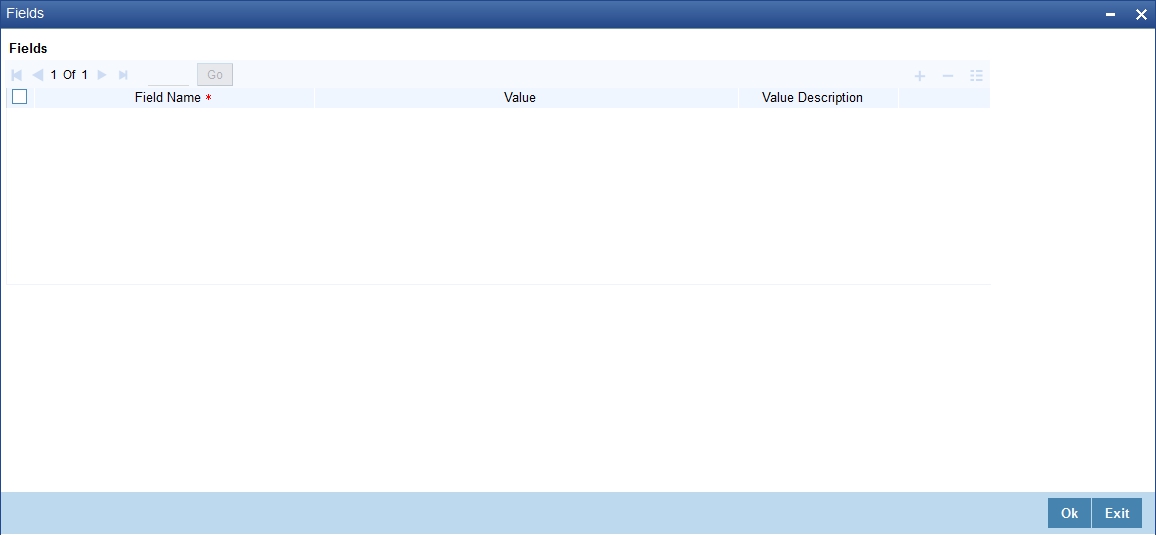
For more details on how to create user Defined fields, refer chapter ‘Creating custom fields in Oracle FLEXCUBE’ in the User Defined Fields User Manual under Modularity.
5.1.14 Principal Button
Limit tracking for Notional Contract amount will be carried out on the in leg principal. For risk weighted limit tracking, notional amount will be multiplied with the risk percent for finding out the risk weighted amount and limit tracking will be done on this amount.
If credit netting is checked during contract input and the contract is governed by a master agreement, then the limit tracking will be done against a single reference number. This reference number will be the master agreement code of the master agreement for the counterparty of the contract.
5.1.14.1 Maintaining the Principal Schedule Details Screen
You have to maintain the principal schedule details for the in and out legs of the contract only if you have specified so for the derivative type linked to the contract.
While defining the details of a particular leg (either in leg or out leg) click ‘Principal’ button. The ‘Contract Principal Schedule’ screen will be displayed.
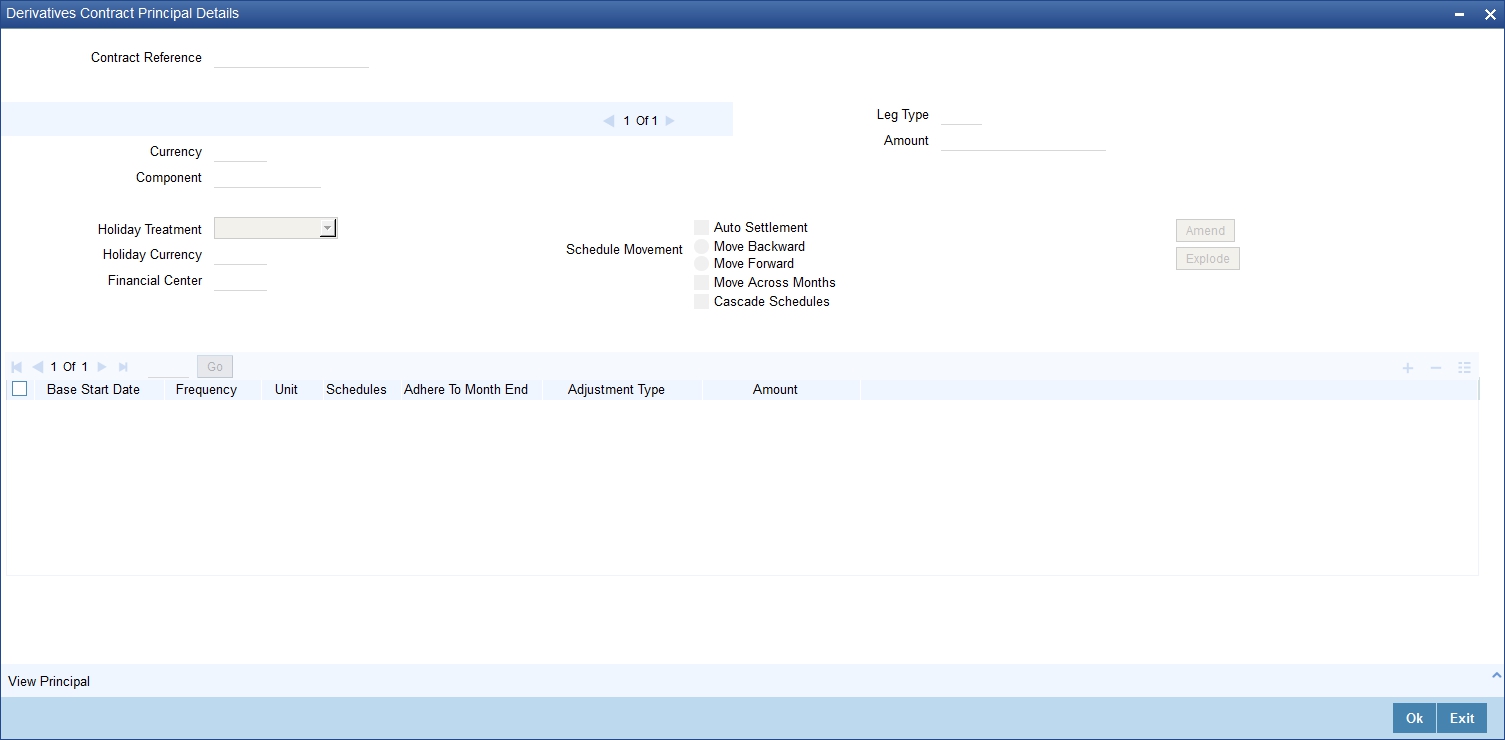
In this screen you can specify the holiday treatment, the holiday movement and the frequency of the principal schedules.
Holiday Treatment
In Oracle FLEXCUBE, a schedule date falling due on a holiday can be treated in any of the following ways:
- Ignore the holiday - In which case the holiday will be ignored and the schedule date will be retained on that day.
- Choose to follow the Local holiday - The holiday will be treated as per your specifications in the ‘Branch Holiday Maintenance’ screen.
- Choose to follow the Currency holiday - The movement of schedules will be based on the holiday calendars maintained for all the currencies that you have specified for the contract in the ‘Holiday Currency’ screen (explained in detail in the subsequent section).
- Indicate that the holiday treatment should be governed by the Financial Center – In such a case, the movement of schedules will be based on the holidays maintained for the financial institutions involved in the contract (multiple financial institutions are also maintained in the ‘Holiday Currency’ screen).
Holiday Currency and Financial Centre
If you choose to follow either the currency holiday or the holiday calendar maintained for the financial center, you need to specify the currencies/ financial institutions that are involved in the contract. In the event, a schedule date of a component falls due on a holiday, the system computes the next schedule date based on the combination of holiday calendars maintained for all the currencies/ financial institutions that you have specified for the contract (whether principal, interest or revision). Therefore, in effect, the next schedule date for a component will be a working day in all the calendars involved in the contract.
Auto Settlement
The principal exchange schedules can either be settled automatically or manually. In this case only automatic settlement is supported.
Holiday Movement
Move Backward/Forward
Occasionally the preferred holiday treatment, the branch holiday, the currency holiday or the holiday governed by the financial centre may, in turn, fall on a holiday. In such a situation you have to indicate the movement of the schedule date. Whether it is to be moved forward to the next working day or whether it should be moved backward to the previous working day.
This concept can be easily explained with the help of an example:
Example
For a CCS Trade Contract, you have defined monthly schedules falling due on the following dates:
- March 31
- April 30
- May 31
April 30 is a holiday. You have the following options in fixing the date for that schedule:
- You can move the schedule date forward to the next working day, which happens to be May 1. In this case, the schedule will be liquidated during BOD processes on this date, as it is a working day.
- You can move the schedule date backward. In such a case, the schedule date will be April 29, the last working day before the holiday. The schedule will be liquidated during BOD processes on this date as it is a working day.
Moving Across Months
If you have chosen to move a principal schedule falling due on a holiday either forward or backward, such that it falls due on a working day, and it crosses over into another month, the schedule date will be moved into the next month only if you so indicate. If not, the schedule date will be kept in the same month.
For example,
Scenario 1:
You have defined a principal schedule that falls due on April 30. This happens to be a holiday. You have indicated that in case of a holiday, the schedule date is to be moved forward to the next working day.
If you have indicated that the schedule can be moved across months, then the schedule will be automatically moved to May 1, that is, the next working day in the next month.
If you have not allowed movement across the month but have indicated forward movement for the same schedule under discussion, the schedule date will be automatically moved (backward in this case), to the last working day of the same month, that is, to April 29 despite your having indicated a forward movement into the next working day.
Scenario 2:
You have defined a repayment schedule that falls due on May 1. This happens to be a holiday. You have indicated that in case of a holiday, the schedule date is to be moved backward to the previous working day.
If you have indicated that the schedule can be moved across months, then the schedule will be automatically moved to April 30, that is, the previous working day.
If you have not allowed movement across months but have indicated backward movement for this schedule, the schedule date will be automatically moved (forward in this case), to the next working day of the same month, that is, to May 2, despite your having indicated a backward movement into the previous working day.
Cascade Schedules
The question of cascading schedules arises only if:
- You have specified that a schedule falling due on a holiday has to be moved forward or backward; and,
- The schedule has been defined with a definite frequency.
If you have indicated that schedules should be cascaded, the schedule date for the next payable schedule will depend on how the schedule date was moved for a holiday. The following example illustrates how this concept of cascading schedules functions:
For example,
A monthly schedule has been defined with backward movement and a schedule date falling due on April 30 was moved to April 29, April 30 being a holiday.
The schedule date for May depends on whether you have chosen to cascade schedules. If you have, the schedule date for May will be set as May 29, as the frequency has been specified as monthly. For the subsequent schedules also, May 29 will be considered the last schedule date.
If you have not specified that schedules have to be cascaded, the date originally specified will be the date for drawing up the schedules. Even if the April month end schedule has been moved to April 29, the next schedule will remain on May 30.
Principal Schedules
Specify the following details.
Start Date
Enter the date on which the particular principal schedule should start.
Frequency
In addition to indicating the holiday treatment you also need to specify the periodicity or the frequency of the schedules for each principal component. You can indicate that the frequency of schedules can either be Periodic or Bullet.
If you choose to have bullet schedules for a particular component, liquidation for the component will be done only as of the Maturity Date. In the case of periodic schedules you have to specify whether the frequency should be daily, weekly, monthly, quarterly, half-yearly or yearly.
Frequency Unit
In addition to specifying the frequency of schedules you are also required to indicate the number of units of the frequency. The number of units that you indicate will determine the actual schedule frequency.
For instance for a particular schedule you want to have a bi-weekly frequency. The list of choices available for the Frequency field does not have this option. In the Frequency field indicate the option Daily. Enter 2 as the Frequency Unit, the particular schedule will be due once in every two weeks.
Number of Schedules
For a particular Frequency and Frequency Unit combination you can choose to have a number of schedules depending on how many you want to define for the particular component.
For instance, for a particular schedule you have indicated that the Frequency should be Weekly and the Frequency Unit as 2. Subsequently you indicate that the Number of Schedules as 12. This particular schedule will be run once in every two weeks, twelve times.
Adhere to the Month End
When the principal exchange frequency is in terms of a month you can choose to indicate whether the schedules should be liquidated as of the last working day of the month or whether it should strictly follow the defined schedule.
For example,
The start date of a particular schedule is 1st February 2000. The frequency you have specified is Monthly and you indicate that the Frequency Unit is 1.
If you indicate that schedules have to adhere to month ends this particular schedule will be liquidated on the 29th of February 2000. However if you do enable this option the schedule will be liquidated on the 1st of March 2000.
Adjustment Type
Periodic schedule repayment of the principal amount will always bring about a readjustment in the principal amount. It either increases or decreases the amount that is to be repaid to the counterparty.
Therefore while defining principal schedules you have to indicate whether liquidation of the particular schedule results in the Increase or Decrease of the actual amount.
Amount
Since the periodic schedule repayment of the principal amount either increases or decreases the amount to be repaid to the counterparty, you have to indicate the amount by which the principal is being changed.
5.1.14.2 Multiple Currencies/Financial Institutions
Click ‘Holidays’ button to invoke the ‘Holiday Currency’ screen to indicate the currencies or the financial institutions (depending on your selection of the holiday treatment) involved in the contract. This option is enabled only if you have selected the ‘Combined’ option for the Derivative Type involved in the contract.
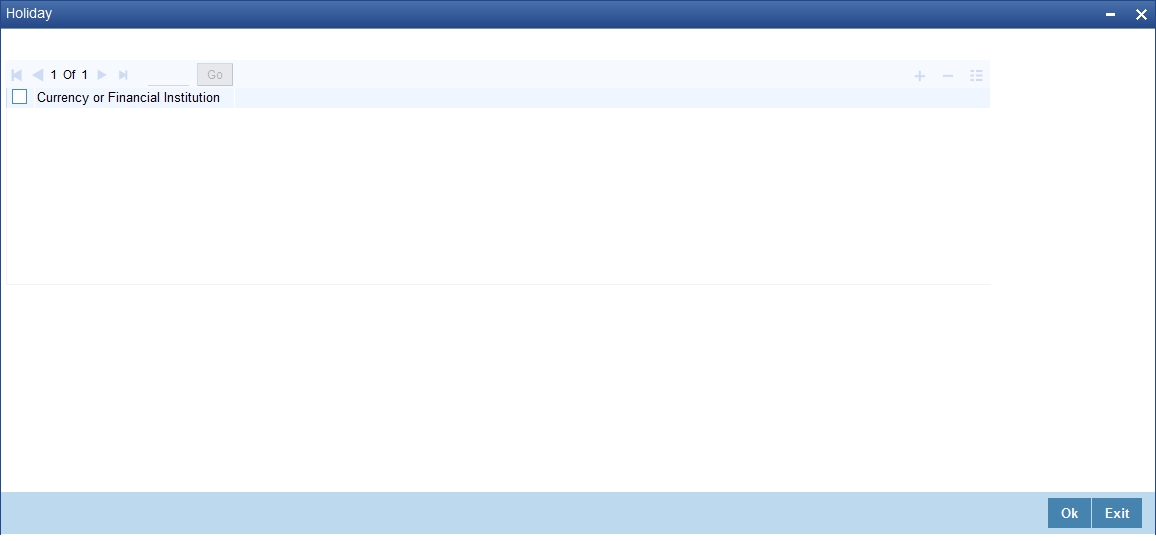
Click add icon to select a currency /financial institution from the option list. If you wish to delete a currency/financial institution, click delete icon.
The following example illustrates the procedure for combined holiday processing as handled by Oracle FLEXCUBE:
Example
Your bank enters into a CCS trade contract involving USD and GBP on 1st March 2001. You have defined multiple schedules falling due on the following dates:
- March 31
- April 30
- May 31
The other holiday handling specifications are as follows:
- Move Forward – Yes
- Move Across Months – Yes
The following is a section of the holiday calendar maintained for the two currencies for the year 2001:
Currency |
Days |
||||
30th March |
31st March |
1st April |
2nd April |
3rd April |
|
USD |
Working |
Working |
Holiday |
Holiday |
Working |
GBP |
Working |
Holiday |
Working |
Holiday |
Working |
The first schedule falls due on March 31st. As per the calendar for USD, 31st March is a working day. But GBP is closed on 31st; hence the schedule will not be liquidated on this day. The next schedule date is computed, such that it is a working day for both USD and GBP. The system, therefore, moves forward (as the Move Forward option is selected) to check the specification for the next day. As per the calendars, 1st April is a holiday for USD and 2nd April is a holiday for both USD and GBP. Therefore, liquidation is not possible on either of these days. 3rd April is the next working day for USD, which is also marked as a working day for GBP. Therefore, 3rd April 2001 is the next valid schedule date (for the schedule due on 31st March) since it is marked as a working day in both the calendars.
The net result due to the combination of both the calendars is as follows:
Net result |
Days |
||||
|
30th March |
31st March |
1st April |
2nd April |
3rd April |
Combined result |
Working |
Holiday |
Holiday |
Holiday |
Working |
In this example, if you choose the Move Backward option, the system checks the status of the previous day to arrive at the next schedule date. In this case, 30th March is a working day for both the currencies. Hence, 30th March 2001 will be the next schedule date for the contract.
The relevant contract confirmations (both SWIFT and MAIL) will also reflect the fact that the holiday treatment is based on multiple holiday calendars.
Note
The holiday treatment for the interest and revision schedules (if allowed for the derivative type involved in the contract) is also handled in a similar manner.
5.1.14.3 Viewing Schedule Details
Click ‘Explode’ button to view the details of all the schedules for the contract.
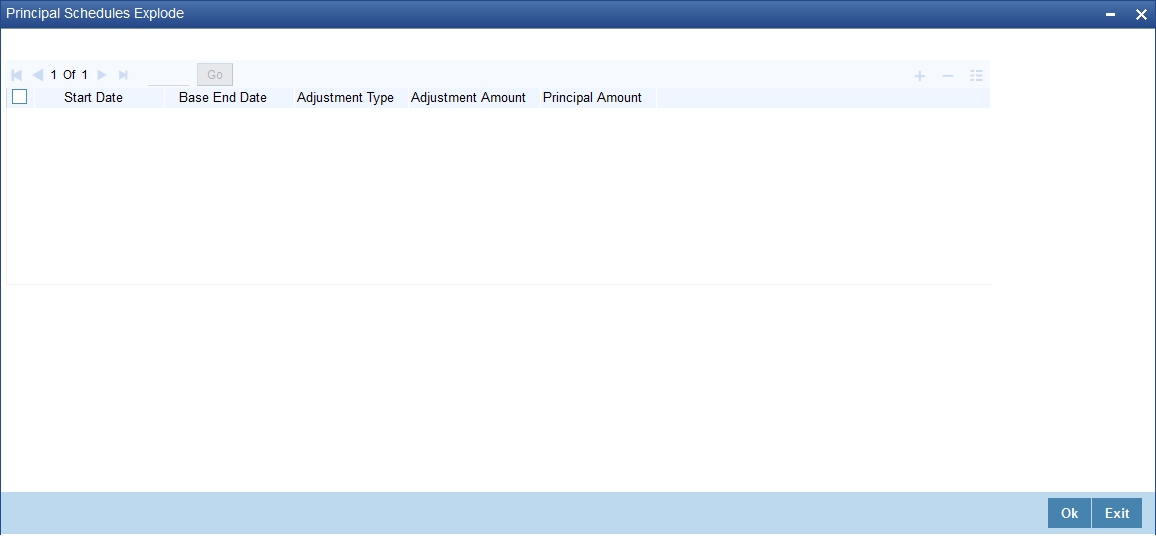
Note
You can change the details of existing schedules by clicking ‘Amend’ button.
5.1.15 Saving the Details of a Contract
Enter valid inputs into all the mandatory fields; or you will not be able to save the contract. After you have made the mandatory entries, save the contract by either selecting ‘Save’ from the Actions menu in the Application tool bar or by clicking save icon.
On saving the contract, your User Id will be displayed in the Entry By field at the bottom of the screen. The date and time at which you saved the deal will be displayed in the Date/ Time field.
A contract that you have entered should be authorized by a user bearing a different login ID, before the EOD is run. Once the contract is authorized, the ID of the user who authorized the contract will be displayed in the Auth By field. The date and time at which the deal is authorized will be displayed in the Date/ Time field positioned next to the Auth By field.
The current status of the contract is also displayed in the field Deal Status. The field will display one of the following: active, closed, expired, reversed, cancelled, and on hold.
During the authorization of the contract, the External Payment System generates messages by applying the floating interest rate at that point of time.
The system handles the payment messages in two different ways:
- In case maturity/ liquidation date falls before the settlement days of the currency, the messages are generated after authorization
- In case maturity/ liquidation date is after the settlement days, the messages are generated on the settlement day (Maximum of both Legs of the transaction)
The payment messages are generated for the principal exchange and interest liquidation as of the system date. However, the system will not reset the floating rate of the interest schedules for which settlement messages are already generated.
The system will trigger the event DRVN (Rate Reset) once you save the DV contract with interest schedules. Subsequently, SGEN event will be triggered on authorization.
When you enter a contract in Oracle FLEXCUBE, it is assigned a version number of 1. From then on, each amendment of the contract results in its next version. When you come to the ‘Derivatives Contract Input Detailed’ screen, the latest version of the contract will be displayed.
To navigate between the versions of a deal, use the buttons provided for the same,
- Click back arrow icon to view the previous version.
- Click forward arrow icon to view the next version.
5.2 Contract Upload
This section contains the following topics:
- Section 5.2.1, "Uploading Contracts for Amendment"
- Section 5.2.2, "Operations on a Derivatives Contract Record"
- Section 5.2.3, "Uploading Derivative Rates "
5.2.1 Uploading Contracts for Amendment
From an external system, you can upload contracts that require amendment in Oracle FLEXCUBE. The system will distinguish between the new and the contracts that require amendment based on the action code of the uploaded record. For a contract requiring amendment, the action code will be ‘AMND’. If the action code is ‘AMND’, Oracle FLEXCUBE will first check whether the contract exists in the system or not. If the contract does not exist in the system, an error message will be displayed to notify that the contract cannot be amended.
The Reference Number provided by the external system has to same if it is a new contract or if it is an amendment to an existing contract.
When you upload a new contract, the Reference Number will be displayed in the User Reference Number field for that contract. The User Reference Number will be the basis for checking whether the contract exists or not.
The upload for contract amendment will trigger the ‘DAMN’ event. The same event is triggered even when you make the amendment in the ‘Derivatives Contract Input’ screen.
The fields that can be amended for the Derivatives module are as follows:
- Remarks
- Rate Type (IN LEG)
- Rate (IN LEG)
- Rate Type (OUT LEG)
- Rate (OUT LEG)
- Reval Required
- Reval Netting Required
- Reval Method
- Holiday Treatment
- Holiday Currency
- Finance Centre
- Holiday Movement
- Move Across Months
- Inception Value
5.2.2 Operations on a Derivatives Contract Record
You can perform the following operations on a derivative contract:
- Copy
- Authorize
- Delete
- Amend
- Reverse
- Liquidate
Refer to the Common Procedures User Manual of Oracle FLEXCUBE for details on these operations.
5.2.3 Uploading Derivative Rates
Oracle FLEXCUBE allows uploading of derivative rates. During the upload, Oracle FLEXCUBE expects the following information to be present in the upload message:
- Rate Code
- Rate Source
- Tenor Code
- Currency
If any of these values are missing for any record, then the system will raise an error.
Validations
- If the effective date is Null, then the current application date is defaulted.
- All the validations are performed for the received fields.
Based on the data, it identifies whether the request is creation or amendment. For new records, new maintenance is created else, the details of the existing record are updated.
During the upload, even if one record fails to process, entire upload will get rejected.
Note on DV Contract Amendment Upload
If any one of the fields mentioned below is sent by the external system, Oracle FLEXCUBE considers the upload as a non financial amendment upload:
- Internal Remarks
- Rate Type (In & Out)
- Rate Code (In & Out)
- Rate Source (In & Out)
- Tenor Code
- Spread
- Interest Rate
- Remarks
- Interest Details
- Accrual Allowed Flag
- Numerator & Denominator Method
- Denominator Basis
- Liquidation Details
- Auto Settlement flag
- Numerator and Denominator Method
- Denominator Basis
- Payment Details
- Rate Denominator Basis
- Payment Method
- Discount Rate basis
- Discount Rate
- Floating Component
- Discount Rate Source
- Discount Rate Code
- Discount Tenor Code
- Discount Rate Spread
- Schedules
- Holiday Treatment
- Currency / Financial Centre
- Holiday Movement
- Cascade Schedules flag
- Move across month flag
- Schedule Details
- Revision
- Reset Date Basis
- Revision Details
A financial amendment is allowed only through External system (Gateway). If any one of the fields sent by the external system is not the mentioned in the list above, it is considered as a financial amendment upload.
The following points are noteworthy:
- In such a case, the original contract is reversed and a new contract is booked.
- However, financial amendment upload is not allowed if SGEN message is already generated for the underlying contract. In case of a financial amendment, the system doesn’t generate any confirmation message for the reversed deal. It generates an amendment confirmation message as part of the DBOK event of the new deal. This applies to only mail messages and not for SWIFT messages.
- In case of a SWIFT message, the system sends a cancellation message and a booking message.
- Any amendment of a contract is not allowed if the contract is cancelled / liquidated / reversed (for a contract status L, V or D).
5.3 Schedule Confirmation
This section contains the following topic:
5.3.1 Confirming of Interest and Principal Schedules
The interest and principal schedules (for FRAs/ Single / Cross currency swaps) defined for a derivative contract would typically be confirmed by the counterparty involved in the contract. In Oracle FLEXCUBE you can capture the details of each such confirmation received.
The details that need to be confirmed have to be entered in the ‘Confirmation’ screen, available under the Derivatives Menu in the Application Browser.
The schedule details pertaining to the contract are automatically populated in the ‘Confirmation’ screen upon authorization of the contract.
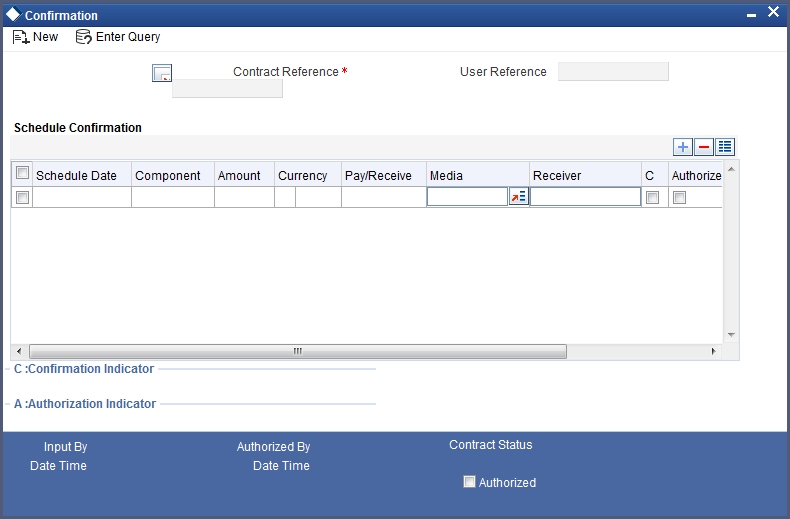
The following details are displayed in the screen:
Field |
Field Description |
Schedule Date |
The date on which a particular component falls due. |
Component |
The various principal and interest components for which the confirmation is being processed. The components displayed depend on the rate type associated with them. All the components for which the rate type is fixed are displayed. In the case of a floating rate type, only those components that have undergone a rate revision will be displayed. |
Amount |
The amount due towards each schedule. If you have opted for netting at the contract level, the amount displayed will be netted provided the components due for settlement are in the same currency and have the same schedule date. The components are always netted against the main component specified for the ‘In Leg’ of the contract. The netted amount will be displayed against the main component. |
Currency |
The amount due towards each schedule will be settled in the currency displayed here. |
Pay/Receive |
Indicates whether the components are payables or receivables. The value displayed may be: O (Outgoing/Payable), or I (Incoming/Receivable) |
In addition to the above fields, you are allowed to enter the following details in the screen. You need to unlock the record before proceeding to enter these details.
For each schedule you can indicate the media (MAIL, SWIFT, etc) through which the confirmation was received. You can select the appropriate media from the option list provided. You are also allowed to enter a media type that is not available in the option list.
You can specify the name of the receiver (for instance the name of the Derivatives back-office user in your bank) who received the confirmation. No validation is done for this field.
If it is desired, you can enter additional information for each schedule in the ‘Remarks’ column. The system does not validate the contents of this field.
Confirming a schedule
You can mark the schedules for which a confirmation is required from the counterparty. Select the Confirmation option (by checking the ‘C’ option) for each schedule.
At the time of saving the record, the system triggers the Derivative Schedule Confirmation (DCON) event for the selected schedules on the relevant Derivatives contract. You can view this event at the contract level by invoking the ‘Contract Input’ screen and clicking on the events button.
After the confirmation is saved, the contract status becomes unauthorized. On authorization of the confirmation, through the ‘Confirmation’ screen, the contract status is also updated to ‘Authorized’.
Note
After you authorize the record (the ‘A’ option appears checked), you are not allowed to make any modifications in the ‘Schedule Confirmation’ screen pertaining to a confirmed schedule. If the counter-party confirms another schedule, later on, the above process must be repeated for the relevant schedule.
5.4 Derivatives Contract Reassign
This section contains the following topic:
5.4.1 Reassigning a Contract to another User
A contract can be deleted only by the user who entered it. If a contract has to be deleted and the user who input the same is not available to do it, you can reassign the contract to another user so that the other user can delete it. Typically, this situation may arise during EOD operations, when a contract that is not authorized has to be deleted and the user who input it has left office for the day.
You can invoke the ‘Derivatives Contract Reassign’ screen by typing ‘DVDTREAS’ in the field at the top right corner of the Application tool bar and clicking on the adjoining arrow button.
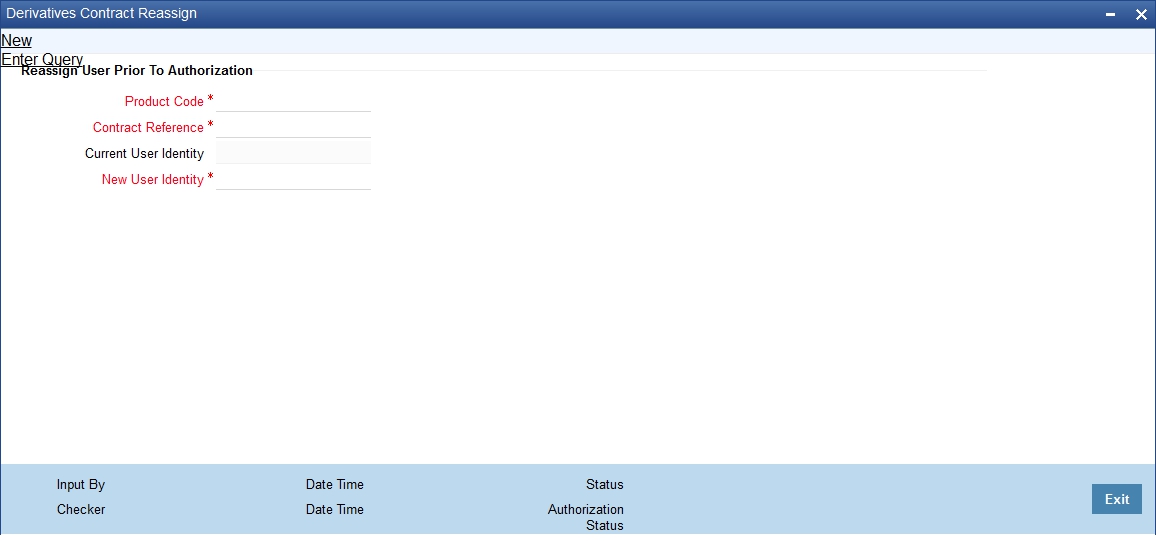
To reassign a contract to another user, the following steps are required:
Product Code
- Indicate the product associated with the contract. You can select a product code from the option list, which contains a list of the authorized products that you have created.
Contract Reference
- Indicate the contract reference number of the derivative you wish to reassign, to another user. You can select a reference number from the option list, which contains a list of all the active derivative contracts.
New User Identity
- Select the User ID of the user to whom you are assigning the contract.
Note
This user to whom you reassign a contract should have access rights to enter derivative contracts.
Your User ID will be defaulted from the login screen. Select ‘Save’ from the Actions menu in the Application toolbar or click save icon to save the specifications you have made. Click ‘Exit’ or ‘Cancel’ button if you do not want to save the details that you entered.