4. Common Operations
Help topics are available for some of the operations that are common to most modules in Oracle FLEXCUBE and can be performed on:
- Product
- Contract
- Record in a table
Besides these, some other operations like changing your branch of operation; viewing different versions of a contract; reassigning a contract to different users; static data and its maintenance; types of fields; and making a query on the ‘Contract On-line Summary’ screen are also discussed.
As soon as you launch any screen, a processing icon will be displayed. You need to wait for it to disappear before entering details.
This chapter contains the following sections
- Section 4.1, "Product Group ID"
- Section 4.2, "Entering a New Contract"
- Section 4.3, "Automatic Authorization"
- Section 4.4, "Dual Authorization"
- Section 4.5, "Multilevel Authorization of Contract"
- Section 4.6, "Retrieving Information"
- Section 4.7, "Static Data"
- Section 4.8, "Copying Parameterization Data"
- Section 4.9, "Performing Multi Branch Operations"
- Section 4.10, "Other Operations"
4.1 Product Group ID
This section contains the following topics
- Section 4.1.1, "Creating a Product Group ID"
- Section 4.1.2, "Modifying or Amending the Group ID Description"
- Section 4.1.3, "Deleting a Product Group ID"
- Section 4.1.4, "Closing a Product Group ID"
- Section 4.1.5, "Authorizing a Product Group ID"
- Section 4.1.6, "Creating a New Product"
- Section 4.1.7, "Deleting a Product"
- Section 4.1.8, "Copying a Product"
- Section 4.1.9, "Closing a Product"
- Section 4.1.10, "Amending an Existing Product"
- Section 4.1.11, "Authorizing a Product"
- Section 4.1.12, "Retrieving Information about a Product"
- Section 4.1.13, "Summary View of a Product"
- Section 4.1.14, "Detailed View of a Product"
4.1.1 Creating a Product Group ID
From the Application Browser, click on your module name, (for example, Funds Transfer, Data Entry, Loans etc,). All the operations for which you have access rights for the module will be displayed. Click on Product Group and on Detail under it. Click new icon. The ‘Product Group Definition’ screen will be displayed without any values.
In the ‘Product Group Definition’ screen, enter a unique Group ID (an ID for which no record has been opened). Give it a description and then save the record by clicking save icon. Click ‘Exit’ or ‘Cancel’ button to go back to the Application Browser.
Note
If automatic authorization has been enabled for the product group maintenance function, as well as the logged in branch, profile of the user who is saving the record, and the user also has rights for both input and authorize operations, the record will be automatically authorized when the Save operation is performed.
After you save the Product Group ID, your user-ID will be displayed at the ‘Input By’ field and the date and time at which you saved the product will be displayed at the ‘Date Time’ field. At this point, the Product Group ID is still unauthorized. It will be available for use only after it has been authorized by a user other than you.
4.1.2 Modifying or Amending the Group ID Description
The description of a Group ID can be modified even after it has been authorized.
Click unlock icon:
- When the Group-ID is highlighted in the Product Group Summary View
- When the Group ID is displayed in the Product Group Detailed View
Change the description and save it by clicking save icon. A user other than you should authorize the modification.
Note
If automatic authorization has been enabled for the product group maintenance function, as well as the logged in branch, profile of the user who is saving the record, and the user also has rights for both input and authorize operations, the record will be automatically authorized when the Save operation is performed.
4.1.3 Deleting a Product Group ID
You can delete a Group ID only before it has been authorized. When you delete a Group ID, it is removed from the system completely. It will not be available to you for future use. You need to define it again, if you need it.
Click delete icon.
- When the Group ID is highlighted in the Summary View
- When it is displayed in the Detailed View
You will be prompted to confirm the deletion. If you cannot delete a Group ID you can close it.
4.1.4 Closing a Product Group ID
You cannot delete a Group ID once it has been authorized. However, you have the option of closing it. A closed Group ID will not be available to you for use, although it will remain in the system.
A Product Group ID can be closed only under the following circumstances:
- It should not have any Products linked to it. (A product, which has active contracts involving it cannot be closed. Only when all the contracts involving the product are liquidated can the product be closed. Only when such products are closed can a group be closed).
- It should have been authorized for the last activity that was performed on it.
Click close icon:
- When the Group-ID is highlighted in the Summary View
- When it is displayed in the Detailed View
You will be prompted to confirm the closing.
4.1.5 Authorizing a Product Group ID
A Group ID should be authorized by a user other than you (if it has been initiated by you) before it is available for use. Modifications to the Group ID have to be authorized before they take effect.
Click authorize icon in the Application toolbar:
- When the Group ID is highlighted in the Summary View
- When it is displayed in the Detailed View
You will be prompted to confirm the authorization.
4.1.6 Creating a New Product
From the Application Browser, click on the relevant module name like Data Entry, Funds Transfer, Loans etc. All the operations for which you have access rights for the module will be displayed in an adjoining box. Click on Product Group and Detail under it. Click new icon. The ‘Product Group Definition’ screen will be displayed without any values in the fields.
Enter the details of the record in the respective fields and click save icon.
Note
If automatic authorization has been enabled for the product definition function, as well as the logged in branch, profile of the user who is saving the record, and the user also has rights for both input and authorize operations, the record will be automatically authorized when the Save operation is performed.
4.1.7 Deleting a Product
You can delete a product that has been created, prior to its authorization. To delete the unauthorized details of a product:
Click delete icon when you are in ‘Product Detailed View’.
You will be prompted to confirm the deletion. If you want to go ahead with the deletion, click ‘Yes’ button from the message window that pops up.
When you delete a product the details of the unauthorized product are removed from the system.
If you do not want to delete the product, click ‘No’ button in the message box.
You will be returned to the Product Detailed View and the product details will not be deleted.
4.1.8 Copying a Product
Often, you may have a situation where you need to create a product that closely resembles an existing product. In such a case, instead of entering all the details for the product, you can copy the details of one product on to another, changing only those attributes that are different for the new product.
To copy the details of a product from the Product Detailed View, click copy icon.
All the attributes of the old product, barring the Product Code, will be copied. You will be prompted to enter a new Product Code. Enter the Code and click on save icon. You can make relevant changes to the fields that have had the inputs copied on to them from the old product and you can again save your new product.
4.1.9 Closing a Product
You cannot delete a product once it has been authorized. However, you have the option of closing it. A closed product will not be available to you for use, although it will remain in the system.
A product can be closed only under the following circumstances:
- It should not have any contracts linked to it. (A product, which has active contracts involving it, cannot be closed. Only when all the contracts involving the product are liquidated can the product be closed).
- It should have been authorized for the last activity that was performed on it.
Click close icon:
- When the product is highlighted in the Summary View
- When it is displayed in the Detailed View
You will be prompted to confirm the closure. If you want to go ahead with the closure, click ‘Yes’ button from the message window that pops up. If you do not want to close the product, click ‘No’ button in the message box.
4.1.10 Amending an Existing Product
Certain attributes of an authorized product can be changed depending on whether a contract has been input for the product:
- If no contracts have been input for the product, you can amend the inputs to any of the fields.
- If contracts have been input for the product (even if all of them have been liquidated) you can amend only those attributes that do not affect the financial information of a contract.
The changed attributes will be applied to all contracts that are entered or rolled over after the amendment is authorized.
To Amend a Product:
- Click unlock icon in the Application tool bar.
The latest version of the product will be displayed and you can make the changes to the inputs.
Save the changes by:
- Clicking on save icon in the Application tool bar.
All the validations that were done when you created the product will be carried out again by the system and error messages and override messages will be displayed. The modification will be displayed in the ‘Modification No.’ field of the audit trail.
Note
If automatic authorization has been enabled for the product definition function, as well as the logged in branch, profile of the user who is amending the record, and the user also has rights for both input and authorize operations, the record will be automatically authorized when the Save operation is performed.
After the amendment is stored, your User-ID will be displayed at the Input By field. The date and time at which you saved the product will be displayed at the Date/Time field. The Status of the product will be shown as unauthorized. The changes to the product have to be authorized before you enter a contract for it. The version of the product with all the changes you made in this session will be the latest version.
If you click delete icon in any of the screens, you will see a message that will prompt you to confirm whether the changes have to be saved. You can choose to do one of the following:
- Save the changes by clicking ‘Yes’ button in the message
- Not save the changes by clicking ‘No’ button in the message
- Click ‘Cancel’ to get back to the screen from where you selected ‘Unlock’.
4.1.11 Authorizing a Product
The creation and modification of a product should be authorized before it can be used to input a contract.
To authorize the details of a Letter of Credit Product, from the ‘Letter of Credit Product Definition’ screen:
- Click authorize icon on the Toolbar
Remember that you cannot authorize an event that was input by you. It should be done by another user who has access rights for authorization.
If you are authorizing changes, the new value and the old value of the fields will be displayed. The ‘Authorization’ screen will be displayed with the modification number. Click ‘View Changes’ button to view the changes done on the record.

Check the records to be authorized and then click ‘Accept’ button to accept the changes and authorize the record else click ‘Reject’ button. Your User-ID, the date and the time at which you did the authorization will be displayed in the Maker ID and Maker Date Stamp fields at the top of the screen. The Status of the record will be updated as authorized.
If you click ‘Reject’ button the selected modification numbers are marked as ‘Rejected’. If the authorizer selects a particular modification number and click ‘Reject’, all the modification numbers beyond the selected modification number will be marked as ‘Rejected’ and the authorizer can enter remarks in the ‘Checker Remarks’ column. Once all the tanked modifications are rejected the record is marked as ‘Rejected’.
If the authorizer rejects a record because of a correction, the maker cannot correct the changes in the same record but has to re-do the required changes again.
Note
You can ‘Reject’ the modifications done to a maintenance record only if the record belongs to a function id for which ‘Tanking Required’ is checked.
The maker remarks, override remarks and warnings are displayed during authorization. The first level authorizer can enter remarks against ‘First Checker Remarks’ and the next level authorizer can enter remarks against ‘Checker Remarks’.
Click ‘View Changes’ button to view the modification. The following screen will be displayed

The changed details will be highlighted.
Click ‘Exit’ button to go back to ‘Authorization’ screen. Select the modification that needs to be authorized and click ‘Ok’ button to authorize the transaction.
If you do not want to confirm the authorization, click ‘Exit’ button. You will be taken back to the Tax Summary View. The record will not be authorized.
4.1.12 Retrieving Information about a Product
The details about a product can be retrieved either as a display or in print. The details are available in two forms:
- The Product Summary View gives a list of the attributes of all the products
- The Product Detailed View gives you all the attributes about a specific product
You can print the details of a product from any of these screens.
4.1.13 Summary View of a Product
You can go to the Summary View by highlighting the module name in the Application Browser; all the functions associated with that module will be displayed in an adjoining box. Similarly highlight a function, the options (Detailed or Summary) available for the particular function will be displayed in an adjacent box. Click on Summary, the ‘Summary View’ screen is displayed.
The following attributes of all the products will be displayed in the Summary View:
- Product Code
- Description
- Group (Product)
- Start Date
- End Date
- Record Status (Open/Closed)
- Authorization Status (Authorized/Unauthorized)
To begin with, the information will be sorted on the Product Code, in the ascending order. You can choose to sort it on any of the attributes that are displayed.
4.1.13.1 Invoke Detailed Screen from Summary View
From the Summary View you can go to the ‘Product Detail View’ screen by double clicking on the required record.
You may also select one or more records from Summary View and click ‘Details’ button to view the detailed screens of all selected records. When you click ‘Details’ button after selecting multiple records, the system displays the detailed screen of the first record. You can navigate to the next record by clicking the navigation buttons provided at the top right corner of the detailed screen.
4.1.13.2 Lock Columns of Results
You can lock the columns in the results while viewing the records from Summary screens.
Select the number of columns o be frozen while scrolling the results to the right. You can freeze upto four columns of the results using this option. When you select the number of columns, freezes that many columns from first, leaving scrolling enabled for the remaining columns.
To go back to the screen from where you invoked the Product Summary View, click ‘Exit’ button.
Note
If recommended fields search is enabled for a summary screen, then it is mandatory to specify the minimum required search parameters to search the summary records.
Refer to Open Development Tools user guides for details.
4.1.14 Detailed View of a Product
You can retrieve information about all the attributes of a product through the Product Detailed View. To view the details of the product, click on the respective icons. The status of the product will be indicated along with the details.
From the Product Detailed View, you can choose to do the following operations:
- Input a new product
- Amend the product whose details are being displayed
- Delete the product whose details are being displayed, if it is unauthorized
- Copy the details of the product that is being displayed onto a new product
- Authorize the product that is being displayed, if it is unauthorized
- Print the details of the product that is being displayed
You can carry out any of these operations by choosing them from the Toolbar. For example:
To input a new product:
- Input a new product by highlighting the product, and:
- Clicking new icon in the Toolbar
- Authorize a product, by highlighting the product and:
- Clicking authorize icon in the Toolbar
- Close a product by highlighting the product, and:
- Clicking close icon in the Toolbar
- Copy the details of one product onto another by highlighting the
product, and:
- Clicking copy icon in the Toolbar
- Print the details of one product onto another by highlighting the
product, and:
- Clicking on print icon in the Toolbar
Click ‘Exit’ button to go back to the screen from where you invoked the Product Detailed View.
4.2 Entering a New Contract
To input a new contract in the ‘Contract Details’ screen:
- Click on new icon in the Toolbar
This section contains the following topics
- Section 4.2.1, "Unlocking a Contract"
- Section 4.2.2, "Amending a Contract"
- Section 4.2.3, "Deleting a Contract"
- Section 4.2.4, "Copying the Details of a Contract"
- Section 4.2.5, "Placing a Contract on Hold"
- Section 4.2.6, "Removing the Hold Status on a Contract"
- Section 4.2.7, "Reversing a Contract"
- Section 4.2.8, "Saving a Contract"
- Section 4.2.9, "Authorizing a Contract"
4.2.1 Unlocking a Contract
If you want to change the details of an Authorized Contract you can open the record by:
- Click unlock icon in the Toolbar
A record that is unlocked by a user cannot be opened by any other user.
4.2.2 Amending a Contract
You can amend certain details of a contract depending upon its authorization status:
- When you have captured the details of a contract and it is yet to be authorized for the first time you can change all its attributes - financial as well as non-financial, even if the details have been saved once. If accounting entries are involved in the change, the old entries are deleted and new ones passed.
- Once a contract has been authorized, changes can be made only to the non-financial details of the contract, or the details that do not affect the accounting entries passed by the system.
From the Detailed View:
- Click unlock icon in the Toolbar
Make your amendments and save them. If you do not wish to save changes, exit the contract. It will retain the old values.
Note
If automatic authorization has been enabled for the contract function, as well as the logged in branch, profile of the user who is saving the amended contract record, and the user also has rights for both input and authorize operations, the record will be automatically authorized when the Save operation is performed.
For each amendment, a new version of the contract will be generated.
4.2.3 Deleting a Contract
You can delete a contract that has been:
- Input and stored, stored, but yet authorized
- That has been put on hold
- That has been modified but not authorized
The Contract Detailed View:
- Click delete icon in the Toolbar
You will be prompted to confirm the deletion. Once you confirm it, all the entries that have not been authorized will be deleted.
4.2.4 Copying the Details of a Contract
Often, you may have a situation where you need to create a contract that closely resembles an existing one. In such a case, instead of entering all the details for the contract, you can copy the details of one contract on to another, changing only those attributes that are different for the new contract.
From the Contract Detailed View you can copy the details of a contract onto a new one.
To copy a contract either:
- Click copy icon in the Toolbar.
When you copy a contract:
- A new Reference Number will be allotted to the contract
- The User Reference field will default to the Contract Reference number
- The Contract Start Date will be given a value of today and the Contract End Date will be left blank
After you have made the relevant changes to the fields that have had the inputs copied on to them from the old product you can save your new product.
To Save either:
- Click save icon on the Toolbar
4.2.5 Placing a Contract on Hold
There may be a situation where you do not have the complete details of the contract you are entering. In such a case you can enter the details you have on hand and place the contract on Hold instead of saving it. You can perform this operation from the Contract Detailed View.
You need not authorize a contract that is on hold. During information retrieval, such a contract will be reported as Held.
To put a product on Hold either:
- Click hold icon on the Toolbar
No accounting entries and advices will be generated for a contract on Hold and the incomplete contract details will remain in the system. When all the details of the contract are available, you can lift the Hold status on the contract and process it like any other contract.
4.2.6 Removing the Hold Status on a Contract
When all the details of the contract are available, you can remove the Hold status on the contract by either:
- Clicking unlock icon in the Toolbar
After you have unlocked a contract put on Hold you can enter the necessary details and process the contract like any other contract.
4.2.7 Reversing a Contract
Using the Contract Reversal function you can reverse out an authorized contract. Typically, you would use the contract reversal function, if the details of an authorized contract are erroneous. All accounting entries that were passed for the original contract will be reversed.
Note
The limits utilized by the original contract will be released.
The Contract Detailed View:
- Click reverse icon in the Toolbar
You will be prompted to confirm the reversal. Once you confirm it, all the accounting entries that have been passed for the contract will be reversed (this is done by passing the entries with a negative sign). These entries could be the contract initiation entries or any liquidation entries (interest, tax, etc.).
After the reversal has been done, you will be returned to the ‘Contract Detail View’ screen.
4.2.8 Saving a Contract
To save a contract after having captured its details, made modifications, copied it, etc. either:
- Click save icon in the Toolbar
Note
If automatic authorization has been enabled for the contract function, as well as the logged in branch, profile of the user who is saving the contract record, and the user also has rights for both input and authorize operations, the record will be automatically authorized when the Save operation is performed.
4.2.9 Authorizing a Contract
Any operation on a contract - input, copying, modification, value-dated changes, manual liquidation, rollover, reversal, etc., - has to be authorized by a user other than the one who performed the operation. All the contracts should be authorized before End of Day operations can begin. A contract on Hold does not need authorization.
From the Contract Summary View (when the contract is highlighted), or the Contract Detailed View (when the contract details are displayed), you can invoke the ‘Contract Authorization’ screen either by:
- Clicking authorize icon in the Toolbar

If the contract involves a product for which some Re-key fields have been defined, the details of the contract will be displayed only after you input the values in those fields. If no Re-key fields have been defined, the details of the contract will be displayed in the ‘Authorization’ screen.
All the overrides that were given during the operation will be displayed when the contract is being authorized.
If you are authorizing an amendment, the old values are replaced by the amended values, which will be available for subsequent processing.
The old values, however, will still be available in an earlier version of the contract. Click on ‘Ok’ button to authorize the contract. Click on ‘Exit’ button if you do not want to authorize the contract.
After the contract has been authorized, the accounting entries passed during this stage will also be marked as authorized and advises, if any have been specified for the operation, will be generated.
You will be returned to the screen from where you invoked the ‘Contract Authorization’ screen (Contract Summary View or Contract Detailed View).
The audit trail of the screen will display the following details:
- User ID of the person who input/modified contract details – ‘Input By’ field
- Date and time of data input – ‘Date Time’ field
- User ID of the person who authorized contract details – ‘Authorized By’ field
- Date and time of authorization – ‘Date Time’ field
- Contract Status (Open or Closed)
- Authorization status – Authorized or not
Note
If the record has changed after the data was fetched for authorization, when you click ‘Authorize’ button, the system displays an alert message ‘Snapshot ID too old. Retry the operation after a re-query’.
This override is shown when you try to amend, delete, close or authorize a record created. With this alert, you can ensure that the latest modified record is available for you to view before any of these actions are performed.
4.3 Automatic Authorization
If automatic authorization has been enabled for a function, branch and user profile, and such a user has rights for both input and authorize operations, any record maintained by such a user in the corresponding function (maintenance or online) screens will be automatically authorized when the Save operation is performed.
When automatic authorization takes place,
- The authorization screen is not opened. Authorization is considered as full or complete authorization, which would mean that all unauthorized changes to the record would be authorized.
- The re-key fields configured for authorization in respect of the function are not required to be entered by the user.
- Messages in respect of overrides are not displayed, but are internally authorized. Similarly, overrides requiring confirmation are also automatically confirmed.
- Any applicable online message are generated and displayed. The user can respond based on the error type – For ‘Ignore’ error types, the system automatically generates the messages; for ‘Override’ error types, the user is prompted about whether message generation is required; for ‘Error’ error types, messages are not generated.
- The user’s authorization limit is checked when automatic authorization takes place
- The maker/checker validation is not performed when automatic authorization takes place
4.4 Dual Authorization
After creation or modification of maintenance records belonging to a function, for which Dual authorization has been enabled, an intermediate verifier (First Authorizer) has to verify the record before the record can be actually authorized. Only after the first authorization, system allows you to actually authorize the record.
The first level authorization is done using the ‘Verify’ screen. You can invoke this screen by typing ‘CSSVERFY’ in the field at the top right corner of the Application tool bar and clicking on the adjoining arrow button.

In the ‘Verify’ screen you can query the modifications pending for verification (First Authorization) and do the first level authorization for selected modifications. Based on the search criteria entered system queries and displays all the records that meet the search criteria.
If you double click on a particular record you can view the details of all the modifications pending for verification for that record in a separate screen (CSDVERFY).
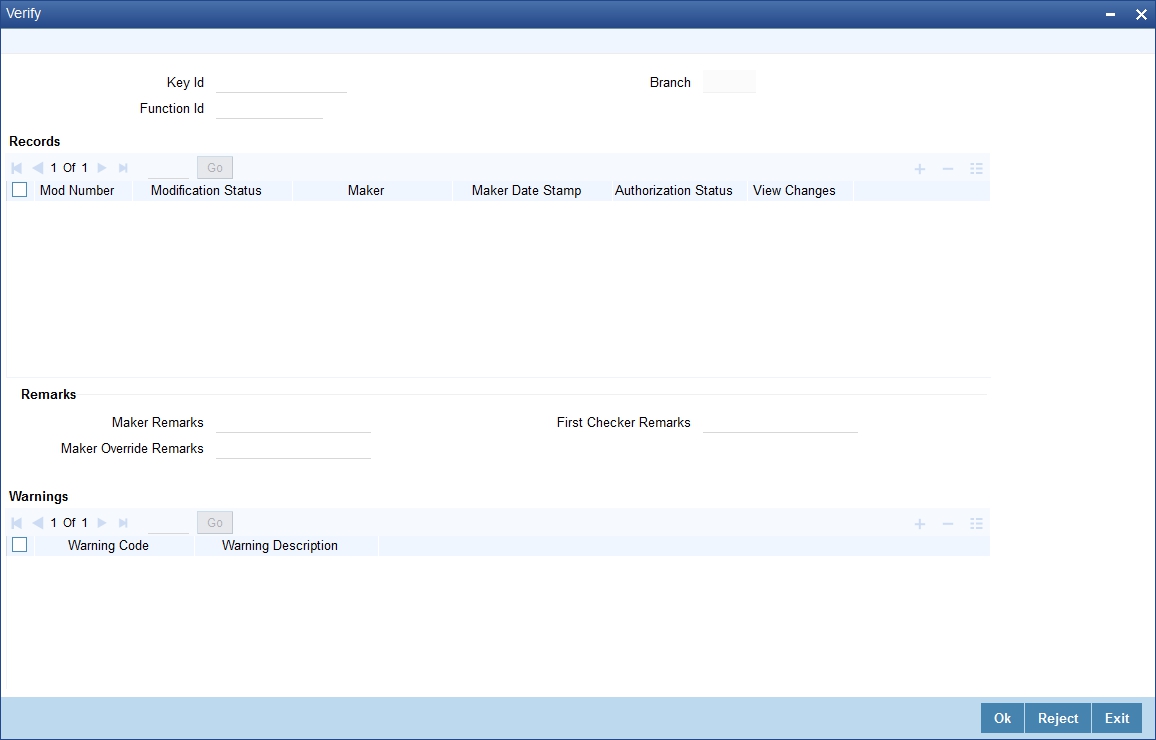
All the modifications pending will be shown and you can select a modification and verify all the modifications till the selected modification number.
For examples if there are 3 modifications (Modification numbers 2, 3 and 4) pending for verification and if you select Modification number 3, system marks modification numbers 2 and 3 as ‘Verified’. Similarly if you select Modification number 4, modification number 2,3 and 4 will be marked as ‘Verified’.
The following details are captured here:
Key Id
Specify the key identification based on which the record can be queried. Alternatively, you can select the key Id from the option list. This list displays the following values:.
- Branch - To query the record based on input branch
- Maker ID – To query the record based on maker ID
- Function ID – To query the record based on function ID through which the record was submitted. For example, STDCIF, STDCUSAC
- Key ID – To query the record based on unique key ID
Note
You can search for a specific record using any of the above combination. To authorize a record, you should select the record and click the ‘Accept’ button.
Branch
The system displays the branch for the selected record.
Records
The following details pertaining to the records are displayed:
- Modification No
- Modification Status
- Maker
- Maker Date Stamp
- Authorization Status
- View Changes
Remarks
The following details are captured here:
Maker Remarks
The remarks entered by the maker of the record are displayed here.
First Checker Remarks
Specify remarks if any as part of first level authorization.
Maker Override Remarks
The Override remarks entered by the maker of the record are displayed here.
Warnings
The system displays the error or warning codes for which dual authorization is enabled.
Warning Code
The warning code is displayed here.
Warning Description
The warning message or override messages logged for the record is displayed here.
Fields
The following details are captured here:
Field Name
The field name is displayed here.
Old Value
The old value of the field is displayed here.
New Value
The new value of the field is displayed here.
For every record you can click ‘View Changes’ button which will launch the function id screen and highlights the changes.
4.5 Multilevel Authorization of Contract
Some contracts may require multiple levels of authorization. The levels of authorizations are defined in the ‘Product Transaction Limits’ screen. You can use the ‘Multilevel Authorization Detailed’ screen for authoring a contract n-1 times. However, you can do final authorization only in the contract screen.
You can invoke the ‘Multilevel Authorization Detailed’ screen by typing ‘OVDAUDEF’ in the field at the top right corner of the Application tool bar and clicking on the adjoining arrow button. The screen is displayed below:
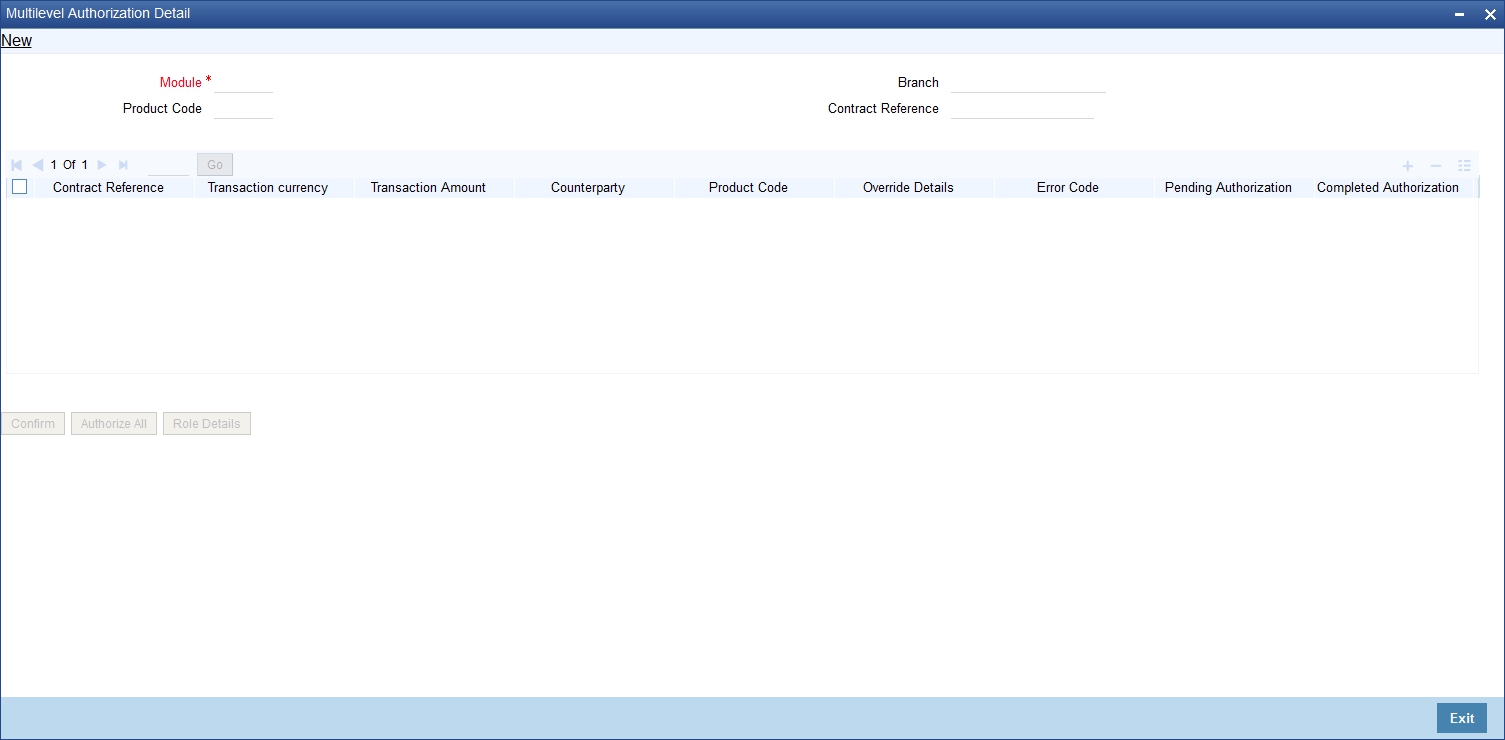
Specify the following:
Branch
Specify the initiating branch code to authorize the records initiated through this branch. Alternatively, you can select the branch code from the option list. The list displays all the branch code maintained in the system.
Product Code
Specify the product code to filter the records for authorization. Alternatively, you can select the product code from the option list. The list displays all the product code maintained in the system.
Module
Select a module from the adjoining option list. The list displays all the modules maintained in the system which require multilevel authorizations.
Contract Reference No
Specify the contract reference number requiring multiple authorizations. Alternatively, you can select the contract reference number from the option list. The list displays the following values with all the valid contracts of the selected module requiring multilevel authorizations: Branch – To query the record based on input branch
- Maker ID – To query the record based on Maker ID
- Product Code – To query the record based on product code used in the transaction record submitted. For example, CLDACCNT
With multi branch access, you can navigate to the respective transaction from the authorization queue by selecting a record and clicking 'View Contract Details’ button from the same branch you are logged in.
Note
You can view the records for authorization for a combination of ‘Branch and Module’ or ‘Branch, Module and Contract Reference’. To authorize a record, you should select the record and click the ‘Accept’ button.
Multilevel Authorization Detail
The following details of the selected contract are displayed:
- Contract reference number
- Error code
- Override details
- Override authorization status
- Completed Levels of Authorization
- Pending levels of authorization
- Remarks
- Counter Party
- Product Code
- Transaction amount
- Transaction currency
- Maker ID
- Status of the authorization. The system displays the error details in case of authorization failure.
4.5.1 Authorize All Button
If you have the authorization limit as that of the contract amount, then click ‘Authorize All’ button to authorize all the levels of a contract displayed in this screen. Click ‘Confirm’ button to authorize/reject the records available in the grid individually.
Click the ‘Authorizer All’ button to view the details of all the authorizers involved in authorizing a contract. The system displays the following screen:
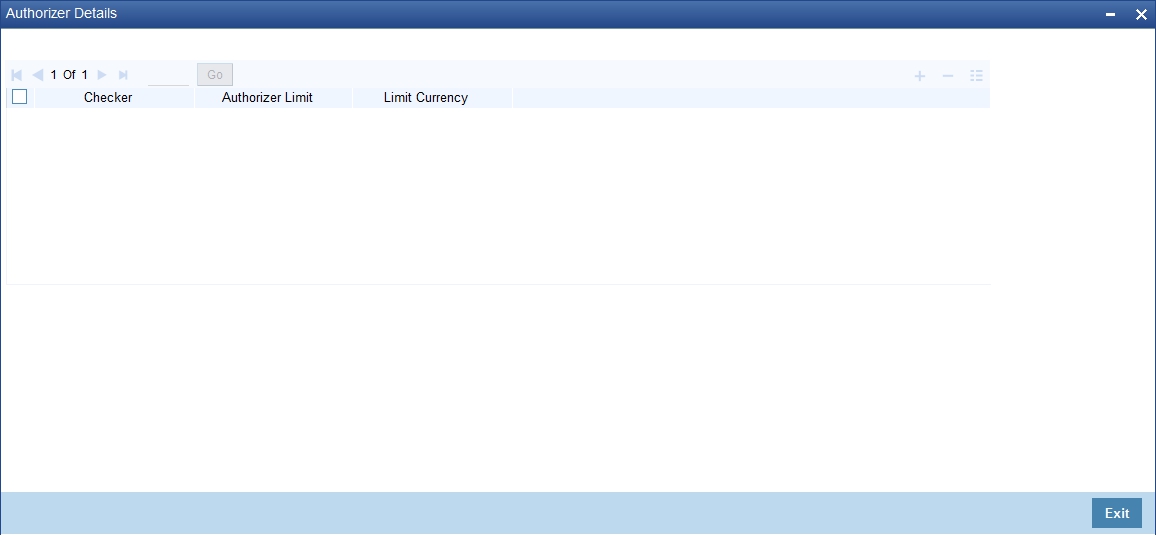
The system displays the following authorizer details:
- Authorizer ID
- Authorizer limit
- Contract Currency
4.5.2 Role Details Button
Click the ‘Role Details’ button to view the ‘Multi Level Authorization Details’ screen. The system displays the transaction and authorization role details as maintained in the ‘Multi Authorization Role Details’ screen.

You can view the roles for each level as per primary and alternate rule in successive rows. By default, the system selects the role as per the lowest level in the primary rule. During authorization, you can edit the role by clicking the check box against respective role based on the roles mapped and authorize the transaction. You can also reject a transaction before authorization. To reject a transaction, select the transaction and click ‘Reject’ button.
To view the transaction details, click ‘View’ button. You can navigate to the respective transaction from the authorization queue by double-clicking on a record. This is applicable for authorizers with multi branch access to navigate from the same branch they are logged in.
Note
If you have Multi Branch Access, you can view and authorize pending records from other branch by querying on records of the respective branch. You can filter the records for authorization belonging to a specific branch and authorize the transaction
For more information on Mutli Level Authorization, refer to the section ‘Multi Authorization Role Details Button’ in the chapter ‘Transaction Work flow’ in Savings User Manual.
While Authorization of the Contract
- The level of authorization is decreased each time a contract is authorised successfully.
- On successful authorization, authorizer’s authorization limit accumulates
- The system restricts authorization when the last level of authorization
is pending if:
- The authorization limit of the authorizer is less than the difference in contract value and the sum of authorization limit of the authorizers involved in the authorization process
- The authorization limit of the authorizer is less than the minimum authorization limit
After Authorization of the Contract
- Creator of a contract cannot authorise an override
- An authorizer can authorize a contract at the contract screen when there is no authorization limit for the transaction amount and where the authorizers limit is equal or greater than the contract amount.
- An appropriate error will be displayed if the authorizer tries to approve a contract whose authorization limit is less than the minimum authorization limit maintained in the ‘Product Transaction Limit Maintenance’ screen.
- The contract amount is considered as authorizer’s authorization
limit during validation if:
- The authorizer with no limit maintenance is authorizing the contract.
- Contract will be listed even after the completion of n-1 level of authorization when the sum of authorization limit of the authorizer involved is less than the contract amount.
- The system restricts authorization and displays an appropriate error message if the level of authorization is equal to or greater than n-1 and if the authorisation limit of the user is greater than or equal to contract value minus sum of authorisation limit of users involved in authorization
Refer the ‘Maintaining Transaction Limits’ section in Core Services User Manual for more details on transaction limit maintenance.
4.6 Retrieving Information
The details of a contact can be retrieved either as a display or in print. The details are available in two forms:
- The Contract Summary View gives a gist of the attributes of all the contracts under various products
- The Contract Detailed View gives you all the attributes about a specific contract
From any of these screens, you can print the details of a contract.
This section contains the following topics
- Section 4.6.1, "Contract Detailed View"
- Section 4.6.2, "Viewing the Summary of a Contract"
- Section 4.6.3, "Confirming a Contract"
- Section 4.6.4, "Viewing the Different Versions of a Contract"
- Section 4.6.5, "Reassigning a Contract to Another User"
4.6.1 Contract Detailed View
You can retrieve information about all the attributes of a contract through the Contract Detailed View.
To view the details of a contract from the Contract Summary View you can double click on the contract or choose Detailed from the View Menu. The status of the contract is displayed along with the authorization details.
From the Contract Detailed View, you can choose to do the following operations:
- Input a new contract
- Amend the contract whose details are being displayed
- Delete the contract whose details are being displayed, if it is unauthorized
- Copy the details of the contract that is being displayed onto a new contract
- Authorize an operation on the contract being displayed
- Print the details of the contract that is being displayed
- Close and Re-open a contract that has been authorized
- Process the contract. Thus, you can:
- Reverse a contract. That is, reverse out its accounting entries
- Roll a contract over if it has been defined with manual rollover
- Record counterparty confirmation for a contract
- Liquidate some components of a contract
- Hold a contract if you do not have its complete details
You carry out any of these operations by choosing them from the Toolbar.
To input a new contract either:
- Click new icon in the Toolbar
Click ‘Exit’ button to go back to the screen from where you invoked the Contract Detailed View.
4.6.2 Viewing the Summary of a Contract
To go to the Summary View you can highlight the module name in the Application Browser, all the functions associated with that module will be displayed in an adjoining box. Similarly highlight a function, the options (Detailed or Summary) available for the particular function will be displayed in an adjacent box. Click on Summary, the ‘Summary View’ screen is displayed.
If you are in the Contract Detailed View, choose Summary from the View Menu. Typically, the following details of all contracts will be displayed:
- Branch
- Reference Number
- Counterparty
- Contract Amount
- Currency
- Value Date
- Maturity Date
- Product
- User Reference Number
- Related Reference Number
- Status
- Payment Method
- Rate Code
- Rate Spread
- Interest Amount
Note
If recommended fields search is enabled for a summary screen, then it is mandatory to specify the minimum required search parameters to search the summary records.
Refer to Open Development Tools user guides for details.
When you invoke this function, all the contracts will be displayed. The unauthorized contracts, the liquidated ones and those on Hold will be displayed.
The contracts will be sorted on their product codes (alphabetical order of the product code). You can choose to sort them on any of the fields displayed.
To view all the details of a contract, do one of the following:
- Double click on the contract
- Choose Contract Detailed View when the contract is highlighted
Note
- The system displays only 5 pages of records, when you click search. The system displays the page numbers as <Current Page of ..>. However; if the total number of pages is less than 5, then the system displays page count as <Current Page of Exact Number of Pages>.
- Before searching, you may also set the number of records to show per page, and the number of columns to lock/freeze.
- The system enables the last button and displays the total count only when you navigate to the Last page.
4.6.2.1 Saving Queries
You can save query criteria and advanced search query criteria in the summary screen based on the user and function id combination.
To save a query do the following:
- Enter the query criteria in the summary screen and on click of ‘Search’, the ‘Save’ option is enabled.
- On click of Save, the criteria searched can be saved by entering:
- Query Criteria Name
- Remarks
- The saved query is then displayed on click of ‘Saved Queries’
with the following details:
- Query Name - Displays the name of the query as you have saved on click of which the system populates the saved criterion and search results in the summary screen.
- Query Type - Displays whether the query is normal or advanced.
- Action - You can edit or delete the saved query.
- On click of edit, the system populates the query criteria on summary screen. You can modify the criteria search and on click of save, the criteria name and remarks are displayed. On click of OK, the system will prompt for confirmation of modifying the criteria and on click of OK, the system saves the modified query.
4.6.3 Confirming a Contract
Events on certain types of contracts like money market or foreign exchange contracts need to be confirmed by the counterparty or the broker. For example, if a money market placement is initiated an advice is sent to the counterparty along with a confirmation slip. Upon receiving the confirmation slip, duly signed by the counterparty or the broker, you can confirm the deal.
Invoke the contract that has to be confirmed. Click Confirm button in the Application toolbar under processing to confirm the contract or the event on the contract.
4.6.4 Viewing the Different Versions of a Contract
When you are in the Contract Detailed View, you can view the different versions by clicking on the following buttons:
Button |
Function |
|
To move to previous version of the record |
|
To move to next version of the record |
|
To move to first version of the record |
|
To move to the last version of the record |
Note
These buttons are specific to certain modules of Oracle FLEXCUBE only.
You can also click on the following options under View in the Main Menu:
- Move First (to move to the first version of the record)
- Rewind (to move backward until you find the version you are looking for)
- Move Previous (to move to the previous version of the record)
- Move Next (to move to the next version of the record)
- Fast Forward (to move forward until you find the version you are looking)
- Move Last (to move to the last version of the record).
4.6.5 Reassigning a Contract to Another User
A contract can be deleted only by the user who entered it. If a contract has to be deleted and the user who input it is not around to do it, you can reassign the contract to another user so that the other user can delete it. Typically, this situation may arise during End of Day operations when a contract that is not authorized has to be deleted and the user who input it has left office for the day. The access rights to reassign a contract are usually allotted to a senior user in the department.
In the Application Browser, highlight your module. The operations for which you have access rights will be displayed in an adjoining box. Position your mouse pointer and highlight Contract. The options available under it will be displayed in an adjacent box. Highlight Reassign and click on it once.
The ‘Contract Reassignment’ screen will be displayed and you can enter the User-ID of the user to whom you want to assign the contract. This user should have access rights to input contracts.

Click ‘Ok’ button after you make all the specifications. Click ‘Exit’ button if you do not want to save the details that you entered.
4.7 Static Data
This section contains the following topics
- Section 4.7.1, "Maintaining Static Data"
- Section 4.7.2, "Types of Fields"
- Section 4.7.3, "Adding a New Record in a Table"
- Section 4.7.4, "Deleting a Record in a Table"
- Section 4.7.5, "Copying the Details of a Record"
- Section 4.7.6, "Authorizing a Record in a Table"
- Section 4.7.7, "Modifying a Record in a Table"
- Section 4.7.8, "Closing a Record in a Table"
- Section 4.7.9, "Viewing the Details of a Record"
- Section 4.7.10, "Maker and Authorizer Details"
- Section 4.7.11, "Printing the Details of a Record"
4.7.1 Maintaining Static Data
Data that remains constant over a period of time is called static data. Usually, such data will be commonly accessed by more than one module. The following are some typical examples of static data:
- The details about the currencies that are used in your bank
- The details about the brokers with whom you may deal
- The details of End of Cycle functions that should be executed automatically
Such data is maintained in tables. Once the data is entered in a table, it has to be authorized before it can be used by any function. Each item in a table is called a record. Each record has a key that uniquely identifies it.
For example, when you open a record for a broker, you should allot an identification code. This code, called the Broker ID is unique to the broker whose details you are defining and cannot be allotted to any other broker. Thus, the Broker ID identifies the broker for whom the details have been defined. In a similar fashion, you have to allot unique codes to each currency, dealer, etc.
While you are defining a record, you have to enter the key first and then go on to define the attributes for it. These attributes will automatically be picked up when the key of the record is involved in a transaction. For example, you define Alexander (with a Broker ID of Alex) as a broker and indicate that the brokerage should be booked in advance. Whenever Alexander is involved in a transaction, the brokerage will be booked in advance.
4.7.2 Types of Fields
You will encounter three types of fields in most screens:
- Mandatory fields
- Optional fields
- Conditional fields
4.7.2.1 Mandatory Fields
Of the many fields in a screen, the inputs to some may be mandatory. This means that you cannot save the record without giving a valid input in such fields.
4.7.2.2 Optional Fields
The inputs to some of the fields in a screen may be optional. You may or may not give an input to such fields. Further, an optional field may have a default value; a value that the system puts in the field if you do not enter anything. Unless you change this default value, it will be taken as the input to the field. However, please note that all optional fields need not have default values. It is possible that some fields can be left blank.
4.7.2.3 Conditional Fields
There are some fields, which take input based on data in some other field(s). For example, in the Loans and deposits module, you have to specify the Cluster ID only if you are processing a deposit. It is not unusual that a conditional field also has a default.
4.7.2.4 Option lists
Inputs to certain fields can be picked up from the option list provided with the field. The option list will contain values that are valid inputs to the field.
After you have made all your inputs, save the record by clicking save icon.
Click ‘Exit’ button to exit this screen.
4.7.3 Adding a New Record in a Table
To add a new record in a table, click new icon when the ‘Detailed View’ screen of the table is invoked. For example, if you want to define a New Broker in the Broker Master file, first invoke the Broker Master table, click new icon. A new input screen for the table with no values in it will be displayed; with the cursor positioned at the key field.
If you are defining a new broker, the ‘Broker Master’ screen will be displayed with the cursor at the Broker ID field.
Note
Certain tables are attached to a specific branch. Which means that a record defined in the table will be applicable only for the branch in which it was opened. For such tables, the Branch Code will be displayed along with the key of the record. This Branch Code will be that of the branch where the record was defined and you cannot change it. If you want to open a record in a different branch, you should sign-on to that branch (by invoking the ‘Change Branch’ screen from the main menu).
Enter a unique value in the key field and go on to define its attributes. At each field, press <F1> for help on what the field is about and the inputs it takes. If you give an invalid input to any field, an error message will be displayed.
4.7.4 Deleting a Record in a Table
A record that has been defined will be available for any functional operation only after it has been authorized. Before the addition of a record is authorized, you can delete it. A record can be deleted only from the detailed view of a record.
In the ‘Detailed View’ screen the table will be displayed with all the values that have been defined for the record. You can click delete icon. You will be prompted to confirm the deletion before the record is deleted.
Note
In the ‘Summary View’ screen you can only print the details of the highlighted record. Any operation on a record like deletion, modification, cancellation etc. will have to be carried out through the ‘Detailed View’ screen.
4.7.5 Copying the Details of a Record
Very often, you may have to enter into a table a record that closely resembles an existing record. In such a case, you can copy the details of the record that has already been defined. You can then change the attributes that are different for the new record.
At the ‘Summary View’ or the ‘Detailed View’ screen of the table, click copy icon when the record you want to copy is highlighted. The input screen for the table will be displayed with all the details except those in the key field(s). Enter the appropriate value(s) in the key field(s) that are applicable for the new record you are defining. You can change the input in any field. The validations that are done when you are defining a new record will be done for the fields you change. Save the new record by clicking save icon.
4.7.6 Authorizing a Record in a Table
Whenever you add, modify, close or re-open a record, the activity should be authorized before the End of Day operations (EOD) can begin. Authorization can be carried out only by a user other than the one who carried out the activity being authorized. For example, if you have added a new record in the Broker Master table it should be authorized by some other user.
At the ‘Summary View’ screen of the table, click authorize icon, when the record you want to authorize is highlighted. You will be prompted to confirm the authorization. The record will be authorized only if you give the confirmation.
After you confirm the authorization, your User-ID will be displayed at the Auth By field. The date and time of authorization will be displayed in the Date/Time field. These fields will always show the details of the latest authorization.
4.7.7 Modifying a Record in a Table
Certain attributes that have been defined for a record can be changed after it has been stored and even authorized. However, you may not be able to modify the inputs in all the fields under certain circumstances. If there is a restriction on modifying the input to a field, it will be mentioned in the on-line help for the field. <F1> at any field gives you the on-line help on the field.
You can choose to modify a record by, either:
- Clicking unlock icon in the Toolbar when the details of the record are being displayed in the ‘Detailed View’ screen for the table.
or
- After you have indicated your modifications, save them by clicking save icon.
Your User-ID will be displayed at the Entry By field. The date and time at which you saved the modification will be displayed next to it. The record has to be authorized by a user other than you.
4.7.8 Closing a Record in a Table
When a record is closed, it will not be available for use by any function. You can reopen the record if it has to be used again. A record can be closed only if it is not linked to any other table. For example, you cannot close a Rule in the Brokerage Rule Definition table, if the rule is linked to a broker in the Brokerage Association Table.
Click close icon when the details of the record are being displayed in the ‘Detailed View’ screen for the table.
Click OK. You will be prompted to confirm the closing of the record. The closing should be authorized by a user other than you, before you can begin the End of Day operations.
4.7.9 Viewing the Details of a Record
Two types of view screens are available for records in a table. The ‘Summary View’ screen displays the value in the main fields of the table, in a tabular column. To move to the Detailed View for the record, do the following:
- Double click on the record
From the Summary or Detailed view for a record, you can choose any action from the application toolbar.
Note
- The system displays only 5 pages of records, when you click search on summary screen. The system displays the page numbers as <Current Page of ..>. However; if the total number of pages is less than 5, then the system displays page count as <Current Page of Exact Number of Pages>.
- The system enables the last button and displays the total count only when you navigate to the Last page.
4.7.10 Maker and Authorizer Details
When you save a record, your User-ID will be displayed in the Entry By field. The date and time at which the record was created will be displayed in the Date/Time field. These fields will always show the details of the latest action on the record - addition or modification.
A record that has been defined should be authorized before it is available for a function. This authorization should be made by a user other than the one who defined the record. All the new records that were defined during the day and the ones that were modified should be authorized before you can begin the End of Day operations for the day. You can however delete a record before it is authorized.
The User-ID of the authorizer will be displayed in the Auth By field. The date and time at which the record was authorized will be displayed in the Date/Time field. As with the Entry By field, this field will be for the latest action that was authorized.
4.7.11 Printing the Details of a Record
The Print function lets you print the details of record(s) in a table. You can choose to print only a specific record, a range of them or all of them in a table.
4.8 Copying Parameterization Data
You can copy parameterization data from Oracle FLEXCUBE environment to any other environment and vice versa. The data from Oracle FLEXCUBE can be exported into an excel sheet or an XML format.
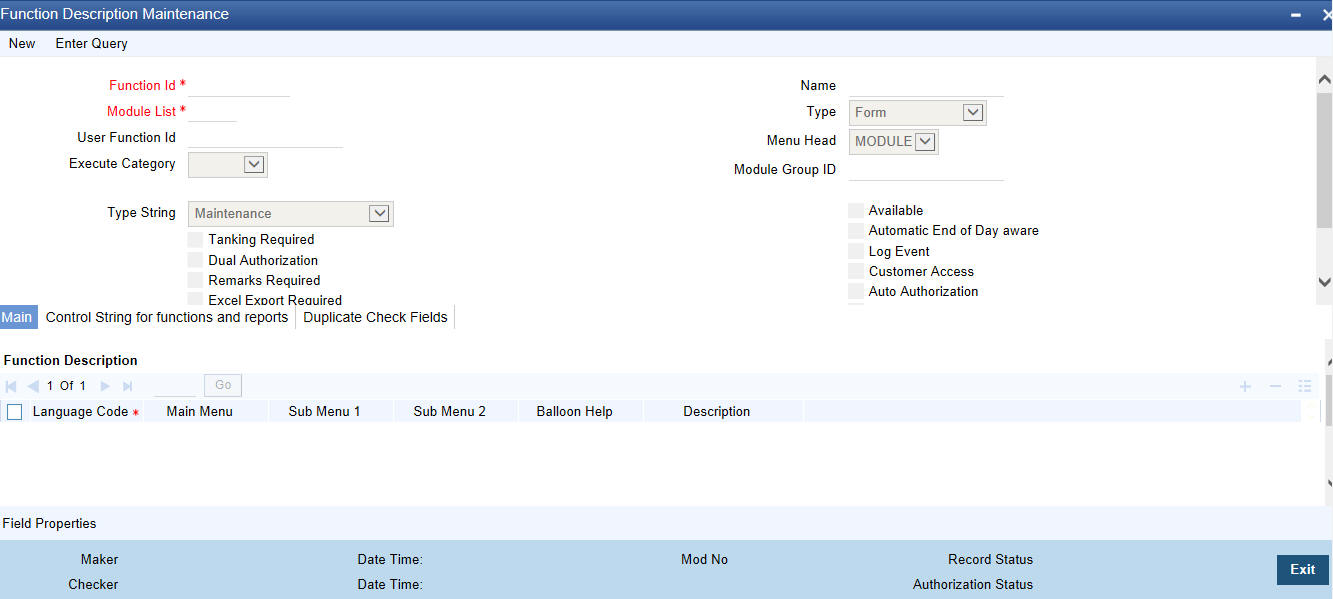
If ‘Excel Export Required’ option is checked for a function Id in the ‘Function Description Maintenance’ (SMDFNDSC) screen then an ‘Export’ button is enabled in the summary screen of that function Id.
In the Summary screen you can query records based on the query parameters available and then select the required records to be exported and click ‘Export’ button. On clicking ‘Export’ button, system would export the data into an excel sheet and opens the excel sheet with data populated. You can then save the excel sheet.
The records can be exported either in .XLS or .XLSX format. The format of the export file must be maintained in ‘CSTB_PARAM’ against the parameter ‘EXCEL_FORMAT’.
You can also import data into Oracle FLEXCUBE environment using the ‘Excel Import’ screen. You can invoke this screen by typing the function id ‘CSDXLUPD‘ in the field at the top right corner of the Application tool bar and clicking on the adjoining arrow button.
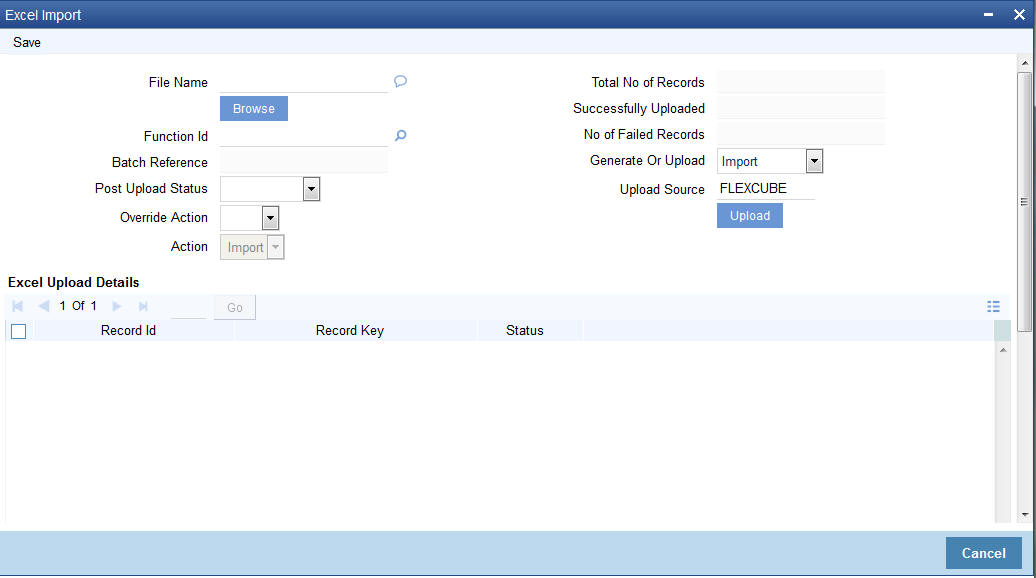
The following details are captured here:
File Name
Select the excel file to be imported by clicking ‘Browse’ button.
Total No of Records
The total number of records to be uploaded is displayed here.
Function Identification
The function id mentioned in the excel file chosen is displayed here.
Batch Reference
The unique reference number generated for an upload is displayed here.
Post Upload Status
Select the status to be set for the file post upload, from the drop-down list. The following statuses are available in the drop-down list:
- Authorized
- Unauthorized
- Hold
Override Action
Select the action to be taken if an override message is encountered, from the drop-down list. The following options are available:
- Ignore
- Error
Action
The action is displayed here.
No of failed records
The total number of records which failed to get uploaded is displayed here.
Generate or Upload
Select the action to be taken for importing the file, from the drop-down list. The following options are available for selection:
- Generate – Select this option if an XML has to be generated from the imported file.
- Upload – Select this option if the data has to be uploaded as an excel file itself.
Note
To start the upload process click ‘Upload’ button. Once you click this button system starts importing the data from the excel file.
Source
Specify the source code of the file to be used for generating the XML file. You need to specify the source if you have chosen ‘Generate’ option in the ‘Generate or Upload’ field.
Excel File Upload Details
The following details are captured here:
Record Id
The unique number of the record uploaded is displayed here.
Record Key
The record key is displayed here.
Status
The upload status of the record is displayed here.
Excel Upload Errors
Record Id
The unique number of the record, which encountered error while uploading, is displayed here.
Error Code
The error code corresponding to the error encountered during upload is displayed here.
Error Message
The error message corresponding to the error code displayed is defaulted here.
4.9 Performing Multi Branch Operations
The user can perform all multi-branch operations without changing the branch. To invoke the screen of a multi-branch operation, type the corresponding function ID in the field at the top right corner of the Application tool bar; and click the adjoining arrow button.
While updating Transaction Branch and Transaction Branch Date:
- The system validates the access rights of the user for the selected function and branch.
- If you do not have appropriate rights on the selected function and branch, the system displays an error message.
- If you select a valid branch, the system updates the same as transaction branch; and posts the transaction into this branch.
- Transaction branch date is updated as system date.
4.9.1 Multi Branch Operational Functions
The following module transaction screens do not require change of branch for multi branch operations:
Conventional Multi Branch Access Screens
Conventional Accounts
Function ID |
Transaction Screen |
ACDMUNCL |
Uncollected Funds Release |
CADAMBLC |
Consolidated Amount Block Input |
CADAMBLK |
Amount Block Input |
CADSPMNT |
Stop Payment Input |
CADSTRUC |
Account Structure Maintenance |
ICDCALAC |
Interest & Charges Single Account Online Calculation |
ICDLIQAC |
Interest & Charges Single Account Online Liquidation |
ICDOCALC |
Interest & Charges Multiple Account Online Calculation |
ICDOLIQ |
Interest & Charges Multiple Account Online Liquidation |
IFDXTACC |
Replicated Account Maintenance |
MSDCACAD |
Account Address Maintenance |
STDACINS |
Account Instruction Maintenance |
STDACLMT |
Customer Account Tax Allowance Maintenance |
STDACRST |
Automatic Consolidated Request Statement Maintenance |
STDACTAQ |
Customer Tax Allowance Query |
STDACTFR |
Account Class Transfer |
STDCIF |
Customer Maintenance |
STDCUSAC |
Customer Account Input |
STDSTCDM |
CrDrStat Maintenance |
STDSTDOR |
Dormancy Parameter Maintenance |
STDSTMNT |
Manual Status Change Maintenance |
Conventional Deposits
Function ID |
Transaction Screen |
DESWACDT |
Manual Term Deposit Booking |
ICDBADHC |
Term Deposit Advice |
ICDPMNTS |
Recurring Deposit Payment Input |
ICDPMREV |
Recurring Deposit Payment Reversal |
ICDREDMN |
Term Deposits Redemption Input |
STDAMBLK |
Term Deposit Amount Block Input |
STDCUSTD |
Term Deposit Input |
Collections
Function ID |
Transaction Screen |
CNDCOLIN |
Collection Interactions |
CNDCAASG |
Collection Agent Assignment |
CNDINAPQ |
Interaction Approval Queue |
CNDASGNQ |
Queue Assignment Pending Queue |
CNDCNQCH |
Collection Queue Change |
CNDCLDRY |
Collection Reminder Messages |
Conventional Financing
Function ID |
Transaction Screen |
CLDACAUT |
Lending Account Authorization |
CLDACCNT |
Lending Account Input |
CLDACCVM |
Lending Value Dated Amendments |
CLDADCHG |
Lending Ad hoc Charge Input |
CLDBLKAU |
Lending Bulk Authorization |
CLDBLKPT |
Lending Bulk Payment Input |
CLDCMTMT |
Commitment Input |
CLDCMTVM |
Commitment Value Dated Amendments |
CLDCROLL |
Lending Consolidated Rollover Input |
CLDIMROL |
Lending Inactive Rollover Input |
CLDINADT |
Lending Inactive Account Input |
CLDISTCH |
Lending Instalment Status Change |
CLDLQSPN |
Lending Liquidation Suspension |
CLDLSTMT |
Loan Statement |
CLDMDAUT |
Lending Disbursement Authorization |
CLDMNDSB |
Lending Disbursement Input |
CLDMROLL |
Lending Rollover Input |
CLDMSTCH |
Lending Status Change |
CLDNOCON |
Lending Notary Confirmation |
CLDNOVDT |
Lending Account Reassign |
CLDPWOAU |
Lending Partial Write off Authorization |
CLDPWOFF |
Lending Partial Write off |
CLDPYAUT |
Lending Payment Authorization |
CLDPYMNT |
Lending Payment Input |
CLDRENOG |
Lending Account Renegotiation |
CLDUDCMT |
Lending UDE Cascade |
CLSACCNT |
CL Account Summary |
CLSACCVM |
CL VAMI Summary |
CLSCMTMT |
CL Commitment Summary |
CLSMNDSB |
CL Manual Disbursement Summary |
Conventional Letters of Credit
Function ID |
Transaction screen |
LCDAMEND |
Letters of Credit Amendment Confirmation Input |
LCDAVMNT |
Letters Of Credit Availment Detail |
LCDEPMNT |
Letters of Credit Deferred Payment |
LCDTRANF |
Letters of Credit Transfer Input |
LCDTRAUT |
Letters Of Credit Contract Authorization |
LCDTREAS |
Letters of Credit Contract Reassign |
LCDTRONL |
Letters Of Credit Contract Detailed |
LCDTRPAY |
Letters of Credit Payment Input |
LCSAMEND |
LC Amendment Summary |
LCSAVMNT |
LC Summary |
LCSTRONL |
LC Contract Summary |
Conventional Bills and Collections
Function ID |
Transaction Screen |
BCDAMEND |
Bills & Collections Amount Amendment Input |
BCDTRAUT |
Bills & Collections Contract Authorization |
BCDTRDOC |
Bills & Collections Document Arrival Notice Input |
BCDTREAS |
Bills & Collections Contract Reassign |
BCDTRGON |
Bills & Collections Registration Input |
BCDTRONL |
Bills and Collection Contract Detailed |
BCDTRPAY |
Bills & Collections Payment Input |
BCSTRONL |
BC Contract Summary |
Message Screens
Function ID |
Transaction Screen |
MSSOUBRS |
Message Outgoing Browser |
MSDFFT |
Free Format Messages |
Funds Transfer
Function ID |
Transaction Screen |
FTDTRONL |
FT Contract Input |
FTSTRONL |
FT Contract Summary |
Foreign Exchange
Function ID |
Transaction Screen |
FXDTRONL |
FX Contract Input |
FXSTRONL |
FX Contract Summary- |
FXDPMNT |
FX Liquidation |
FXSPMNT |
FX Summary |
Payments and Collection
Function ID |
Transaction Screen |
PCDONONL |
Payment and collections transaction input |
PCDFTONL |
Payment and collections Fast track input |
Other screens
Function ID |
Transaction Screen |
CSDINSTR |
Instructions Maintenance screen |
CADCHBOO |
Cheque book maintenance screen |
SIDCONON |
Standing Instruction Online screen |
Islamic Multi Branch Access Screens
Islamic Accounts
Function ID |
Transaction Screen |
IADCUSAC |
Islamic Customer Account Input |
ICDZAKBA |
Islamic Zakat Batch |
Islamic Deposits and Conventional Deposits
Function ID |
Transaction Screen |
IADCUSTD |
Islamic Deposit Input |
IADREDMN |
Islamic Deposit Redemption |
Islamic Financing
Function ID |
Transaction Screen |
CIDACCNT |
Islamic Financing Account Input |
CIDACCVM |
Islamic Financing Amendment Input |
CIDIMROL |
Islamic Financing Inactive Rollover Input |
CIDINADT |
Islamic Financing Inactive Account Input |
CIDMNDSB |
Islamic Financing Disbursement Input |
CIDMROLL |
Islamic Financing Rollover Input |
CIDNOVDT |
Islamic Financing Account Reassign |
CIDPYMNT |
Islamic Financing Payment Input |
CIDRENOG |
Islamic Financing Account Renegotiation |
CIDTSALE |
Islamic Financing Sale Confirmation |
Islamic Letters of Credit
Function ID |
Transaction screen |
LIDAMEND |
Islamic Letters of Credit Amend Confirmation |
LIDAVMNT |
Islamic Letters of Credit Availment Input |
LIDEPMNT |
Islamic Letters of Credit Deferred Payment Input |
LIDTRANF |
Islamic Letters of Credit Transfer Input |
LIDTRAUT |
Islamic Letters of Credit Contract Authorization |
LIDTREAS |
Islamic Letters of Credit Contract Reassign |
LIDTRONL |
Islamic Letters of Credit Contract Input |
LIDTRPAY |
Islamic Letters of Credit Payment Input |
Islamic Bills and Collections
Function ID |
Transaction Screen |
IBDAMEND |
Islamic Bills & Collections Amount Amendment Input |
IBDTRAUT |
Islamic Bills & Collections Contract Authorization |
IBDTRDOC |
Islamic Bills & Collections Document Arrival Notice Input |
IBDTREAS |
Islamic Bills & Collections Contract Reassign |
IBDTRGON |
Islamic Bills & Collections Registration Input |
IBDTRONL |
Islamic Bills & Collections Contract Detailed |
IBDTRPAY |
Islamic Bills & Collections Payment Input |
Islamic Asset Management
Function ID |
Transaction Screen |
IADFNONL |
Islamic Fund Input |
Note
When you launch a function ID with multi branch access using ‘User ID’ with dual access rights and set the transaction branch, the calendar present on the function ID displays the holiday list of the corresponding transaction branch.
4.10 Other Operations
This section contains the following topics
- Section 4.10.1, "Changing the Branch of Operation"
- Section 4.10.2, "Making a Query"
- Section 4.10.3, "The Procedure, with Example"
- Section 4.10.4, "Making a Query Based on More than One Criterion"
- Section 4.10.5, "Selecting the Same Criterion to Apply One or More Conditions"
- Section 4.10.6, "Ordering"
- Section 4.10.7, "Using Wildcards to Make a Query"
- Section 4.10.7, "Using Wildcards to Make a Query"
- Section 4.10.8, "Viewing Errors and Overrides"
- Section 4.10.9, "Viewing Customer Account Balance"
- Section 4.10.10, "Viewing Customer Signature"
4.10.1 Changing the Branch of Operation
You can change the branch of operation to a branch other than the one you are signed on to, using this function. The branches to which you can change will be defined in your user profile. You can change your branch of operation only when a function that has been initiated by you in the current branch has been completed.
In the Application tool bar, place the cursor over ‘Branch Online’ icon and then select the option ‘Select Branch’. The ‘List of Values Branch Code’ screen is displayed in which you can query and select branches maintained in the system.

Specify the query parameters and click ‘Fetch’ button. The records meeting the query criteria are displayed in the lower grid.
To change the current branch, click the branch code to which you want to change to from the list of displayed records. System displays a ‘Confirmation Message’ window in which the following confirmation message is displayed:
Do you want to change the branch to: <<Selected Branch Code>>

Click ‘OK’ to continue with the change branch operation else click ‘Cancel’.
To change to a branch, select the branch code from the option list of the branch code text field and click on the Change Branch button. This branch becomes your Host branch. When you are in the Host branch, invoke this screen again and click on Home Branch to return to your Home branch.
Note
When you change your branch through the Change Branch function, you become a GUEST in the branch you have changed into. Your user profile will be the one created for a User ID called GUEST in that branch. However, if you are defined as an End of Day operator, your user profile in your branch will be applicable in the branch you change into.
4.10.2 Making a Query
When you are in the Contract On-line Summary view, all the contracts involving all the products defined for the module are displayed. This may amount to hundreds of contracts. To avoid wading through this mass of data, you can make a query to see only those contracts, which are relevant to you at a particular time.
For example, you may want to see the contracts for just three customers of your choice, maturing on a specific date. Or you may want to see all contracts across products, defined with a specific rate of interest. The ‘Query’ screen makes this possible.

Note
If recommended fields search is enabled for a summary screen, then it is mandatory to specify the minimum required search parameters in the advanced search. Recommended fields will be displayed separately at the top foe easy input.
Refer to Open Development Tools user guides for details.
4.10.3 The Procedure, with Example
Example
In the ‘Summary View’ screen for on-line contracts, the fields displayed are the criteria by which you can make a query.
Suppose you want to see all the loans (in the Loans module) with a specific Maturity date:
- Click on Maturity Date in the Fields list.
- From the Operator option list, click on Equal To.
- To specify the Maturity Date (28 December 1999), pick the date from the option list under Value.
- Click ‘Accept’ button.
- You will see the query appearing in the ‘Query’ screen.
- If you wish to go ahead with the original query, click ‘Ok’ button. You will see the ‘Contract Summary’ screen, with a display of the details of only those contracts maturing on the date you have specified.
- If you do not wish to carry the query through, then click ‘Clear Query’ button. The ‘Query’ screen is cleared and you can proceed to make a new query.
4.10.4 Making a Query Based on More than One Criterion
Suppose you want to see loans (in the Loans module) based on more than one criterion - that is, you may want to see all USD loans with a value date (which come into effect) beyond 31 December 1999 and an interest rate greater than 10%.
To make such a query, first click on Currency under Fields, choose Equal To under Operator and USD under Value. Click ‘Accept’ button. Now click ‘AND’ button. Repeat the procedure with the criteria value date and rate, click ‘Accept’ button and ‘AND’ button in the sequence described for the first criteria currency. You will see the query displayed in the ‘Query’ screen.
Check it for correctness and click ‘Ok’ button. You will see the ‘LD Contract Summary’ screen showing only USD contracts with a value date beyond 31 December 1999 and a rate of interest over 10 per cent.
4.10.5 Selecting the Same Criterion to Apply One or More Conditions
Now, you may want to make a query to see the loans (in the Loans and Deposits module) involving three different products and having a rate less than 12 percent. This involves specifying the products one by one all of which come under the same criterion - Product (listed out under Fields) and indicating a rate range for them.
Click on Product in the Fields list, specify the Operator as Equal To and pick out the product from the Value option list, say LDSP and click ‘Accept’ button. To select another product, click ‘OR’ button and then click Product in the Fields list, specify the Operator as Equal To and pick out the product from the Value option list, say LL05. Repeat the process for the third product, LL07.
To cull out loans involving these three products with an interest rate less than 12%, click ‘AND’ button and specify the rate condition. (Pick Rate from the Fields list, specify the Operator as Less than and give the Value as 12. Click ‘Accept’ button. You will see the following query in the ‘Query’ screen:
PRODUCT = `LDSP OR PRODUCT = `LL05 OR PRODUCT = `LL07 AND RATE < 12
Now click ‘Ok’ button to see the query through. You will see displayed in the ‘LD Contract Summary’ screen, all the loans with an interest rate less than 12% for the three products you have specified.
4.10.6 Ordering
You can see a display of the fields in the Contract Summary View either based on the ascending order or the descending order.
Suppose you want to see the Contract Amounts for all the loans in the Loans and Deposits module in the descending order, highlight the field Contract Amount from the Fields list in the screen and click on it. In the Operator option list, choose Order By.
Once you do this, the Value list will contain the two options:
- Ascending
- Descending
Click the option of your choice, say, Descending. Click ‘Accept’ button.
Click ‘Ok’ button. You will see all the contract amounts of all the loans in the Loans and Deposits module, in the descending order, in the ‘LD Contract Summary’ screen.
If you decide to cancel the ordering you have specified, click ‘Clear Query’ button. The screen clears and you can specify a new order.
4.10.7 Using Wildcards to Make a Query
You need not always specify the criteria. You can use Wildcards such as * or %, to see a particular set of criteria. For instance, in the Loans and Deposits module, you have defined both loan products. All loan products have a Product Code that starts with LD (LD01, LD02 etc.), and all deposit products have a Product Code that begins with DP (DP01, DP (DP01, DP02, etc.).
Now suppose you want to see only the loan products and you know that they all begin with LD, instead of specifying each from the list of Values, you can give the Operator as Like and in the Value field key in LD%.
Once you click Accept and make a query, the ‘Contract Summary’ screen displays all the loan products.
4.10.8 Viewing Errors and Overrides
The system throws up messages while performing a task to either point out an error , or to issue a warning that can be overridden or just to give some information.
Based on the type of message, the screen will be displayed as under.
4.10.8.1 Error
The following error message is displayed.
No Function ID available for execution.
Click ‘Ok’ button to close the window.
4.10.8.2 Override
The following override message is displayed.
Provisioning Details should be manually modified, if required.
Check the box adjoining the required message and click ‘Accept’ button to proceed with the transaction. Click ‘Cancel’ button to close the window.
The maker can view the override messages and can enter remarks before accepting the same. The maker remarks along with the overrides are displayed during authorization.
4.10.8.3 Information
The following Information message is displayed.
The Account is not valid for the particular operation.
Click ‘Ok’ button to close the window.
4.10.9 Viewing Customer Account Balance
You can view the balance and account status of a customer account from any customer account field of any screen in Oracle FLEXCUBE.
To view the balance and account status you need to select the customer account and press F11.
For example, to view the account balance information and account status of the credit account that you have selected in the ‘FStanding Instruction Customer Detailedunds Transfer Contract Input’ screen, place your cursor in the credit account field and press F11.
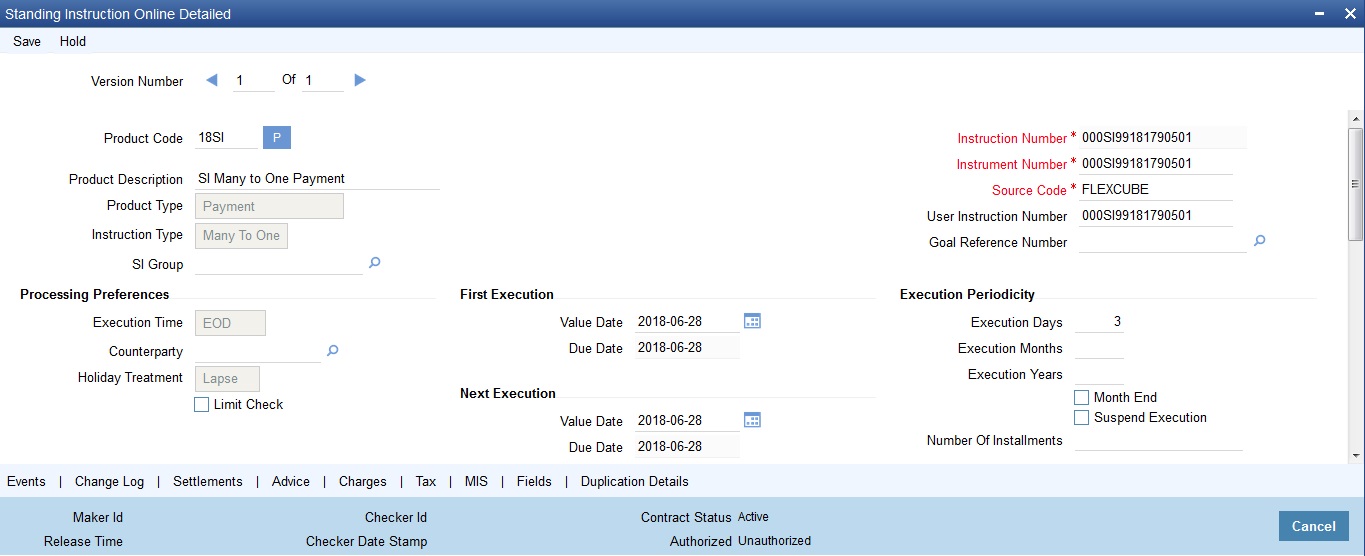
The system will open the ‘Customer Balance View’ screen containing the brief information about the credit account selected..

The ‘Customer Balance View’ screen displays the following information:
- Branch Code
- Customer Account
- Customer ID
- Account Current Balance
- Account Available Balance
- Local Currency Current Balance
Click the ‘Details’ button on the ‘Customer’s Balance View’ screen to invoke the ‘Customer Account Balance’ screen. This screen displays detailed information on customer’s account balance. The system displays the detailed balance information of the selected customer account if it is a valid customer.

‘Customer Account Balance’ screen displays the following information:
Basic Details
The system displays the following details under ‘Account Details’ section:
- Account Number
- Account Description
- Branch Code
- Account Class
- Currency
- Customer No
- Account Open Date
- Customer Name
- Ownership
- Mode of Operation
Memo Details
The system displays the following details:
- Instruction Id
- Instruction Description
- Cheque Date
- Instruction Expiry Date
- Display Type
Balances
The system displays the following details under ‘Balance Details’ section:
- Current Balance
- Uncollected
- Blocked
- Available
- Total Available
- Book Balance
- Sweep Eligible Balance
- Available TOD
Status
The system displays the following details under ‘Balance Details’ section:
- Posting Allowed
- Blocked
- Dormant
- Stop Payment
- Frozen
- Status Change Automatic
- No Credits
- Overdraft
- No Debits
- The system captures the required information from the ‘Transaction Enquiry’ screen and defaults the same information in transaction details.

Turnover Details
The system displays the following details under ‘Balance Details’ section:
- Opening
- Daily Turnover (Cr)
- Daily Turnover (Dr)
- Currency (ACY)
Additional Details
The system displays the following details under ‘Balance Details’ section:
- Accrued Interest (Dr)
- Accrued Interest (Cr)
- Interest Due
- Charges Due
- Last Interest Debit
- Last Interest Credit
- Last DR Activity
- Last CR Activity
The system displays the transactions depending on the ‘Statement Period’ selected, and displays the following details under ‘Transactions’ section:
- Transaction Date
- Value Date
- Description
- Branch
- Credit
- Debit
- Click ‘Exit’ button to exit from the screen.
4.10.10 Viewing Customer Signature
You can view the customer account signature of any customer account and the authorized signatories based on the instruction maintained from any customer account field of any screen in Oracle FLEXCUBE.
To view the customer account signature you need to select the customer account and press F12. System displays the signature details of the selected customer account and the amount based instruction details if it is a valid customer.
The signature details of the customer account is displayed in the ‘Customer Account Signature/Image Verification’ screen.
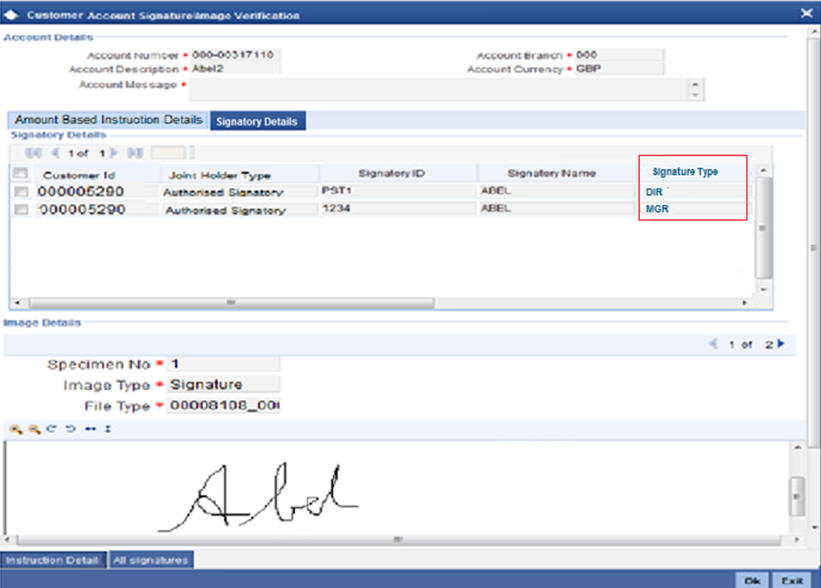
4.10.10.1 Signatory Details Tab
The system displays the following values:
- Customer Id
- Joint Holder Type
- Signatory Id
- Signatory Name
- Signature Type
4.10.10.2 Amount Based Instruction Details Tab
This tab will be visible only for certain webbased function ids where there is debit from customer account. Here you can view the instructions maintained for the amount slab in which the transaction falls. If no instructions are maintained for that amount then the instruction tab will have no data.
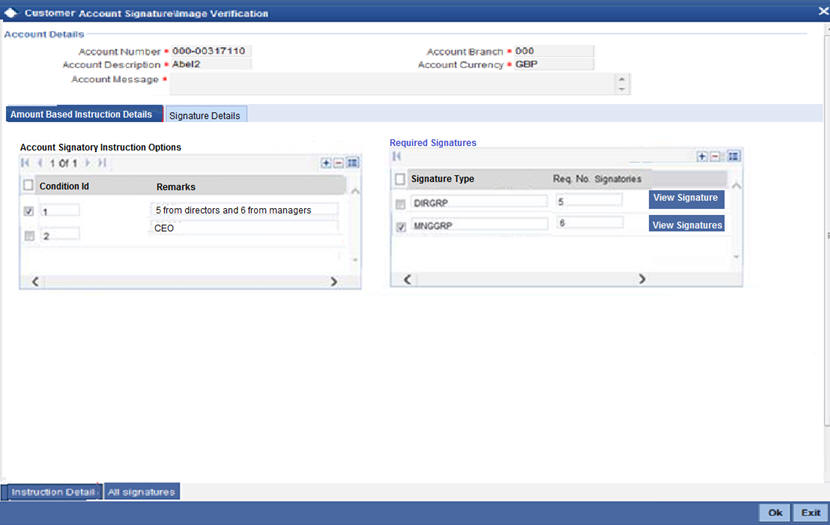
The system displays the following values:
- Customer Id
- Remarks
- Signature Type
- Required Number of Signatories
Click on ‘View Signatures’ button to view the signatures maintained for the signature ids belonging to the selected group.
Note
The Amount Based Signatory Instructions tab will be enabled in the following RT screens only if the value of param ‘AMOUNT_BASED_SV’ is Y in CSTM_BRANCH_LOC_PARAMS.
- Cash Withdrawal (1001)
- Account to Account Transfer (1006)
- Miscellaneous Customer Debit (1008)
- TC Sale against Account (1009)
- BC Issue against Account (1010)
- Cheque Withdrawal (1013)
- DD Issue against Account (1014)
- Bill Payment Against account (1075)
- Account Close Out Withdrawal by BC (1300)
- Close Out Withdrawal (1301)
- Multimode Deposit Redemption (1317)
- Account Close Out Withdrawal (1320)
- Account Close Out Withdrawal by Multi Mode (1350)
- Cash Transfer (1405)
- Inward Clearing Data Entry (5555)
- FX Sale Against Account (8206)
- TT Issue against Account (8318)
- DD Issue against Cheque (8330)
- BC Issue against Cheque (8335)
- In House Cheque Deposit (LOCH)
- Payment by in house cheque (1045)
4.10.10.3 All Signatures button
Click ‘All Signatures’ button to view a consolidated view of all signatures linked to a signature id.
System displays the first signature by default. You can view the next signature by clicking the forward arrow button.
Note
If the account signature is not available the customer signature is displayed.
You cannot use the following characters in any of the Oracle FLEXCUBE fields:
Tilde |
~ |
Caret |
^ |