12. Vault Operations
12.1 Introduction
This chapter details the various Vault Operations that can be performed through this module.
This chapter contains the following sections:
- Section 12.2, "Transferring Cash from Vault"
- Section 12.3, "Transferring Cash to Vault"
- Section 12.4, "Buy Cash from Central Bank"
- Section 12.5, "Sell Cash to Central Bank"
- Section 12.6, "Buying TCs from Agent"
- Section 12.7, "Buying TCs from Head Office"
- Section 12.8, "Selling TCs to Head Office"
- Section 12.9, "Buying TCs from Vault"
- Section 12.10, "Returning TCs to Vault"
- Section 12.11, "Capturing TC Details"
12.2 Transferring Cash from Vault
You can transfer cash from vault using the ‘Transfer cash from Vault’ screen. You can invoke this screen by typing ‘9007’ in the field at the top right corner of the Application tool bar and clicking on the adjoining arrow button.
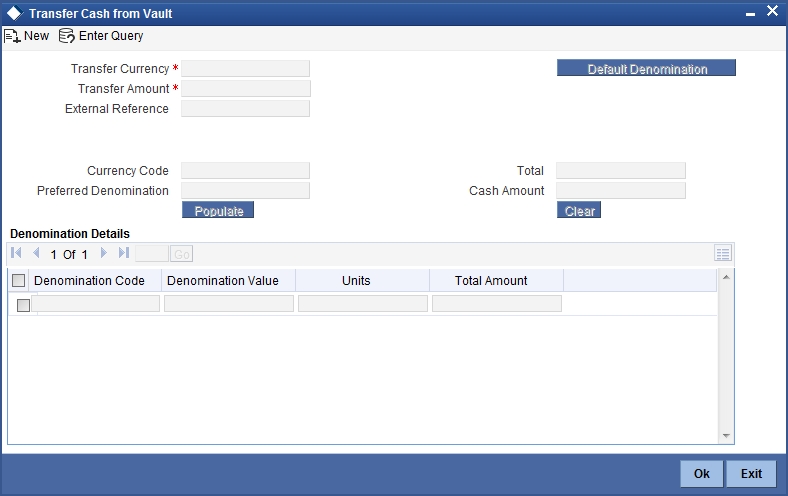
Here, you can capture the following details:
TransferCurrency
Select the currency to be transferred from Vault.
Transfer Amount
Specify the total amount to be transferred.
Preferred Denomination
Specify the preferred denomination.
Total
The system displays the total amount transferred.
External Reference
This is system generated reference number for the branch, which is the unique identifier for a branch transaction.
12.2.1 Capturing denomination details
You have to specify the following details for the cash being transferred:
Denomination Code
Specify the denomination of the currency used in the transaction. For every currency, the various denominations are assigned separate denomination codes. These codes are displayed in the adjoining option list. Choose the appropriate one.
Denomination Value
The system computes the face value of the denomination and displays it. For instance if the denomination code represents a USD 100, the value will be displayed as ‘100’.
Units
Indicate the number of units of the specified denomination. By default, vault contents are decremented for outflow transactions like cash transfer. To reverse this default behaviour, you can specify units in negative.
Total Amount
The system computes the denomination value by multiplying the denomination value with the number of units. For instance, if the denomination code represents a USD 100 and the number of units is 10, the denomination amount will be ‘1000’.
After entering these details, you need to click save icon. The specified amount will flow from vault and gets updated.
Click save icon to save the transaction. The approver can fetch this transaction for his/her task list and authorize it. The authorization process is similar to that of cash deposit.
Refer the corresponding section under ‘Depositing Cash’ in the chapter ‘Cash Transactions’ of this User Manual for further details.
12.3 Transferring Cash to Vault
You can transfer cash to vault using the ‘Transfer cash to Vault’ screen. You can invoke this screen by typing ‘9008’ in the field at the top right corner of the Application tool bar and clicking on the adjoining arrow button.
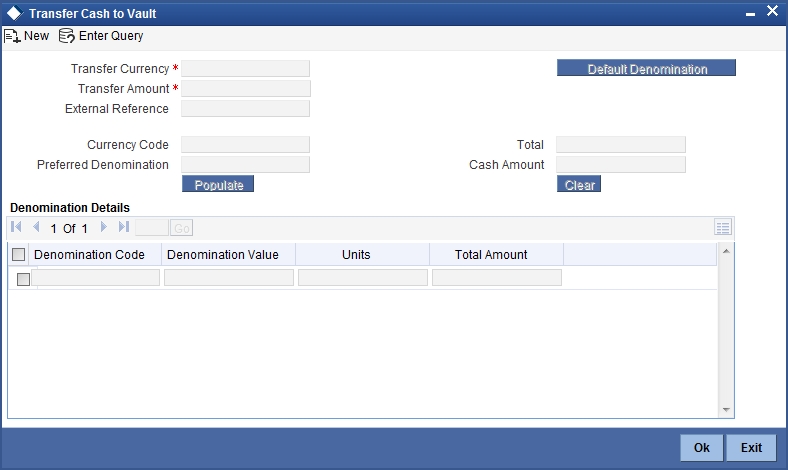
Here, you can capture the following details:
Transaction Currency
Select the currency to be transferred to Vault.
Transaction Amount
Specify the total amount to be transferred.
Preferred Denomination
Specify the preferred denomination.
Total
The system displays the total amount transferred.
External Reference
This is system generated reference number for the branch, which is the unique identifier for a branch transaction.
12.3.1 Capturing denomination details
You have to specify the following details for the cash being transferred:
Denomination Code
Specify the denomination of the currency used in the transaction. For every currency, the various denominations are assigned separate denomination codes. These codes are displayed in the adjoining option list. Choose the appropriate one.
Denomination Value
The system computes the face value of the denomination and displays it. For instance if the denomination code represents a USD 100, the value will be displayed as ‘100’.
Units
Indicate the number of units of the specified denomination. By default, vault contents are incremented for inflow transactions like cash transfer. To reverse this default behaviour, you can specify units in negative.
Total Amount
The system computes the denomination value by multiplying the denomination value with the number of units. For instance, if the denomination code represents a USD 100 and the number of units is 10, the denomination amount will be ‘1000’.
After entering these details you need to click save icon. The specified amount will flow into the vault and gets updated in the branch.
Click save icon to save the transaction. The approver can fetch this transaction for his/her task list and authorize it. The authorization process is similar to that of cash deposit.
Refer the corresponding section under ‘Depositing Cash’ in the chapter ‘Cash Transactions’ of this User Manual for further details.
12.4 Buy Cash from Central Bank
This section contains the following topics:
- Section 12.4.1, "Buying Cash from Central Bank"
- Section 12.4.2, "Specifying Denomination Details"
- Section 12.4.3, "Specifying the MIS Details"
- Section 12.4.4, "Specifying UDF Details"
12.4.1 Buying Cash from Central Bank
You can buy cash from central bank using the ‘Buy Cash from Central Bank’ screen. You can invoke this screen by typing ‘9009’ in the field at the top right corner of the Application tool bar and clicking on the adjoining arrow button.
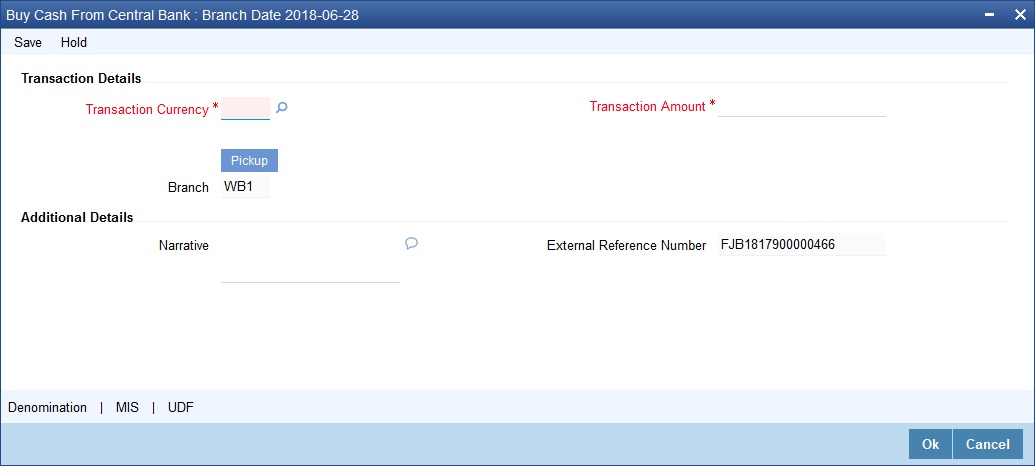
Here, you can capture the following details:
Transaction Currency
Select the currency to be bought from the Central bank.
Transaction Amount
Specify the total amount to be transferred.
Narrative
Enter remarks about the transaction.
External Reference
This is system generated reference number for the branch, which is the unique identifier for a branch transaction.
In the single stage flow, if there is an transaction level override or error during approval then the transaction will be moved to the pending queue. Without save action being initiated, the transaction will not be in pending queue.
Enrichment Stage
In this stage some additional details need to be captured on the screen. The screen displayed is as below:
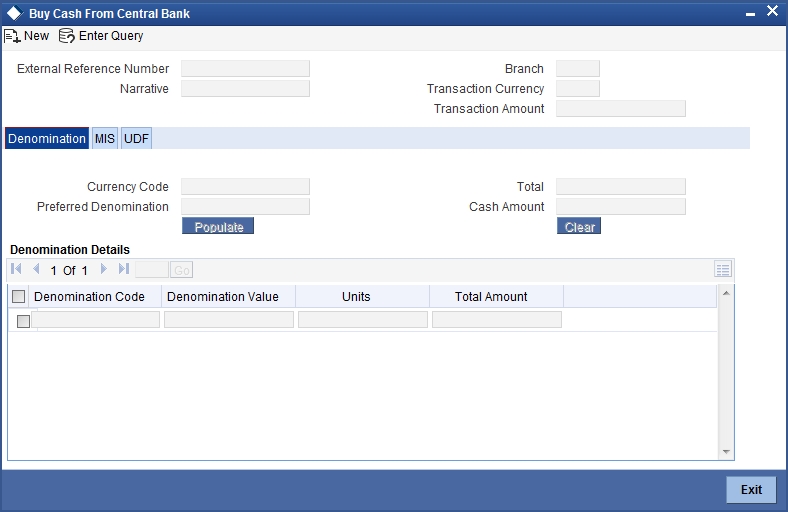
The screen has two tabs which are as follows:
- Denomination
- MIS/UDF
12.4.2 Specifying Denomination Details
The following details have to be captured in this section:
Currency Code
The system displays the currency of the account.
Denomination Code
Specify the denomination of the currency used in the transaction. For every currency, the various denominations are assigned separate denomination codes. These codes are displayed in the adjoining option list. Choose the appropriate one.
Denomination Value
The system computes the face value of the denomination and displays it. For instance if the denomination code represents a USD 100, the value will be displayed as ‘100’.
Units
Indicate the number of units of the specified denomination. By default, vault contents are incremented for inflow transactions like cash purchase. To reverse this default behaviour, you can specify units in negative.
Total Amount
The system computes the denomination value by multiplying the denomination value with the number of units. For instance, if the denomination code represents a USD 100 and the number of units is 10, the denomination amount will be ‘1000’.
12.4.3 Specifying the MIS Details
You can specify the details in the ‘MIS’ tab of the screen.
MIS is user definable and is configured at the host. Refer to the Oracle FLEXCUBE Host User manual for details.
As an example, the following details may be captured in this section:
Cost Center
The MIS code assigned to the cost center related to the account involved in the transaction is displayed here.
Account Officer
The MIS code assigned to the account officer in-charge of executing this transaction is displayed here.
Contract in Various Currencies
Explanation required from Dev/testing team.
Standard Industrial Code
The MIS code assigned to the industry to which your customer belongs is displayed here.
12.4.4 Specifying UDF Details
You can specify the UDF details under ‘UDF’ tab.
Field Name
The system will display all the User-Defined Fields (UDF) maintained for the product in the Host.
Field Value
Specify the value for the required UDFs.
The approver can fetch this transaction for his/her task list and authorize it. The authorization process is similar to that of cash deposit.
Refer the corresponding section under ‘Depositing Cash’ in the chapter ‘Cash Transactions’ of this User Manual for further details.
12.5 Sell Cash to Central Bank
This section contains the following topics:
- Section 12.5.1, "Selling Cash to Central Bank"
- Section 12.5.2, "Specifying Denomination Details"
- Section 12.5.3, "Specifying MIS Details"
- Section 12.5.4, "Specifying UDF Details"
12.5.1 Selling Cash to Central Bank
You can sell cash to central bank using the ‘Sell Cash to Central Bank’ screen. You can invoke this screen by typing ‘9010’ in the field at the top right corner of the Application tool bar and clicking on the adjoining arrow button.
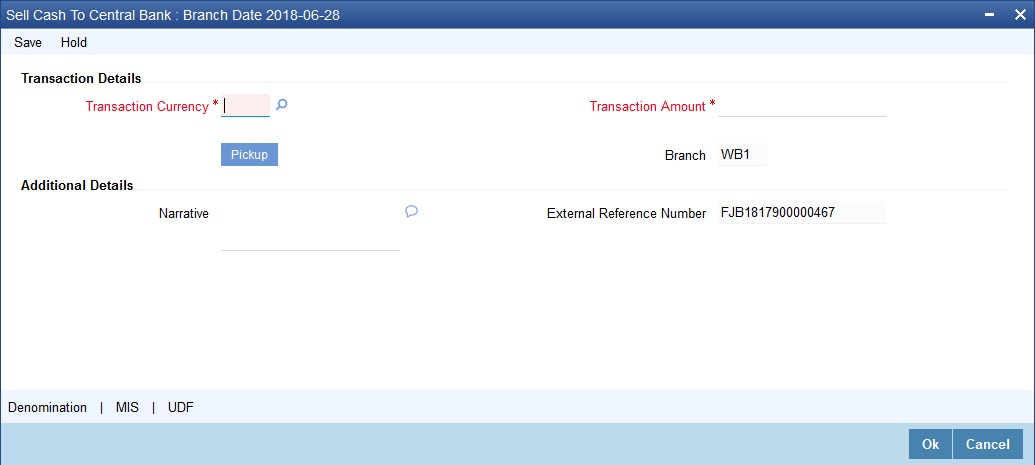
Here, you can capture the following details:
Transaction Currency
Select the currency to be sold to Central bank.
Transaction Amount
Specify the total amount to be sold.
Narrative
Enter description of the transaction.
External Reference
This is system generated reference number for the branch, which is the unique identifier for a branch transaction.
In the single stage flow, if there is an transaction level override or error during approval then the transaction will be moved to the pending queue. Without save action being initiated, the transaction will not be in pending queue.
In this stage some additional fields are displayed like Exchange rate.
The screen has two tabs which are as follows:
- Denomination
- MIS/UDF
12.5.2 Specifying Denomination Details
The following details have to be captured in this section:
Currency Code
The system displays the currency of the account.
Denomination Code
Specify the denomination of the currency used in the transaction. For every currency, the various denominations are assigned separate denomination codes. These codes are displayed in the adjoining option list. Choose the appropriate one.
Denomination Value
The system computes the face value of the denomination and displays it. For instance if the denomination code represents a USD 100, the value will be displayed as ‘100’.
Units
Indicate the number of units of the specified denomination. By default, vault contents are decremented for outflow transactions like cash sale. To reverse this default behaviour, you can specify units in negative.
Total Amount
The system computes the denomination value by multiplying the denomination value with the number of units. For instance, if the denomination code represents a USD 100 and the number of units is 10, the denomination amount will be ‘1000’.
12.5.3 Specifying MIS Details
You can capture the details in the ‘MIS’ tab of the screen:
MIS is user definable and is configured at the host. Refer to the Oracle FLEXCUBE host user manual for details.
As an example, the following details may be captured in this screen:
Cost Center
The MIS code assigned to the cost center related to the account involved in the transaction is displayed here.
Account Officer
The MIS code assigned to the account officer in-charge of executing this transaction is displayed here.
Standard Industrial Code
The MIS code assigned to the industry to which your customer belongs is displayed here.
Contract in Various Currencies
12.5.4 Specifying UDF Details
You can capture the UDF details under ‘UDF’ tab.

Field Name
The system will display all the User-Defined Fields (UDF) maintained for the product in the Host.
Field Value
Specify the value for the required UDFs.
The approver can fetch this transaction for his/her task list and authorize it. The authorization process is similar to that of cash deposit.
Refer the corresponding section under ‘Depositing Cash’ in the chapter ‘Cash Transactions’ of this User Manual for further details.
12.6 Buying TCs from Agent
You can buy TCs from Agent using the ‘Buy TCs from Agent’ screen. You can invoke this screen by typing ‘9011’ in the field at the top right corner of the Application tool bar and clicking on the adjoining arrow button.
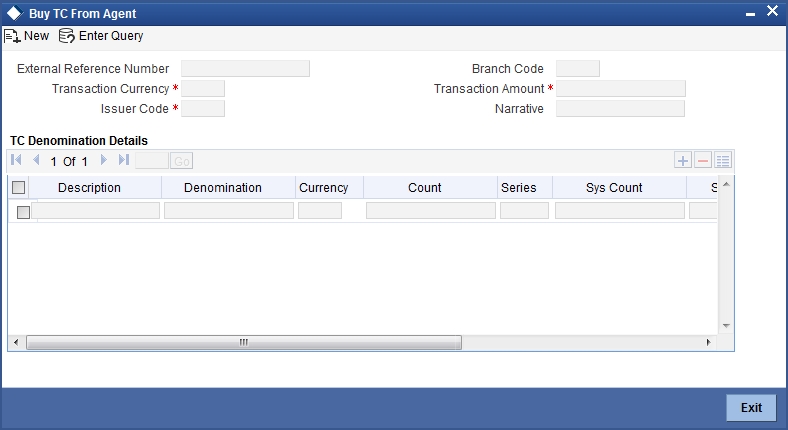
Here, you can capture the following details:
External Reference Number
This is system generated based on the XREF Number sequence for the branch. It is a unique identifier for a branch transaction.
Transaction Currency
Select the currency by which TC is being purchased, from the option list available.
Transaction Amount
Specify the total amount of transaction.
Issuer Code
Select the code of the issuer from the option list available.
Narrative
Enter remarks about the transaction if any.
Branch Code
The current branch is defaulted.
12.6.1 Specifying TC Details
The following details have to be maintained:
Description
Select the description for the denomination of the TC from the adjoining option list.
Denomination
The system displays the denomination for the specified description.
Currency
The system displays the currency.
Count
Specify the count of the TC which you have selected.
Series
Specify the series having the TC denomination. The valid TC series is shown in the adjoining option list. With this reference you have to specify the start and end number.
System Count
The system count will be defaulted only if you have selected the TC series from the option list. Otherwise this field will be blank.
Start Number
Specify the starting number of the series. If you have selected the TC series from the option list, the start number will be defaulted. You need to modify this value.
End Number
The system defaults the end number, which is the sum of start number and the count.
TC Amount
The system defaults the TC Amount. It is the product of the denomination and the count.
After entering all the data, click save icon to save the transaction. The approver can fetch this transaction for his/her task list and authorize it. The authorization process is similar to that of cash deposit.
Refer the corresponding section under ‘Depositing Cash’ in the chapter ‘Cash Transactions’ of this User Manual for further details.
12.7 Buying TCs from Head Office
You can buy TCs from Head office using the ‘Buy TCs from HO’ screen. You can invoke this screen by typing ‘9015 in the field at the top right corner of the Application tool bar and clicking on the adjoining arrow button.
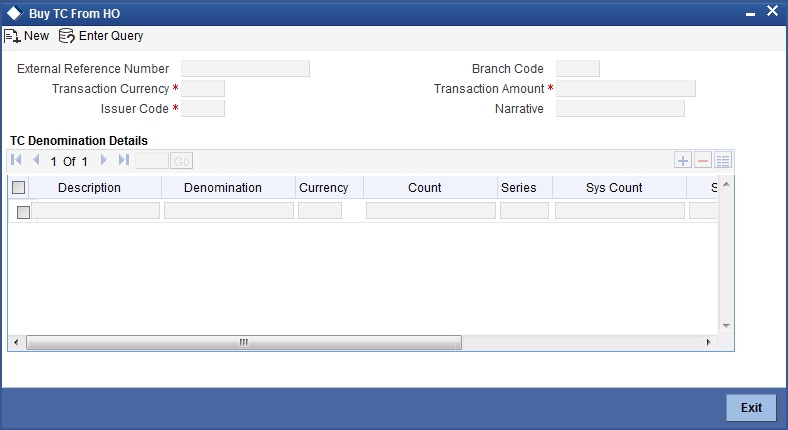
Here, you can capture the following details:
External Reference Number
This is system generated based on the XREF Number sequence for the branch. It is a unique identifier for a branch transaction.
Transaction Currency
Select the currency by which TC is being purchased, from the option list available.
Transaction Amount
Specify the total amount of transaction.
Issuer Code
Select the code of the issuer from the option list available.
Narrative
Enter remarks about the transaction if any.
Branch Code
The current branch is defaulted.
12.7.1 Capturing TC Details
The following details have to be captured:
Description
Select the description for the denomination of the TC from the adjoining option list.
Denomination
The system displays the denomination for the specified description.
Currency
The system displays the currency.
Count
Specify the count of the TC which you have selected.
Series
Specify the series having the TC denomination. The valid TC series is shown in the adjoining option list. With this reference you have to specify the start and end number.
System Count
The system count will be defaulted only if you have selected the TC series from the option list. Otherwise this field will be blank.
Start Number
Specify the starting number of the series. If you have selected the TC series from the option list, the start number will be defaulted. You need to modify this value.
End Number
The system defaults the end number, which is the sum of start number and the count.
TC Amount
The system defaults the TC Amount. It is the product of the denomination and the count.
After entering all the data, click save icon to save the transaction. The approver can fetch this transaction for his/her task list and authorize it. The authorization process is similar to that of cash deposit.
Refer the corresponding section under ‘Depositing Cash’ in the chapter ‘Cash Transactions’ of this User Manual for further details.
12.8 Selling TCs to Head Office
You can sell TCs from Head office using the ‘Sell TCs to HO’ screen. You can invoke this screen by typing ‘9016’ in the field at the top right corner of the Application tool bar and clicking on the adjoining arrow button.

Here, you can capture the following details:
External Reference Number
This is system generated based on the XREF Number sequence for the branch. It is a unique identifier for a branch transaction.
Transaction Currency
Select the currency by which TC is being purchased, from the option list available.
Transaction Amount
Specify the total amount of transaction.
Issuer Code
Select the code of the issuer from the option list available.
Narrative
Enter remarks about the transaction, if any.
Branch Code
The current branch is defaulted.
12.8.1 Capturing TC Details
You have to maintain the following information in this section:
Description
Select the description for the denomination of the TC from the adjoining option list.
Denomination
The system displays the denomination for the specified description.
Currency
The system displays the currency.
Count
Specify the count of the TC which you have selected.
Series
Specify the series having the TC denomination. The valid TC series is shown in the adjoining option list. With this reference you have to specify the start and end number.
System Count
The system count will be defaulted only if you have selected the TC series from the option list. Otherwise this field will be blank.
Start Number
Specify the starting number of the series. If you have selected the TC series from the option list, the start number will be defaulted. You need to modify this value.
End Number
The system defaults the end number, which is the sum of start number and the count.
TC Amount
The system defaults the TC Amount. It is the product of the denomination and the count.
After entering all the data, click save icon to save the transaction. The approver can fetch this transaction for his/her task list and authorize it. The authorization process is similar to that of cash deposit.
Refer the corresponding section under ‘Depositing Cash’ in the chapter ‘Cash Transactions’ of this User Manual for further details.
12.9 Buying TCs from Vault
You can buy TCs from Vault using the ‘Buy TCs from Vault’ screen. You can invoke this screen by typing ‘9017’ in the field at the top right corner of the Application tool bar and clicking on the adjoining arrow button.

Here, you can capture the following details:
External Reference Number
This is system generated based on the XREF Number sequence for the branch. It is a unique identifier for a branch transaction.
Transaction Currency
Select the currency by which TC is being purchased, from the option list available.
Transaction Amount
Specify the total amount of transaction.
Issuer Code
Select the code of the issuer from the option list available.
Narrative
Enter remarks about the transaction if any.
Branch Code
The current branch is defaulted.
12.9.1 Capturing TC Details
You have to capture the following details of the TC:
Description
Select the description for the denomination of the TC from the adjoining option list.
Denomination
The system displays the denomination for the specified description.
Currency
The system displays the currency.
Count
Specify the count of the TC which you have selected.
Series
Specify the series having the TC denomination. The valid TC series is shown in the adjoining option list. With this reference you have to specify the start and end number.
System Count
The system count will be defaulted only if you have selected the TC series from the option list. Otherwise this field will be blank.
Start Number
Specify the starting number of the series. If you have selected the TC series from the option list, the start number will be defaulted. You need to modify this value.
End Number
The system defaults the end number, which is the sum of start number and the count.
TC Amount
The system defaults the TC Amount. It is the product of the denomination and the count.
After entering all the data click save icon to save the transaction. The approver can fetch this transaction for his/her task list and authorize it. The authorization process is similar to that of cash deposit.
Refer the corresponding section under ‘Depositing Cash’ in the chapter ‘Cash Transactions’ of this User Manual for further details.
12.10 Returning TCs to Vault
You can return TCs to Vault using the ‘Return TCs to Vault’ screen. You can invoke this screen by typing ‘9018’ in the field at the top right corner of the Application tool bar and clicking on the adjoining arrow button.
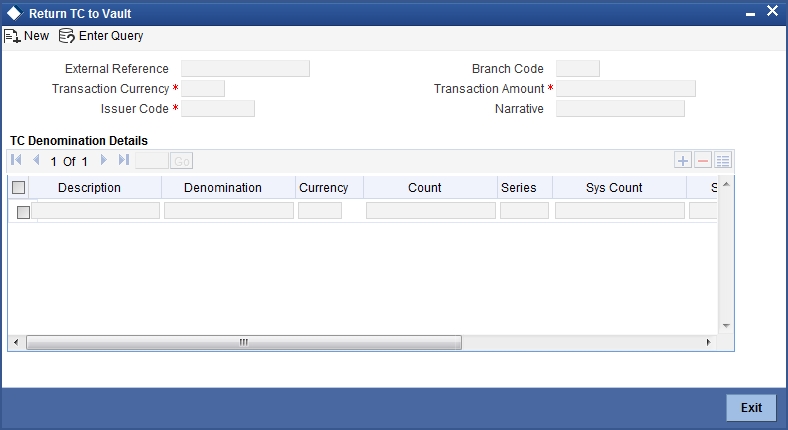
Here, you can capture the following details:
External Reference Number
This is system generated based on the XREF Number sequence for the branch. It is a unique identifier for a branch transaction.
Transaction Currency
Select the currency by which TC is being purchased, from the option list available.
Transaction Amount
Specify the total amount of transaction.
Issuer Code
Select the code of the issuer from the option list available.
Narrative
Enter remarks about the transaction if any.
Branch Code
The current branch is defaulted.
12.11 Capturing TC Details
You have to specify the following details of a TC:
Description
Select the description for the denomination of the TC from the adjoining option list.
Denomination
The system displays the denomination for the specified description.
Currency
The system displays the currency.
Count
Specify the count of the TC which you have selected.
Series
Specify the series having the TC denomination. The valid TC series is shown in the adjoining option list. With this reference you have to specify the start and end number.
System Count
The system count will be defaulted only if you have selected the TC series from the option list. Otherwise this field will be blank.
Start Number
Specify the starting number of the series. If you have selected the TC series from the option list, the start number will be defaulted. You need to modify this value.
End Number
The system defaults the end number, which is the sum of start number and the count.
TC Amount
The system defaults the TC Amount. It is the product of the denomination and the count.
After entering all the data, click save icon to save the transaction. The approver can fetch this transaction for his/her task list and authorize it. The authorization process is similar to that of cash deposit.
Refer the corresponding section under ‘Depositing Cash’ in the chapter ‘Cash Transactions’ of this User Manual for further details.
12.11.1 Viewing TCs available with Vault
You can view TCs available with vault using the ‘Display TCs available with Vault’ screen. You can invoke this screen by typing ‘9020’ in the field at the top right corner of the Application tool bar and clicking on the adjoining arrow button.
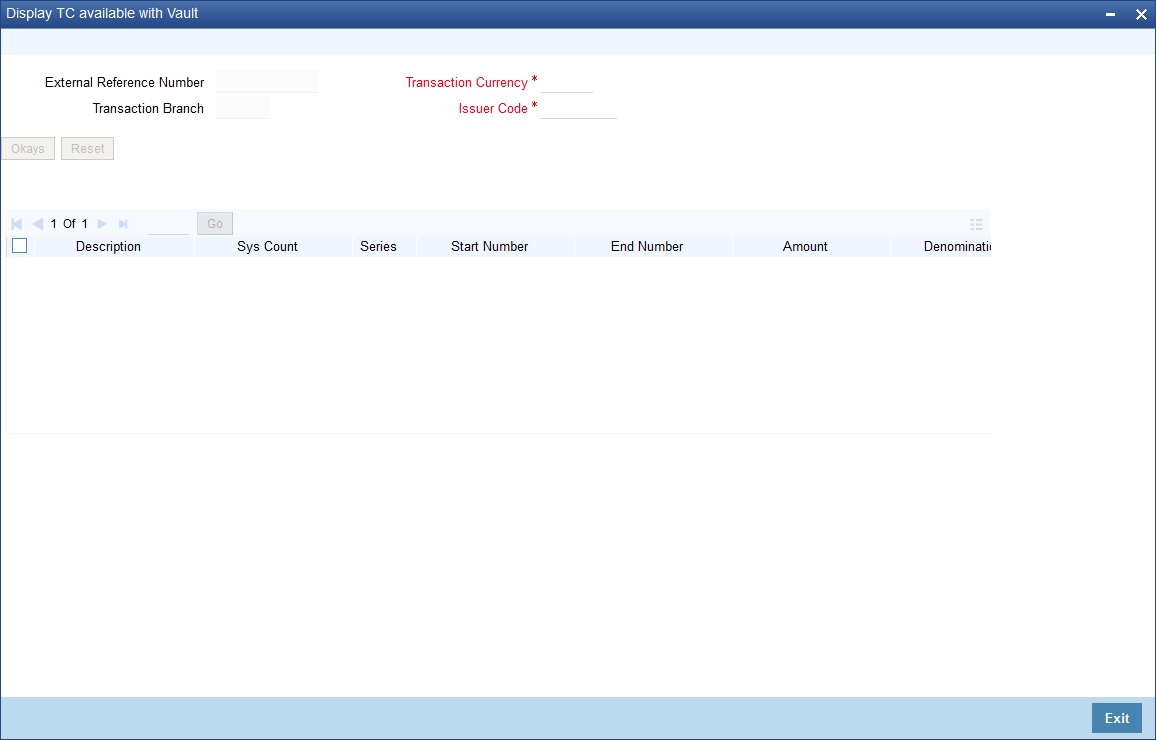
Here, you can capture the following details:
Transaction Branch
The current branch is displayed here.
Issuer Code
Select the issuer code of the instrument from the option list available.
Transaction Currency
Select the currency in which the transaction is carried out, from the option list available. After entering the above details, click ‘Ok’ button on the screen to view all the TCs available with vault. The system displays the following details:
- Description
- Sys Count
- Series
- Start Number
- End Number
- Amount
- Denomination
To view the details in a vault in other branch, click ‘Reset’ button. After this you can enter the appropriate values and click ‘Ok’ button.