| Oracle® Retail Pricing Cloud Service Oracle Retail Pricing Cloud Service User Guide 16.0.029 E99964-01 |
|

 Previous |
| Oracle® Retail Pricing Cloud Service Oracle Retail Pricing Cloud Service User Guide 16.0.029 E99964-01 |
|
Previous |
A promotion is a temporary reduction in price. Promotions consist of one or more Offers which can vary in complexity. Some offers require the consumer to qualify for the offer by meeting specific purchasing conditions, other offers are available for any items purchased.
Updates can be made to the details of an existing offer on a promotion and new offers can be added to an existing promotion.
Creating a Promotion is done using either the Create Promotion task from the Task List, or selecting the Create action from the Task bar on the Promotions Search screen (which is called from the Manage Promotion task on the Task List).
Creating a promotion is a two step process. First, Offers are added to a promotion using the Offer Wizard. After the Offer is created, eligible locations are added to the offer.
There are three potential stops within the wizard:
Perform the following procedure to create a promotion and add an offer to the promotion:
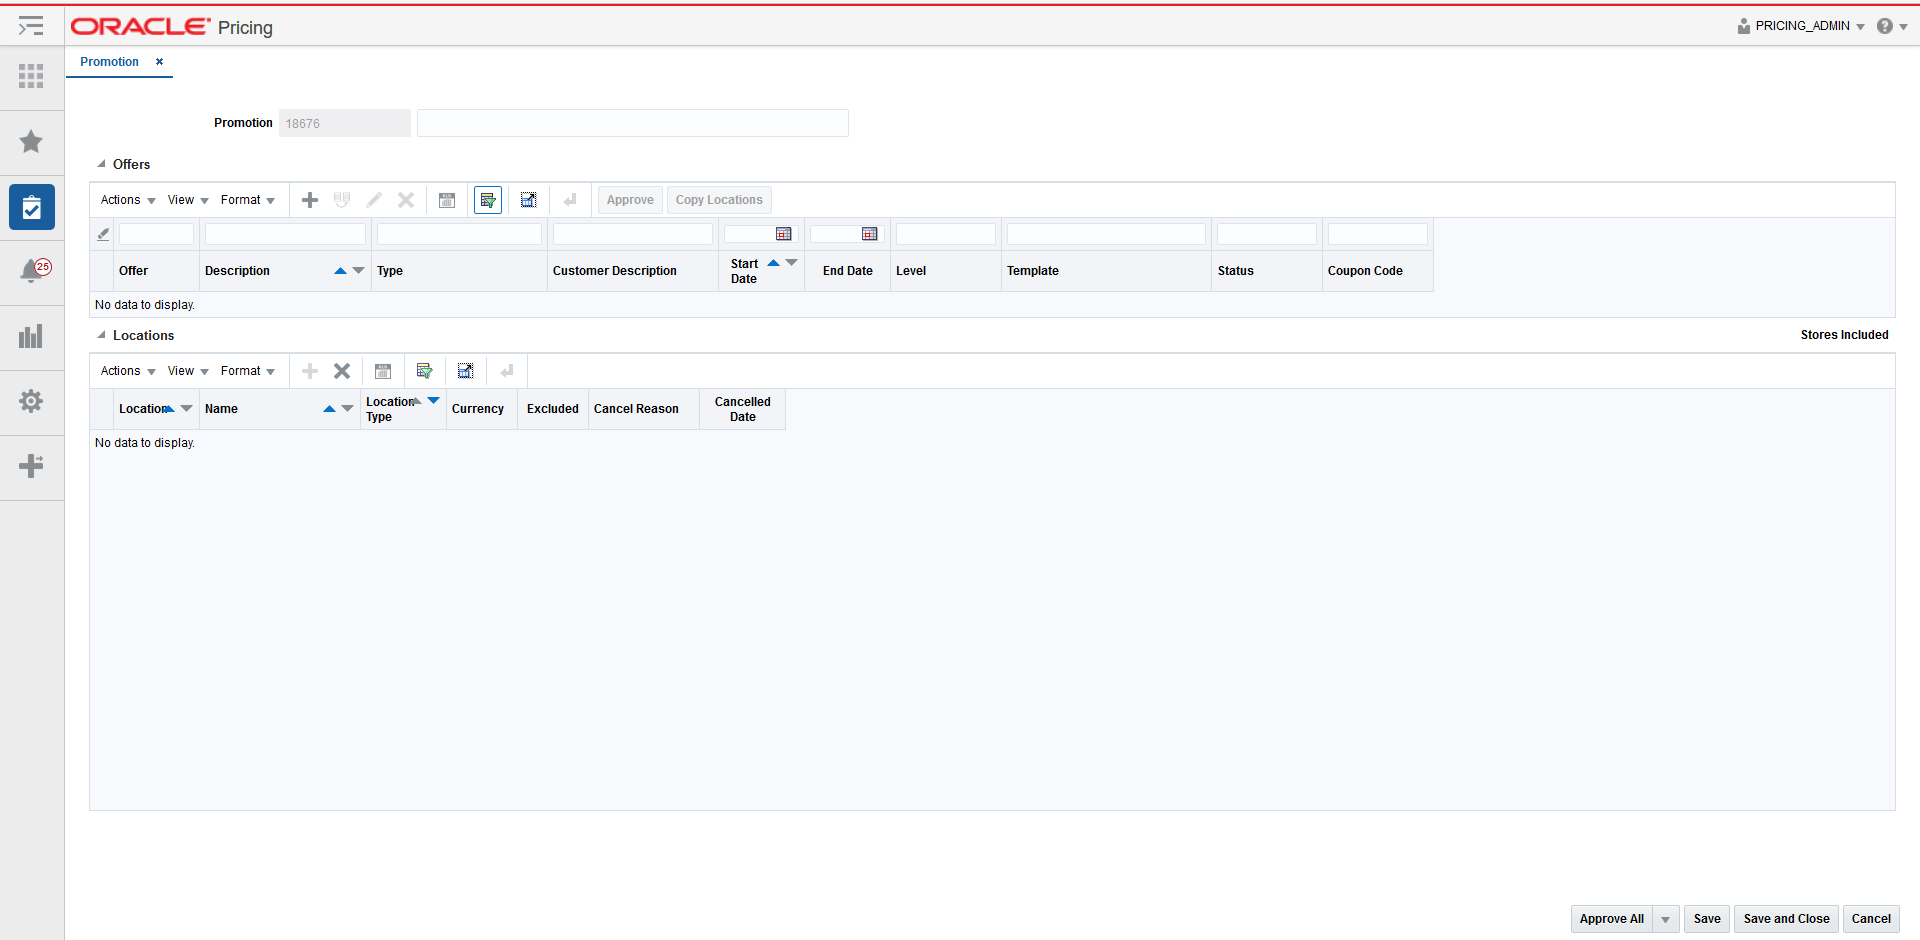
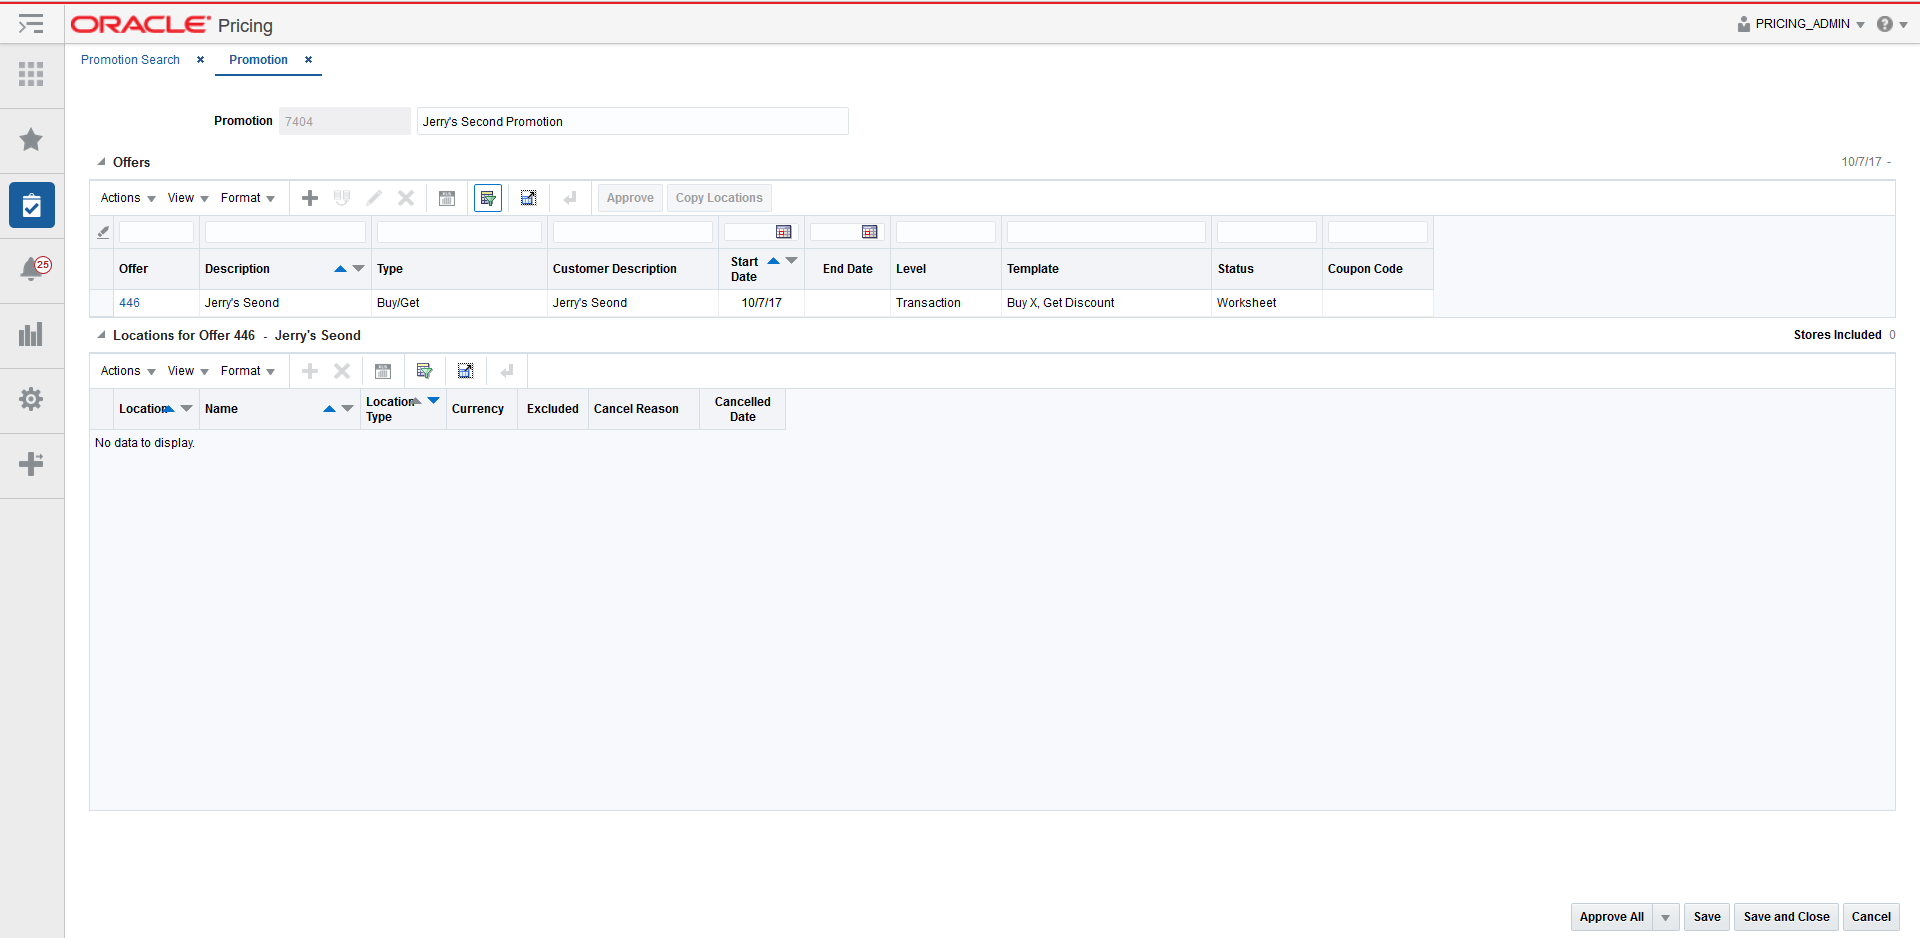
From the Tasks menu, select Create Promotion under Promotions. The Promotion tab appears.
Enter the Promotion Description.
In the Offers pane, select Add from the Actions menu. The Offer Wizard is launched. Continue with Offer Page.
Offer Page
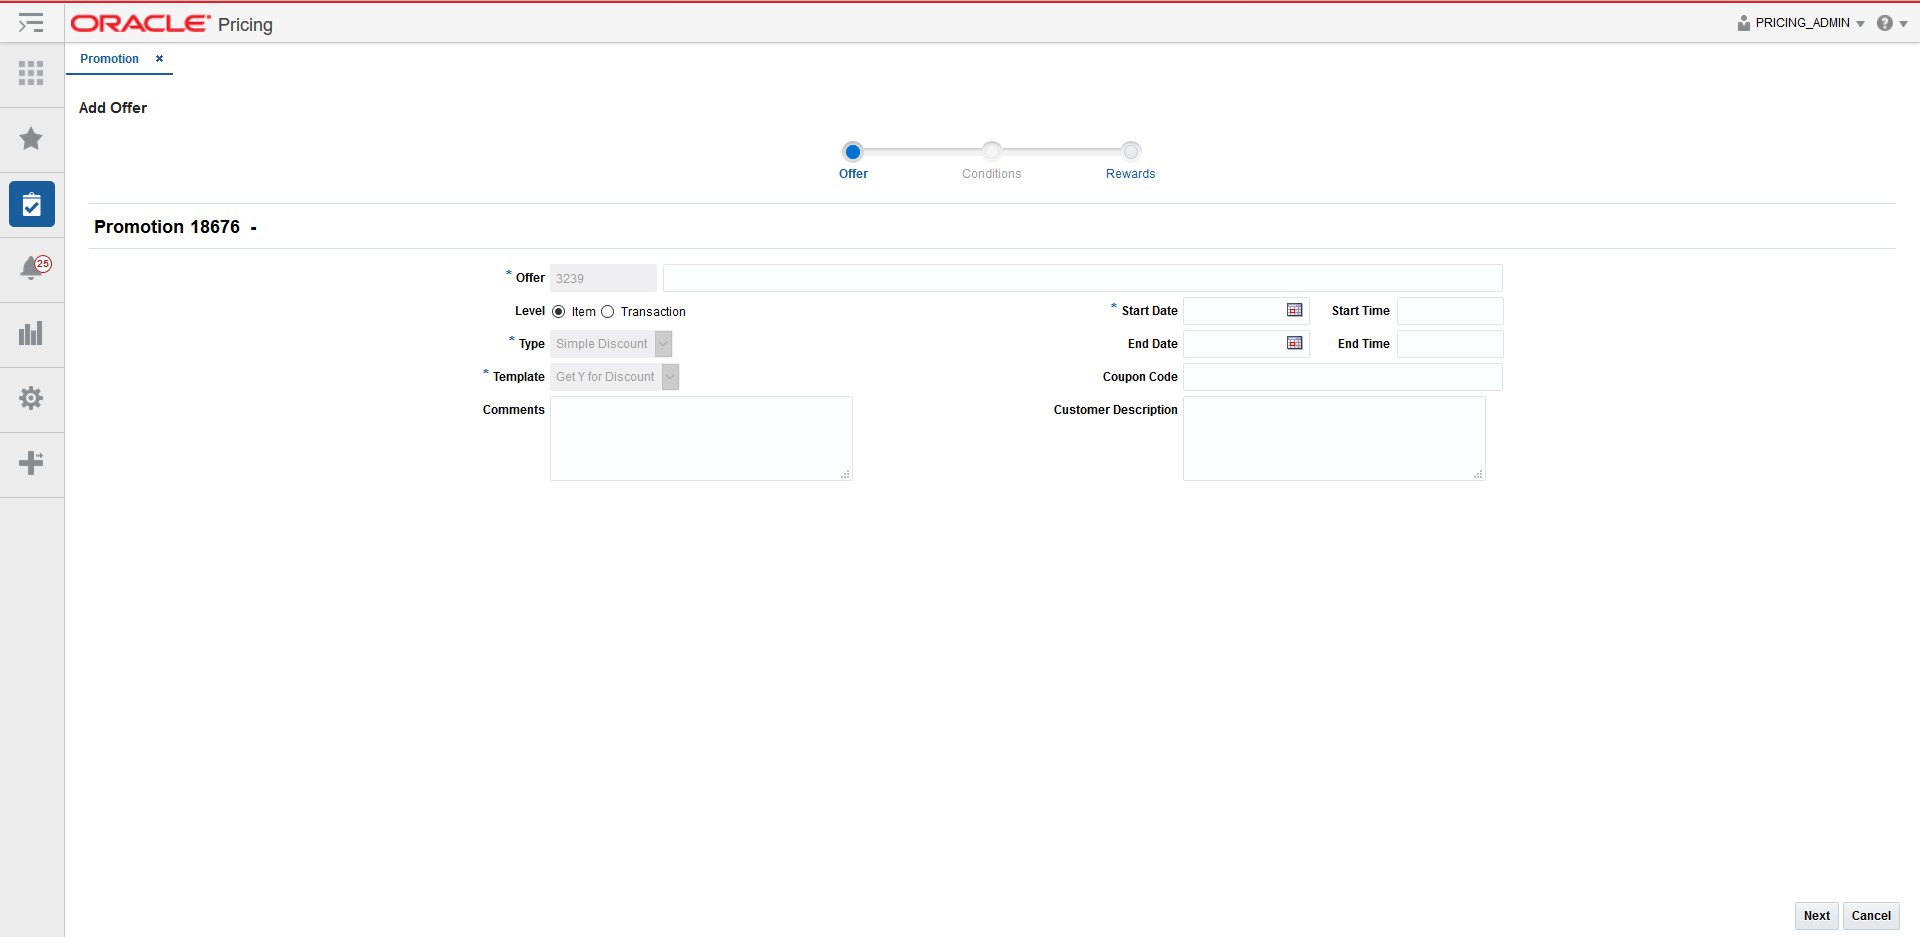
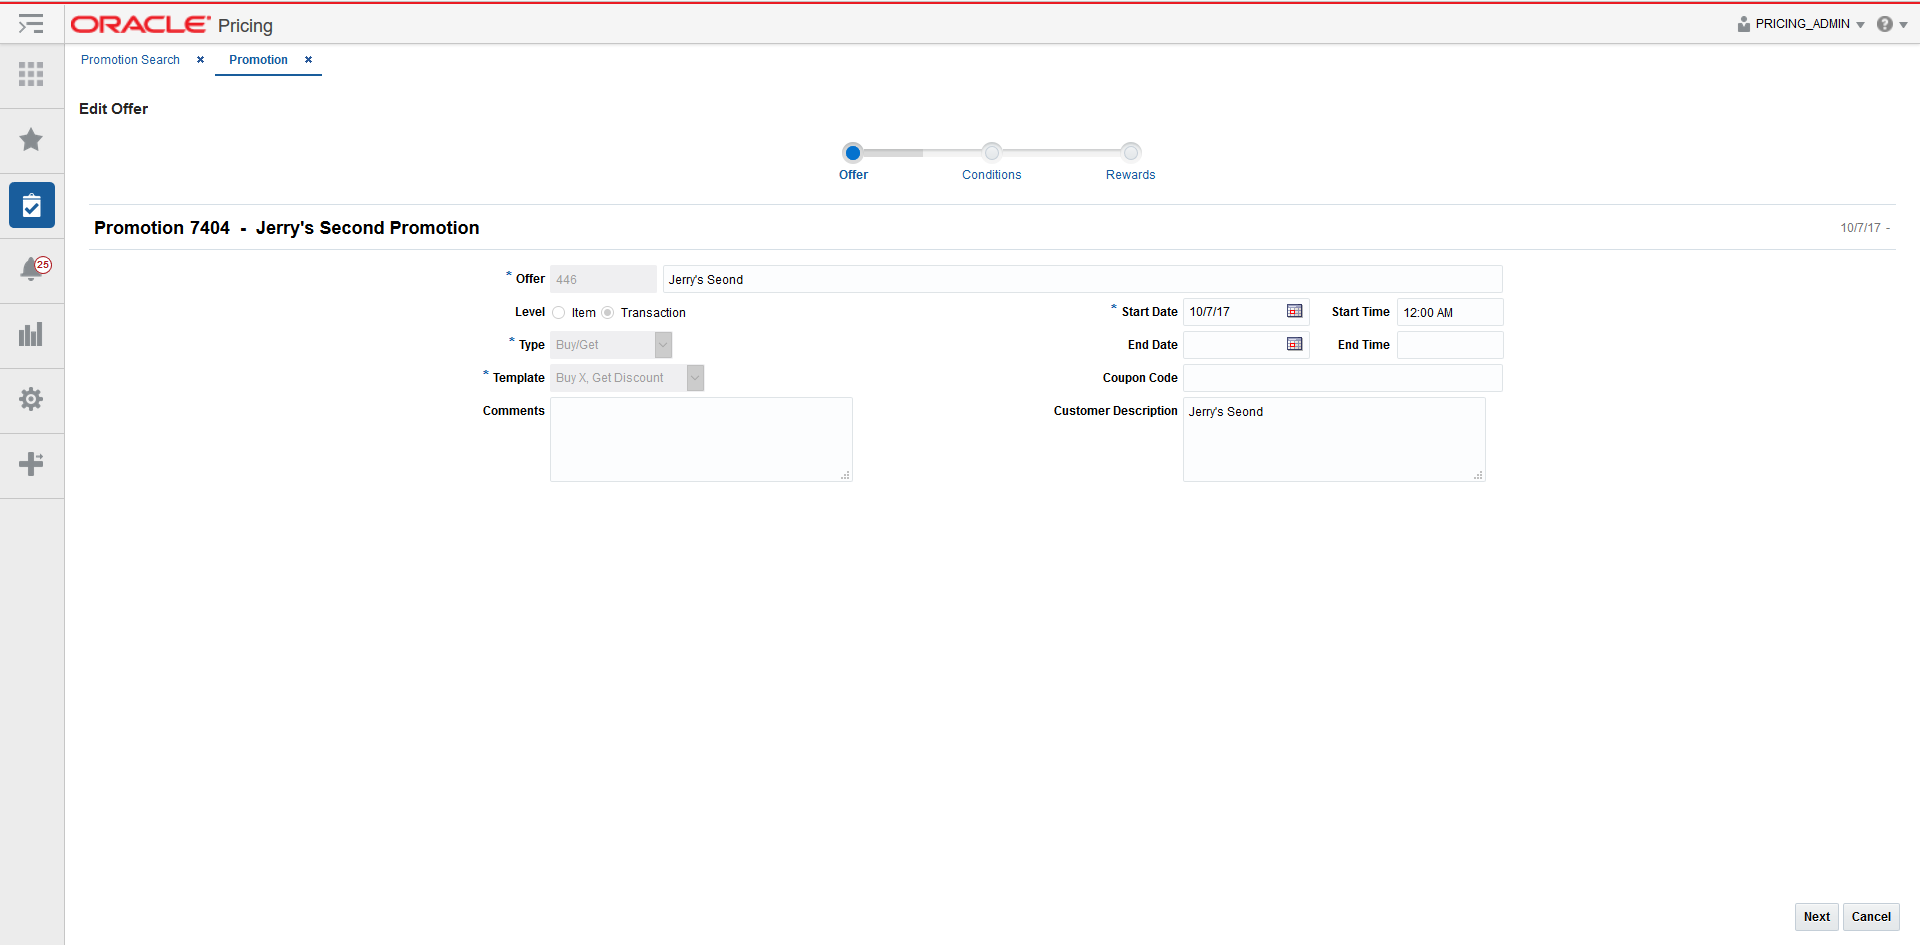
The initial page in the Offer Wizard allows you to set the basic criteria of the offer.
From the Add Offer screen, set your item offer criteria using the following options:
Table 8-1 Add Item Offer Fields
| Field | Description |
|---|---|
|
Offer |
The Offer field allows the user to enter an offer description. |
|
Level |
The Level radio button allow you to select the type of offer to create. Options are Item or Transaction. |
|
Type |
The Type field displays the decoded value of the Offer Type. Valid values are Simple Discount or Buy/Get. For Item Offers, this field is automatically set to Simple Discount and cannot be changed. |
|
Template |
The Template field displays the decoded value of the template for the offer. Valid values are:
For Item Offers, this field is automatically set to Get Y for Discount and cannot be changed. |
|
Comments |
The Comments field displays any comments associated with the offer. |
|
Start Date |
The Start Date field allows the user to enter or select a start date for the offer. |
|
Start Time |
The Start Time field allows the user to enter a start time for the offer. |
|
End Date |
The End Date field allows the user to enter or select an end date for the offer. |
|
End Time |
The End Time field allows the user to enter an end time for the offer. |
|
Coupon Code |
The Coupon Code field displays the coupon code associated with the offer. |
|
Customer Description |
The Customer Description field displays the customer description for the offer. |
Once your offer criteria are entered, click Next. Depending on the type of offer being created, continue with either the Conditions Page or the Rewards Page.
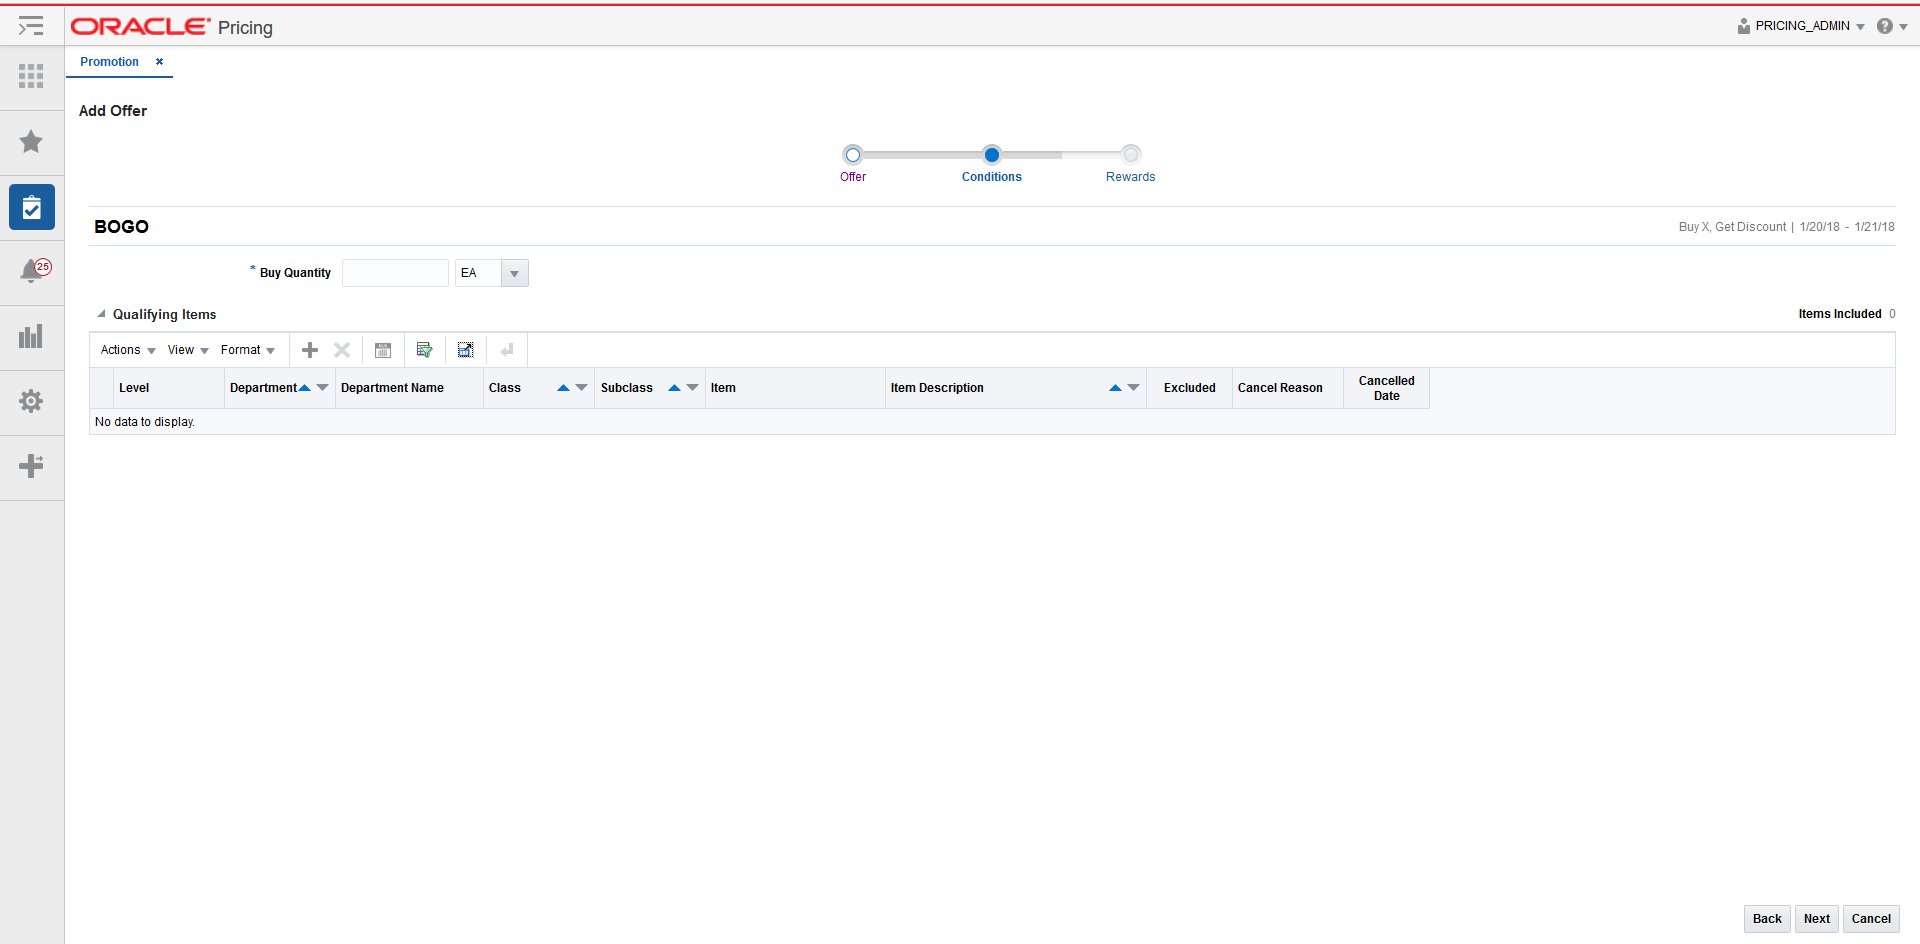
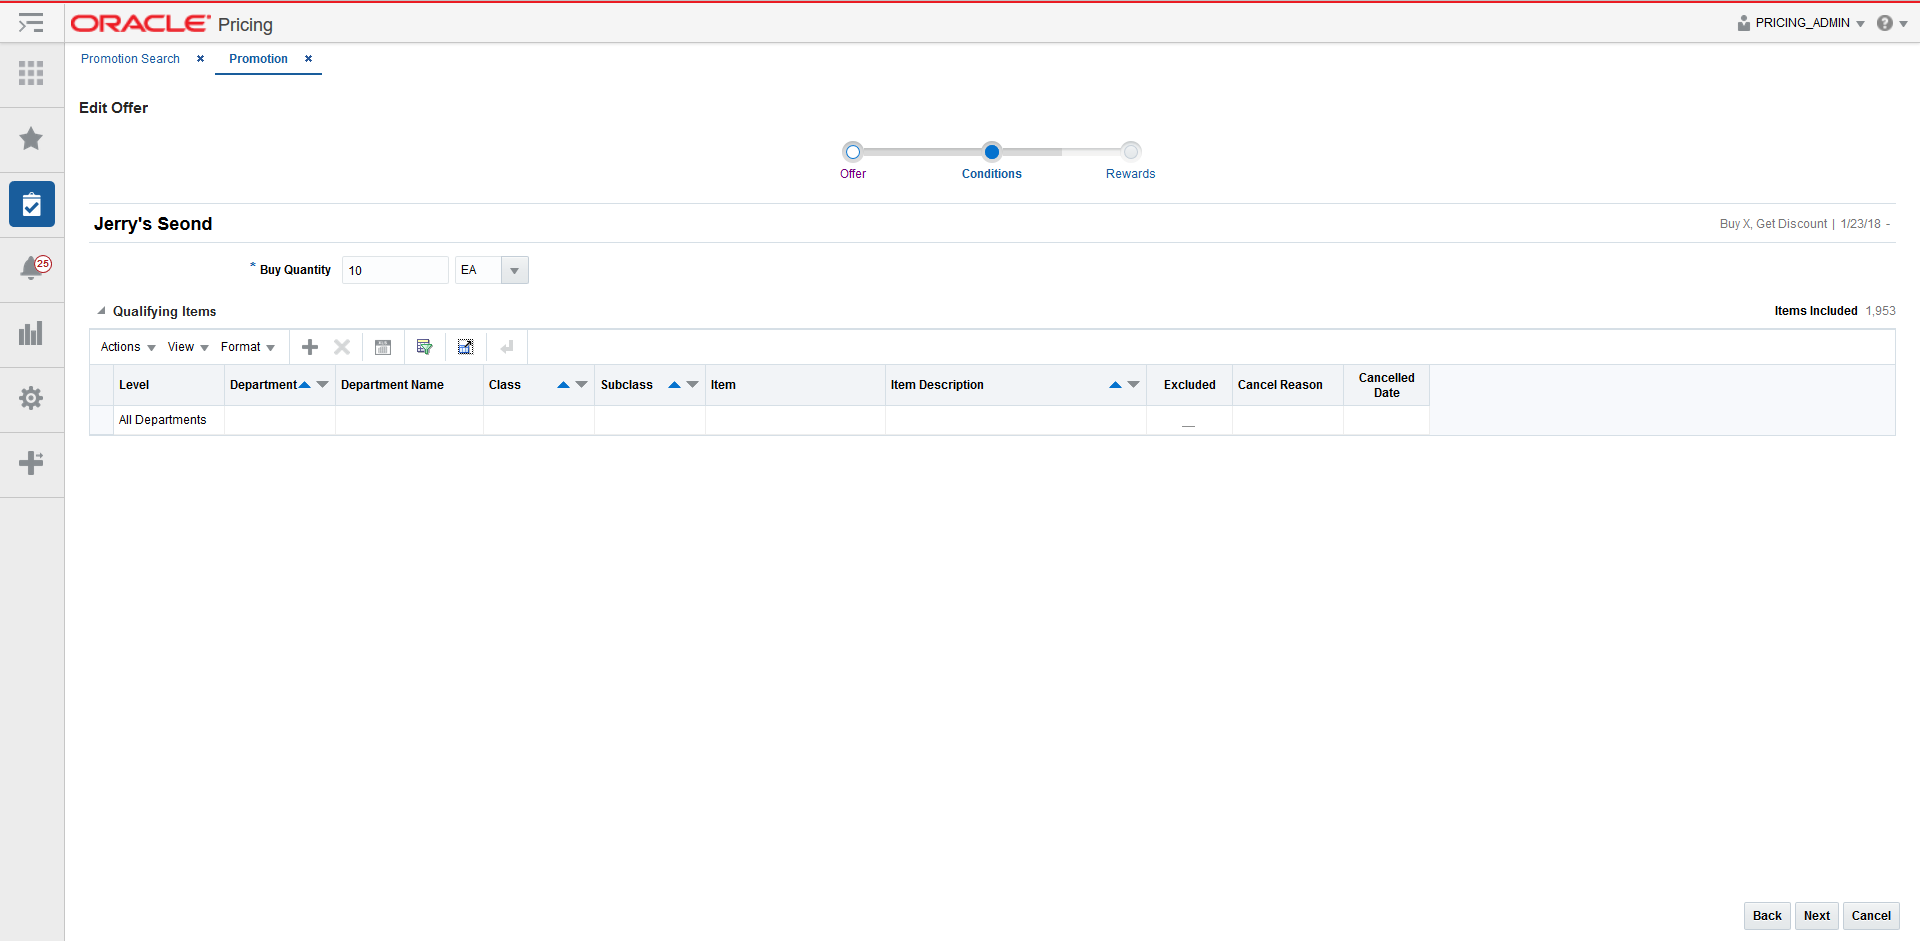
Conditions Page
The Conditions page is used when there is a complicated offer such as a Buy/Get. The Conditions page of the wizard allows you to define the conditions associated with the offer.
|
Note: Not all templates use the Conditions page. |
From the Add Offer Conditions screen, set your offer conditions criteria using the following options:
Table 8-2 Add Offer Conditions Fields
| Field | Description |
|---|---|
|
Buy Quantity |
The Buy Quantity field allows you set the number of items that need to be purchased in order to receive the offer reward. |
|
Spend |
The Spend field allows you to set the amount which needs to be spend to in order to receive the offer. |
|
Note: The template selected determines which of these fields will be shown on the Conditions page. |
Select the items that you want to include or exclude from qualifying for the buy quantity on the offer.
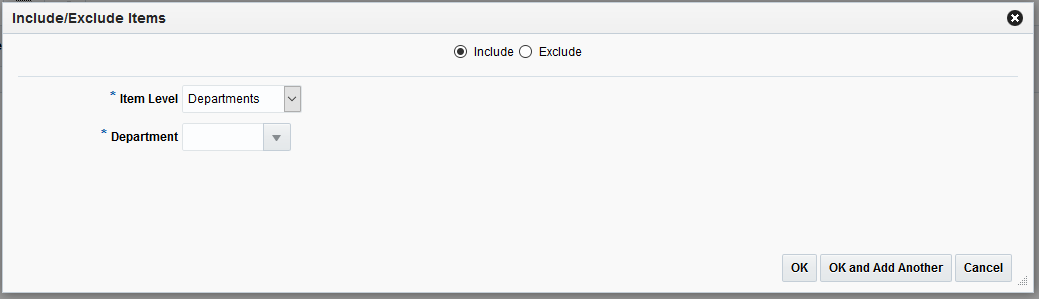
In the Qualifying Items table, select Add from the Actions menu. The Include/Exclude Items dialog opens.
Select whether you want to include or exclude items using the radio buttons.
Set the criteria of the included or excluded items using the following fields:
Table 8-3 Include/Exclude Fields
| Field | Description |
|---|---|
|
Item Level |
The Item Level field allows you to select a category by which you can narrow the list of things to include or exclude in the qualifications for the offer. Options are:
|
|
Department |
The Department field is active if you select Department, Class, or Subclass in the Item Level field. Click the dropdown to select a department for the items you want to include or exclude. |
|
Class |
The Class field is active if you select Class or Subclass in the Item Level field. Click the dropdown to select a class of items to include or exclude. |
|
Subclass |
The Subclass field is active if you select Subclass in the Item Level field. Click the dropdown to select a subclass of items to include or exclude. |
|
Item |
The Item field is active if you select Item in the Item Level field. Click the magnifying glass to search for an item to include or exclude. |
|
Parent/Diff Search |
The Parent/Diff field is active if you select Parent/Diff in the Item Level field. This field appears as a magnifying glass next to the Item Level field and allows you to search for a parent/diff to include or exclude. |
|
Diff Type |
The Diff Type field is active if you select Parent/Diff in the Item Level field. |
|
Diff |
The Diff field is active if you select Parent/Diff in the Item Level field. |
|
Item List |
The Item List field is active if you select Item List in the Item Level field. Click the dropdown to select a defined list of items to include or exclude. |
|
Source File |
Source File is active if you select Upload List in the Item Level field. Click Browse to select the file to upload. |
When you have entered the criteria for the inclusion or exclusion, click OK to accept the criteria and close the popup. Clicking OK and Add Another will accept the criteria, but remain on the Include/Exclude dialog to allow for an additional inclusion or exclusion.
Once your offer conditions criteria are entered, click Next. The Rewards Page opens.
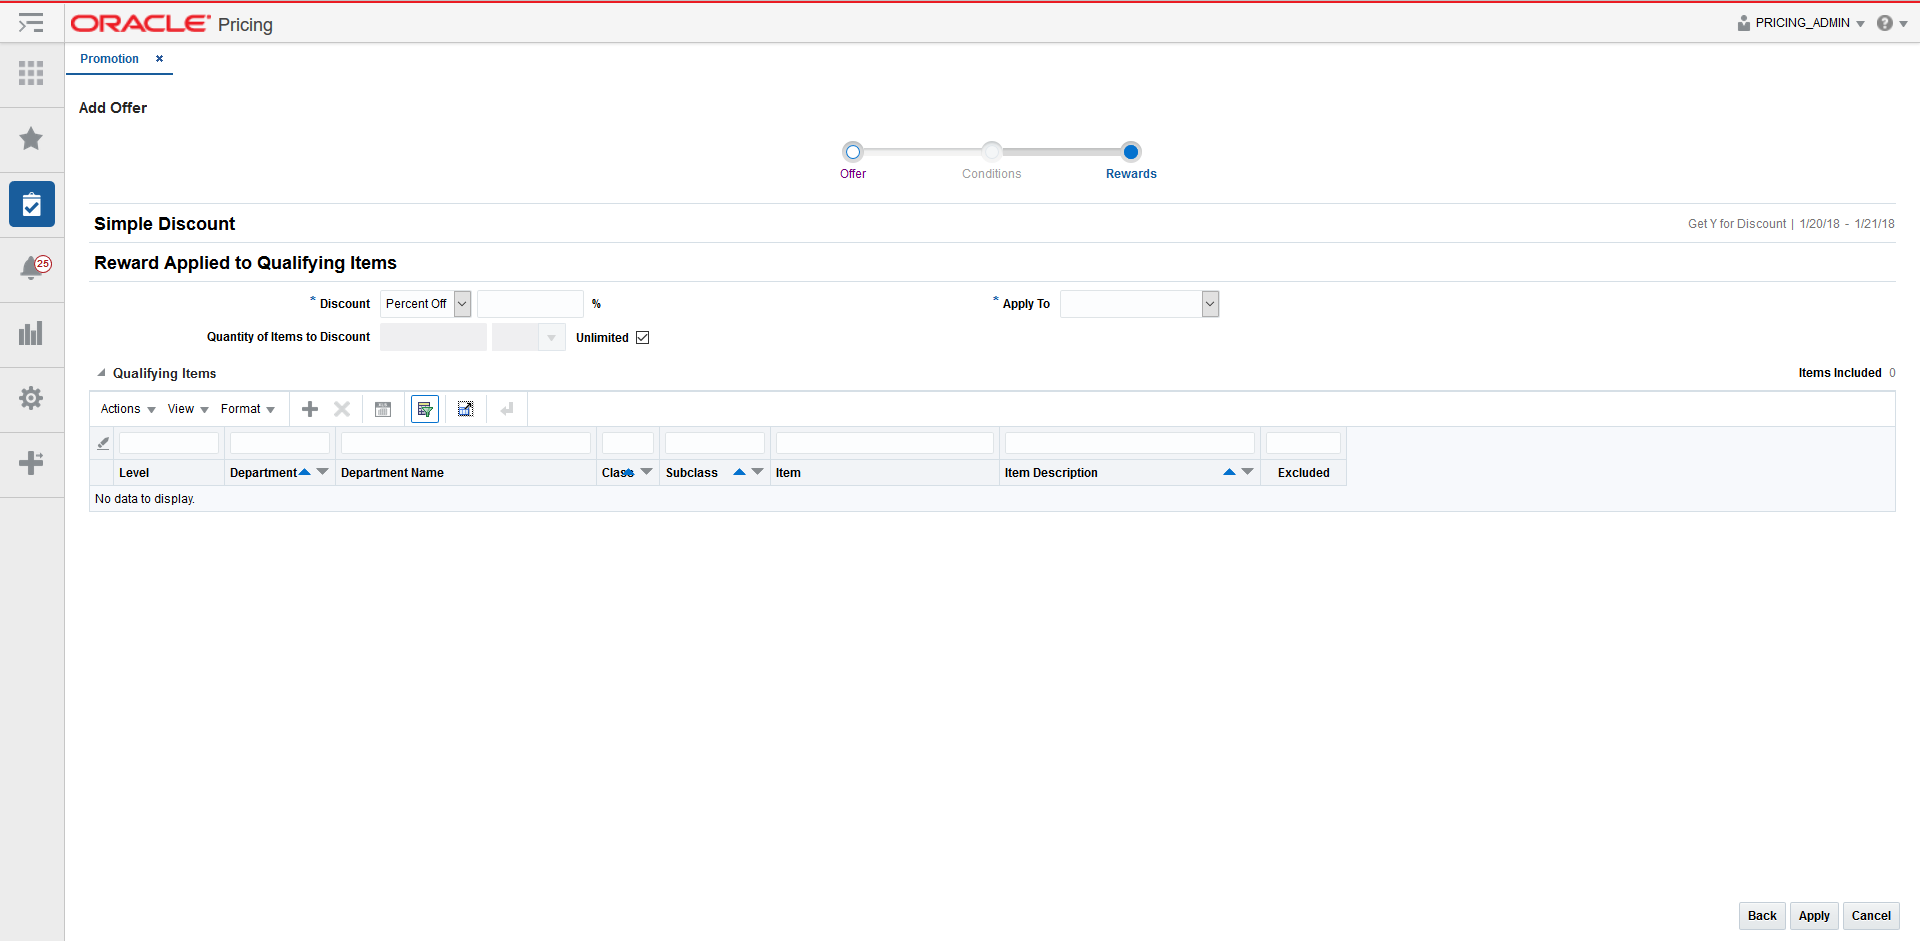
Rewards Page
The Rewards page allows you to define the rewards associated with the offer. For complicated offers, the rewards are dependent upon the conditions being met that were defined in the Conditions Page.
From the Add Offer Rewards screen, set your item offer rewards criteria using the following options:
Table 8-4 Add Offer Rewards Fields
| Field | Description |
|---|---|
|
Discount |
The Discount field allows you to select the type of discount and the amount. Options are:
If you select Amount Off, you can select the specific currency to which the reward applies or whether the reward should be applied for all currencies. |
|
Apply To |
The Apply To field allows you to select which types of retail price the reward applies. Options are:
|
|
Quantity of Items to Discount |
The Quantity of Items to Discount field allows you to set the number of items eligible for the discount. |
For Item level offers, set the items you want to include or excluded from the offer. For Transaction level offers, set the items that you want to exclude from the offer reward.
In the Items table, select Add from the Actions menu. The Include/Exclude Items dialog opens. For Transaction Level offers, the Exclude radio button is automatically selected and cannot be changed.
Set the criteria of the included or excluded items using the following fields:
Table 8-5 Include/Exclude from Reward Fields
| Field | Description |
|---|---|
|
Item Level |
The Item Level field allows you to select a category by which you can narrow the list of things to include/exclude in the offer reward. Options are:
|
|
Department |
The Department field is active if you select Department, Class, or Subclass in the Item Level field. Click the dropdown to select a department for the items you want to include/exclude. |
|
Class |
The Class field is active if you select Class or Subclass in the Item Level field. Click the dropdown to select a class of items to include/exclude. |
|
Subclass |
The Subclass field is active if you select Subclass in the Item Level field. Click the dropdown to select a subclass of items to include/exclude. |
|
Item |
The Item field is active if you select Item in the Item Level field. Click the magnifying glass to search for an item to include/exclude. |
|
Parent/Diff Search |
The Parent/Diff field is active if you select Parent/Diff in the Item Level field. This field appears as a magnifying glass next to the Item Level field and allows you to search for a parent/diff to include/exclude. |
|
Diff Type |
The Diff Type field is active if you select Parent/Diff in the Item Level field. |
|
Diff |
The Diff field is active if you select Parent/Diff in the Item Level field. |
|
Item List |
The Item List field is active if you select Item List in the Item Level field. Click the dropdown to select a defined list of items to include/exclude. |
|
Source File |
Source File is active if you select Upload List in the Item Level field. Click Browse to select the file to upload. |
When you have entered the criteria for the inclusion or exclusion, click OK to accept the criteria and close the popup. Click OK and Add Another to remain on the Include/Exclude dialog and add an additional inclusion or exclusion.
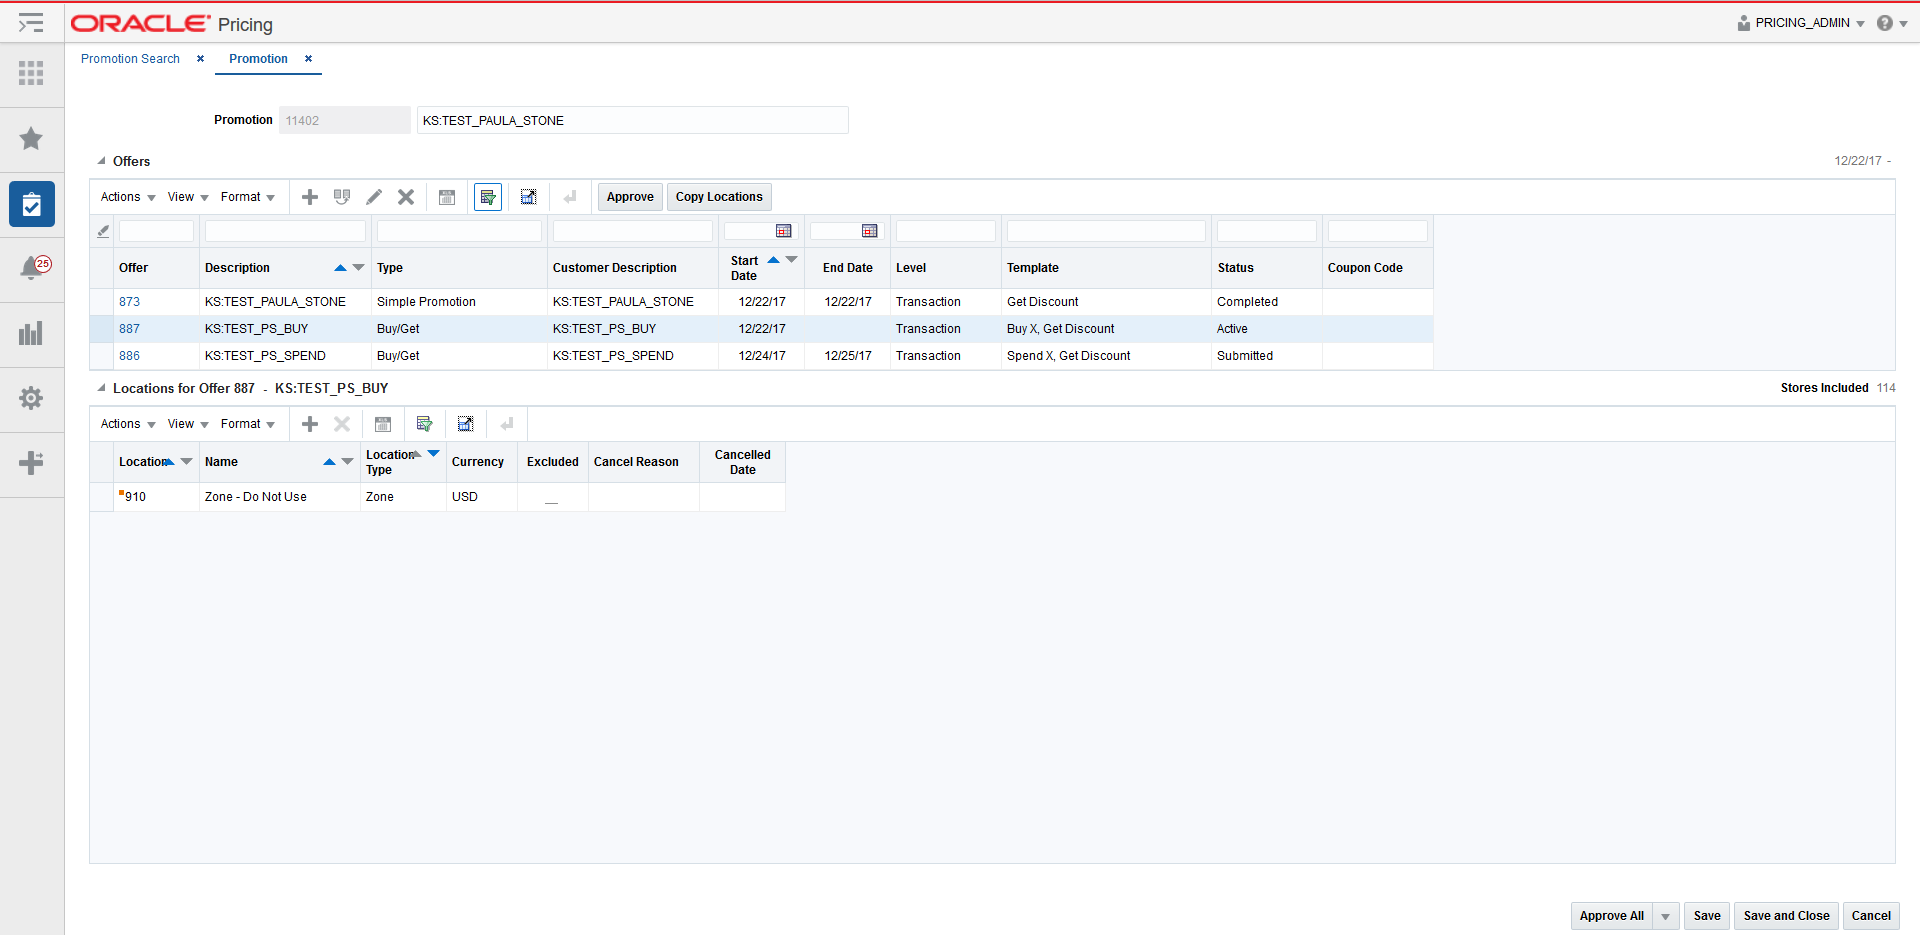
Once your promotion criteria are complete, click Apply. You are returned to the Promotions tab. Your new promotion is displayed in the Promotion table.
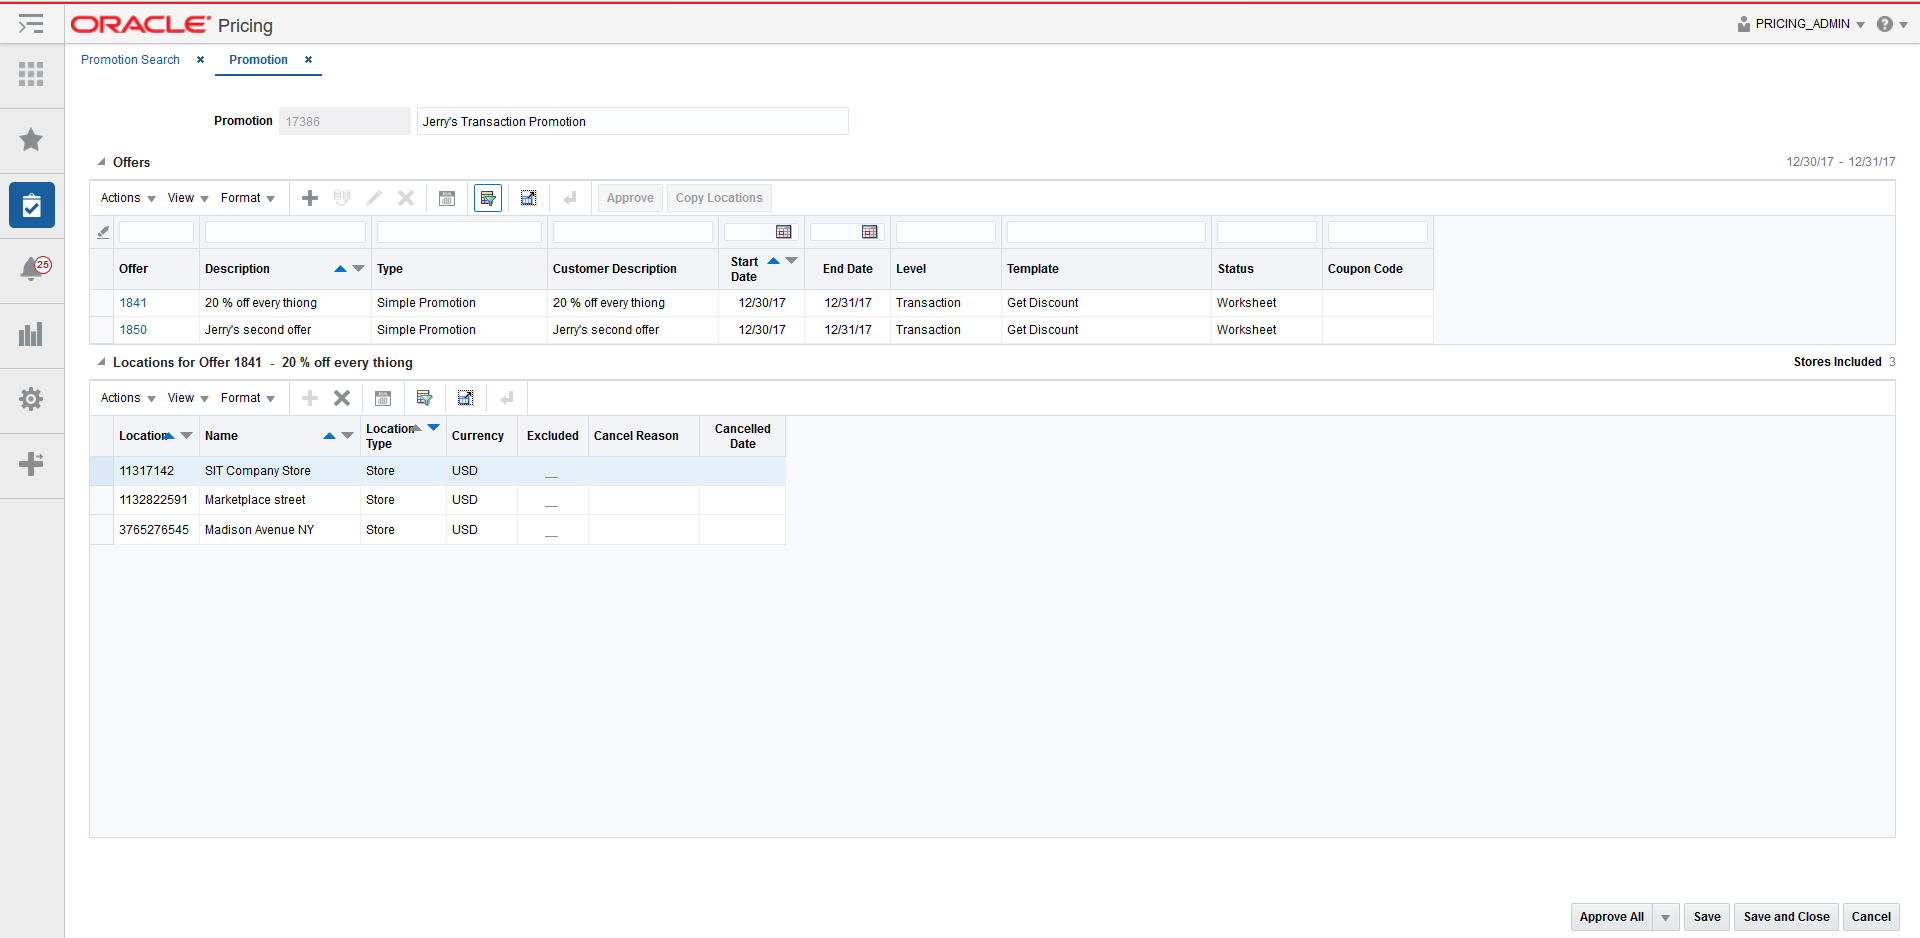
This feature allows the user to add locations to an Offer. Adding Locations to an Offer is executed from the Promotions tab.
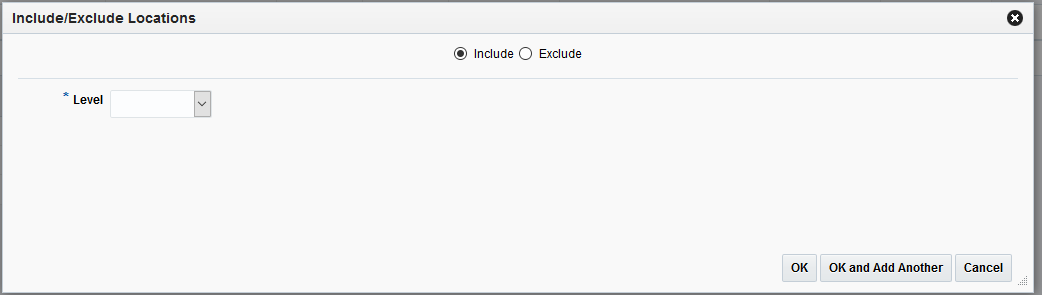
From the Offers table, highlight the offer to which you want to add a location. From the Locations table, select Add from the Actions menu. The Include/Exclude Locations dialog appears.
From the Include/Exclude Locations dialog, select the Include radio button and set the criteria for the location or locations being added using the following fields:
Table 8-6 Include/Exclude Locations Dialog Fields
| Field | Description |
|---|---|
|
Level |
The Level field allows you to select a category by which you can narrow the list of locations to add in the offer. Options are:
|
|
Zone Group |
The Zone Group field is active if you select Zone in the Level field. Click the dropdown to select a zone group for the location(s) you want to add. |
|
Zone |
The Zone field is active if you select Zone in the Level field. Click the dropdown to select a specific zone from the selected zone group from which to add the location(s). |
|
Location List |
The Location List field is active if you select Location List in the Level field. Click the dropdown to select from a defined list of locations from which to add the location(s). |
|
Store |
The Store field is active if you select Store in the Level field. Click the dropdown to select a store from which to add the location(s). |
Click OK to add the location(s) and close the dialog. Click OK and Add Another to remain on the dialog and add additional locations.
The Manage Promotions tasks provide options for existing promotions, including:
Perform the following procedure to search for an existing promotion.
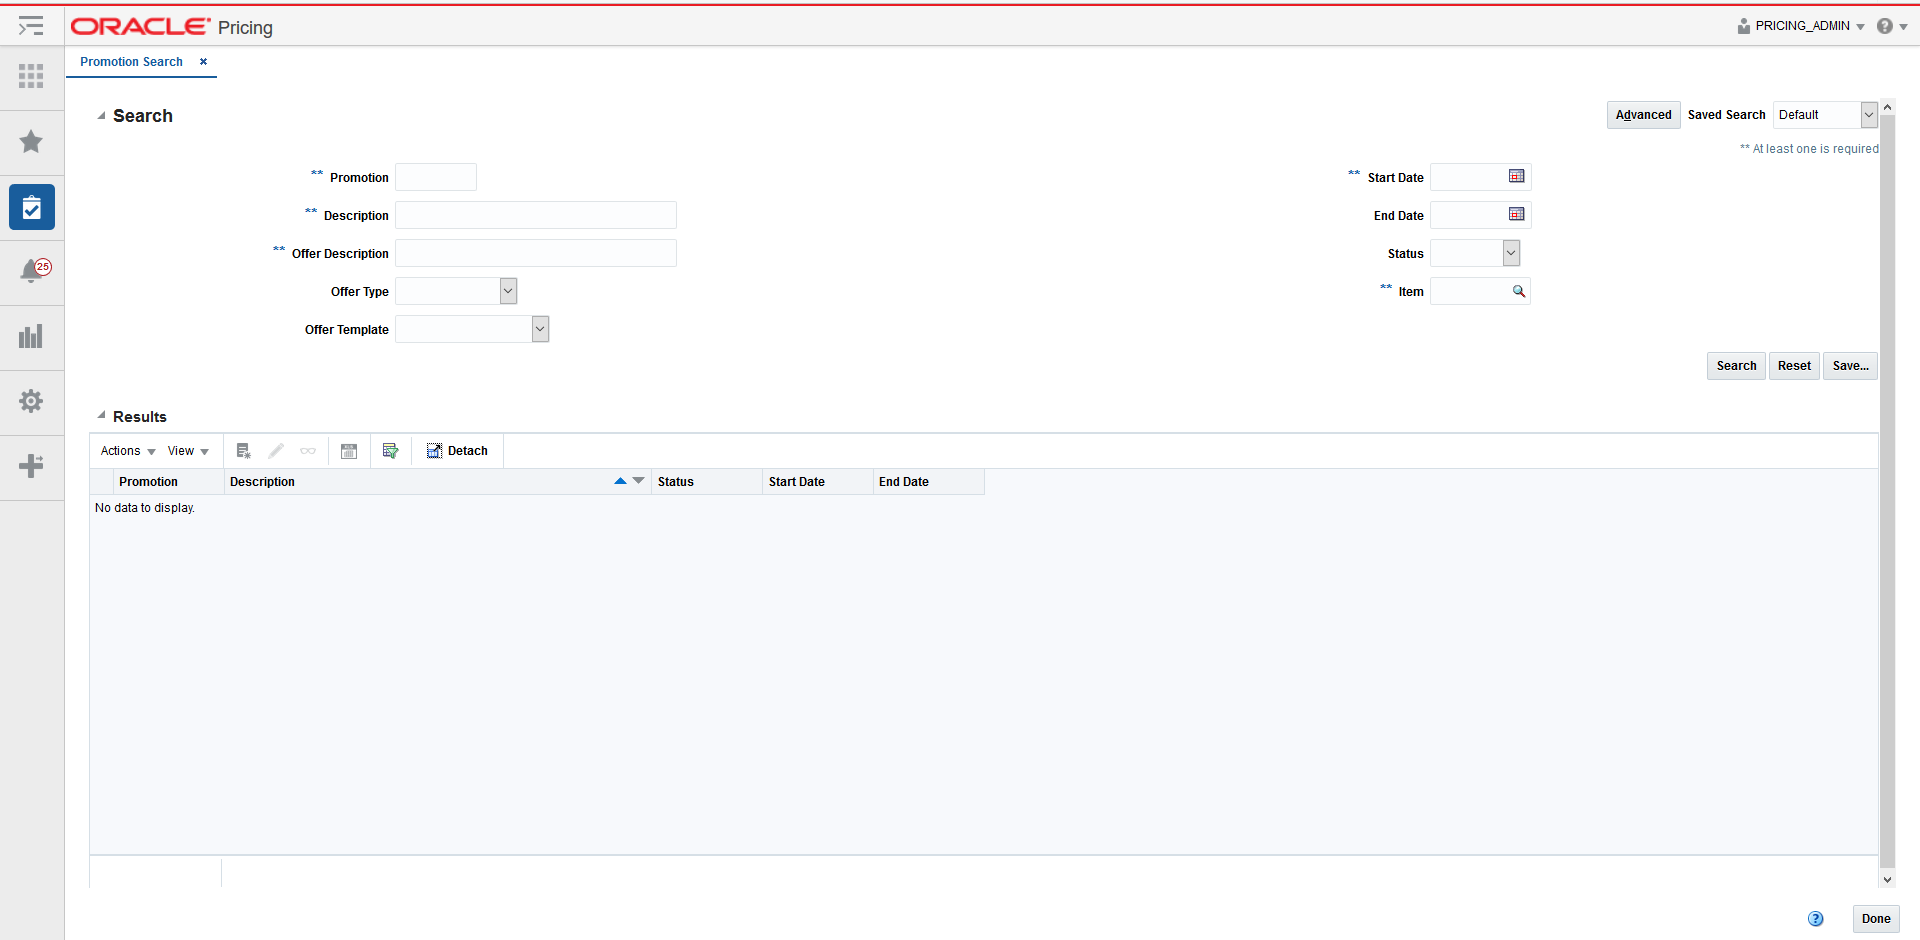
From the Tasks menu, select Manage Promotions. The Promotion Search tab appears.
Enter your promotion search criteria using the following fields:
|
Note: In order to conduct a promotion search, users must enter at least one of the following; Promotion, Description, Offer Description, Start Date, or Item. |
Table 8-7 Promotion Search Fields
| Field | Description |
|---|---|
|
Promotion |
The Promotion field allows the user to enter a promotion ID to be used in search criteria. |
|
Description |
The Description field allows the user to enter a promotion description to be used in search criteria. |
|
Offer Description |
The Offer Description allows the user to enter an offer description to be used in search criteria. |
|
Offer Type |
The Offer Type field allows the user to select an offer type to be used in search criteria. Promotions containing at least one offer with the entered type should be returned. Values for the drop down include:
|
|
Offer Template |
The Offer Template field allows the user to select an offer template to be used in search criteria. Values for the drop down include:
|
|
Start Date |
The Start Date field allows the user to enter or select a Start Date to be used in search criteria. |
|
End Date |
The End Date field allows the user to enter or select an End Date to be used in search criteria. |
|
Status |
The Status field allows the user to select a Status to be used in search criteria. Values for the drop down include:
|
|
Item |
The Item field allows the user to enter or select an Item(s) to be used in search criteria. Users have the option to go directly to the search icon to look up items. |
Once your search criteria are entered, click Search. The search results are displayed in the Results pane.
Editing a single offer is performed using the Offer Wizard. There are three potential pages within the wizard:
Perform the following procedure to edit a single offer:
Perform a search for the promotion that you want to edit. See Search for a Promotion.
From the search results pane of the Promotion Search tab, highlight the promotion you want to edit and select Edit from the Actions menu. The Promotion tab appears.
From the Promotion tab, highlight the offer you want to edit and select Edit from the Action menu. If a single offer was selected, the Offer Wizard is launched. Continue with Offer Page.
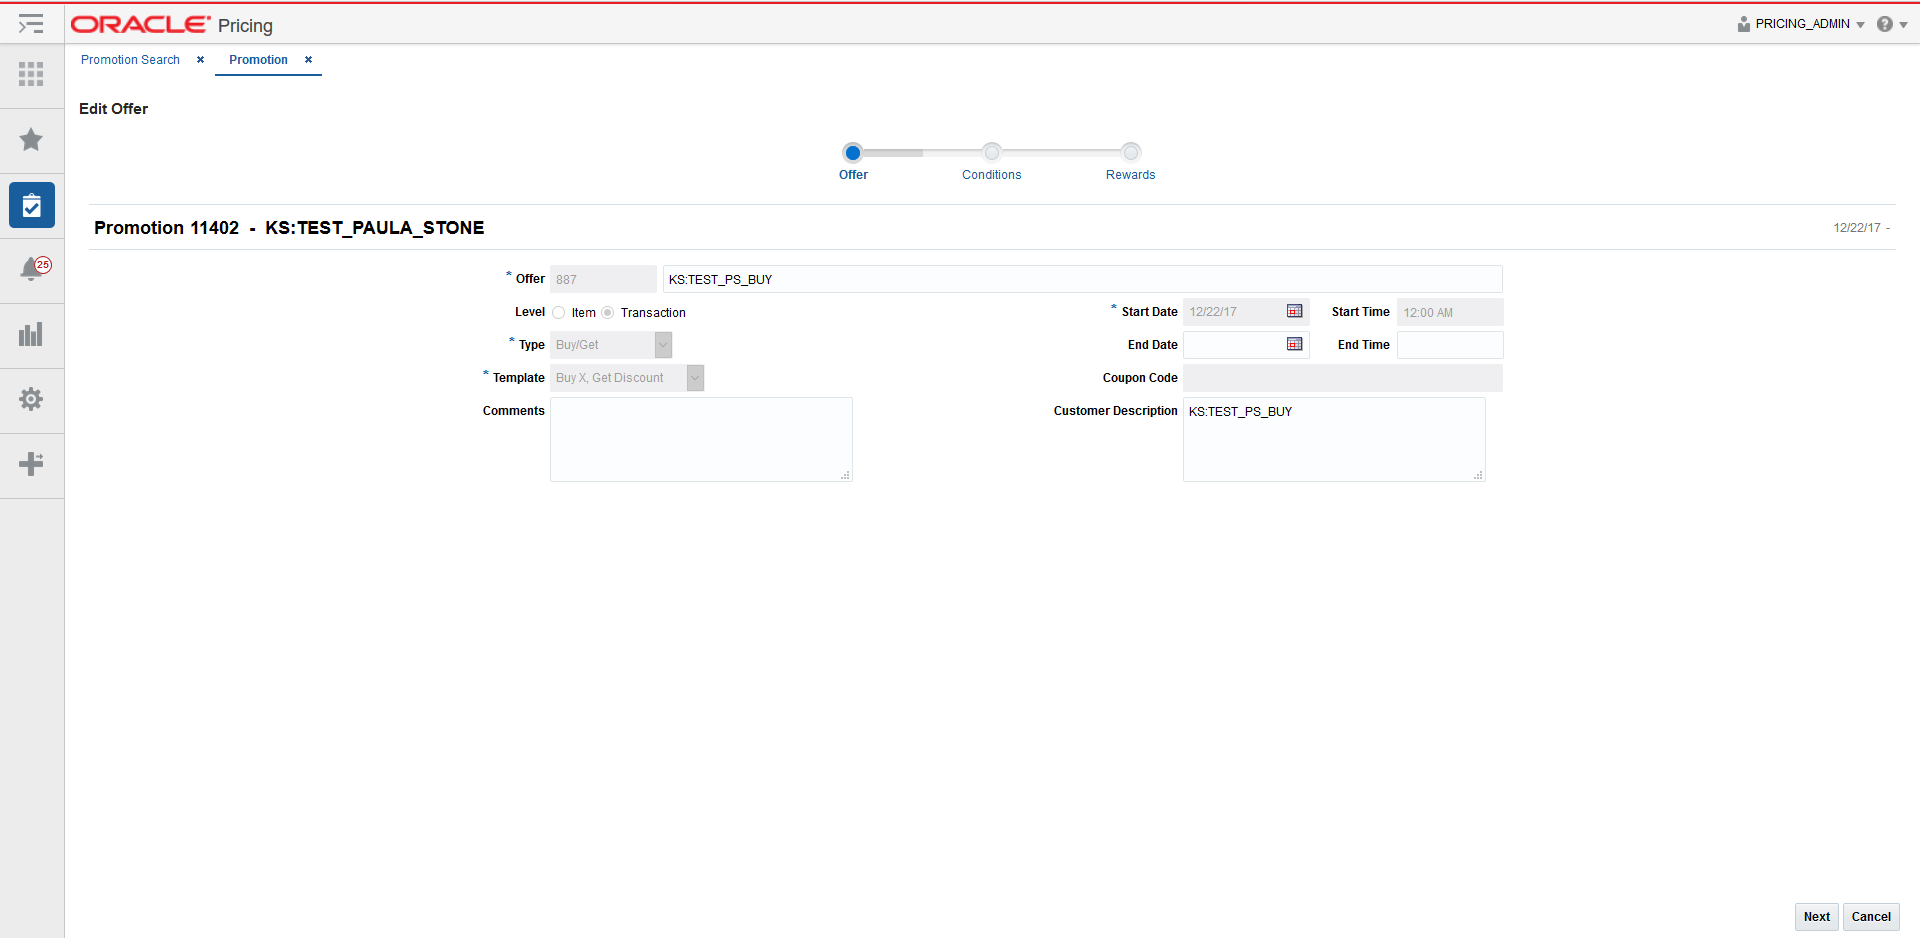
Offer Page
The initial page in the Offer Wizard allows you to edit the basic criteria of the offer.
From the Edit Offer screen, edit your item offer criteria using the following options:
Table 8-8 Add Item Offer Fields
| Field | Description |
|---|---|
|
Offer |
The Offer field allows the user to enter an offer description. |
|
Level |
The Level radio button is disabled in Edit mode. |
|
Type |
The Type field displays the decoded value of the Offer Type. It is disabled in Edit mode. |
|
Template |
The Template field displays the decoded value of the template for the offer. Valid values are:
It is disabled in Edit mode. |
|
Comments |
The Comments field displays any comments associated with the offer. Comments can be changed in edit mode. |
|
Start Date |
The Start Date field allows the user to enter or select a start date for the offer. |
|
Start Time |
The Start Time field allows the user to enter a start time for the offer. |
|
End Date |
The End Date field allows the user to enter or select an end date for the offer. |
|
End Time |
The End Time field allows the user to enter an end time for the offer. |
|
Coupon Code |
The Coupon Code field displays the coupon code associated with the offer. The Coupon Code can be changed in edit mode. |
|
Customer Description |
The Customer Description field displays the customer description for the offer. The Customer Description can be changed in edit mode. |
Once your offer criteria are edited, click Next. Depending on the type of promotion being created, continue with either the Conditions Page or the Rewards Page.
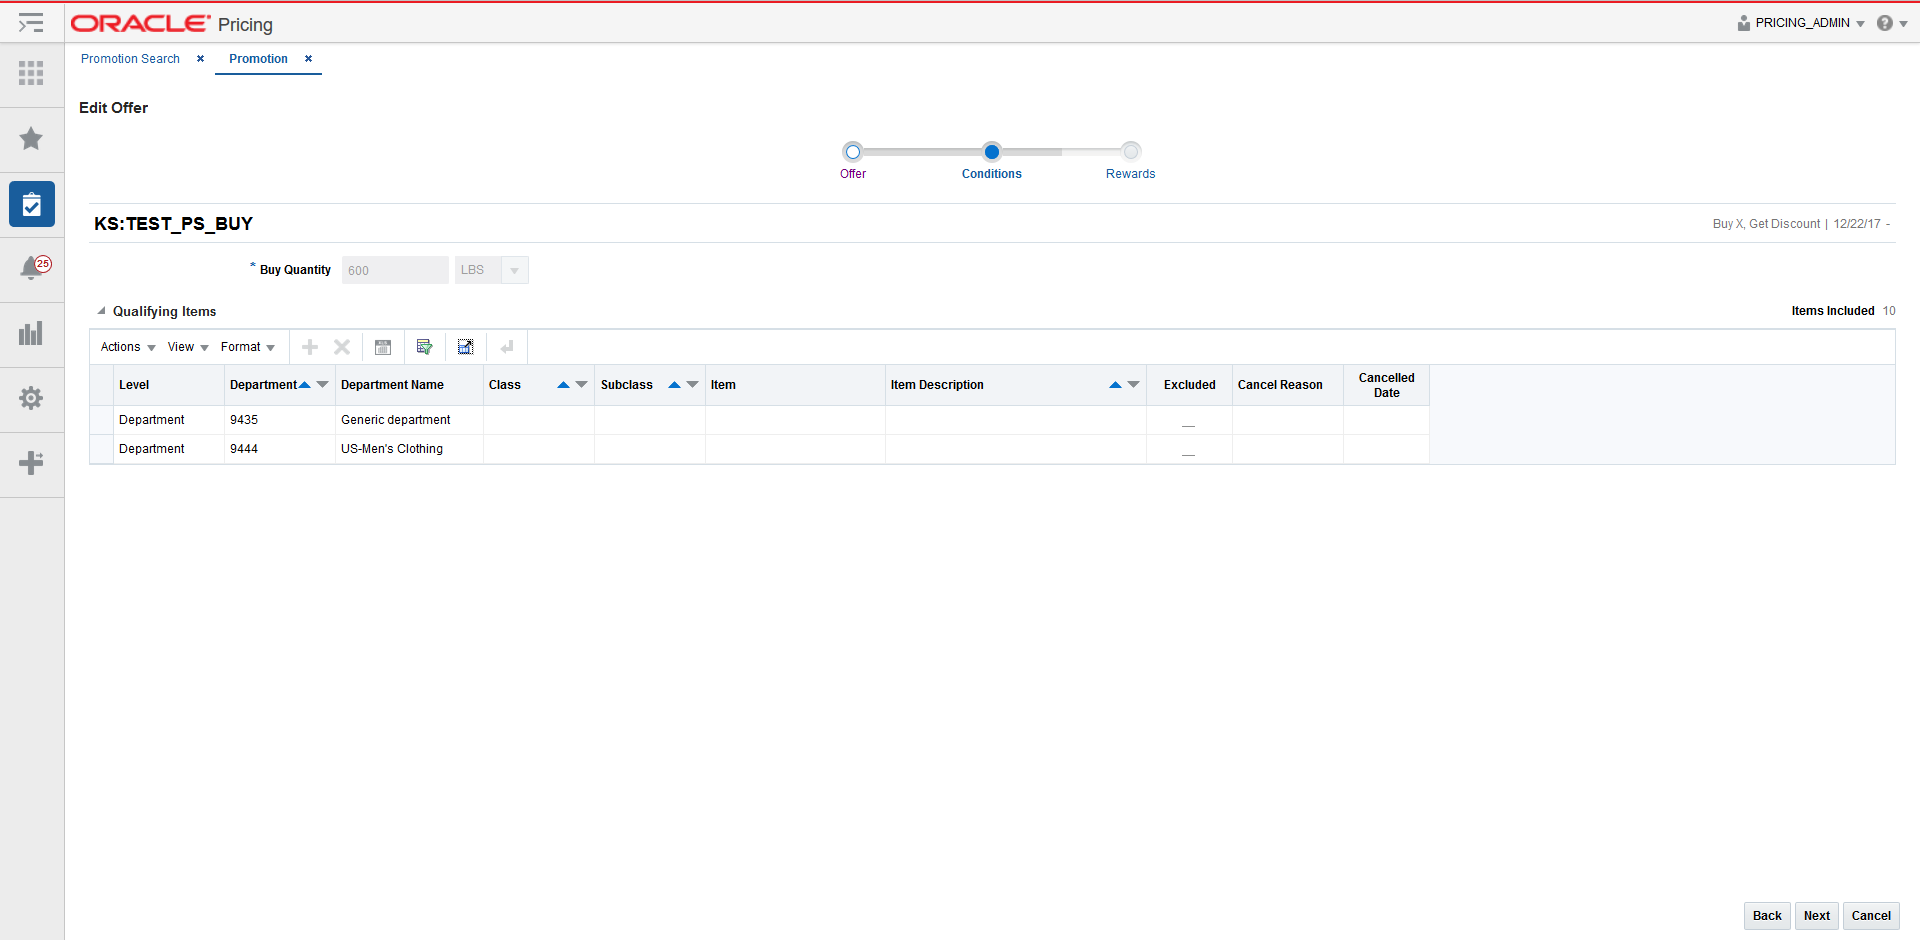
Conditions Page
The Conditions page is used when there is a complicated offer such as a Buy/Get. The Conditions stop of the wizard allows you to edit the conditions associated with the offer.
|
Note: Not all templates use the Conditions stop. |
From the Edit Offer Conditions screen, edit your offer conditions criteria using the following options:
Table 8-9 Edit Offer Conditions Fields
| Field | Description |
|---|---|
|
Buy Quantity |
The Buy Quantity field allows you set the number or amount that needs to be purchased in order to receive the offer reward. |
|
Spend |
The Spend field allows you to set the amount which needs to be spend to in order to receive the offer. |
|
Note: The template selected determines which of these fields will be shown. |
Select the items that you want to include or exclude from qualifying for the buy quantity on the offer.
To add additional rows to the Qualifying Items table, select Add from the Actions menu. The Include/Exclude Items dialog opens.
Select whether you want to include or exclude items using the radio buttons.
Set the criteria of the included or excluded items using the following fields:
Table 8-10 Include/Exclude Fields
| Field | Description |
|---|---|
|
Item Level |
The Item Level field allows you to select a category by which you can narrow the list of things to include or exclude in the offer. Options are:
|
|
Department |
The Department field is active if you select Department, Class, or Subclass in the Item Level field. Click the dropdown to select a department for the items you want to include or exclude. |
|
Class |
The Class field is active if you select Class or Subclass in the Item Level field. Click the dropdown to select a class of items to include or exclude. |
|
Subclass |
The Subclass field is active if you select Subclass in the Item Level field. Click the dropdown to select a subclass of items to include or exclude. |
|
Item |
The Item field is active if you select Item in the Item Level field. Click the magnifying glass to search for an item to include or exclude. |
|
Parent/Diff Search |
The Parent/Diff field is active if you select Parent/Diff in the Item Level field. This field appears as a magnifying glass next to the Item Level field and allows you to search for a parent/diff to include or exclude. |
|
Diff Type |
The Diff Type field is active if you select Parent/Diff in the Item Level field. |
|
Diff |
The Diff field is active if you select Parent/Diff in the Item Level field. |
|
Item List |
The Item List field is active if you select Item List in the Item Level field. Click the dropdown to select a defined list of items to include or exclude. |
|
Source File |
Source File is active if you select Upload List in the Item Level field. Click Browse to select the file to upload. |
When you have entered the criteria for the inclusion or exclusion, clicking OK will accept the changes, close the popup, and return to the Edit Offer Conditions page.
|
Note: You also have the option to remove rows from the Qualifying Items table by highlighting a row or rows and using the Delete action. |
Once your offer conditions criteria are entered, click Next. The Rewards Page opens.
Rewards Page
The Rewards page allows you to edit the rewards associated with the offer. For complicated offers, the rewards are dependent upon the conditions being met that were defined in the Conditions Page.
From the Edit Offer Rewards screen, edit your item offer rewards criteria using the following options:
Table 8-11 Edit Offer Rewards Fields
| Field | Description |
|---|---|
|
Discount |
The Discount field allows you to select the type of discount and the amount. Options are:
If you select Amount Off, you can select the specific currency to which the reward applies or whether the reward should be applied for all currencies. |
|
Apply To |
The Apply To field allows you to select which types of retail prices the reward applies. Options are:
|
|
Quantity of Items to Discount |
The Quantity of Items to Discount field allows you to set the number of items to discount. |
Select the items that you want to include/exclude from the promotion reward.
In the Include/Exclude Items table, select Add from the Actions menu. The Include/Exclude Items dialog opens. The Include/Exclude radio button is automatically selected and cannot be changed.
|
Note: On a Transaction Level Offer, only excluded items need to be specified. All other items are eligible for the reward, so the table is called Exclude Items. |
Set the criteria of the included/excluded items using the following fields:
Table 8-12 Include/Exclude from Reward Fields
| Field | Description |
|---|---|
|
Item Level |
The Item Level field allows you to select a category by which you can narrow the list of things to exclude in the promotion reward. Options are:
|
|
Department |
The Department field is active if you select Department, Class, or Subclass in the Item Level field. Click the dropdown to select a department for the items you want to include/exclude. |
|
Class |
The Class field is active if you select Class or Subclass in the Item Level field. Click the dropdown to select a class of items to include/exclude. |
|
Subclass |
The Subclass field is active if you select Subclass in the Item Level field. Click the dropdown to select a subclass of items to include/exclude. |
|
Item |
The Item field is active if you select Item in the Item Level field. Click the magnifying glass to search for an item to include/exclude. |
|
Parent/Diff Search |
The Parent/Diff field is active if you select Parent/Diff in the Item Level field. This field appears as a magnifying glass next to the Item Level field and allows you to search for a parent/diff to include/exclude. |
|
Diff Type |
The Diff Type field is active if you select Parent/Diff in the Item Level field. |
|
Diff |
The Diff field is active if you select Parent/Diff in the Item Level field. |
|
Item List |
The Item List field is active if you select Item List in the Item Level field. Click the dropdown to select a defined list of items to include/exclude. |
|
Source File |
Source File is active if you select Upload List in the Item Level field. Click Browse to select the file to upload. |
When you have entered the criteria for the exclusion, clicking OK will accept the changes, close the popup, and return to the Edit Offer Conditions.
|
Note: You also have the option to remove rows from the Items table by highlighting a row or rows and using the Delete action. |
Once your promotion criteria are complete, click Apply. You are returned to the Promotions tab. Your updated promotion is displayed in the Promotion table.
Several fields on an offer are eligible to be maintained via a mass maintenance screen. The fields which allow mass maintenance all reside on the Offers page in the Offer Wizard. The Mass maintenance functionality is called when multiple offers are selected from the Promotions screen.
Perform the following procedure to edit multiple offers:
Perform a search for the promotion that you want to edit. See Search for a Promotion.
From the search results pane of the Promotion Search tab, highlight the promotion you want to edit and select Edit from the Actions menu. The Promotion tab appears.
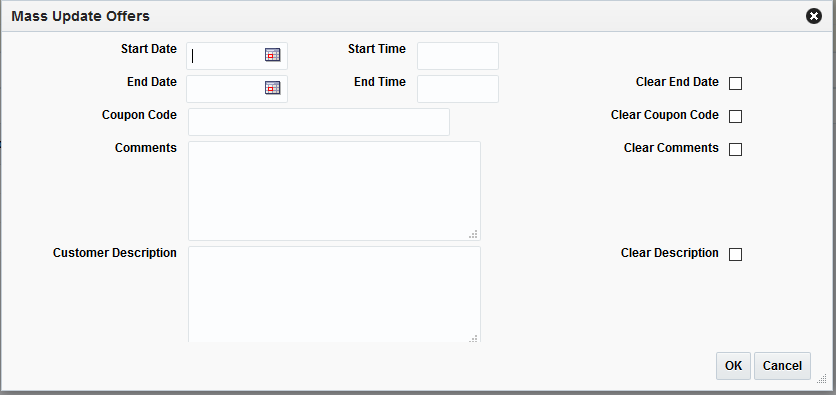
From the Promotion tab, highlight the offers you want to edit and select Edit from the Action menu. If multiple offers were selected, the Mass Update Offers dialog is launched.
Mass Update Offers
From the Mass Update Offers dialog, edit your item offer criteria using the following options:
Table 8-13 Mass Update Offers Fields
| Field | Description |
|---|---|
|
Start Date |
The Start Date field allows the user update the start date for the all the selected offers. |
|
Start Time |
The Start Time field allows the user to update the start time for all the selected offers. |
|
End Date |
The End Date field allows the user to update the end date for all the selected offers. |
|
End Time |
The End Time field allows the user to update the end time for all the selected offers. |
|
Coupon Code |
The Coupon Code field allows the user to update the coupon code for all the selected offers. |
|
Comments |
The Comments field allows the user to update the comments for all the selected offers. |
|
Customer Description |
The Customer Description field allows the user to update the customer description for all the selected offers. |
|
Clear End Date |
Selecting Clear End Date will clear the End Date for all selected offers. |
|
Clear Coupon Code |
Selecting Clear Coupon Code will clear the Coupon Code for all selected offers. |
|
Clear Comments |
Selecting Clear Comments will clear the Comments for all selected offers. |
|
Customer Description |
Selecting Clear Customer Description will clear the Customer Description for all selected offers. |
When you have entered all the changes for the Mass Update, click OK to accept the criteria and close the dialog.
Users have the option to create a new offer using an existing offer as a template.
Perform a search for the promotion that has an offer you want to copy. See Search for a Promotion.
From the search results pane, select Edit from the Actions menu. The Promotion tab appears
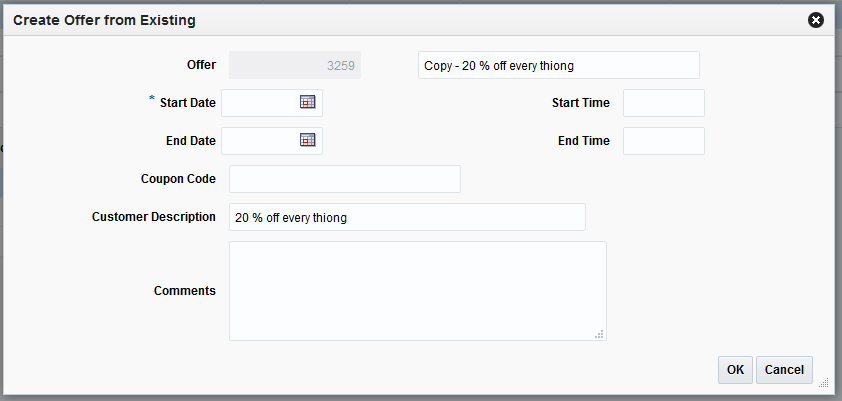
From the Promotions tab, select the Offer you want to use as a template for your new offer and select Create from Existing from the Actions menu. The Create Offer from Existing dialog appears.
From the Create Offer from Existing dialog, enter your new offer criteria using the following options:
Table 8-14 Create Offer from Existing Fields
| Field | Description |
|---|---|
|
Offer |
The Offer field allows the user to enter an offer description. |
|
Start Date |
The Start Date field allows the user to enter or select a start date for the offer. |
|
Start Time |
The Start Time field allows the user to enter a start time for the offer. |
|
End Date |
The End Date field allows the user to enter or select an end date for the offer. |
|
End Time |
The End Time field allows the user to enter an end time for the offer. |
|
Coupon Code |
The Coupon Code field displays the coupon code associated with the offer. |
|
Customer Description |
The Customer Description field displays the customer description for the offer. |
|
Comments |
The Comments field displays any comments associated with the offer. |
When you have entered the criteria for the new offer, click OK. You are returned to the Promotion tab.
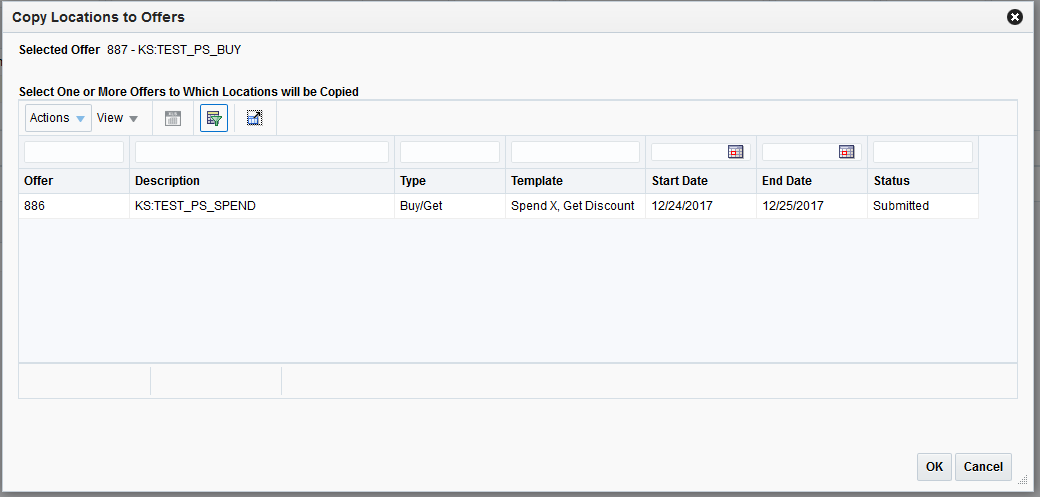
The copying locations feature allows users to select an offer and then copy the entries from the location table associated with that offer to one or more other offers within the same promotion.
Perform a search for the promotion that has an offer with items you want to cancel. See Search for a Promotion.
From the search results pane, select the Promotion from which you want to copy locations and select Edit from the Actions menu. The Promotion tab appears.
From the Promotion tab, select the offer that contains the location to copy and select Copy Locations from the Actions menu. The Copy Locations to Offers dialog appears.
From the Copy Locations to Offers dialog, select one or more offers to which locations will be copied and click OK. You are returned to the Promotions screen.
Users have the option to cancel an offer from a Promotion. Cancelling an offer can only be done when the offer is in active status.
Perform a search for the promotion that has an offer in Active status. See Search for a Promotion.
From the search results pane, select the Promotion from which you want to cancel an offer and select Edit from the Actions menu. The Promotion tab appears.
From the Promotion tab, select the offer you wish to cancel and select Cancel from the Actions menu. The Cancel Offer dialog appears.
From the Cancel Offer dialog, select a Reason for the cancellation.
Click OK to Cancel the Offer and close the dialog.
Users have the option to cancel an item or items from an offer. Cancelling an item from an offer can only be done when the offer is in Active status.
Perform a search for the promotion that has an offer with items you want to cancel. See Search for a Promotion.
From the search results pane, select the Promotion from which you want to cancel items from an offer and select Edit from the Actions menu. The Promotion tab appears.
From the Promotion tab, select the offer that contains the item or items to cancel and select Edit from the Actions menu. The Offer Wizard is launched.
From the Edit Offer screen, click Next. The Edit Offer Conditions page opens.
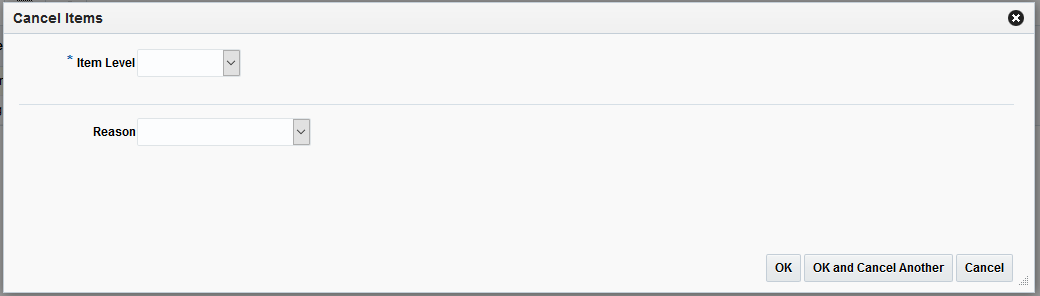
From the Qualifying Items table, select the item or items you want to cancel and select Cancel from the Actions menu. The Cancel Items dialog appears.
From the Cancel Items dialog, set the criteria for the item or items being cancelled using the following fields:
Table 8-15 Cancel Items Dialog Fields
| Field | Description |
|---|---|
|
Item Level |
The Item Level field allows you to select a category by which you can narrow the list of things to cancel in the offer. Options are:
|
|
Department |
The Department field is active if you select Department, Class, or Subclass in the Item Level field. Click the dropdown to select a department for the items you want to cancel. |
|
Class |
The Class field is active if you select Class or Subclass in the Item Level field. Click the dropdown to select a class of items to cancel. |
|
Subclass |
The Subclass field is active if you select Subclass in the Item Level field. Click the dropdown to select a subclass of items to cancel. |
|
Item |
The Item field is active if you select Item in the Item Level field. Click the magnifying glass to search for an item to cancel. |
|
Parent/Diff Search |
The Parent/Diff field is active if you select Parent/Diff in the Item Level field. This field appears as a magnifying glass next to the Item Level field and allows you to search for a parent/diff to cancel. |
|
Diff Type |
The Diff Type field is active if you select Parent/Diff in the Item Level field. |
|
Diff |
The Diff field is active if you select Parent/Diff in the Item Level field. |
|
Item List |
The Item List field is active if you select Item List in the Item Level field. Click the dropdown to select a defined list of items to cancel. |
|
Source File |
Source File is active if you select Upload List in the Item Level field. Click Browse to select the file to upload. |
|
Reason |
The Reason field allows you to enter a reason for the item(s) cancellation. |
When you have entered the criteria for the item(s) being cancelled, click OK. Clicking OK and Cancel Another allows you to select another item to cancel. You are returned to the Edit Offer Conditions page.
From the Edit Offer Conditions page, click Next. The Edit Offer Rewards page appears.
From the Edit Offer Rewards page, click Apply. You are returned to the Promotions tab.
|
Note: You also have the opportunity to cancel items from the Items table on the Rewards page by following similar steps as outlined for cancelling from the Qualifying Items table on the Conditions page. |
Users have the option to cancel locations from an offer. Cancelling locations from an offer can only be done when the offer is in Active status.
Perform a search for the promotion that has an offer in Active status. See Search for a Promotion.
From the search results pane, select the Promotion from which you want to cancel a location from an offer and select Edit from the Actions menu. The Promotion tab appears.
From the Promotion tab, highlight the offer which has the location you want to cancel.
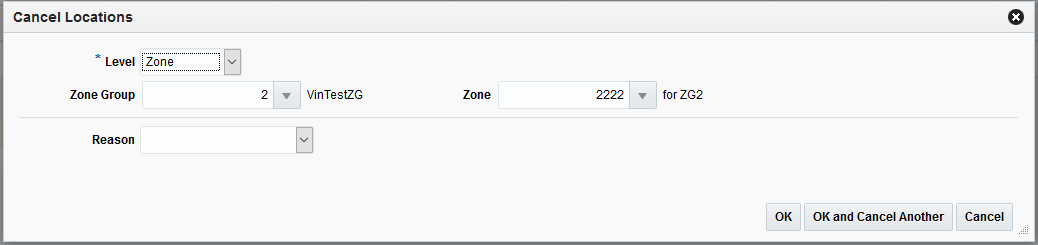
From the Promotion tab, on the Locations table, select the location(s) to be canceled and select Cancel from the Actions menu (on the locations table). The Cancel Locations dialog appears.
From the Cancel Locations dialog, set the criteria for the location or locations being cancelled using the following fields:
Table 8-16 Cancel Locations Dialog Fields
| Field | Description |
|---|---|
|
Level |
The Level field allows you to select a category by which you can narrow the list of locations to cancel in the offer. Options are:
|
|
Zone Group |
The Zone Group field is active if you select Zone in the Level field. Click the dropdown to select a zone group for the location(s) you want to cancel. |
|
Zone |
The Zone field is active if you select Zone in the Level field. Click the dropdown to select a specific zone from the selected zone group from which to cancel the location(s). |
|
Location List |
The Location List field is active if you select Location List in the Level field. Click the dropdown to select from a defined list of locations from which to cancel the location(s). |
|
Store |
The Store field is active if you select Store in the Level field. Click the dropdown to select a store from which to cancel the location(s). |
|
Reason |
The Reason field allows you to enter a reason for the location(s) cancellation. |
Click OK to Cancel the location(s) and close the dialog. Click OK and Cancel Another to remain on the dialog and cancel additional locations.
Users will have options to perform Delete maintenance at Offer level for one or many items or at the Offer/Location level for one or more Locations tied to an offer.
Offer Level: Users highlight one or more rows on the Offer table and click Delete on the Offer table
Location Level: Users will highlight a single row on the Offer table and then highlight one or many rows on the Locations table and click Delete on the Locations table
Perform a search for the promotion that you want to delete. See Search for a Promotion.
From the search results pane, select the Promotion from which you want to delete an offer and select Edit from the Actions menu. The Promotion tab appears.
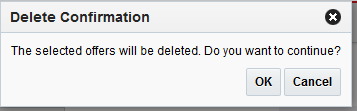
From the Promotion tab, you can select either offers or locations to delete. Highlight the item or location you want to delete and select Delete from that tables' respective Action menu. The Delete Confirmation dialog appears.
From the Delete Confirmation dialog, click OK to confirm the deletion. You are returned to the Promotion tab.