5. Disbursing a Loan
This chapter contains the following sections:
- Section 5.1, "Introduction"
- Section 5.2, "Capturing Loan Disbursement Details"
- Section 5.3, "Preferences for a Loan"
- Section 5.4, "Linking a Loan to Commitments, or Accounts"
- Section 5.5, "Levying Transaction Charges on a Loan"
- Section 5.6, "Posting the Manual Journal Entries"
- Section 5.7, "Uploading Loan Contracts through OL Upload Screen"
- Section 5.8, "Error Log Details"
- Section 5.9, "Viewing Event Details"
- Section 5.10, "Levying Tax on a Loan Contract"
- Section 5.11, "Specifying the Interest Details"
- Section 5.12, "Maintaining Transaction-specific MIS Refinancing Rates"
- Section 5.13, "Maintaining Overwrite Settlement Details"
- Section 5.14, "Viewing Effective Rate (ER) of Interest for a Loan"
- Section 5.15, "Changing the Status of a Loan"
- Section 5.16, "Enquiry for Interest and Principal Projections"
- Section 5.17, "Viewing the Settlement Details during Contract Authorization"
- Section 5.18, "Viewing the Different Versions of a Loan"
- Section 5.19, "Viewing the Accrual Fee Details for a Loan"
- Section 5.20, "Viewing Entity Details"
- Section 5.21, "Viewing the Effective Interest Details for a loan"
- Section 5.22, "Specifying the Installment Preferences for a Loan"
- Section 5.23, "Capturing customer relationships for every loan"
- Section 5.24, "Specifying the Special Penalty Components"
- Section 5.25, "Maintaining Floor and Ceiling Initial Details"
- Section 5.26, "Booking Re-Price Transactions"
- Section 5.27, "Consolidating Re-Price Transactions"
- Section , "For more information, refer to ‘Dual Authorization’" chapter in this User Manual.
- Section 5.29, "Amending the Exchange Rate"
- Section 5.30, "Classifying LC Sublimit"
- Section 5.31, "Maintaining Special Penalty Component Waiver Details"
- Section 5.32, "Viewing the Waiver Details of Special Penalty Components"
- Section 5.33, "Maintaining Floor and Ceiling Details"
- Section 5.34, "Specifying the Disclosure Schedule Details"
- Section 5.35, "Viewing the Contract Disclosure Schedule Status Details"
- Section 5.36, "Viewing Summary Details of a Loan"
- Section 5.37, "Dual Authorization"
5.1 Introduction
A product is a specific service that you offer your customers. For example, you may offer loans.
These types of loans are examples of specific services that you offer. In Oracle Lending, you can define a specific type of service as a product.
Defining a loans product, first of all, helps you classify the loans that you issue according to broad groups or categories. Therefore, you can easily retrieve information relating to loans of a specific category.
The other advantage is that, when building a product, you set up it up with attributes generic to loans of a particular type. All loans processed under a product acquire its attributes.
Therefore, when disbursing loans, you do not have to capture these generic details every time; loan disbursement is remarkably automated in Oracle Lending.
Note
The attributes you define for a product default to all loans processed under it. However, to suit the requirements of a loan, you can change these default attributes.
Apart from the general attributes that a loan acquires from a product, you have to capture some information specific to a loan, such as the loan amount, the repayment account, and so on during contract input. You can capture such information in the Loan Disbursement screens.
5.1.1 Invoking the Loan Disbursement Screens
You can capture the details of a loan in the following screens:
- Contract details
- Contract Preferences
- Contract Linkage details
- Contract Schedule Definition details
- Contract Rollover details
You can invoke the ‘Contract and Commitment - Contract Input’ screen from the application typing ‘OLDTRONL’ in the field at the top right corner of the Application tool bar and click on the adjoining arrow button.
In the Contract and Commitment - Contract Input screen, you can see five tabs, each representing a section:
Tabs |
Screen |
Contract |
Indicates the contract main section |
Preferences |
Indicates the contract preferences section |
Schedules |
Indicates the contract schedule definition section |
Linkage |
Indicates the linkage details section |
Rollover |
Indicates the contract rollover section |
5.2 Capturing Loan Disbursement Details
This section contains the following topics:
- Section 5.2.1, "The Facility Name"
- Section 5.2.2, "Specifying the LC Sublimit Amount"
- Section 5.2.3, "Contra GL Balance Details"
- Section 5.2.4, "Net Outstanding Amt"
- Section 5.2.5, "Current Exposure Details"
- Section 5.2.6, "Specifying the Currency"
- Section 5.2.7, "Specifying the Loan Amount"
- Section 5.2.8, "Specifying the Line Code"
- Section 5.2.9, "Specifying the Settlement Account"
- Section 5.2.10, "Specifying the Related Reference Number"
- Section 5.2.11, "Capturing Details of Amendments to Loan Agreements"
- Section 5.2.12, "Specifying the Tenor"
- Section 5.2.13, "Last Availability Date"
- Section 5.2.14, "Specifying the Loan Status"
- Section 5.2.15, "The Payment Method"
- Section 5.2.16, "Specifying the Maturity Type"
- Section 5.2.18, "Specifying the ICCF Details"
- Section 5.2.19, "Allowing Rollover"
- Section , ""Specifying Industry Code
- Section , ""Specifying the Administrator Details
- Section , ""Pool Funding
- Section 5.2.22, "Identifying an Agency Contract"
- Section 5.2.23, "Rollover Count"
- Section 5.2.24, "Confirming the Status of Loan Products"
- Section 5.2.25, "Tax Scheme"
- Section 5.2.26, "Entering Internal Remarks"
- Section 5.2.27, "Enabling the Reprogramming Counter"
- Section 5.2.28, "Enabling Auto Extension"
- Section 5.2.30, "Indexed Loans"
- Section 5.2.31, "Interpolation"
Using a template to disburse a loan
A template can be described as
a sample contract that has attributes common to many loans in a category (that is, involving a particular product). Once a template is defined, it can be used as a base to enter a loan and only attributes that are specific to the loan you are processing need to be changed. This simplifies the input of disbursement details of a loan.
To use a template you should enter the details of a loan by specifying the template ID of your choice in the LD Contract Details screen.
Entering disbursement details without using a template
If you do not want to use a template, do not specify a Template ID. Enter values into all the mandatory fields and save the loan details.
Whenever a loan is booked and if the UDF ‘RATE-VARIANCE’ is maintained as a non-zero value for a commitment contract to which the loan is linked, dual authorization is required.
For more information on dual authorization, refer to the Dual Authorization in this manual.
The Contract Reference Number
The Contract Reference Number identifies a loan. It is automatically generated by the system for each loan. The Contract Reference Number is a combination of the branch code, the product code, the date on which the loan is booked (in Julian format) and a running serial number for the booking date.
The Reference Number consists of a three-digit branch code, a four-character product code, a five-digit Julian Date, and a four-digit serial number.
The Julian Date has the following format:
- YYDDD
Here, YY stands for the last two digits of the year and DDD for the number of day(s) that has/have elapsed, in the year.
Example
January 31, 1998 translates into the Julian Date: 98031. Similarly, February 5, 1998 becomes 98036 in the Julian format. Here, 036 is arrived at by adding the number of days elapsed in January with those that elapsed in February (31+5=36).
You can enter any reference number for a loan that you issue. The loan is identified through this number in addition to the Contract Reference Number generated by the system. Two loans cannot have the same User Reference Number. By default, the Contract Reference Number generated by the system is taken as the User Reference Number. You can use this number, besides the loan Reference Number, to retrieve information relating to a loan.
Every loan that you issue, would involve a specific service that you offer (which you defined as a product). When disbursing a loan, you should specify the product that it involves.
All the attributes of the product that you specify applies to the loan. However, you can change some of these attributes while entering the details of the contract. When you specify the product, the product type, loan or commitment is displayed.
5.2.1 The Facility Name
If you are entering the details of a commitment contract, the field Facility Name will be enabled. You have the option of entering the name of the facility here. When you save the commitment contract, the name that you have entered is displayed alongside the screen name and customer name.
The Facility Name entered for a commitment is also displayed for a loan contract booked under it.
Note
- It is not mandatory that you enter the Facility Name for a commitment contract
- When you carry out a search for a contract using the Summary screen, you can do so with the Facility Name. All commitment and loan contracts linked to the name is displayed.
- You are allowed to amend the Facility Name for a commitment contract and if you do so, all loan contracts linked to the commitment contract carries the new Facility Name.
Potential Available Commitment
The system displays the potential commitment availability balances on the value date of the forward dated loan. This field is applicable for commitment contract only.
The formula for potential available commitment is the actual commitment available balance minus the sum of future dated uninitiated loan contract amount in commitment currency. While booking a new loan the system validates the commitment availability based on potential available commitment.
Note
- As part of new forward dated Loan input, you can link the loan to the commitment in order to identify the reporting commitment and for performing the possible validations.
- However, the system does not trigger the LINK event at the commitment level as part of the Loan Booking (BOOK event) activity on the booking date of the loan. Hence, the Commitment availability balance is not reduced during the Forward dated Loan Booking.
- The LINK event triggers at the commitment level during the Forward dated Loan Initiation (INIT event) activity as part of the BOD batch process on the value date of the forward dated Loan. Hence, the commitment availability balances are updated on the value date of the forward dated loan
- To consider the possible impact of the future dated loan utilizations, which affect the commitment available balances, the system considers the utilization of the uninitiated forward dated loan contracts along with the actual utilization of the already initiated loans for the potential available balance verifications.
- If the future-dated loan contract and the commitment contract are of different currencies, then the system updates the commitment availability, applying the provided exchange rate, from the value date of the loan contract.
Specifying the Customer
When entering the details of a loan, you should specify the customer to whom you are issuing it. The category of customers (or the customers themselves) that can be counterparty to a loan is defined for the product. Specify the code of an authorized customer, who falls into a category allowed for the product.
Specifying the Agent CIF
You can select the Agent CIF from the option list. If, for a contract, you specify the Agent CIF, settlement instructions are taken based on this number instead of the Customer code. If you do not specify the Agent CIF, the Customer code is used during settlement.
Note
- If you select an Agent CIF, you have to specify the Settlement Sequence Number (explained later), based on which the settlement instructions are taken.
- If you do not select an Agent CIF and specify, instead, a Customer, you can either enter the Settlement Sequence Number or the Settlement Account, based on which the settlement instructions are taken. If you specify both, the Settlement Sequence Number and the Settlement Account, the Settlement Account takes precedence.
SSI Mnemonic
The system displays the SSI mnemonic along with settlement sequence number.
Specifying EG Number
The Entitlement Group Number gets displayed here.
Specifying the CUSIP No.
Enter the CUSIP No. for the customer. This number will help track the securities of the customer.
Note
- It is not mandatory that you enter the CUSIP number for a commitment contract.
- You are allowed to amend the CUSIP No. for a commitment contract and if you do so, all loan contracts linked to the commitment contract carries the new CUSIP number.
- You cannot amend the CUSIP number for a loan contract. The field CUSIP No. in the loan contract screen displays the CUSIP No. that you have entered for the commitment contract.
Specifying the External CUSIP/ISIN
Specify the external CUSIP/ISIN of the customer.
Ext Deal CUSIP/ISIN
System displays the external deal CUSIP/ISIN of the customer.
System displays a value for the commitment, only if the commitment was created as part of STP, and the Tranche has external deal CUSIP/ISIN associated with it.
5.2.2 Specifying the LC Sublimit Amount
Specify the LC sublimit amount for the loan in commitment contracts. The system tracks the LC sub limit balance and unused commitment amount based on the LC sublimit amount you specify here.
Note
- You can amend the LC sublimit amount during the contract life cycle.
- The system uses the following logic to arrive at the Change in LC Sub Limit Amount on various activities on the Loans and commitments such as Value dated amendment, Payments, and so on.
- Unfunded Commitment Amount = Total Commitment Amount – (Outstanding Normal loan amount + Outstanding LC loan Amount)
- New LC Sublimit amount = Minimum of ( Unfunded Commitment Amount), (Contractual LC Limit – Outstanding LC amount))
- Change In LC Sub Limit amount = New LC sublimit amount – Old LC sublimit Amount
FAS114 Reserve Amt
The system displays the funded FAS114 Reserve amount for a loan and the unfunded FAS114 Reserve amount for a commitment in this field.
Write off Amount
The system displays the amount written off for the loan.
Recovery Amount
The system displays the amount recovered for the loan.
5.2.3 Contra GL Balance Details
If there is a balance amount in the Contra GL, the same is displayed in the field ‘Contra GL Bal’. The reserve amount is also displayed in the field ‘Reserve Amount’.
Note
- For the Contra GL balance details to be displayed, you should have, for the Product, indicated the applicability of Contra Accounting by selecting the box ‘Contra Accounting Applicable’ and select the Contra GL from the option list against the field ‘Contra GL’ in the Status Maintenance screen.
- If the contract, for which you are entering details, moves from a status other than ‘NORMAL’ back to ‘NORMAL’, the system displays a configurable override.
5.2.4 Net Outstanding Amt
Oracle Lending calculates and displays the net outstanding amount here, based on the commitment available. This commitment is dependent on revolving and non revolving type.
Examples
Current value for revolving commitment is calculated as follows:
Revolving |
Contract Amount |
Commitment Outstanding |
Commitment Available |
Commitment Net Outstanding Amt field in contract online screen |
Commitment 1 |
100,000 |
0 |
100,000 |
100,000 |
Loan1 -- INIT |
10,000 |
10,000 |
90,000 |
100,000 |
Loan2 -- INIT |
9,000 |
19,000 |
81,000 |
100,000 |
Loan1 -- LIQD |
4,000 |
15,000 |
85,000 |
100,000 |
Current value for non-revolving commitment is calculated as follows:
Non Revolving |
Contract Amount |
Commitment Outstanding |
Commitment Available |
Commitment Net Outstanding Amt field in contract online screen |
Commitment 2 |
100,000 |
0 |
100,000 |
100,000 |
Loan1 -- INIT |
10,000 |
10,000 |
90,000 |
100,000 |
Loan2 -- INIT |
9,000 |
19,000 |
81,000 |
100,000 |
Loan1 -- LIQD |
4,000 |
15,000 |
81,000 |
96,000 |
5.2.5 Current Exposure Details
This indicates the sum of commitment availability and the total outstanding amount on active loans under the commitment as on current date. This is applicable for commitment contracts.
You can view the payment details using the ‘Payment Summary’ screen by clicking on the ‘PS’ button on the right hand side of the ‘LD Contract Online’ screen.
5.2.6 Specifying the Currency
You should specify the currency of the loan when issuing it to a customer. You can select any currency that is allowed for the product, which the loan involves.
5.2.7 Specifying the Loan Amount
If a product has bearing or discounted type of interest, you should enter the principal of the loan in this screen. For a loan involving a true discounted product, you should enter the face value (nominal) of the loan. You can enter T or M to indicate thousand and million, respectively. For example, 10T means 10,000 and 10M means 10 million.
Note
The amount, which you enter, would be assumed to be in the currency specified for the loan.
5.2.8 Specifying the Line Code
By default, you can view the loans credit line, defined for the customer. You can change over to another authorized credit line, if you want to track the loan under a different line.
If you are entering a loan contract linked to a commitment, the credit line of the commitment is displayed in the ‘COMM’ field.
Note
If you specify a credit line and then link the loan contract to a commitment, the credit line that you have selected is deleted by the system, and the one linked to the commitment, is displayed in the ‘COMM’ field. The Credit Line field is blank.
5.2.9 Specifying the Settlement Account
You have to specify the settlement account if Settlement Instructions have not been defined for the customer.
The settlement account that you specify, is the account through which:
- The loan disbursement would be drawn down
- The repayment for ALL the components would be done
If Settlement Instructions have been defined for the customer, the settlement accounts are taken from those instructions. While entering the loan disbursement details, you can change the Settlement Instructions for the loan.
If a settlement account has been specified, in the settlement instructions for the customer, and a different account has been specified for the loan, the account specified for the loan takes precedence.
In the Settlement Instruction screen, you would have maintained settlement instructions for a Branch-Product-Currency-Counterparty-Module combination. Each set of instructions for this combination carries a unique sequence number. You can also select the ‘Settlement Sequence Number’ based on which the settlement instructions taken for the Customer or the Agent CIF.
Note
It is mandatory for you to select a Settlement Sequence Number if you select an Agent CIF.
LC Contract
Select this field to identify the loan under commitment as LC Loan (which defaults from the Product). You are allowed to amend this before the first authorization.
5.2.9.1 Cross Currency Settlement
If the contract currency of a loan is different from that of the settlement account, you can specify the exchange rate as well as the spread applicable for the component in the Settlements screen while capturing the contract details.
If you just specify the spread, the System picks the standard currency rate and applies the spread defined here.
The settlement function derives the effective rate by taking into account the exchange rate, spread and pay or receive indicator. When the quotation method for the currency pair is direct, the spread is subtracted from the exchange rate in case of a Pay component. However, for a Receive component, the spread is added to the exchange rate. When the quotation method is indirect, the spread is added to the exchange rate for a pay component and subtracted for a receive component in order to get the effective exchange rate.
5.2.10 Specifying the Related Reference Number
In a scenario where your customer is tracking a loan issued to her, in her system, she would probably assign it, a unique reference number. If she offers the number for reference purposes, it can be recorded in this screen. This reference number is printed on the advices sent to the customer to enable her to identify and track, the loan with ease.
5.2.11 Capturing Details of Amendments to Loan Agreements
You can record whether there has been any amendment to the loan agreement after it was initiated. If you record that there has been an amendment, you have to specify the date on which such an amendment was made.
The details that you specify in these fields are stored as part of that particular version of the contract. You, therefore, need to enter these details afresh each time you amend the contract.
These details are incorporated in the contract confirmation advice and amendment confirmation advice that is sent to the customer.
5.2.12 Specifying the Tenor
5.2.12.1 Booking Date
The date on which the loan disbursement details are entered would be displayed in this screen. This defaults to the system date (today’s date). This date is for information purposes only. The accounting entries are passed as of the Value Date of the loan (initiation date of the loan).
5.2.12.2 Value Date
This is the date on which a loan takes effect. The accounting entries for the disbursement of the loan is passed as of this date. The tenor of the loan begins from this date. Calculations for interest and all the other components based on tenor is from this date onwards.
The system defaults to today’s date. You can enter a Value Date of your choice. The date that you enter can be any one of the following:
- Today’s date
- A date in the past
- A date in the future (you can enter a date in the future only if Future Dating has been allowed for the product)
The Value Date should not be earlier than the Start Date or later than the End Date, defined for the product involved in the loan.
If the liquidation date for any component falls before today’s date, the liquidation entries (as defined by you for the product) are passed if specified to do so, for the product. If the Maturity Date of a loan is earlier than today, maturity entries are also be passed.
Once the loan disbursement details have been stored and authorized, this date can be amended only if the loan has bearing type of interest and NO schedule has been liquidated.
Note
An override is sought if the Value Date falls on a holiday, in the country of the loan currency.
The maturity date of a loan is automatically calculated using the value date and tenor that you specify for the product associated with the loan. If the product to which the loan is associated is defined with a Standard Tenor, it is defaulted here. You have the option to change the defaulted tenor.
If you enter the maturity date, the tenor of the loan is automatically calculated using the value date and the maturity date.
For a loan with Fixed Maturity Type, the tenor can either be extended or brought backward through the Value Dated Changes function, once the loan has been initiated.
Initiating a Loan with a Value Date in the Future
A future-dated loan is one that has a Value Date later than the date on which it is booked. The Automatic Contract Update function initiates the loan on the Value Date of the loan.
A future Value Date falling on a holiday is initiated either on the previous working day or on the next, depending on your definition for automatic processing at your branch.
All the initiation-related entries specified for the product involved in the loan is passed automatically. If currency conversions are involved, the conversion rates as of the date on which the loan is initiated is taken from the Currency Table.
If the loan is linked to a commitment, the commitment utilization is updated. In addition, the contingent entries passed when the commitment was initiated is reversed to the extent of the loan amount linked (provided this entry is defined for the product). If the available balance in the commitment is not enough to cover the entire loan amount linked, the loan is not initiated. This is reported in the Exception Report.
If there is a rate revision applicable for the future dated loan, on the day it is initiated (that is, on the future Value Date), the rate revision is applied on the loan also. This rate revision could either be due a Floating Rate change or a Value Dated Change.
5.2.12.3 Original Start Date
For a loan that has been rolled-over, this is the date on which the loan was originally initiated. If a loan has been rolled-over more than once, this is the date on which the first loan was initiated.
If you are entering a loan that has already been initiated, you should enter the date on which the loan began. In this case, the date is for information purposes only and for all accounting purposes the Value Date is considered as the date on which the loan was initiated.
5.2.12.4 Contractual Maturity Date
This field is enabled in the LD Contract Online screen, if the product is a Fed Rate product (if, for the product, you have selected the ‘Rolling Loan’ check box in the Loans and Deposits – Product Preferences screen).
You can enter the Maturity Date of the contract here. The principal schedule is based on the contractual maturity date that you enter here.
A new schedule for a contract booked under a Fed Rate product can be defined by amending and extending the Contractual Maturity Date.
5.2.12.5 Contractual Effective Date
This field is enabled in the ‘Loans and Commitment- Contract Input’ screen, if the product is a Fed Rate product (if, for the product, you have selected the ‘Rolling Loan’ check box in the ‘Loans and Commitment – Product Preferences’ screen).
Enter the date on which a new disbursement has been made to the customer involved in the loan contract.
Note
- Future dated liquidation is not allowed on these loans. Only forward dated value dated amendment is allowed.
- The value date of future dated value dated amendment cannot be beyond the contractual maturity date provided by the user for a contract.
5.2.13 Last Availability Date
The system defaults the contract maturity date as the last availability date. You can specify a new ‘Last availability date’ of the commitment contract to disallow the commitment availability beyond this date.
The last availability date, you specify here, should be later than the value date and on or prior to, the maturity date of the commitment contract.
Note
- You can amend the last availability date as part of contract amendment only before the ‘Last Availability Date’.
- The system does not allow the following activities for this contract,
beyond the last availability date of the commitment:
- Disbursements of new loan contracts
- Value dated amendment for the increase in loan principal
- Value dated amendment for the commitment principal change
- As part of value dated amendment for the commitment, if the maturity
date is extended, then the system displays the message stating the current
value of Last Available date. You should make changes to the Last Available
date as part of contract amendment activity subsequently.
- The commitment availability becomes zero on crossing the expiry date.
5.2.14 Specifying the Loan Status
The status of a loan is indicative of the status of repayments on it. If you have specified automatic status movement for the loan, it is moved automatically to the various statuses as per your definition. However, if you indicated that the status change is made manually on the loan, you can change the status manually in this screen. Even if you have defined a loan with automatic status movement, you can still change the status manually, before the automatic status change is due.
There may be another scenario, where you may have defined a loan with automatic status movement forward and the manual status movement however, in the reverse direction. When the conditions for a loan to be in a particular status no longer exist and, if you have specified manual reverse movement, then you will have to manually move the loan to the appropriate status.
The different status codes applicable to a loan are defined for the product it involves. By default a loan acquires these status codes.
When you are capturing loan disbursement details, the system allots the status of Active by default. You may change it to any of the status codes you have defined.
The following status codes are available:
- Active
- Past Due
- Non-accrual
- Write-off
You can move from one status to the other by bypassing an intermediate status. For instance, you can change the status of a loan from Active to Non-accrual by skipping the intermediate status ‘Past Due’. If a status change has been defined with a change in the GL, the entries are passed for the GL movement.
5.2.15 The Payment Method
The payment method, specified for the main interest of the product (whether bearing, discounted or true discounted), applies to the contract as well. The method defined for the product is displayed here.
Bearing
Interest is liquidated on schedule payment date(s).
Example
You have advanced Mr. Brian Williams a loan of USD 10,000 under the scheme Short Term Loans For Individuals at 10% interest for a year.
Under the bearing type of interest payment method, the nominal (USD 10,000), which becomes the principal in this case, is advanced to Mr. Williams. The interest on it is collected over one year, which is the tenor of the loan.
Discounted
In this interest payment method, the interest is deducted at the time of initiating the loan.
Example
You have issued a loan of USD 10,000, under the scheme Short Term Loans For Individuals, at 10% interest for a year, to Mr. Brian Williams.
Under the discounted type of interest payment, the total interest calculated for the tenor of the loan, (USD 1,000), is deducted from the nominal (USD 10,000) and only USD 9,000 is advanced. This forms the principal of the loan.
True discounted
In this interest payment method, the interest is calculated on the principal of the loan and not on the nominal. All the same, like the discounted method, the interest is deducted from the principal at the time of initiation of the loan.
Example
You have advanced Mr. Brian Williams a loan of USD 10,000 under the scheme Short Term Loans For Individuals at 10% interest for a year.
Under the true discounted type of interest payment, the interest amount in absolute terms is not USD 1,000 but less than that. This is because the interest rate of 10% is not applied on USD 10,000 but on the actual amount disbursed (derived by the system) which is USD 9090.91.
5.2.16 Specifying the Maturity Type
The Maturity Type you have specified for the product is displayed by default, in the screen. However, you can change it to one of the following:
Fixed |
The loan has a fixed Maturity Date. This date should be specified in the screen |
Call |
The Maturity Date is not fixed. The loan can be liquidated any time. It indicates the contract is a demand loan. |
Notice |
The loan will be liquidated after a certain period of notice. The number of days of notice should be specified in the screen |
Fed Rate Loan |
The name of the section is displayed as ‘Rolling Loan (Fixed). The Maturity Date is not displayed. |
For a loan with a Fixed Maturity, this date can either be postponed or advanced, through the Value Dated Changes function.
Maturity Date
If the Maturity Type is fixed (that is, the Maturity Date of the loan is known when the loan is disbursed), specify the Maturity Date when entering the loan. This date should be later than the Start Date of the product. If the product has a Standard Tenor, this date is defaulted, based on the tenor and the From Date of the contract. If this date is changed an override should be given when you store the loan.
For a loan with Call or Notice type of maturity, the Maturity Date should be entered in the screen once it is known. This date should be later than the Start Date of the product. You can unlock the record and add the date.
Oracle Lending maintains an internal parameter ‘Default Fee end tenor’ to indicate the end period for a demand loan fee on a monthly basis. This tenor is used to arrive at the end date for calculation of accrual amount (only for Straight Line method type) of advance type of fees.
When the end date is maintained, the system facilitates you to maintain provision to specify rate revision schedules for a demand loan. You can set up the following demand loans:
- Floating-Auto
- Floating-Periodic-Auto
- Floating-Periodic-Manual
During the life cycle of the loan contract, you are allowed to modify the revision method only for Floating-Periodic type of demand loans.
Note
You are not allowed to amend rate revision method on the day rate revision.
You can define the rate revision schedules in a similar way as defined for normal fixed maturity type of loans. In case if the current revision schedules are over, you can maintain the new revision schedules by means of contract amendment.
If the product has a Standard Tenor, this date will be defaulted based on the tenor and the From Date of the contract. If you change this date, you have to give an override when you store the loan.
If you have specified auto liquidation for the loan, liquidation is done automatically on that date. If manual liquidation has been specified, you have to manually liquidate the loan through the Manual Liquidation function.
For a loan with Fixed Maturity Type, this date can either be extended or brought backwards through the Value Dated Changes function, once the loan has been initiated.
When a contract is booked under an ‘Intra-Day Product’ (a product for which the box ‘Intra-Day Product’ is checked in the Loans and Deposits Product – Preferences screen), the Maturity Date is the system date.
Note
- For a Fed Rate loan, the Maturity Date is not displayed.
- In case of an Intra day loan, the value date and the maturity date is the same and the interest is calculated for one day.
Value Date
This date is displayed only for a contract which is booked under an ‘Intra-Day Product’ (a product for which the ‘Intra-Day Product’ check box is selected in the Loans and Deposits Product – Preferences screen). The Value Date is the System Date.
Notice Days
For a contract maturing at notice, you should enter the notice period (in days). This is for information purposes only. When the notice to repay is issued to the counterparty, you should indicate the Maturity Date of the loan in this screen. You can unlock the record and add the date.
If you have specified auto liquidation for the loan, liquidation is done automatically on that date. If it is manual, you have to manually liquidate the loan, through the Manual Liquidation function.
Extending the maturity date of a contract after expiry
You can choose to extend the maturity date of a contract after the maturity date has passed. In such a case, any penalty accruals for the maturity schedule are reversed. The due date for the bullet schedule is changed to the new maturity date, and any interest that would accrue from the old maturity date to the changed date is added to the total interest. Any penal accruals that have commenced since the maturity date, they are reversed and the status of the contract is changed accordingly.
5.2.17 Banker’s Acceptance
You can view or capture banker’s acceptance details only if the Banker’s Acceptance check box is selected at the product level.
Contract Details
The contract details get defaulted from the ‘Contract’ tab.
Broker BA Product
You can select BA broker product from the list of values. These values are maintained the ‘Static Maintenance’ screen.
Interest Day Basis
The interest day basis gets defaulted from the ‘Interest Basis’ of the main interest component.
Rate Details
Stamping Fee Rate
This rate gets defaulted from the ‘Final Rate’ of the main interest component.
Discount Rate
Specify the discount rate.
Treasury MIS Rate
Specify the treasury MIS rate.
This rate gets defaulted to ‘User Rate’ of the MIS screen. You can also modify this rate
Agent Rate
Specify the agent rate.
Amount Details
Stamping Fee Amount
This amount gets defaulted from the ‘Interest Amount’ field of main interest component amount.
Stamping fee amount = loan amount * stamping fee rate * no. of days / day basis.
Example:
- Loan Amount = 2,200,000.00
- Interest / Stamping Fee Rate = 1.37%
- Stamping Fee / Interest amount = 2,200,000.00 * 1.37% * 30 days/365 = 2,477.26
Discount Amount
This amount is calculated automatically, that is, Loan Amount * (1 – Discount Rate)
Example:
- Loan amount = 2,200,000.00
- Discount Rate = 99.96%
- Discount amount = 2,200,000.00 * (1 - 99.96%) = 880.00
Net Borrowing Amount
This amount is calculated automatically, that is, after deducting the discount and stamping fee from the drawdown amount.
Example:
- Original loan amount – stamping fee (main interest) – discount amount
- From the above example:
- Net Borrowing Amount = 2,200,000.00 – 2,477.26 – 880.00 = 2,196,642.74
5.2.18 Specifying the ICCF Details
Numerous interest rates, charges and fees can be defined for a product through the ICCF (Interest, Commission, Charge or Fee) screens. By default, all these are applied on the loan involving the product.
The attributes pertaining to the component defined as the Main Interest (by checking the ‘Main Component’ in the ICCF Product Details screen), is displayed here. If you want to make changes to the Main Interest component only, you can do so through this screen without having to invoke the Contract ICCF screen. If you change the Main Interest details, the changed values will be applied on the loan, along with the specifications for the other components (fee, charge, and so on.). If you want to change the details for any other ICCF component, you have to invoke the Contract ICCF screen by clicking on the ICCF button and then make the changes.
Rate Type
The rate type applicable for the product involved in the loan will be displayed in the respective field in the screen. It can be one of the following:
- Fixed - a fixed rate
- Floating rate - a rate that changes periodically or automatically as per your specifications in the Floating Rate Table
- Special - an amount instead of a rate
For more information on negative interest rate processing, refer to the Interest User Manual.
Floating Rate Code
The Floating Rate Code specified for the product involving a loan is displayed in the screen. You can change it to suit the needs of a specific loan and cannot be amended as a part of contract amendment. However, Float Rate code can be amended by Value Dated Amendment.
Spread
For a loan with a floating interest rate, you can specify the Spread that you want to apply, over the rate maintained in the Floating Rates table.
This Spread should be greater than or equal to the Minimum Spread and less than or equal to the Maximum Spread defined for the product, involved in the loan. If the spread you apply is greater than the Maximum Spread, then the Maximum Spread will be applied on the rate. On the other hand, if it is less than the Minimum Spread defined for the product, the Minimum Spread will be picked up.
For a floating rate, the spread will be applied over the market rate, applicable for the day.
Fixed Interest Rate
If the loan involves a fixed interest rate product, the Default Rate defined in the Product ICCF screen will be displayed here. This rate can be changed if required. The rate can be changed (through this screen), only for the main interest component.
This changed rate should be greater than or equal to the Minimum Rate and less than or equal to the Maximum Rate, defined in the Product ICCF screen.
Example
The minimum and maximum rates defined in the product ICCF screen are 2% and 10% respectively.
The interest rate, which defaults from the product, is 5%. The interest rate you have specified for the loan is 8%. This will be accepted, as it does not exceed the maximum rate of 10%. However, if you want to specify the rate as 1%, this will not be accepted, as this rate is less than the minimum rate of 2%.
Note
You can define a revision schedule for a loan with a fixed rate of interest. The revision schedule can be brought into effect when you change the fixed rate through an amendment.
Special Interest Amount
If the product involved in the loan has been defined with a special interest, the interest amount applicable for the loan is displayed in this screen. You can change this amount.
5.2.18.1 Specifying Rate Fixing Days and Rate Fixing Required
‘Rate Fixing Required’ check box value is selected from the product level interest screen and and ‘Rate Fixing Days’ is selected from Interest Limit screen. However, you can modify these values.
For more information on rate fixing days and rate fixing required, refer to Interest User Manual.
5.2.18.2 Specifying the Interest Period Basis
You can indicate how the system must consider the tenor basis upon which interest is computed over a schedule or interest period, in respect of the contract. This preference is inherited from the Interest Limits definition for the product used by the contract, and you can change the default option chosen.
You can choose any of the following options:
Including the From Date
For all schedules, the period considered for interest calculation would include the start date and exclude the end date. Therefore, the value date of the loan is considered for interest calculation and the maturity date is excluded.
Including the To Date
For all schedules, the period considered for interest calculation would exclude the start date and include the end date. Therefore, the value date of the loan is excluded, but the maturity date is included for interest calculation.
Including both From and To Dates
The period considered for interest calculation would include both the value date and the maturity date. This would mean:
- For the first schedule, it would include the Value Date. Interest would be calculated for the Value Date
- For the last schedule, it would include the Maturity Date. Interest would be calculated for the Maturity Date
Excluding both From and To Dates
The period considered for interest calculation would exclude both the value date and the maturity date. This would mean:
- For the first schedule, it would exclude the Value Date. No interest would be calculated for the Value Date.
- For the last schedule, it would exclude the end date. No interest would be calculated for the Maturity Date.
Example
A loan with a value of USD 400,000 is value dated 1st January 2003 and matures on 1st May 2003. The intermediate interest payment schedules are on 1st February 2003, 1st March 2003 and 1st April 2003.
Schedule |
Start Date |
End Date |
1 |
1st January 2003 (Value Date) |
1st February 2003 |
2 |
1st February 2003 |
1st March 2003 |
3 |
1st March 2003 |
1st April 2003 |
4 |
1st April 2003 |
1st May 2003 (Maturity) |
The periods considered for interest calculation for each schedule, for each of the four options, are arrived at as given below:
Include From Date
Schedule |
Days from |
Days To |
Days for Interest Calculation |
1 |
1st January 2003 (including) |
1st February 2003 |
32 |
2 |
2nd February 2003 |
1st March 2003 |
28 |
3 |
2nd March 2003 |
1st April 2003 |
31 |
4 |
2nd April 2003 |
1st May 2003 (excluding) |
31 |
Include To Date
Schedule |
Days from |
Days To |
Days for Interest Calculation |
1 |
1st January 2003 (excluding) |
1st February 2003 |
31 |
2 |
2nd February 2003 |
1st March 2003 |
28 |
3 |
2nd March 2003 |
1st April 2003 |
31 |
4 |
2nd April 2003 |
1st May 2003 (including) |
30 |
Include both From and To Dates
Schedule |
Days from |
Days To |
Days for Interest Calculation |
1 |
1st January 2003 (including) |
1st February 2003 |
32 |
2 |
2nd February 2003 |
1st March 2003 |
28 |
3 |
2nd March 2003 |
1st April 2003 |
31 |
4 |
2nd April 2003 |
1st May 2003 (including) |
30 |
You would notice that consequent to the first schedule, this option would work in the same manner as the Include To Date option.
Exclude From and To Dates
Schedule |
Days from |
Days To |
Days for Interest Calculation |
1 |
1st January 2003 (excluding) |
1st February 2003 |
31 |
2 |
2nd February 2003 |
1st March 2003 |
28 |
3 |
2nd March 2003 |
1st April 2003 |
31 |
4 |
2nd April 2003 |
1st May 2003 (excluding) |
29 |
You would notice that consequent to the first schedule, this option would work in the same manner as the Include From Date option.
5.2.18.3 Specifying the Currency Rounding Logic for Interest Components
A Loans contract or Money Market deal inherits the currency-wise rounding rules defined for interest components, in the interest class associated with the product used by the contract.
Such inherited rounding rules can be altered, if required, when the contract is entered. For the main interest component, the applicable rounding rules can be altered in the main Contract Online screen.
The following rounding rules can be specified:
- How the interest amounts in respect of the interest component in the specified currency are to be rounded – truncated, rounded up, rounded down, or rounded near.
- If truncation is opted for, the number of digits after the decimal place, to which interest amounts in respect of the interest component in the specified currency, must be truncated. The number of digits specified for truncation cannot exceed the allowed decimal places for the specified currency. If not specified, the number of decimals indicated in the Currency Definition for the specified currency is picked up by the System.
- For the Round Up, Round Down and Round Near options, the rounding unit, which is the lowest possible measure in which the interest amounts in respect of the interest component in the specified currency, can be considered. This value cannot be less than the rounding unit for the specified currency in the Currency Definition. If not specified, the rounding unit indicated in the Currency Definition for the specified currency is picked up by the System.
The rounding rules so defined would also be applicable for any special interest and / or rollover special interest amount in respect of the contract.
The rounding rules for any of the interest components applicable for the contract can be specified in the ICCF Details screen, which can be invoked by clicking on the ‘I’ button in the Contract Online screen.
Application of Rounding Rules during Interest Processing
When the System processes any of the following events in respect of a Loans contract, the rounding rules defined for the interest component applicable for the contract are picked up:
- Interest Schedule Calculation
- Interest Accrual
- Manual Liquidation.
- Contract Rollover (if a partial liquidation is done, the rules are applied on the interest liquidation amount, and any differential amount arising from this is adjusted. An override is sought in such a case)
- Auto Liquidation (If the Verify Funds and Partial Liquidation Allowed options are applicable, the rules are applied on the interest liquidation amount, and any differential amount arising from this is adjusted)
If the rounding rules are not available from the contract details, the rounding rules specified in the Currency Definition are used.
5.2.18.4 Choosing the Applicable Rate from Historical Rates
For contracts involving a fixed rate primary interest component, your bank may require choosing the applicable rate from historical floating rates for a floating rate code that has been maintained for a treasury source. For such requirements, select the TREASURY option in the Fixed Rate Type field in the main Contract Online screen.
To select the applicable floating rate from those available for the
rate code maintained for the designated default treasury, click ‘Floating Rate’ button alongside
the User Rate field. The Treasury Floating Rates Maintenance screen is
opened, with the historic floating rates for the rate code displayed.
You can choose the required rate for the desired effective date, in this
screen. The rate you select is displayed in the Rate field in the main
Contract Online screen. You can also specify an appropriate spread.
For all future interest computations, fixed rate contracts for which such historic floating rates have been specified are processed as fixed rate contracts for which the applicable rates are derived from the user rate and the specified spread.
System updates and tracks the adjustment rate for each interest component associated with the loan contract for which floor and ceiling propagation is done.
If loan contract all-in rate (Base Rate + Spread) of the interest component is less than the floor value of all-in rate, then
- Adjustment Rate = Floor value – Computed all-in rate
- Revised All-In Rate = Floor Value
- In this case, the “Adjustment Rate” will be positive
If loan contract all-in rate (Base Rate + Spread) of the interest component is greater than the Ceiling value of all-in rate, then
- Adjustment Rate = Ceiling value – Computed All-In rate
- Revised All-In Rate = Ceiling Value
- In this case, the “Adjustment Rate” will be negative
History of propagation details are not available for the loan contract, and system always display the latest adjustment rate which is updated as part of the latest floor and ceiling propagation.
5.2.18.5 Viewing Interest Details
The ‘Rate’ displayed in the ‘ICCF Details’ screen is the current rate as of today.
For history of rates, click ‘Interest Details’ tab in the ‘Loan and Commitment -Contract Input’ screen. The ‘Interest Details Summary’ screen displays history of rates.

5.2.19 Allowing Rollover
While setting up a product, if you have specified that loans involving the product should be automatically rolled-over, then all loans involving the product are rolled-over on their respective Maturity Dates. This feature is called auto rollover. If auto rollover is specified for the product the loan involved is indicated on this screen.
However, if you do not want the loan, whose disbursement details are being captured to be rolled-over, you can disallow rollover for the particular loan. If rollover has been disallowed for a product, you cannot rollover loans involving the product.
5.2.20 Viewing Messages using Message Preview
The 'Message Preview' screen allows you to preview the messages/advices generated for unauthorized contracts. By saving the contract, you can preview the messages/advices generated.
From ‘Loan and Commitment - Contract Input’ screen, click ‘'Message Preview' tab to view the ‘Message Preview’ screen.
In addition, you can take print of the messages/advices generated from the 'Message Preview' screen.
Instead of going to 'Message Preview' screen (OLDMSPRV), you can preview the messages/advices generated in the 'Message Preview' tab.
- Contract Reference - The current contract reference number appears.
- DCN - The generated DCN number of the particular message/advice appears.
- Message Type - The type of message generated for that event appears.
- Receiver - The customer ID (Receiver) of the particular message/advice appears.
- Name - The name of the receiver of the particular message/advice appears.
- Media- The media through which the particular message/advice is transmitted. For example, SWIFT or mail.
- Message Status - The status of the particular message/advice appears.
Click 'View' to open 'Message Details' screen. The DCN and the message format is displayed in this screen.

You can also click 'Print' to print the generated messages/advices.
5.2.21 Specifying Preferences Tab
Specifying Industry Code
Specify the industry code here. The adjoining option list displays all industry codes maintained in the system. You can choose the appropriate one.
Specifying the Administrator Details
Select the administrator code from the adjoining option list. This list displays admin details maintained in the Admin Maintenance screen.
Pool Funding
Pool Funding Reference No.
Specify the pool funding Reference number from the adjoining option list. The option list displays all open and authorized pool funding reference numbers where branch code and currency match the commitment contract.
It is mandatory to specify this value, if you have checked the ‘Master Funding Required’ check box at the product level.
Master Funding Reference No
Specify the master funding reference number from the adjoining option list. The option list displays all open and authorized master funding reference numbers where branch code and currency match the commitment contract.
It is mandatory to specify this value, if you have checked the ‘Pool Funding Required’ check box at product level.
Pool and Master Funding linkages are applicable only to commitment contracts in the LD module. These fields will be disabled for contracts using other product types.
You can specify the funding reference Number for a commitment contract either during contract input or contract amendment operation.
After the funding reference number is selected in the Loan Contract Input screen, system validates the available balance in the pool is sufficient for the commitment contract amount.
If pool balance is insufficient, system displays the error message ‘Commitment amount exceeds available balance of Pool/Master Fund’. You cannot proceed with booking the commitment contract under the given Pool/Master fund reference.
These validations will be performed for the following scenarios:
- Funding reference number is selected during new contract input /contract amendment
- Funding reference number is changed during contract amendment
- Commitment amount is increased using Value Dated Amendment (VAMI) operation
You can link commitment contracts using different product codes to the same funding reference.
You can also link revolving/non revolving commitments to a Pool/Master funding regardless of whether the Pool/Master funding is revolving/non-revolving.
You can also add or modify a funding reference number for a contract using contract amendment operation. While adding a funding reference number to a commitment contract, system validates if any active loans under the commitment should be in the same currency as the commitment. If the loan currency differs from commitment currency, system displays an error message stating that such commitments cannot be linked to a funding reference number.
When you amend the contract, and select a new funding reference number, system validates that the available balance in the new pool is sufficient for the commitment amount. If yes, then you can proceed with the contract amendment operation. If the available balance in the pool is insufficient, then you cannot proceed with the amendment.
For commitment contracts reversed or deleted before authorization, the available amount under pool reference number will be reinstated to the extent of the commitment contract amount for both revolving and non-revolving types of pools.
5.2.21.1 Processing Pool Funding
System calculates the available balance of a pool/master fund during new contract input/contract amendment
When a funding reference number is attached to a commitment contract, system validates the contract amount against the available (un-utilized) amount of that pool/master funding reference.
For such commitments, system validates the currency of any loans booked under them should be the same as the commitment contract currency. The commitment contract currency is always the same as that of the funding reference.
If both Pool and Master funding codes are linked to a commitment contract, then contract booking amount is validated against the minimum available amount of the Pool and Master Funding Reference.
When a commitment contract is linked to a Funding Reference Number, system derives the available Funding Amount (for both Pool and Master Funding) as follows:
Available Funding Amount for Revolving Funding
Fund Utilization = Sum of contract amount (latest version) of all revolving commitments booked
+ Sum of principal Available balance of all non revolving commitments booked
+Sum of principal outstanding balance of Loans linked under the non revolving commitments
Available Fund Amount = Fund Amount – Fund Utilization
Available Funding Amount for Non-Revolving Funding
Fund Utilization = Sum of contract amount (latest version) of all revolving commitments booked
+ Sum of contract amount (latest version) of all non revolving
+ Sum of Principal Decreases of all revolving commitments booked
+ Sum of Principal Decreases of all non-revolving commitments booked
Available Fund Amount = Fund Amount – Fund Utilization
Note
- The available amount or utilization of Pool and Master Funding are not stored in system, but derived at run time during commitment input and during any principal increases of commitment through VAMI operation.
- If the commitment contract amount is increased using value dated amendment (VAMI), the new contract amount is validated against the available amount in the pool or the master funding attached to the commitment.
- System does not check available Funding Amount if commitment amount is reduced using VAMI.
5.2.22 Identifying an Agency Contract
Oracle FLEXCUBE allows Straight Through Processing from LB module to OL module to track bank or any of bank entities (playing the role of a self participant) share in a syndicated loan. For the tranche/drawdown booked for the self participant on the agency side, Oracle FLEXCUBE automatically creates the corresponding commitment/loan on the originations side (in the OL module).
The system checks the ‘Agency Contract’ box to indicate that the loan is created as a result of STP. However, you can deselect this check box, if required. To do this, you have to first unlock the record. If deselected, the contract becomes a normal loan contract. Further, the system stops tracking the bank details or its entities share in the syndication. If you select this option at the commitment contract level then the system does not allow you to deselect the option at OL contract level. But if you deselect the option at the OL contract level then the system allows you to check this option at the commitment contract level.
Note
This field is enabled only for products where the agency contract flag is set to ‘NO’.
- You cannot edit this field after first authorization (as part of CAMD, the field cannot be edited).
- Based on the contract level flag, the system changes the main interest component rate type to ‘Fixed’ and fixed rate type as ‘Agency’.
- The system does the Interest re-pickup, if the agency contract flag is set back to ‘NO’.
- For agency types of loans, you should handle the changes in the agency rates through the ‘Agency Rate Revision’ screen. You are not allowed to change Agency rate as part of VAMI. In addition, you are not allowed to maintain the Agency rates for future dates
- You can select a Loan contract for Agency Contract Type only if the reporting commitment also is of Agency Contract type.
- If you modify the following UDF values for the contract wherein ‘Agency
Contract’ box is checked, the system will send an amendment feed
to Intellect system provided the box ‘Intellect Feed for UDF Change’
is checked in the ‘Loan Parameters’ screen:
- CUSTOMER RATE
- DEALER LIBOR RATE
- LATE TRADE
- RA COST
This feed contains the updated UDF values.
The Base rate and the spread can be in negative. All in rate will become zero if all in rate is negative.
5.2.23 Rollover Count
You will see the rollover count in this screen. For a loan that has been rolled-over, this count indicates the number of times it has been rolled-over.
Note
For rollover to be applicable for the loan, it has to be defined for the product.
5.2.24 Confirming the Status of Loan Products
System defaults the maintenance done for the ‘Confirm’ check box from the product level. If this box is checked at the product level, then system defaults the same to the contract booked under that product and you cannot amend at the contract level. If this box is deselected at the product level, then you can amend this box only during the life cycle of the contract.
System re-defaults the maintenance done for 'Confirm' check box from the product level during actual initiation of value dated amendment and processing of normal rollovers. During payment, system does not re-default the maintenance for 'Confirm' check box from the product. This check box will continue to have the same value as maintained at the contract level.
System does not generate the intellect message if only the 'Confirm' box is amended. There is no impact on Initiation, Liquidation, Rollover, Re-price and generation of payment messages due to the 'Confirm' check box.
5.2.25 Tax Scheme
The tax scheme, which has been specified for the product is displayed in this screen. The tax scheme cannot be changed at the time of loan processing. You can however, waive the tax applicable on the contract.
5.2.26 Entering Internal Remarks
You can enter information describing the loan that you are processing. This is available when you retrieve information on the loan. However, this information is not available on any advice printed for the customer’s benefit. This information is displayed whenever you retrieve information on the loan, either as a display or in print.
5.2.27 Enabling the Reprogramming Counter
Whenever any event (loan disbursement, value dated amendment, schedule changes, and so on.) in the life-cycle of a loan contract results in a negative cash flow for a bank, you have to enable the reprogramming counter by selecting the check box positioned next to the Reprogram Counter field.
5.2.28 Enabling Auto Extension
Select this check box to define the interim interest schedules for the contract. It ensures that schedules are created in advance to facilitate billing notice generation. Accordingly the system creates the schedules when the schedule date is crossed. It is essential for the schedules to be generated for billing details in future.
Note
- This field is enabled only if you select the call type of loans (demand loans). If the auto extension flag is enabled, the number of schedules is defined based on the internal parameter AUTO_EXTENSION_SCHEDULES from CSTBS_PARAM.
- The frequency is determined based on the product level definition. At the product level, if there is a frequency as bullet for main interest component, then there is no interim interest schedules for the main interest component using AUTO_EXTENSION/AUTO_EXTENSION_SCHEDULES.
- Auto extension flag is checked or unchecked only at the time of booking demand loans. It cannot be amended as part of CAMD.
- While defining schedules the number of schedules is specified. However, these contracts are not considered for Auto Extension.
The system creates the schedules based on the internal parameter for number of schedules of demand loan, provided the ‘Auto Extension’ flag is checked. For instance, if the internal parameter for number of schedules for demand loan is set as 2 with the monthly interim schedule, then it will always have two monthly future interim schedules for the interest component. When a particular schedule date is reached for such demand loan, the system creates additional future schedule.
5.2.29 Enabling Residual Amount Liquidation
Residual Required check box
Select this check box for loan payment transaction for residual. If this check box is selected at ‘Contract and Commitment - Contract Input’ screen (OLDTRONL), then the system defaults it to ‘Manual Payment’ screen (OLDPMNT). However, this check box can be superseded at ‘Manual Payment’ screen.
Note
- While creating a contract if residual threshold for a currency is not maintained, then an error message appears.
- This option is available in ‘Payment Simulation’ screen.
Residual Amount
In OLDTRONL, the residual amount will be shown in 'Accounting Entries' of Event tab once the residual accounting entries are passed.
Residual Amount Liquidation is supported for the following:
- Principal, Interest and penalty components
- Current, Back Dated and Future Dated payment
- Manual or Auto loan liquidation
Positive and negative residual amount is supported for
- Bearing, Discounted and True Discounted loans
- Normal, Amortized and Capitalized Schedule type
Computation of Residual amount
Residual amount is computed as amount due less amount paid. If the resultant amount comes as a positive value and lower than the positive threshold maintained at product level, then the residual amount is considered as 'Positive Residual' amount.
Example
When payment is done as below:
- Schedule due amount: 10000
- Residual threshold: 50
- Payment made with residual as Y: 9980
- Here payment made amount is less than the schedule due amount, so entry is passed for 20. So residual entry is passed for 20, along with the payment amount.
If the resultant amount come as a negative value and lower than the negative threshold maintained at product level, then the residual amount is considered as 'Negative Residual' amount.
Example
When payment is done as below
- Schedule due amount: 10000
- Negative Residual threshold: 50
- Payment made with residual as Y: 10030
Here payment made amount is greater than the schedule due amount, so entry is passed for 30. So residual entry is passed for 30, along with the payment amount.
5.2.30 Indexed Loans
To guard against the fluctuations in the value of money in the economy due to inflation, you can maintain loans in a separate imaginary currency called the index currency. (The index currency is maintained in the Currency Maintenance screen of the Core Services module.)
Note
Since the index currency is linked to the local currency of your branch, you can only mark loans quoted in the local currency as indexed loans.
The fluctuations in the inflation rate is effected by the fluctuation in the exchange rate between the Index currency and the LCY.
Example
You have advanced Mr. Brian Williams a loan of USD 10,000 under the scheme ‘Short Term Loans for Individuals’ at 12% interest for a period of five months.
As a consequence of inflation the price index has gone up from 50 to 55 as of the date of loan repayment.
Now what Mr. Williams has to pay you is computed as follows:
P = 10,000 x 55/50 = USD 11,000
The interest will be calculated on the new principal amount.
To index a loan you have to choose the index currency as the loan currency while maintaining the contract details of the loan. However, you have to specify the LCY equivalent of the contract amount. The system computes the amount in index currency based on the exchange rates maintained in the Currency Rates Maintenance screen.
The Impact
As a consequence of maintaining indexed loans the following functions is affected:
- Interest accruals are reflected in the index currency
- Payment advices for customers are generated in the index currency. Even if the advice has the local currency equivalent, the conversion will be based on the rate as of the generation date rather than the payment date.
- Repayment schedules are maintained in the index currency
- In the central bank report, this loan is identified as a local currency loan
- If the loan is pre-paid during the course of the month the exchange rate for the particular deal has to be calculated manually and entered into the system.
- When payments are overdue, the dues continue to remain in the index currency. Upon liquidation the prevalent exchange rate between the index currency and the local currency is applied.
5.2.31 Interpolation
Interpolation is used to determine interest rates for a period of time that are not available.
In this case, the interest rate is the dependent variable, and the length of time is the independent variable. To interpolate an interest rate, you need the interest rate of a shorter period of time and a longer period of time.
In Corporate Lending, changes are made to standard interpolation formula so that the system picks the actual days for a month instead of directly picking the tenor available in the ‘Floating Maintenance’ screen.
For example:
Floating rates are maintained in the following format.
Currency - USD
Tenor |
Rate |
0 |
2.1 |
7 |
1.78 |
14 |
1.85 |
30 |
1.90 |
60 |
2.1 |
90 |
2.03 |
180 |
1.85 |
360 |
1.7 |
999 |
1.89 |
Schedule Date is 4-2-2015 and reset tenor is 17.

5.3 Preferences for a Loan
Preferences are options. For instance, for a product, you have the following options:
- Making liquidation automatic or manual or component based
- Allowing or disallowing rollover
- Applying tax or waiving it
- Applying prepayment penalty or waiving it
- These are your product preferences. For a contract, you have the option (preference) of specifying the following in the ‘Contracts’ tab of the Contract Online screen.
- Liquidating back valued schedules
- Applying Back Valued Schedules
- Suppressing Back Value Payment Messages
- Residual Liquidation Entries
You cannot however, change the schedule payment type (amortized, capitalized or normal) for specific contracts. By default, the payment type, which you have defined for the product, applies to all loans involving the product.
This section contains the following topics:
- Section 5.3.1, "Setting Loan Schedule Preferences"
- Section 5.3.2, "Re-computing Late Payment Charges Online"
- Section 5.3.3, "Processing the Late Payment Charges"
- Section 5.3.4, "Maintaining System Derived Schedules"
- Section 5.3.5, "Maintaining User Input Schedule Amounts"
- Section 5.3.6, "Maintaining Schedule Adjustments on Interest Rate Revision"
- Section 5.3.7, "Maintaining previous interest rate"
- Section 5.3.8, "Maintaining Schedule Adjustments on Prepayment"
- Section 5.3.9, "Re-Amortization"
5.3.1 Setting Loan Schedule Preferences
Schedule preferences are the attributes of the repayment schedules, defined for the loan in the Schedules tab of ‘Loans and Commitment-Contract Input’ screen
When you are entering a loan for the first time, you can define certain attributes for it. They include:
- The amortization type, if the loan has been specified with amortized schedules
- Whether holidays are to be ignored at the time of drawing up repayment schedules
- The behaviour of schedules when they fall due on the holiday
Types of repayment schedules
When creating a product, you specify the type of repayment schedule - amortized, capitalized or normal (periodic). All loans involving the product acquires the repayment schedule type, defined for the product. When processing a loan you cannot change the repayment schedule type that the loan has acquired.
For example, if you have specified an amortized, repayment schedule for a product, it applies to all loans involving the product. This cannot be changed.
By specifying that payment schedules have to be amortized over the period of repayment, you indicate that all the repayments should be in Equated Instalments. These repayment schedules are drawn up taking the Principal and the Main Interest. While defining the attributes of interest applicable on a product, you can designate one interest component as the main interest.
If you specify amortized schedules, the system automatically do the amortization according to the frequency that you have defined.
Note
If a loan is to be amortized, it should have a fixed type of interest and a Bearing interest payment method.
You can also specify Capitalization and define schedules for the various components of the loan. If the repayments of principal or interest are not made on a particular schedule date, they are capitalized for the next schedule. If a partial payment has been made, the unpaid amount is capitalized (the unpaid interest is added to the unpaid principal and this becomes the principal for the next schedule).
If you have specified Normal type of schedules, you can define your own schedules for loans involving the product.
Specifying the amortization type
You need to specify the amortization applicable to the loan only if the schedule type is amortization.
The following options are available:
- Reducing Balance: The reducing balance method is used for calculating interest on the reduced principal/outstanding balance for each repayment schedule. The principal repayment would be the difference between the equated monthly installment and the interest, for each schedule. The following example illustrates principal and interest calculation using this method.
Example
Assume that you have disbursed a loan with the following details:
- Principal – 10,000 USD
- Interest Rate – 10%
- Interest Calculation Method – Actual/360
- Loan Start Date - 12/1/2000
- Loan End Date - 11/30/2001
- Days in the year – 364
Based on the reducing balance method, the interest, principal and the EMI are as follows:
Sl. No |
Interest |
Principal |
EMI |
Outstanding Bal |
1 |
86.11 |
$793.05 |
$879.16 |
$9,206.95 |
2 |
79.28 |
$799.88 |
$879.16 |
$8,407.07 |
3 |
65.39 |
$813.77 |
$879.16 |
$7,593.30 |
4 |
65.39 |
$813.77 |
$879.16 |
$6,779.53 |
5 |
56.50 |
$822.66 |
$879.16 |
$5,956.88 |
6 |
51.30 |
$827.86 |
$879.16 |
$5,129.02 |
7 |
42.74 |
$836.42 |
$879.16 |
$4,292.60 |
8 |
36.96 |
$842.20 |
$879.16 |
$3,450.40 |
9 |
29.71 |
$849.45 |
$879.16 |
$2,600.95 |
10 |
21.67 |
$857.49 |
$879.16 |
$1,743.46 |
11 |
15.01 |
$864.15 |
$879.16 |
$879.31 |
12 |
6.11 |
$873.05 |
$879.16 |
$6.26 |
The interest for the first schedule is computed on the loan principal (10,000) for the first month (31 days) using the following formula:
(10000 * 10 * 31) / (100*360)
Interest for the subsequent schedules are computed on the outstanding principal for each schedule.
- Rule of 78: A method of amortization, the Rule of 78 is also a way of determining how much of each monthly payment is paid towards interest and how much is paid towards the principal component. First, you need compute the total interest on the original principal amount. Then, you need divide this interest amount equally into n parts, where n is the number of schedules and divide the loan principal amount also into n equal parts, so that each equal installment is basically a sum of the two. Subsequently, you need apply the rule of 78 to calculate how much of the EMI goes towards interest and principal. The following example illustrates this:
Example
Consider the loan details mentioned in the above example:
Total interest on the loan = (10000 * 10 * 364)/(100*360) = 1011.11
Interest for each schedule = 1011.11/12 = 84.26
Principal for each schedule = 10000/12 = 833.33
EMI = 833.33 + 84.26 = 917.59
First month’s interest = 12/78 times $1011.11 = 155.56
(78 is the sum of integers from 1 to 12)
Therefore, principal for the first month = 917.59 – 155.56 = 762.03. The interest, principal, and EMI due for each schedule is as follows:
Sl. No |
Interest |
Principal |
EMI |
1 |
155.56 |
762.03 |
917.59 |
2 |
142.59 |
775.00 |
917.59 |
3 |
129.63 |
787.96 |
917.59 |
4 |
116.67 |
800.92 |
917.59 |
5 |
103.70 |
813.89 |
917.59 |
6 |
90.74 |
826.85 |
917.59 |
7 |
77.78 |
839.81 |
917.59 |
8 |
64.81 |
852.78 |
917.59 |
9 |
51.85 |
865.74 |
917.59 |
10 |
38.89 |
878.70 |
917.59 |
11 |
25.93 |
891.66 |
917.59 |
12 |
12.96 |
904.63 |
917.59 |
Total |
1011.11 |
9999.97 |
11011.08 |
Handling a repayment schedule date that falls due on a holiday
The holiday check parameter (Currency, Local or Both) and the holiday preferences specified at the product level is defaulted to the contracts associated with it.
You cannot change the holiday check parameter at the time of processing contracts. However, you can modify the holiday preferences for the contract. Oracle Lending performs holiday checks for the value date, maturity date, schedule date, and revision date.
If any of these days falls on a holiday (either local holiday or currency holiday or both, whichever you have specified), the system handles the holiday treatment according to the holiday preferences specified for the contract.
You have specified that repayment schedules should be generated automatically, after indicating the frequency, number and the date of first repayment. When the system computes the repayment dates based on these values, there is a chance that one or more schedules fall due on a holiday. In such a case, you have the following choices:
- Ignore the holiday and retain the due date
- Move it either backward or forward
- Move across months
- Move other schedule dates relative to the current rescheduled date
Ignoring Holidays
If you specify that holidays are to be ignored, the schedule dates are fixed without taking the holidays into account. In such a case, if a schedule date falls on a holiday, the automatic processing of such a schedule is determined by your holiday handling specifications for automatic processes, in the Branch Parameters screen.
In this screen, you can specify the following:
- Processing has to be done on the last working day before the holiday for automatic events falling due on the holiday. The schedule falling on the holiday is liquidated during End of Day processing on the last working day.
- Processing has to be done only up to the System Date. In this case, only the events scheduled for today is processed. The events of the holiday are processed on the next working day during Beginning of Day processing.
Always, the payment is processed as of the day it falls due (as of the holiday, if it falls on a holiday).
Example
A monthly repayment schedule date for Taggart Iron and Steel’s loan, of USD 100,000 (for one year at 16% interest) falls on October 31, a holiday. If you have specified that holidays should be ignored by clicking this field, the schedule date remains as October 31 when the schedules are fixed. The processing of this is determined by your holiday handling specifications in the Branch parameters screen.
- You can specify that processing has to be done today (on System date) for automatic events up to the day before the next working day. Then, on October 30 itself, the schedule of October 31 is liquidated, during the EOD run of the Automatic Contract Update function.
- You can specify that processing has to be done only up to the System Date. Then, on October 30, only the events scheduled for that date is processed. This means that since the schedule date is October 31, which is a holiday, the schedule is processed on November 1 (the next working day) during the BOD run of the Automatic Contract Update function.
Note
Oracle Lending applies to the above explained holiday checks on all contracts uploaded from an external system also.
Moving schedule dates forward or backward
For a schedule date falling on a holiday and you can specify that holidays are to be ignored at the time schedule definition. If you do so, then you have to indicate the movement of the schedule date, forward to the next working day or backward to the previous working day. In such a case, since the schedule date itself is moved to a working day, the payment is processed on the day it falls due, as of that day.
This concept can be easily explained with the help of an example:
Example
For a loan, you have defined monthly schedules falling due on the following dates:
- March 31
- April 30
- May 31
April 30 is a holiday. You have the following options in fixing the date for that schedule:
- You can ignore the holiday. In such a case, the schedule date is still be April 30, despite the holiday. The liquidation of the schedule is done as per your specifications in the Branch Parameters screen. You can move the schedule date forward to the next working day, which happens to be May 1. In this case, the schedule is liquidated during BOD processes on this date.
- You can move the schedule date backward. In such a case, the schedule date is April 29, the last working day before the holiday. The schedule is liquidated during BOD processes on this date.
Principal Holiday Treatment
You can maintain separate holiday treatment for the principal and interest components interim payment schedules.
In the Schedules tab, in Holiday Treatment, click in the to display the ‘Holiday Treatment for Principal Schedules’ section. The holiday preferences available for the principal component are displayed here.
Note
This button is enabled only if you have selected the ‘Principal Holiday Treatment’ box at the product level.
- Ignore Holidays – No holiday treatment for the Principal component
- Cascade Schedules – The due date arrived at by the holiday treatment is considered as the start date for the due dates for the subsequent schedules
- Move Across Months – Allows movement of schedule date of the contract across months
- Move Backward – If a due date is a holiday, then the due date is moved backward to the previous working day
- Move Forward – If a due date is a holiday, then the due date is advanced to the next working day
After contract booking, the schedules for Principal and Interest are generated based on the holiday preferences maintained for the components.
Moving a schedule date across the month
Suppose you have chosen to move a schedule falling due on a holiday either forward or backward, so that it falls due on a working day. The next or the previous day crosses over into another month. In this case the schedule date is moved into the next month only if you so indicate. If not, the schedule date is kept in the same month.
Example
Scenario 1
You have defined a repayment schedule that falls due on April 30. This happens to be a holiday. You have indicated that in case of a holiday, the schedule date is to be moved forward to the next working day.
As you have indicated that the schedule can be moved across months, then the schedule is automatically moved to May 1, that is, the next working day in the next month. However, if you have not allowed movement across the month but have indicated forward movement for the schedule, the schedule date falls on the holiday itself.
Scenario 2
You have defined a repayment schedule that falls due on May 1. This happens to be a holiday. You have indicated that in case of a holiday, the schedule date is to be moved backward to the previous working day.
As you have indicated that the schedule can be moved across months, the schedule is automatically moved to April 30, that is, the previous working day. However, if you have not allowed movement across months but have indicated backward movement for this schedule, the schedule date falls on the holiday.
Cascading schedules
The question of cascading schedules arises only under the following conditions:
- You have specified that a schedule falling due on a holiday has to be moved forward or backward
- The schedule has been defined with a definite frequency
If you have indicated that schedules should be cascaded, the next schedule date depends on how the payment schedule date was moved for a holiday. The following example illustrates how this concept of cascading schedules functions:
Example
A monthly schedule has been defined with backward movement and a schedule date falling due on April 30 was moved to April 29, April 30 being a holiday.
The schedule date for May depends on whether you have chosen to cascade schedules. If you have, chosen to cascade schedules, the schedule date for May is set as May 29, since the frequency has been specified as monthly. For the subsequent schedules also, May 29 is considered as the last schedule date.
If you have not specified that schedules have to be cascaded, the date originally specified is the date for drawing up the remaining schedules. Even if the April month end schedule has been moved to April 29, the next schedule remains on May 30.
When you cascade schedules, the last schedule (at maturity), is liquidated on the original date. It will not be changed like the interim schedules. Thus, for this particular schedule, the interest days may vary from those of the previous schedules.
Specifying the Holiday Currency
You can indicate here, the currency of a country for which the holiday table should be checked, before drawing the payment schedules related to the loan.
By default, the currency to be checked is the loan currency. If a currency other than this is specified, the holiday table is checked for both the currencies.
Note
Oracle Lending applies the above explained holiday checks on all contracts uploaded from an external system also.
Holiday treatment for Maturity Date
Just as you define holiday preferences for the schedule date, you can also maintain preferences for holiday treatment for the maturity date of a loan.
The following options are available:
- Ignore the holiday and retain the due date
- Move it either backward or forward
- Move across months
Mode of Liquidation
A loan inherits the attributes of the product it uses. One of the attributes defined for a loan product is the liquidation type that governs how schedules are liquidated. This attribute inherited by a loan can be changed when you enter the loan contract. For instance, if the liquidation type specified for the product was ‘Auto’, you can change it to ‘Manual’, if required, and so on.
If Auto liquidation has been set for the contract, then all components of the loan are liquidated automatically when each schedule is liquidated. You cannot modify the order in which components are automatically liquidated, which was defined for the product.
If Manual liquidation has been set for the contract, then a manual liquidation must be performed for each schedule, and all components of the loan must be liquidated manually. You cannot modify the order in which components are to be manually liquidated, which was defined for the product.
If Component liquidation has been set for the contract, then you can select the components that must be automatically liquidated, and specify the order in which the automatic liquidation take place. In such a case, only those components so selected are liquidated automatically in the order specified. The other components that are not selected must be liquidated manually.
When you select the liquidation mode, the system enables the ‘Liquation Order‘ button for all types of liquidation mode during contract booking as well as contract amendment. For ‘Component’ liquidation, the specifications made for the product can be viewed in the ‘Component Level Preferences’ screen when you enter a contract. Click the ‘Liquation Order‘ button to invoke the ‘Component Level Preferences’ screen.

Note
The system does not display the fee components in the component liquidation screen at the contract level.
The ‘Component Liquidation Order’ screen is displayed, with the component liquidation preferences defined for the product. You can make changes to these specifications in this screen.
Here you can view the interest components and the Principal component linked to the product. The system defaults the Contract Reference Number, Component, and the Order of liquidation.
5.3.1.1 Specifying the Liquidation Order
Auto Liquidation
Select the check box adjacent to each component to liquidate the contract automatically.
5.3.1.2 Specifying the Liquidation Mode
Interim Schedule
Select the check box to indicate the Interim schedule liquidation mode for each component. This is enabled for editing only if the liquidation mode selected is ’Component’.
Bullet Schedule
Select the check box to indicate the Bullet schedule of liquidation for each component. This is enabled for editing only if the Liquidation mode is selected as ’Component’.
Note
- If Auto Liquidation flag is not selected, the system liquidates the component manually.
- You are allowed to check the ‘Interim Schedule’ and the ‘Bullet Schedule’ flags only if the Auto Liquidation flag is checked.
- You are allowed to check the Interim and Bullet schedules only against the main interest component and the principal component.
Example
Let us assume the following:
A contract has the following interest payment schedules
- 01-Apr-2008 - USD 1000
- 01-May-2008 - USD 1000
- 01-Jun-2008 - USD 1000
- 01-Jul-2008 - USD 10,000
Assuming Principal is USD 10,000, if you select the liquidation mode for Bullet Schedule as Auto for Principal and Manual for Interest. The system liquidates the Principal automatically whereas the Interest is liquidated manually.
Similarly if you select the liquidation mode for interim schedules as Auto for Interest and Manual for Principal, then the system liquidates the interest in all the interim interest schedules automatically and the Principal is liquidated manually.
If interim interest schedules are in Auto Liquidation mode and the bullet schedule is in Manual liquidation mode. And if the last interim interest schedule has the residual amount for liquidation in the next schedule which is bullet schedule, the system does not allow the you to Liquidate the Bullet schedule, if there is any previous O/D amount.
Note
If you change the liquidation mode for an overdue schedule from Manual to Auto then the system liquidates the overdue schedule as part of the next batch.
5.3.1.3 Specifying the Billing Notice Details
Notice Days
The system defaults the notice days from the product level notice days. However, you are allowed to amend the notice days defaulted and suppress flag for each component.
Suppress
Select this check box to suppress the bill for a particular component. If it is not selected, during notice generation the system considers the notice days specified instead of taking it from the product preference screen.
You are allowed to amend Suppress Billing Notice flag during contract booking and as part of CAMD. Accordingly if the billing falls overdue due to the billing day’s amendment during CAMD, the system performs the auto billing in batch.
While amending the Suppress Billing Notice flag from Y to N, the system generates the billing notice on the batch of amendment date, provided the Billing Notice days is less than the difference between the amendment date and the next schedule date.
Example
Let us assume the notice days defined at the Product Level is 3 Days and it is defaulted to the contract level.
- Due Date - 17-Apr-2009
- Notice Days - 3 Days
- Notice Generation Date - 14-Apr-2009
- You can change notice days to 5 days at the contract level for all the Components
- Due Date: 17-Apr-2009
- Notice Days: 5 Days
- Notice Generation Date: 12-Apr-2009
Note
- The system calculates the notice generation date based on the scheduled due date.
- The system generates the bill for fee provided the Notice flag at the Component Level is deselected. It generates the bill as per the preferences maintained at the contract in the ‘Fee’ screen available at the Contract level.
- The system generates the single notice for both Principal and Interest, if the Billing Days, Schedule Date, and the Liquidation mode are same for both the component. Even if one of this is different, then the system generates a separate notice for each component.
- The system does not generate any notices for Backdated Schedules in case of Manual/Auto Liquidation mode during contract booking.
For any components selected for automatic liquidation in the product preferences, the ‘Auto’ box is selected. You can deselect it to indicate that the component is not to be selected for automatic liquidation.
For any components not selected for automatic liquidation in the product preferences, the ‘Auto’ box is not selected. You can select the component for automatic liquidation.
Note
You cannot change the liquidation order defined for the product, in the Component Liquidation Order screen, when you enter a contract.
Specifying the mode of Status Control
While defining the product, you indicate the various status codes for the product. For example - active, past due obligation, non-accrual basis, write-off, and so on. For the product, you can specify either manual or automatic change of status.
When processing a loan you can change the mode of status change from automatic to manual or vice-versa.
5.3.1.4 Specifying Other Details
Ascertaining availability of funds before an automatic liquidation
The customer’s repayment account as per instructions can be debited automatically by the system. However, you can specify that the availability of funds for liquidation of the various components (Principal, Interest, Charges, and so on) of the loan must be ascertained before liquidation.
If you opt for verification of funds, the system verifies the account for sufficient funds to liquidate the components (in the order specified, in the Liquidation Order Screen). If sufficient funds are available, the entire amount is liquidated. If not, and you have allowed partial liquidation of schedules, the schedule is liquidated to the extent of funds available. If you have not allowed partial liquidation of schedules, the system marks the schedule as outstanding.
If you have indicated that the availability of funds has to be ascertained, the system verifies the account for sufficient funds to liquidate the components (in the order specified, in the Liquidation Order Screen). If sufficient funds are available, the entire amount is liquidated. If the funds are insufficient, and you have allowed partial liquidation of schedules, the schedule is liquidated to the extent of funds available. The payment schedules for those components, which have not been liquidated or have been partly liquidated, are left as outstanding. Aging analysis and penalty on such loans are carried out as specified for the product.
Example
You have a loan on which penalty interest has been applied, as the interest was not paid on the scheduled date. There are several schedules for several components falling due on the same date, they are serviced by the same repayment account and there are insufficient funds in the account. You have specified the liquidation order as Penalty interest (first priority), interest (next), and principal (last). Thus the penalty interest will be liquidated first and the interest next. If the funds in the repayment account are not enough to liquidate the principal, it will be left outstanding.
Note
If you have allowed a debit balance for the repayment account, all the components are liquidated leaving the repayment account with a debit balance. (On this debit balance, debit interest as specified for the type of account is applied through the Interest and Charges sub-system.) In addition, if you have opted to track the contract under a credit line, the system liquidates schedules from the repayment account to the extent of the line limit (that is, over and above the debit balance limit you have set).
If a debit balance has not been allowed, the schedules are liquidated to the extent of the credit line limit. If you have disallowed a debit balance in the account, and have not associated the contract with a credit line, schedules with insufficient funds for liquidation are marked as such. Aging analysis are take over.
This feature is of significance when:
- The components have the same schedule dates, and are serviced by a single repayment account
- The funds in the repayment account are insufficient
The component(s) for which funds are available is liquidated in the order that you have specified, in the Liquidation Order screen.
Loans with payments, which have not been processed due to non-availability of funds, appears in the Exception Report, generated by the Automatic Contract Update function for the day.
Note
For the final principal payment on maturity, the availability of funds in the payment account is always verified.
Liquidating back valued schedules
If you have specified, while defining the product, that for a back-dated loan (which has an initiation date which falls before today’s date), with repayment schedules prior to today’s date, the schedules have to be liquidated when the loan is initiated, the same will apply to the loan you are entering. However, you can choose not to liquidate back valued schedules.
Example
Loans can be initiated as of today, a date in the future, or as of a date in the past.
Today’s date is 15 October 1997. Suppose you initiate a loan today, of USD 15,000 with the Value Date (date on which the loan comes into effect) as 15 September 1997, the system passes accounting entries for initiation as of September 15.
However, there had been an interest payment schedule for 30 September1997, for USD 500. If you specify that back valued schedules should be liquidated, then you can make the system pass accounting entries to liquidate this schedule when the loan is initiated.
If you specify that back dated schedules are not to be liquidated only accrual entries are passed till today.
The entries associated with each event (initiation and liquidation in this case), is passed only if they have been defined for the product. Further, the accounts used are the ones defined for each entry.
Indicating whether tax should be deducted on capitalization
If you choose to capitalize the interest earned on loans, the interest will be added to the principal on the schedule date. However, it is important to note that only the main interest component can be capitalized. For capitalization of interest, you can choose to deduct tax and add only the net interest (Interest – tax) to the principal of the loan. To achieve this, select the option ‘Deduct Tax on Capitalization’.
If you do not select this option, interest is added to the loan principal along with the associated tax component for capitalization.
Suppress Revision Notice
Select this check box to suppress the rollover advice prior to rate revision. You cannot edit the rate revision notice days if this check box is selected.
Revision Notice Days
The notice days for rate revision to generate the rollover advice get defaulted here when you select the product for this contract. However, you can edit the notice days here, if ‘Suppress Revision Notice’ flag is unchecked.
Allowing Cost of Credit Valuations
The system displays the option entered at the product level. If the option is deselected at the product level, it is disabled in this screen and you cannot select this option at the contract level. If this option is selected at the product level, then you can deselect it. During contract amendment, you can select or deselect it based on its value in the previous version..
If the option is currently not selected, the system automatically select this option if the user-defined status changes to ‘Non-performing’ for the commitment or for any of the loans underlying the commitment. However, you can deselect it.
If this option is selected and the commitment is in ‘Non-performing’ status, the system derives the cost of credit valuations based on the data received from RAPID and apply them to the commitment. If this option is selected and the commitment is in ‘Performing’ status then system derives the cost of credit valuations based on the data received from RAPID and trigger recovery for reserve decrease and rebalancing of write-off.
If this option is not selected, then system does not perform cost of credit valuation for the commitment or loans underlying it irrespective of whether the contract status is ‘Performing’ or ‘Non-performing’.
Propagate Status Change to Loan
You can change this option while creating or amending a commitment. If you are linking a loan to a commitment and this option is selected for the particular commitment, then the status is propagated from the commitment to the loan. This is applicable only if the mode of changing status for the commitment and the underlying loan is manual.
If this option is selected and a new non-performing commitment is booked, the system assigns the non-performing status to any loan that is booked under this commitment. The system does not allow you to change the status to performing for the booked loan. Similarly, a loan that is booked under a commitment with status ‘performing’ is also assigned the same status, even if you assign the non-performing status for the loan through this screen. You cannot change this status for the loan to non-performing.
When multiple statuses are maintained in commitment and/or loan products, then the status change at the loan level is determined by the ‘Status Sequence Number’ maintained at the product level.
Grace Days
For commitment contracts, system defaults the value maintained for ‘Grace Days’ at the commitment product level. However, you can edit this value during contract booking and contract amendment. In case of contract amendment, the amended value is applicable to future schedules only.
For loan contracts linked to commitments, system displays the following override message when you exit the Linkage tab:
Grace Days for the loan will be defaulted from the commitment contract, do you wish to continue?
If you accept the override message, then system defaults the value of ‘Grace Days’ from the linked commitment contract and over-writes the grace days from the loan product. You can reject the override message to retain the existing value of ‘Grace Days’.
For Loan contracts that are not linked to commitments, system defaults the value of ‘Grace Days’ defined for the loan product to the contract. However, you can edit this value during contract booking and contract amendment. In case of contract amendment, the amended value is applicable to future calculations of late payment charges only.
When a loan contract is delinked from a commitment, system retains the default value of Grace Days for the loan contract.
The grace days used for penalty computation are the calendar days without considering any holidays.
Commitment Blockage
You can define utilization blockage period for the commitment contract during a certain period of the year. Commitment Utilization Blockage is applicable for revolving commitments only.
Start Month
Select the commitment blockage start month from the drop-down list. The list specifies 12 months of the year.
Start Day
Select the commitment blockage start day from the drop-down list. The list specifies days of the month you have selected.
End Month
Select the commitment blockage end month from the drop-down list. The list specifies 12 months of the year.
End Day
Select the last day of commitment blockage from the drop-down list. The list specifies days of the month you have selected.
During this period utilization is not allowed for any activities including the following:
- New loan booking
- Loan VAMI (Principal Increase)
- Loan Renewals with capitalization of interest
- Loan Renewals with Principal Increase
You can amend the scheduled blockage date after the contract is authorized. System does not perform validation for already captured activities for the revised blocking period while amending the blocking period at the commitment contract level.
During loan input if rollover allowed and maturity date is falling in between of blockage period of linked commitment, and the rollover amount is Principal + Interest or Principal + (Interest-Tax) or special amount which is greater than loan outstanding, system throws an override. Also an override is given for the same validation while modifying blockage period of a commitment.
Verify Billed Amount
The system defaults it to Yes, however you are allowed to amend it. When the check box is selected, the system verifies the billed amount for the schedule and the amount due, and liquidates the least of the two.
The system liquidates the residual amount as part of next schedules auto liquidation procedure, provided the billing has not been suppressed for the component.
Note
The system does not perform auto liquidation of least of billed amount and due amount, if the bill has not been generated or has been suppressed for a component. In such cases, the system performs auto liquidation process.
Example
Let us assume the following:
A contract is booked with details as below:
- Contract Value Date - 01-May-2008
- Maturity Date - 01-May-2009
- Repayment Schedule of Interest - Monthly
- Repayment Schedule of Principal - Bullet
- Liquidation Mode - Auto for both Interest and Principal
- Billing Days for Interest - 5
- Billing Date for 1st schedule due on 01-Jun-2008 – 27-May-2008.
On 27-May-2008 bill is generated Billed Amount - USD 1000 and on 01-Jun-2008 the interest amount is scheduled to be liquidated. Due to Interest Rate change, the due amount on 01-Jun-2008 recomputed as USD 1200.
Assuming ‘Verify Billed Amount’ is checked, the amount liquidated will be USD 1000. The remaining amount of USD 200 is liquidated as part of next schedules auto liquidation procedure, provided the billing is not suppressed for the component.
Note
- If you change the liquidation mode from manual to auto, then the system liquidates the least amount of billed amount and due amount as part of that day’s EOD batch provided ‘Verify Billed Amount’ is checked.
- You cannot amend the Verify Billed Amount as part of Contract Amendment.
- Even manually billed / re-billed amount, that is., manually generated is considered for billed amount.
- In case if the billing (for the residual amount) is happens as part of next billing schedule then the liquidation will happen as part of next schedule.
- It is not applicable for Installment type of loans
Specifying Reversal of Components
For a component the schedules you have defined for the product is applied to the fee, by default. You can reverse these schedules here.
Rev
Select the schedule types for revision from the list provided:
- P - Repayment of the various components.
- I – Auto step-up
- C - Commitment Reduction (Auto step-down)
- D –Disbursement
- R - Revision of interest rates for a loan with periodic interest rates
The I (which increases the commitment amount during EOD, through value dated amendment on schedule date by schedule amount)
For interest revision schedules, you have to provide the details only in the Start Date and Frequency fields subsequently. For a loan with an interest component that is defined with Floating Rate, applied periodically, at least one interest revision schedule should be defined.
For information about Revolving/non Revolving types of commitments and reversal of commitment schedule details, refer to Processing a Commitment chapter in this manual.
5.3.2 Re-computing Late Payment Charges Online
The latest value of the Basis Component, Grace Days or Fixed Rate/Flat Amount of late payment charge are used while re-computing late payment charges. System re-computes the late payment charges online in the following scenarios:
Event |
Scenario |
Processing |
Amendment of past schedules (CAMD) |
User revises past schedules where schedule is not settled and therefore late payment charges have been computed |
System re-computes late payment charges based on the newly defined schedules |
Back value dated change in Interest Rate/Principal (VAMI) |
VAMI for back value dated change made to Interest rate or principal amount that affects the basis for fixed rate late payment charge |
System re-computes late payment charges based on the new basis amount |
Reversal of Value Dated Amendment (VAMC) |
Reversal of a VAMI done earlier for principal/interest change |
System re-computes the late payment charges based on the value of basis amount prior to this VAMI |
Current dated Value Dated Amendment (VAMI) |
VAMI for change in special penalty component rate/flat amount |
No effect. System uses the new updated rate/flat amount for future schedules only |
Reversal of Value Dated Amendment (VAMC) |
Reversal of VAMI done earlier for Late payment fixed rate/flat amount change |
System re-computes the late payment charges based on the penalty rate/flat amount prior to this VAMI |
Reversal of payment (REVP) |
Payment done within grace period, Payment reversal done after grace period |
System computes late payment charges as part of payment reversal since grace period has expired |
Back Value dated Payment (LIQD) |
Payment done after grace period (back value date for payment is within grace period) |
Late payment charge initially be computed on grace period expiry, and is treated as unsettled unless late payment charges are paid/waived |
Reversal of Special Penalty Waiver (RSPW) |
Late payment charge is waived and waiver reversed at a later date by user |
Late payment charges recalculated on waiver reversal using the latest values of basis component, grace days, and late payment charge fixed rate/flat amount |
5.3.3 Processing the Late Payment Charges
System identifies the loan contracts where grace period has expired and tracks due date, amount paid and amount settled for each component of the loan. If late payment charge component has been defined for a loan contract, that is, if the ‘Special Penalty Component’ is selected for a component in a contract, then system does the following:
- System identifies the late payment charge basis components (components for which late payment charges are applicable) from the loan contract details.
- Since late payment charges are applicable for partially paid overdue schedules also, system validates if there is any outstanding amount due on the current date for components selected for late payment charges.
- If there is any outstanding amount, then system calculates the total outstanding amount on all components in this schedule and stores the value in the amount tag ‘SCH_AMT_OS’. This forms the basis of calculating the late payment charge.
- System then calculates the late payment charge by multiplying the value of ‘SCH_AMT_OS’ with Fixed Rate or Flat Amount, based on the setup.
- Each late payment charge schedule is separately stored with the due date same as the original schedule due date.
- The calculation date (schedule date + grace days) of each late payment charge calculated is also stored for information and reporting purpose.
- System does not pass any accrual entries for the special penalty component.
5.3.4 Maintaining System Derived Schedules
To maintain system derived schedules for amortized contracts you must do the following maintenance:
In 'Loans and Commitment Product Maintenance' screen under the 'Product Preference' tab, select the 'Field Payment Schedule Type' as “Amortized”. All other parameters to be maintained as required.
In 'Loan Contract Maintenance' screen, under the 'Schedule' tab, select the field 'Amortization Type' as “Reduced Balancing” or “Rule 78”. All other contract parameters to be maintained as required.
You must also maintain Contract schedules parameters like 'Component', 'Start Date', 'Number', 'Frequency', 'Units', and other fields. The 'Amount' field is disabled and it is automatically derived by the system. Based on these parameters, installment amount of each payment schedule is derived.
5.3.5 Maintaining User Input Schedule Amounts
You can specify the payment schedule amount for amortized contract and adjust the difference amount (if any) to the bullet schedule of the contract. To do this, you need to maintain the following:
- The ‘Allow User Input Installment’ field is available at the product level in the ‘Product Preference’ screen. This box is enabled only for the schedule type ‘Amortized’. During contract maintenance, can maintain the installment amount for an amortized contact only if this box maintained at product level is enabled.
- The ‘Installment Amount’ field is available in the ‘Schedule Maintenance’ tab of the ‘Contract Online’ screen and will allow you to input the installment amount for amortized contracts.
- The following validations are performed for the ‘Installment
Amount’ field in the ‘Contract Maintenance’ screen:
- This field is enabled only if the ‘Allow User Input Installment’ box is selected at the product level.
- The Amount must be greater than zero and less than the contract amount. It should also be greater than the maximum schedule interest amount of the contract.
- System also validates that the bullet schedule has a non-zero principal schedule based on the user input installment amount.
System performs the following validations/processing:
- The ‘Installment Amount’ specified is same for all schedules, however the bullet schedule may differ.
- The EMI computation function available in the system for amortized loan passes the upfront EMI entered by the user.
- The main interest component amount of each installment is computed based on the principal balance.
- The principal portion of the payment is derived as, Principal = user input installment– Interest component.
- The iteration of reducing the Principal Balance with the above mentioned Principal component continues till the penultimate schedule (assuming schedules are not exhausted before the bullet schedule).
- The Principal Component of the bullet schedule is derived based on the original loan amount and the total principal payout till the last calculated schedule.
Example
The below example explains the user input instalment schedules. Assume that you have disbursed a loan with the following details:
- Principal – 10,000 USD
- Interest Rate – 2.25%
- Contract Start Date – 01-Dec-04, First due date is 31-Dec-04
- Contract Maturity Date – 30-Nov-05
- Term / Tenor {In Years} – 1.00
- Basis of Tenor – 365
- Tenor Frequency – 12
- User input instalment EMI – 700 USD ( In case of system driven is 843.51)
Based on the reducing balance method, the interest, principal and the EMI will be as follows:
Schedule Sl. No |
Date |
Interest |
Principal |
Principal o/s |
EMI |
|
1-Dec-04 |
|
|
$10,000.00 |
|
1 |
31-Dec-04 |
$19.11 |
$680.89 |
$9,319.11 |
$700.00 |
2 |
31-Jan-05 |
$17.81 |
$682.19 |
$8,636.92 |
$700.00 |
3 |
28-Feb-05 |
$14.91 |
$685.09 |
$7,951.83 |
$700.00 |
4 |
31-Mar-05 |
$15.20 |
$684.80 |
$7,267.02 |
$700.00 |
5 |
30-Apr-05 |
$13.44 |
$686.56 |
$6,580.46 |
$700.00 |
6 |
31-May-05 |
$12.57 |
$687.43 |
$5,893.04 |
$700.00 |
7 |
30-Jun-05 |
$10.90 |
$689.10 |
$5,203.93 |
$700.00 |
8 |
31-Jul-05 |
$9.94 |
$690.06 |
$4,513.88 |
$700.00 |
9 |
31-Aug-05 |
$8.63 |
$691.37 |
$3,822.50 |
$700.00 |
10 |
30-Sep-05 |
$7.07 |
$692.93 |
$3,129.57 |
$700.00 |
11 |
31-Oct-05 |
$5.98 |
$694.02 |
$2,435.55 |
$700.00 |
12 |
30-Nov-05 |
$4.50 |
2,435.56 |
$0 |
$2,440.06 |
5.3.6 Maintaining Schedule Adjustments on Interest Rate Revision
You can adjust either a bullet or an installment and make adjustments for any rate type contracts. To do this, you need to maintain the following:
- You must select an appropriate value for the ‘On Rate Revision’ field 'Loans and Commitment Product Maintenance'). The options available are, 'Change Installment’ and ‘Change Bullet Schedule’. This field is enabled only for Amortized products.
- The ‘On Rate Revision’ field in the ‘Contract Maintenance’ screen is defaulted from the product level; however, you can modify it while creating a contract. Once the contract is saved and authorized, this field cannot be modified.
System performs the following validations/processing:
- In Oracle Lending, Interest Rate changes can happen either through Rate Revision (REVN) or Value Dated Amendment (VAMI) events. For floating rate contracts, the rate change is possible through REVN and VAMI events. For fixed rate contracts, rate change can be done only through VAMI event. System performs the following enhanced validations/processing:
- Change Installment:
- The EMI re-computation function is stored upfront the prevailing EMI and check the preference is ‘Change Installment’ or ‘Change Bullet Schedule’.
- For 'Change Installment' preference, the current maturity date is kept constant and the EMI is re-generated.
- Change Bullet Schedule:
- The EMI re-computation function stores upfront the prevailing EMI and check if the preference is ‘Change Installment’ or ‘Change Bullet Schedule’.
- If the preference maintained is ‘Change Bullet schedule’, then in the event of ‘REVN’ or ‘VAMI’ an increase or decrease in the rate increases or decreases the bullet schedule amount without affecting the EMI / Tenor. As a result, the EMI of the bullet schedule is below or above the other schedules.
- The main interest component amount of each installment is re-computed based on the principal balance and the new rate.
- The prevailing EMI is kept constant. The EMI present in the current schedule of the transaction – System does not consider the EMIs of the previous schedules.
- The iteration of reducing the Principal balance with the above Principal component of EMI continues until the bullet schedule is reached.
- The last EMI have the remaining Principal amount and the interest as the EMI.
The below example explains change bullet schedule due to interest change option. Assume that you have disbursed a loan with the following details:
- Principal – 10,000 USD
- Interest Rate – 2.25%
- Contract Start Date – 01-Dec-04, First due date is 31-Dec-04
- Contract Maturity Date – 30-Nov-05
- Term / Tenor {In Years} – 1.00
- Basis of Tenor – Actual/360
- Tenor Frequency – 12
- System generated EMI – 843.65 USD
Based on the reducing balance method, the interest, principal and the EMI is as follows:
Schedule SI No |
Date |
Interest |
Principal |
Principal o/s |
EMI |
|
1-Dec-04 |
|
|
$10,000.00 |
|
1 |
31-Dec-04 |
$19.38 |
$824.28 |
$9,175.73 |
$843.65 |
2 |
31-Jan-05 |
$17.78 |
$825.87 |
$8,349.85 |
$843.65 |
3 |
28-Feb-05 |
$14.61 |
$829.04 |
$7,520.82 |
$843.65 |
4 |
31-Mar-05 |
$14.57 |
$829.08 |
$6,691.74 |
$843.65 |
5 |
30-Apr-05 |
$12.55 |
$831.10 |
$5,860.63 |
$843.65 |
6 |
31-May-05 |
$11.35 |
$832.30 |
$5,028.34 |
$843.65 |
7 |
30-Jun-05 |
$9.43 |
$834.22 |
$4,194.12 |
$843.65 |
8 |
31-Jul-05 |
$8.13 |
$835.52 |
$3,358.59 |
$843.65 |
9 |
31-Aug-05 |
$6.51 |
$837.14 |
$2,521.45 |
$843.65 |
10 |
30-Sep-05 |
$4.73 |
$838.92 |
$1,682.53 |
$843.65 |
11 |
31-Oct-05 |
$3.26 |
$840.39 |
$842.14 |
$843.65 |
12 |
30-Nov-05 |
$1.53 |
$842.13 |
$0 |
$843.66 |
Assume interest is changed to 4% on 18th Mar, then schedules are given below:
Schedule Sl. No |
Date |
Interest |
Principal |
Principal o/s |
EMI |
|
1-Dec-04 |
|
|
$10,000.00 |
|
1 |
31-Dec-04 |
$19.38 |
$824.28 |
$9,175.73 |
$843.65 |
2 |
31-Jan-05 |
$17.78 |
$825.87 |
$8,349.85 |
$843.65 |
3 |
28-Feb-05 |
$14.61 |
$829.04 |
$7,520.82 |
$843.65 |
4 |
31-Mar-05 |
$19.69 |
$823.96 |
$6,696.86 |
$843.65 |
5 |
30-Apr-05 |
$22.32 |
$821.33 |
$5,875.53 |
$843.65 |
6 |
31-May-05 |
$20.24 |
$823.41 |
$5,052.12 |
$843.65 |
7 |
30-Jun-05 |
$16.84 |
$826.81 |
$4,225.31 |
$843.65 |
8 |
31-Jul-05 |
$14.55 |
$829.10 |
$3,396.21 |
$843.65 |
9 |
31-Aug-05 |
$11.70 |
$831.95 |
$2,564.26 |
$843.65 |
10 |
30-Sep-05 |
$8.55 |
$835.10 |
$1,729.16 |
$843.65 |
11 |
31-Oct-05 |
$5.96 |
$837.69 |
$891.46 |
$843.65 |
12 |
30-Nov-05 |
$2.87 |
$891.46 |
$0 |
$894.33 |
5.3.7 Maintaining previous interest rate
In 'Loan Parameters' screen, if you select ‘Proceed with previous rate available’ check box then the system proceeds with booking the contract with rate available previously as of value date.
If the check box is not selected, then the loan contract is booked with zero rate.
5.3.8 Maintaining Schedule Adjustments on Prepayment
When the principal pre-payment is made for amortized contracts, system re-calculates the installment amount based on the outstanding principal maintaining the same tenor. System, now, retains the original installment amount on pre-payment and reduces the balances on LIFO basis. To do this, you need to maintain the following:
Select an appropriate option for the ‘On Prepayment’ field ('Loans and Commitment Product Maintenance'. The options available are 'Change Installment’ and ‘Change Bullet’. This field is enabled only for Amortized products.
System performs the following validations/processing:
Change Installment
On prepayment for amortized contracts, the installment amount is re-computed and the new installment amount is re-distributed to the pending schedules maintaining the original tenor.
Change Bullet
System performs the following validations/processing to retain the original installment amount when the pre-payment is done for an amortized contract.
If you select the ‘Change Bullet’ option, then the outstanding schedules for the principal component is reduced starting with the bullet schedule (LIFO), and the interest amount is re-computed accordingly.
If the pre-payment amount is sufficient to cover the bullet and prior schedules, then the amount due for these schedules equates to zero without changing the maturity date.
When a payment is being done in the middle of a cycle and the limit date is entered, system computes the till date interest along with other components. The payment can be done for all or any specific component as required.
Schedule Adjustments Based on Prorata Prepayment
Pro rata is applicable only for bearing normal contract, the installment amount is recomputed and new installment amount is equally re-distributed to the pending schedules maintaining the original tenor.
In ‘Loan and Commitment - Contract Input’ screen, the prorata amount along with the interest is displayed in the 'Amount' field available under 'Schedules' section.
The interest re-computation for future schedules are done based on the outstanding principal amount after prepayment.
The same amount is displayed in 'Amount Due' in ‘Payment Details’ screen. This screen appears when you click 'Payment Details' button in ‘Schedules’ tab.
5.3.9 Re-Amortization
You can re-define the installment schedules of an amortized contract as if the maturity date of the contract has been extended for schedule re-calculation purpose. You can specify a new end date (temporary maturity date) for calculation purpose The installment amount is re-calculated based on the remaining schedules and the new tenor, where the tenor is considered between the Re-amortization value date and the new end date. The installment schedules derived beyond the maturity date is added up and parked in the bullet schedule, this results in high payment amount in the bullet schedule. You need to maintain the following details for re-amortization:
- The ‘Allow Re-amortization’ box in the ‘Product Preference’ screen is enabled only if the Product schedule type is ‘Amortized’.
- You can maintain the ‘Re-Amort Date’ in the ‘Value Dated Amendment (VAMI)’ screen.
System performs the following validations:
- It is not possible to amend the ‘Re-Amort Date’ with other existing fields in single operation.
- Back value dated re-amortization is allowed however the Value date of the re-amortization should not be earlier than the last liquidation date, and it should not be earlier then last re-amortization date.
- Future value dated re-amortization is not allowed.
- Re-amortization can be done even if the contract has un-paid (overdue) schedules. In such instances, only the future outstanding principal schedules are considered for Re-amortization.
- Re-amortization request placed in the middle of the cycle also considers the current schedule for re-amortization calculation.
- For example, if the contract schedule is monthly and re-amortization request is received in the middle of the month, it also considers the current schedule.
- A Re-amortized product contracts can have only one frequency linked to a contract schedule in addition to the bullet schedule.
- For example, Schedule maintenance with combination of monthly and Quarterly are not allowed, it can either have all monthly or quarterly schedules and not combination of both.
System performs the following processing:
- Re-amortization processing happens during the save operation from the VAMI screen.
- It is possible to delete the un-authorized entries or reversal of authorized entries for a Re-amortization amendment details for the other existing fields in the VAMI screen.
- System validates the ‘Value Date’. After all other validations are done, the re-amortization process is triggered during save operation.
- Re-Amortization is processed based on current principal outstanding balance.
- System derives the installment amount. System uses the following
parameters to derive the new installment amount:
- Calculation Start Date= Amendment value date
- Calculation End Date= Re-Amort Date
- Balance= Principal outstanding balance
- Rate= Current rate applicable for the contact.
- System maintains an amortization table till the Re-amort end date, the new installment amount in this table is retained till the original penultimate bullet schedule and the installment schedules beyond maturity date onwards is added up and parked to the original bullet schedule. This may result in a very high balloon payment in the bullet schedule.
- Re-amortization process triggers a VAMI event. A version number and event sequence number is created during this operation.
- Rate change, CAMD, Principal amount change/maturity date change through VAMI have an impact on the EMI; and the installment amount (and balloon payment on bullet schedule) is calculated based on the ‘Re-Amort Date’.
The following parameters are available at branch level (CSBRAPRM):
Restore On Payment Reversal
Select this check box if you want to re-instate the original payment details rather then re-computing the details. For CCC branches, this check-box must be selected.
Restrict Multiple VAMI
Select this flag to indicate that multiple changes in a single VAMI operation are restricted. For CCC branches, this check box must be selected.
Restrict Multiple Freq
For CCC branches, select this check box. Re-amortization cannot be done if an amortized contract has different payment frequencies maintained, this is restricted for CCC branches based on this parameter.
If the flag is selected, schedule maintenance with combination of monthly and Quarterly payment frequencies are not allowed, it can either have all monthly or all quarterly schedules.
Example
The following example explains Re-Amortization functionality. Assume that you have disbursed a loan with the following details:
- Principal – 10,000 USD
- Interest Rate – 2.25%
- Contract Start Date – 01-Dec-04, First due date is 31-Dec-04
- Contract Maturity Date – 30-Nov-05
- Term / Tenor {In Years} – 1.00
- Basis of Tenor – Actual/365
- Tenor Frequency – 12
- System generated EMI – 843.51 USD
Based on the reducing balance method, the interest, principal, and the EMI are as follows:
Schedule Sl. No |
Date |
Interest |
Principal |
Principal o/s |
EMI |
|
1-Dec-04 |
|
|
$10,000.00 |
|
1 |
31-Dec-04 |
$19.11 |
$824.40 |
$9,175.60 |
$843.51 |
2 |
31-Jan-05 |
$17.53 |
$825.98 |
$8,349.62 |
$843.51 |
3 |
28-Feb-05 |
$14.41 |
$829.10 |
$7,520.53 |
$843.51 |
4 |
31-Mar-05 |
$14.37 |
$829.14 |
$6,691.39 |
$843.51 |
5 |
30-Apr-05 |
$12.37 |
$831.14 |
$5,860.25 |
$843.51 |
6 |
31-May-05 |
$11.20 |
$832.31 |
$5,027.94 |
$843.51 |
7 |
30-Jun-05 |
$9.30 |
$834.21 |
$4,193.73 |
$843.51 |
8 |
31-Jul-05 |
$8.01 |
$835.50 |
$3,358.23 |
$843.51 |
9 |
31-Aug-05 |
$6.42 |
$837.09 |
$2,521.14 |
$843.51 |
10 |
30-Sep-05 |
$4.66 |
$838.85 |
$1,682.29 |
$843.51 |
11 |
31-Oct-05 |
$3.21 |
$840.30 |
$842.00 |
$843.51 |
12 |
30-Nov-05 |
$1.56 |
$841.99 |
$0 |
$843.55 |
If we assume that Re-amort Request is triggered on 15-Apr-05, then the modified schedules are as follows:
Schedule Sl. No |
Date |
Interest |
Principal |
Principal o/s |
EMI |
|
1-Dec-04 |
|
|
$10,000.00 |
|
1 |
31-Dec-04 |
$19.11 |
$824.40 |
$9,175.60 |
$843.51 |
2 |
31-Jan-05 |
$17.53 |
$825.98 |
$8,349.62 |
$843.51 |
3 |
28-Feb-05 |
$14.41 |
$829.10 |
$7,520.53 |
$843.51 |
4 |
31-Mar-05 |
$14.37 |
$829.14 |
$6,691.39 |
$843.51 |
5 |
30-Apr-05 |
12.37 |
602.81 |
$6,088.19 |
$615.18 |
6 |
31-May-05 |
$11.63 |
$603.55 |
$5,484.65 |
$615.18 |
7 |
30-Jun-05 |
$10.14 |
$605.04 |
$4,879.61 |
$615.18 |
8 |
31-Jul-05 |
$9.32 |
$605.86 |
$4,273.76 |
$615.18 |
9 |
31-Aug-05 |
$8.17 |
$607.01 |
$3,666.74 |
$615.18 |
10 |
30-Sep-05 |
$6.78 |
$608.40 |
$3,058.34 |
$615.18 |
11 |
31-Oct-05 |
$5.84 |
$609.34 |
$2,449.01 |
$615.18 |
12 |
30-Nov-05 |
$4.53 |
$2,449.01 |
$0.00 |
$2,454.67 |
5.4 Linking a Loan to Commitments, or Accounts
This section contains the following topics:
- Section 5.4.1, "Specifying the Type of Linkage"
- Section 5.4.2, "Specifying the Details of the Linkage"
- Section 5.4.3, "Projected Available Amount"
- Section 5.4.4, "The Exchange Rate"
- Section 5.4.5, "Specifying the Linked Amount"
- Section 5.4.6, "Linking a Loan in One Branch to a Commitment in another Branch"
- Section 5.4.7, "Linking Commitments to a Loan"
- Section 5.4.8, "Linking OL contract to a facility or multiple collateral/pool"
- Section 5.4.9, "Modifying a Loan Disbursement"
- Section 5.4.10, "Financial Details that can be Changed"
- Section 5.4.11, "Viewing the Other Details of a Loan"
- Section 5.4.12, "Advices for Loan Disbursement"
A loan can be linked to a deposit, commitment or an account. A linkage of this nature means:
Type of linkage |
What it indicates |
Linked to a deposit |
The entire principal of the loan, or a portion of it can be linked to the deposit. The outstanding amount in the deposit should always be greater than or equal to the amount of loan outstanding. A deposit can be linked to more than one loan provided funds are available in the deposit. |
Linked to a commitment |
You can utilize the entire amount of a commitment, or a portion of it for a loan. The available balance in the commitment will be reduced. You can also link a portion of the loan to a commitment. If contingent entries were passed when the commitment was initialized, they should ideally be reversed, when a loan is linked to it. This accounting entry should be defined for the INIT (initiation) event of the loan, for the loan product. A commitment can be linked to more than one loan, provided the amount is available for utilization. |
Linked to an account |
You can link the entire loan principal or a portion of it to a savings or current account. The available balance in the account should always be equal to or greater than the outstanding balance in the loan. |
Linked to a commitment in another branch |
You can link a loan in one branch to a commitment in another branch by selecting the commitment reference number across branches. |
Linked to multiple collateral or pool |
You can link OL contract to multiple collateral or collateral pool. |
An account can be linked to any number of loans provided, a balance greater than or equal to, the principal of the loan is available. A loan, or a portion of it, can be linked to any number of deposits, commitments, accounts, or a combination of the three.
5.4.1 Specifying the Type of Linkage
You can specify the type of linkage in this screen. The loan can be linked to the following:
- Commitment
- Customer account
5.4.2 Specifying the Details of the Linkage
If the linkage is with a commitment or a deposit, you should enter the Reference Number of the commitment or deposit in this field. This should be a valid contract in Oracle Lending, with a Value Date that is earlier than or the same as the Value Date of the loan. The Maturity Date must also be the same as or later than that of the loan you are processing.
If the linkage is with an account, enter the account number to which the loan is linked. The account number has to be a customer account (a current account or a savings bank account). The loan amount being linked should be available in the contract or account, as the case may be.
The currency of the deposit, commitment or account to which the loan is being linked is also displayed once the linkage details are specified.
5.4.3 Projected Available Amount
The system displays the projected available amount on the value date of the forward dated loan.
5.4.4 The Exchange Rate
The currency of the loan can be different from the currency of the deposit, commitment or account to which it is being linked. In such as case mid-rate for the day is taken from the Exchange Rate Table and displayed in the screen.
5.4.5 Specifying the Linked Amount
You should indicate the amount that has to be linked to the commitment, deposit or account, as the case may be. This amount can be the entire principal of the loan or a portion of it.
This amount should be available in the commitment, deposit or account. On the screen the amount available for linkage can be viewed in the specified commitment, deposit, or account.
The available amount is arrived at taking into account the other linkages, uncollected, and unauthorized balance (in the case of an account).
The system displays the following amounts, after the Linked Amount is specified:
- Amount linked to each contract or account
- The amount of principal not linked, in the case of a partial linkage
5.4.6 Linking a Loan in One Branch to a Commitment in another Branch
Oracle Lending facilitates linking of loan in one branch to a commitment in another branch. The system displays all commitment contract reference number across branches in the commitment contract reference number option list. You are allowed to select the required commitment reference number and save the contract.
Note
- The loan counterparty is one of the listed borrowers in the commitment.
- The system blocks the inter branch linkage of the loan, if the commitment branch is not in Transaction Input state.
5.4.7 Linking Commitments to a Loan
You can link a commitment to a loan at any stage during the life cycle of the loan. However, when associating a commitment with a loan you cannot make changes to commitments already linked to the loan.
If the value date of the loan is earlier than the commitment value date, then the commitment utilization happens on the commitment value date.
For example
Loan Value date - 31 July 2001
Commitment Value Date - 15 August 2001
On 31 August 2001 you associate the commitment with the loan. The commitment outstanding is reduced from 15 August 2001.
You can also link a commitment to a loan, if the commitment maturity date is less than the loan maturity date. You can extend maturity date such that the new maturity date is greater than the commitment maturity date. However, when the commitment maturity date is increased and if the existing loan contracts have a maturity date greater than the old maturity date, then the Unused Commitment Fees (UNUTIL) should be re-computed again for the period between the old maturity date and the new maturity date.
Note
This linkage is applicable for non-revolving commitments only.
5.4.8 Linking OL contract to a facility or multiple collateral/pool
You can either link a single facility or multiple collateral/pool to an OL contract. For the Collateral/Pool/Facility linkage, you should specify the linked %. Based on this contract amount utilization takes place.
5.4.8.1 Different scenarios of linking facility/collateral/pool to OL contracts
The following are the different scenarios of linking facility/collateral/pool to OL contracts.
- You can link only one facility to an OL contract and you must specify the linkage percentage as 100%. You cannot link any collateral/pool to that OL contract.
- If you are linking collateral/pool, then you cannot link a facility to the OL contract.
- In case of an already existing collateral or pool linkage, you should
choose the linked reference number from the LOV. The following fields
gets defaulted.
- Description
- Branch
- Currency
You can perform the following in OLDTRONL screen.
- You can capture the linkages to limits at the time of contract booking itself
- You can also amend the linkage details captured during contract amendment (CAMD Event). That is, you can either link or de-link the existing linkages. Based on this, the utilization amount gets updated accordingly. The utilized amount is altered on EOD based on auto-liquidation, auto-rollover, and so on.
Limit/Liability CIF
You can enter limit/liability CIF in the ‘Contract’ tab of OLDTRONL. This is not a mandatory field.
Specify the following in Linkages tab.
List of collaterals/Lines
In Linkages tab, if you click ‘List of Collaterals/Lines’ button the facility, collateral, and pool details are displayed.
If the Limit CIF details are entered in contract, then the Limit CIF details are displayed.
If the Limit CIF details are not entered in contract, then system defaults the counterparty in the Limit CIF and counterparty limit details are displayed.
Limit Tracking Required
Only if Limit Tracking Required check box is selected, you can enter Linkages details,
Linkage Type:
You can select the linkage type which is to be linked to the OL contract. The list displays the following values:
- Facility – Select if the OL contract is to be linked to an existing facility
- Collateral – Select if the OL contract is to be linked to an existing collateral
- Collateral Pool – Select if the OL contract is to linked to a collateral pool
Linked Ref No:
Specify a reference number for the selected linkage type from the list of values.
Description:
Linkage type description gets defaulted here.
Linked Amount:
Once you enter the linked %, the system automatically calculates the linked amount. This field is disabled.
Linked % :
If you specify the linked percentage, the system updates and displays the linked amount based on the linked % given. The system does not allow the user to input both linked amount and linked %.
Utilization Order No:
This field specifies the order in which the utilization happens. The system utilizes the linkage in ascending order.
5.4.9 Modifying a Loan Disbursement
There are two types of modifications that you can make on a contract:
- Those that affect the financial details of the contract
- Those that do not affect the financial details of the contract
For example, the changes made to the User Reference Number, Auto Roll-over and Auto Liquidation flags do not result in changes, to the accounting entries that have been passed.
However, inputs to certain fields that contain financial information can be changed only under specific circumstances. For example, the changes in the interest rate, increase in the principal and so on, can be made only through the Value Dated Changes function.
A loan on which the previous activity has been saved but not been authorized, can be modified. For example, you have captured the details of a loan. The details had been saved but not yet authorized when you realize that some of the details have been wrongly entered. You can unlock the contract, make the modifications and Save it.
Note
Any type of change, however, has to be authorized, before it takes effect.
Note
If a contract is pending for authorization in any screen and if you try to unlock in OLDTRONL to do changes, then an error message “Unauthorized amendments exist for contract in ‘function id’ “appears.
5.4.10 Financial Details that can be Changed
Inputs to the following fields can be changed through the contract processing function:
- Takedown Account/Drawdown Account, if the loan disbursement has not yet been initiated
- Maturity Account if the loan is yet to mature
- Interest Payment Account, if the entire interest has not yet been liquidated. The new account is used for future interest payments
- Contract End Date, for a notice or call contract
- Tax details, if tax has not yet been liquidated
Note
The changes listed do not trigger any accounting entries or the generation of any advices.
5.4.11 Viewing the Other Details of a Loan
Using the buttons that are displayed in the Contract Online screen you can view the following details of a loan:
- The advices that you can suppress or prioritize
- ICCF details
- The settlement details
- The tax details
- MIS details
- View Events for the loan
- The Annual Effective Rate (AER) of interest for the loan
5.4.12 Advices for Loan Disbursement
The advices that have to be generated for any event, during the lifecycle of a loan are specified for the product involved in the loan. For example, you may have specified the following advices for the product:
- When a loan is initiated, a contract advice, addressed to the customer
- If any components (like discounted interest, tax on principal and so on.) are liquidated on takedown, an advice for each of them
While processing the loan disbursement, you can suppress the generation of any of these advices. Click ‘Advices’ to invoke the ‘Advices Details’ screen to make these changes.

Suppress All
Select this check box to indicate that the system can suppress all the messages.
Suppressing the generation of an advice
By default, all the advices that have been defined for a product is generated for a loan. However, you can suppress the generation of an advice, for a loan by specifying the same in this screen.
Indicating the generation priority
For a payment message by SWIFT, you also have the option to change the priority with which the message should be generated. By default, the priority of all advices is marked as Normal. You have the option to prioritize a payment message to one of the following options:
- Normal
- Medium
- High
5.5 Levying Transaction Charges on a Loan
For each loan that you process, you can specify the charges that apply. The characteristic feature of a charge is that it is always booked in advance and is not accrued, as a charge is collected only when it is due. You also have the facility to waive charge for a specific contract.
The charge details are maintained in the Contract ICCF screen. You can click the ‘ICCF’ in the ‘Loans and Commitment - Contract Input’ screen to invoke the Contract ‘ICCF Deatils’ screen.
For details relating to levying charges on a contract, refer the Charges and Fees User Manual.
5.6 Posting the Manual Journal Entries
You can book Manual/Excel upload Adjustment entries at the contract level. To do this you have to do the following.
- Section 5.6.1, "Maintaining the Amount Types"
- Section 5.6.2, "Mapping the Accounts and the Amount Type"
- Section 5.6.3, "Posting Manual Adjustment Entry"
- Section 5.6.4, "Uploading Excel for Adjustment Entry Posting"
5.6.1 Maintaining the Amount Types
You can also invoke this screen by typing ‘OLDATMNT’ in the field at the top right corner of the Application tool bar and clicking on the adjoining arrow button.

Amount Type
Specify the amount type which you want to maintain.
Amount Tag
Specify the amount tag corresponding to the amount type. The system uses this amount tag while maintaining the product level entry and accounting entry posting.
Description
Specify a short description of the maintenance.
Note
You are allowed to perform actions namely, New, Save, Authorize, and Delete before the first authorization.
5.6.2 Mapping the Accounts and the Amount Type
You can map the accounts and amount type in ‘Account Amount Type Transaction Mapping Summary’ screen.
You can also invoke this screen by typing ‘OLSACAMM’ in the field at the top right corner of the Application tool bar and clicking on the adjoining arrow button.
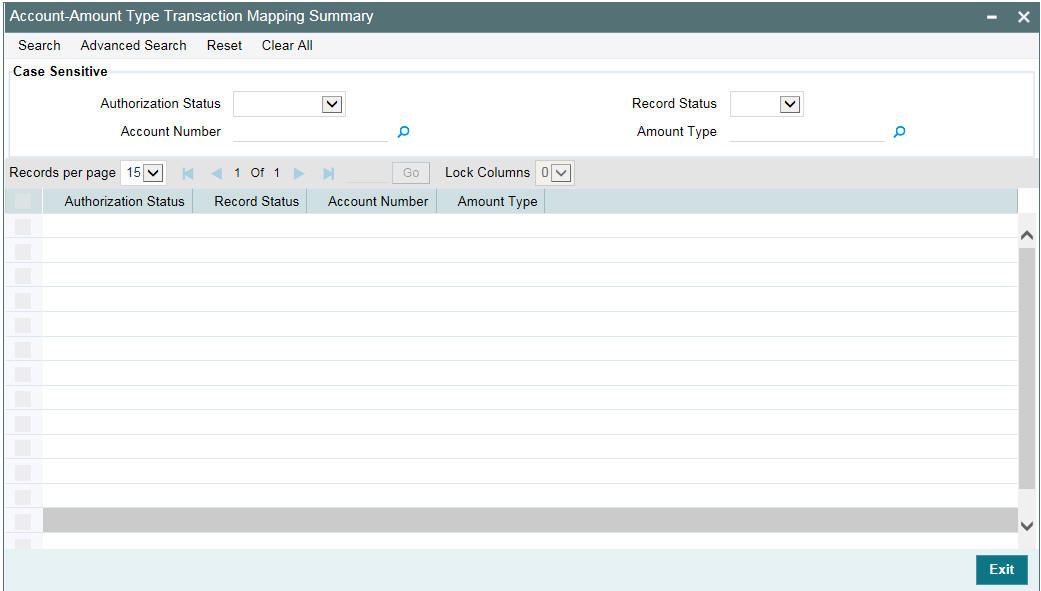
Account Number
Specify the Account Number which you want to map with the amount type.
Amount Type
Specify the amount type corresponding to the Account Number.
Note
- You are allowed to perform actions namely, New, Save, and Authorize before the first authorization.
- You have to maintain the Accounting entry for the CADJ event and
the Debit/Credit accounting entry for the following Amount tags at the
Product Maintenance level:
- Principal-adj
- Contra-Int-adj
- Reserve-Amt-adj
- WriteOffAmt
- FacilityFeeamt
- Accr-Int-Amt
- CMT-Fee-amt
- UnamortizedFee
- ContingentAmt
- UnusedComm
5.6.3 Posting Manual Adjustment Entry
You can post manual adjustment entry in ‘Contract Adjustment’ screen. You can also invoke this screen by typing ‘OLDLDENT’ in the field at the top right corner of the Application tool bar and clicking on the adjoining arrow button.

You can maintain the following details in this screen:
Contract Reference Number
Select the contract reference number from the adjoining option list. The list displays the contract reference numbers that are maintained in the system.
Once the contract reference number is selected, the following contract details are displayed:
- User Reference Number
- Expense Code
- Counterparty
- Branch
- Amount
- Event Sequence Number
Contract Ccy
Specify the contract currency.
Booking Date
Specify the booking date of the contract.
Value Date
Specify the value date of the contract.
Adjustment Ccy
Select the adjustment currency from the adjoining option list. All the adjustment entries are posted only using the currency specified here.
Note
- Access to this screen is restricted based on user, branch, and department code restrictions.
- Adjustment entry posting for LS module allows such entries to be posted for borrower tranche and drawdown contracts as well.
5.6.3.1 Details
On selecting the New Operation, You have to specify the following details
Serial Number
Specifies the serial number of the contract.
Adjustment Amount
Specify the adjustment amount of the contract.
CR Acc Branch
The system defaults the contract branch. However, you can modify it by selecting a branch from the adjoining option list.
Credit Account
Select the account that is to be credited from the adjoining option list.
Credit Account Type
The system defaults the credit account type once the credit account is selected.
DR Acc Branch
The system defaults the contract branch. However, you can modify it by selecting a branch from the adjoining option list.
Debit Account
Select the account that is to be debited from the adjoining option list.
Note
- You are allowed to post Multiple Adjustments accounting entry for a contract in an Adjustment activity.
- The Debit and Credit Account types can be different from each other.
Debit Account Type
The system defaults the debit account type once the debit account is selected.
Adjustment Type
Select the adjustment type from the adjoining drop-down list. The list displays the following values:
- Fincon
- Operation
If you have selected the adjustment type as ‘Operation’, the system does not allow the following for an adjustment entry:
- Value date which is less than current application date
- Auto reversal
Recon ID
Specify the recon id.
Instrument No
Specify the instrument number. This field is mandatory if the debit account or credit account is a Miscellaneous Debit/Credit GL.
Remarks
Specify the remarks for each adjustment entry, if any.
Component
Select an appropriate component from the adjoining option list. System displays the following options in the list:
- The components maintained using Static Maintenance screen where the Field Type is ESC1, ESC2, ESC3, or ESC6
- The Interest and Fee components maintained for the contract
Note
- The generic component ‘PRINCIPAL’ is not available as a component in the 'Contract Adjustment' screen. You can maintain generic components such as ‘PRIN_SUSP’ using the 'Static Maintenance' screen.
- The Component selected for each adjustment entry is stored in along with existing contract adjustment details for reporting, notice and balance purposes. It is not mandatory to specify value in this field for adjustment transactions.
- Adjustment entry posting is not restricted only to accounts that are linked to the contract using the 'Escrow Account Maintenance' screen.
Reversal
Select the check box to indicate that the reversal of adjustment entries can be done. Once the adjustment entries are posted, you cannot reverse it. The transaction date for the reversals is the date on when the entries are posted.
If the reversal of adjustments is posted on a working day, the system does the following:
- For all the adjustments posted on a working day and marked for auto-reversal, the entries are reversed during the beginning of day process on the next application date.
- The value date of the reversal entries will be the next adjustment date compared to the transaction date of the actual adjustment posting. If adjustment maintenance is not available or next adjustment date is not maintained, then the current application date is used as the value date for the reversals.
- Any exceptions as part of adjustment reversals would be logged as part of the batch.
- If the reversal of adjustments is posted on a holiday, the system does the following:
- For all the adjustments posted on a holiday and marked for auto-reversal, auto-reversal will be initiated as part of the ‘Adjustments Handoff’ screen which is used to mark closure of adjustments for the day.
- The value date of the reversal entries are next adjustment date as per the ‘Adjustment Days Maintenance’ screen. If next adjustment date is not maintained, then the current application date is used as the value date for the reversals
- Any exceptions as part of adjustment reversals would be logged as part of the reversal process.
You are allowed to perform actions namely New, Delete, Save, and Authorize in this screen.
5.6.3.2 Validation
The system does the following validation while capturing contract adjustment.
- The value date and book date can not be in future
- The back value dated contract adjustment is allowed
- The adjustment amount can not be more than the contract amount
- The Debit and Credit account is validated with the account type mapping table
- The Adjustment entry is not allowed to post into period, which is closed.
- The Event CADJ will trigger at contract level when the adjustment activity is getting saved.
- The contract Adjustment entries are authorized when the Adjustment Activity is authorized.
During posting of adjustments through ‘Contract Adjustment’ screen or the ‘Contract Adjustment Upload’ screen, the following validation would be added to restrict the posting of adjustments:
- If the adjustment is of type ‘Fincon’ adjustment, then adjustment posting is allowed only if the value for UDF ‘INDIRECTGL’ for the GL is maintained as FINCON/BOTH
- If the adjustment is of type ‘Operation’ adjustment, then adjustment posting is allowed only if the value for UDF ‘INDIRECTGL’ for the GL is maintained as OPERATION/BOTH
- If no value or any other value than these three are maintained for the UDF, then the restriction of posting adjustments is done based on the Indirect flag, not the UDF, at the GL level, for both adjustment types
Note
Using this screen, you can also post the adjustment entries for agency (LS) participant contracts and trading (SLT) position contracts.
5.6.4 Uploading Excel for Adjustment Entry Posting
You can post the adjustment entry by selecting the excel sheet and uploading it into Contract adjustment upload table using ‘Contract Adjustment Upload’ screen.
You can also invoke this screen by typing ‘OLDXLUPD’ in the field at the top right corner of the Application tool bar and clicking on the adjoining arrow button.

XL File to be uploaded
Choose the Excel File to be uploaded into Oracle Lending.
On save the system uploads the excel sheet and validates the data uploaded from the excel sheet. On upload the system displays the message.
Upload Successful
On authorize, the system processes the data and triggers the corresponding event 'CADJ' and accounting entries for the validated records.
The following fields are displayed.
- Batch Number
- Book Date
- Total Number of Records in XL
- Number of Records in Error
- Contract Reference Number
- CUSIP No
- Firm Acct Mnemonic
- Adjustment Value Date
- Adjustment Amount
- Dr GL Account
- Cr GL Account
- Status Description
- Currency
- Expense code of the contract
- Debit Account Branch
- Credit Account Branch
- Adjustment Type
- Recon ID
- Instrument Number
- Component
- Remarks
- Reversal
Exceptions
In case of any validation error and processing error, the system marks the entry status as an error and displays the error reason in this field.
When you save the adjustment entries, the system displays a message with the following details:
- The number of entries that have been validated
- The number of validation errors
When you authorize the adjustment entries, the system displays a message with the following details:
- The number of entries that have been uploaded
- The number of failed errors
Note
Using this screen, you can also post the adjustment entries for agency (LS) participant contracts and trading (SLT) position contracts.
5.7 Uploading Loan Contracts through OL Upload Screen
Once data is uploaded in the Upload Tables using files like Excel file, CSV file and so on, system uses OL Upload screen (OLDUPLOD) to process data available in the OL upload tables and then creates an OL contract.
You can upload following function ID data.
- OLDTRONL
- LBDINSTR
- OLDCUENT
To upload this data, you need to select the function ID in the OL Upload screen.
You can invoke this screen by typing the function id ‘OLDUPLOD ‘ in the field at the top right corner of the Application tool bar and clicking on the adjoining arrow button.
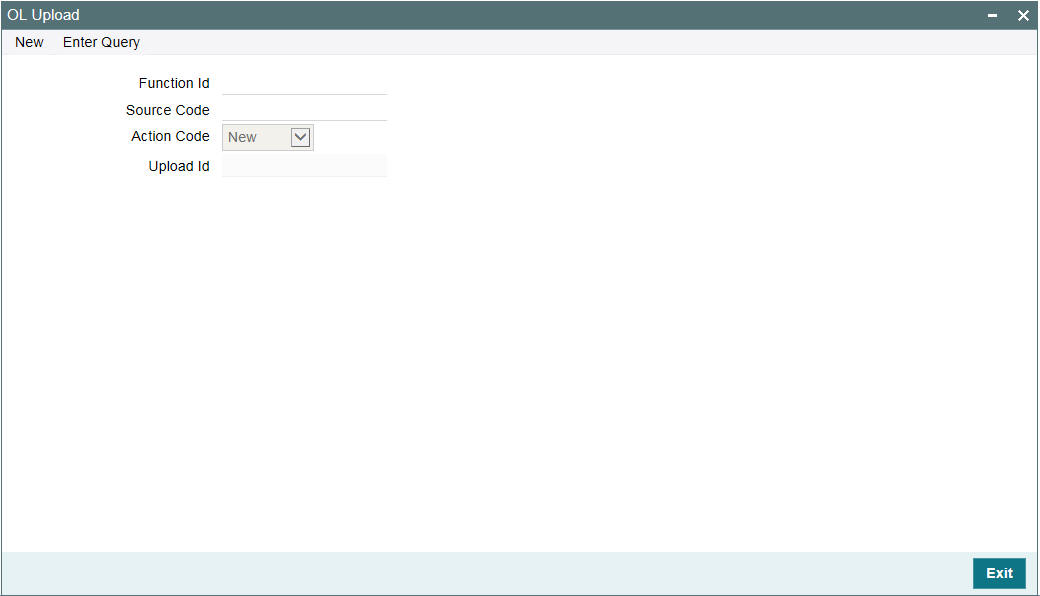
Function ID
Select the function ID to upload OL details. For example, OLDTRONL.
Source Code
Select the source code from which the OL contract was uploaded.
Action Code
Select the action code to be set for the upload from the drop-down list. The following statuses are available in the drop-down list.
- New
- Modify
- Close
- Re-open
- Authorize
- Delete
Upload ID
An unique number of the file upload is displayed here
On ‘Save’, the system uploads the OL data and an upload successful message appears.
5.8 Error Log Details
You can view the error details that have been incurred during validation or upload processing in the ‘Error Message’ screen. You can access this screen by clicking ’Error Log’ in ‘Contract Adjustment Upload’ screen.
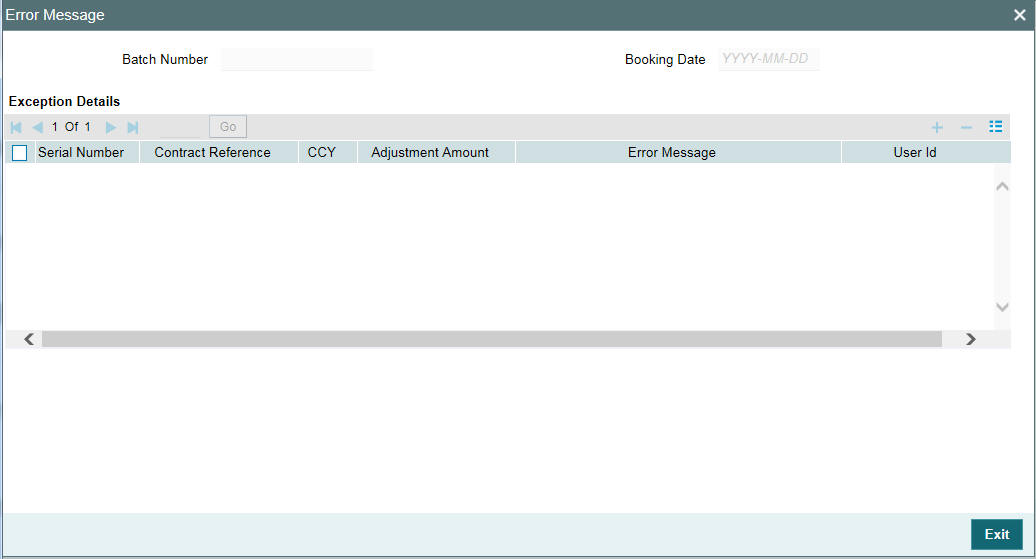
The system displays the following details:
- Serial #
- Contract Ref No
- CCY
- Adjustment Amount
- Error Message
- User ID
5.9 Viewing Event Details
You can view all the events that have take place on a loan through the View Events screen. You can access this screen by clicking the ‘Events’ from ’Loans and Commitment - Contract Input’ screen.

All the events that have taken place on the contract so far will be listed in this screen according to the sequence in which they have taken place. The Date on which the event took place is also displayed.
For example, this list could contain events like Booking, Initiation, Interest Accrual, Interest Payment, and so on.
5.9.1 Viewing Accounting Entries for Loan disbursement
To view the accounting entries passed for a specific event, highlight
the event and double- click on the event in the View Events screen or
click the  ‘Accounting Entries’
in this screen. The accounting entries and overrides for that event are
displayed.
‘Accounting Entries’
in this screen. The accounting entries and overrides for that event are
displayed.
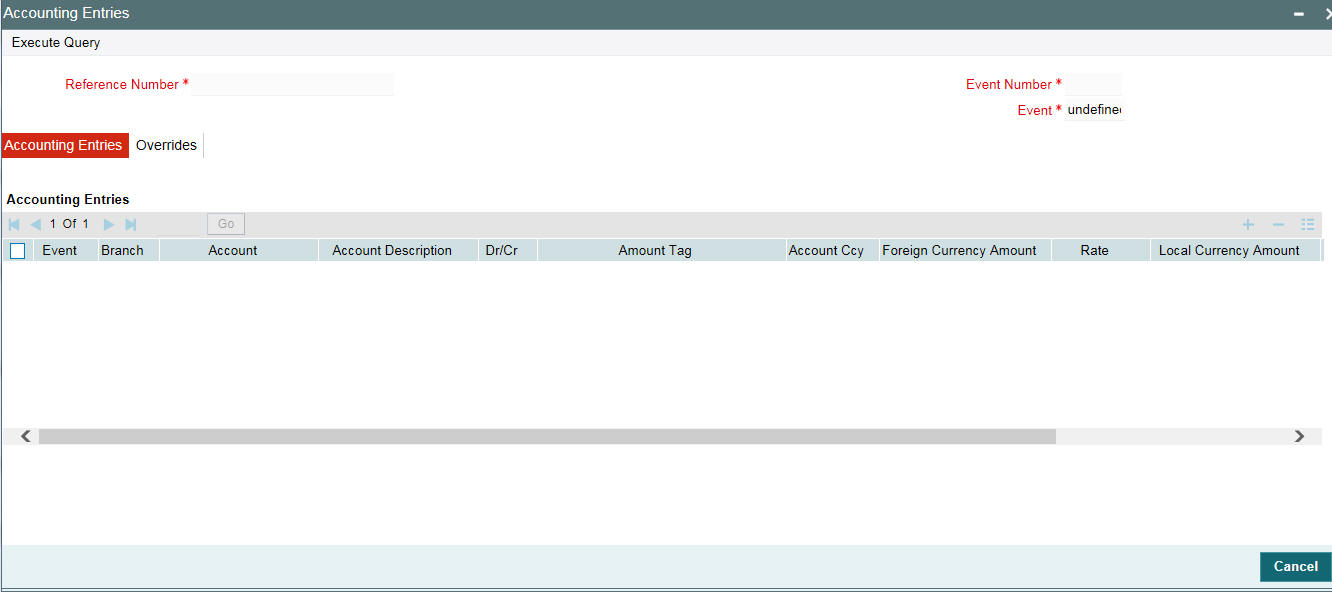
The following information is provided for each event:
- Branch
- Account
- Dr/Cr indicator
- The amount tag
- The currency
- FCY
- Rate
- LCY
- Date
- Value Date
- Code
- All the overrides that were encountered for the event is also displayed.
5.10 Levying Tax on a Loan Contract
The tax details specified for the product to which the loan is associated is automatically applied to the loan. However, while processing a loan, you can waive the application of tax.
You can invoke the Tax Details screen by clicking ‘Tax’ from the ’Loans and Commitment - Contract Input’ screen.
For more information relating to levying tax on a contract, refer to the Tax User Manual.
5.11 Specifying the Interest Details
Numerous interest rates and fees can be defined for a product through the ICCF (Interest, Commission, or Fee) screen. By default, all these will be applied on the loan involving the product. However, while processing a loan, you can waive the application of interest.
The interest details are maintained in the Contract ICCF screen. You can click the ‘ICCF’ in the ’Loans and Commitment - Contract Input’ screen to invoke the Contract ICCF screen.
For more information relating to interest on a contract, refer to the Interest User Manual.
5.12 Maintaining Transaction-specific MIS Refinancing Rates
You can choose to perform MIS Refinancing on a daily basis for all loan contracts, only if this option has been enabled in the Bank-wide Preferences screen. If the MIS refinancing has been set to a daily frequency, you have to indicate the refinance rate pick up specification through the transaction MIS sub-screen while processing the contract.
Click the ‘MIS’ button
in the ’Loans and Commitment - Contract Input’ screen. The
‘MIS’ screen is displayed.
In this screen, the transaction type of MIS class, the cost code and pool code is taken from the product under which the contract is processed. The composite MIS code is taken from the definition made for the customer, on behalf of whom the contract is being processed.
As part of specifying the MIS refinance specifications you have to indicate whether the system should pick up the MIS Rate associated with the pool linked to the contract or whether you would like to maintain a rate specific to the contract. You can indicate your choice by selecting any one of the following options:
- Pool Code – indicating that the MIS Rate maintained for the pool code should be used for refinancing
- Contract Level – indicating that you would like to maintain a specific MIS Rate for the particular contract
- If you specify that the system should pick up the refinancing rate specific to the contract you have to indicate the rate type, which is to be used for refinancing. The options available are:
- Fixed
- Floating Automatic – indicating that the system should pick up the refinancing rate associated with the Reference Number of the contract. Since the contract is linked to a Rate Code the system picks up the rate associated with the rate code when the End of Day processes are run to refresh the various rates.
- Floating Periodic – you can select this preference only if you are maintaining rate refinance details for the Loans module. The periodic revision rates maintained at the product level will be picked for refinancing purposes.
Note
If you have indicated that the rate maintained for the pool to which the contract is linked should be picked up for refinancing, you need not specify the Rate Type. The rate applicable on the pool will be made applicable on the contract as well.
5.12.1 Maintaining Contract Level Refinance Rates
If you have indicated that you would like to maintain a fixed rate for refinancing, you have to capture the effective dates along with the effective refinance interest rates through the Refinancing Rates maintenance screen. Click the ’Refianance Rate’ in the MIS screen.
When you invoke this screen, the Reference Number of the contract for which you are maintaining refinancing rates appears in the respective field. Similarly, the booking date of the contract will be defaulted in the Booking Date field.
Specifying the Effective Date
You have to specify the Effective Date with which you would like to associate the refinance interest rate. You are allowed to maintain any number of Effective Date and Refinance Rate combination records.
Note
The effective date is the date on which the refinance rate comes into effect. Once a rate comes into effect, it will be applicable till a rate with another effective date and reference number combination is maintained.
Specifying the Refinancing Rate
You can specify the refinancing rate that is to be associated with the effective date.
Note
If the Rate Type you have specified is either Floating Automatic or Floating Periodic the system automatically calculates and populates the effective date and refinancing interest rate in the respective fields after the EOD processes have been run successfully.
5.13 Maintaining Overwrite Settlement Details
You can maintain the overwrite settlement instructions during contract booking or amendment for a component and the same is applicable for all amount tags for that component. Overwrite Settlement instructions that are captured during contract booking or amendment is applicable for all the future events performed on that contract like Liquidations, Value dated amendments, and fee liquidations.
Click the ’Overwrite SI Details’ in the ’Loans and Commitment - Contract Input’ screen to invoke the following screen.

Specify the following details:
Account/GL
Specify the customer account or general ledger account number. If you have checked ‘Allow all accounts in Overwrite SSI’ box in ‘Loans Parameters’ screen, then the adjoining option list displays all the customer accounts and GL accounts maintained in the system. You can select the appropriate one.
If you have not checked the box, only general ledger accounts appears.
Overwrite Default SI
The system will use the account / GL maintained in this screen only if this box is checked for the component.
Generate Message
The system defaults this option from the settlement instructions. However, you can modify it.
The system will generate the payment messages that are applicable for the component only if this box is checked. Otherwise the payment message is suppressed.
During contract loan booking, if ‘Generate Message’ box is checked, then the payment message will be sent to customer. In case, if it is not checked, but overwrite account is maintained, then the payment message is suppressed.
The Overwrite SI accounts maintained or amended for the commitment will be restricted to the Commitment only. They are not defaulted/propagated to the Linked Loan contracts.
If any amendments done in the ‘Settlement Instruction Maintenance’ screen and necessary SSI propagation online job is configured, then the system propagates to all the contracts online excluding those contracts where Overwrite SSI is applicable.
SSI Propagation batch in EOD process picks up all the contracts including those contracts where Overwrite SSI is applicable and propagate the SSI changes. The system excludes only those components in a contract where SSI Overwrite is chosen as ‘Yes’.
5.14 Viewing Effective Rate (ER) of Interest for a Loan
For loans involving products marked for Effective Rate Calculation, you can view the ER through the ‘Effective Interest Rate’ screen. Click the ‘Effective Rate’ in the ‘Loans and Commitment - Contract Input’ screen to navigate to the ’Effective Interest Rate’ screen:
Oracle Lending calculates the ER using the interest rate applicable to the main interest component of the loan. The ER is printed in the Loans Contract Advice, Amendment Advice and Loan Statements.
Note
ER is not calculated for Special Interest.
In addition to the ER value, the following details are also displayed in the screen:
- The event sequence number
- Date of ER Calculation
- Start date and End date of the period for ER calculation
The ER for a loan is given by the following expression:
[{(Contract Rate/100)*(Tenor/D) + 1} ^ (D/Tenor)] – 1
Where,
- Tenor is expressed in days
- D = Actual / 360 / 365, depending on the day count method applied on the loan
- Contract Rate = Interest Rate applicable to the main interest component of the loan
The calculation of ER is done when the following conditions are satisfied during the lifecycle of the loan contract:
For Fixed Rate Contracts and Floating Rate Contracts with auto rate revision (Contracts without any rate revision schedules):
- On booking of the contract
- In the event of any change in the rate or tenor of the contract. In this case, the ER is re-calculated for the entire tenor of the contract
- For Floating Rate Contracts with periodic rate revision schedules
- On booking of the contract
- Every time a rate revision takes place. In this case, ER is calculated for the revision period
- In the event of any change in the rate or tenor of the contract. In this case, the ER is re-calculated for the current rate revision period
Note
- Every instance of ER computation is displayed in this screen
- The Denominator Day Count method is taken to be ‘365’ if your specification is ‘Actual’
5.15 Changing the Status of a Loan
The status change of a loan can either be automated or manual.
Automated change of status
The change of status is carried out during the beginning of day processes on the day the change falls due. The movement from one GL to another, if it has been specified, is done. Further, any advice specified for the event is generated. Reversal entries for accruals are passed if it has been specified so.
In the Manual Status Change Details screen, you can:
- Manually change the status of a contract (provided status processing for schedules has not been defined for the product involving the contract), OR,
- Manually change the status of any schedule defined for the contract (provided status processing for schedules has been defined for the product involving the contract)
You can invoke the ‘Manual Status Change’ screen by typing ‘OLDMSCDT’ in the field at the top right corner of the Application tool bar and clicking the adjoining arrow button.
Note
In case of contracts for products with schedule level processing, if you change the status of any of the schedules, the contract status is determined by the system as the worst status among the individual statuses of the schedules.
To select a contract in this screen, you can either enter the reference number, or the code of the product that the contract uses. For the contract that you select, the status details are displayed.
If you have chosen a contract involving a product for which status processing for schedules has been allowed, then you can only change the status of any of the schedules, as required, and not for the contract. Select the new status in the Status field, for the schedule.
If you have chosen a contract involving a product for which status processing for schedules has not been allowed, you can only change the status of the contract, and not for individual schedules. Select the new status for the contract in the User Defined Status field.
In this screen, if the contract you have selected is a commitment and you have selected the ‘Propagate Status To Loan’ (at the product or contract level), then the status change that you specify here for the commitment is assigned to all the active contracts underlying the commitment. If the contract selected is a loan and you select a status that does not match the status of the commitment, the system displays an error message.
For instance, if the commitment status is ‘Performing’, the status of the corresponding loan will also be ‘Performing’. You cannot change the status of the loan from ‘Performing’ to ‘Non-performing’. Similarly, if the commitment status is ‘Non-performing’, the corresponding loan will also have the ‘Non-performing’ status. You cannot change it from ‘Non-performing’ to ‘Performing’. Cost to credit valuation is applicable for performing and non-performing commitments and loans underlying them. However, the nature of the valuation differs based on the status of the contract – performing or non-performing. Once the loan becomes non-performing, the system performs certain validations during the EOD batch as part of cost to credit valuation. However, if the loan status changes to ‘performing’ subsequently, the system amends the validation applicable for cost to credit valuation. To achieve this, the system checks the value of the backend static parameter ‘ALLOW_REPERFORMING_LOAN_FUNC’. If the value for this parameter is ‘Y’ then the system will perform the applicable validations on the contract during cost to credit valuation based on the loan status. Additionally, the system also perform the following during status change of loan and commitment contracts:
- Memo interest reversal – This is done irrespective of whether the ‘Cost of Credit’ check box is selected for the contract or not. This is applicable to loan status change.
- Release of FAS114 for loan - If FAS 114 reserve balances exist for the loan, they will be reversed only if ‘Cost of Credit’ box is checked for the loan contract.
- Restart of amortization fee accrual – This is done irrespective of whether the ‘Cost of Credit’ check box is selected for the contract or not. This is applicable to commitment status change.
- Release of FAS114 for commitment – If FAS 114 reserve balances exist for the commitment, they will be reversed only if ‘Cost of Credit’ check box is selected for the contract.
If the value of the parameter is ‘N’, the system does not perform the above mentioned processes during status change of the contract. Changes to the user-defined status received from RAPID for uploaded commitment contracts are also propagated to the loan contracts that fall under the respective commitment.
Note
If a contract is pending for authorization in any screen and if you try to unlock in ‘OLDMSCDT’ to do changes, then an error message “Unauthorized amendments exist for contract in ‘function id’ “appears.
For more information about fee liquidation, refer to ‘Processing Upfront Fee Accruals’ in this User Manual
5.16 Enquiry for Interest and Principal Projections
You can view the projected interest accruals and principal on a loan contract, for a future date. You can choose the contracts of a particular customer, for which you want to view the projections.
The following details are displayed, for each contract:
- Outstanding principal amount
- Interest due as of the current date
- Penal interest due as of the current date
- Projected interest amount, from the current date till the future (projection) date
- Any applicable tax due on the projected amounts
- Total amount due
- The settlement account
- The balance in the settlement account, on the current date
5.16.1 Reversal of Accruals during Contract Reversal
Your bank might encounter a situation wherein you might have to change the non-financial details (like customer account, customer, and so on) of a contract after it is authorized. You cannot amend these non-financial details after authorization. Under such circumstances, you can to ‘reverse’ a contract and then make the necessary modifications. When you reverse a contract, the event-wise accounting entries of the original contract are reversed.
During reversal of foreign currency contracts, for the events ACCR
(Accrual) and STCH (Status Change), Oracle Lending takes the current
exchange rates maintained in the Exchange Rate table for the accrual
entries with the amount
tag _ACCR. Further, the system re-calculates the local currency equivalent
of the amount and pass the entries to the respective GLs.
5.17 Viewing the Settlement Details during Contract Authorization
During authorization of Contract Input, Value Dated Amendment and payments of LD contracts, you can view the settlement details of the contract. Oracle Lending forces you to view the settlement details during authorization. During authorization of contracts and value dated amendments in the ‘Authorization’ screen, click ‘Settlements’ to view the settlement details of the contract.
5.18 Viewing the Different Versions of a Loan
When a loan is input, it is assigned the version number ‘1’. Each amendment of the loan results in it being assigned the next version. The Detailed View Screen for a loan displays the latest version. To see the previous version, click ‘Previous’. Click ‘Next’ to view the next version.
5.19 Viewing the Accrual Fee Details for a Loan
While processing contracts in Oracle Lending, you can choose to accrue fee components at the time of booking the contract. The upfront fee involved in a contract is accrued by the system over the tenor of the contract.
During contract processing, you need to enter the details of the fee if you are collecting a fee from the customer. You can specify the fee details in the ‘Accrual Fee Input’ screen .
You can invoke the ‘Amortization Fee Details’ screen by typing ‘LFDACFIN’ in the field at the top right corner of the Application tool bar and clicking the adjoining arrow button.
In the ’Amortization Fee Details’ screen, click on the ‘Accrual Fee’ to view the upfront fee details associated with a loan.

The following details are available in this screen:
- Component: The fee components associated with the product under which the contract is being processed
- Effective Date: The date on which the accounting entries for the fee amount specified at the product level is to be posted to the customer account
- Accrual Method: The method used to accrue the fee amount. It can be either by Straight-line method or Yield Basis method
- Amount: The amount that is to be collected as fee from your customer
- Currency: This is the currency of the fee amount or refund amount
Note
For more information on Upfront Fee Accrual, refer to the Processing Upfront Fee Accruals in this User Manual.
5.20 Viewing Entity Details
Oracle Lending facilitates sending messages (for advices only) to multiple entities. You can view the entity details of the customer to whom the bills has to be sent through the ‘Customer Entities’ screen. The entity details in the ‘Customer Entities’ screen is defaulted from the customer entity details maintained at the Customer Maintenance level.
For more information on ‘Customer Entity Details’, refer to the Core Entities User Manual.
You can view the entity details of the customer to whom the bills
is sent through the ‘Customer Entity Details’ screen. Click
the ‘Entity’ button to invoke
the screen.
Note
The system enables the Entity subsystem only for OL contracts.
Here the system defaults the Contract Details of the customer from the maintenance done at the Customer Maintenance level.
5.21 Viewing the Effective Interest Details for a loan
You can view the effective interest rates applied for the contract through the Effective Interest Rate details screen. Click the ’Effective Interest Rate’ to invoke the screen.
In this screen you can view the Effective Interest Rate and the date from which interest rate is effective.
5.22 Specifying the Installment Preferences for a Loan
Click ‘Installment Loan’ in the ‘Loan and Commitment - Contract Input‘ screen to modify the unearned interest calculation parameters.
The calculation parameters defined for the product gets defaulted to the contract.
For more details on Installment Loans, refer the chapter - Annual Rest Loans of this User Manual.
5.23 Capturing customer relationships for every loan
To capture the relationships for every loan input, click ‘Customer Relations’ in the ‘Loan and Commitment - Contract Input to invoke the Customer to Contract Relation screen.
You can capture the relationship between the loan contract and any other customer of your bank through this screen. Relationships of this nature could be joint account holders, co-debtors, main account holders, and so on.
Specify the following details in this screen:
- The nature of the relationship
- CIF and name of the customer of your bank with whom the relationship exists
- Type of identification of the customer, and the identification number
The relationships that you can maintain should already have been defined in the Relationship Maintenance.
5.23.1 Capturing Currency Sub-limits
You can define the sublimit for a combination of Customer, Currency, and Products for commitment contract. Click ‘Borrower’ button in the ‘Loan and Commitment - Contract Input screen to invoke the ‘Borrower Details’ screen.

You can maintain the list of products for a borrower and the combination of product and currency wise limits in this screen.
The following details are displayed here from the parent contract screen:
- Product Code
- Contract Reference Number
- User Reference Number
- Customer
Borrower Details
You can specify the list of borrowers here.
Borrower
Select the name of the borrower for whom you want to maintain the sublimit from the option list.
Loan Product
You can specify the loan details here.
Loan Product
Select the loan product you want to map the borrower from the option list. The description of the selected loan product gets displayed in the adjacent text box.
Currency Wise Drawing Limit
You can specify the currency and amount here.
Currency
Select the currency for which you want to maintain the limit amount. The description of the currency gets displayed in the adjacent text box.
Limit amount
Specify the limit amount for the currency selected against the loan product combination.
The limits can be defined for individual contract currency and the limit amount is specified in the commitment currency.
During the Loan Linkage, at the contract Level system validates whether the loan linkage amount is exceeding the sub limit defined at the commitment level, for the combination of Borrower, product and currency. This validation is run during Loan Booking also.
In case of counterparty change system validates that transfer amount is within the available sub limit amount defined for the new counterparty for the contract currency.
If you want to maintain the limit across products for a particular Borrower, the same can be maintained against “ALL” Product. In this case, you cannot define sublimit for the individual product.
Similarly, if you want to maintain the limit across currencies for a particular borrower and product combination, the same can be maintained against “ALL” Currency. In this case, you cannot define sublimit for the individual currency.
Revolving and Non – Revolving attribute of the commitment is considered for tracking the utilization against the limit maintained for the combination of borrower, product, and currency.
Sub-limit validations will also be done during value dated amendment, payment reversal (for non-revolving), exchange rate amendment and split reprice (for the additional amount, if any).
Example
The maintenance given below is done at the commitment level.
Borrower |
Product |
Currency |
Amount |
B1 |
D1 |
USD |
50MM |
|
D3 |
GBP |
100MM |
B2 |
D5 |
USD |
75MM |
As per the maintenance given above, borrower B1 have a limit of EUR 50MM for the product D1 and currency USD. For the product D3 and currency GBP, he have a limit of EUR 100 MM. Commitment currency in the above case is EUR.
FM Reference Number
Specify the FM Reference Number for the sub limit.
Facility ID
Specify the Facility Identification for the sub limit.
Modified Date
The system displays the date on which the sub limit is created or modified.
Note
The system uploads the fields FM Ref number and Facility ID during new sub limit upload and sub limit amendment. It updates the Modified Date whenever a sub limit is created or modified through upload.
5.24 Specifying the Special Penalty Components
You can select components to which late payment charges are applicable for both commitment and loan contracts using the ‘Special Penalty Components’ screen. To invoke this screen, click the ‘Penalty Components’ in ‘Loan and Commitment - Contract Input’ screen.

Specify the following details:
Component
System defaults the components selected for late payment charge application at the product level. However, you can modify the components during contract input and contract amendment. In case of contract amendment, the modified components are applicable to future schedules only.
If you perform a back value dated change for any component due to which late payment charges are applicable, then on recalculation of late payment charges, system considers the new list of components for late payment charge computation.
Apply Special Penalty
Select this check box to indicate that system should apply special charges to the penalty component.
5.25 Maintaining Floor and Ceiling Initial Details
You can maintain the floor and ceiling initial details for all-in-rates
of the interest components associated with Loan contracts in the ‘Floor
and Ceiling’ screen. Click ‘Floor and Ceiling’to access this screen.

You can specify the following details in this screen:
Contract Ref No
The system displays contract reference number.
Product Code
The system displays the product code.
Customer
The system displays the customer name.
Facility Name
The system displays the facility name.
User Ref No.
System generates and displays the user reference number.
5.25.1 Specifying Currency Details
CCY
Specify the currency details.
Currency Name
The system displays the name of the currency selected.
5.25.2 Specifying Effective Date
Effective Date
Specify the effective date for each currency you have selected.
5.25.2.1 Specifying All-In Rate for Floor and Ceiling
Loan Product
Select an appropriate loan product from the adjoining option list.
Interest Comp
Select the applicable interest component from the adjoining option list.
Floor
Specify the floor all-in rate.
Ceiling
Specify the ceiling all-in rate.
Note
The button to launch this sub-screen is enabled only for commitments; hence, this screen is available only for initial Floor and Ceiling maintenances during commitment booking. Subsequent Floor and Ceiling maintenance/amendments must be done using the ‘Floor and Ceiling Maintenance’ screen explained in this chapter.
5.26 Booking Re-Price Transactions
You have the option of re-pricing fixed rate contracts to floating rate contracts and vice-versa. When you enter a contract under a product that allows re-pricing, (for which you have selected the ‘Reprice Product’ check box in the Loans and Deposits – Product Preferences screen) you have to do using the Re-price Transaction screens. Such products are not available for contract booking through the ‘Loan and Commitment - Contract Input’ screen.
Note
You cannot carry out a re-pricing (splitting) and a consolidation simultaneously.
When you re-price a contract, the amount is taken from the parent contract into the Re-Price Suspense GL that you have specified in the Preference screen (Branch Parameters – Detail View). The status of the parent contract remains ‘Active’ even though it has been liquidated completely. The contract is closed on confirmation from the customer.
You can re-price a transaction (or part amount) into a new transaction or multiple transactions through the ‘Renewal or Split Detail’ screen. You can also renew non-performing loans using this screen.
You can invoke the ‘Renewal or Split Detail’ screen by typing ‘OLDREPRS’ in the field at the top right corner of the Application tool bar and clicking the adjoining arrow button.
In this screen, specify the following details:

Contract Ref. No.
Select or enter the reference number of the contract to be re-priced. When you enter the reference number, the following details are displayed for the parent contract:
- User Reference Number
- Counterparty
- Currency
- Outstanding principal amount
The Split Serial No. gives you the number of split transactions carried out on the parent contract till date.
Note
Only those contracts with no overdue schedules can be re-priced.
Product
The product code linked to the contract reference number is displayed here.
Book Date
This is the book date with which the re-pricing is processed.
Value Date
This is the value date with which the re-pricing is processed.
Liquidate Principal and Interest
Check this box to indicate the outstanding principal or interest amount is to be liquidated for the parent contract at the time of re-pricing.
Note
This check box is selected by the system if the total amount of the child contracts is greater than the outstanding principal balance.
Capitalize Interest
Select this check box to indicate if the interest due has to be capitalized to the child contract. Capitalization of Interest including the overdue interest is calculated into the child contract on the maturity date.
Note
If Capitalization of Interest is applicable, then “Transfer Parent Main Interest’ and ‘Liquidate principal & Interest’ will not be applicable. Capitalization of interest is allowed in case of single split reprice (One to One) only.
Transfer Unamortized Fee (FAS91 Accrual)
Select this check box to transfer the unamortized fee of the contract to child contract. The amount is amortized over the tenor of the child contract. Amortization starts from EOD of the Application date.
During the transfer, system checks if the unamortized fee component has selected for both ‘Discount Accrual and ‘Apply for Re-price’ before transferring the amount from parent contract to child. An error message throws up otherwise and system does not save the transaction.
The unamortized amount which is available for transferring gets displayed in the ‘Unamortized FAS91 Fee’ field. Discount accrual for the transferred amount is impacted as per the child contract.
During Reprice transaction, SPTI event is triggered in the parent contract.
Accounting Role |
Dr. / Cr. |
Amount Tag |
EIMDISC_PARENT_RIA |
Dr. |
EIMDISC_TRFR |
Wash Account GL |
Cr. |
EIMDISC_TRFR |
The entries triggered for fee as part of INIT in the child contract for inheriting the unamortized fee are given below:
Accounting Role |
Dr. / Cr. |
Amount Tag |
Wash Account GL |
Dr. |
Component_TRIN |
EIMDISC_CHILD_RIA |
Cr. |
Component_TRIN |
Note
- Discounted Accrual is applicable only for Fixed Maturity type of Loans.
- Discount Accrual is applicable only for Advance type of User Input fees.
- In case of split reprice to many contracts, partial reprice or merge reprice, transfer of fees will not be allowed
- The transfer of fees accrued based on Yield Accrual is for the whole contract and not at the component level.
- If a child contract has inherited a discount accrual component and it itself has a discount accrual component, then a subsequent liquidation of the fees impacts the total yield accrual.
- For calculating the IRR, the main interest component, principal and fee (if marked for discount accrual) will be considered as Cash flow.
Transfer of Unamortized Fee (Straight Line Method)
The system displays the unamortized fee amount which is accrued based on the straight line method. The system triggers the event SPTI as part of re-price in the parent contract. The system posts only the accounting entries for the transferred of unamortized fee from parent to child contract:
Accounting Role |
Dr / Cr |
Amount Tag |
ComponentPARENT_RIA |
Dr. |
Component_TRFR |
Wash Account GL |
Cr |
Component_TRFR |
The following are the entries triggered for fee as part of INIT in the child contract for inheriting the unamortized fee are:
Accounting Role |
Dr / Cr |
Amount Tag |
Wash Account GL |
Dr. |
Component_TRIN |
ComponentCHILD_RIA |
Cr. |
Component_TRIN |
Note
- Component PARENT refers to each component available at the Parent Product.
- Component CHILD refers to the components which have ‘Apply for reprice’ flag checked at the child product level.
Prepayment Schedule Processing
Indicate the type of payment schedule processing that you want to maintain. You can select one of the following options:
- FIFO
- LIFO
5.26.1 Child Re-Price Transaction (Split)
In this section, you can enter details of the child contracts.
Product
Select the product under which the child contract is to be created during re-pricing. The option list will include those products for which you have checked the box ‘Re-Price Product’ in the Loans and Deposits Product – Preferences screen.
Amount
Enter the amount of the split contract.
The sum total of the amounts of all the child contracts can be lesser than, or greater than the amount of the parent contract. If the total amount of the child contracts is greater than the outstanding principal balance, the system displays an override. If you click on the ‘OK’ button, there will be an additional disbursement, and the difference amount is added to the principal amount before re-pricing is done. If ‘Capitalize Interest’ is selected then the outstanding principal is defaulted to ‘Amount’ field for child contract and you cannot modify the same.
Currency
The currency of the child contract is displayed here. You are not allowed to change the same. The currency of all child contracts are the same as that of the parent contract.
Maturity Type
Select the maturity type of the contract from the drop-down list. You can select one of the following options:
- Call – Select this option to re-price a term loan into a demand loan.
- Fixed – Select this option to re-price a demand loan into a term loan.
Note
The system defaults ‘Fixed’ as maturity type. However, you are allowed to change it.
You can differentiate a demand loan and a term loan through the maturity type of the transaction. The maturity type of a term loan is ‘Fixed’ and for demand loan it is ‘Call/Notice’.
Note
The system does not allow capitalized schedule type of demand loans to be re-priced to other non capitalized schedule type of products. It is applicable for Merge Re-price where only the parent contract is a demand loan. But it is not applicable for Notice type of loans.
Reprice Amount
The total reprice amount is displayed here and you cannot modify the same.
Maturity Date
Enter the Maturity Date of the child contract here.
Transfer Parent Main Interest
If you have selected ‘Liquidate Principal and Interest’ check box, the interest amount can be acquired by a child contract. If you have not selected the check box, the interest amount remains with the parent contract.
The interest amount that can be acquired can be passed to one child contract only. You are not allowed to split the acquired interest amount among multiple child contracts. Select the ‘Transfer Parent Main Interest?’ check box against a child contract to indicate the interest from the parent contract is acquired by that child contract.
When you select the Transfer Parent Main Interest, the system transfers the interest amount due or the difference of amount paid and amount due (if any overpayment exists) to the child contract. The transferred interest is due on the first schedule due date of interest. However, the acquired interest, of the child contract is allowed for liquidation before the schedule due date.
Note
- Transfer of fees is only allowed for Advance type of fees.
- Transfer of Fees flag is disabled for back valued re-price.
- Transfer of Fees is not allowed in case of split re-price into many contracts, partial re-price or merge re-price. The system does not perform any catch up accrual done for fee transferred as part of re-price.
- If the parent contract has overpayment of interest, then the system transfers only the difference of amount paid and amount due into the child contract. This amount is not allowed for refund after the re-price is performed.
- In case of back valued activity, the system performs a catch up accrual of fee before transferring the amount to the child contract. However, the amount displayed in ‘Unamortized Amount’ vary from the actual amount transferred and accordingly the system displays an override.
- The system displays an override in case of future dated re-price with transfer of unamortized fee amount.
Child Contract Ref. No
The reference number of the child contract is displayed here.
Total Split Amount
The total amount of all child contracts is displayed here.
5.26.1.1 Specifying BA Details
In the BA Details section of this screen, you can perform the following:
- You can select only BA drawdown products for the child contracts in this screen.
- Ensure ‘Bankers Acceptance’ check box is selected for the BA drawdown product at the product level.
- As part of reprice, the BA details entered in the parent contract are defaulted to child contract.
- Reprice Decrease
- In case of reprice decrease, ensure to select 'Liquidate Principal’ check box and perform reprice decrease.
- Before the parent contract is liquidated, principal must be liquidated from the parent contract to the extent of decrease for BA drawdowns and the associated loans.
- This is posted as part of ‘LIQD’ event in borrower and participant contracts.
- Reprice Increase
- In case of reprice increase, the increased amount is disbursed to the borrower from the borrower contract. There is no netting of the increased loan amount disbursed to the borrower with that of the stamping fee and discount amount.
- Before the parent contract is liquidated, principal must be liquidated from the parent contract to the extent of increase for BA drawdowns and the associated loans.
- This is posted as part of ‘VAMI’ event in borrower and participant contracts.
You can specify the following:
Broker BA Product
You can select the BA drawdown product for the list of values.
Interest Day Basis
The interest day basis gets defaulted from the ‘Interest Basis’ field of the ‘Product Components’ section.
Net Borrowing Amount
The net borrowing amount gets defaulted from the ‘Amount’ field of ‘Child Re-Price Transaction (Split)’ section.
Stamping Fee Rate
The stamping fee rate gets defaulted from the ‘Rate’ field of the ‘Product Components’ section.
Stamping Fee Amount
The stamping fee amount gets automatically calculated on save of the BA drawdown contract.
Discount Rate
Specify the discount rate.
Discount Amount
The discount amount gets automatically calculated on save of the BA drawdown contract.
Treasury MIS Rate
Specify the treasury MIS rate.
Agent Rate
Specify the agent rate.
5.26.1.2 Product Components
In the Product Components section, specify the following:
Component
Select the component to be associated with the child contract. The option list includes all the components linked to the product.
Rate Type
Select the rate type of the component.
Rate Code Usage
The system defaults the rate code usage from the product. You are not allowed to amend it. The possible values are periodic and automatic. It is applicable only for floating rate.
Rate Revision Method
Select the rate revision method from the drop down list. You are allowed to amend it for Floating Periodic type of loans.
For more information on rate revision schedules, refer ‘Maintaining Rate Revision Schedules’ chapter.
Reset Tenor
The tenor of the parent contract is defaulted here, for the child contract. You can change the same.
Rate Code
Select a rate code to be applied to the child contract.
Base Rate
The base rate for the child contract is displayed here.
Spread
Enter the spread for the contract.
Final Rate
The final rate is computed by the system based on the base rate and the spread you have entered. This is applied to the component.
Rate Fixing Required
Select this check box to indicate whether the rate fixing is applicable for a particular component.
Rate Fixing Days
The rate fixing days gets defaulted from the ‘Rate Fixing Days Maintenance’ screen. You can modify this value.
Remarks
You can enter remarks for the split transaction you have entered, in the space provided.
Note:
- When you enter a future dated re-pricing transaction, the system does not process any event (such as accrual, liquidation which has an effect on the outstanding balance of the parent contract) linked to the parent contract, till the re-pricing has been completed. Child contracts are created on the value date and not on the date that you enter the contract. Accounting entries are passed on the value date.
- Re-pricing does not have any effect on a revolving commitment linked to the parent contract
- Advices to customers involved in child contracts, are sent from the parent contract
- MIS details of the parent contract are propagated to all child contracts
- When renewing a contract with non-performing status, all the child contracts created inherits the non-performing status of the parent contract with the contra balance and reserve amount applicable for the parent contract being distributed among the child contracts. In case of multiple child contracts, the contra balance (and reserve amounts where applicable) is calculated based on the outstanding for each child contract and in the order in which the child contracts were created during the renewal/re-pricing.
- For a split re-price of non-performing loan with reserve and contra amounts, first the reserve amount is apportioned based on principal outstanding for each child contract, then the contra amount.
5.26.2 Authorizing Override for Split Re-Pricing
If the UDF ‘RATE-VARIANCE’ is maintained as a non-zero value for a commitment contract to which the loan is linked, dual authorization is required.
For more details, refer the section ‘Dual Authorization’ in this User Manual.
5.26.3 Fixing Rate during Reprice
For floating periodic manual type of Loans, the rate can be fixed during reprice. Click ‘Rate fixing’ in the screen.
For more information on rate fixing, refer to Capturing Rate Fixing chapter in Interest User Manual.
Following validations are performed while specifying the rate for the new reset period:
- Current reset date is the Next reset date of the previous revision.
- Next Rate reset date is mandatory
- Current Reset Date <= Reset Value date<=Next Reset Date
- During rate revision, ‘RCHG’ event is triggered for resetting value date and rate and during batch if the new rate reset value date is in the future, ‘RTFX’ event is triggered. Its triggered online if the rate reset value date is back valued or current dated.
- Following validations are performed while amending the current reset period:
- Reset value date is allowed for modification only if the reset value date is in the future.
- Next Reset Date is allowed for modification
- Rate change is allowed if reset value date is greater than or equal to the Last paid schedule date or value date whichever is later.
- Current Reset Date <= Reset Value date<=Next Reset Date
During the rate amendment, RTAM event is triggered. After the first authorization of the Loan Contract, the Rate revision method of the Floating Periodic type of Loans can be changed through Value Dated Amendment (VAMI).
5.26.4 Floating Periodic Manual Contracts
You can amend the following options for the rate fixed in the past:
- Interest Rate
- Spread
- Reset End Date
- Current reset date (in new mode)
- Reset Value date (only when the reset value date is in future)
RTAM and RTFX are registered for this modification. Reset end date for the past period is allowed for modification. However, the same is not allowed to be increased if the rate is already fixed for the next period.
If the reset end date is reduced, the system calculates the fixing a rate for the interim gap created due to end date reduction. In such cases RCHG and RTFX events are activated for the new rate fixing. Reset value date cannot be less than the current reset date.
You can modify the rate fixing details, even if the current rate type of the component is not floating periodic manual. However, the rate type should be ‘Floating’ periodic manual for the rate fixing period.
Reset value date can be beyond the last payment date when the rate is being fixed for the interim gap created due to the reduction of reset end date.
Note
Amendment of rate revision method is not be allowed on the day rate revision has already happened.
During reprice the repayment schedules do not default from the parent contract to the child contract. CAMD event has to be triggered for the child contract to define the schedules.
5.27 Consolidating Re-Price Transactions
You can consolidate one or more re-priced child contracts with a parent contract. This includes non-performing loans as well; however, it is essential that all the child contracts being merged have the same user-defined status. The consolidation can be done through the Re-Price Transaction (Consolidation Details) screen.
You can invoke the ‘Consolidate Details’ screen by typing ‘OLDREPRC’ in the field at the top right corner of the Application tool bar and clicking the adjoining arrow button.

Specify the following details:
Contract Ref. No.
Select or enter the reference number of the contract with which various child contracts are being consolidated. When you enter the reference number, the following details are displayed for the parent contract:
- User Reference Number
- Counterparty
- Currency
- Outstanding principal amount
The Merger Serial No. gives you the number of merger transactions carried out on the parent contract.
Book Date
This is the book date with which the re-pricing is processed.
Value Date
This is the value date with which the re-pricing is processed.
In the Child Re-Price Transaction (Consolidation) section, you can enter details of the child contracts. Specify the following:
Contract Ref. No.
Select the reference number of the child contract which is merged with the parent contract.
Note
- The child contracts being merged should have the same maturity date and this date should be lesser than the maturity date of the parent contract.
- For a consolidation, it is mandatory that the underlying commitments of a child contract are the same as that of the parent contract.
- If there is an overdue schedule linked with a child contract, the system does not include the same during the merger.
User Ref. No.
The user reference number of the child contract is displayed here.
Value Date
The value date of the child contract is displayed here. This also the maturity date of the child contract.
Amount
The amount of the child contract which is re-priced and consolidated with the parent contract, is displayed here. This is the outstanding principal amount of the child contract. You are not allowed to change the same.
Currency
The currency of the child contract is displayed here. Only those child contracts with the same currency as the parent contract can be merged with the parent contract.
Note
- When you enter a future dated re-pricing transaction, the system does not process any event (such as accrual, liquidation) linked to the child contract, till the re-pricing has been completed. The consolidation is done on the value date and not on the date that you enter the contract. Accounting entries are passed on the value date.
- You are allowed to enter a back-value dated consolidation transaction
- Interest liquidation can happen on all child contracts before consolidation. You can only merge the outstanding principal amount with a parent contract. The principal amount is moved to the Re-Price Suspense GL you have specified. The interest amount of a child contract is adjusted with the customer involved in the child contract.
Remarks
You can enter remarks for the consolidation transaction you have entered, in the space provided.
Note
- You cannot carry out a re-pricing (splitting) and a consolidation simultaneously.
- The contra amounts (and the reserve amounts, if applicable) for the child loans is merged and made part of the parent loan, when you merge child contracts.
- If the UDF ‘RATE-VARIANCE’ is maintained as a non-zero value for a commitment contract to which the loan is linked, dual authorization is required.
For more information, refer to ‘Dual Authorization’ chapter in this User Manual.
5.28 Maintaining Loan Loss Reserve
You can change the reserves for the various transaction types for loans and commitments in the ‘Loan Loss Reserve’ screen.
You can invoke the ‘Loan Loss Reserve’ screen by typing ‘OLDLLRSV’ in the field at the top right corner of the Application tool bar and clicking the adjoining arrow button.
In this screen, enter the following details:
Contract Reference No
Enter the reference number of the loan or commitment contract for which you want to change the transaction type.
Based on your choice, the system displays the following details:
- User Ref No
- Custom Ref No
- Counterparty
- Userdefined Status
- Contact Status
- Outstanding Balance
- Maturity Date
- Department Code
- Branch Code
- Treasury Source
- Value Date
- Total Reserve Amount
- Contract Currency
- Total FAS114 Reserve Amt
- Penalty Amount
Transaction Type
Select the transaction type from the adjoining option list. The options are:
- Write-off
- Recovery
- Complete Writeoff
- FAS114 Increase
- FAS114 Decrease
You can select the FAS114 increase or the FAS114 decrease option only if the contract you have selected is a commitment contract.
Transaction Amount
Enter the amount for the transaction type selected.
5.29 Amending the Exchange Rate
When you book a new loan contract and link it to the commitment, the system defaults the exchange rate captured in contract linkages to exchange rate fixing table, for cross currency loans.
You can amend this exchange rate and specify a new effective date for a chosen contract using, ‘Exchange Rate Amendment’ screen.
You can invoke the ‘Exchange Rate Amendment’ screen by typing ‘OLDEXAMD’ in the field at the top right corner of the Application tool bar and clicking the adjoining arrow button.
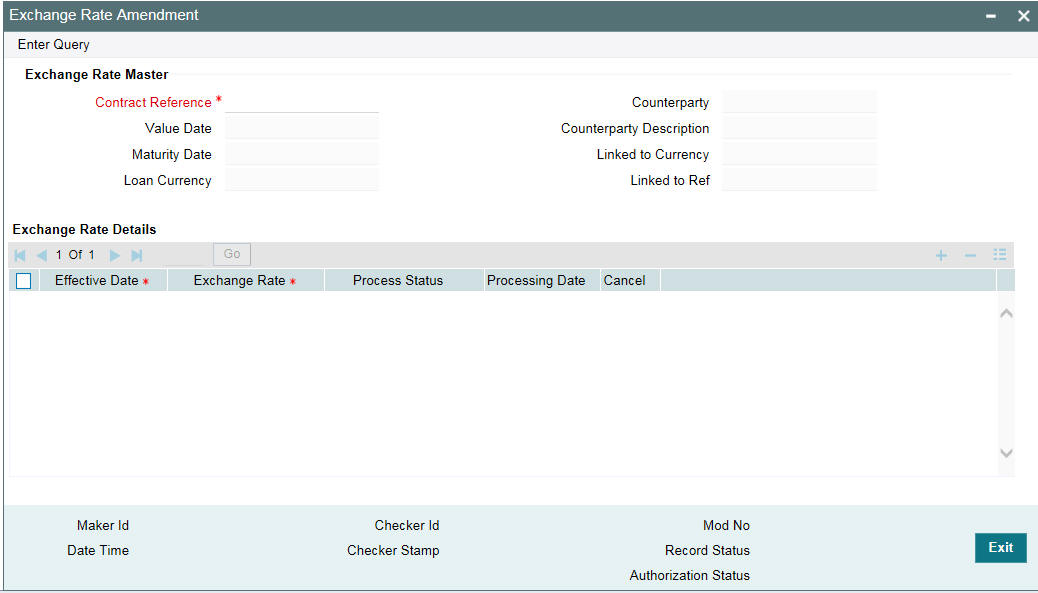
Contract Reference Number
Choose the reference number of the contract whose exchange rate you wish to amend from the list of Contract Reference Numbers.
The following fields are displayed:
- Counterparty
- Contract Currency
- Value Date
- Maturity Date
- Commitment Reference
- Commitment Currency
5.29.1 Exchange Rate Details
Effective Date
Specify the new effective date for the contract.
You can specify the effective date multiple times, so that the system triggers link/delink event on the commitment with effective date as loan value date. However, the ‘Effective Date’ should not be,
- before loan value date
- before last loan payment date
- before last amendment value date of loan
- before last commitment fee liquidation date
- after loan maturity date
- If any of the above conditions are not satisfied for ‘Effective Date’, then the system displays the following error messages:
- If the effective date is before loan value date, then the system displays
Effective date cannot be earlier than the value date of the contract
- If the effective date is before last loan payment date, then the system displays
Effective date cannot be earlier or equal to last liquidation date
- If the effective date is before last amendment value date of loan, then the system displays
Effective date cannot be earlier or equal to VAMI date
- If the effective date is before last commitment fee liquidation date, then the system displays
Effective date cannot be earlier than the last commitment fee liquidation date
- If the effective date is before after loan maturity date, then the system displays
Effective date cannot be later than the maturity date of the contract
Exchange Rate
Specify the new exchange rate for the contract. You cannot specify the back dated exchange rate beyond the last processed effective date and you are not allowed to amend the exchange rate for processed contract. You can enter upto 15 decimal points.
Process Status
The status of the contract is displayed as Processed/Unprocessed.
Note
- You can do the exchange rate amendment by contract amendment also.
- You are allowed to delete Unprocessed Exchange rate and for future dated exchange rate, the system processes it in batch.
- You can define the exchange rate revision only for active loan contracts.
5.30 Classifying LC Sublimit
LC Sublimit is classified at Originations (OL) Commitment level from HFI to HFS account based on the Origination trade ratio. System performs the following processing/validations for the LC Sublimit classification:
- LC Sublimit reclassification happens online for the commitment, when a trade event is authorized
- Available LC sublimit balance at the commitment level is considered for HFI to HFS movement
- Reclassification for the HFS balance is done for the traded ratio, by computing the HFS balance using the trade ratio and the LC Sublimit balance
- Reclassification is done on zero-basis, as done for commitment balance and loan/LC loan outstanding, recomputed HFS balance is compared with the previous day HFS balance and reclassified accordingly
- Necessary accounting entries must be setup for TRCL event for the commitment product for LC sublimit reclassification. See ‘Annexure-A’ document for details.
- New amount tags for LC Sublimit reclassification is available in the system
5.30.1 Updating LC Sublimit HFS Balance
System performs the following processing/validations for updating the LC Sublimit HFS balances:
- For Trade Booking, TRCL for LC Sublimit reclassification from HFI to HFS is triggered on the commitment, and the amount tag LCLMT_HFS_INCR. LC Sublimit HFS balance is increased accordingly
- For Trade Settlement, TRCL for LC Sublimit reclassification from HFS to HFI will be triggered with the amount tag LCLMT_HFS_DECR. LC Sublimit HFS balance is decreased accordingly
- For Trade amendment, if there is a change in trade amount, then TRCL for LC Sublimit reclassification is triggered to increase/decrease the LC Sublimit HFS balance
- For Trade reversal/cancellation, TRCL for LC Sublimit reclassification from HFS to HFI is triggered on the commitment and the amount tag LCLMT_HFS_DECR. LC sublimit HFS balance is decreased accordingly
- For Trade settlement reversal, the TRCL event for LC Sublimit reclassification from HFI to HFS is triggered with the amount tag LCLMT_HFS_INCR. LC Sublimit HFS balance is increased accordingly
- if any of the processing for LC Sublimit HFS balance update or posting of LC Sublimit HFS accounting fails , then the authorization of the trade event will fail and an error message ‘LC Sublimit processing failed’ will be displayed,
5.30.2 Updating LC Sublimit HFI Balance
System performs the following processing/validations for updating the LC Sublimit HFI balances:
- The LC Sublimit balance is computed and updated as part of the VAMB/VAMI for the commitment. The VAMB/VAMI is triggered as a result of STP from agency for the trade settlement
- 'LC Sublimit balance Reduction’ is computed by applying the PRAM transfer percentage on the current LC Sublimit balance
- LC Sublimit balance is updated by reducing the current LC Sublimit balance by the computed ‘LC Sublimit Balance Reduction’
- As a result of this, the necessary update for LC Sublimit balance is done based on the Minimum of (Latest LC Sublimit balance, Commitment Availability)
- If any of the processing for LC Sublimit HFI balance update or posting of LC Sublimit accounting fails , then the processing of the STP event VAMB/VAMI fails and the error message ‘LC Sublimit processing failed’ is displayed,
- The necessary LC Sublimit accounting entries for reducing the LC Sublimit is posted, as a part of the VAMI event,
5.31 Maintaining Special Penalty Component Waiver Details
You can waive late payment charge schedule(s) for a component using ‘LD Special Penalty Component Waiver’ screen.
You can invoke the ‘LD Special Penalty Component Waiver’ screen by typing ‘OLDPNWVR’ in the field at the top right corner of the Application tool bar and clicking the adjoining arrow button.
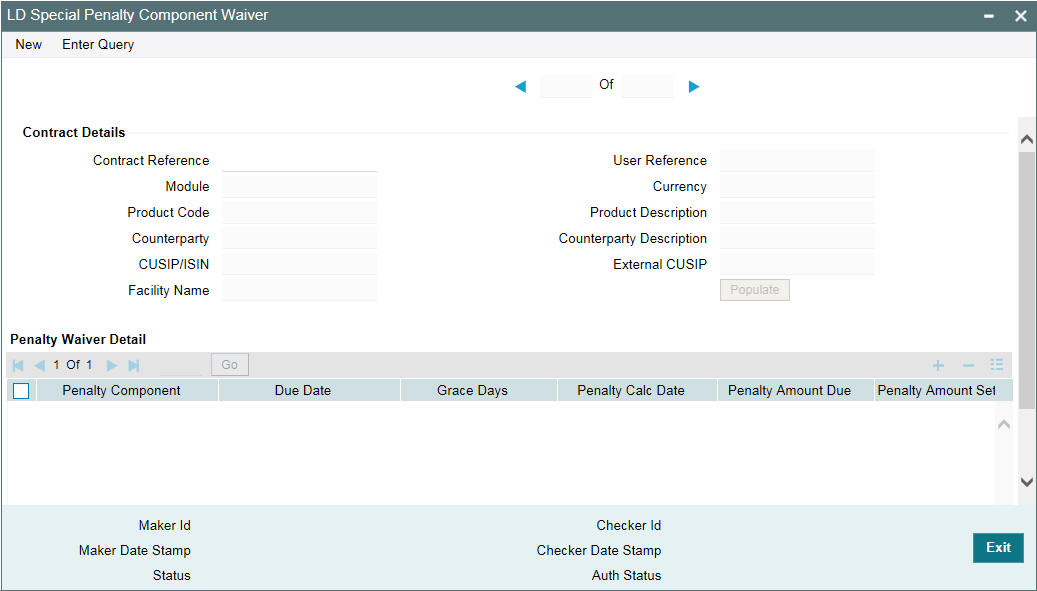
Specify the following details:
Contract Ref No
Specify the reference number of the contract for which the late payment charge schedules should be waived.
System displays the following details based on the specified contract reference number:
- Module Code
- CCY
- Department Code
- Product Code
- Counterparty
- Facility Name
- CUSIP/ISIN
- External CUSIP
- Treasury Source
Penalty Comp
Select the penalty component from the adjoining option list. This list displays all the late payment charge schedules for the contract which are not fully paid of waived.
Due Date
System displays the due date for the penalty component selected.
System displays the following details based on the selected penalty component:
- Grace Days
- Penalty Calc Date
- Penalty Amount Due
- Penalty Amt Settled
- Basis Amount Due
- Basis Amount Settled
Remarks
Specify a brief description regarding the waiver for late payment charges for a schedule.
Waive
Select this check box to indicate that the late payment charge schedule should be waived for a component. You can save the waiver operation only if the ‘Waive’ box is selected for all schedules.
You can waive a partially paid late payment charge schedule. In this case, the unpaid amount is treated as waived and the already paid amount is treated as settled. No further dues are tracked for this schedule.
Before allowing the waiver of each schedule, system checks that all preceding schedules have been paid or waived. If there are any unpaid schedules preceding this schedule, then system displays the following override message:
Prior schedules are unpaid for this component. Please pay/waive all such schedules before proceeding
On waiving a late payment charge, the previously calculated charges will no longer be due.
The accounting entries are posted against the event ‘SPWV’ (Special Penalty Waiver). If multiple schedules are waived as part of the same waiver operation, then system triggers a single ‘SPWV’ event with separate accounting entries for each schedule. The accounting entries are posted for information and tracking purposes only.
5.31.1 Reversing the Waiver of Late Payment Charges
You can reverse the waiver of late payment charges by selecting the original waiver record using the ‘Special Penalty Component Waiver Reversal’ screen. You can invoke this screen by clicking the ‘Reversal’ in the ‘Special Penalty Component Waiver’ screen.
If multiple schedules are waived as part of the original waiver operation, then system allows you to select any or all of such waived schedules for waiver reversal and deselect the ‘Waive’ box. Reversal can be done only if the ‘Waive’ box is deselected for at least one schedule.
System allows you to undo the waiver operation only if the basis component for the late payment schedule is unpaid/partially paid. If basis component for the late payment charge schedule is fully paid, then you cannot undo the waiver operation.
On waiver reversal, system re-computes late payment charges using values of basis component, grace days and late payment charge fixed rate/flat amount as on the current date. Calculation date will be the original schedule due date.
Waiver reversal accounting entries are posted against the event ‘RSPW’ (Reversal of special penalty waiver). If waiver reversal of multiple schedules is performed simultaneously, then system triggers a single RSPW event with separate accounting entries for each schedule. The accounting entries are posted for information and tracking purposes only.
Accrual entries are not passed and late payment charges are booked to P&L only upon liquidation.
Note
At the loan product level, system validates to check that event ‘SPWV’ is mandatorily maintained for a component for which ‘Special Penalty Component’ is selected. System also validates to check that no account entries are maintained for the RSPW event at the loan product level. System automatically associates the reversal event ‘RSPW’ for such products.
5.32 Viewing the Waiver Details of Special Penalty Components
You can view current status of all unpaid late payment charge components for a contract using ‘LD Special Penalty Component Waiver Summary’ screen.
You can invoke the ‘LD Special Penalty Waiver Summary’ screen by typing ‘OLSPNWVR’ in the field at the top right corner of the Application tool bar and clicking the adjoining arrow button.

In this screen, you can view the following details:
- Contract Ref No
- ESN
- Event
- Auth Stat
- Penalty Component
- Penalty Due Date
- Penalty Calc Date
- Penalty Amt Due
- Penalty Amt Settled
- Waive Stat
- Basis Amount Due
- Grace Days
- Basis Amount Settled
- Remarks
5.33 Maintaining Floor and Ceiling Details
You can capture floor and ceiling details for all-in rates. You can maintain/amend Floor and Ceiling at the commitment level for the combination of currency, effective date, loan product and interest component.
You can invoke the ‘Floor and Ceiling Maintenance’ screen by typing ‘OLDFLRCL’ in the field at the top right corner of the Application tool bar and clicking the adjoining arrow button.
You can specify the following details in this screen:
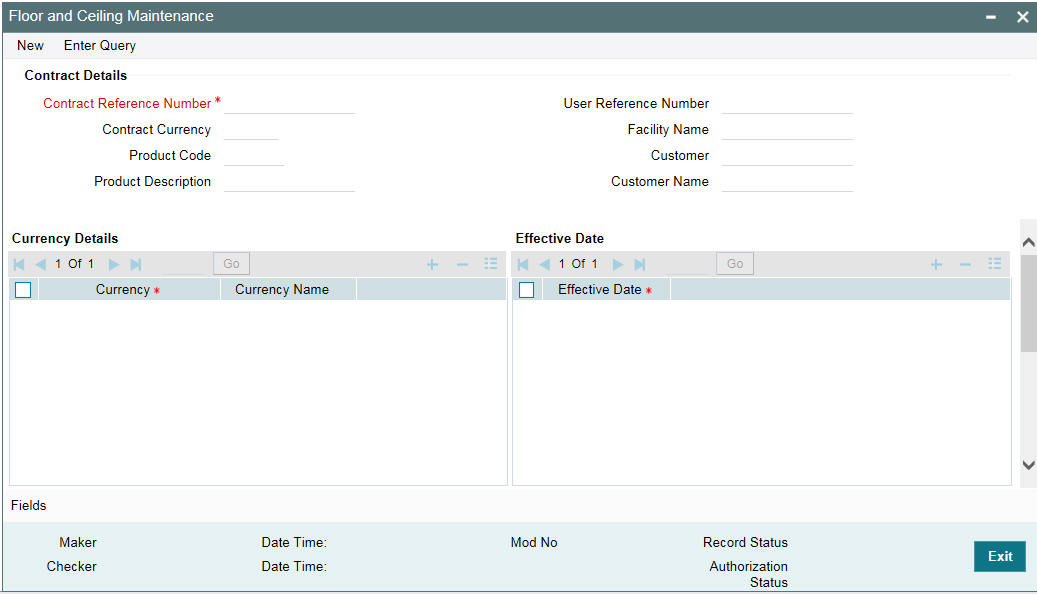
Contract Ref No
The system displays contract reference number.
Product Code
The system displays the product code.
Customer
The system displays the customer name.
Facility Name
The system displays the facility name.
User Ref No.
The system displays the user reference number.
This section contains the following topics:
- Section 5.33.1, "Specifying Currency Details"
- Section 5.33.2, "Specifying Effective Date"
- Section 5.33.3, "Processing All-In Rate Floor and Ceiling rates"
- Section 5.33.4, "Validating and Propagating All-In Rates for Re-Price Transactions"
- Section 5.33.5, "Manual Linking of Standalone Loans with Commitments"
- Section 5.33.6, "All-In Rate Batch Propagation"
5.33.1 Specifying Currency Details
CCY
Select an appropriate currency from the adjoining option list. The list displays all currencies that are allowed for the commitment product.
Currency Name
The system displays the name of the currency you have selected.
5.33.2 Specifying Effective Date
Effective Date
The current application date is defaulted as the effective date. Since the effective date cannot be modified, back valued or future value dated Floor and Ceiling maintenance cannot be done.
5.33.2.1 Specifying All-In Rate for Floor and Ceiling
Loan Product
Select an appropriate loan product from the adjoining option list.
Interest Component
This list displays all fixed, floating, and agency type of interest components associated with the loan product, for all interest component except type ‘Special’.
Floor
Specify the floor all-in rate.
Ceiling
Specify the ceiling all-in rate.
Note :
- Floor and Ceiling propagation happens for the loan contracts, based on the Floor/Ceiling maintenance at the Originations (LD) Commitment level, irrespective of the loan being booked through an agency (STP) or booked manually
- STP of Floor/Ceiling propagation of drawdown from Agency (LS) happens to the underlying loan contract as well as per current functionality. But the loan contract all-in-rate is validated with the floor/ceiling maintained at the linked commitment
- If there is any interest rate mismatch between the mapped components of Drawdown and Loan based on Floor/Ceiling maintenance in a commitment, then STP processing will fail for the Drawdown contracts and such mismatches must be manually handled
5.33.3 Processing All-In Rate Floor and Ceiling rates
System validates if all-in rate of the interest component for the loan contract is within the Floor and Ceiling for the below scenarios:
Online activities
- New Loan booking
- Value dated amendment for rate changes
- While capturing Re-price instruction rate details
- While processing Re-price transaction
- While manually linking loan with a commitment through Linkage Amendment screen
Batch activities
- Rate revision for floating rate loan contracts
The Min/Max rates maintained for the base rate in Interest limits (product currency level) will not be validated for a loan contract, if all-in rate maintenance is available for the loan product at the linked commitment contract level.
For online activities, if all-in rate of the interest component for a loan contract is not within the floor and ceiling limit, the system displays the following override message:
All-in rate is less/more than the maintained Floor/Ceiling value
If you click OK button, Floor/Ceiling propagation is processed as follows:
- If the calculated all-in rate is less than the maintained Floor value of all-in rate, system considers the Floor value as the all-in rate for interest computation
- If the calculated all-in rate is more than the maintained Ceiling value of all-in rate, system will consider the Ceiling value as the all-in rate for interest computation
System does not allow you to save the transaction if you cancel the override.
Rate Amendment (RTAM) event is registered for the loan during floor and ceiling propagation, however no accounting entries are posted for the RTAM event.
During online transaction or End of Day batch process, if the Floor and Ceiling propagation happens for multiple interest components associated with a loan, then RTAM is registered individually for the propagation of Floor/Ceiling of each interest component.
For batch activities, overrides are not logged; however system validates all-in rate based on the Floor/Ceiling and apply the necessary Floor/Ceiling all-in rate to the loan contract for interest computation, as part of the batch activity.
Floor and Ceiling validation and propagation is done only for the active loans. Uninitiated loans will be ignored. However, the validation and propagation happens during initiation of an uninitiated loan.
Floor and Ceiling validation and propagation is done only for current or back value dated transactions. System does not do any validation/propagation during the above mentioned online/batch activities if the value date of the transaction is in future.
5.33.4 Validating and Propagating All-In Rates for Re-Price Transactions
While saving split Re-Price instructions, system provides necessary over-ride stating that all-in rate of the interest component is not within Floor / ceiling limit, if the all-in rate for the child product and interest components are not within the maintained Floor/Ceiling for the child loan product and interest components:
- On click of OK, all-in rate is systematically changed based on Floor and ceiling maintenance and system does not register any event for such systematic rate changes
- On click of Cancel, system does not allow to save the renewal instruction
Split Reprice instructions, having split value date as current application date, the all-in rate for the child contract is validated and updated during the online child contract creation/initiation.
Split Re-price instructions, having split value date greater than current application date, validations happen online during the save of the Split Re-price instructions. In addition, the validations and necessary defaulting with the floor or ceiling rate (if all-in rate of interest component is not within floor/ceiling limit) happens while initiating the child contract during batch process as per the propagation mentioned above.
Propagation is always based on the latest Floor and ceiling maintenance as of the renewal processing date (split value date)
5.33.5 Manual Linking of Standalone Loans with Commitments
Floor and ceiling propagation happens when standalone loan is getting linked with the commitment, or the loan is de-linked and linked to a different commitment, through the ‘Linkage Amendment’ screen.
While saving linkage amendments, system provides necessary over-ride stating that all-in rate of the loan interest component is not within Floor / ceiling limit maintained for the newly linked commitment, if all-in-rate of any of the component under the loan is not within the maintained Floor/Ceiling
- On click of OK, all-in rate propagation is done based on Floor and ceiling maintenance and the system registers Rate Amendment (RTAM) event for the propagation
- On click of Cancel, Commitment linkage amendment fails
The Rate Amendment (RTAM) event gets authorized along with the ‘Linkage Amendment’ (LAMD) authorization.
Floor/Ceiling validations is not done if the loan is de-linked from a commitment and converted to a stand-alone loan from the ‘Linkage Amendment’ screen.
5.33.6 All-In Rate Batch Propagation
Floor/Ceiling validation and propagation for loan contracts happens in a batch, if:
- Floor/Ceiling is newly maintained at commitment level for any of the interest component associated with the loan contract which is linked to the commitment
- Existing current dated floor/ceiling maintenance is amended at the commitment level for any of the interest component associated with the loan contract which is linked to the commitment, and there is no online propagation for the loan after the floor/ceiling amendment
If the underlying loan contract’s all-in rate for any of the interest component is not within the Floor or Ceiling limit, then system does the floor/ceiling propagation as mentioned in the section ‘Processing All-In Rate Floor and Ceiling rates’ of the User Manual.
For Split Re-price Instruction which is already captured but yet to be processed (split value date in future), system does not update the all-in rate in the Split Reprice instructions during batch
Floor/Ceiling propagation does not happen in batch, in the following scenarios:
- If the propagation has already happened online for the current day floor/ceiling maintenance/amendment
- Floor/ceiling maintenance has not been changed after online propagation for the loan
5.34 Specifying the Disclosure Schedule Details
You can specify the disclosure schedule details of a contract using the ‘Contract Disclosure Schedule Details’ screen.
You can invoke the ‘Contract Disclosure Schedule Details’ screen by typing ‘OLDSCSCH’ in the field at the top right corner of the Application tool bar and clicking the adjoining arrow button.

Here you can specify the following details:
Contract Details
You can specify the contract details here.
Contract Ref No
Specify the contract reference number of the contract for which the reporting requirement details to be linked.
Disclosure Details
You can specify the disclosure code, its description and can add notes about the disclosure code here.
Disclosure Code
Specify the code for the reporting requirement. The reporting requirement is captured as disclosure code. The adjoining option list displays the disclosure codes and you can choose the required disclosure code.
Note
UCC disclosure code linked to a commitment contract need not be defaulted to linked loan contracts. You can manually attach a UCC disclosure code to individual loan contracts.
Disclosure Description
The description of the reporting requirement is displayed here.
Parent Disclosure Code
Select the parent disclosure code if the disclosure code is to be associated as a sub-event. The adjoining option list displays the disclosure codes that are already linked to the contract. For a UCC disclosure code, this field is disabled.
Note
- If a disclosure code is linked to a parent disclosure code, then you cannot define schedule for this disclosure code and the schedule defined for the parent disclosure code is automatically propagated to the child disclosure code.
- Once a disclosure code is linked to a parent disclosure code, the same cannot be linked as a parent to another disclosure code, that is, a child cannot be selected as a parent. However, multiple disclosure codes can be linked to the same parent.
Notes
Click ‘Notes’ button to add any notes for the disclosure codes.
Schedule Details
You can specify the start date, end date of the schedule and its frequency here.
Start Date
Specify the start date from which the schedule commences. The start date can only be a date in the future and it cannot be a back dated date.
For a UCC disclosure code, system automatically defaults the current date as the start date.
Period End Date
Specify the end date on which the schedule ends. For a UCC disclosure code, system automatically defaults the expiry date maintained in the ‘UCC Details’ screen.
For more information on UCC details screen, refer to the Maintaining UCC Details in this User Manual.
No
Specify the number of schedules that are required.
For example, if 3 quarterly schedules are required starting from 15-Dec-06 (i.e. 15-Dec-06, 15-Mar-07, 15-Jun-07), enter the Start Date as ‘15-Dec-06’ and No. as ‘3’ and Frequency as ‘Quarterly’.
For a UCC disclosure code, system sets this field as ‘1’ and disables it.
Frequency
Select the frequency of the disclosure schedule from the drop-down list. The list displays the following values:
- Daily
- Monthly
- Quarterly
- Half Yearly
- Yearly
- Weekly
- BULLET
For a UCC disclosure code, system sets the frequency as ‘BULLET’ and disables it.
Unit
Specify the value of unit of the frequency selected.
For example, if the schedule should be once in two months for a Frequency ‘Monthly’ then the value for unit is ‘2’.
For a UCC disclosure code, system sets this field as ‘1’ and disables it.
Note
- While generating the schedule, the system does not check whether the due date falls on a holiday.
- The system does not perform any validation associated with the contract start date.
- However, validation is performed to ensure that schedule date is not beyond the Contract Maturity Date.
- It is mandatory to maintain Schedules for each disclosure code unless the disclosure code is linked to a parent.
- For a UCC disclosure code, you cannot add a schedule or delete the
automatically generated disclosure schedule.
- If you click on ‘Add’ button in the Schedule Details section, system will display the following error message:
Multiple schedules are not allowed for UCC disclosure codes.
- If you click on ‘Delete’ button in the Schedule Details section, system will display the following error message:
Cannot delete the schedule for UCC disclosure codes
- You can only modify ‘Start Date’ and ‘Period End Date’ fields for the contract.
5.35 Viewing the Contract Disclosure Schedule Status Details
The individual disclosure codes for each due date can be viewed from the ‘Contract Disclosure Details’ screen.
You can invoke the ‘Contract Disclosure Details’ screen by typing ‘OLDSSTAT’ in the field at the top right corner of the Application tool bar and clicking the adjoining arrow button.

You can specify the following details:
Contract Details
Contract Ref No
Specify the contract reference number for which you want to query the disclosure code details. This adjoining option list displays the all the contracts to which the disclosure codes are linked. You can select the required contract.
Disclosure Code
Specify the disclosure code for which you want to query the details. This adjoining option list displays the all the disclosure codes that are linked to the contract and you can choose the appropriate one.
Schedule Status Details
Due Date
The system displays the date on which the schedule is due.
Period End Date
The system displays the end date on which the schedule ends.
Closure Date
The system displays the closure date here.
Closure Flag
Select this check box to indicate that closure is applicable for the schedule.
Specifying the Notes Detail of Contract Disclosure
Notes pertaining to the contract disclosure can be added in the ‘Contract Disclosure Details - Notes’ screen. You can invoke this screen by clicking the ‘Notes’ in the ‘Contract Disclosure Details’ screen.
You can specify the following details:
Notes
Specify the follow-up notes to be added about the contract disclosure.
User
Specify the identification name or code of the user.
Propagate Future Schedules
The system checks this box to indicate that the notes are created using ‘Contract Disclosure Schedule Details - Notes’ screen.
5.36 Viewing Summary Details of a Loan
You can view the summary details of loans issued by your bank in the ‘Loans and Commitment - Contract Input Summary’ screen (OLSTRONL).
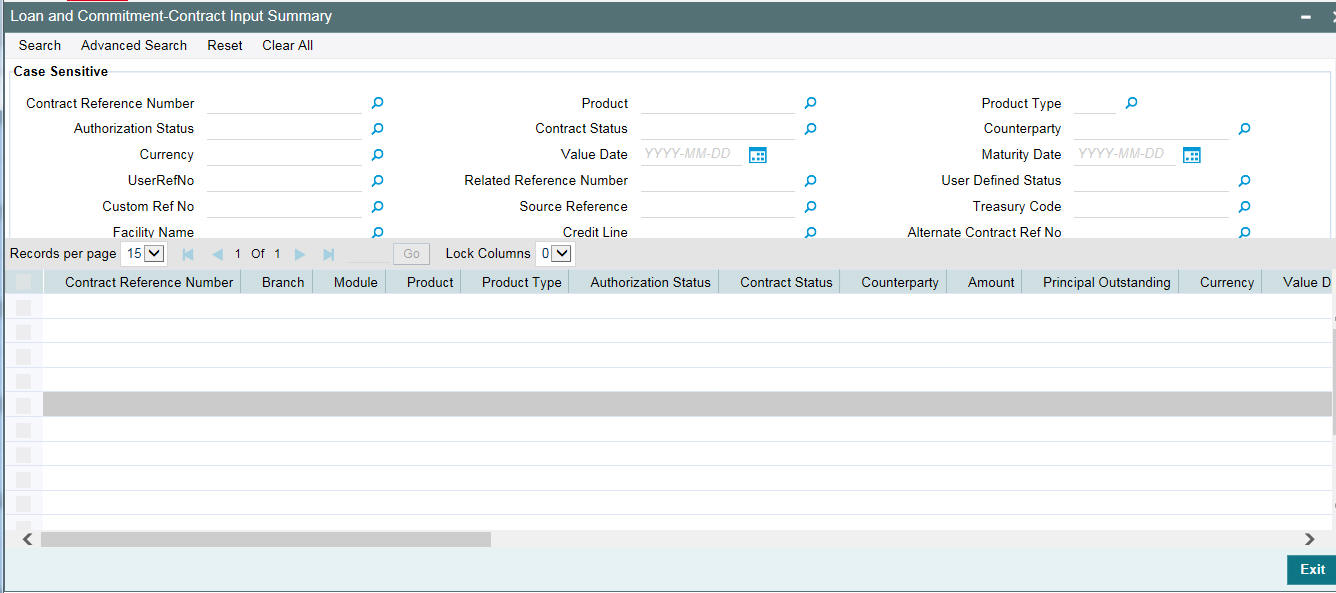
Following details are displayed here:
- Auth Status
- Cont Stat
- Dept Code
- Branch Code
- Treasury Code
- Commitment Reference Number
- Reference No
- EG Number
- GFCID
- Facility Name
- Workflow Status
- Revision Status
- Custom Reference No
The system allows you to perform a case-independent query (upper, lower, or mixed case) using the following fields:
- Commitment Ref No
- Reference No
- Custom Reference No
- Counterparty
- Agent CIF
- Ccy
- Product
- User Reference No
Note
You can perform a case independent search only if the parameter, ‘CASE_SENSITIVITY’ in CSTB_PARAM, is set to ‘Y’.
5.37 Dual Authorization
Variance Rate Cap ‘RATE- VARIANCE’ is a UDF defined for commitment products. This represents the maximum rate change (both upper and lower limit) for contracts processed under the commitment product.
Note
This UDF is not maintained for loan products.
You need to perform dual authorization, if the UDF ‘RATE-VARIANCE’ is maintained as a non-zero value for commitment or commitment linked to the loan contract for any of the following operations:
- Commitment contract booking/amendment
During commitment contract amendment, if the above UDF value is modified (zero to non-zero, non-zero to zero, or original value is changed) an override is displayed for dual authorization.
- Loan contract booking
During loan contract amendment, no override is displayed for dual authorization as the variance rate cap maintenance is done only at commitment level.
- Manually changing rate or spread for commitment/loan contracts in
the following scenarios:
- Rate changed for fixed rate contracts through Value Dated Amendment (VAMI) screen.
- Rate code changed for floating rate contracts through VAMI screen
- Spread changed for fixed and floating rate contracts through VAMI screen.
- Re-pricing of loan contracts in the following scenarios:
- Consolidation Re-price
- Split Re-price
If any of the aforementioned operations are performed, the system displays the following override message:
Variance rate cap <value> is maintained for this contract, dual authorization required.
If the override is selected as ’Yes’, the contract is saved for further processing. If the override is selected as ‘No’, the save operation fails.
Once the contract is saved successfully, the contract reference number with override details appears in the dual authorization screen for the first authorization.
Once the contract is authorized in the dual authorization screen, final authorization is done.
Note
If the UDF ‘RATE-VARIANCE’ is not maintained or maintained as zero, dual authorization is not required.
5.37.1 Relaxing Dual Authorization
The system allows you to mark dual authorization relaxed for non-Lead type of contracts and to payments and fee liquidations.
Dual auth relaxation is provided for some messages based on the certain conditions. Below mentioned are the messages for which Dual authorization is relaxed.
ERR_CODE |
MESSAGE |
TYPE |
LS-PMT-404 |
Participant share amount not matching with the fax send. Please Resend the fax. |
D |
LS-PMT-402 |
Investor side amounts have been changed due to trade activity resend the message before making the payment |
D |
LS-PMT-804 |
Participant share amount not matching with the fax send. Please Resend the fax $1 |
D |
CF-CUS-001 |
Borrower/Counterparty is Classified. |
D |
CF-CUS-002 |
Investor/s are Classified |
D |
The fee liquidation and payments done through the system and for incoming FpML processing, the system checks for the below mentioned conditions before applying dual authorization:
- If a contract has only self-participants with non-zero (<>0) position, when fee liquidation or the payment processing encounters the messages mentioned above system does NOT apply Dual Authorization process. In case of incoming FpML consumption, status in incoming browser will NOT be updated as Pending Authorization
- If a contract has self-participants with non-zero (<>0) position and external participants with zero (0.0) position, when fee liquidation or the payment processing encounters the messages mentioned above system does NOT apply Dual Authorization process. In case of incoming FpML consumption, status in incoming browser is NOT updated as Pending Authorization
- If there are non self-participants with non-zero (<>0) position brought into the tranche at a later date, fee liquidation or the payment processing is on Dual Authorization process, based on any dual authorization condition is met.
- If the bank entity that do not reflect as self participant OR external participant exists with non-zero (<>0) position in the contract, fee liquidation or the payment processing is of Dual Authorization screen populating, based on any dual authorization condition is met.
5.38 Simulating Loans
You can simulate loans to answer customer queries especially for new loans. The payment schedules of any type of loan products can be generated while negotiating with clients during the pre-sale stage.
Loan simulation functions exactly the same way as a regular loan input. All warnings and overrides associated with an actual contract save, comes in this simulation screen.
You can perform the following operations in ‘Loan - Contract Simulation’ screen.
- Simulation - Simulate a loan and also loan advice generated based on simulated data
- View Advice - You can view the generated advices
- Create Active contract - Create a loan directly based on the simulated data
- Create Inactive contract - Create an inactive loan based on the simulated data
Note
In addition to simulating active and inactive contracts using the simulation screen, a contract can also be simulated without getting into the active/inactive state.
5.38.1 Loan- Contract Simulation for Active Contract
You can simulate active contract using ‘Loan - Contract Simulation’ screen.
You can invoke the ‘Loan - Contract Simulation’ screen by typing ‘OLDTROSI’ in the field at the top right corner of the Application tool bar and clicking the adjoining arrow button.
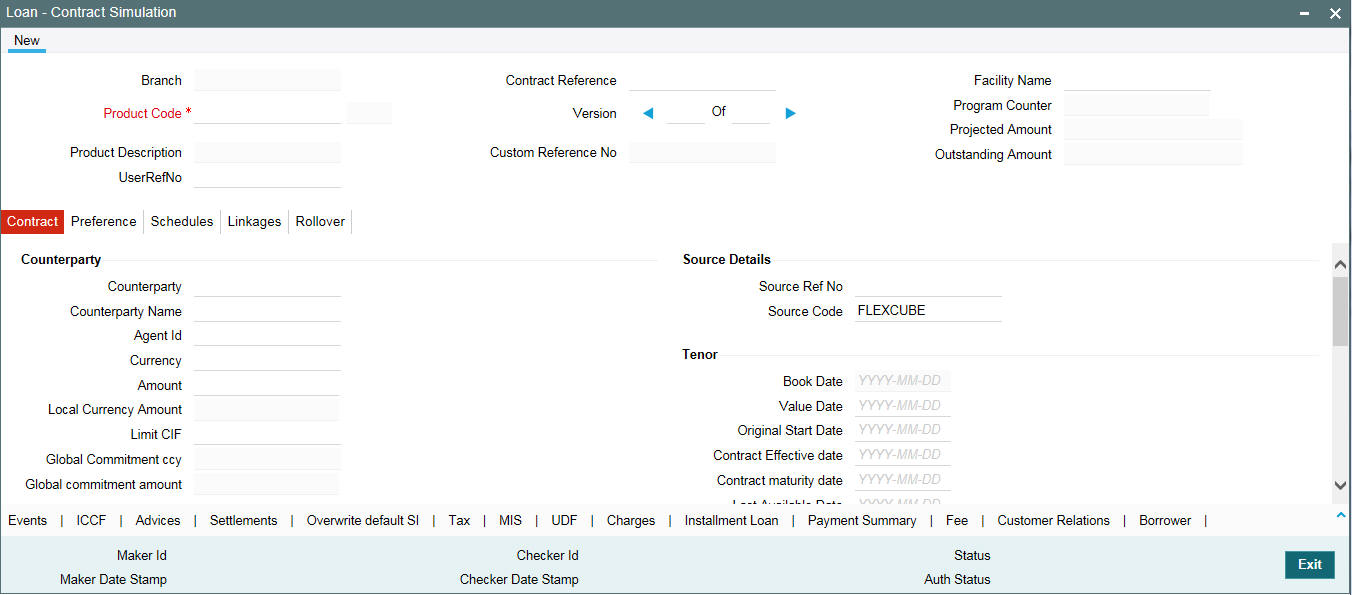
5.38.2 Loan- Contract Simulation for Inactive Contract
You can perform new, delete, and query operations using 'Loan Inactive Contract' screen.
Using this screen, you can activate the inactive contract also.
You can invoke the ‘Loan - Inactive Contract Simulation’ screen by typing ‘OLDTROIC’ in the field at the top right corner of the Application tool bar and clicking the adjoining arrow button.
5.38.3 Viewing Summary Details for Inactive Contracts
You can view summary details of Loan Inactive Contract in ‘Loan Inactive Contract’ screen.
You can invoke the ‘Loan Inactive Contract’ screen by typing ‘OLSTROIC’ in the field at the top right corner of the Application tool bar and clicking the adjoining arrow button.
