2. Security Management
2.1 Introduction
Controlled access to the system is a basic parameter that determines the robustness of the security in banking software. In Oracle FLEXCUBE, we have employed a multi-pronged approach to ensure that this parameter is in place.
Only Authorized Users Access the System
First, only authorized users can access the system with the help of a unique User ID and a password. Secondly, a user should have access rights to execute a function.
User Profiles
The user profile of a user contains the User ID, the password and the functions to which the user has access.
Restricted Number of Unsuccessful Attempts
You can define the maximum number of unsuccessful attempts after which a User ID should be disabled. When a User ID has been disabled, the Administrator should enable it. The password of a user can be made applicable only for a fixed period. This forces the user to change the password at regular intervals thus reducing security risks. Further, you can define passwords that could be commonly used by a user as Restrictive Passwords at the user, user role and bank level. A user cannot use any password that is listed as a Restrictive Password at any of these levels.
Restricted Access to Branches
You can indicate the branches from where a user can operate in the Restricted Access screen.
All Activities Tracked
Extensive log is kept of all the activities on the system. You can generate reports on the usage of the system anytime. These reports give details of unsuccessful attempts at accessing the system along with the nature of these attempts. It could be an invalid password attempt, the last login time of a user etc.
Audit Trail
Whenever a record is saved in the module, the ID of the user who saved the record is displayed in the ‘Input By’ field at the bottom of the screen. The date and time at which the record is saved is displayed in the Date/Time field.
A record that you have entered should be authorized by a user, bearing a different login ID, before the EOD is run. Once the record is authorized, the ID of the user who authorized the record will be displayed in the ‘Authorized By’ field. The date and time at which the record was authorized is displayed in the ‘Date/Time’ field positioned next to the ‘Authorized By’ field.
The number of modifications that have happened to the record is stored in the field ‘Modification Number’. The Status of the record whether it is Open or Closed is also recorded in the ‘Open’ check box.
This chapter contains the following sections:
- Section 2.2, "Bank Level Parameter Setup"
- Section 2.3, "Bank Restriction"
- Section 2.4, "User Details Modification in Bulk"
- Section 2.5, "Common Branch Restrictions"
- Section 2.6, "Function Maintenance"
- Section 2.7, "Defining Password Restriction"
- Section 2.8, "User Role Maintenance"
- Section 2.9, "User Holidays Maintenance"
- Section 2.10, "User Creation"
- Section 2.11, "User Profile Entitlements"
- Section 2.12, "Customer Access Group Maintenance"
- Section 2.13, "Personally Identifiable Information"
- Section 2.14, "Mask Maintenance"
- Section 2.15, "Forget Customer"
- Section 2.16, "Log Access"
- Section 2.17, "Department Details"
- Section 2.18, "Process Codes"
- Section 2.19, "Single Sign On (SSO) Enabled Environment"
- Section 2.20, "Defining Entity Maintenance"
2.2 Bank Level Parameter Setup
This section contains the following topics:
- Section 2.2.1, "Invoking SMS Bank Parameters Maintenance Screen"
- Section 2.2.2, "Password Restriction Button"
2.2.1 Invoking SMS Bank Parameters Maintenance Screen
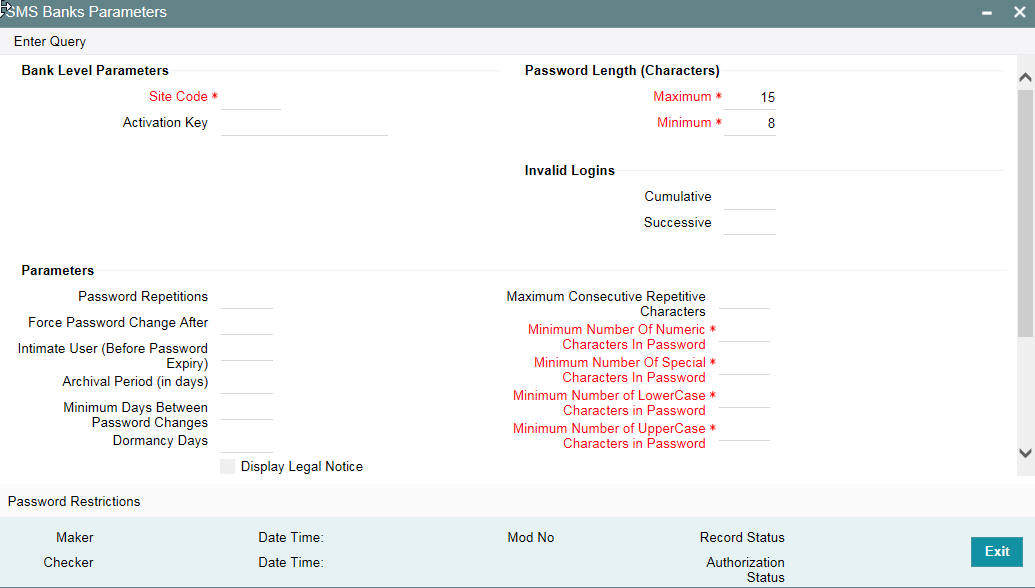
Certain parameters related to security management should be defined at the bank level. These parameters will apply to all the users of the system. Examples of such parameters are the number of invalid login attempts after which a user-id should be disabled, the maximum and minimum length for a password, the number of previous passwords that should not be used, the interval at which the password should be changed by every user, and so on..
You can invoke the ‘SMS Bank Parameters ’ screen by typing ‘SMDBANKP’ in the field at the top right corner of the Application tool bar and clicking on the adjoining arrow button.
Note
You can modify the Bank Parameters only when the Head Office branch is in the transaction input stage.
Specifying Invalid Logins
You can specify the allowable number of times an invalid login attempt is made by a user. Each user accesses the system through a unique User ID and password. While logging on to the system, if either the User Id or the Password is wrong, it amounts to an invalid login attempt.
You can stipulate the allowable number of cumulative invalid attempts made during the course of a day, as well as the allowable number of consecutive or successive invalid attempts made at a time. In either case, if the number of invalid attempts exceeds the stipulated number, the user ID is disabled.
By default, the allowable number of cumulative invalid attempts is six, and the allowable number of consecutive invalid attempts is three. You can change the default and specify the allowable number of attempts in each case. You can specify an allowable number for cumulative attempts between 6 and 99, and for consecutive (successive) attempts, between 3 and 5.
Once specified, you can change the allowable number of cumulative or consecutive login attempts, provided you do so only at a time when no users are logged in to the system.
When authentication of credentials is unsuccessful due to an incorrect user ID, then the user id will not be logged in the audit logs. In case the user id is correct and the password is wrong, the attempt is logged in the audit log and the successive and cumulative failure count is incremented. When the user id and password are correct, this is logged into the audit logs.
Specifying Parameter
Archival Period in Days
You can specify the period (in calendar days) for which the audit trail details of system security related activities (such as usage of the system by a user, activities by the system administrator, and so on.) should be maintained. The system defaults to a value of 30, which you can change.
You can specify an archival period that is greater than or equal to 7 calendar days.
Dormancy Days
Oracle FLEXCUBE allows you to automatically disable the profile of all the users who have not logged into the system for a pre-defined period of time. A user ID is considered dormant if the difference between the last login date and the current date is equal to or greater than the number of ‘Dormancy Days’ that you specify in this screen. This is reckoned in calendar days i.e. inclusive of holidays.
All dormant users (whose home branch is same as the current branch) are disabled during the end of day run at the current branch.
Password External
The password external is enabled if the PASSWORD_EXTERNAL is maintained as ‘Y’ in the property file. However, you cannot edit this check box.
If ‘Password External’ is enabled then you cannot modify the user and the password.
Specifying Warning Screen Text
Warning Screen Text
At your bank, you may require a warning message containing legal requirements and security policy to be displayed to all users before allowing them to login to Oracle FLEXCUBE.
You can specify the text (content) of such a message, in the Warning Screen Text field. This message will be displayed soon after a user launches the Oracle FLEXCUBE login screen. The user will be allowed to continue with the login process only after he clicks on the OK button on the message window.
You can modify the contents of the message only during the transaction input stage. The changes will come into effect during the next login by a user. The maximum size of the warning message is ‘1000’ characters.
Note
You will be allowed to specify the contents of the warning message only if the ‘Display Legal Notice’ option is enabled.
Specifying Screen Saver Details
You can lock the Oracle FLEXCUBE application screen if there is no activity for some time. You can log in back to the screen only if you specify the password of your user ID.
Screensaver Required
Check this box if screensaver is required.
Screensaver Interval Modifiable at User level
Check this box if you want to modify the screensaver interval at user level.
Screensaver Interval (in seconds)
Specify the time in seconds, after which the screen should be locked.
If both 'Screensaver required' and 'Screensaver Interval Modifiable at User level' are checked in bank level, then it will be visible at user level. Otherwise it will be hidden.
The system will default the screensaver time out from that maintained in bank parameter screen.Administrator who creates user will be allowed to change the same during user creation time.
The screensaver interval maintained at user level should be always be less than or equal to that maintained at bank level.
If screensaver interval is not specified in user level, the system will take the interval from bank parameter maintenance.
The screensaver interval can be specified by the user only if ‘Screensaver Modifiable at User Level’ is checked in the bank parameter maintenance.
Specifying Parameters for User Passwords
You can specify the following parameters that would govern user passwords:
Password Length (characters)
You can indicate the range of length (in terms of number of characters) of a user password. The number of characters in a user password is not allowed to exceed the maximum length, or fall below the minimum length that you specify here.
The minimum length defaults to 8, and the maximum length to 15. You can change the defaults and specify the required range. If you do so, you can specify a minimum length between 8 and 11 characters, and a maximum length between 12 and 30 characters.The minimum length that you specify must not exceed the maximum length that you have specified.
Force Password Change after
The password of a user can be made valid for a fixed period after which a password change should be forced. In the ‘Force Password Change after’ field, you can specify the number of calendar days for which the password should be valid. After the specified number of days has elapsed for the user’s password, it is no longer valid and a password change is forced.
The number of calendar days defined here will be applicable for a password change of any nature - either through the ‘Change Password’ function initiated by the user or a forced change initiated by the system.
The system defaults to a value of 30, which can be changed. If you change it, the number of days you specify here should be between 15 and 180 days, inclusive.
Password Repetitions
You can stipulate the number of previous passwords that cannot be set as the new current password, when a password change occurs.
The system defaults to a value of three (i.e., when a user changes the user password, the user’s previous three passwords cannot be set as the new password). You can change the default, and if you do, you can specify a number between one and five, inclusive.
For example, while setting up the Bank Level Parameters, you have given a value of ‘2’ in the Password Repetitions field. Suppose that a user of the system has the user ID and password for login.
If the user wants to change the password for the first time, he/she should invoke the Change Password screen. The user cannot choose his current password again, but has to enter a new password.
The user wants to change the password for the second time. As the last two passwords cannot be used (Password Repetitions = 2 in the Bank Level Parameters table), the user cannot enter either of the old password. He/she should enter a password which is different from the previous two password.
The number you specify here should be greater than or equal to 1 and less than or equal to 5.
Minimum Days between Password Changes
You can specify the minimum number of calendar days that must elapse between two password changes. After a user has changed the user password, it cannot be changed again until the minimum number of days you specify here have elapsed.
By default, the minimum days between password changes is set to One. However, you can modify this.
Note
- The minimum days between password changes should not be a value more than the days defined in the field ‘Force Password Change After’.
- It is recommended not to set the minimum days between password changes to ‘0’
Intimate Users (before password expiry)
The number of days for which a password is to be valid is defined in the ‘Force Password Change’ after field. You can also indicate the number of working days before password expiry that a warning is to be issued to the user. When the user logs into the system (the stipulated number of days before the expiry date of the password), a warning message will continue to be displayed till the password expires or till the user changes it.
By default, the value for this parameter is two (i.e., two days before password expiry). You can change the default if required. If you do, you can specify a number greater than zero and less than or equal to five.
For example, if the value specified in the Intimate User (Before Password Expiry) field is 2 and a user’s password is due to expire on January 31. The warning message is displayed on January 29 and January 30 whenever the user logs in.
Specifying Restrictions on User Passwords
You are allowed to place restrictions on the number of alpha and numeric characters that can be specified for a user password.
Maximum Consecutive Repetitive Characters
You can define the maximum number of allowable repetitive characters occurring consecutively, in a user password. This specification is validated whenever a user changes the user password, and is applicable for a password change of any nature - either through the ‘Change Password’ function initiated by the user or a forced change initiated by the system.
For example, the value specified in the Maximum Consecutive Repetitive Characters field is 3 and a user decides to change his password to STUDDDD123. The System will not allow this password change as the Maximum Repetitive Characters value has exceeded in the recurrence of ‘D’ in the password.
Minimum Number of Special Characters in Password
You can define minimum number of special characters allowed in a user password. The system validates these specifications only when a user chooses to change the password.
If you do not specify the limits, the following default values will be used:
- Minimum No of Special Characters = 1
Minimum Number of Numeric Characters in Password
Likewise, you can also define the minimum number of numeric characters allowed in a user password. The system validates the password only when a user chooses to change his password.
If you do not specify the limits, the following default values will be used:
- Minimum No of Numeric Characters = 1
Note
You can specify any number between 0 and 11 in each of these fields. However, you must ensure that the sum total of the minimum number of special characters and the minimum number of numeric characters is less than or equal to the ‘Maximum Password Length’.
Minimum Number of Lower Case Characters in Password
You can define the minimum number of lowercase characters allowed in a user password. The allowed lower case characters are from the US-ASCII character set only. The system validates these specifications only when a user chooses to change the password
If you do not specify the limits, the following default values will be used:
- Minimum No of Lower Case Characters = 1
- Maximum No of Numeric Characters = Maximum Password Length
Minimum Number of Upper Case Characters in Password
You can define the minimum number of upper case characters allowed in a user password. The allowed upper case characters are from the US-ASCII character set only. The system validates these specifications only when a user chooses to change the password.
If you do not specify the limits, the following default values will be used:
- Minimum No of Upper Case Characters = 1
- Maximum No of Numeric Characters = Maximum Password Length
2.2.2 Password Restriction Button
You can define a list of passwords that cannot be used by any user of the system in the bank. This list, called the Restrictive Passwords list can be defined at three levels:
- At the bank level (applicable to all the users of the system)
- At the user role level (applicable for all the users assigned the same role)
- At the user level (applicable for the user)
The list of Restrictive Passwords should typically contain those passwords the users are most likely to use: the name of your bank, city, country, etc. For a user role, it could contain names, or terms, that are commonly used in the department. At the user level, it could contain the names of loved ones, and so on. By disallowing users from using such common passwords, you can reduce the risk of somebody other than the user knowing the password.
Click ‘Password Restrictions’ button to define restricted passwords at the bank level that should not be used by any user of the bank.
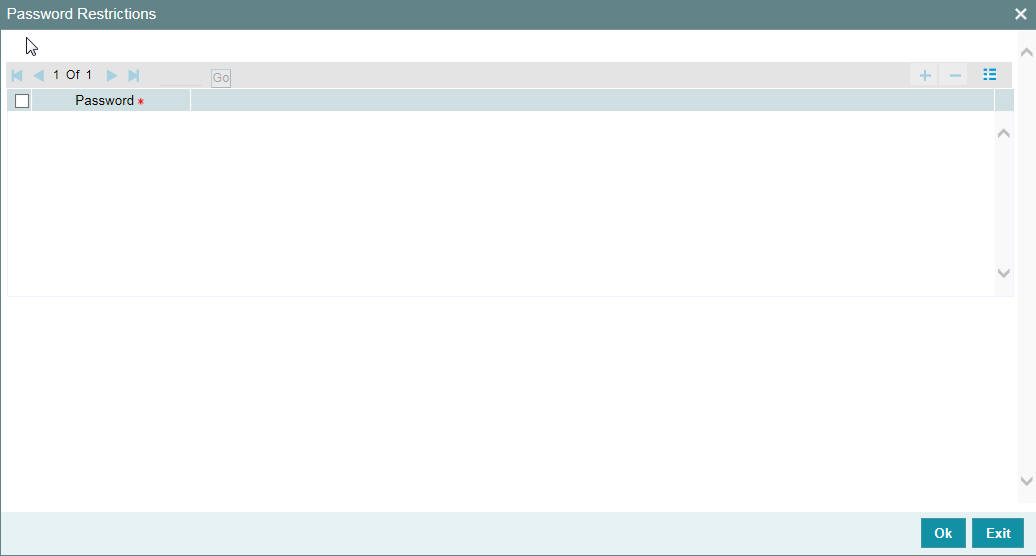
To add a password to the ‘Password’ list, click add icon. To select a record in the list use the check box beside it.
After you listed the restrictive passwords in the ‘Password’ list, click ‘Ok’ button to save the password restrictions.
2.3 Bank Restriction
You can restrict administrators of branches from performing operations related to specific functions in branches other than their home branch. These are referred to as ‘Branch Restrictions for Specific Applications’. You can also maintain a list of branches in which the administrator of a certain branch is allowed / restricted to perform specific operations. These other restrictions are referred to as ‘Common Branch Restrictions’.
According to the restrictions you maintain, the administrator of a specific branch is allowed to perform specific operations in the administrator’s home branch, as well as any branch found in the list of allowed branches.
According to your requirements, the implementers at your installation configure a list of the specific functions or applications for which you might wish to maintain such branch restrictions. You can maintain branch restrictions for each of these applications, as required.
To invoke the ‘Bank Restrictions’ screen, by typing ‘SMDBNKRT’ in the field at the top right corner of the Application tool bar and clicking on the adjoining arrow button.

2.4 User Details Modification in Bulk
This section contains the following topics:
2.4.1 Invoking the User Credentials Change Screen
You can change or reset user passwords in bulk if you have the system admin rights. After modification of the user list, click ‘Save’, The modified user list will be stored in a temporary table. The lists of users which are modified and mapped with a unique sequence number will not be available until the particular sequence number is authorized. When the particular sequence number is authorized those user details will be changed and updated.
You can invoke this screen by typing ‘SMDCHPWD’ in the field at the top right corner of the Application tool bar and clicking on the adjoining arrow button.
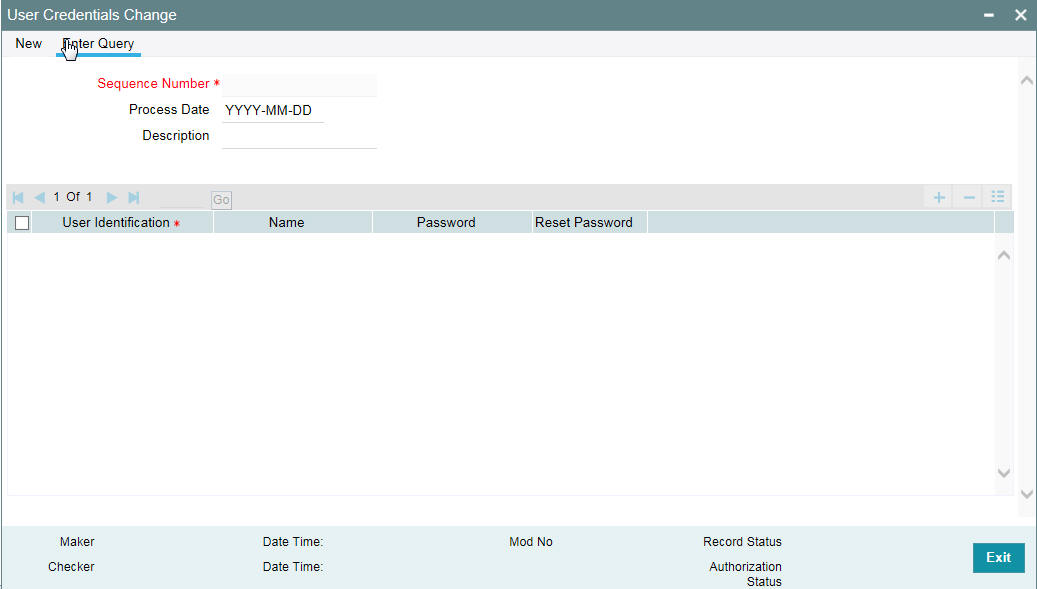
In this screen, the following information is to be provided.
Sequence Number
Click on ‘New’ icon to generate a new ‘Sequence Number’.
Process Date
Select a date by clicking on the calendar icon beside the field. This field is generally useful for querying purpose.
Description
Provide a description of what modification is being done on selected user ids.
User Id
Select the User Id to be changed from the option list provided.
Name
Name of the user specific to the selected user id will be displayed in this field.
Password
Password of the selected user id will be displayed here. This field will be editable only if the ‘Auto Generation Required’ option is not selected at the application level. If the ‘Auto Generation Required’ option is checked, the password will be auto generated by the application.
Reset Password
Select this checkbox to reset the password in case of user ids where password needs to be auto generated.
If the external password is enabled in the bank parameters, then the Password and Reset Password will be disabled for editing.
2.5 Common Branch Restrictions
This section contains the following topics:
2.5.1 Invoking the Branch Restriction Screen
To recall, in the Branch Restrictions maintenance, you have identified those applications and operations, for which you intend to maintain branch restrictions. Having done this, you must proceed to create the appropriate common branch restrictions for each branch administrator. You can maintain these restrictions in the common ‘Branch Restrictions’ screen.
You can invoke this screen by typing ‘SMDBRRST’ in the field at the top right corner of the Application tool bar and clicking on the adjoining arrow button.
This can be done only at the head office branch.
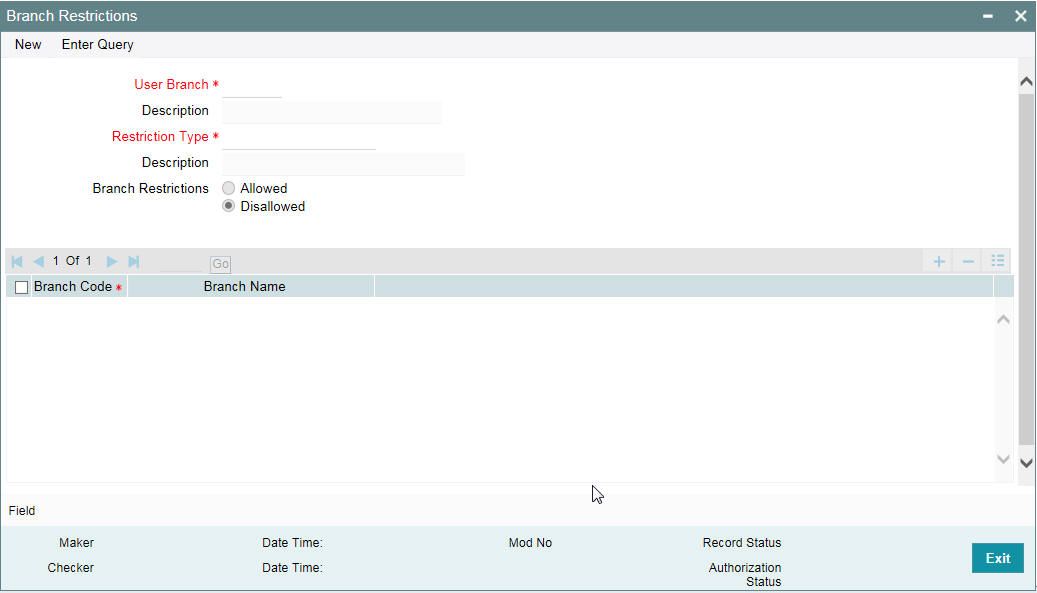
In this screen, you create common branch restrictions by specifying the information described below.
User Branch
You must first select the home branch of the administrator for which you are maintaining common branch restrictions, in the User Branch field.
Restriction Type
You must also indicate the specific application for which you wish to maintain common branch restrictions, for the administrator of the selected branch. You can only specify a restriction type that has been maintained in the SMS Branch Restriction Type maintenance.
Branch Restriction
You maintain common branch restrictions by creating a list of branches for each administrator, in which the administrator will either be allowed / disallowed access to perform operations related to the selected application (Restriction Type). You can maintain either an ‘allowed’ or a ‘disallowed’ restriction list.
The common branch restrictions you maintain are applicable for operations in the selected application (Restriction Type) in the home branch (User Branch) of the administrator and the list of allowed / disallowed branches.
For example, suppose that you have created the following common branch restrictions:
Home Branch |
Restriction Type |
Allowed Branches |
000 |
USRADMIN |
000, 001, 002, 005 |
001 |
USRADMIN |
001, 006 |
002 |
ICCFRULE |
002, 005, 006 |
005 |
EODOPERATN |
002, 005, 006 |
006 |
ICRATES |
004, 005, 006 |
The administrator of branch 000 can perform user administration for the branches 000, 001, 002 and 005, but not for 006. Similarly, the administrator of branch 002 can create ICCF rules in branches 002, 005 and 006, but not in branches 000 and 001.
When the administrator of branch 000 attempts to create a new user in the User Profile screen, the branches available in the Home Branch field in the screen will be 000, 001, 002 and 005.
Note
- The administrator of the head office branch is allowed to perform all operations in any of the other branches
- When a new branch is created, it must be manually added to the allowed / disallowed list, as required
- For those applications (Restriction Types) that you have specified in the SMS Branch Restriction Types maintenance, you must create the appropriate common branch restrictions in the Common Branch Restrictions screen. If no restrictions have been created in the Common Branch Restrictions screen for a specific branch for an application chosen in the SMS Branch Restriction Types maintenance, operations pertaining to the application will not be allowed from that branch.
- To allow the administrator of a certain branch to perform operations pertaining to a specific application for all branches, you can either maintain an allowed list with all branches selected or maintain a disallowed list with none of the branches selected.
2.6 Function Maintenance
This section contains the following topics:
- Section 2.6.1, "Invoking Function Description Maintenance Screen"
- Section 2.6.2, "Defining the Menu"
2.6.1 Invoking Function Description Maintenance Screen
Any function that is a part of the system should be defined through the ‘Function Description Maintenance’ screen before it is available for execution. Mostly, our professionals carry out this activity. You can modify the description of the function that appears in the Application Browser through this screen. You can invoke this screen by typing ‘SMDFNDSC’ in the field at the top right corner of the Application tool bar and clicking on the adjoining arrow button.
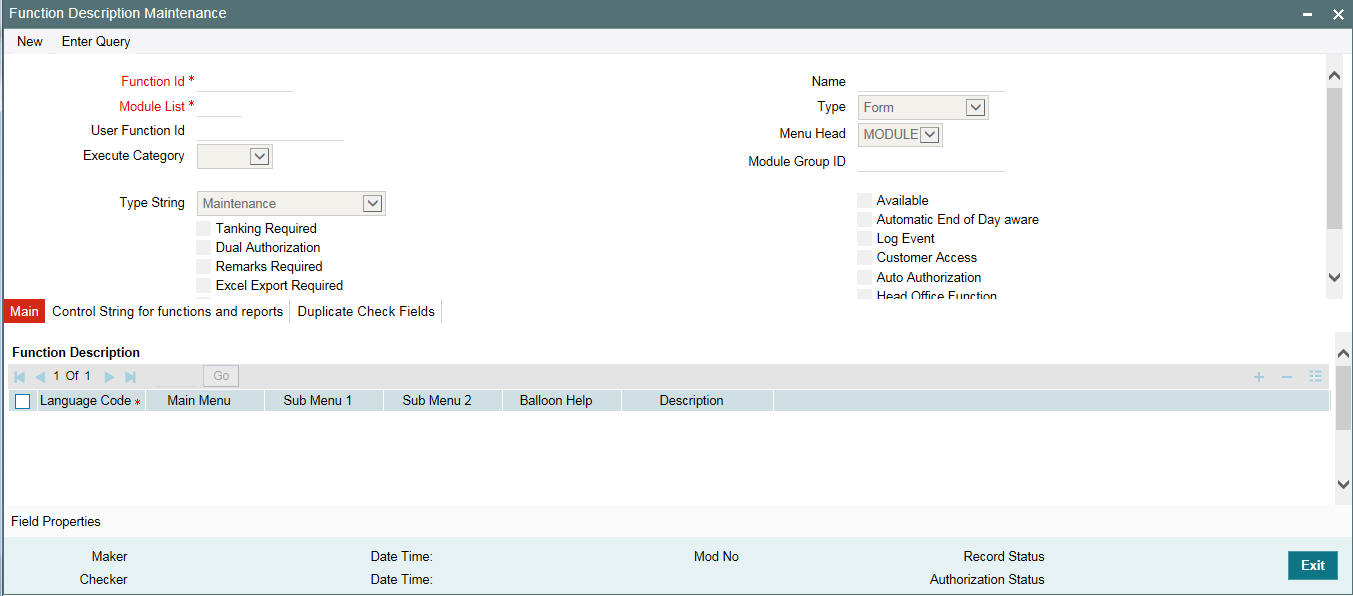
The following details are captured here:
Function Id
Select the Function Id for which you want to give access rights, from the option list.
Module List
Select the module to which the Function id has to be mapped. All Functions are mapped to specific modules.
Name
Specify the executable to open the Function Id.
Type
Select the type of Function Id here from the drop-down list. The options available are:
- Form
- Report
- Stored Procedure
Menu Head
Select the menu head from the drop-down list. The options available are:
- Module
- Report
You can then specify the rights to the different actions for the functions by checking against the action. These actions can be:
- Static Maintenance Functions
- New (Define a new record)
- Copy (Copy details of an existing record)
- Delete (Delete an existing record)
- Close (Close an existing record)
- Unlock (to amend an existing record)
- Reopen (Reopen an existing record)
- Print (Print the details of selected records)
- Authorize (Authorize any maintenance activity on a record)
- Contracts and on-line transaction processing
- Reverse (reverse an authorized contract)
- Rollover (to manually roll over an existing contract into a new contract)
- Confirm (to indicate the counterparty or broker confirmation of a contract)
- Liquidate (to manually liquidate a contract)
- Hold (to put a contract on hold)
- View (to see the details of the contract)
- Reports
- Generate (to generate reports)
- View (view the reports)
- Print (print the reports)
To delete the access rights given for a Function, select the Function ID and click delete icon.
Module Group ID
Specify the group ID of the module. Alternatively, you can select the module group ID from the option list. The list displays all valid module group IDs maintained in the system.
User Function ID
Specify a custom function id which can be used as an alias for the function id selected.
If you input this value in the field at the top right corner of the Application tool bar and click on the adjoining arrow button, system will check for the mapped function id and will launch that function id screen.
Execute Category
You can either select ‘Java’ or ‘PL/SQL’ from the drop-down list.
If you select ‘Java’, the ODT screen processing logic is done through application layer. If you select ‘PL/SQL’, then the ODT screen processing logic is done through database layer.
Tanking Required
Check this box to indicate that the maintenance records that are created or modified in the system, for the function Id specified here, need to be tanked till they get authorized.
The new or the modified records are written to the static tables only after authorization.
For more details on tanking of maintenance records refer the Core Services user manual.
Dual Authorization
Check this box to enable dual authorization for records that are created or modified in the system, for the specified function ID. If dual authorization is enabled then after creation or modification of a maintenance record, an intermediate verifier (First Authorizer) has to verify the record before the record can actually be authorized.
You cannot enable both ‘Dual Authorization’ and ‘Auto Authorization’ for a function ID at the same time, as they are mutually exclusive.
Remarks Required
Check this box to enable capturing of maker remarks on the actions like save, close and reopen of records belonging to the selected function id.
If this box is checked then system pops up a ‘Maker Remarks’ window and forces the maker to save remarks while saving, closing or reopening a record, The checker/authorizer can view the maker remarks entered and also enter remarks for each modification while authorizing the record.
Excel Export Required
Check this box to enable data export for the selected function id.
If this box is checked, system allows you to export data from records belonging to the selected function id into an excel file.
Multi Branch Access Required
Check this box to configure dual access framework for the function ID.
Note
- If the function level check box is unchecked, the transactions will be posted in the current branch.
- Dual access functionality is enabled only when the ‘Multi Branch Access’ check box is checked at ‘User ID’ and ‘Function ID’ levels.
Available
Check this box to make the Function accessible in the Oracle FLEXCUBE menu. The definition of the menu would be as specified in the Column at the bottom of the ‘Function Description Maintenance’ screen. If this box is unchecked, then this screen will not be accessible from the menu even if it is selected for the Role that is assigned to the user.
Automatic End Of Day aware
Check this box to consider the Function for an AEOD run.
Log Event
Check this box to enable the event log for a particular Function ID, Oracle FLEXCUBE maintains an extensive log of the activities of every user. This can later be used for reporting on the user activities.
Cust Access
Check this box to make the Function available to Users who are classified as Customers.
Auto authorization
As configured for your installation according to your requirement, automatic authorization is applicable for a pre-shipped list of functions. For those functions, you can revoke the applicability of automatic authorization, if required.
It is not possible to indicate the applicability of automatic authorization for any other functions than those pre-shipped functions configured for your installation.
Head Office Function
Check this box to enable the Function to be handled only by the users of the Head Office. Users of the other branches would be only allowed to view the Function.
2.6.2 Defining the Menu
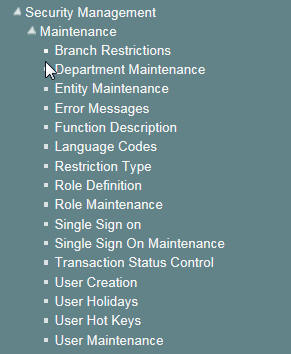
The Oracle FLEXCUBE menu can be defined in the Function Description section.
You can define menu appearance for a given Language. The Menu can only be drilled down up to two sub menu levels.
For example, for Language Code ‘ENG’ if the Main menu value is given as Security Management’, Sub Meu1 as ‘Maintenance’ and Sub Menu2 as ‘Function Description’ for Function id SMDFNDSC then on the Oracle FLEXCUBE menu it would appear as follows:
2.7 Defining Password Restriction
System allows you to create a list of words that the users, having a certain Role are likely to use as Passwords and on which restrictions can be placed. The list of Restrictive Passwords should contain those passwords that the users are most likely to use: the name of your bank, city, country, and so on. For a user role, it could contain names, or terms, that are commonly used in the department. At the user level, it could contain the names of loved ones, etc. By disallowing users from using such common passwords, you can reduce the risk of somebody other than the user knowing the password.
You can invoke this screen by typing ‘SSDROLDF’ in the field at the top right corner of the Application tool bar and clicking on the adjoining arrow button. Any user, who is attached to the role, cannot use a password in this list.

You can define only the functions that are applicable for the role and the list of Restrictive Passwords for a role. All the other attributes of a user profile should be defined when the user profile is being created.
2.8 User Role Maintenance
This section contains the following topics:
- Section 2.8.1, "Invoking Role Maintenance Screen"
- Section 2.8.2, "Defining Functions for a Role Profile"
- Section 2.8.3, "Process Stage Rights Button"
- Section 2.8.4, "Branch Restriction Button"
- Section 2.8.5, "Account Class Restriction Button"
- Section 2.8.6, "Rights Button"
- Section 2.8.7, "Copying the Role Profile of an Existing Role"
- Section 2.8.8, "Closing a Role Profile"
- Section 2.8.9, "Defining Roles for Oracle FLEXCUBE Branch Users"
2.8.1 Invoking Role Maintenance Screen
It is likely that users working in the same department at the same level of hierarchy need to have similar user profiles. In such cases, you can define a Role Profile that includes access rights to the functions that are common to a group of users. A user can be linked to a Role Profile by which you give the user access rights to all the functions in the Role Profile.
The roles defined will be effective only after dual authorization.
Role profiles are defined in the ‘Role Maintenance’ screen. You can invoke this screen by typing ‘SMDROLDF’ in the field at the top right corner of the Application tool bar and clicking on the adjoining arrow button.
The screen is as shown below:
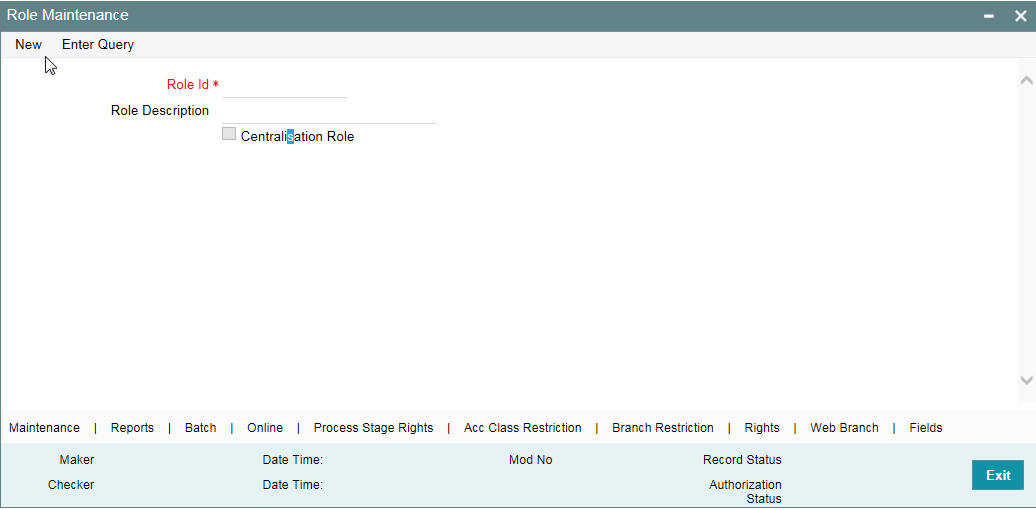
You can specify the following details
Role ID
Specify the role profile.
Role Description
Specify the role description.
Centralisation Role
Check this box to centralise the role.
2.8.2 Defining Functions for a Role Profile
After you have defined the basic attributes of a role profile (the Role Identification, Description) you should define the functions to which the role profile has access. Check centralization role to specify that the role is applicable for centralized users. The role is automatically associated with all branches accessible to you, if the multi branch operational parameter is enabled. The various functions in the system fall under different categories.
To assign a function to a role in the ‘Role Maintenance’ screen, you must click the function category button to which the function belongs.The function category buttons in the ‘Role Maintenance’ screen are as follows:
- Maintenance - Functions related to the maintenance of static tables
- Reports - Functions related to the generation of reports in the various modules
- Batch - Functions related to the automated operations (like automatic liquidation of contract, interest, and so on.)
- On Line - Functions related to contract processing
- Process Stage Rights - Functions related to workflow
- Acc Class Restriction –Functions related to restricting the role from using certain account classes
- Branch Restriction – Functions related to restricting the association of roles to certain branches.
- Rights – Functions related to giving necessary rights for perform various operations in respect of incoming and outgoing messages
- Web Branch – Functions related to the Teller Module for the role of branch users.
- Fields – Functions related to User Defined Fields.
The lower portion of the Role Description screen has buttons corresponding to each of the above function categories. Click on a button to view the corresponding screen.
2.8.3 Process Stage Rights Button
You can specify the function id to which the role profile is associated. Click ‘Process Stage Rights’ button in the ‘Role Maintenance’ screen. The ‘Process Stage Rights’ screen is opened.
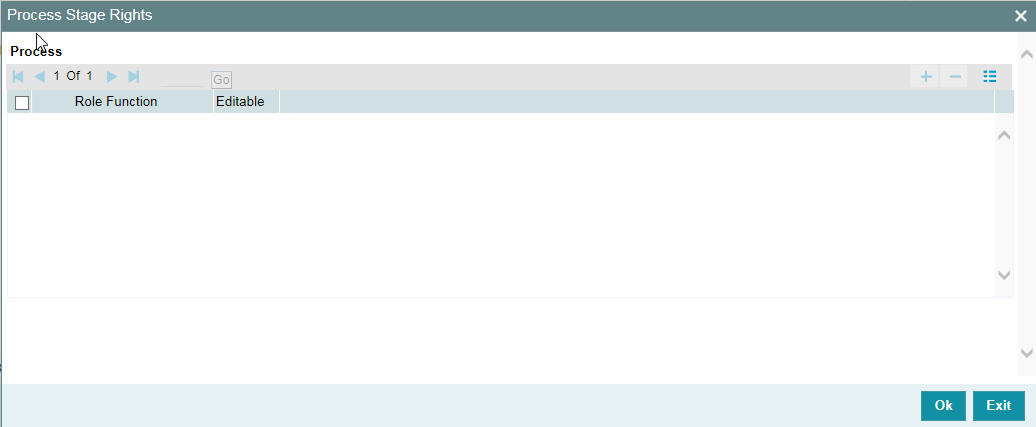
You can specify the following details:
Role Function
Specify the function id for which you need to provide access rights. Alternatively you can select the function id from the option list. The list displays all valid function ids maintained in the system for the selected category.
Editable
Check this box to provide editing access for the selected function id.
2.8.4 Branch Restriction Button
You can specify the branches to which the role profile is associated, and for which it is available. Click ‘Branch Restriction’ button in the ‘Role Maintenance’ screen. The ‘Branch Restriction’ screen is opened.
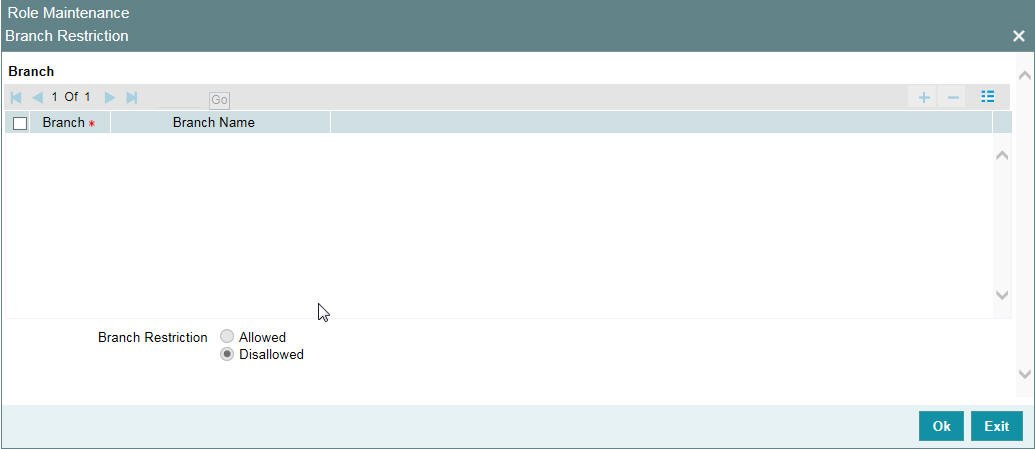
You can maintain a list of branches for which the role is either:
- Allowed
- Disallowed
Choose the ‘Allowed’ option to maintain an allowed list, and the ’Branch Restrictions’ list will show the list of allowed branches. Choose the ‘Disallowed’ option, to maintain a disallowed list of branches.
If you maintain an ‘Allowed’ list, then the role profile will be available only for those branches that you specify in the Branch Restrictions list. Similarly, if you maintain a ‘Disallowed’ list, then the role profile will not be available only for those branches that you specify in the Branch Restrictions list.
After choosing either the ‘Allowed’ or ‘Disallowed’ option, click add icon to add a record under the ‘Branch Restrictions’ list. Into each added record field, select the required branch from the adjoining option list.
2.8.5 Account Class Restriction Button
You can restrict the role from using certain account classes that are maintained in Oracle FLEXCUBE. Click ‘Acc Class Restriction’ to specify the account class restrictions. The ‘Account Class Restriction’ screen is displayed.
The screen is as shown below:
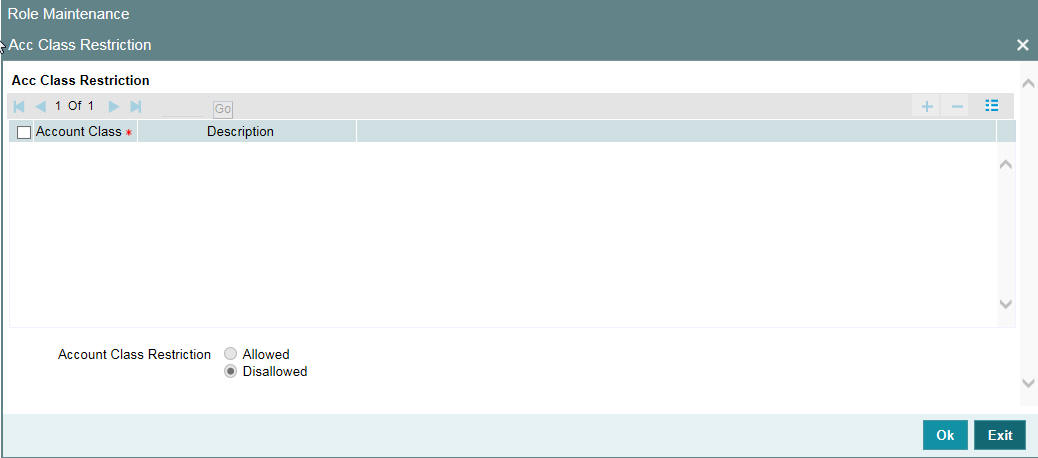
You can either allow or disallow association of the role with certain account classes. Subsequently, specify the account classes, which have to be restricted for the role.
After choosing the ‘Allowed’ or ‘Disallowed’ option, click add icon to add a record under the ‘Account Class Restrictions’ list. Into each added record’s field, select the required account class from the adjoining option list.
For more details about account class restriction, refer Account Class Restriction at "Example 2.8" on page 17 and "Example 2.11" on page 30 of this user manual.
2.8.6 Rights Button
For a role profile, you can specify the necessary rights to perform various operations in respect of incoming and outgoing messages, in the Messaging module of Oracle FLEXCUBE. You can grant specific permissions for operations on messages, as well as allot the messaging queues to which the role has access.
In the ‘Role Maintenance’ screen, click ‘Rights’ button to open the ‘Rights’ screen. Here you can grant the rights pertaining to the Messaging module, to the role.
The screen is as shown below:
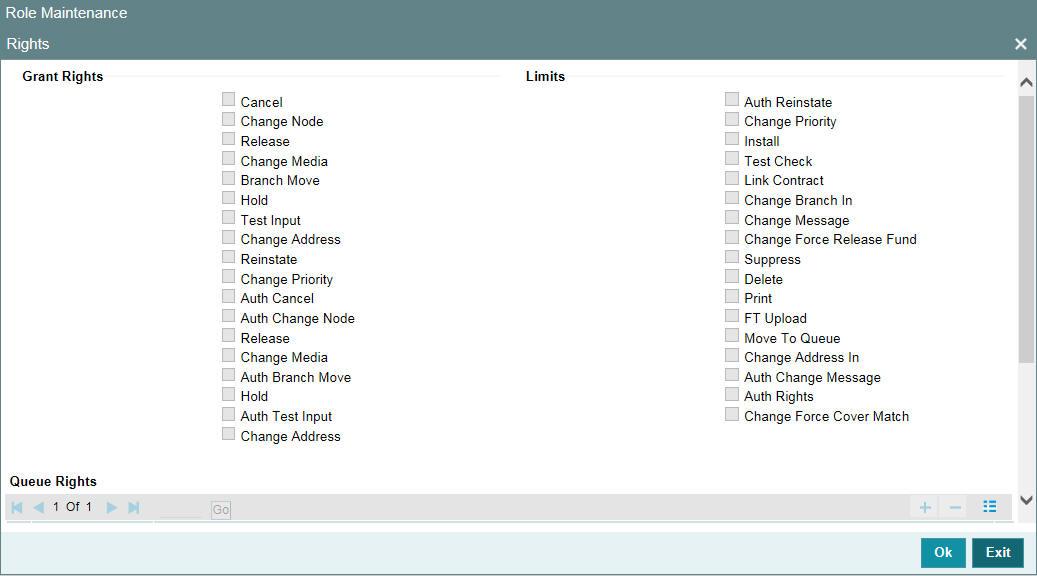
Check against the messaging operations for which you want to grant the permission.
Granting rights pertaining to operations on messages
You can grant permissions for the following operations on outgoing messages:
- Generating a message
- Printing a message
- Placing a message on hold
- Releasing a message on hold
- Cancelling a message
- Inserting a testword
- Reinstating a message
- Changing the priority of a message
- Request information relating to Status of a message
- Request cancellation of a message
- Changing the media through which a message is transmitted
- Changing the address to which a message is to be sent
- Moving a message to another branch
- Changing the node from which a message should be generated
- Authorization of any of the operations listed above, in respect of outgoing messages
You can grant permissions for the following operations on incoming messages:
- Printing a message
- Authorizing a testword
- Routing a message to a queue
- Associating a message with a contract
- Uploading incoming messages
- Making changes (edit) incoming messages. You can also grant permissions for changing the branch and the address in incoming messages
- Authorizing changes made to incoming messages
- ‘Force Release’ payment message transactions with ‘Funding Exception’ status and insufficient funds
- Suppressing a message
- Deleting a message
Granting each of these permissions in the Rights screen enables the user having this role to perform the corresponding functions in the Incoming and Outgoing Message Browsers. The appropriate button in the Browser, in each case, is enabled for the users associated with the role.
For details regarding each of these operations in respect of both incoming and outgoing messages, consult the Messaging System user manual
Apart from these functions, you can also grant permission for the cover matching function for incoming payment message transactions.
For details regarding uploading incoming payment transaction messages and cover matching for incoming payment transactions, refer the ‘Straight Through Processing’ chapter in the Funds Transfer user manual.
Grant Queues
You can grant the message queues to which the role has access, and in which users associated with the role can perform messaging operations according to the messaging rights you have assigned. The required queues can be selected and listed in the ‘Queues’ list under the ‘Grant Queues’ section.
2.8.7 Copying the Role Profile of an Existing Role
Often, you may have to create a Role Profile that closely resembles an existing one. In such a case, you can copy the existing profile on to the new one.
Select ‘Copy’ from the Actions menu in the Application toolbar or click copy icon. A list of existing role profiles will be displayed. Click on the one you want to copy. All the details of the profile except the Role ID will be copied and displayed. Enter a unique Role ID. You can change any of the details of the profile before saving it.
2.8.8 Closing a Role Profile
A Role Profile should be closed only if there are no users linked to it. Thus, before closing a role profile, you should modify each user profile attached to it and delete the link to the role.
Select ‘Close’ from the Actions menu in the Application toolbar to delete an existing role profile. If the role is linked to any user, a warning message will be displayed. This message will bring your attention to the fact that the user profile to which the role is linked will not be the same if the role profile is closed.
You will be prompted to confirm the closure. The Role Profile will be closed only if you confirm the Closure.
2.8.9 Defining Roles for Oracle FLEXCUBE Branch Users
You can define a role with functions typically performed by you from Oracle FLEXCUBE Branch system. You can maintain the role ‘Teller’ and select the branch function from the ‘Web branch’ button.
Note
- In case you wish to give access of the host functions to the ‘Teller’, you can attach role like ‘ALLROLES’ or other role with host functions in addition to the ‘Teller’ role. You can do this at the User Profile level for the branch you are allowed.
- The system generates notification on authorization of any modification, addition or deletion of role.
2.9 User Holidays Maintenance
This section contains the following topics:
- Section 2.9.1, "Invoking User Holiday Maintenance Screen"
- Section 2.9.2, "Viewing Holiday Summary Details"
2.9.1 Invoking User Holiday Maintenance Screen
You can block a specific user login for a certain time frame by defining holiday slots for that user profile. You can define holiday slots through the ‘User Holiday Maintenance’ screen. You can invoke this screen by typing ‘SMDUSHOL’ in the field at the top right corner of the Application tool bar and clicking on the adjoining arrow button.
The ‘User Holiday Maintenance’ screen is shown below.
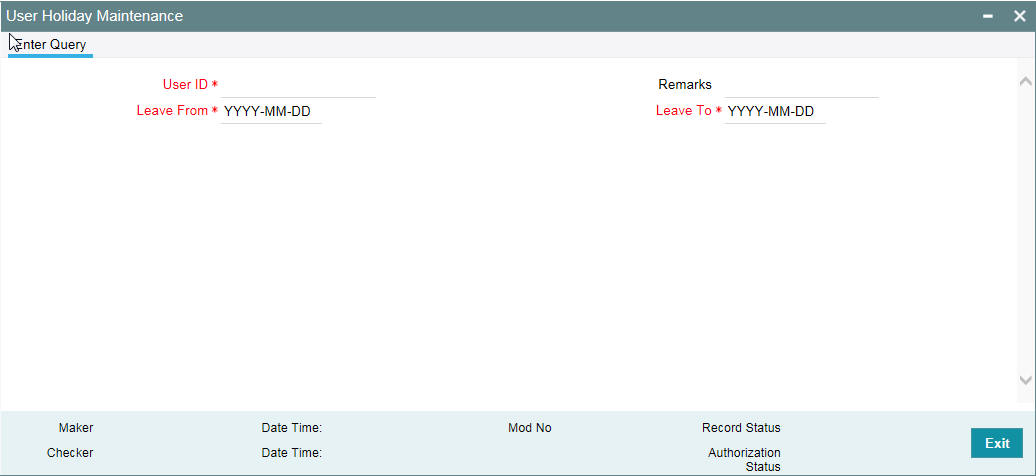
Specify the following details:
User ID
Specify the user ID of the user for whom you want to define the holiday period. The adjoining option list displays all the valid user profiles maintained in the system. You can select the appropriate one.
Leave From
Select the start date for the holiday period from the adjoining calendar.
Leave To
Select the end date for the holiday period from the adjoining calendar.
The user will not be allowed to log in within the specified holiday range.
Remarks
Specify a brief description for the holiday.
You can maintain multiple holiday slots for a user but the system will not allow including a specific day in more than one slot.
2.9.2 Viewing Holiday Summary Details
You can view holiday periods maintained for any user profile in the ‘Users Holiday’ screen. You can also invoke this screen by typing ‘SMSUSHOL’ in the field at the top right corner of the Application tool bar and clicking on the adjoining arrow button.
The screen is as shown below:
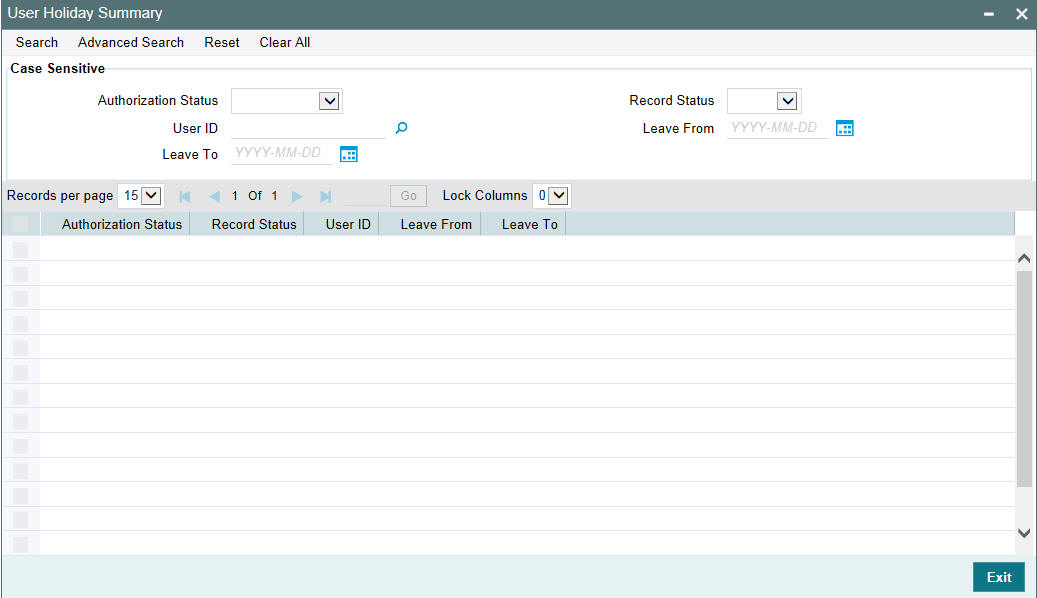
You can query for records based on the following criteria:
- Authorization Status
- Record Status
- User ID
- Leave From
- Leave To
Click ‘Search’ button. Based on your preferences, the system identifies all records satisfying the criteria and displays the following details for every record:
- Authorization Status
- Record Status
- User ID
- Leave From
- Leave To
2.10 User Creation
You can create an user through the ‘User Creation’ screen. You can invoke this screen by typing SSDUSRDF in the field at the top right corner of the Application tool bar and clicking on the adjoining arrow button. The ‘User Creation’ screen is shown below:
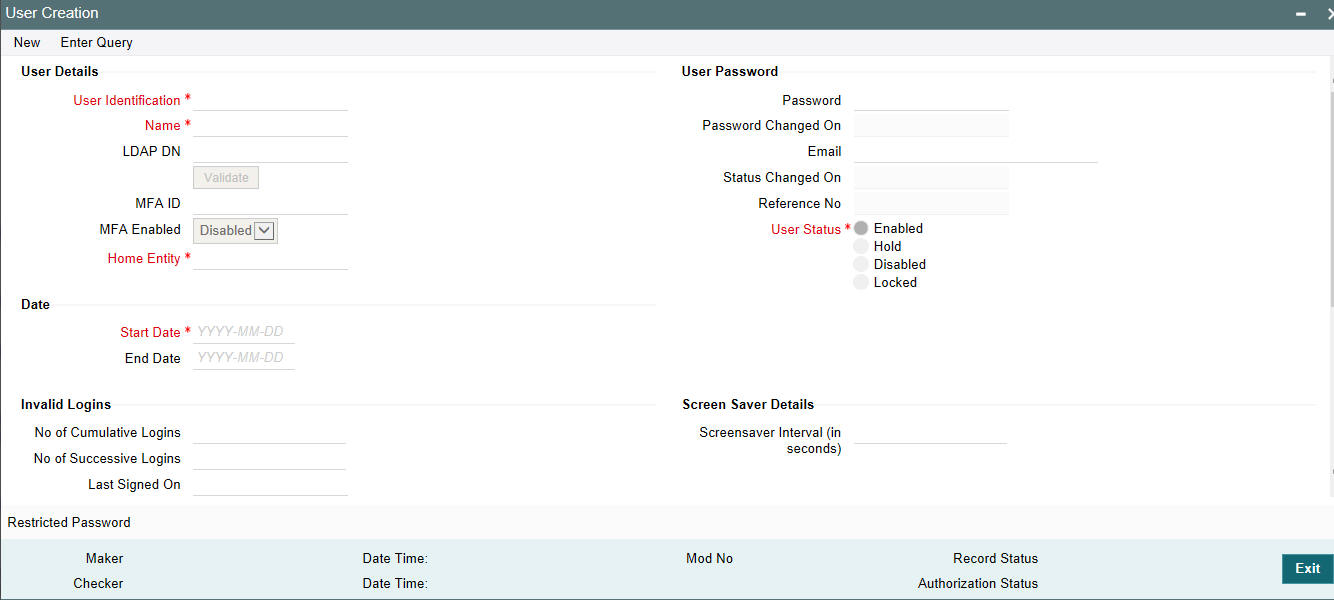
User Identification
Specify the User Id with which a User logs into Oracle FLEXCUBE. This User Id is unique across all branches. The minimum length of UserId must be six and the maximum number can be 12 characters.
Restrictions on User Profile Administration
A branch administrator can create, modify or delete user profiles only in the Head Office, Home branch of the administrator or in those branches that are allowed for the restriction type USRADMIN, in the Common Branch Restrictions.
When the administrator of a branch attempts to create a new user in the User Profile screen, the branches available in the Home Branch field in the screen are only those allowed branches maintained in the Common Branch Restrictions for restriction type ‘USERADMIN’.
For details about the Common Branch Restrictions, refer the section ‘Creating Common Branch Restrictions’ in this user manual.
For example, suppose that you have created the following branch restrictions:
Home Branch |
Restriction Type |
Allowed Branches |
000 |
USRADMIN |
000, 001, 002, 005 |
001 |
USRADMIN |
001, 006 |
The administrator of branch 000 can perform user administration for the branches 000, 001, 002 and 005, but not for 006.
When the administrator of branch 000 attempts to create a new user in the User Profile screen, the branches available in the Home Branch field in the screen will be 000, 001, 002 and 005.
User Status
Select the status of the user from the options available. The options available are:
- Enabled
- Hold
- Disabled
- Locked
For a user to be able to login to Oracle FLEXCUBE, his status should be set as ‘Enabled’. The field ‘Status Changed on’ displays the date and time when the Status of the User was last changed.
LDAP DN
The LDAP Details that have been maintained in the SSO screen have to be input here. Clicking on the ‘Validate’ button validates the LDAP details entered in the Single Sign On. The application will verify if only one user ID in FLEXCUBE UBS is mapped to the subject (DN) while authentication via SSO.
.

Multi-Factor Authentication
MFA Enabled
Select whether multi-factor authentication is enabled for the user ID or not from the drop-down list. The list displays the following values:
- Disabled - If you select this, multi factor authentication will be disabled for the user
- Enabled - If you select this, multi factor authentication will be enabled for the user. If MFA is enabled, then it is mandatory to specify the MFA ID
- Locked - The system updates the status to Locked in specific situation. For example, in case of cumulative invalid logins beyond the permissible attempts, the system may change the MFA status to ‘Locked’. This limit is usually defined in the external system that validates the MFA credentials.
MFA ID
Specify the multi-factor user ID assigned to the user. This field is enabled if you select ‘Enabled’ option in the MFA Enabled field.
For more information on multi factor authentication, refer to the section ‘Multi-Factor Authentication Limits’ in this User Manual.
User Password
Password
Specify the Users Password here. This is a Hidden Field. The Password set must not be a restricted word. It should also be governed by the parameters set in the SMS Bank Parameters table, like Maximum and Minimum length, Number of Alphabetic and Numeric characters etc.
Note
If the application level parameter which indicates the auto generation of the password is required or not is set to Y (Yes), then this field will be disabled and the system will create a random password in accordance with the parameters maintained at the level of the bank. The new password will be send to the respective user via mail.
Password Changed On
The date when the password was last changed gets displayed here.
Specify a valid Email id at the time of user creation. All system generated passwords shall be communicated to the user via this mail id.
Start Date
Specify the date from which the User is valid. The Branch date gets defaulted if no other value is specified.
End Date
Specify the End Date upto which the User is valid. By default the user does not have an End Date associated, unless otherwise specified.
Invalid Logins
Cumulative
The number of Cumulative Invalid Login attempts allowed for a User before the User status gets Disabled is specified in the ‘SMS Bank Parameters’ screen. The actual attempts that a user makes when he logs into Oracle FLEXCUBE get displayed here.
Successive
The number of Successive Invalid Login attempts allowed for a User before the User status gets Disabled is specified in the ‘SMS Bank Parameters’ screen. The actual attempts that a user makes while he logs into Oracle FLEXCUBE get displayed here.
Last Signed On
This is a display field which shows the Date and Time of the Users last Login.
Screen Saver Details
Screensaver Interval (in seconds)
The system defaults the screen saver interval based on the screen saver details maintained in the bank parameters screen.
2.10.1 Restricted Passwords Button
You can maintain a list of passwords that the user is most likely to use. For example, a user may tend to use the names of persons, bank, department, etc. as a password, as these are easy to remember. This might be a security risk as it will be easy for another person to guess a password. To prevent this, you can maintain a list of passwords that the user should not use. This list of restrictive passwords will be checked before a password is accepted when the user is changing passwords. If the password entered by the user exists in the list, it will not be accepted.
To specify a list of passwords that the user is not allowed to use, click ‘Restricted Passwords’ button in the User Profile definition screen.

The user for whom you are defining the restrictive passwords cannot use restrictive passwords defined in the Bank Level Parameters screen and the Role Profile screen.
2.10.2 Copying the User Profile of an Existing User
Often, you may have to create a user profile that closely resembles an existing one. In such a case, you can copy the existing profile on to the new one.
Select ‘Copy’ from the Actions menu in the Application toolbar. A list of existing user profiles will be displayed. Click on the one you want to copy. All the details of the profile except the User ID and the password will be copied and displayed for the new user. Enter a unique User ID and give a password. You can change any of the details of the profile before saving it.
2.10.3 Deleting a User Profile
Enter the User ID. The details defined will be displayed. Select ‘Delete’ from the Actions menu in the Application toolbar to delete an existing user profile. Only users that have not been authorized can be deleted by the creator. You will be prompted to confirm the deletion. The user profile will be deleted only if you confirm the deletion.
2.10.4 Closing a User Profile
Users Ids that are no longer usable can be closed. For Closing, Enter the User ID. The details defined will be displayed. Select ‘Close’ from the Actions menu in the Application toolbar to close an existing user profile. The profile can be closed only if the User is currently not logged on to the system.
You will be prompted to confirm the Closure. The user profile will be closure only if you confirm the Closure.
2.11 User Profile Entitlements
This section consists of the following topics:
- Section 2.11.1, "Invoking User Maintenance Screen"
- Section 2.11.2, "Additional Details tab"
- Section 2.11.3, "Roles Button"
- Section 2.11.4, "Rights Button"
- Section 2.11.5, "Functions Button"
- Section 2.11.6, "Account Classes Button"
- Section 2.11.7, "Branches Button"
- Section 2.11.8, "Products Button"
- Section 2.11.9, "Disallowed Functions Button"
- Section 2.11.10, "Centralized Role Button"
- Section 2.11.11, "Dashboard Mapping Button"
- Section 2.11.12, "Access Group Restriction Button"
2.11.1 Invoking User Maintenance Screen
A User Profile defines the activities that a user can carry out on the system. It also contains the user ID, the name through which the user will access the system and the password. The user profiles will be effective only after dual authorization.
You can create User Profiles through the ‘User Maintenance’ screen. You can invoke this screen by typing SMDUSRDF in the field at the top right corner of the Application tool bar and clicking on the adjoining arrow button. The ‘User Entitlements’ screen is shown below.
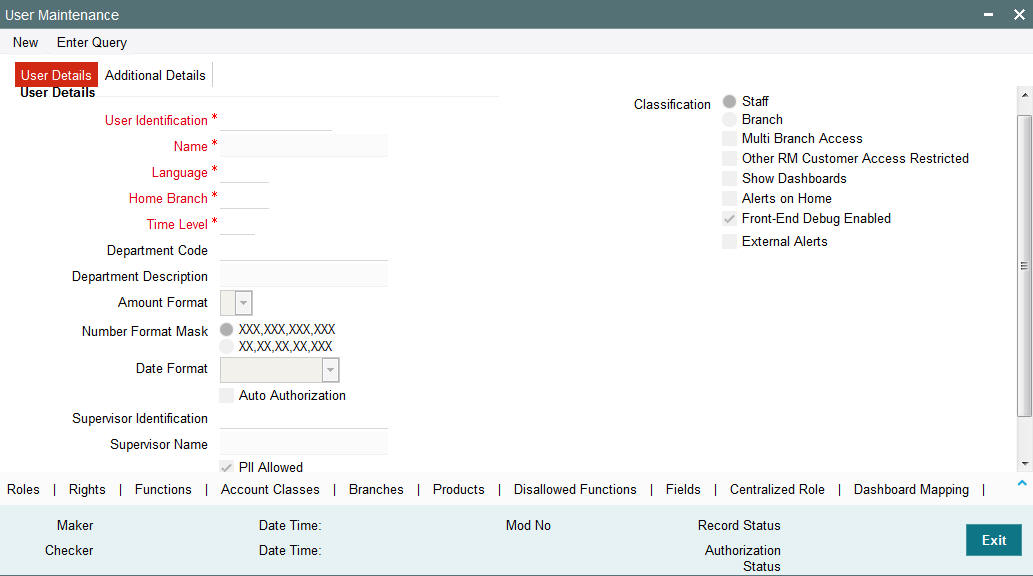
Specify the following details:
User Identification
Specify the user identification. This ID identifies the user whose profile you are defining. In a user ID, you can use alphabets in upper or lower case, numbers 0 to 9 and _ (underscore).
The number of characters in a User ID should be greater than or equal to six and less than 12.
Name
Specify the name of the user.
Classification
Staff
All internal users of the bank can be classified as Staff. You can include any of the functions available in the system in the user profile.
Branch
This indicates a branch user. This is used to identify a branch user and branch specific user maintenance for Branch user.
Multi Branch Access Required
Check this box if you need to configure dual access framework for the specified User ID.
Other RM Customer Access Restricted
You can restrict the users’ access to the transactions of the customers who are assigned to a different relationship manager. Check this box to restrict the user from viewing, creating, authorizing or amending the transactions of the customers who are not assigned to him/her. The customers not assigned to the RM include the customers assigned to other relationship managers as well as those who are not assigned to any relationship manager.
If you do not check this box, the user can view, create, authorize and amend the transactions of the customers assigned to other relationship managers.
This is applicable to the users created with their role as ‘Relationship Manager’.
Show Dashboards
Check this box if you want the system to display all the Dashboards assigned to your ‘User Role, on the landing page.
Alerts on Home
Check this box if you want the system to display the Alerts, relevant to you, on the landing page.
Front-End Debug Enabled
Check this box to enable the debug window for a user.
Auto Authorization
To indicate that a user is allowed to perform automatic authorization, you must enable the ‘Auto Authorize’ option in the User Maintenance screen.
If automatic authorization has been enabled for a function, branch and user profile, and such a user has rights for both input and authorize operations, any record maintained by such a user in the corresponding function (maintenance or online) screens will be automatically authorized when the Save operation is performed.
Consider the following example.
You have enabled automatic authorization for the following branches in the Branch Parameters:
Branch |
Automatic Authorization Enabled |
000 |
Yes |
001 |
No |
002 |
Yes |
In the Function Description maintenance, automatic authorization has been enabled for the following functions:
Function |
Automatic Authorization Enabled |
Customer Information Maintenance |
Yes |
LD Contract Online |
Yes |
Customer Account Maintenance |
Yes |
FT Contract Online |
No |
You have maintained automatic authorization rights for specific users in the User Profile maintenance as shown below:
User |
Automatic Authorization Enabled |
Ronald |
Yes |
George |
Yes |
Smith |
No |
You have also maintained transaction access rights for the users as shown below:
User |
Branch |
Function |
Input Access |
Authorize Access |
Ronald |
000 |
Customer Information Maintenance |
Yes |
Yes |
Ronald |
001 |
Customer Information Maintenance |
Yes |
Yes |
Ronald |
000 |
FT Contract Online |
Yes |
Yes |
Ronald |
000 |
Customer Account Maintenance |
Yes |
No |
George |
001 |
LD Contract Online |
Yes |
Yes |
George |
000 |
Customer Account Maintenance |
Yes |
Yes |
Smith |
000 |
LD Contract Online |
Yes |
Yes |
Smith |
000 |
Customer Account Maintenance |
Yes |
Yes |
According to your maintenance, automatic authorization would be performed as shown below:
User |
Branch |
Function |
Automatic Authorization on Save? |
Reason |
Ronald |
000 |
Customer Information Maintenance |
Yes |
Input and Authorize rights enabled for the user, as well as automatic authorization rights enabled for the user, branch and function. |
Ronald |
001 |
Customer Information Maintenance |
No |
Automatic authorization not enabled for branch 001 |
Ronald |
000 |
FT Contract Online |
No |
Automatic authorization not enabled for the FT Contract Online function |
Ronald |
000 |
Customer Account Maintenance |
No |
Authorization access not enabled for the user |
George |
001 |
LD Contract Online |
No |
Automatic authorization not enabled for branch 001 |
George |
000 |
Customer Account Maintenance |
Yes |
Input and Authorize rights enabled for the user, as well as automatic authorization rights enabled for the user, branch and function. The user can also authorize any maintenance done by the user Ronald in this function.. |
Smith |
000 |
LD Contract Online |
No |
Authorization access not enabled for the user |
- For more details about automatic authorization, consult the Common Procedures user manual.
Language
Select the Language in which the Users screen have to be defined, from the option list. The Language Codes maintained through the ‘Language codes’ screen will be available for selection.
Home Branch
By default the Current Branch is displayed here. All users have to be attached to a branch.
Time Level
Time level is defaulted to nine here. You can specify the time level you need to maintain at the User level, if needed. You can specify values between zero and nine.
Time level can be specified at two levels - at the Branch level and at the User level.
If you need to login, then the time level maintained at your User Profile should be greater than or equal to that maintained at the Branch level.
Time levels are maintained to prevent you from logging into the application when the system is processing EOC batch. Before EOC Operations, the time level of the system is increased, so that it is higher than that maintained at the User level. However, if you are not logged out when the Time level is raised to the one higher than yours, then you can continue to use the application.
You can modify time level at user profile level when branch is at Transaction Input stage.
Note
After modifying the time level value to the value you need to maintain, move the cursor to any other field and then click the save icon.
Department Code
Specify the department code. The adjoining option list displays a list of all the valid department codes maintain in the system. You can choose the appropriate one.
Department Description
The system displays the Department description.
Number Format Mask
Select the format of mask number either in Million or in /Lakh from the following options:
- XXX,XXX,XXX,XXX
- XX,XX,XX,XX,XXX
Supervisor Identification
Specify the ID of the supervisor of the user. The option list displays all valid supervisor identifications maintained in the system. Choose the appropriate one.
In case of relationship managers, you can also use this field to define the RM hierarchy. For defining RM hierarchy in this method, you need to select the RM user who is one level up in the hierarchical order as the supervisor.
If the user is the superior in the RM hierarchical order, you can specify his/her own user ID as supervisor ID. The supervisor ID option list also shows the user ID of the user being maintained. This means, you can define an RM user as his/her own supervisor.
Note
The RM hierarchy defined in this method is enabled only if the checkbox ‘RM Hierarchy Setup Required’ is not checked in ‘Bank Parameters Maintenance’ screen.
Supervisor Name
Based on the supervisor ID selected, the system displays the name of the supervisor.
Start Date
Specify the date from which the User is valid. The default date appears if date is not specified.
End Date
Specify the end date up to which the User is valid. By default, there is no end date unless specified.
Number Format Mask
Select the format of mask number either in Million or in /Lakh from the following options:
- XXX,XXX,XXX,XXX
- XX,XX,XX,XX,XXX
Front-End Debug Enabled
Check this box to enable the debug window for a user.
PII Allowed
Check this box to allow the users to view Personally Identifiable Information.
2.11.2 Additional Details tab
Customer Number
For User Profiles of your choice, Oracle FLEXCUBE allows you to restrict the viewing and printing of Balances (in case of accounts) and financial details of contracts involving customers who also happen to be employees of your bank. In order to enable this option, while creating the User Profile of the employee you can link the customer number (CIF ID) of the employee with the User ID.
Tax Identifier
Specify the tax identifier code of the customer to monitor Anti Money Laundering activities. A user with restricted access will not be able to view/print details of contracts involving the product in all Contract Functions and Contract Summary screens for the following modules:
- Corporate Teller
- Clearing
- Funds Transfer
- Payment and Collections
- The Contract Online and Cycle Due screen of SI
- Foreign Exchange (online and payment)
- The Contract Online, Value Dated Amendments and Payments Input screens of MM
- The Contract Online put, Value Dated Amendments, Payments Input and Loans
Note
The view restriction is not applicable to the transaction or contract screens in which the other staff accounts are involved.
The other functions to which the user will have restrictive rights is as follows:
- Ad-hoc loan statement generation
- Queries – Accounting Entries
- Customer Based Information Retrieval
- Limits Overrides showing account balances
- Message Browser
- Payments and Collections Message browser
Note
In the Payments and Collection module the restriction is applicable to product categories and not products.
If a balance exception has occurred, the balances are not displayed for the restricted user but will be replaced by **.
Note
The restricted users will be able to:
- View/print financial information pertaining to contracts they have initiated or view/print balances pertaining to their own accounts
- Post transactions to the staff accounts or create contracts for staff members, even if the user is restricted to view/print balances / contract information pertaining to other colleagues.
- In case of balance exception during transaction posting, the balance will not be displayed. The Exception Message will only state that the account will be ‘overdrawn’ on account of the transaction.
- Post transactions and view transaction information until the contract is authorized. After authorization, such users cannot access the contract
The only exception is that when the user has captured a contract, the user will be allowed to view the details till the contract gets authorized.
MFI User
Select the ‘MFi User’ check box to indicate that the user is a Microfinance (Account Officer) user. By default, the system leaves this check box deselected to indicate that all users would be normal users.
Note
An account officer can book loan accounts for customers who are linked to him/her.
For more details, refer to ‘Linking Customers to Account Officers’ in the Microfinance User Manual.
F10 Access Required
Select this check box to access ‘Customer Signature and Image View’ (SVDIMGVW) screen.
F11 Access Required
Select this check box to access ‘Customer Account Balance View (STDCUBAL) screen.
F12 Access Required
Select this check box to access ‘Customer Signature and Image View’ (SVDIMGVW) screen.
2.11.3 Roles Button
A Role is always associated to a User for a specific Branch. The values set at the Role level are directly inherited by the User for that branch, like Functions Ids, Account Class and Branch Restrictions, Input and Authorization Limits, and so on.
To attach the user profile you are defining to a role, you must use the ‘Roles’ screen. Click ‘Roles’ button and the ‘Roles’ screen will be displayed. The roles to be attached to the user profile can be listed under ‘Roles’ list.
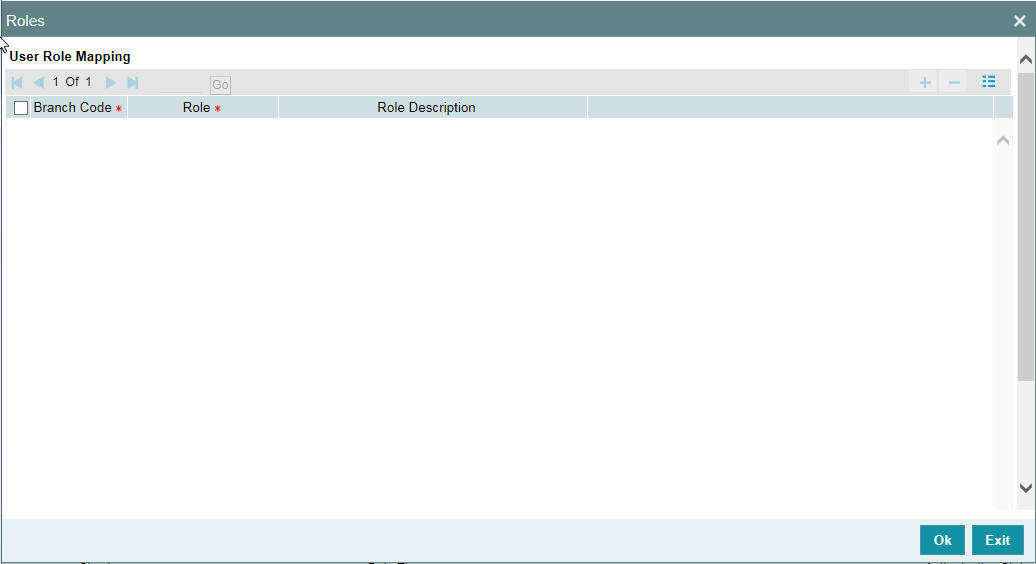
Specify the following details:
Branch Code
Specify the branch code assigned to the user role. The option list displays all the valid branch codes maintained in the system. You can choose the appropriate one.
Role
Specify the role assigned to the user for the selected branch. The option list displays all valid roles maintained in the system. Choose the appropriate one.
Note
You can assign the role of Relationship Manager to a user by selecting ‘RM-ROLE’.
Role Description
Based on the role selected, the system displays the role description.
Click add icon to add a record under the ‘Roles’ list. Specify the above details to attach more roles to the user.
To delete a role(s) that has been attached to a user profile, check the box beside it and click delete icon.
2.11.4 Rights Button
A user should have the necessary rights to perform various operations in respect of incoming and outgoing messages, in the Messaging module of Oracle FLEXCUBE. You can grant specific permissions for operations on messages, as well as allot the messaging queues to which the user has access. In the User Maintenance screen, click ‘Rights’ button to grant these rights pertaining to the Messaging module, to the user.
The screen is as shown below:
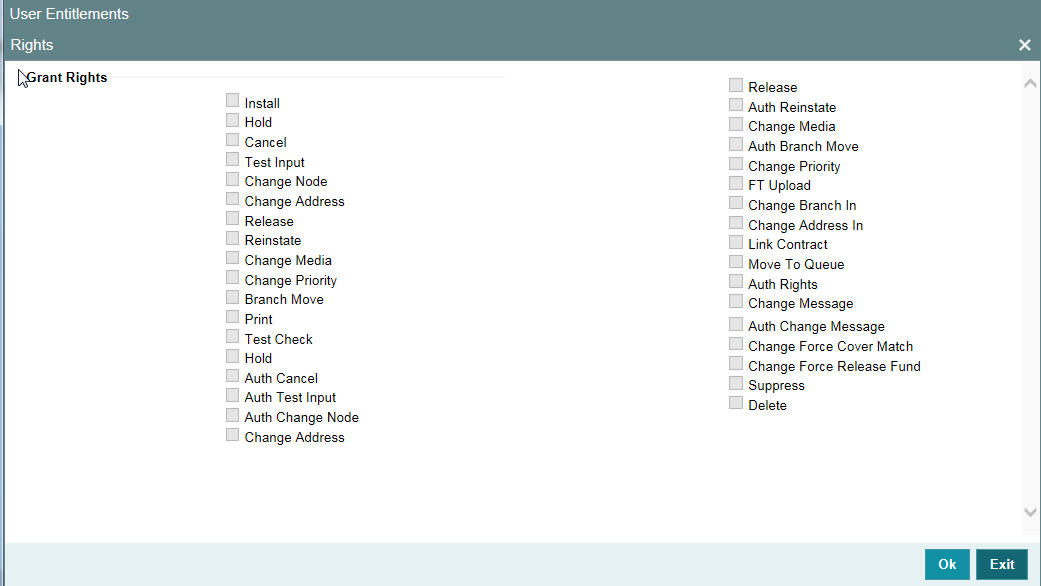
Check against the messaging operations for which you want to grant the permission.
Granting rights pertaining to operations on messages
You can grant permissions for the following operations on outgoing messages:
- Generating a message
- Printing a message
- Placing a message on hold
- Releasing a message on hold
- Canceling a message
- Inserting a test word
- Reinstating a message
- Changing the priority of a message
- Requesting status of a message
- Requesting cancellation of a message
- Changing the media through which a message is transmitted
- Changing the address to which a message is to be sent
- Moving a message to another branch
- Changing the node from which a message should be generated
- Authorization of any of the operations listed above, in respect of outgoing messages
You can grant permissions for the following operations on incoming messages:
- Printing a message
- Authorizing a test word
- Routing a message to a queue
- Associating a message with a contract
- Uploading incoming messages
- Making changes (edit) incoming messages. You can also grant permissions for changing the branch and the address in incoming messages
- Authorizing changes made to incoming
- ‘Force Release’ payment message transactions with ‘Funding Exception’ status and insufficient funds
- Suppressing a message
- Deleting a message
Granting each of these permissions in the Rights screen enables the user to perform the corresponding functions in the Incoming and Outgoing Message Browsers. The appropriate button in the Browser, in each case, is enabled for the user.
For details regarding each of these operations in respect of both incoming and outgoing messages, consult the Messaging System user manual
Apart from these functions, you can also grant permission for the cover matching function for incoming payment message transactions.
For details regarding uploading incoming payment transaction messages and cover matching for incoming payment transactions, refer the Straight Through Processing chapter in the Funds Transfer user manual.
Queues
You can allot the message queues to which the user has access, and in which the user can perform messaging operations according to the messaging rights you have assigned. The required queues can be selected and listed in the ‘Queues’ list under the ‘Grant Queues’ section.
2.11.5 Functions Button
In addition to attaching a user profile to a role, you can give rights to individual functions. For a user profile to which no role is attached, you can give access to specific functions. If you have:
- Attached one or more roles to a user profile
- You have given access to individual functions to a profile to which roles are attached
The rights for Function IDs that figure in both the role and user specific functions will be applied as explained in the following example.
Example
The role profile FXDP1 has access to New, Copy, Delete, Close, Reopen, Unlock and Print for the Forward Rates table.
You attach the user profile of Tanya to the role FXDP1. While allotting rights to individual functions for Tanya, you give rights to New, Copy, Delete and Close for the Forward Rates table. The role has access rights to Reopen, Unlock and Print in addition to these. In such a case, the user profile of Tanya will have rights to only the functions to which rights are given at the user profile level (that is, New, Copy, Delete and Close) even if the role FXDP1 has rights to other functions.
To give access to functions for the user profile you are defining, click ‘Functions’ button in the ‘User Profile Definition’ screen. The ‘Functions’ screen will be displayed as shown below:
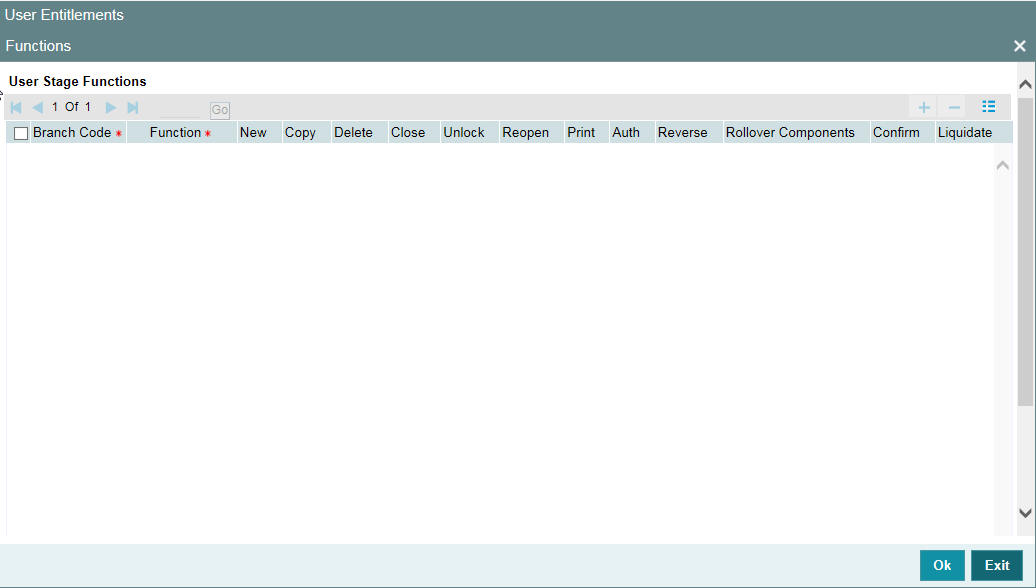
The various functions in the system fall under different categories.
To assign a function to a user profile in the User Functions screen, you must select the tab of the function category to which the function belongs. The function categories and their respective tab in the User Functions screen are as follows:
Category (Tab) |
Description |
Maintenance |
Functions relating to the maintenance of static tables. |
On-line |
Functions relating to contract processing. |
Batch |
Functions relating to the automated operations (like automatic liquidation of contract, interest, etc.) |
Reports |
Functions relating to the generation of reports in the various modules. |
Process |
Functions relating to access rights for the tasks under a process |
Click on the corresponding category tab to associate the required functions as described below:
To add a function, click add icon. At Function Identification, you should select the function for which you want to give rights. The adjoining option list displays a list of Function IDs belonging to the category along with their descriptions. From this list you can pick up the function for which you want to give access rights by double clicking on it when it is highlighted. You can then specify the rights to the different actions for the functions by checking against the action.
2.11.6 Account Classes Button
You can restrict the user from using certain account classes that are maintained in Oracle FLEXCUBE in two ways.
- You can map an user role which has an account class restriction at User Role level, for an allowed branch in the Roles button at User Profile level.
Restricted account classes can be viewed in ‘Account Class’ option list at User Role level and not at User Profile level.
- Select account classes from the ‘Account Class’ option
list and then select an option from the following at User Profile level:
- Allowed–Select to allow selected account classes and disallow unselected account classes.
- Disallow–Select to disallow selected account classes and allow unselected account classes.
In both the cases, user can query customer accounts belonging to restricted account class. However, the system will not allow creation and modification of an account under restricted account class.
Click ‘Account Classes’ button to specify such account class restrictions.
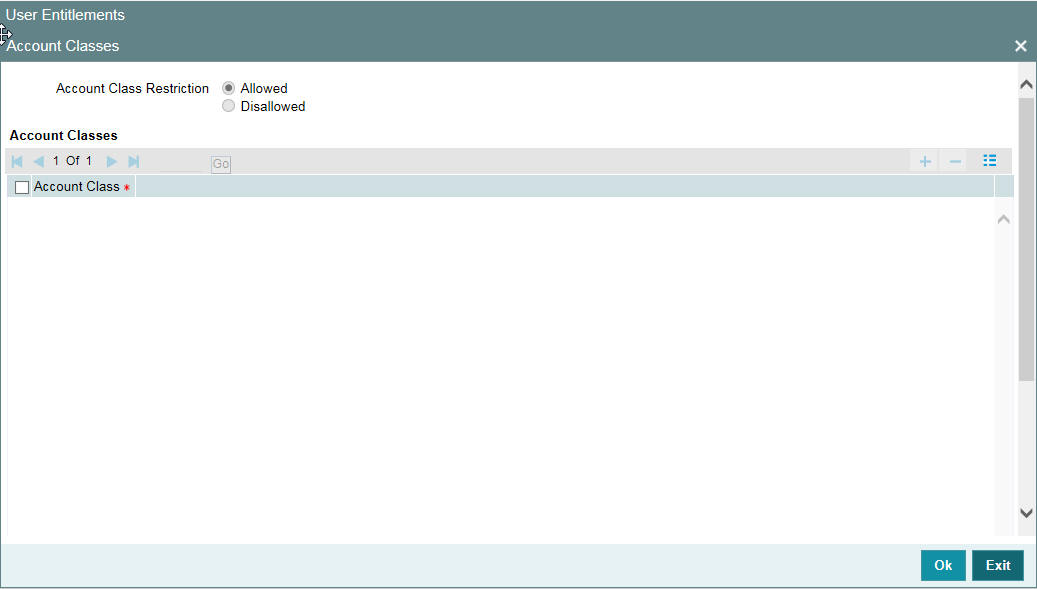
You can either allow or disallow the user from using certain account classes. Subsequently, specify the account classes, which have to be allowed or restricted for the user depending on the option selected. The following options are provided:
- Allowed–Select to allow user to use specified account classes.
- Disallowed–Select to disallow user to use specified account classes.
2.11.7 Branches Button
To specify the branches from which the Staff and Branch users of the bank can operate, you must use the ‘Branches’ screen.
Click ‘Branches’ button in the User Maintenance screen and ‘Branches’ screen will be displayed as shown below.
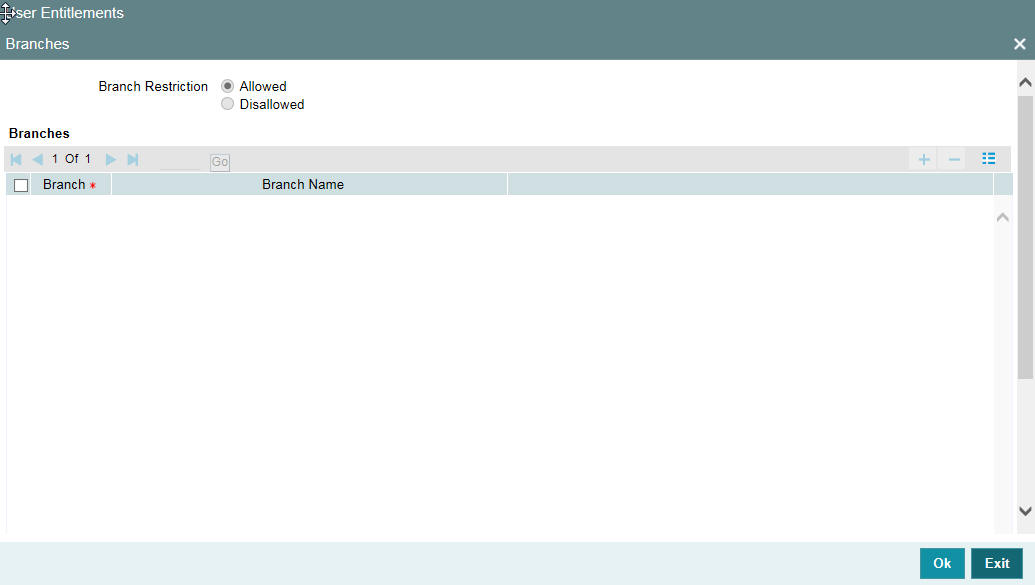
You can maintain a list of branches to which the user is either:
- Allowed
- Disallowed
To maintain an allowed list of branches choose the Allowed option. Then the ’Branch Restrictions’ list will show the list of allowed branches. To maintain a disallowed list of branches, choose the Disallowed option.
If you maintain an ‘allowed’ list, then the user profile will be available only for those branches that you specify in the Branch Restrictions list. Similarly, if you maintain a ‘disallowed’ list, then the user profile will not be available only for those branches that you specify in the Branch Restrictions list. Any branch that is ‘Disallowed’ will not appear to that user in his ‘Change Branch’ list.
After choosing either the ‘Allowed’ or ‘Disallowed’ option, click add icon to add a record under the ‘Branch Restrictions’ list. Into each added record’s field, select the required branch by clicking the adjoining option list.
Note
- The branch in which the user profile is defined is known as the Home Branch. The branches the user can access are known as the Host Branches
- You should create an ID called GUEST in each branch. When a user belonging to the Staff category changes the branch of operation, he can perform the functions defined for the GUEST ID in the Host Branch.
2.11.8 Products Button
You can restrict the user from using certain products maintained in FLEXCUBE. Such product restrictions for the user can be specified in the ‘Products’ screen. Click ‘Products’ button and the ‘Products’ screen will be displayed.

In this screen you can place the following restrictions on the User Profile:
- Posting Restriction
- Access Restriction
Users who have posting restrictions will not be able to process transactions involving restricted products. Users with access restrictions will not be allowed to view or print financial details of contracts involving restricted products.
To allow or disallow the user from posting into/accessing certain products by
- Select the option ‘Allowed’ if you want to allow the user to post entries into/access certain products
- Select the option ‘Disallowed’ to disallow the user from posting/accessing certain products
After choosing the ‘Allowed’ or ‘Disallowed’ option, click add icon to add a record under the ‘Products’ list. Into each added record’s field select the required Product Code by clicking the adjoining option list.
Note
- If for a product the Access restriction has not been maintained but Posting is allowed the restricted user can post transactions for that product and can view the contract information until such time that the contract gets authorized.
- For the PC module, you can apply restrictions on product categories.
2.11.9 Disallowed Functions Button
You can restrict certain functions from being performed by a user. You can specify such restrictions in the ‘Disallowed Functions’ screen. Click ‘Disallowed Functions’ button to invoke this screen.
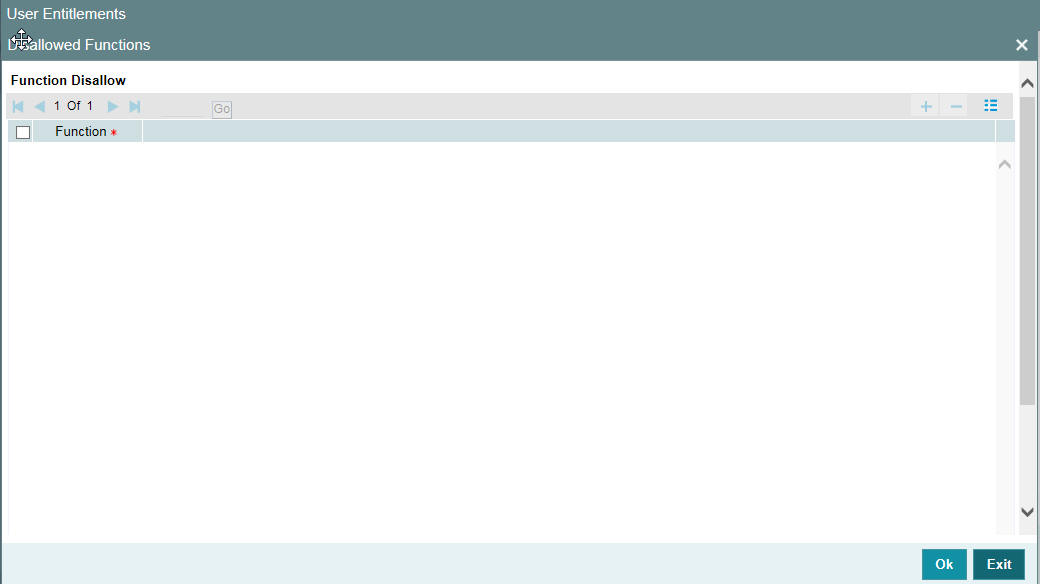
Click add icon to add a record under the ‘Function’ list. Into each added field, select the required function by clicking the adjoining option list.
2.11.10 Centralized Role Button
The centralization role can be linked to a user here. You can view centralized role maintained for the user profile in the ‘Centralized Role’ screen. Click ‘Centralized Role’ button to invoke this screen.
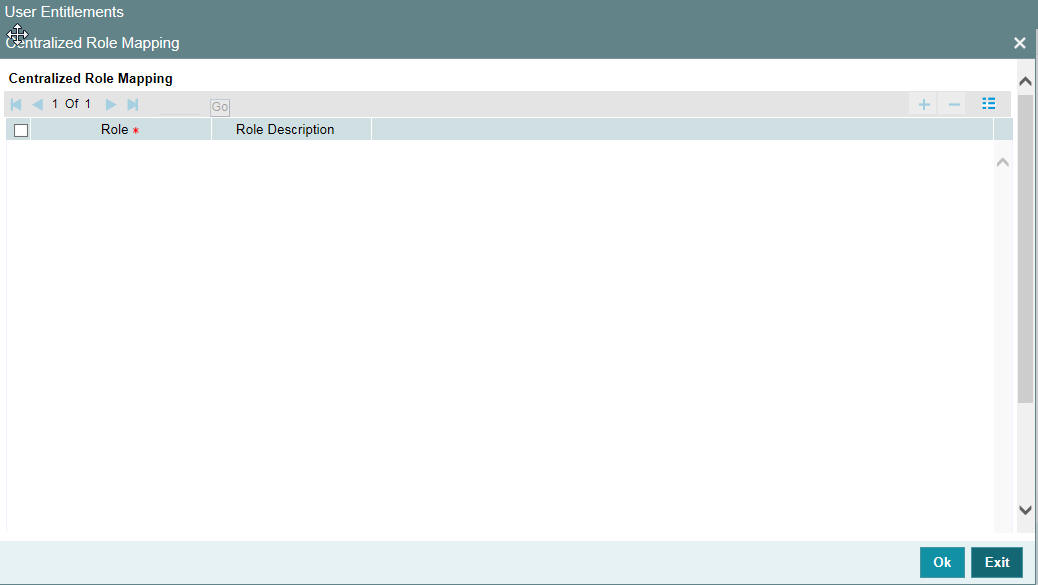
If the multi branch operational parameter is enabled and the centralization roles are defined, then the roles are automatically assigned to the branches based on the branch restricted details specified in the user maintenance screen. You can also include additional list of normal roles from the Roles sub screen.
Note
You cannot assign a centralized role to a subset of allowed branches of a user. You have to manually assign the normal role to each applicable branch.
2.11.11 Dashboard Mapping Button
If you checked the ‘Show Dashboards’ check box in the main page of the ‘User Maintenance’ screen, then you can map the specified ‘User’ to one are more Dashboards in the ‘Dashboard Maintenance’ sub-screen. Click ‘Dashboard Mapping’ button to invoke this screen.
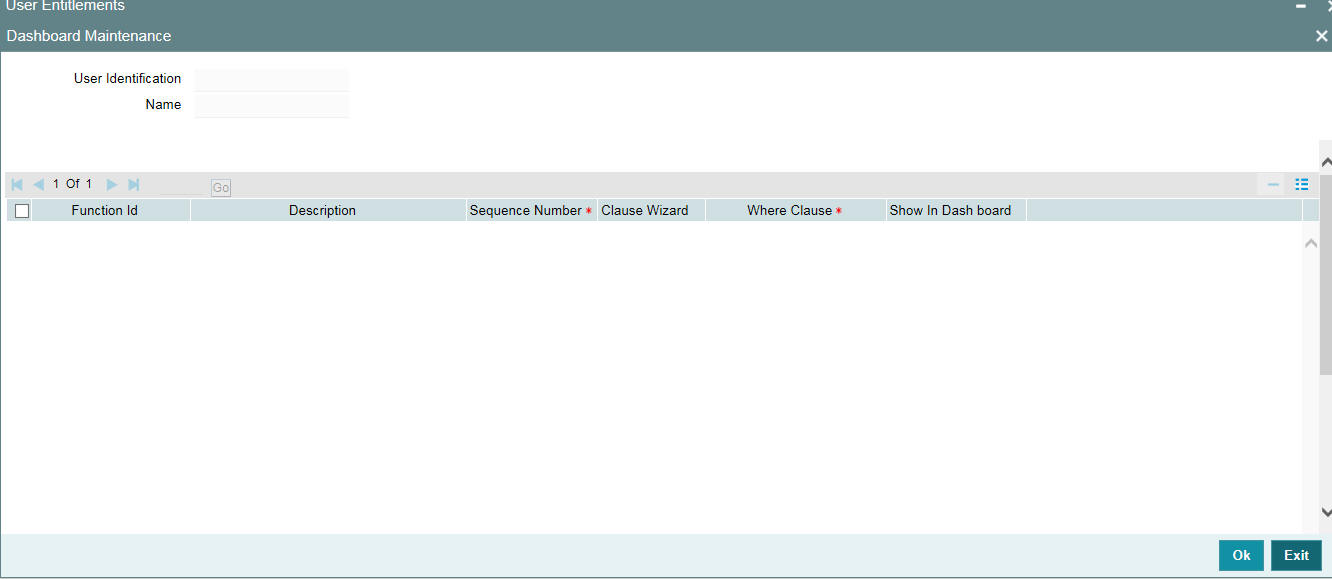
The system defaults the following from the main screen:
- User Identification
- Name
Click ‘Populate’ button, the system displays DFIs mapped to the specified ‘User Role’. The system defaults the following details:
- Function ID – Function ID of the Dashboard assigned to the ‘User’.
- Description – Description of the Dashboard
You can maintain the following details for the dash:
Sequence Number
Specify the sequence number, based on the ‘User’ preference.
Clause Wizard
Click to invoke ‘Dashboard Condition’ sub-screen. You can maintain filter conditions for each DFI the ‘User’ is mapped to.
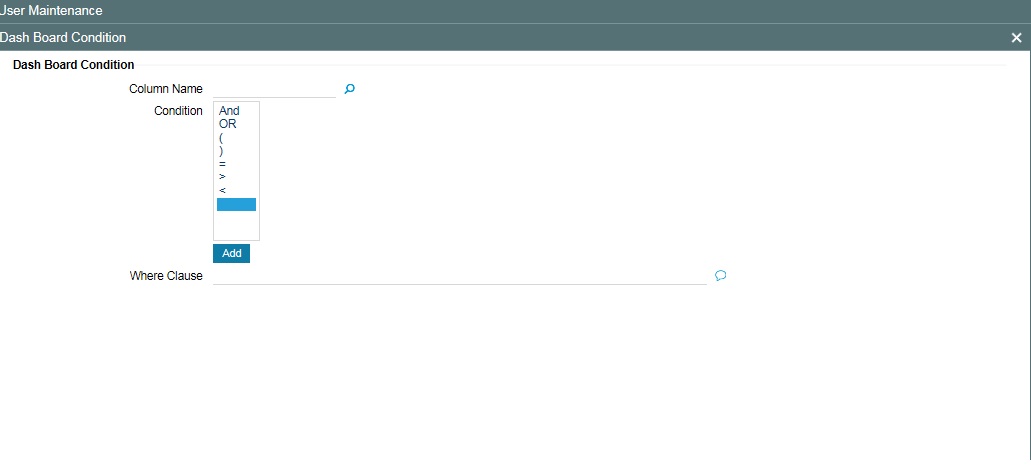
You can maintain filter conditions for a specific Dashboard:
Column Name
Specify the column name for which you want to maintain filter conditions. The adjoining option list displays all valid columns available in the Dashboard. Choose the appropriate one.
Condition
Select the filter condition you want to maintain. The following conditions are available:
- AND
- OR
- (
- )
- =
- >
- <
Click ‘Add’ to add the selected conditions to ‘Where Clause’.
Where Clause
Here, the system defaults the values specified in ‘Dashboard Condition’ screen.
Show in Dashboard
Check this box if you want to display a specific Dashboard assigned to the ‘User’.
Note
The system generates a notification on authorization of any modification, addition or deletion of user.
2.11.12 Access Group Restriction Button
You can restrict the group code for the selected user id using ‘Access Group Restriction’ screen. To invoke this screen, click ‘Access Group Restriction’ button in ‘User Maintenance’ screen.
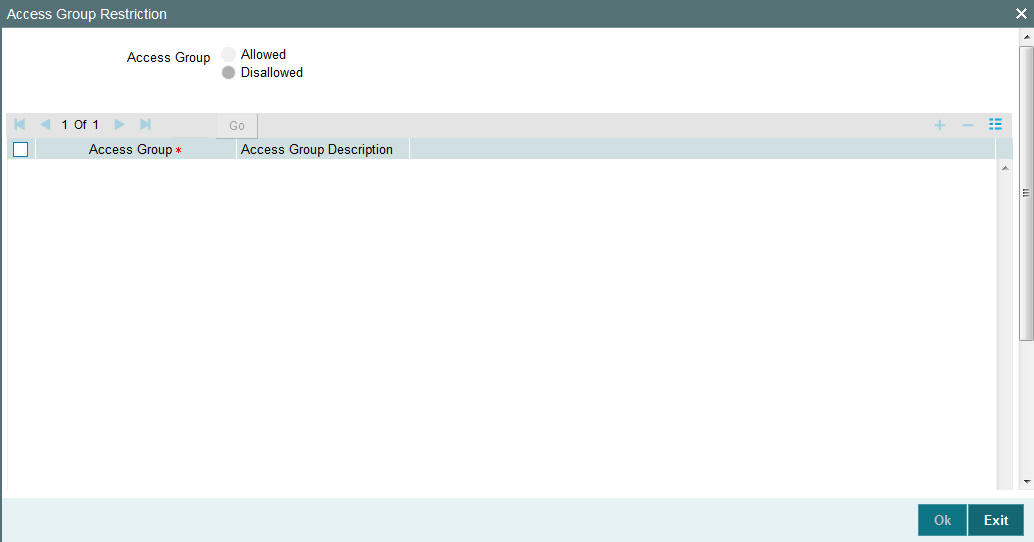
Access Group
Specify whether the access group is allowed or disallowed for the user. You can select one of the following:
- Allowed
- Disallowed
Access Group
Specify the access group which is allowed or disallowed for the user. Valid access group codes (Open/Authorized) are displayed in the Access Group option list.
Group Description
System describes the group code selected by the user.
User will be able to query or modify the account details only for those customers whose group code is allowed to him. If a user tries to query or modify the account of the customer whose group code is restricted for him, system will display the error message “User is restricted to query or modify the account”.
2.12 Customer Access Group Maintenance
This section contains the following topics:
2.12.1 Maintaining Customer Access Group
You can maintain the access group for retail and corporate customers in the ‘Customer Access Group Maintenance’ screen. You can invoke this screen by typing ‘STDACGRP’ in the top right corner of the Application tool bar and clicking the adjoining arrow button.
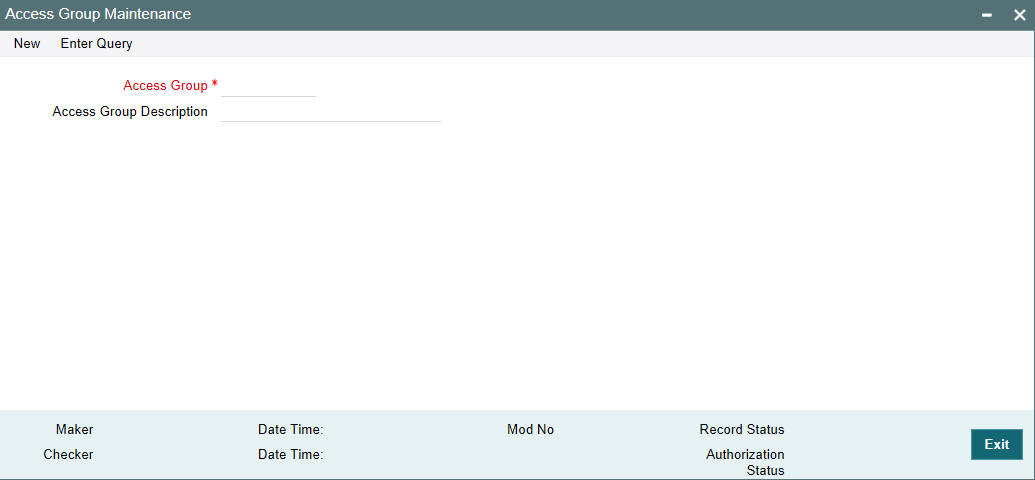
Access Group
Specify the access group code.
Access Group Description
Give a brief description on the access group specified.
2.13 Personally Identifiable Information
Personally Identifiable Information (PII) is the information that can be used on its own to identify a person. Any information that is used to distinguish one person from another can be a personally identifiable information. It can be any information like name, contact information, demography information, financial information, SSN, Passport number etc. Oracle FLEXCUBE allows you to mask, forget or restrict access to personally identifiable information of a user. You can mask or forget the PII based on the maintenance in Mask Maintenance and Forget Customer PII Maintenance screens.
The following flow diagram explains the data flow of Personally Identifiable Information (PII).
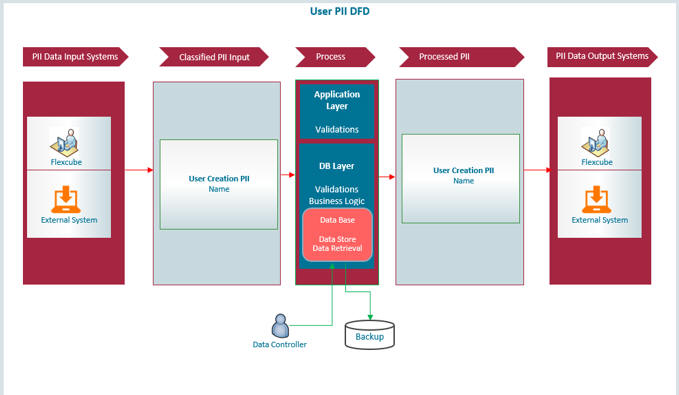
Personally Identifiable Information captured in the system are categorized as below:
Personal Information Category |
Personal Information Data |
User Personal Information |
|
Customer Name |
User Name |
2.14 Mask Maintenance
This section contains the following topic:
2.14.1 Maintaining Masking Details
You can mask personally identifiable information based on the maintenance at ‘Masking Maintenance’ screen. The data for this screen is picked from PII field’s static data. However, you can modify the masking definitions defaulted in this screen. You can invoke ‘Masking Maintenance’ screen by typing ‘SMDMASKD’ in the top right corner of the Application toolbar and clicking adjoining arrow button.
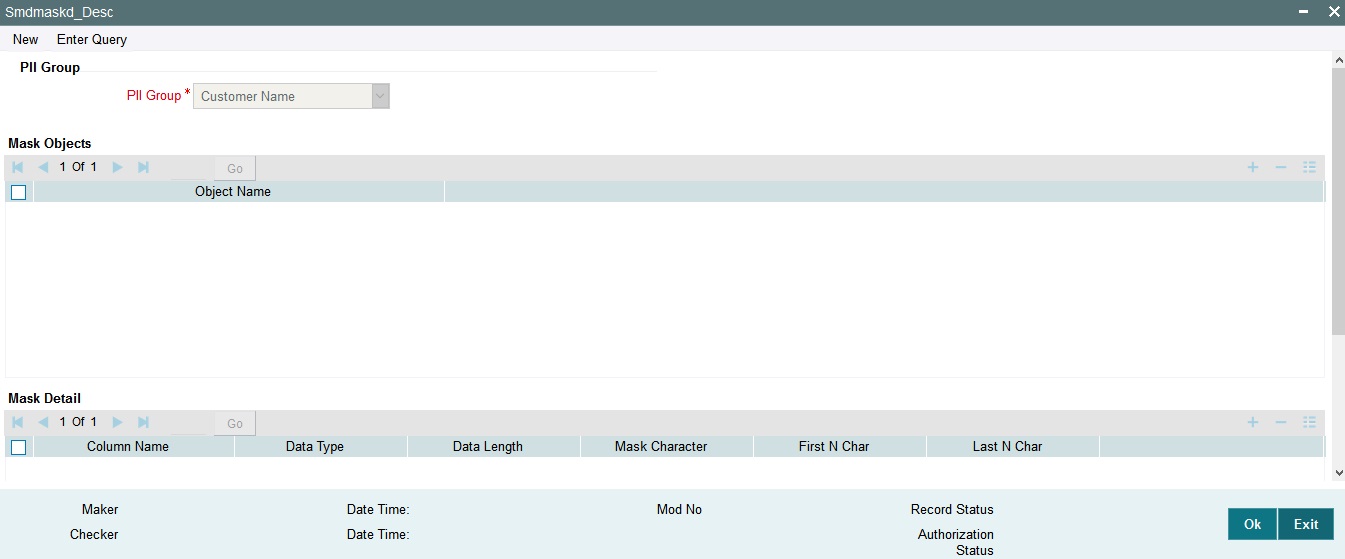
Following details are maintained in this screen:
PII Group
Select the PII group from the drop-down list. The list displays the following values:
- Customer Name
- Customer Contact Information
- Demographic Information
- Financial Information
- Unique Identifiers
- Other Information
You can view the following details based on the PII group selected:
Mask Objects
- Object Name - The database objects ‘Table’ or ‘View’ that applies the masking policies. Select the object name from the option list based on the chosen PII group.
Mask Details
- Column Name - Select the name of the column from the list of values that displays masked value.
- Data Type - The length of the data. The value is pre-populated based on the column name you chose. You can enter the new value, if required.
- Data Length - The length of the data. The value is pre-populated based on the column name you chose. You can enter the new value, if required.
- Mask Character - Enter the character with which the information is
masked.
- If the data type is ‘Alphanumeric’, you can use alphabets and numerals.
- If the data type is ‘Date’ you can leave the mask character blank. By default date the system displays the date ‘01-Jan-1970’.
- If the data type is ‘Numeric’, you can maintain any number from 1-9.
- First N Character - Enter the number of characters at the start of the string that has to be masked as per the chosen masking character.
- Last N Character - Enter the number of characters at the end of the string that has to be masked as per the chosen masking character.
After maintaining masking details when the user logs in to the Application, the system checks ‘PII Allowed’ value maintained in the ‘User Maintenance’ screen against a user role and then displays masked or unmasked data.
Note
PII disallowed user cannot view tanked and change log records.
2.15 Forget Customer
Oracle FLEXCUBE allows you can sanitize the data by forgetting the customer’s personally identifiable information (PII) once their accounts are closed. This is useful when data cannot be deleted due to referential integrity.
The following are the screens through which you can query the details of a customer:
- STDCIFCR
- STDCRACC
However, when you try viewing details of a customer whose data is forgotten you see a message that says details of the forgotten customer can’t be viewed.
The section contains the following topics:
- Section 2.15.1, "Maintaining Forget Customer Personal Identifiable Information (PII)"
- Section 2.15.2, "Forgetting Customer Process"
2.15.1 Maintaining Forget Customer Personal Identifiable Information (PII)
In Oracle FLEXCUBE you can maintain the customer or user PII that you want the system to forget. You can invoke ‘Forger Customer PII Maintenance’ screen by typing ‘SMDPIFRT’ in the top right corner of the Application toolbar and clicking adjoining arrow button
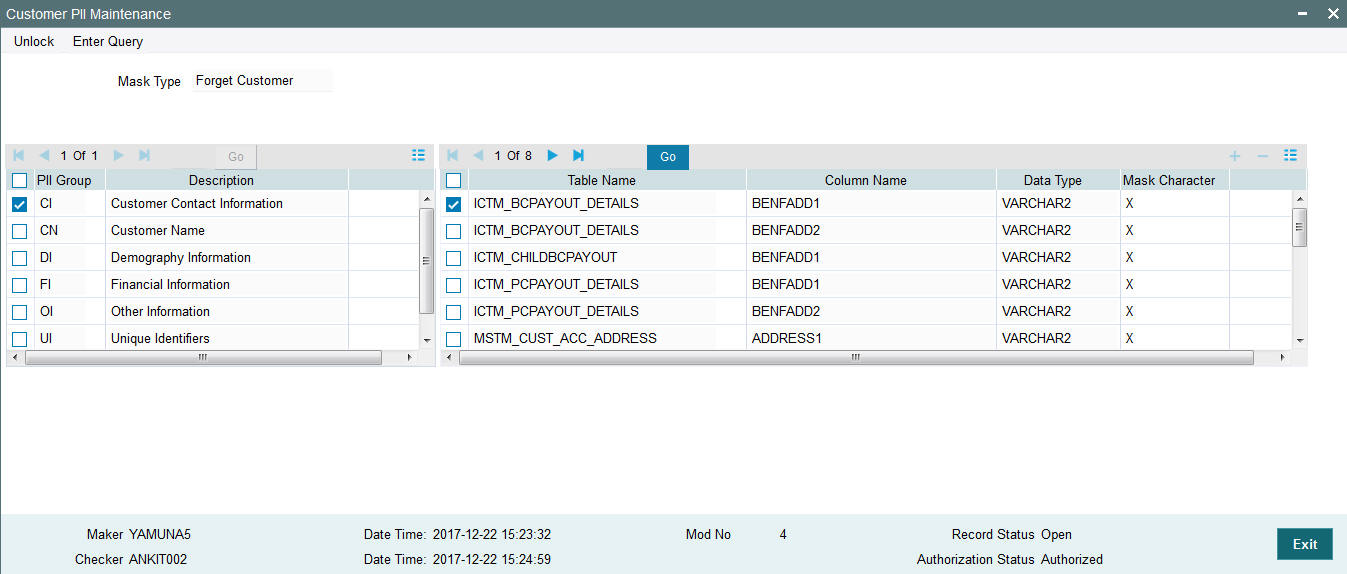
Following details are maintained in this screen:
PII Group Details
PII Group
Select the PII group for which you want to forget the data.
Description
The description for each PII group.
PII Field Details
Table Name
The name of the table in the database which contains the customer information that you want the system to forget. Select the table name from the option list.
Column Name
The column name in the table.
Data Type
The data type of the customer information.
Mask Character
Enter the character that you want to use to mask the customer information, so that it is not visible to anyone.
2.15.2 Forgetting Customer Process
You can forget a specific customer by using the ‘Forget Customer Process’ screen. You can invoke the screen by typing ‘STDCSFRT’ in the top right corner of the application toolbar and clicking adjoining arrow button.
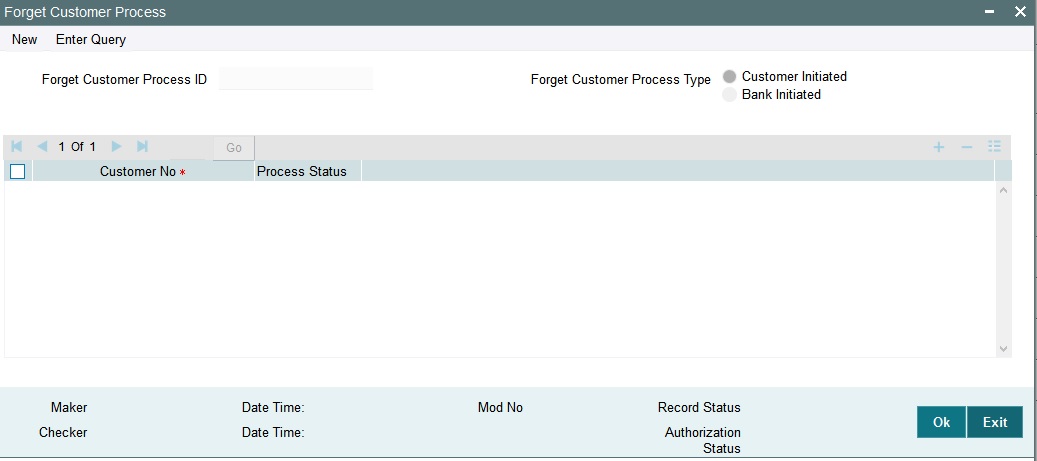
Following details are maintained in the screen:
Forget Customer Process ID
The system generated ID for processing the customer details. You can also enter manually while searching for forgotten customers.
Forget Customer Process Type
Select the type of request for forgetting the customers.
You can select ‘Customer Initiated’, when the customer has requested for forgetting their details immediately.
You can select ‘Bank Initiated’ process type to process the closed customers in a bulk, as per the bank’s requirement. The process is a non EOD batch process.
For customer initiated process, you can select the list of closed customers. But for bank initiated process, the system picks all the closed customers based on the bank parameter maintenance and not individual customers.
Customer Number
Select the customer number from the option list.
Process Status
The system generated status, when you submit the request status is ‘U’. Once the process is authorized the status changes to ‘P’.
Once authorized, the data of the customer will be updated with the respective masked value that you have entered in the SMDPIFRT screen.
After the customer is forgotten in the system, the customer’s data will not be available for any operations in any ‘Detail’ and the ‘Summary’ screens.
2.16 Log Access
Customer’s can access logs based on the access rights set by the system administrator. They can have limited or full access, and accordingly they can view, generate, or purge logs.
This section contains the following topics:
- Section 2.16.1, "Application Logs"
- Section 2.16.2, "Back-end Logs"
- Section 2.16.3, "Audit Logs"
- Section 2.16.4, "Purging Logs"
2.16.1 Application Logs
The application log consists of the application or the front-end layer logs.
- Application Log path can be configured in fcubs.properties (Parameter APPLICATION_WORK_AREA) file, at the time of the property file creation.
- Application logs can be enabled /disabled based on fcubs.properties (Debug = ‘Y’ Or ‘N’).
- The storage mainly is in application server. The data controller control the access to the storage.
The section of fcubs.properties will look like below:
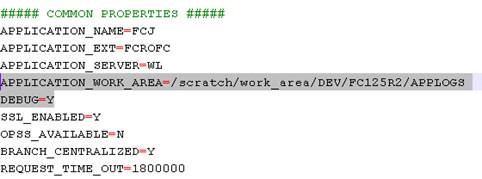
2.16.2 Back-end Logs
Back end log consists of the back end layer debug logs.
- Database directories are created with the back end debug path by the data controller. Database directory has to be specified at the time of day 0 setup.
- The data controller can gives module wise access of the back-end logs to the user.
2.16.3 Audit Logs
Audit Logs are used to see history of all changes that has happened. The user can view the changes made, along with the Maker and Checker Id as well as time stamp information.
In the STDCIF screen , click the Change log button to view the modification details:
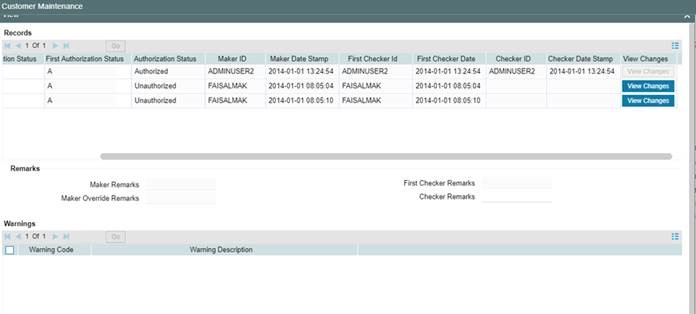
2.16.4 Purging Logs
Logs are purged in both Application and DB server by the data controller.
2.17 Department Details
This section contains the following topics:
2.17.1 Specifying Department Details
Oracle FLEXCUBE allows you to maintain department details in the system. However, only privileged administrative users can edit the department details. You can capture department details in the ‘Department Maintenance’ screen. You can invoke this screen by typing ‘SMDDPTMT’ in the field at the top right corner of the Application tool bar and clicking on the adjoining arrow button.
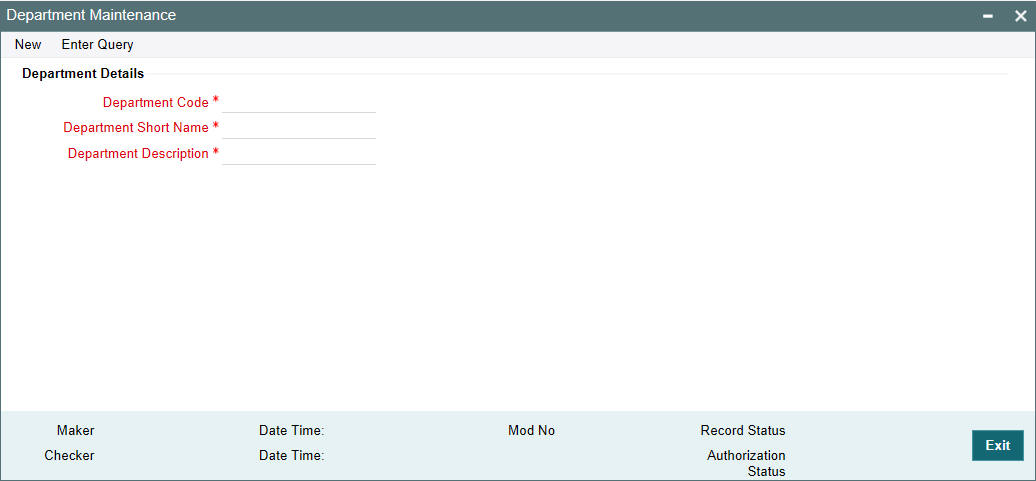
Department Details
Here you can specify the following:
Department Code
Specify the department code. You can enter a maximum of 3 alphanumeric characters.
Department Short Name
Specify the department short name. You can enter a maximum of 10 alphanumeric characters.
Department Description
Specify the department description. You can enter a maximum of 225 alphanumeric characters.
2.18 Process Codes
This section contains the following topics:
2.18.1 Maintaining Process Codes
You can maintain the process codes using the ‘Process Definition’ screen. You can invoke this screen by typing ‘SMDPRCDE’ in the field at the top right corner of the Application tool bar and clicking on the adjoining arrow button.
The ‘Process Definition’ screen is shown below:
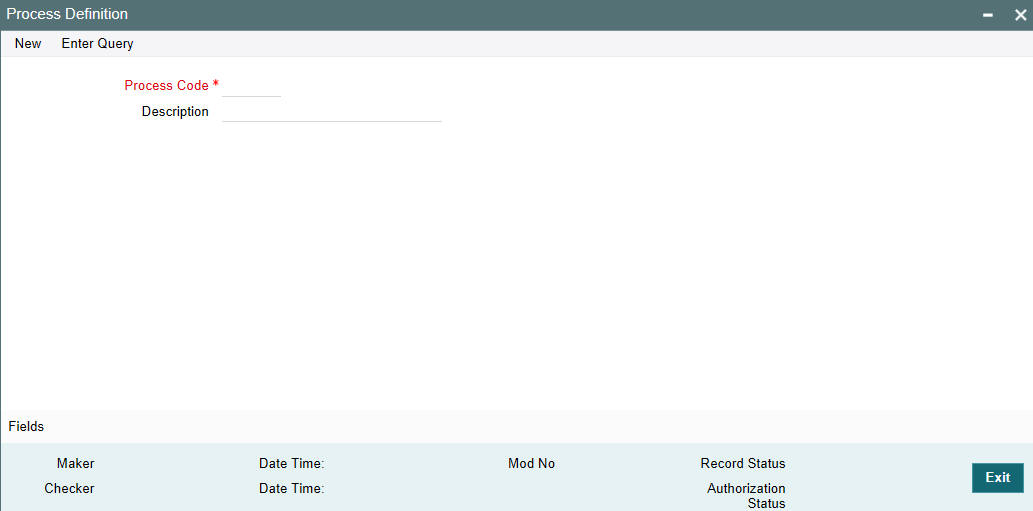
You can specify the following here:
Process Code
Specify a unique code for the process.
Description
Enter an appropriate description of the process.
After entering the details, click the ’Save’ button.
2.19 Single Sign On (SSO) Enabled Environment
Provided you have opted for the SSO Enabled option at bank level, you can log in from an LDAP (Oracle Internet Directory) external system into Oracle FLEXCUBE through the screen shown below.
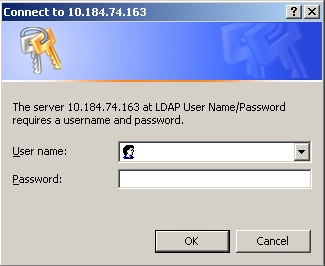
After successful authentication and authorization of the user is carried out by the LDAP (Oracle Internet Directory), a request is forwarded to gain access into Oracle FLEXCUBE. On clicking the ‘Submit’ button you can directly get into Oracle FLEXCUBE without specifying Oracle FLEXCUBE user id and password.
2.20 Defining Entity Maintenance
The ‘Entity Maintenance’ screen is used for maintaining or modifying the entities and Java Naming and Directory Interface (JNDI).
You can invoke this screen by typing ‘SMDENTDT’ in the field at the top right corner of the Application toolbar and clicking on the adjoining arrow button.
