7 Create a Contract
To create a contract follow the steps below:
-
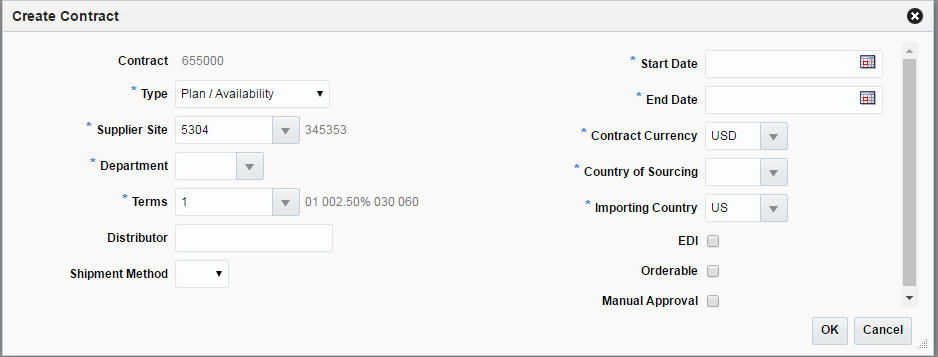
From the Tasks menu, select Orders > Contracts > Create Contract. The Create Contract page appears.
Note:
You can also create a contract in the Contract Search page. For more information about how to create a contract in the Contract Search page, see the Manage Contracts chapter. -
In the Contract field, the contract ID is filled in automatically.
-
In the Type field, select one of the following contract types:
-
Plan/Availability - refers to Type A contracts
-
Plan/No Availability - refers to Type B contracts
-
No Plan/No Availability - refers to Type C contracts
-
No Plan/Availability - refers to Type D contracts
Note:
When using a Type B (Plan/No Availability) contract, purchase orders are generated automatically. Manual and Replenishment orders are never created from a Type B contract. -
-
In the Supplier Site field, enter, select or search for the supplier site. The fields such as Terms, Contract Currency and Importing Country are filled with default values based on the entered supplier site. You can change these values, if necessary. This is a required field.
Note:
A Type C contract (No Plan/No Availability) does not require a supplier to provide availability information; therefore, it is possible that an order can be placed that a supplier cannot fulfill. -
In the Department field, enter, select or search for the department. Only items from this department can be placed on the contract. This field is a required field.
-
In the Terms field, enter, select or search for the contract terms, if you want to change the default value.
-
In the Distributor field, enter the distributor.
-
In the Shipment Method field, select the shipment method, for example, Air.
-
In the Start Date field, enter the contract start date or click the Calendar icon to specify the start date of the contract. This field is a required field.
-
In the End Date field, enter the contract end date or click the Calendar icon to specify the end date of the contract. This field is a required field.
-
In the Contract Currency field, enter, select or search for the currency of the contract, if you want to change the default value. This field is a required field.
-
In the Country of Sourcing field, enter, select or search for the country of sourcing for the contract. This field is a required field.
-
In the Importing Country field, enter, select or search for the importing country of the contract, if you want to change the default value. This field is a required field.
-
Check the EDI check box, to indicate that the contract is transmitted to the supplier via an EDI transaction.
-
Check the Orderable check box, to indicate that orders can be placed against this contract.
-
Check the Manual Approval check box, to indicate that all purchase orders will be created in Worksheet status and must be manually approved.
Note:
All required fields are marked with an asterisk. If you do not enter a value for one of the required fields, an error message is shown. -
After you have entered all the necessary data for the contract, choose one of the following options.
-
Click OK, to create the contract. The Contract page appears in a new tab. For more information about the Contract page, see the Contract section.
-
Click Cancel, to reject all entries and close the Create Contract page.
-
Contract
The Contract page allows you to create or maintain a contract. You can also add, edit and view the items, cost and distribution details on the contract. Moreover, you can navigate to the Parent/Diff summary screen, where you can view the details of the diffs for an item parent on a contract along with the quantity contracted, ordered, and received, as well as the ready date by diff value.
The Contract page consists of the following sections:
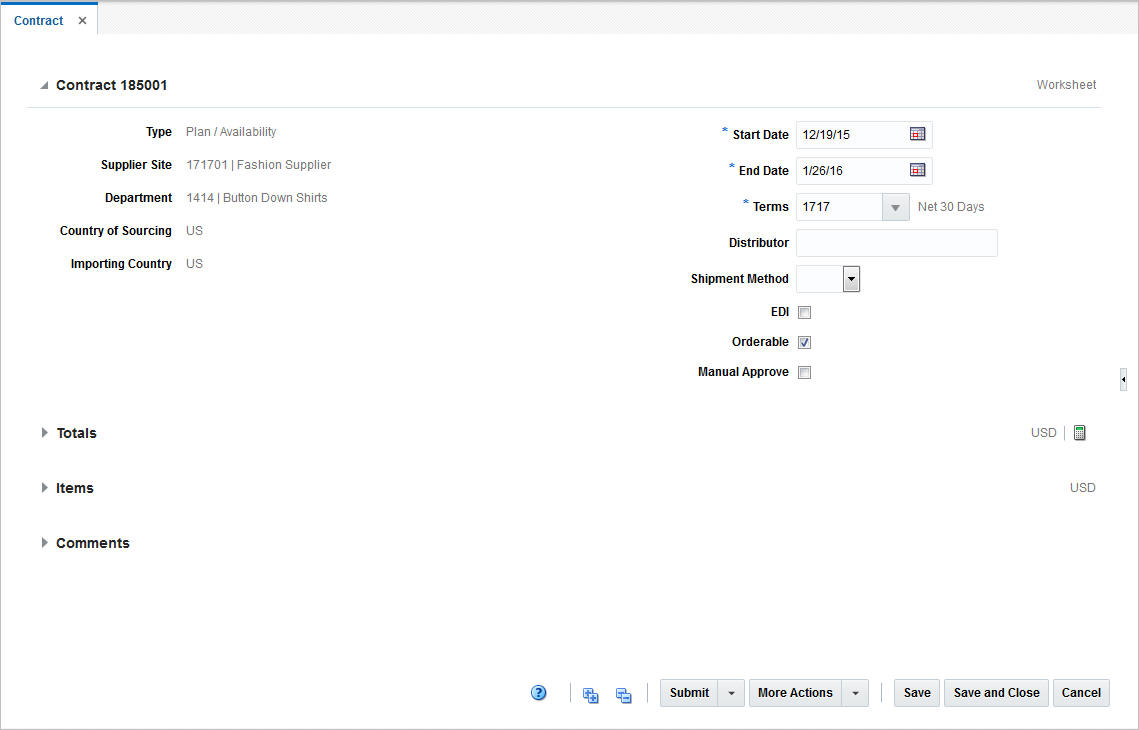
Contract Header
The Contract Header section contains the contract ID number and the status of the contract, for example Worksheet. Additionally the Contract Header section shows all values, entered in the Create Contract page. For more information about the values entered in the Create Contract page, see the start of the Create a Contract chapter.
Table 7-1 Contract Header - Fields and Description
| Fields | Description |
|---|---|
|
Type |
Displays the contract type. Possible contract types are:
For more information about the different contract types, see the Contract Overview chapter, section "Contract Types" section. This field is a view-only field. |
|
Supplier Site |
Displays the supplier site. This field is a view-only field. |
|
Department |
Displays the department. Only items from this department can be placed on the contract. This field is a view-only field. |
|
Country of Sourcing |
Displays the country of sourcing for the contract. This field is a view-only field. |
|
Importing Country |
Displays the importing country for the contract. This field is a view-only field. |
|
Start Date |
Displays the contract start date. You can edit this field, if the contract is still in Worksheet status. |
|
End Date |
Displays the contract end date. You can edit this field, if the contract is still in Worksheet status. |
|
Terms |
Displays the contract terms, for example, Net 30 Days. You can edit this field, if the contract is still in Worksheet status. |
|
Distributor |
Displays the distributor for the contract. You can edit this field, if the contract is still in Worksheet status. |
|
Shipment Method |
Displays the shipment method for the contract. You can edit this field, if the contract is still in Worksheet status. |
|
EDI |
If the EDI check box is checked, the data is exchanged electronically. You can edit this field, if the contract is still in Worksheet status. |
|
Orderable |
If the Orderable check box is checked, orders can be placed against this contract. You can edit this field, if the contract is still in Worksheet status. |
|
Manual Approve |
If the Manual Approve check box is checked, all purchase orders will be created in Worksheet status and must be manually approved. You can edit this field, if the contract is still in Worksheet status. |
Totals
The Totals section contains the currency and Recalculation icon ![]() in the title bar. Additionally the Totals section displays VAT information such as Markup % Excl. VAT, Retail Incl. VAT, Retail Excl. VAT and Total VAT. Moreover, cost, estimated duty, estimated expenses, landed and outstanding costs are shown. For more information about the displayed VAT information, see Table 7-2, "Totals - Fields and Description".
in the title bar. Additionally the Totals section displays VAT information such as Markup % Excl. VAT, Retail Incl. VAT, Retail Excl. VAT and Total VAT. Moreover, cost, estimated duty, estimated expenses, landed and outstanding costs are shown. For more information about the displayed VAT information, see Table 7-2, "Totals - Fields and Description".
Note:
If you create a new contract, the fields in the Totals section are empty. Total cost need to be added to type C and D contracts, before you add items.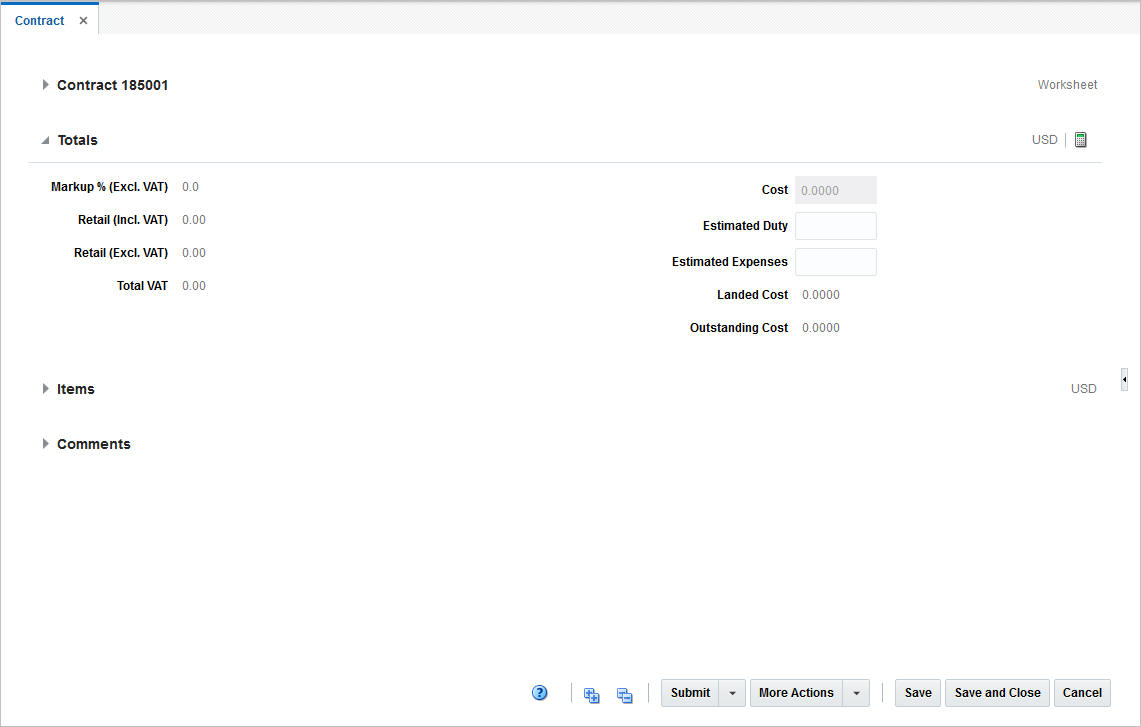
The following table describes the fields in the Totals section.
Table 7-2 Totals - Fields and Description
| Fields | Description |
|---|---|
|
Markup % Retail |
This field shows the markup in %. When the retailer uses Simple VAT or Global Tax, this value excludes VAT. |
|
Retail (Incl. VAT) |
This field shows the total retail value of all items on the contract, including the VAT amount. This field only displays, if the retailer uses Simple VAT or Global Tax. |
|
Retail (Excl. VAT) |
This field shows the total retail value of all items on the contract, excluding the VAT amount. When the retailer uses Simple VAT or Global Tax, this value excludes VAT. |
|
Total VAT |
This field shows the total VAT of the contract. This field only displays, if the retailer uses Simple VAT or Global Tax. |
|
Cost |
This field shows the total cost of the contract. If you create a Type A or B contract this field is calculated automatically. You can not edit this field for these contract types. If you create a Type C or D contract, you can edit this field. The cost need to be added before you add items. |
|
Estimated Duty |
This field shows the estimated duties, taxes, and fees the retailer must pay to import the goods on this contract. You can specify this value for any contract type. |
|
Estimated Expenses |
This field shows the value of the estimated expenses that occurred for this contract. You can specify this value for any contract type. |
|
Landed Cost |
This field shows the sum of the cost, duty, and expenses for the shipments of the contract. |
|
Outstanding Cost |
This field shows the amount that is still open for this contract. |
Items
The Items section contains the contract item, contract item description, item level, diffs and unit costs by default. You can add items to the contract in this section. For more details about how to add items to a contract, see the Add Items to a Contract section. Additionally, you can update the unit cost per item. For more information about how to update the unit cost for an item, see the Editing Unit Costs of Items on a Contract section.
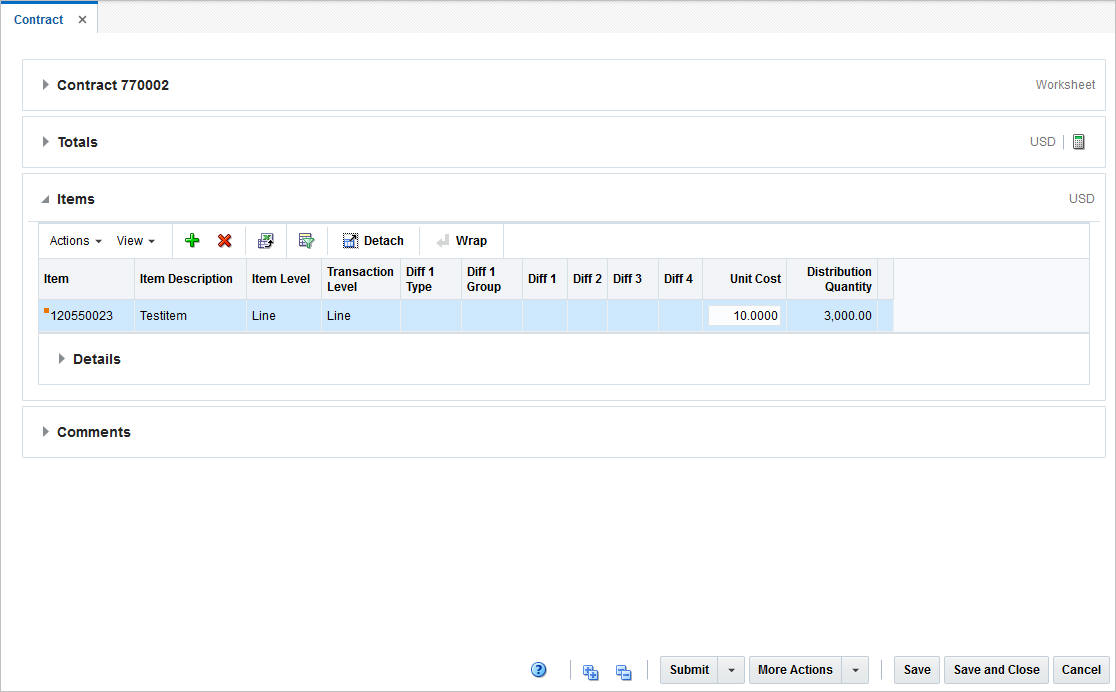
Details
The Details section displays the item distribution details by ready date and/or location. Columns shown are location type, location, name and ready date as well as the distribution, ordered and received quantity. The Details section is only displayed for Type A and B contracts, after items have been added and distributed.
You can edit the distribution quantity in this table. For more information about how to edit the distribution quantity, see the Manage Contracts chapter, section Editing the Distribution Quantity on a Contract section.
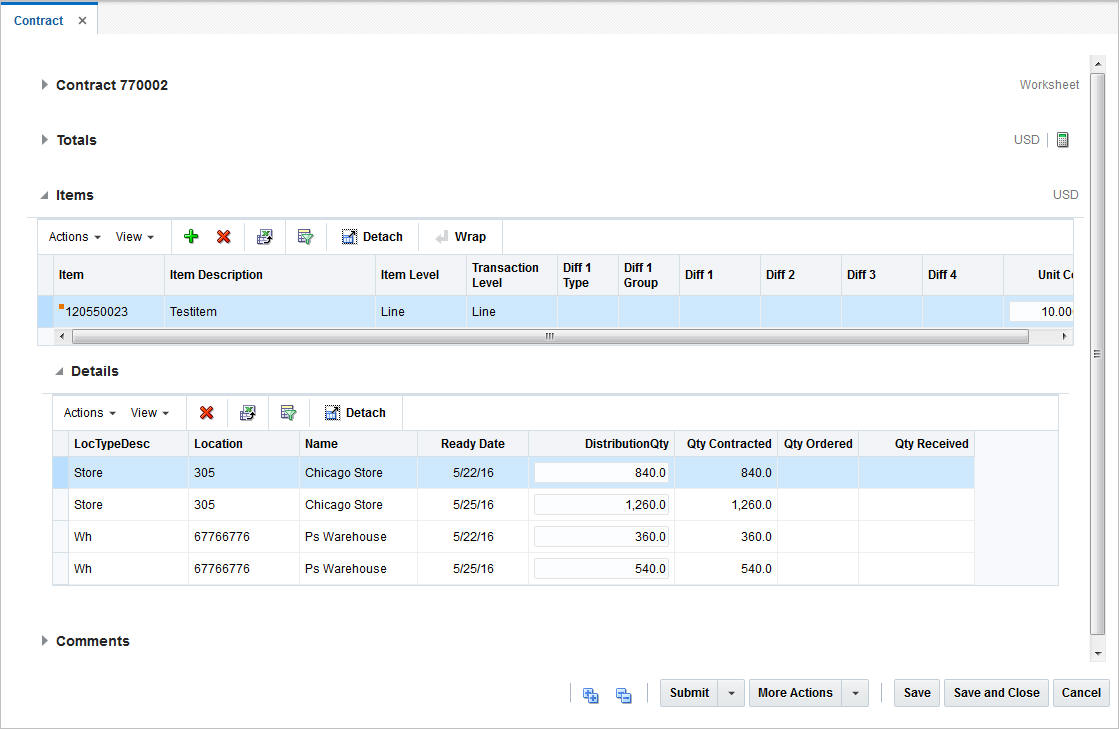
Comments
In the Comments section you can enter necessary comments for the contract.
Contract - More Actions Menu
Use the More Actions menu to navigate to the following pages. The More Actions menu contains the following options.
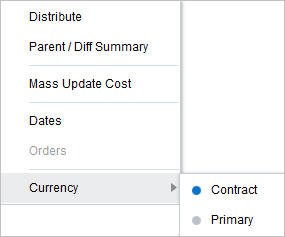
Table 7-3 Contract - More Actions Menu and Description
| More Actions Menu | Description |
|---|---|
|
Distribute |
Opens the Contract Distribution page. For more information about how to distribute items on a contract, see the Contract Distribution section. |
|
Parent Diff/Summary |
Opens the Parent Diff/Summary page. For more information about the parent diff/summary, see the Parent/Diff Summary section. |
|
Mass Update Cost |
Opens the Mass Update page. For more information about how to update the costs for all items on a contract, see the Mass Update Cost section. |
|
Dates |
Opens the Dates page. For more information on contract dates, see the Dates section. |
|
Orders |
Opens the Contact Order List page. For more information about how to view the details of purchase orders raised against a contract, see the Manage Contracts chapter, section "View Purchase Orders for Contract". |
|
Currency |
You can toggle between the contract and the primary currency for the monetary values shown in the page. |
Adding the Total Cost to Type C and D Contracts
Before you can add items to Type C and D contracts, you have to add the total cost to the contract.
-
In the Contract page, go to the Totals section.
-
In the Cost field, enter the total cost of the contract.
-
After you have entered the total cost, choose one of the following options.
-
Add Items to the contract. For more information about how to add items to a contract, see the Add Items to a Contract section.
-
Click Save to save the entered record.
-
Click Save and Close to save the entered records and close the page.
-
Click Cancel to reject all entries and close the page.
-
Add Items, Costs, and Locations
Add Items to a Contract
To add items to the contract, follow the steps below.
-
In the Items section of the Contract page, select Actions > Add, or use the Add icon
 . The Contract Distribution page appears.
 -
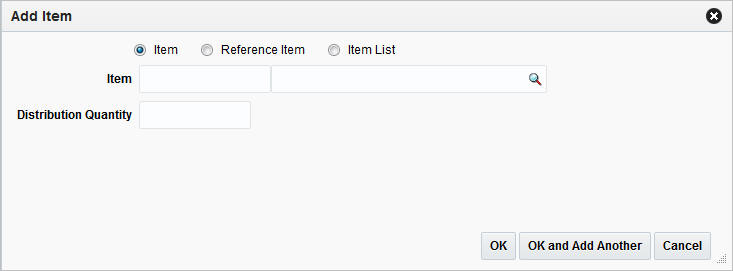
In the item table, select Actions > Add, or use the Add icon
to add an item, reference item or list item to the contract. The Add Item page appears.-
Select the item hierarchy level, you want to add item/items by. Items can be added at the transaction/item level, reference/item level or multiple items can be added by adding an existing item list.
-
In the Item/Reference Item/Item List field, select, enter or search for the item, reference item or item list.
-
In the Distribution Quantity field, enter the distribution quantity.
Note:
The Distribution Quantity field is only available for type A and B contracts. For type C and D contracts, the quantity is not required. -
After you have entered all necessary data, choose one of the following options.
-
Click OK to add the item/items to the contract and exit the Add Item page. The system returns to the Contract Distribution page. The item/items is/are displayed in the item table.
-
Click OK and Add Another to add more items to the contract.
-
Click Cancel to reject all entries and close the page. The system returns to the Contract Distribution page.
Note:
When selecting items for a contract, the number of levels in the group and the transaction level of the item group must be considered. Items above the transaction level can only be added to a contract, if the Soft Contract Indicator is selected in the System Variables.
-
-
-
After you have added all items, choose one of the following options.
-
Distribute the added items. For more information on distributing items, see the Distributing Items of a Contract section.
-
Select Save and Close to save the entered records and close the Contract Distribution page.
-
Select Cancel to reject all entries and close the Contract Distribution page.
-
Distributing Items of a Contract
To distribute the items of a contract, see the Contract Distribution section.
Verifying or Editing the Cost of the Items
Typically the contract cost is negotiated with the supplier. Therefore, the contract cost is lower than the default cost. To edit the cost of the contract item, follow the steps below.
-
In the Contract page, go to the Item section. Choose an item.
-
In the Unit Cost column, verify and/or edit the unit cost as necessary.
-
After you have entered the new unit cost for the item, choose one of the following options.
-
Click Save to save the entered records.
-
Click Save and Close to save the entered records and close the page.
-
Click Cancel to reject all entries and close the page.
-
Editing Unit Costs of Items on a Contract
Typically contract costs are negotiated with the supplier. Therefore, the contract costs are often lower than the default cost. You can update the unit cost in the Item section in the Contract page. You can either update the unit cost of a single item or for all items shown in the table.
To edit the unit cost of a single item on the contract, see the Editing the Unit Cost of Single Items on a Contract section.
To edit the unit cost for all items displayed in the Item table, see the Mass Update Cost section.
Editing the Unit Cost of Single Items on a Contract
To edit the unit cost of a single item on a contract, follow the steps below.
-
From the Tasks menu, select Orders > Contracts > Manage Contracts. The Contract Search page appears.
-
Enter or select search criteria as desired to make the search more restrictive.
-
Click Search. The contracts that match the search criteria are displayed in the Results section.
-
In the Contract column, click the contract ID link, or mark a record and select Actions > Edit, or use the Edit icon
 . The Contract page appears.
 -
Go to the Items section and choose an item.
-
In the Unit Cost field enter a new unit cost amount.
-
After you have entered the new unit cost for the item, choose one of the following options.
-
Click Save to save the entered records.
-
Click Save and Close to save the entered records and close the page.
-
Click Cancel to reject all entries and close the page.
-
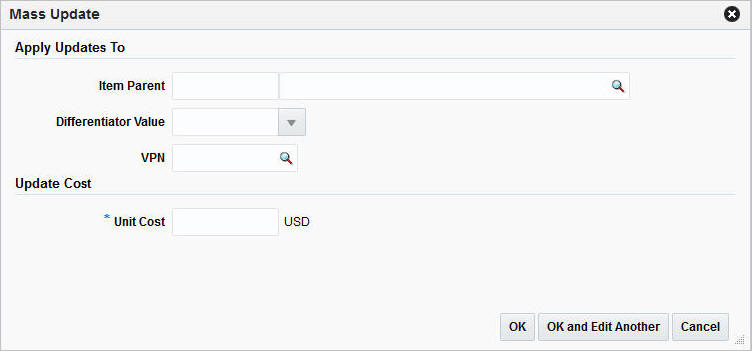
Mass Update Cost
You can update the unit costs for multiple or all items on a contract. You can apply the unit cost update by item parent, differentiator value or vendor product number (VPN).
To update the unit cost for all items on a contract follow the steps below.
-
From the Tasks menu, select Orders > Contracts > Manage Contracts. The Contract Search page appears.
-
Enter or select search criteria as desired to make the search more restrictive.
-
Click Search. The contracts that match the search criteria are displayed in the Results section.
-
In the Contract column, click the contract ID link, or mark a record and select Actions > Edit, or use the Edit icon
. The Contract page appears. -
In the Toolbar, select More Actions > Mass Update Cost.
-
The Mass Update page appears.
-
If you want to apply the update to the item parent, you can choose the differentiator value or VPN.
-
Update by Item Parent: In the Item Parent field, enter or search for the corresponding item parent.
-
Update by Differentiator Value: In the Differentiator Value field, enter, select or search for the corresponding diff value, such as Small.
-
Update by VPN: In the VPN field, enter or search for the corresponding VPN.
-
-
In the Unit Cost field, enter the new unit cost.
-
After you have entered the necessary information:
-
Click OK to apply the mass update by the selected value and exit the Mass Update page. The system returns to the Contract page.
-
Click OK and Edit Another to apply another unit cost mass update.
-
Click Cancel to reject all entries and exit the Mass Update page.
-
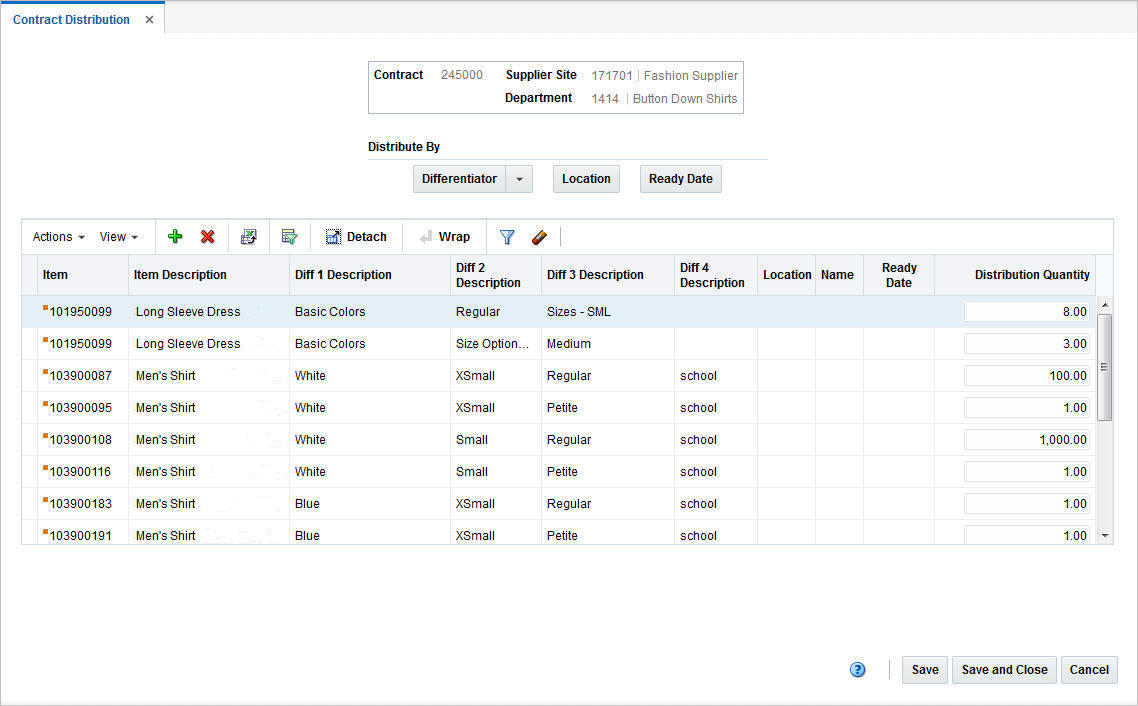
Contract Distribution
The Contract Distribution page allows you to add or delete items on a contract and distribute those items. Items can be distributed by item parent or diffs. Additionally for Type A contracts you can distribute the items by ready date or location. For more information about distribution items of Type A contracts, see the Distributing Items of a Contract section. For Type B contracts the items can be distributed by location and by ready date. For more information about how to distribute items of Type B contracts, see the Distributing Items by Location and Distributing Items by Ready Date sections.
The Contract Distribution page consists of the following sections:
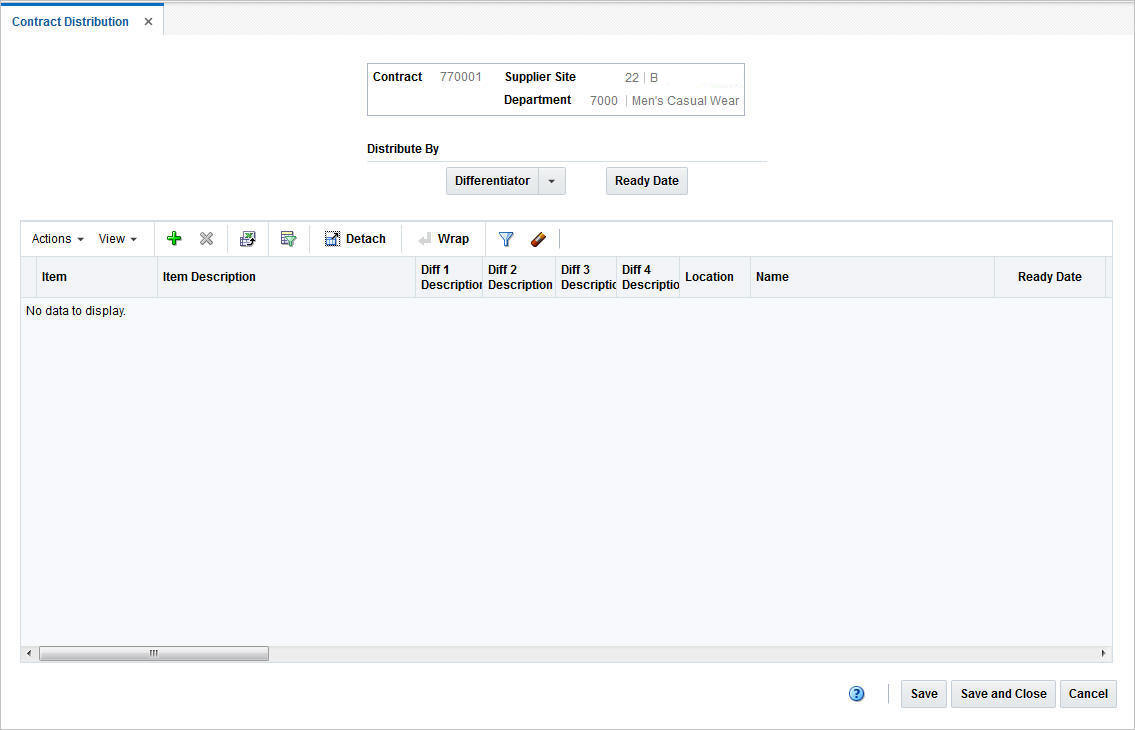
Contract Distribution Header
The header section of the Contract Distribution page displays the following information:
-
Contract ID
-
Supplier Site
-
Department
Distribute By
The Distribute By section contains options by which you can distribute the items of the contract.
Table 7-4 Distribute By Options
| Buttons | Description |
|---|---|
|
Differentiator |
Opens list with Diff options 1 - 4. |
|
Location |
Opens the Distribute By Location page. You can distribute the item by location. For more information about this distribution method, see the Distributing Items by Location section. Only available for Type B contracts. |
|
Ready Date |
Opens the Distribute By Ready Date page. You can distribute the item by ready date. For more information about this distribution method, see the Distributing Items by Ready Date section. Only available for Type A and B contracts. |
Item Table
The Item table contains the contract items. By default the table displays the contract item, item description, diff 1-4 description, location, location name and ready date as well as distribution quantity.
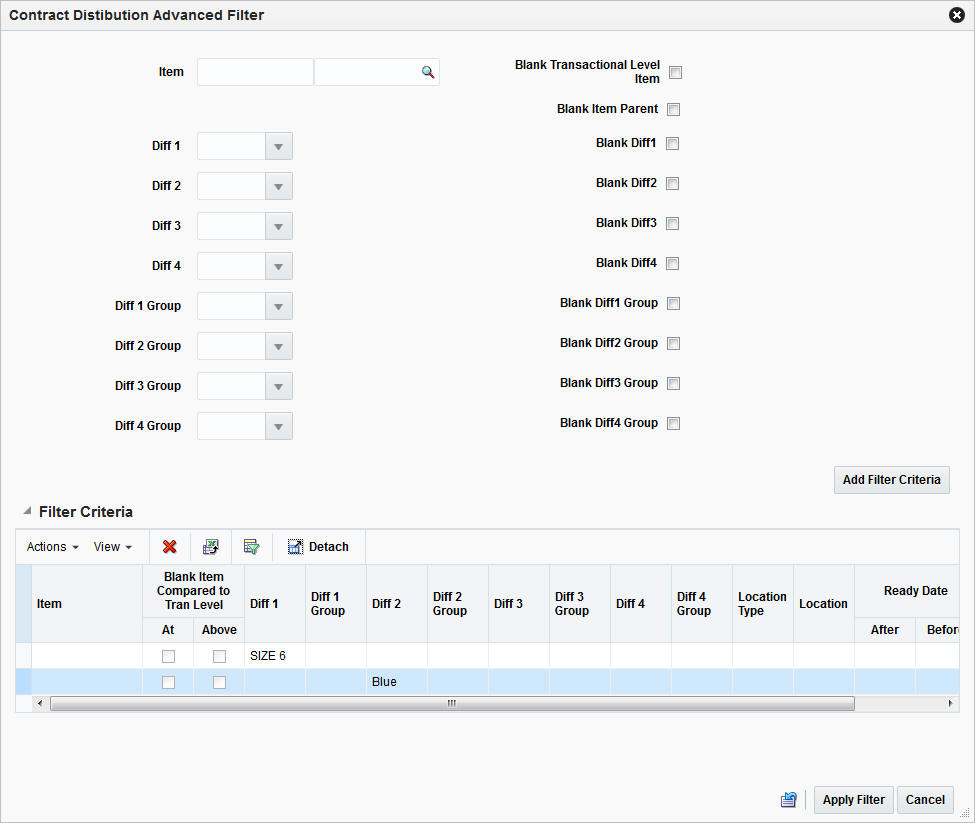
Contract Distribution Advanced Filter
The Contract Distribution Filter page allows you to filter the items that appear on the Contract Distribution page. You can then edit or distribute the resulting subset of items.
The Contract Distribution Advanced Filter page consists of the following sections.
-
Add Filter Criteria
-
Filter Criteria table
-
Toolbar
To filter the items on a contract follow the steps below.
-
From the Tasks menu, select Orders > Contracts > Manage Contracts. The Contract Search page appears.
-
Enter or select search criteria as desired to make the search more restrictive.
-
Click Search. The contracts that match the search criteria are displayed in the Results section.
-
In the Contract column, click the contract ID link, or mark a record and select Actions > Edit, or use the Edit icon
. The Contract page opens. -
In the Toolbar select More Actions > Distribute. The Contract Distribution page appears.
-
To filter the items shown in the item table, click the Apply Filter icon
 . The Contract Distribution Advanced Filter page appears.
-
Enter, select or search for the criteria by which you want to filter the item table.
-
Select Add Filter Criteria. The filtered criteria is added to the Filter Criteria table.
-
To delete a criterion from the Filter Criteria table, follow the steps below.
-
Select the record.
-
Select Actions > Delete or use the Delete icon
 . You are prompted to delete the record.
 -
Confirm with Yes. The record is removed from the Filter Criteria table.
-
-
After you have added all filter criteria, choose one of the following options.
-
Click Apply Filter, to display the results of the filter in the Order Distribution page and close the Contract Distribution Advanced Filter page.
-
Click Cancel, to reject the filter criteria and close the Contract Distribution Advanced Filter page.
-
Click the Reset icon
 , to reject the filter criteria and stay in the Contract Distribution Advanced Filter page.
-
-
-
In the Contract Distribution page, edit the filter results as needed.
-
To clear the filter, select Actions > Clear Filter, or use the Clear Filter icon
 . All items are displayed in the item table again.
-
-
Choose one of the following options.
-
Click Save and Close to save your changes and close the Contract Distribution page.
-
Click Cancel to reject your changes and close the Contract Distribution page.
-
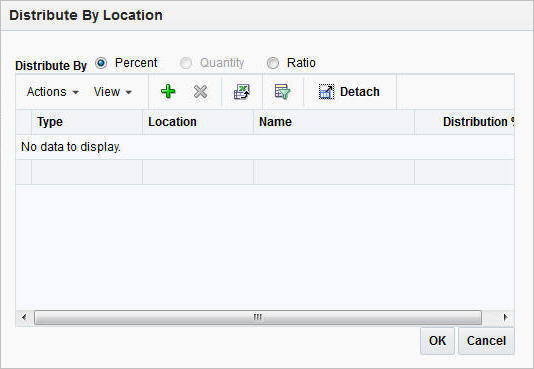
Distributing Items by Location
Note:
Since the automatic ordering process does not determine locations for the ordered goods from a Recommended Order Quantity, you must designate the locations for distribution with a Type B contract.To distribute the items by location, follow the steps below.
-
From the Contract page select More Actions > Distribute. The Contract Distribution page appears. Go to the item table.
-
If you are already in the Contract Distribution page, go to the item table.
-
In the item table select a record.
-
In the Distribute By section, click the Location button. The Distribute by Location page appears.
-
In the Distribute By section, select the method of distribution, such as percent, quantity or ratio.
Note:
You can distribute by quantity only, if you did not enter a quantity in the Contract Distribution page. -
Select Actions > Add, or use the Add icon
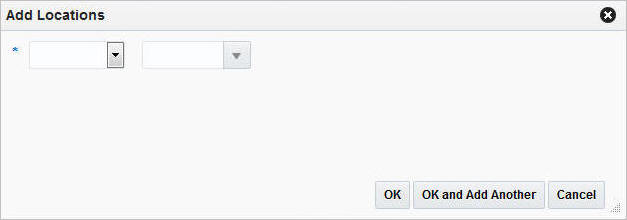
to add locations for distribution. The Add Locations page appears.-
In the Location Type field, select the type of location, for example, Store or Warehouse.
-
In the Location field, enter, select or search for the location.
-
After you have selected the location, choose one of the following options.
-
Click OK to add the current location and close the Add Locations page. The system returns to the Distribute by Location page. The location is shown in the table.
Note:
To delete a location from the table in the Distribute By Location page, mark the location. Then select Actions > Delete, or use the Delete icon to delete the location. -
Click OK and Add Another to add additional locations.
-
Click Cancel to reject all entries and close the Add Locations page. The system returns to the Distribute by Location page.
-
-
-
In the Distribute by Location page, enter the distribution percentage, quantity or ratio, depending on your distribution method. If you select the following distribution method:
-
Percent: Enter the percentage of the items you want at each location.
-
Quantity: Enter the number of items you want at each location, or the total items you want at each location.
Note:
You can distribute by quantity only if you did not enter a quantity in the Contract Distribution page. -
Ratio: Enter the proportion of items that you want at each location.
Note:
You can distribute to a location and enter a quantity distribution or ratio of zero (0).
-
-
Choose one of the following options.
-
Click OK to save your changes and close the Distribute by Location page. The system returns to the Contract Distribution page. The item table displays the item by location and the corresponding distribution quantity.
-
Click Cancel to reject your entries and close the Distribute by Location page. The system returns to the Order Distribution page.
-
Distributing Items by Ready Date
To distribute the items by ready date, follow the steps below.
-
From the Contract page select More Actions > Distribute. The Contract Distribution page appears. Go to the item table.
-
In the item table, select a record.
-
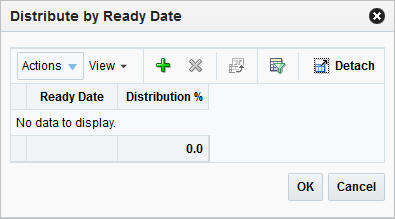
In the Distribute By section, click the Ready Date button. The Distribute by Ready Date page appears.
-
Click Actions > Add or use the Add icon
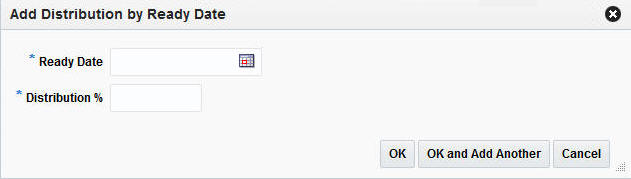
to add a ready date. The Add Distribution by Ready Date page appears. -
In the Ready Date field enter or use the Calendar icon to select a ready date.
-
In the Distribution % field, enter the percentage of the goods that are due by the ready date.
-
Then choose one of the following options.
-
Click OK to add the ready date and close the Add Distribution by Ready Date page. The entered ready date and distribution percentage are shown in the table of the Distribute by Ready Date Page.
-
Click OK to distribute the item. The system returns to the Contract Distribution page. The item table shows the item including the ready date and the corresponding distribution quantity.
-
Click Cancel to reject all entered records and close the Ready Date Page.
-
-
Click OK and Add Another to add additional ready dates for the selected item.
-
Click Cancel to reject all entered records and close the Add Distribution by Ready Date page.
-
Distributing by Diff
The Distribute by Diff page allows you to distribute an item by the differentiator groups attached to the item. The user may use differentiator ranges and ratios while performing the distribution, or perform the process manually. For each selected differentiator, the distribution can be carried out on the basis of quantity, percentage or ratio.
To distribute the items previously added to the contract, by individual diffs, follow the steps below.
-
From the Contract page select More Actions > Distribute. The Contract Distribution page appears. Go to the item table.
-
If you are already in the Contract Distribution page, go to the item table.
-
In the item table, select a record.
-
In the Distribute By section, select a diff from the list. The Differentiator Distribution page appears.
-
The Differentiator Distribution page contains the following sections.
-
Header: The header contains the selected diff group.
-
Diff Range: The Diff Range section contains a subset of diff groups.
-
Diff Ratio: The Diff Ratio section shows the ratio of diff IDs based on the sales history, which is used to assist in the distribution.
-
-
To limit the available diffs, go to the Diff Range field and enter or select a diff range ID.
-
Click Apply. The Available Differentiator column now only contains diff IDs limited to the chosen range.
Note:
To apply multiple diff ranges, choose more than one valid range. -
In the Available Differentiator area, choose one of the following options.
-
Select a diff and click the right arrow button. The diff is moved to the Diff Ratio section to the Applied Differentiator column.
-
Select all diffs and click the move all right arrow button. All diffs are moved to the Diff Ratio section to the Applied Differentiator column.
Note:
To deselect diffs, select the individual diff or all diffs. Then use the left arrow or move all left arrow buttons. The selected diffs move from the Applied Differentiator to the Available Differentiator column. -
-
Select one of the following distribution methods.
-
Percent: Enter the percentage of the items you want for each diff.
-
Quantity: Enter the number of items you want for each diff.
Note:
You can only distribute by quantity, if you did not enter a quantity in the Order Distribution page. -
Ratio: Enter the proportion of the items you want for each diff.
Note:
You can distribute the diffs and enter a percentage, quantity or ratio of zero (0).
-
-
After you have selected the diffs and the distribution method, choose one of the following options.
-
Click OK to distribute by the selected diffs and exit the Differentiator Distribution page. The system returns to the Contract Distribution page. The individual diff distributions are shown in the table.
-
Click Cancel to reject all entries and close the Differentiator page. The system returns to the Contract Distribution page.
-
Review and Approve a Contract
Recalculating and Completing the Contract
To recalculate the costs of the contract follow the steps below.
-
In the Contract page, go to the Totals section.
-
Use the Recalculate icon
 to update the costs and retail value.
 -
Review the entered data and choose one of the following options to complete the contract:
-
Click Save to save the entered records.
-
Click Save and Close to save the entered records and close the page.
-
Click Cancel to reject all entries and close the page.
-
Parent/Diff Summary
The Parent/Diff Summary page allows you to view the parent/diff summary of the diffs for an item parent on a contract. You can view the quantity contracted, quantity ordered, quantity received, and the ready date by diff value.
The Parent/Diff Summary page consists of the following sections:
Parent/Diff Summary Header
The header of the Parent/Diff Summary page contains the contract ID and the supplier site as well as the department of the contract.
View By
In the View By section, you can choose to view records either by diff 1 to diff 4. Diff 1 is selected by default.
Parent/Diff Summary Table
The Parent/Diff Summary table displays the following columns by default:
-
Parent Item
-
Description
-
Differentiator
-
Differentiator Description
-
Quantity
-
Contracted
-
Ordered
-
Received
-
-
Ready Date
Viewing a Parent/Diff Summary
To view the parent/diff summary of a contract follow the steps below.
-
From the Tasks menu, select Orders > Contracts > Manage Contracts. The Contract Search page appears.
-
Enter or select search criteria as desired to make the search more restrictive.
-
Click Search. The contracts that match the search criteria are displayed in the Results section.
-
In the Contract column, click the contract number link, or mark a record and select Actions > Edit, or use the Edit icon
. The Contract page appears. -
In the Toolbar select the More Action > Parent/Diff Summary. The Parent Diff/Summary page appears.
-
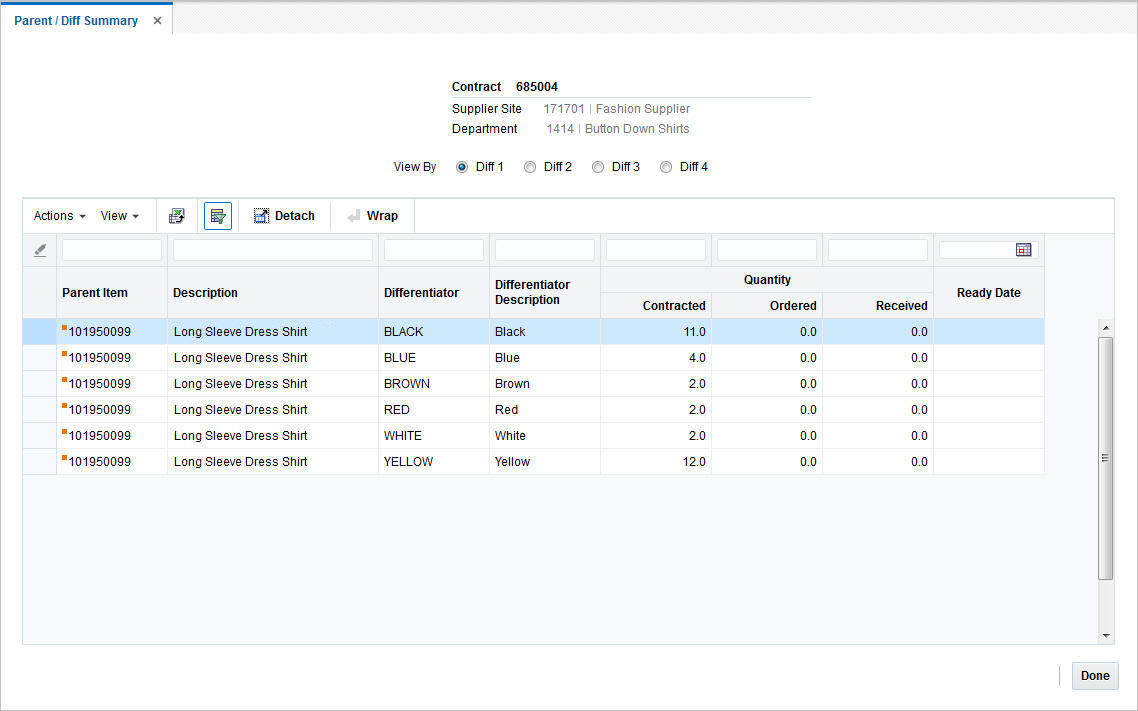
The page displays the contract ID, the supplier site and the department in the Header section.
-
In the View By section select the differentiator 1, 2, 3 or 4.
Note:
Diff 1 is selected by default. If you selected Diff 2, the content of the summary table is refreshed to display details corresponding to differentiator 2. -
The items are displayed in the Parent/Diff Summary table in the lower section of the page. The table contains the following information.
-
Parent Item
-
Description
-
Differentiator
-
Differentiator Description
-
Contracted, ordered and received Quantity
-
Ready Date
Note:
Use the header row of the Parent/Diff Summary table to further narrow down the displayed records. Enter a value in the corresponding column. To clear the filter, click the Clear All icon .
. -
-
To exit the Parent Diff /Summary page press Done.
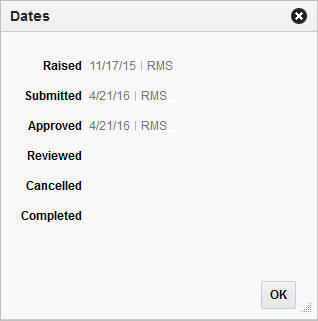
Dates
The Dates page displays the following dates:
-
Raised - shows the date, the contract was issued
-
Submitted - shows the date, the contract was submitted
-
Approved - shows the date, the contract was approved
-
Reviewed- shows the date, the contract was reviewed
-
Cancelled - shows the date, the contract was cancelled.
To view the contract dates, follow the steps below:
-
From the Tasks menu, select Orders > Contracts > Manage Contracts. The Contract Search page appears.
-
Enter or select search criteria as desired to make the search more restrictive.
-
Click Search. The contracts that match the search criteria are displayed in the Results section.
-
In the Contract column, click the contract ID link, or mark a record and select Actions > Edit, or use the Edit icon
. The Contract page appears. -
In the Toolbar select More Actions > Dates, the Dates page appears.
-
View the displayed contract dates.
-
Click OK to close the page.
Contract Approval Process
When a contract is added to the system, it must go through a series of checks before it is accessible in the system. Depending on your user role, you may not be able to move the contract to the next status. A contract may be in any of the following statuses:
| Status | Definition |
|---|---|
| Worksheet | The contract is newly created or manually placed in Worksheet status. The contract can be edited in this status. |
| Submitted | The contract has been completed and is pending review.
Once the contract is submitted it cannot be edited. |
| Approved | The contract has been reviewed and has been approved.
Once approved, POs can be written against the contract. If no orders have been written against the contract, the contract can be changed to Worksheet status, if any further changes are required. |
| Canceled | The contract has been manually closed and is no longer valid.
A cancelled contract can be reinstated for re-use. |
| Completed | The contract is complete. |
| Reviewed | The contract has been reviewed, but not completed.
All contract types can be set to status Review after a specified period of inactivity. Type C and D contracts will also be set to status Review, if the contract has an open commitment and is past its end date. When in status Reviewed, orders can be called off the contract and retailers can choose to extend the end date or renew the supplier agreement. |
Submitting a Contract for Approval
To submit a contract for approval follow the steps below.
-
From the Tasks menu, select Orders > Contracts > Manage Contracts. The Contract Search page appears.
-
Restrict your search to contracts in Worksheet status.
-
Click Search. The contracts in Worksheet status are displayed in the Results section.
-
In the Contract column, click the contract number link, or mark a record and select Actions > Edit, or use the Edit icon
. The Contract page appears. -
In the Toolbar select Approve > Submit.
-
When prompted to submit the contract, choose one of the following options.
-
Click Yes to submit the contract and close the prompt. The system returns to the Contract page. The status of the contract is changed to Submitted.
-
Click No to end the process and close the prompt. The system returns to the Contract page. The status of the contract did not change.
-
-
To end the submit process, choose one of the following options.
-
Select Save to save your changes.
-
Select Save and Close to save your changes and close the page.
-
Select Cancel to reject your changes and close page.
-
Approving a Contract
To approve a contract follow the steps below.
-
From the Tasks menu, select Orders > Contracts >Manage Contracts. The Contract Search page appears.
-
Restrict your search to contracts in Submitted status.
-
Click Search. The contracts in Submitted status are displayed in the Results section.
-
In the Contract column, click the contract number link, or mark a record and select Actions > Edit, or use the Edit icon
. The Contract page appears. -
In the Toolbar select the Approve button.
-
When prompted to approve the contract, choose one of the following options.
-
Click Yes to approve the contract and close the prompt. The system returns to the Contract page. The status of the contract is changed to Approved.
-
Click No to end the process and close the prompt. The system returns to the Contract page. The status of the contract did not change.
-
-
To end the approval process, choose one of the following options.
-
Select Save to save your changes.
-
Select Save and Close to save your changes and close page.
-
Select Cancel to reject your changes and close the page.
-