7 Manage Replenishment Foundation Data
Manage Priority Groups
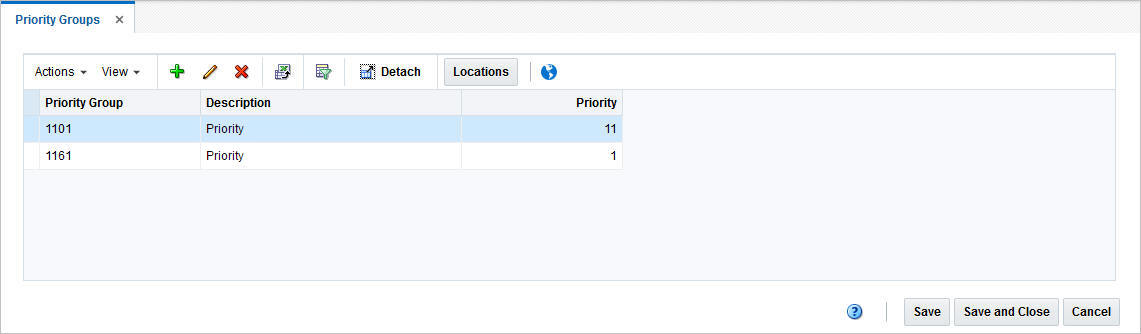
You can add, maintain and delete priority groups in Merchandising. The priority group, description and priority are displayed by default.
Priority Groups Table
The Priority Groups table displays the priority group, and group description as well as the priority by default.
Adding a Priority Group
To add a priority group, follow the steps below.
-
From the Tasks menu, select Replenishment > Priority Groups. The Priority Group window appears.
-
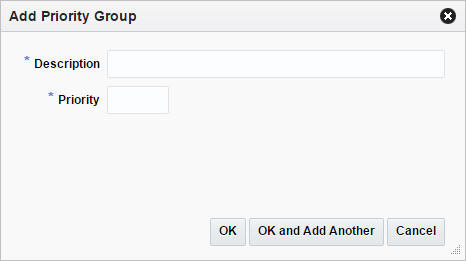
Select Actions > Add or use the Add icon
 . The Add Priority Group window appears.
 -
In the Description field, enter the desired description of the group.
-
In the Priority field, enter the desired priority level.
-
Then choose one of the following options.
-
Click OK to add the new priority group to the table.
-
Click OK and Add Another to add additional groups.
-
Click Cancel to reject all entries and close the window.
-
Editing a Priority Group
To edit a priority group, follow the steps below.
-
From the Tasks menu, select Replenishment > Priority Groups. The Priority Group window appears.
-
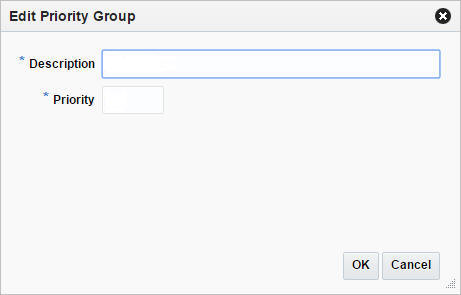
Select Actions > Edit or use the Edit icon
 . The Edit Priority Group window appears.
 -
In the Description field, edit the description of the group, if necessary.
-
In the Priority field, edit the priority level, if necessary.
-
Then choose one of the following options.
-
Click OK to save your changes and close the window.
-
Click Cancel to reject all entries and close the window.
-
Priority Group Locations
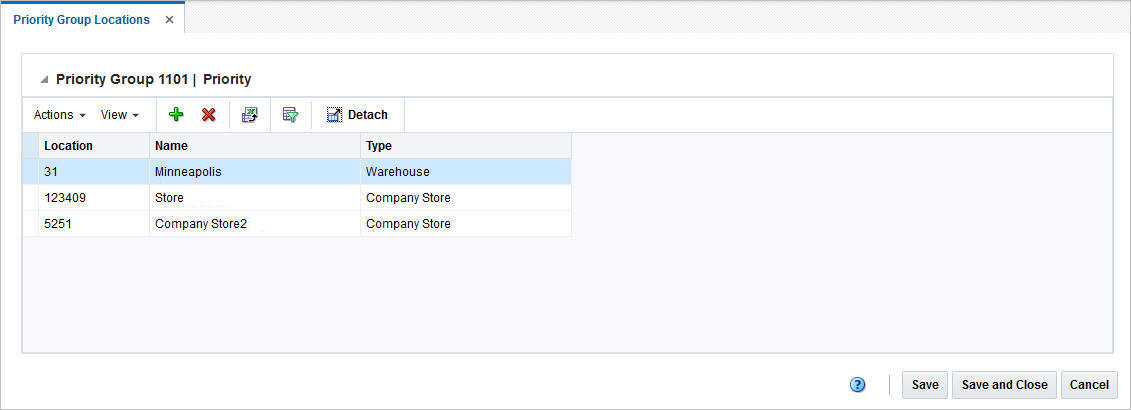
You can add and delete priority group locations in this window. The title of the table displays the priority group ID and description.
Priority Group Locations Table
The Priority Group Locations table displays the priority location, name and type.
Adding a Priority Group Location
To add a priority group location, follow the steps below.
-
From the Tasks menu, select Replenishment > Priority Groups. The Priority Groups window appears.
-
Then select Actions > Locations or use the Locations button. The Priority Group Locations window appears.
-
In the table, select Actions > Add or use the Add icon
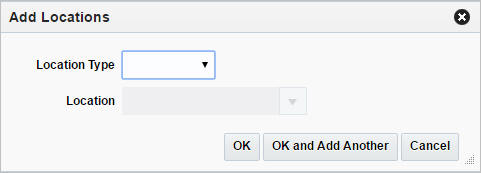
. The Add Locations window appears. -
In the Location Type field, select the desired location type from the list.
-
The Location field is enabled. In the Location field, enter, select or search for the desired location ID.
-
Then choose one of the following options.
-
Click OK to add the new location and close the window.
-
Click OK and Add Another to add additional locations.
-
Click Cancel to reject all entries and close the window.
-
Manage Delivery Slots
Within Merchandising there is the ability to take in information about delivery slots that define time periods that can be used to support replenishing the same item/location combination multiple times per day. This information is used only by the Store Order method of replenishment. Delivery slots are configured during implementation and can be held in a format set by the retailer for communication with suppliers, warehouses, and stores. If used, the delivery slot that is associated with a store order will be held on the transfer created based on the store order and is included in the information sent to the warehouse and store when the transfer is approved. This functionality is accessed from the main Merchandising task list under Foundation Data > Download Foundation Data and Foundation Data > Upload Foundation Data.
To add, update, or remove delivery slot information, you will need to select the template type of Replenishment from the Download Data screen and then the template Delivery Slot. Click the Download button and when prompted, choose to either open the .ods file that is generated or save the file and open it separately in the spreadsheet application of your choice.
Add Delivery Slot
To add a new delivery slot, select the action type of Create on the Delivery Slot tab. Next, enter the slot code and description that need to be associated with the new slot. The last field for this worksheet is the sequence number of the slot. The translations tab will hold the delivery slot in the alternate languages from the system's primary language.
Update Delivery Slot
If you would like to update a delivery slot, then a similar process will have to be followed to that described above for entering new slot information. First, download the spreadsheet, and then find the delivery slot that you want to update. In that row select the action type of Update, and then update the current details in the spreadsheet.
Delete Delivery Slot
If you wish to delete a delivery slot, update the action column to select Delete in each of the rows you want to delete.
Uploading Changes
For all actions defined above, once all the updates have been made to the data in the spreadsheet, save the file and close it. Then, return to the Merchandising screens and select Foundation Data > Upload Foundation Data from the main task list. In this screen, select the template type Replenishment and the template Delivery Slot. This will generate a process description automatically, but this can be updated if desired. Lastly, select the Browse button and navigate to the directory where you saved the updated spreadsheet.
To review the status of the upload and check whether any errors occurred, select the Foundation Data > Review Status task from the main task list.
See also Download/Upload Data from Spreadsheets.
Manage Supplier Distribution
Retailers may want to split orders generated via replenishment across multiple suppliers for one or more items, with the intention of taking advantage of deals, bracket costing or to meet vendor constraints. In order to configure Merchandising replenishment to split orders by supplier, a percentage can be assigned to an item/location combination, which will indicate what percentage of the recommended order quantity from a replenishment run will be allocated to a particular supplier/country of sourcing combination. This is referred to as Supplier Distribution and within Merchandising, where the ability exists to take in information about any updates to the supplier distribution at an item/location level. This functionality is accessed from the main Merchandising task list under Foundation Data > Download Foundation Data and Foundation Data > Upload Foundation Data.
To update supplier distribution information, you will need to select the template type of Replenishment from the Download Data screen and then the template Supplier Distribution. Click the Download button and when prompted, choose to either open the .ods file that is generated or save the file and open it separately in the spreadsheet application of your choice.
Update Supplier Distribution
If you would like to update the supplier distribution percentage, first download the spreadsheet and find the item/location/supplier/country of sourcing record that you want to update. In that row select the action type of Update, and then update the current percentage in the spreadsheet.
Uploading Changes
For all actions defined above, once all the updates have been made to the data in the spreadsheet, save the file and close it. Then, return to the Merchandising screens and select Foundation Data > Upload Foundation Data from the main task list. In this screen, select the template type Replenishment and the template Supplier Distribution. This will generate a process description automatically, but this can be updated if desired. Lastly, select the Browse button and navigate to the directory where you saved the updated spreadsheet.
To review the status of the upload and check whether any errors occurred, select the Foundation Data > Review Status task from the main task list.
See also Download/Upload Data from Spreadsheets.
Manage Transit Times
Retailers may want to maintain details around the transportation time between two locations at the department, class or subclass level with the intention of calculating the estimated in stock date of items put on replenishment orders based on the merchandise hierarchy of the item. These orders consider the transit time defined from the supplier location to the location for which the order has been raised, resulting in a far more accurate estimation of the date. This transit data is referred to as Transit Times and is accessed from the main Merchandising task list under Foundation Data > Download Foundation Data and Foundation Data > Upload Foundation Data.
To update transit time information, you will need to select the template type of Inventory from the Download Data screen and then the template Transit Times. Click the Download button and when prompted, choose to either open the .ods file that is generated or save the file and open it separately in the spreadsheet application of your choice.
Add Transit Times
To add a new transit time record, select the action type of Create on the Transit Time tab. Next, enter the transit time for the merchandise hierarchy/point of origin/point of destination combination. This data needs to be specified in terms of days.
Update Transit Times
If you would like to update the transit time data, first download the spreadsheet and find the merchandise hierarchy/point of origin/point of destination record that you want to update. In that row select the action type of Update, and then update the current transit time in the spreadsheet.
Delete Transit Times
If you wish to delete a transit time record, update the action column to select Delete in each of the rows you want to delete.
Uploading Changes
For all actions defined above, once all the updates have been made to the data in the spreadsheet, save the file and close it. Then, return to the Merchandising screens and select Foundation Data > Upload Foundation Data from the main task list. In this screen, select the template type Inventory and the template Transit Times. This will generate a process description automatically, but this can be updated if desired. Lastly, select the Browse button and navigate to the directory where you saved the updated spreadsheet.
To review the status of the upload and check whether any errors occurred, select the Foundation Data > Review Status task from the main task list.
See also Download/Upload Data from Spreadsheets.
Manage Location and Company Schedules
Location Delivery Schedules Window
The Location Delivery Schedules window allows you to create, edit, and view delivery schedules for items from a supplier or warehouse to stores and warehouses. After you create a delivery schedule, you can define exceptions to the schedule by specifying which items are not to be delivered to the location on a specific delivery day.
When the Use Location Delivery Schedule system parameter is selected, the replenishment feature uses the delivery schedule to calculate lead times for the items at the location. When there is a delivery schedule for a supplier or warehouse at a location, the specified lead times for the item are the minimum amount of time in which a purchase order can be delivered to that location.
When the delivery date of the purchase order does not fall on a delivery day of the supplier or warehouse, the lead time is calculated by taking the minimum lead time and adding additional days to reach the next valid delivery day. In effect, the lead time is extended until the next delivery day of the supplier or warehouse. Extending the lead time increases the number of units required to replenish the item. The lead time is only extended when the replenishment method is Dynamic, Dynamic - Seasonal, Dynamic - Issues, or Floating Point.

Location Delivery Schedules Header
The header displays the Source and Destination Location field.
-
In the Source field, select the source type, store or warehouse. Then, enter, select or search for the source ID.
-
In the Destination Location field, select the destination type, store or warehouse. Then, enter, select or search for the destination ID.
When you access the Location Delivery Schedules window from the Warehouse window, the Destination Locations fields are populated with the selected warehouse. The Source fields are blank and enabled. Once you choose a source, the table displays records matching the source and destination locations values.
When you access the Location Delivery Schedules window from the Supplier Site window, the Source fields are populated with the selected supplier site. The Destination Locations fields are blank and enabled. Once you choose a destination, the table displays records for the source and destination values.
Location Delivery Schedules Table
The table displays the available delivery schedules for the selected location.
Managing Location Delivery Schedules
To manage location delivery schedules, follow the steps below. You can enter the Location Delivery Schedules window in different ways.
Adding a Delivery Schedule at the Store or Warehouse Level
To add a delivery schedule at the store or warehouse level:
-
From the Tasks menu, select Foundation Data > Locations > Organizational Hierarchy. The Organizational Hierarchy window appears.
-
Select the Store/Warehouse button. The available stores/warehouses are displayed in the table.
-
Select a record in the table.
-
In the Store/Warehouse column, click the store/warehouse ID link, or mark a record and select Actions > Edit, or use the Edit icon. The Store/Warehouse window appears.
-
Click More Actions > Delivery Schedules. The Location Delivery Schedules window appears.
-
Store/Warehouse Level:
-
In the Source fields, select supplier site or warehouse. Then enter, select or search for the source ID.
-
The Destination Locations fields display the information of the selected store/warehouse.
-
To manage delivery schedules, see the Managing Delivery Schedules section.
-
-
Adding a Delivery Schedule at the Supplier Level
To add a delivery schedule at the supplier level:
-
From the Tasks menu, select Foundation Data > Suppliers and Partners > Manage Suppliers. The Supplier Search window appears.
-
Enter or select search criteria as desired to make the search more restrictive.
-
Click Search. The suppliers that match the search criteria are displayed in the Results section.
-
In the Supplier Site column, click the supplier site ID link, or mark a record and select Actions > Edit, or use the Edit icon. The Supplier Site window appears.
-
Select More Actions > Delivery Schedule. The Location Delivery Schedules window appears.
-
Supplier Level:
-
In the Source fields display the information of the selected supplier.
-
The Destination Locations field, select a destination type from the list. Then select the location ID.
-
To manage delivery schedules, see the Managing Delivery Schedules section.
-
-
Managing Delivery Schedules
In the Delivery Schedules window, follow the steps below.
-
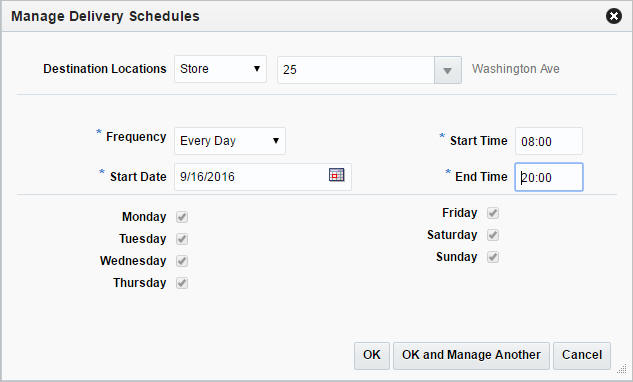
In the table, select the Manage Schedules button. The Manage Delivery Schedules window appears.
-
The Destination Location fields display the store information.
-
In the Frequency field, select the desired time span from the list.
-
In the Start Date field, enter the start date or use the Calendar icon to select a date.
-
In the Start Time field, enter the starting time of the schedule.
-
In the End Time field, enter the end time of the schedule.
-
Select the checkboxes of the desired weekdays of the delivery schedule.
-
Then choose one of the following options.
-
Click OK to add the current schedule and close the window.
-
Click OK and Manage Another to add the current schedule and add additional entries.
-
Click Cancel to reject all entries and close the window.
-
Source Delivery Exceptions Window
The Source Delivery Exceptions window allows you to define exceptions to the delivery date of a supplier at a store or warehouse. You specify which items are not to be delivered to the location on a specific delivery date.
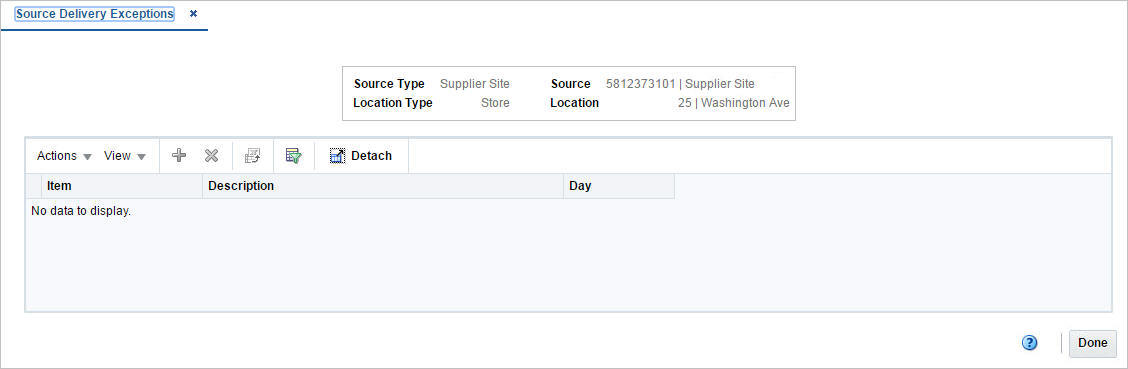
Source Delivery Exceptions Table
The table displays the item for which the delivery exception is valid.
Adding Source Delivery Exceptions
To add a delivery exception for a supplier to a warehouse or store, follow the steps below. You can enter the Source Delivery Exceptions window in different ways
Navigate: through Store/Warehouse window
-
From the Tasks menu, select Foundation Data > Locations > Organizational Hierarchy. The Organizational Hierarchy window appears.
-
Select the Store/Warehouse button. The available stores/warehouses are displayed in the table.
-
Select a record in the table.
-
In the Store/Warehouse column, click the store/warehouse ID link, or mark a record and select Actions > Edit, or use the Edit icon. The Store/Warehouse window appears.
-
Click More Actions > Delivery Schedules. The Location Delivery Schedules window appears.
-
Click Exceptions. The Source Delivery Exceptions window appears.
Navigate: through Supplier Site window
-
From the Tasks menu, select Foundation Data > Suppliers and Partners > Manage Suppliers. The Supplier Search window appears.
-
Enter or select search criteria as desired to make the search more restrictive.
-
Click Search. The suppliers that match the search criteria are displayed in the Results section.
-
In the Supplier Site column, click the supplier site ID link, or mark a record and select Actions > Edit, or use the Edit icon. The Supplier Site window appears.
-
Select More Actions > Delivery Schedule. The Location Delivery Schedules window appears.
-
Click Exceptions. The Source Delivery Exceptions window appears.
Adding Exceptions
In the Source Delivery Exceptions window, follow the steps below.
-
In the table, select Actions > Add, or use the Add icon. The Add Exceptions window appears.
-
In the Item Type field, select the type, item or item list.
-
In the Item field, enter select or search for the item.
-
In the Date field, enter the day on which you do not want the item or item list delivered or use the Calendar icon to select a date.
-
Then choose one of the following options.
-
Click OK to add the current exception and close the window.
-
Click OK and Add Another to add additional exceptions.
-
Click Cancel to reject all entries and close the window.
-
Location Closings
Location Closings provides for a way to indicate if specific stores and warehouses will be closed for sales, shipping, and/or receiving on a defined date. For example, if a location close date is defined for Dec. 25, 2019 for sales it would not be expected that any sales are processed on this date. Sales Audit uses the close dates to determine whether or not to create a store/day for a give store and date. Similarly, the replenishment function within Merchandising uses the shipping and receiving location closed dates when determining delivery dates for replenishment orders.
All of these updates are done through a spreadsheet download and upload processes, which are accessed through the main Merchandising task list under Foundation Data > Download Foundation Data and Foundation Data > Upload Foundation Data.
To modify location closing dates, select the template type of Foundation from the Download Data screen and then the template Location Closings. Click the Download button and when prompted, choose to either open the .ods file that is generated or save the file and open it separately in the spreadsheet application of your choice.
Once opened, there will be 2 sheets that can be modified - Location Closings and Location Closings Translations. The Location Closings will show all the existing closing dates in the system currently, by location and with a reason in the primary language. This tab also allows for the deletion of existing closing dates or the addition of new closing dates. The Location Closings Translations tab will show existing closing dates with their translated reasons in other languages, as applicable for your implementation. This tab allows for the addition of new rows, removal of existing rows, and update to existing.
Adding a Location Close Date
To add a new close date, start in the Location Closings tab and in a blank line in the template, select the action type of Create and enter the date, in the DD-MON-YYYY format, for the new close date you wish to add, select a location type of Store or Warehouse, enter a location ID, and provide a reason for the close date (e.g. Christmas Day). The reason should be entered in the primary language as configured in the Merchandising system options and can be up to 120 characters. Additionally, select Yes or No in the Sales, Shipping, and Receiving columns to indicate if the location is closed for that particular business activity. A value of Yes indicates it is closed.
To define alternate translated reasons for this date, navigate to the Location Closings Translations tab. Select a language and enter the same location and date used on the Location Closings tab in the Location and Close Date columns respectively of this tab and then enter the reason in the Reason column. It is not required that translated reasons be defined.
Updating a Location Close Date
If you would like to update any details a similar process will be followed as that described above for creating new location closing dates. First, download the Location Closings spreadsheet, and then navigate to the tab where you would like to make your updates. The following columns can be updated in each tab:
-
Location Closings - Reason, Sales, Shipping, Receiving
-
Company Closing Translations - Reason
In the tab where you are going to make your updates, select the action type of Update, and then correct the value in the spreadsheet. Once your updates are complete, save and close the spreadsheet.
Deleting a Location Closing Date
If you wish to delete a location close date because it is no longer applicable, update the action column to select Delete in each of the tabs where it occurs. This applies to all tabs and, if deleting a location close date, all of the corresponding translation rows must also be marked for delete.
Uploading Changes
For all actions defined above, once all the updates have been made to the data in the spreadsheet, save the file and close it. Then, return to the Merchandising screens and select Foundation Data > Upload Foundation Data from the main task list. In this screen, you'll again select the template type Foundation and the template Location Closings. This will generate a process description automatically, but this can be updated if desired. Lastly, you'll select the Browse button and navigate to the directory where you saved the updated spreadsheet.
To review the status of the upload and check whether any errors occurred, select the Foundation Data > Review Status task from the main task list.
Company Closings
Company Closings provides for a way to indicate if a company will be closed for business and to define any exceptions to company-wide closures. Company close dates are used to determine if sales and shipping/receiving activities should be expected for a given date. For example, if a company close date is defined for Dec. 25, 2019 and there are no exceptions defined it would be expected that no sales are processed on this date and that no shipments or receipts occur. Sales Audit uses the close dates to determine whether or not to create a store/day, and the replenishment function within Merchandising uses them when determining delivery dates for replenishment orders.
All of these updates are done through a spreadsheet download and upload processes, which are accessed through the main Merchandising task list under Foundation Data > Download Foundation Data and Foundation Data > Upload Foundation Data.
To modify company closing dates, select the template type of Foundation from the Download Data screen and then the template Company Closings. Click the Download button and when prompted, choose to either open the .ods file that is generated or save the file and open it separately in the spreadsheet application of your choice.
Once opened, there will be 3 sheets that can be modified - Company Closings, Company Closings Translations, and Company Closing Exceptions. The Company Closings will show all the existing closing dates in the system currently with their primary language descriptions. This tab allows for the update or deletion of existing closing dates or the addition of new closing dates. The Closing Dates Translations tab will show existing closing dates with their translated descriptions in other languages, as applicable, for your implementation. This tab allows for the addition of new rows, removal of existing rows, and update to existing. The Closing Dates Exceptions tab allows for the definition of exceptions for stores and warehouses. This tab also supports addition, update, and delete. Exceptions can be defined for all activities, or they can be marked as an open exception for one or more of sales, shipping, and receiving. For example, a store may be open for sales but closed for shipping and receiving.
Adding a Company Close Date
To add a new close date, start in the Company Closings tab and in a blank line in the template, select the action type of Create and enter the date for the new close date you wish to add, in the DD-MON-YYYY format, and provide a description for the close date (e.g. Christmas Day). The description should be entered in the primary language as configured in the Merchandising system options and can be up to 120 characters.
To define alternate translated descriptions for this date, navigate to the Company Closings Translations tab. Select a language and enter the same date used on the Company Closings tab in the Close Date column of this tab and then enter the business description in the Close Description column. It is not required that translated descriptions be defined.
If exceptions to the company close date need to be defined navigate to the Company Closings Exceptions tab. To define an exception, in a new line in the spreadsheet select Create and then enter the Close Date from the Company Closings tab that you are defining an exception for. Next, select a location type (Store or Warehouse), and enter the store or warehouse ID in the Location column. Then, indicate which activities the store or warehouse will be open for by selecting No in the Sales, Receiving, and Shipping columns. If the location will remain closed for an activity select Yes for the appropriate column(s). In order to be a valid exception at least one of these activities must be marked as No.
Updating a Company Close Date
If you would like to update any details a similar process will be followed as that described above for creating new company closing dates. First, download the Company Closings spreadsheet, and then navigate to the tab where you would like to make your updates. The following columns can be updated in each tab:
-
Company Closings - Close Description
-
Company Closing Translations - Close Description
-
Company Closing Exceptions - Sales, Receiving, Shipping
In the tab where you are going to make your updates, select the action type of Update, and then correct the value in the spreadsheet. Once your updates are complete, save and close the spreadsheet.
Deleting a Company Closing Date
For all actions defined above, once all the updates have been made to the data in the spreadsheet, save the file and close it. Then, return to the Merchandising screens and select Foundation Data > Upload Foundation Data from the main task list. In this screen, you'll again select the template type Foundation and the template Company Closings. This will generate a process description automatically, but this can be updated if desired. Lastly, you'll select the Browse button and navigate to the directory where you saved the updated spreadsheet.
To review the status of the upload and check whether any errors occurred, select the Foundation Data > Review Status task from the main task list.