7. Underwriting
7.1 Introduction
Underwriting is the next step after application entry in Line of credit origination cycle. At the beginning of underwriting process, the application has been entered into Oracle Financial Services Lending and Leasing, receiving an application number. The application, then passes through the initial prescreening checks, and receives a credit bureau report. (Credit bureau pulls are based upon zip code setup.) The system assigns it a custom credit score and based on this, the application automatically updates its status and sent to the appropriate queue. In doing so, one of three things happen to the application:
- The application passes all the prescreening requirements and is automatically approved based on the auto-decisioning process. The system, then, automatically notifies the producer with a decision fax. You can use the Underwriting screen to view the application and decision information and proceed to funding.
- The application fails the prescreening requirements and is automatically rejected based on the auto-decisioning process. Again, the system notifies the producer with a decision fax. You can use the Underwriting screen to view application and decision information. Also, you can rehash the application.
- The application receives a status requiring a manual review and is sent to the underwriting queue. It is now up to the underwriter to verify data and manually change the status of application using Underwriting screen.
This chapter explains how to use the Underwriting screen to complete the following tasks:
- Loading an application on the Underwriting screen
- Verifying the applicant information
- Verifying the credit bureau data
- Calculating and validate the debt-to-income ratios
- Requesting a credit bureau report manually
- Adding comments and tracking attributes
- Making a decision about an application
- Verifying the edits
- Rehashing an application
- Ageing an application.
- Review Requests
7.2 Underwriting Screen - an overview
The underwriting process follows these basic steps:
- Opening the Underwriting screen and loading the application you want to work with.
- Viewing and verifying information about the applicant supplied during application entry.
- Viewing information from the credit bureau report.
- Viewing and verifying information regarding the collateral, if present.
- Viewing and verifying information regarding the trade-ins, if present.
- Calculating and validating the debt-to-income ratios.
- Selecting the pricing for the application.
- Specifying information regarding stipulations, itemizations, check lists, and rate schedules (variable rate Line of credit only), if required. (The checklist can be configured to display a list of tasks to follow when using the Underwriting screen.)
- Making a decision on the Line of credit (approve, reject, or condition).
- Performing an edits check to verify the information on Underwriting screen.
- Viewing errors and warnings from the edits check and make the required corrections to the data.
- Changing the status of the application.
7.3 Loading an Application on the Underwriting screen
The first step in the underwriting process is to load the application you want to work with. For details about using the Loading an application, refer Searching for an Application in the chapter Search Function.
7.3.1 Applications
The Underwriting screen’s Applications section appears at the top of the screen opened from Underwriting master tab. The screen displays the application number and name on the header and contains information such as application purpose, product and producer.
In this section, you can perform any of the Basic Operations mentioned in Navigation chapter

A brief description of the fields is given below:
Field: |
View this: |
App # |
The application number |
Dt |
The application date |
Product |
The Line of credit product of the application. |
Channel |
How the application information was received. |
Priority |
The priority of the application. |
Company |
The company of the application. |
Branch |
The branch of the company. |
Status |
The status of the application. |
Origination Stage Code |
The origination stage code of the application. |
Billing Cycle |
The billing cycle of the application. System displays the applicable billing cycle by default based on the product and the calculation method defined at Setup > Products screen. The editable nature of billing cycle is controlled by the system parameter UIX_BILL_CYCLE_ALLOWED_IND. However, for Rent Factor type of lease calculation, only ‘Monthly’ is applicable and system displays an error on save if any other value is selected. |
Purpose |
The purpose of the application. |
Producer |
The producer type and producer of the application. |
Producer Name |
The name of the producer of the application. The Producer Name is displayed as a hyperlink and clicking on the same will open ‘Producers’ page with details of the producer. |
Producer Contact Number |
The system displays the contact number of the producer. |
Region |
The region of the producer. |
Territory |
The territory of the producer. |
Existing Customer |
Indicates if the customer is an existing customer. |
Duplicate Application |
Indicates if the application is a duplicate application. |
Line of credit Currency |
The Line of credit currency of the application. |
Class |
The class of the application. |
Sales Agent |
The sales agent of the application. |
Contract Type |
The type of application. ‘Manual’ indicates OFSLL generated application, where as ‘eContract/Dealer’ indicates that application is generated from external system. |
Joint |
If selected, indicates this is a joint application. |
Cosigned |
If selected, indicates this is a co-signed application. |
Contact |
The contact of the application. |
Lead # |
The lead number will appear in the list only if a lead is already created using the Sales Lead link. |
CRB Pull |
Check this box to pull an initial credit bureau report, after the application passes the pre screen edits. Uncheck the box, if you want to enter an application without pulling a credit report. To use a previously pulled credit bureau report, uncheck this box and specify the Bureau and Bureau Reorder # fields on the Primary Applicant screen. |
Override Ok |
Check this box to ignore the overrides. If the application has been marked as ‘Override OK’ then the system would allow you to change the application status even when override condition exists. |
Warning Ok |
Check this box to ignore the warnings. If the application has been marked as ‘Warning OK’ then the system would allow you to change the application status even when warning exists. |
Proxy for Underwriter |
If you are acting as a proxy for an Underwriter, then you can select the Underwriter’s name from the adjoining options list. The list displays all the associated Underwriters, Underwriting Supervisors, and Underwriting Managers. However, this is not mandatory and can be used while auctioning an application on behalf of another underwriter. |
- Perform any of the Basic Actions mentioned in Navigation chapter.
7.3.2 Changing the Status of the Application
You can use underwriting screen’s Applications master screen to change the status and sub status of the application.
To change the status of the application
- On the Underwriting form’s Application master screen, change the status of application to either Approved, conditioned, or Rejected in the Status field and click Save.
The system checks the information on the Underwriting form using guidelines established during implementation.
The system finds an error based on these guidelines, a Warning message appears stating “Validation Error exist, Unable to Change the status. Please check the Edits.”
- Click the Verification link and begin verifying edits on the Edits screen (For more information, see the Verification link section in this chapter.)
During status change:
- If there is an error in the edit, system displays an error message as ‘Errors exist. Cannot change status. Please Verify Edits.’ and previous status is retained.
- If there is an edit which requires override, the system displays an override message as ‘Override Required. Do you want to continue?’
- If you select ‘Yes’, the system will continue with OVERRIDE_REQUIRED processing by changing the status.
- If you select ‘No’, the system will change the status back to old status.
During status change, if there is a warning in the edit, the system displays an error message as ‘Warning Exists. Do you want to continue?’.
- If you select ‘Yes’, the system will continue processing by changing the status.
- If you select ‘No’, the system will change the status back to old status.
7.3.3 Rehashing an Application
Once the application moves to status of Approved, Rejected, or conditioned status, you cannot amend the information. However, you can amend the application, by changing the sub status of the application to Rehashing.
To Rehash the Application
- Open the Underwriting screen and load the application you want to change with the Approved, Rejected, or conditioned status.
- In the Applications master section, select Rehashing in the Sub Status field and click Save.
After you enter the information required in the application, you can change the status to Approved, Rejected, conditioned, or Withdrawn. (For more information, refer Decision Tab section in this chapter.)
Once the status is changed to Approved, Rejected, conditioned, or Withdrawn, you cannot make further changes to the information on the Decision tab.
7.3.4 Aging an Application
The Underwriting screen can be configured so that applications will be moved to a separate queue after a certain amount of time. (This time frame is determined in setup). This applications receive a sub status of Aged Application. This housekeeping function allows you to keep your system free of stagnant application by moving them into an archive.
7.4 Summary Tab
The summary screen provides a unified view of the application details without navigating to the respective screens/ sub-tabs.
Using this screen, you can view the following details in their respective sections:
- Super Summary
- Applicant
- Ratios
- Bureau
- Checklist
- Collateral
- Trade-In
- Requested
- Approved
- Decision Itemizations
- Decision History
- Comments
- Stipulations/Adverse Actions
To view the Super Summary
- Open the Underwriting screen and load the application you want to work with.
- Click Summary tab. By default the system opens the summary tab. Expand the Super Summary section.
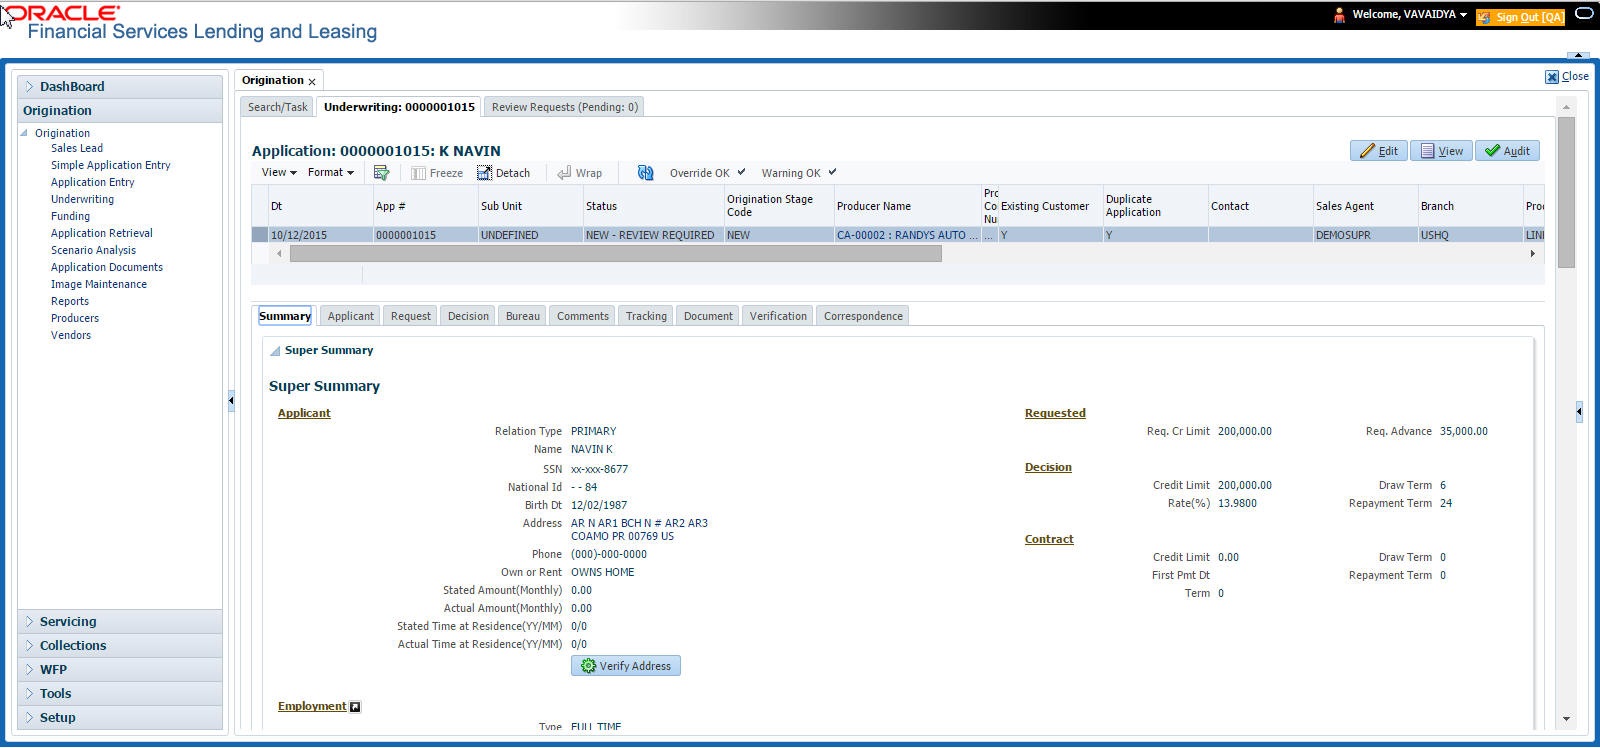
The Super Summary tab provides a snapshot of all relevant details in a single screen and contains details of Applicant, Employment, Ratios, Bureau, Requested financials, Decision updates, Contract updates and Primary Collateral details. You need not have to navigate to each of these tabs for specific information on the application. Also clicking on the hyperlinks of Address, Employment, Ratios, and Trade-In helps you to directly navigate to respective tab(s),
During the Underwriting and Funding stages, 'verified' button is displayed just below the address and employment details for each of the applicants. This would be enabled only when the Verified by and Verified Dt in the respective tabs are blank. You can verify the details from the Super Summary tab. Clicking on Verified will do the following:
- System will copy the stated values to Actual values.
- System will stamp the “Verified By” as 'User Name' and 'Verified Date' as 'Current GL Date' for the respective applicant.
- If 'Verified Details' are already updated in tab or if the details are stamped, this button will be disabled.
- 'Verified' button will be available when 'Actual Amount' equal to ZERO or 'Verified By' or 'Verified Date' is NULL.
You need not navigate to Address and Employment tab for verifying applicant details.
Decision details will be displayed when application has Origination Stage as “Review, Decisioned, Contract or Funded”. In case an application is Rehashed, only Decision information will be displayed and Contract information will not be displayed. Contract details will be displayed when application has Origination Stage as “Contract or Funded”.
The system displays the collateral details maintained in the collateral tab on click of navigation button under the headings Primary Collateral and Secondary Collateral. Collateral details for Unsecured loan also will be displayed if they are maintained.
All the trade-in details, if any, maintained in the application would be displayed on click of Navigation button.
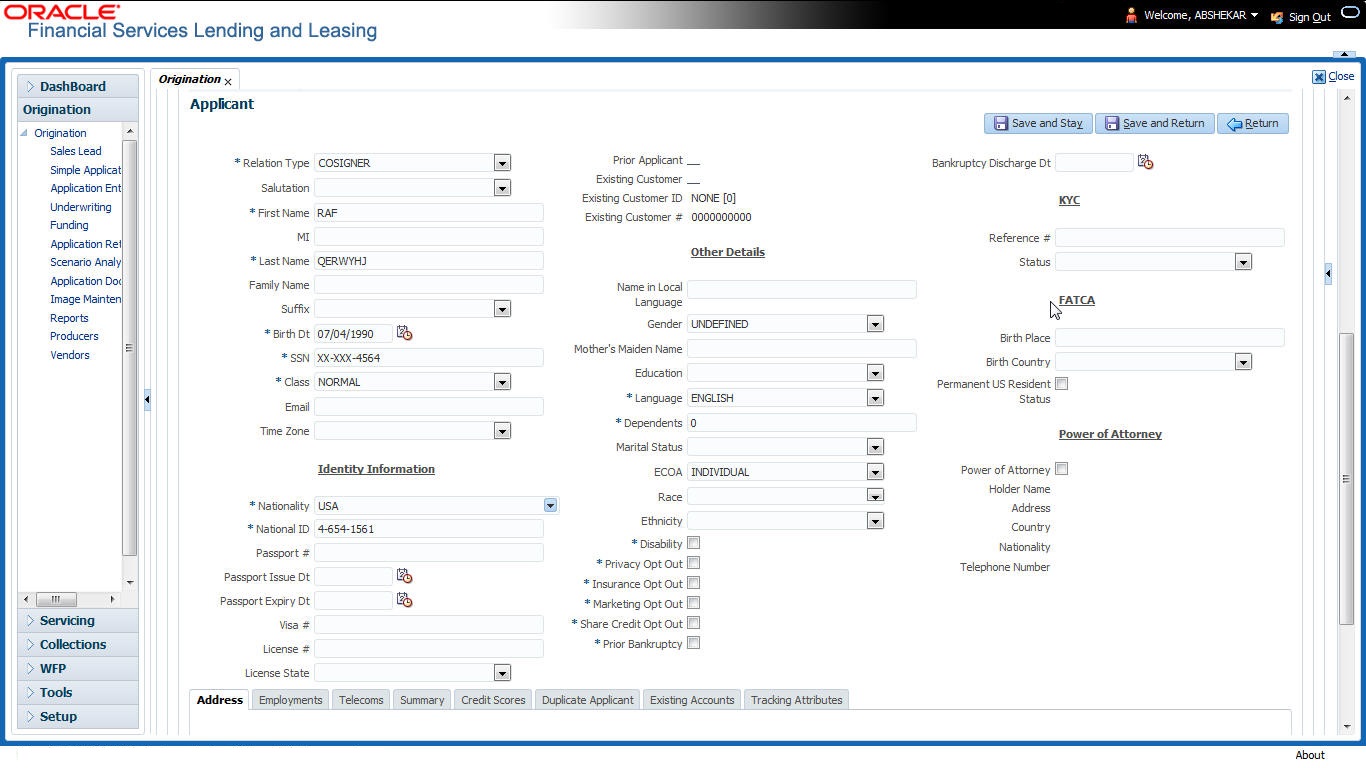
7.5 Applicant Tab
Having selected and loaded an application, you can view the information about applicant in the Applicants tab. This is information that was recorded on the Application Entry screen or gathered during the credit pull. You can edit data from the Application Entry screen at anytime in the following steps. Remember to save your work with each change. Information from the credit bureau pull is available to view only.
Using the information supplied on the application, complete the Applicants tab details and the following sub tab details:
- Address
- Employments
- Telecoms
- Summary
- Credit Scores
- Duplicate Applicant
- Existing Accounts.
- Tracking Attributes
Primary Applicant details are required for SME applications also. The system uses information on the Financial and Liabilities sub tabs in determining the applicant’s net worth. The system uses information on the Employments screen and Other Incomes sub screen to calculate the applicant’s debt-to-income ratio.
To verify applicant information on the Underwriting screen
- Open the Underwriting screen and load the underwriting application you want to work with.
- Click Applicants tab.
- In this section, you can perform any of the Basic Operations mentioned in Navigation chapter
A brief description of the fields is given below:
Field |
Do this |
Relation Type |
Select the relationship type from the adjoining drop-down list. For example, primary, spouse, secondary, or cosigner. |
Salutation |
Select the salutation from the adjoining drop-down list. |
First Name |
Specify the applicant’s first name. |
MI |
Specify the applicant’s middle name. |
Last Name |
Specify the applicant’s last name. |
Family Name |
Specify the applicant’s family name. |
Suffix |
Select the name suffix/generation from the adjoining drop-down list. |
Birth Dt |
Specify the applicant’s date of birth. |
SSN |
Specify the applicant’s social security number. |
Class |
Select the classification of the applicant from the adjoining drop-down list. For example, normal or employee. The system uses this information to restrict access to the database by recognizing employees as ‘secured applications’. You can create a SME (Small Medium Enterprise) application by selecting Small business. When you select small business and save your entry, the Business Applicants link on the Applicants link is available. (required). |
Specify the personal Email ID of the applicant. |
|
Time Zone |
Specify the time zone to which the applicant belongs. This information appears when you enter and save the zip code for the primary applicant’s current home address on the Address sub screen. You can also manually complete this field. |
Identity Information Section |
|
Nationality |
Select the applicant’s nationality from the adjoining drop-down list. |
National ID |
Specify the national identification number. |
Passport # |
Specify the passport number. |
Passport Issue Dt |
Select the date on which passport was issued. |
Passport Expiry Dt |
Select the passport’s expiration date. |
Visa # |
Specify the applicant’s visa number. |
License # |
Specify the applicant’s license number. |
License State |
Select the state where the license was issued, from the adjoining drop-down list. |
Prior Applicant |
Check this box to indicate that the customer is an existing customer. |
Existing Customer |
Check this box to indicate that this applicant has a previous account. |
Existing Customer ID |
Specify the customer ID if the applicant is an existing customer. |
Existing Customer # |
Specify the customer number if the applicant is an existing customer. On saving the applicant details, the data in ‘Existing Customer #’ is displayed as a link in ‘Applicant’ section header and clicking on the same will display the customer details in Search Results section of Servicing module. |
Update Customer Info |
Check this box to indicate if system can override the existing customer information and create the record with latest address and communication details of the customer. |
Other Details section |
|
Name in Local Language |
Specify the applicant’s name in local language. |
Gender |
Select the gender of the applicant from the adjoining drop-down list. |
Mother’s Maiden Name |
Specify the mother’s maiden name. |
Education |
Select the education of the applicant from the adjoining drop-down list. |
Language |
Select the applicant’s native language from the adjoining drop-down list. |
Dependents |
Specify the number of dependents. |
Marital Status |
Select the marital status of the applicant from the adjoining drop-down list. |
ECOA |
Select the ECOA (Equal Credit Opportunity Act) code, from the adjoining drop-down list. This defines the various possibilities on who is liable; individual, joint, cosigner and so on. |
Race |
Select the applicant’s race from the adjoining drop-down list. |
Ethnicity |
Select the applicant’s ethnicity from the adjoining drop-down list. This is the information the Home Mortgage Disclosure Act requires to be reported. |
Disability |
Check this box if the application has a disability. |
Privacy Opt Out |
Check this box to indicate that the applicant has elected to refrain from the non-public sharing of information. |
Insurance Opt Out |
Check this box to indicate that the applicant has elected to refrain from insurance related inquiries. |
Marketing Opt Out |
Check this box to indicate that the applicant has elected to refrain from marketing related inquiries. |
Share Credit Opt Out |
Check this box to indicate that the applicant has elected to refrain from financial information and share credit related inquiries. |
Prior Bankruptcy |
Check this box if prior bankruptcy exists. |
Bankruptcy Discharge Dt |
Enter the discharge date of prior bankruptcy (if one exists). |
KYC Section |
|
Reference # |
Specify the reference number. |
Status |
Select the status of the applicant from the adjoining drop-down list. |
FATCA Section |
|
Birth Place |
Specify the birth place of the applicant. |
Birth Country |
Select the country of birth of the applicant. |
Permanent US Resident Status |
Check this box if the applicant has permanent US resident status. |
Power of Attorney Section |
|
Power of Attorney |
Check this box if you hold a power of attorney. |
Holder Name |
Specify the holder name of the power of attorney. |
Address |
Specify the address of the holder. |
Country |
Specify the country of the power of attorney holder. |
Nationality |
Specify the nationality of the power of attorney holder. |
Telephone Number |
Specify the telephone number of the power of attorney holder. |
Military Service - this section can be used to capture applicant’s Active Military Duty details and can be validated with applicant Bureau Details. |
|
Active Military Duty |
Check this box to indicate if applicant is on Active Military Duty. |
Effective Dt |
Select the date from when the applicant is on Active Military duty using adjoining calendar. |
Order Ref # |
Specify the Order Reference number which indicates the applicant’s Active Military duty service. |
Release Dt |
Select the date from when the applicant was released from Active Military duty using adjoining calendar. |
- Perform any of the Basic Actions mentioned in Navigation chapter.
- You can verify the personal information about the applicant. Two check boxes indicate if this is an existing customer or a prior applicant. The Existing Customer field enables you to select the existing customer.
7.5.1 Address Sub Tab
You can specify more than one address for each applicant, such as a home address, second home address, and vacation home address. However, at least one must be marked as current. Also, only one address can be selected as the mailing address, and that address must be marked as current. Finally, while you can have more than one Home type address, only one can be marked as current.
To complete the Address sub tab
- Click Address sub tab.
- In this section, you can perform any of the Basic Operations mentioned in Navigation chapter.
Based on the country chosen in the address tab, the fields for capturing the address will vary.
A brief description of the fields is given below:
Field |
Do this |
Address Type |
Select the type of address from the adjoining option list. |
Current |
Check this box if this is a current address. The mailing address must be marked as current. |
Confirmed |
Check this box if the address is the confirmed one |
Mailing |
Check this box if this is the mailing address. Only one address entry can be marked as the mailing address. |
Permission to Call |
Check this box if customer has provided permission to contact through the specified phone number. Atleast one phone number per application should have the permission to call (flagged as 'Y') for the successful pre-qualification of the application. Else, an error message is displayed. |
Permission to Text |
Check this box if customer has provided permission to contact through text message. |
Country |
Select the country of mailing address from the adjoining drop-down list. |
Address Details section |
|
Postal Type |
Select the postal address type from the adjoining drop-down list. |
Address # |
Specify the address number of the mailing address |
Street Pre |
Select the street prefix (directional) from the adjoining drop-down list. |
Street Name |
Specify street name. |
Street Type |
Select the street type from the adjoining drop-down list. |
Street Post |
Select the street postfix (directional) from the adjoining drop-down list. |
Apt # |
Specify the apartment number. |
Address Line 1 |
Specify the first address line. |
Address Line 2 |
Specify the second address line. |
Address Line 3 |
Specify the third address line. |
Zip |
Select the zip code from the adjoining drop-down list. For non US country, you have to enter zip code. |
Zip Extn |
Specify the extension of the zip code. |
City |
Specify the city of the mailing address. |
State |
Select the state of the mailing address, from the adjoining drop-down list. |
Phone |
Specify the phone number. |
Additional Information section |
|
Own / Rent |
Select the ownership type from the adjoining drop-down list. |
Landlord |
Specify the landlord’s name. |
Landlord Phone |
Specify the landlord’s phone number. |
Contact |
Specify the person contacted on behalf of landlord. |
Contact Title |
Specify title of the person contacted on behalf of landlord. |
Contact Phone |
Specify phone number of the person contacted on behalf of landlord. |
Extn |
Specify the extension of the phone of the person contacted on behalf of landlord. |
Census Tract/BNA code |
Specify census tract/BNA (block numbering area). These are defined by the US Census Bureau code. |
MSA Code |
Specify the metropolitan statistical area (MSA) code. These are similar in concept to a zip code, but used mostly on government reports. |
Comment |
Specify a comment. |
Address Rent Mortgage Stated section |
|
Years |
Specify the stated number of years at residence. |
Months |
Specify the stated number of months at residence. |
Currency |
Select the currency code of payment amount, from the adjoining drop-down list. |
Pmt Amount |
Specify the stated payment amount. |
Frequency |
Specify the stated payment frequency. |
Rent/Mortgage |
The system displays the rent or mortgage amount. |
Address Rent Mortgage Actual section |
|
Years |
Specify the Actual number of years at residence. |
Months |
Specify the Actual number of months at residence. |
Pmt Amount |
Specify the Actual payment amount. |
Frequency |
Specify the Actual payment frequency. |
Rent/Mortgage |
The system displays the rent or mortgage amount. |
Verified Section |
|
Verified By |
The name of the verifier. |
Verified Dt |
The date of verification. |
- Perform any of the Basic Actions mentioned in Navigation chapter.
- If there are more than one addresses associated with the applicant, click Save And Add on the Address sub screen and add address details.
7.5.2 Employments Sub Tab
Use the Employment sub screen to record employment information about the applicant. You can have more than one entry.
To complete the Employments sub tab
- Click Employments sub tab
- Perform any of the Basic Operations mentioned in Navigation chapter.
A brief description of the fields is given below:
Field: |
Do this: |
Current |
Check this box if this is the current employment. |
Permission to Call |
Check this box if customer has provided permission to contact through the specified phone number. Atleast one phone number per application should have the permission to call (flagged as 'Y') for the successful pre-qualification of the application. Else, an error message is displayed. |
Permission to Text |
Check this box if customer has provided permission to contact through text message. |
Type |
Select the address type from the adjoining drop-down list. |
Employer |
Specify the employer’s name. |
Occupation |
Select the occupation from the adjoining drop-down list. |
Title |
Specify the title. |
Department |
Specify the department of the employer. |
Employee ID |
Specify the employee identification. |
Employer Address section |
|
Country |
Select the country from the adjoining drop-down list. |
Address # |
Specify the building number. |
Address Line 1 |
Specify the first address line. |
Address Line 2 |
Specify the second address line. |
Zip |
Select the zip code from the adjoining drop-down list. For non US country, you have to enter zip code. |
Zip Extn |
Specify the zip code extension. |
City |
Specify the city. |
State |
Select the state from the adjoining drop-down list. |
Additional Information section |
|
Phone |
Specify the work phone number. |
Extn |
Specify phone extension. |
Contact |
Specify the person contacted on behalf of the employer. |
Contact Title |
Specify title of the person contacted on behalf of the employer. |
Contact Phone |
Specify phone number of the person contacted on behalf of the employer. |
Contact Extn |
Specify the extension of the phone of the person contacted on behalf of the employer. |
Comment |
Specify a comment. |
Employment Details Stated section |
|
Years |
Specify the stated number of years with the employer. |
Months |
Specify the stated number of months with the employer. |
Pay Day |
Select the stated payment day of the month using the adjoining calendar. Ensure that the date selected is greater than or equal to current system date. |
Frequency |
Select the stated payment frequency from the adjoining drop-down list. |
Currency |
Select the currency code from the adjoining drop-down list |
Income Amt |
Specify the stated income. |
Salary |
View the salary of the customer. |
Employment Details Actual section |
|
Years |
Specify the Actual number of years with the employer. |
Months |
Specify the Actual number of months with the employer. |
Pay Day |
Select the Actual payment day of the month using the adjoining calendar. Ensure that the date selected is greater than or equal to current system date. |
Frequency |
Select the Actual payment frequency from the adjoining drop-down list. |
Income Amt |
Specify the Actual income. |
Salary |
View the salary of the customer. |
Verified Section |
|
Verified By |
The name of the verifier. |
Verified Dt |
The date of verification. |
- Perform any of the Basic Actions mentioned in Navigation chapter.
7.5.3 Telecoms Sub Tab
The Telecoms sub screen only needs to be completed if additional phone numbers exist. If not, this sub screen can be left blank.
To complete the Telecoms sub tab
- Click the Telecoms sub tab
- Perform any of the Basic Operations mentioned in Navigation chapter.
A brief description of the fields is given below:
Field |
Do this |
Type |
Select the telecommunication type from the drop-down list. |
Phone |
Specify the phone number. |
Extn |
Specify the phone extension. |
Current |
Check this box if this Telecom number is current. |
Permission to Call |
Check this box if customer has provided permission to contact through the specified phone number. Atleast one phone number per application should have the permission to call (flagged as 'Y') for the successful pre-qualification of the application. Else, an error message is displayed. |
Permission to Text |
Check this box if customer has provided permission to contact through text message. |
Time Zone |
Select the applicant’s time zone from the drop-down list. |
Start Time |
Specify the best time to start the call. |
Period |
Select the time period for the best time to call start time, am or pm, from the drop-down list. |
Best day to call |
Select the preferred day of the week to contact the customer from the drop-down list. |
End Time |
Specify the best time to end the call. |
Period |
Select the time period for the best time to call end time, am or pm, from the drop-down list. |
- Perform any of the Basic Actions mentioned in Navigation chapter.
7.5.4 Summary Sub Tab
The system calculates debt ratios in the Ratios section on the Summary sub screen (Applicants link) using the data in the Incomes and Liabilities sections. Information in the Incomes section comes from the Employments sub screen and the Other Incomes sub screen during application entry. The information in the Liabilities section comes from the Address sub screen, the Liabilities sub screen during application entry, and the credit bureau pull.
To View Summary sub tab
- Click the Summary sub tab.
- Perform any of the Basic Operations mentioned in Navigation chapter.
A brief description of the fields is given below:
Field |
Do this |
What if Pmt Amt |
Specify the payment amount you want to use in the ratios. |
Score |
View the credit score for the application |
Grade |
View the credit grade for the application |
Totals |
|
Monthly Income- Stated Amt |
The stated monthly income. |
Monthly Debt- Stated Amt |
The stated monthly liability. |
Monthly Income- Actual Amt |
The actual monthly income. |
Monthly Debt- Actual Amt |
The actual monthly liability. |
Assets Amt - Liabilities Amt |
The net worth amount. |
Ratios |
|
Debt - Stated Before (%) |
The debt amount stated before. |
Debt - Stated After (%) |
The debt amount stated after. |
Debt - Actual Before (%) |
The actual debt amount before. |
Debt - Actual After (%) |
The actual debt amount after. |
Disposable Inc - Stated Before (%) |
The disposable income stated before. |
Disposable Inc - Stated After (%) |
The disposable income stated after. |
Disposable Inc - Actual Before (%) |
The actual disposable income before. |
Disposable Inc - Actual After (%) |
The actual disposable income after. |
Revolving Debt - Stated Before (%) |
The stated revolving debt before. |
Revolving Debt -Stated After (%) |
The stated revolving debt after. |
Revolving Debt - Actual Before (%) |
The actual revolving debt before. |
Revolving Debt - Actual After (%) |
The actual revolving debt after. |
Pmt to Income - Stated Before (%) |
The stated income payment before. |
Pmt to Income - Stated After (%) |
The stated income payment after. |
Pmt to Income - Actual Before (%) |
The actual income payment before. |
Pmt to Income - Actual After (%) |
The actual income payment after. |
- Perform any of the Basic Actions mentioned in Navigation chapter.
Once the payment amount is approved in Decision screen, it will be copied and displayed in the What if Payment field in Summary sub screen.
Calculating Debt Ratios
The system offers powerful tools to the underwriter for analyzing an applicant’s debt-to-income ratios (total of an applicant’s debt obligation divided by that person’s regular income). The system calculates debt ratios in the Ratios section on the Summary sub screen (Applicants link) using the data in the Incomes and Liabilities sections. Information in the Incomes section comes from the Employments sub screen and the Other Incomes sub screen during application entry. The information in the Liabilities section comes from the Address sub screen, the Liabilities sub screen during application entry, and the credit bureau pull.
An underwriter may also add information to the Incomes and Liabilities sections on the Summary sub screen during the underwriting process.
The debt-to-income ratios in the Ratios section can be recalculated by including or excluding information from the Incomes section, Liabilities section and Financials sub screen.
To calculate debt ratios
- Open the Underwriting screen and load the application you want to work with.
- In the Underwriting link bar, click Applicants.
- On the Applicants Details screen, select the applicant you want to work with and click Show in the Details column.
- Click Summary sub tab.
- On the Summary sub screen, view the display only data in the Totals section.
Field:
View this:
Monthly Income (Stated)
The stated monthly income.
Monthly Income (Actual)
The actual monthly income.
Monthly Debt (Stated)
The stated monthly liability.
Monthly Debt (Actual)
The actual monthly liability.
Assets
The assets.
Liabilities
The liabilities.
Net-Worth
The net-worth.
- In the What if Pmt Amt field, enter the payment amount you want to use in the ratios. Once the payment amount is approved in Decision screen, it will be copied in the What if Payment field and the ratios are updated accordingly.
Whenever you modify the ‘What If pmt Amt’ field, system automatically calculates the below ratio's:
- Stated Before DTI - if liabilities, stated income or applicant financials are updated.
- Stated After DTI - if decision payment amount, liabilities, stated income or applicant financials are updated.
- Actual Before DTI - if liabilities, actual income or applicant financials are updated.
- Actual After DTI - if decision payment amount, liabilities, actual income or applicant financials are updated.
- Stated PTI - if decision payment amount, stated income or applicant financials are updated.
- Actual PTI - if decision payment amount, liabilities, actual income or applicant financials are updated.
7.5.4.1 Financials Sub Tab
The Financials sub screen only needs to be completed if financial assets exist on the application. If not, this sub screen can be left blank.
To complete the Financials sub tab
The Financials sub screen only needs to be completed if financial assets exist on the application. If not, this sub screen can be left blank.
- Click Financials sub tab.
- Perform any of the Basic Operations mentioned in Navigation chapter.
A brief description of the fields is given below:
Field |
Do this |
Type |
Select financial type from the drop-down list. For example, liquid assets, retirement assets, and so on. |
Source |
Specify source; for example, stocks, 401K, rent received, and so on. |
Account # |
Specify the account number. |
Currency |
Select the currency code from the drop-down list. |
Line of credit Currency Amount |
View the Line of credit currency amount. |
Amount |
Specify amount. |
Include |
Check this box to indicate that the Asset is included. |
Comment |
Specify comment, if any. |
- Perform any of the Basic Actions mentioned in Navigation chapter.
7.5.4.2 Liabilities Sub Tab
All the liabilities of the applicant that are entered during application entry are displayed in this tab. For example: Rent. In addition, if you need to record additional liabilities for an applicant the same can be done in this tab. Also any liability information of the applicant received through credit pull will be displayed under 'Credit Bureau Data' in Liabilities sub tab.
To complete the Liabilities sub tab
- Click Liabilities sub tab.
- Perform any of the Basic Operations mentioned in Navigation chapter.
A brief description of the fields is given below:
Field |
Do this |
Include |
Check this box to indicate that the liability is included. |
Liability Type |
Select the liability type from the adjoining drop-down list. |
Currency |
Select the currency code from the adjoining drop-down list. |
Amount |
Specify the liability amount. |
Line of credit Currency Amount |
View the Line of credit currency amount. |
Frequency |
Select the frequency from the adjoining drop-down list. |
Account Type |
Specify the account type. |
Account Balance |
Specify the account balance. |
Line of credit |
View the Line of credit currency amount. |
Comment |
Specify a comment, if any. |
Credit Bureau Data |
|
Bureau |
View the name of credit Bureau. |
Open Dt |
View the opening date of credit account. |
Pmt Manner |
View the mode of payment. |
Account # |
View the account number. |
Status |
View the current status of credit account. |
Account Type |
View the type of account maintained. |
Creditor's Name |
View the name of the Creditor. |
Subscriber # |
View the Subscriber number. |
ECOA |
View the ECOA (Equal Credit Opportunity Act) code. |
Term |
View the term of credit. |
Credit Limit |
View the total credit limit amount. |
High Balance |
View the high balance amount if any. |
Past Due Amt |
View the total past due amount if any. |
30 |
View the number of delinquency days. |
60 |
View the number of delinquency days. |
90 |
View the number of delinquency days. |
- Perform any of the Basic Actions mentioned in Navigation chapter.
- The Dedupe Liabilities button removes duplicate (“de-dupes”) liabilities that may be present from subsequent (manual) credit bureau pulls for nonspousal joint applications
7.5.4.3 Other Incomes Sub Tab
The Other Incomes sub tab only needs to be completed if other incomes exist on the application. If not, this sub screen can be left blank.
To complete the Other Incomes sub tab
- Click the Other Incomes sub tab.
- Perform any of the Basic Operations mentioned in Navigation chapter.
A brief description of the fields is given below:
Field |
Do this |
Type |
Select the income type from the adjoining drop-down list. Note: In case, the other income of the applicant is from Employment, then the details of Actual Amount specified in the Employments Sub Tab is auto populated. Also if the income is verified in the Employments Sub Tab, then Verified By and Verified Dt details are auto populated. You can also verify the details here using the current system date. |
Currency |
Select the currency from the adjoining drop-down list. |
Stated Amount |
Specify the monthly stated income. |
Frequency |
Select the income frequency from the adjoining drop-down list. |
Line of credit Currency Amount Stated |
View the Line of credit currency amount stated. |
Comment |
Specify a comment, if any. |
Include |
By default the include check box is selected indicating that the other income details are included. You can deselect the same if not required. When Include check box is selected system automatically adds the ‘Loan Currency Amount Stated’ and ‘Loan Currency Amount Actual’ details to Applicant > Summary Tab. Also system calculates the DTI and PTI ratio's based on ‘Actual Amount’ specified. |
Actual Amount |
Specify the actual monthly income amount. |
Line of credit Currency Amount Actual |
View the actual Line of credit currency amount. |
Verified By |
The Verified By field is auto populated with the logged in user name only after the record has been verified and saved. |
Verified Dt |
You can verify the record by selecting the current system date from the adjoining calendar icon. Note: System displays an error message if any other dates is selected apart from current system date. |
- Perform any of the Basic Actions mentioned in Navigation chapter.
7.5.4.4 Rescoring a Credit Bureau Report Manually
Any manually pulled credit bureau reports can be used to rescore an application.
To manually rescore a credit bureau report
- Open Underwriting screen and load the underwriting application you want to work with.
- Click Applicants.
- On the Applicants Details screen, select the applicant you want to work with and click View.
- Click the Credit Scores sub tab.
- In the Rescore Applicant section, select in the Credit Report ID field, the bureau report you want to use to rescore the applicant.
- Click Rescore.
The system displays the new information in the Credit Scores and Parameters sections. This new score automatically appears in the System Recommendation section on the Decision link.
7.5.5 Credit Score Sub Tab
You can view the credit score based on the system’s internal scoring models in Credit Scores sub tab.
To View Credit Scores sub tab
- Click the Credit Scores sub tab.
You can view the following details:
- Credit Score
- Model
- Bureau
- Credit Report ID
- Credit Grade
- Score
- Current
- Parameters
- Parameters
- Value
- Score
Note
If you select No Bureau in the Credit Bureau Report ID field and click Rescore, the best match internal scoring is used for rescoring the applicant without credit bureau report.
7.5.6 Duplicate Applicant Sub Tab
Click De-dupe Applicants to display the existing customer details of the applicant. While reviewing the de-dupe results, if the current applicant's credentials are exactly matching with an existing customer record, you can attach the current application to the existing customer. The same can be done by just keying in the customer ID in the applicants tab and clicking save.
In case a particular customer has more than one account, on clicking De-dupe Applicants the system displays only one account in ‘Duplicate’ sub tab. However, you can view all the accounts held by customer in 'Existing accounts' sub tab.
To View duplicate applicant’s details, click Duplicate Applicant sub tab. In this section you can view the duplicate applicant’s details.
A brief description of the fields is given below:
Field |
Do this |
Source Type |
View the source type of the duplicate applicant |
Applicant Id/ Cus Id |
View the applicant ID if the source type is applicant and the customer ID if the source type is customer. |
Application # |
View the application number of the existing applicant details for the respective records. |
Days since last application |
View the total number of days elapsed since the last application date. System auto calculates this value as ‘Current system date (minus) Last application date’. |
ID |
View the applicant ID |
First Name |
View the first name of the duplicate applicant |
Middle Name |
View the middle name of the duplicate applicant |
Last Name |
View the last name of the duplicate applicant |
Date of Birth |
View the date of birth of the duplicate applicant |
CIF |
View the CIF no of the duplicate applicant |
SSN # / National ID |
View the national ID or SSN number of the duplicate applicant |
Driving License # |
View the driving license number of the duplicate applicant |
City |
View the city of the duplicate applicant |
State |
View the state of the duplicate applicant |
Zip |
View the zip of the duplicate applicant |
7.5.7 Existing Account Sub Tab
The Existing Account Sub Tab displays the applicant's details, if it has been previously maintained in the system. Also along with the applicant's details, the account number of the applicant is displayed as a hyperlink. Clicking on the hyperlink will display the respective account details through the Customer Service screen of Servicing module.
In case you do not see a hyperlink associated with the account number, then you might have restricted access to the Servicing module. You can request your system administrator to navigate to Setup > User > Access screen, and enable the ‘ACCESS TO SERCOLL UCS CUSTOMER SERVICE TAB’ option in Security Access Definition section available in the 'Screen' tab. For more information, on defining user privileges, refer to ‘3.3.2 Screen’ section in Setup guide.
View the following details:
Field: |
View this: |
Account # |
The account number. |
Title |
The account title. |
Relation |
The customer relationship. |
Product |
The Line of credit product. |
Payoff Amount |
The payoff amount. |
Amount Due |
The delinquent amount due. |
Oldest Due Dt |
The due date. |
Status |
The account status. |
Company |
The company. |
Branch |
The branch. |
Total Pay Off Amt |
The payoff amount. |
Total Amt Due |
The total due amount. |
7.5.8 Tracking Attributes Sub Tab
You can add tracking attribute information to an application at any time in the underwriting process by using the Tracking Attribute tab.
The Tracking tab enables you to record further information associated with the application. What items you choose to track are setup during implementation.
To track attributes
- Click Tracking Attributes sub tab.
- Select the item you want to track.
- Click Edit to edit the following information:
Field
Do this
Sub-Parameter
View the sub-parameter
Parameter
View the parameter.
Value
Specify the information about the corresponding Value field.
- Save changes you made to the account.
7.5.8.1 Create Tracking
- Click Create Tracking, the system loads the tracking parameters.
- If you want to reduce the list of parameters, select a sub-attribute in the Sub Attribute box.
- If your system has been configured to use the Sub Code field, only attributes in a particular group appear in the Parameter display.
- Specify the requested parameter in the Value field and click Save.
7.5.9 Customer Search Tab
While creating an application for an existing customer, you can retrieve and copy the customer details into the new application by using the Customer Search section of the Simple Application Entry screen.
You can modify only the address, employment, financial details and not the demographic and identification details.
To copy the Customer Details
- On the Underwriting screen, click Applicants tab.
- Click Customer Search tab.
- In the Search Criteria screen, use the Comparison Operator and Values columns to create the search criteria you want to use to find a customer.
- Click the Search button.
The system locates and displays all the customer details that meet your search criteria in the Search Results section.
Select Reset Criteria at any time to clear the Comparison Operator and Values columns on the Criteria screen.
- In the Search Results section, select a customer you want to load.
- Select the relation type and click Copy Customer Details.
7.6 Business Tab
Oracle Financial Services Lending and Leasing can record SME business related financial information and business partners on the Business section to assist in approving the Line of credit application during underwriting. The Business Applicant screen is available and contains the following sub screens:
- Address
- Telecoms
- Financials
- Liabilities
- Partners
- Affiliates
- Other details
If there are no business information associated with the application, the Business Applicant tab is unavailable.
To complete the Business tab
- If SME business information is included on the application, select small business in the Class field on the Applications section and click Save.
The Business tab appears on the Underwriting screen.
- Click BusinessTab .

- Perform any of the Basic Operations mentioned in Navigation chapter.
A brief description of the fields is given below:
Field: |
Do this: |
Organization Type |
Select the organization type. |
Business Type |
Select the type of the business. |
Business Name |
Specify the name of the business. |
Legal Name |
Specify the legal name of the business. |
Tax ID |
Specify the tax identification. |
Start Date |
Specify the business start date. |
# of Employees (Cur) |
Specify the current number of employees at the business. |
# of Employees |
Specify the number of employees at the business after financing. |
Contact Person |
Specify the contact person at the business. |
Business Checking Bank |
Specify the bank name of the business’s checking account. |
Bank Acc # |
Specify the bank account number. |
Avg Checking Balance |
Specify the average checking balance. |
# of Locations |
Specify the number of locations of the business. |
Management Since |
Specify the year the current management was established. |
- Perform any of the Basic Actions mentioned in Navigation chapter
7.6.1 Address Sub Tab
You can enter more than one address for the business.
To complete the Address Sub Tab
- Click Address Sub Tab
- Perform any of the Basic Operations mentioned in Navigation chapter.
A brief description of the fields is given below:
Field: |
Do this: |
Current |
Check this box if this is a current address. The mailing address must be marked as current. |
Permission to Call |
Check this box if customer has provided permission to contact through the specified phone number. Atleast one phone number per application should have the permission to call (flagged as 'Y') for the successful pre-qualification of the application. Else, an error message is displayed. |
Permission to Text |
Check this box if customer has provided permission to contact through text message. |
Mailing |
Check this box if this is the mailing address. Only one address entry can be marked as the mailing address. |
Address Type |
Select the address type. |
Country |
Select the country. |
Address # |
Specify the building number. |
Own /Line of credit |
Select the ownership type. |
Comment |
Specify a comment. |
Postal Type |
Select the address type. |
Street Pre |
Select the street prefix (directional). |
Street Name |
Specify street name |
Street Type |
Select the street type. |
Street Post |
Select the street postfix (directional). |
Apt # |
Specify the apartment number. |
Address Line 1 |
Specify the first address line. |
Address Line 2 |
Specify the second address line. |
Zip |
Select the zip code. For non US country, you have to enter zip code. |
Zip Extn |
Specify the zip extension. |
City |
Specify the city. |
State |
Select the state. |
Phone |
Specify the phone number. |
- Perform any of the Basic Actions mentioned in Navigation chapter
- If there are more than one addresses associated with business, click Save And Add and add the address details.
7.6.2 Telecoms Sub Tab
The Business tab’s Telecoms sub tab needs to be completed, if additional phone numbers for the business exist. If not, this sub tab can be ignored.
To complete the Telecoms sub tab
- Click Telecoms sub tab.
- Perform any of the Basic Operations mentioned in Navigation chapter.
A brief description of the fields is given below:
Field: |
Do this: |
Permission to Call |
Check this box if customer has provided permission to contact through the specified phone number. Atleast one phone number per application should have the permission to call (flagged as 'Y') for the successful pre-qualification of the application. Else, an error message is displayed. |
Permission to Text |
Check this box if customer has provided permission to contact through text message. |
Type |
Select the telecommunication type. |
Phone |
Specify the phone number. |
Extn |
Specify the phone extension. |
Current |
If selected, indicates that this is a current telecom. |
- Perform any of the Basic Actions mentioned in Navigation chapter.
7.6.3 Financials Sub Tab
The Business tab’s Financials sub screen only needs to be completed if financial assets exist on the application for the business. If not, this sub screen can be left blank.
To complete the Financials sub tab
- Click the Financials sub tab.
- Perform any of the Basic Operations mentioned in Navigation chapter.
A brief description of the fields is given below:
Field: |
Do this: |
Type |
Select financial type; for example, liquid assets, retirement assets, and so on. |
Source |
Specify source; for example, stocks, 401K, rent received, and so on. |
Currency |
Select the currency of the asset. |
Amount |
Specify amount. |
Line of credit Currency Amount |
The system displays the Line of credit currency amount |
Comment |
Specify comment, if any. |
Include |
Check this box to include this record in calculations on the Other Details sub section. |
- Perform any of the Basic Actions mentioned in Navigation chapter.
7.6.4 Liabilities Sub Tab
The Business Applicant link’s Liabilities sub screen only needs to be completed if financial liabilities exist on the application for the business. If not, this sub screen can be left blank.
To complete the Liabilities sub tab
- Click Liabilities sub tab.
- Perform any of the Basic Operations mentioned in Navigation chapter.
A brief description of the fields is given below:
Field: |
Do this: |
Type |
Select the liability type. |
Currency |
Select the currency. |
Line of credit Currency Amount |
The system displays the Line of credit currency amount |
Amount |
Specify the liability amount. |
Frequency |
Select the frequency. |
Account Type |
Specify the account type. |
Line of credit Currency Account Balances |
The system displays available Line of credit currency account balance. |
Account Balance |
Specify the account balance. |
Comment |
Specify comments, if any. |
Include |
Check this box to include this record in calculations on the Other Details sub screen. |
- Perform any of the Basic Actions mentioned in Navigation chapter.
7.6.5 Partners Sub Tab
You can enter more than one partner for the business.
To complete the Partners sub tab
- Click Partners sub tab
- Perform any of the Basic Operations mentioned in Navigation chapter.
A brief description of the fields is given below:
Field: |
Do this: |
Permission to Call |
Check this box if customer has provided permission to contact through the specified phone number. Atleast one phone number per application should have the permission to call (flagged as 'Y') for the successful pre-qualification of the application. Else, an error message is displayed. |
Permission to Text |
Check this box if customer has provided permission to contact through text message. |
First Name |
Specify the partner’s first name. |
MI |
Select the partner’s middle name. |
Last Name |
Specify the partner’s last name. |
Suffix |
Specify the partner’s suffix. |
SSN # |
Specify the partner’s social security number. |
Birth Dt |
Specify the partner’s birth date. |
Birth Place |
Specify the partner’s birth place. |
Title |
Select the partner’s title. |
Ownership (%) |
Specify the percentage of ownership held by the customer. |
Net worth |
Specify the partner’s net worth. |
Gross Income |
Specify the partner’s gross income. |
Language |
Specify the partner’s language. |
Nationality |
Specify the partner’s nationality. |
Country |
Select the partner’s country code. |
Address # |
Specify the partner’s address number. |
Address Line 1 |
Specify the partner’s first address. |
Address Line 2 |
Specify the partner’s second address line. |
Zip |
Select the partner’s zip code. For non-US country, you have to enter zip code. |
Zip Extn |
Specify the partner’s zip extension. |
City |
Specify the partner’s city. |
State |
Select the partner’s state. |
Phone |
Specify the partner’s phone number. |
Extn |
Specify the partner’s phone extension. |
Specify the partner’s email. |
- Perform any of the Basic Actions mentioned in Navigation chapter.
7.6.6 Affiliates Sub Tab
You can enter more than one affiliate for the business.
To complete the Affiliates sub tab
- Choose Affiliates sub tab.
- Perform any of the Basic Operations mentioned in Navigation chapter.
A brief description of the fields is given below:
Field: |
Do this: |
Organization Type |
Select the affiliate’s organization type |
Legal Name |
Specify the affiliate’s legal name |
Business Name |
Specify the affiliate’s business name |
Tax ID |
Specify the affiliate’s tax identification |
Ownership (%) |
Specify the affiliate’s percentage of ownership |
# of Employees |
Specify the affiliate’s number of employees |
NAICS CODE |
Specify the affiliate’s North American Industry Classification System code. |
Country |
Select the affiliate’s country code. |
Address # |
Specify the affiliate’s address number. |
Address Line 1 |
Specify the affiliate’s first address line. |
Address Line 2 |
Specify the affiliate’s second address line. |
Zip |
Select the affiliate’s zip code. For non US country, you have to enter zip code. |
Zip Extension |
Specify the affiliate’s zip extension. |
City |
Specify the affiliate’s city. |
State |
Select the affiliate’s state. |
- Perform any of the Basic Actions mentioned in Navigation chapter.
7.6.7 Other Details Sub Tab
The Other Details sub screen records information regarding monetary amounts associated with the business such as profits, sales, and expenses.
To complete the Other Details sub tab
- Click Other Details sub tab.
- Click Edit.
- Verify financial details as well as assets and liabilities linked to the business.
A brief description of the fields is given below:
Field: |
Do this: |
Other Details section |
|
Currency |
Select the currency. |
Business Type |
Select the type of business. |
Analysis Frequency |
Select the analysis frequency. |
Line of credit Currency Gross Margin Factor |
The system displays the Line of credit currency business’s gross margin factor |
Gross Margin Factor |
Specify the business’s gross margin. |
Organization Type |
Select the type of organization. |
Line of credit Currency Income |
The system displays the Line of credit currency business income amount. |
Income |
Specify the business’s income amount. |
Line of Credit Currency Collection Average |
Specify the Line of Credit currency collection average. |
Collection Average |
Specify the collection average. |
Line of CreditCurrency Proj Coll Avg Annual |
Specify the Line of Creditcurrency annual projected collection average. |
Proj. Coll.Avg.Annual |
Specify the annual projected collection average. |
Line of CreditCurrency Book List |
Specify the Line of Creditcurrency business booklist. |
Book List |
Specify the business booklist. |
Line of CreditCurrency Turn Over |
Specify the Line of Creditcurrency turnover amount. |
Turn Over |
Specify the turnover amount. |
Line of CreditCurrency Capital Amount |
Specify the Line of Creditcurrency capital amount. |
Capital Amt |
Specify the capital amount. |
Line of CreditCurrency Earned Surplus |
Specify the Line of Creditcurrency earned surplus amount. |
Earned Surplus |
Specify the earned surplus amount. |
Line of CreditCurrency Gross Profit |
Specify the Line of Creditcurrency gross profit amount. |
Gross Profit |
Specify the gross profit amount. |
Line of CreditCurrency Net Profit |
Specify the Line of Creditcurrency net profit amount. |
Net Profit |
Specify the net profit amount. |
Line of CreditCurrency Working Capital |
Specify the Line of Creditcurrency working capital amount. |
Working Capital |
Specify the working capital amount. |
Line of CreditCurrency Annual Sales |
Specify the Line of Creditcurrency annual sales amount. |
Annual Sales |
Specify the annual sales amount. |
Line of CreditCurrency Projected Sales |
Specify the Line of Creditcurrency projected sales amount. |
Projected Sales |
Specify the projected sales amount. |
Line of CreditCurrency Equity |
Specify the Line of Creditcurrency equity amount. |
Equity |
Specify the equity amount. |
Open Delq |
Specify the open delinquency amount. |
Line of CreditCurrency Business Expenses |
Specify the Line of Creditcurrency business expenses amount. |
Business Expenses |
Specify the business expenses amount. |
Line of CreditCurrency Personal Expenses |
Specify the Line of Creditcurrency personal expenses amount. |
Personal Expenses |
Specify the personal expenses amount. |
Line of CreditCurrency Total Expenses |
View the Line of Creditcurrency total expenses amount. |
Total Expenses |
View the total expenses amount. |
Line of CreditCurrency Annual Proj Sales Amt |
View the Line of Creditcurrency annual projected collection amount. |
Annual Proj Sales Amt |
View the annual projected collection amount. |
Line of CreditAnnual Proj Exp Amt |
View the Line of Credit annual projected expenses amount. |
Annual Proj Exp Amt |
View the annual projected expenses amount. |
Line of CreditCurrency Current Assets |
Line of Creditcurrency current assets. |
Current Assets/Liability ratio |
View the current asset to liability ratio. |
Line of CreditCurrency Fixed Assets |
View the Line of Creditcurrency fixed assets. |
Fixed Assets |
View the fixed assets. |
Line of CreditCurrency Intangible Assets |
View the Line of Creditcurrency intangible assets. |
Intangible Assets |
View the intangible assets. |
Line of Credit |
View the Line of Credit |
Current Liabilities |
View the current liabilities. |
Line of Credit |
View the Line of Credit |
Long Term Liabilities |
View the long term liabilities. |
Line of Credit |
View the Line of Credit |
Total Assets |
View the total asset amount. |
Line of Credit |
View the Line of Credit total net worth amount. |
Total Net worth |
View the total net worth amount. |
Line of Credit |
Line of Credit |
Total Liability |
View the total liability amount. |
Debt Net worth Ratio |
View the debt to net worth ratio. |
Current Assets/Liability ratio |
View the current asset to liability ratio. |
Signatures |
|
Title 1-4 |
Specify the title. |
Signature1-4 |
Specify the signature. |
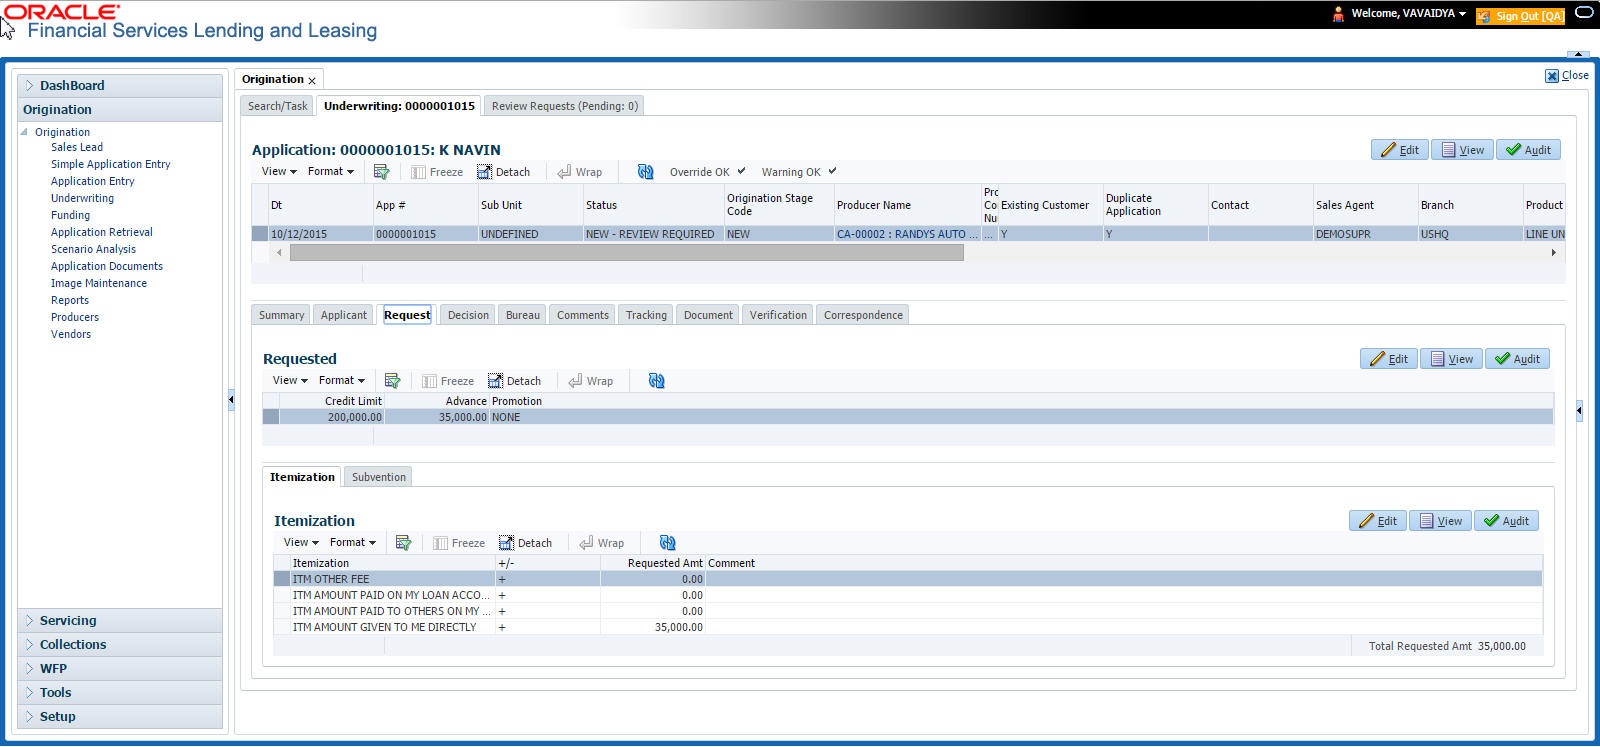
7.7 Request Tab
In the Request tab you can define the required Line of credit parameters. By default, system calculates for monthly repayment term basis. The payment frequency can be changed only in the Underwriting tab during decisioning.
To complete Request section:
- On the Application Entry tab, click Request tab.
- Perform any of the Basic Operations mentioned in Navigation chapter.
A brief description of the fields are given below:
Field |
Do this |
Credit Limit |
Specify the value of the credit limit. |
Advance |
Specify the value of advance amount paid. |
Promotion |
Select the promotion type from the drop-down list. |
- Perform any of the Basic Actions mentioned in Navigation chapter.
7.7.1 Itemization Sub Tab
The Itemizations sub tab enables you to add or verify any itemized amounts associated with the application. The list of itemizations is determined by the product you select in the master screen during the application entry process. The Itemizations sub screen displays an itemization record of the amount financed, such as the cash price, cash down payment, trade-in, unpaid cash price balance and so on. Information that was entered on the Itemization sub screen during the application entry process will appear in the Requested Amt column. Information that you enter as an underwriter in the Approved Amt column will appear in the Itemizations sub tab on the Underwriting screen.
Application request details need to be essentially entered in the itemization sub tab for pre-screening to be successful. Else, the system displays error and application would not proceed to the next level in work flow. The details of down payment, trade-in, insurance, fees etc. and the total sale price are recorded under itemization.
To add or view itemizations
- Open the Underwriting screen and load the underwriting application you want to work with.
- Click Request > Itemizations sub tab.
- Perform any of the Basic Operations mentioned in Navigation chapter.
A brief description of the fields is given below:
Field: |
Do this: |
Itemization |
View the itemization. |
+/- |
View whether the itemized amount is added or subtracted from the Line of credit amount. |
Requested Amt |
Specify the requested amount. |
Comment |
Specify a comment. |
- Perform any of the Basic Actions mentioned in Navigation chapter.
7.7.2 Trade-In Sub Tab
The Trade-In sub screen enables you to add or verify any trade-ins associated with the application. If there is any information regarding an itemized trade-in, use the Trade-In sub screen to enter the details in the system. (This sub screen might already contain information supplied during the application entry process.)
To complete the Trade-In sub screen
- Open the Underwriting screen and load the underwriting application you want to work with.
- Click Request > Trade-In.
- Perform any of the Basic Operations mentioned in Navigation chapter.
A brief description of the fields is given below:
Field: |
Do this: |
Trade-In |
|
Asset Type |
Select the asset type. |
Asset Sub Type |
Select the asset sub-type. |
Year |
Specify the year of the asset. |
Make |
Specify the make of the asset. |
Model |
Specify the model of the asset. |
Body |
Specify the body of the asset. |
Identification # |
Specify the identification number. |
Description |
View the asset description. |
Valuation |
|
Wholesale Amt |
Specify the wholesale value. |
Base Retail Amt |
Specify the retail value. |
Addons Amt (+) |
Specify the add ons value. |
Pay Off Amt (-) |
Specify the payoff amount. |
Total Amt = |
View the total value. |
Valuation Dt |
Specify the valuation date. |
Source |
Select the valuation source. |
Valuation Supplement |
Specify the valuation supplement. |
Edition |
Specify the valuation edition. |
- Perform any of the Basic Actions mentioned in Navigation chapter
7.7.3 Subvention Sub Tab
With the Subvention sub tab, available only for Line of credit, you can review the subvention information from the application entry and calculate the subvention amount, as well as override the calculated subvention amount. The participant’s information is automatically populated based on the selected subvention plan.
To complete the Subvention sub screen
- Open the Underwriting screen and load the underwriting application you want to work with.
- Click Request > Subvention sub tab.
- Perform any of the Basic Operations mentioned in Navigation chapter.
A brief description of the fields is given below:
Field: |
Do this: |
Subvention Plan section: |
|
Plan |
Select the subvention plan. |
Description |
View the subvention plan description. |
Sub Plan |
Select the sub plan. |
Sub Plan Description |
View the subvention sub plan description. |
Subvention Type |
View the subvention type. |
Include |
Check this box to include this record in calculations on the Other Details sub section |
- Perform any of the Basic Actions mentioned in Navigation chapter.
7.8 Decision Tab
If the application was initially approved automatically, the system displays its recommendations on the Decision tab’s Approved section.
If the application was initially rejected automatically, the system displays its reasons on the Decision link’s Stipulation sub tab.
If you choose to approve or reject the Line of credit manually, you must manually select the pricing (rule) set by the portfolio company for a specific product. The system validates this pricing against the information in the System Recommendation sections. The information in the Requested section comes from the application entry process and can be edited.
- If the data meets your approval, change the status of the application to either Approved or Rejected and enter any stipulations.
- If you reject the application, change the status to Rejected and enter the reasons for the adverse action on the Stipulations sub screen.
To verify the application decision data
- Open the Underwriting screen and load the underwriting application you want to work with.
- Click Decision tab.
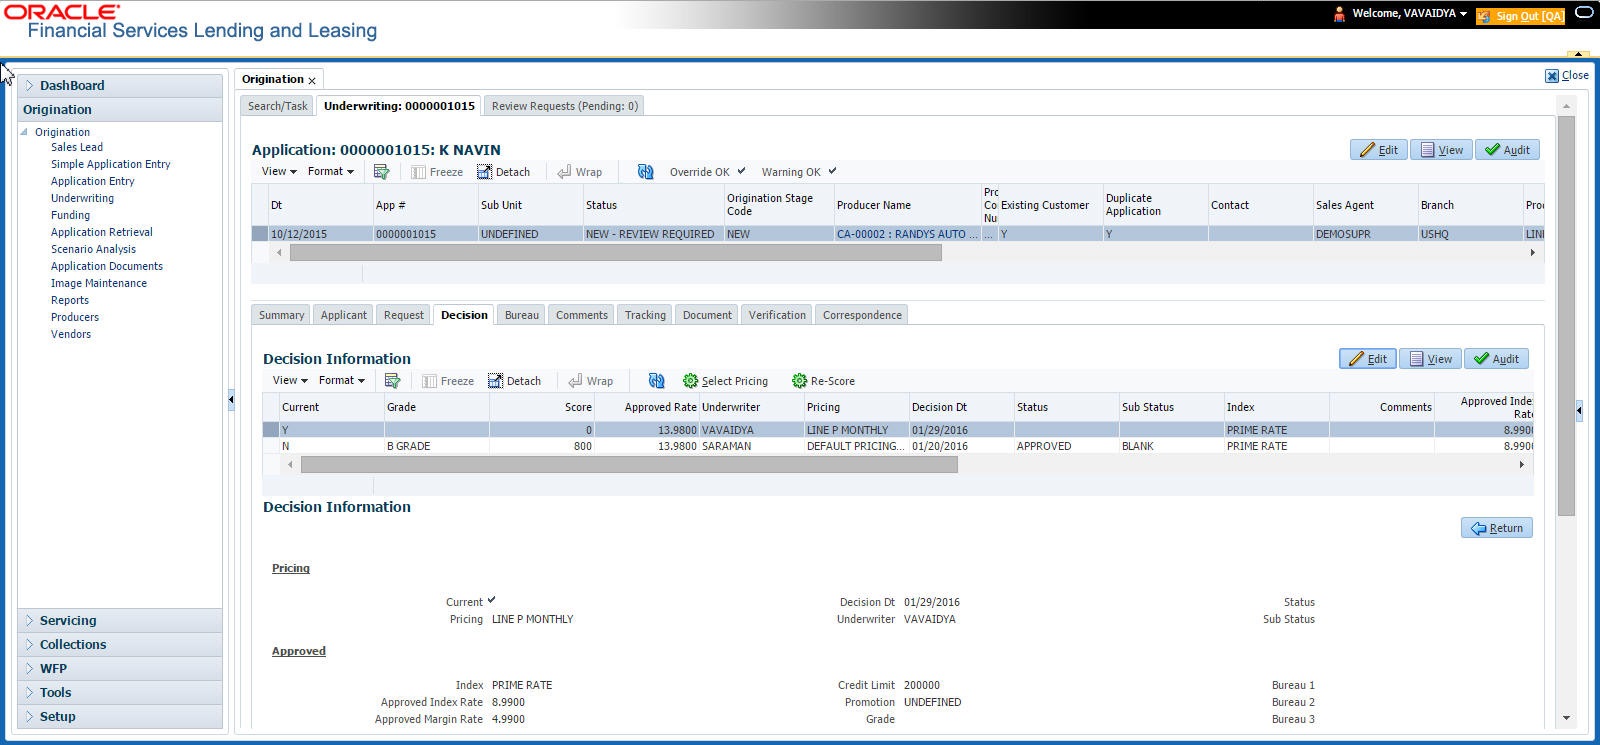
- Perform any of the Basic Operations mentioned in Navigation chapter.
- A brief description of the fields is given below:
Field:
Do this:
Pricing section
Current
Check this box to indicate that this is the current decision.
Pricing
View the pricing.
Decision Dt
View the decision date.
Underwriter
View the underwriter id.
Status
View the application status.
Sub Status
View the application sub-status.
Approved section
Index
Specify the index type.
Approved Index Rate
Specify the approved index rate.
Approved Margin Rate
Specify the approved margin rate.
Approved Rate
Specify the approved rate.
Maturity Index
Select the approved maturity index.
Maturity Margin Rt
Specify the maturity margin rate.
Credit Limit
Specify the credit limit.
Promotion
Select the promotion.
Grade
Select the credit grade.
Score
Specify the credit score.
Draw Term
Specify the draw term.
Repmt Term
Specify the repayment term.
Bureau 1
Specify the Bureau 1.
Bureau 2
Specify the Bureau 2.
Bureau 3
Specify the Bureau 3.
Comments
Specify comments, if any.
- Perform any of the Basic Actions mentioned in Navigation chapter.
- Click Select Pricing.
The system determines the best pricing match of all enabled Line of credit pricing strings in the Setup menu and displays the results in the Pricing and Approved sections.
- Re-Score
A 'Re-Score' button is available next to 'Calculate'. Whenever any sensitive Financial or Collateral information is amended in the Application, OFSLL displays a warning message 'Scoring sensitive information is changed. Re-score the application'. You need to click on Re-Score to re-validate the grade and pricing accordingly.
The display of the warning message to Re-score the application can be controlled using the respective System parameter. If the defined System Parameter is flagged 'Y', only then the message is displayed.
If you are underwriting a Line of credit, record the following information on the Decision tab:
- If you are approving the application, complete the Approved section with the values you want to approve as an underwriter. You can update the default values that appeared when you selected the pricing string in step 3. (The system calculator may be of use when completing this section. For more information, refer the Tools chapter.)
7.8.1 System Recommendation
The System Recommendation sub screen displays the system generated Score, Decision and Grade. You will also be able to view the request details of the application under 'Requested' section itself.
A brief description of the fields in System Recommendation section are given below:
Field: |
Do this: |
Score |
View the system recommended score. |
Decision |
View the system recommended decision. |
Grade |
View the system recommended grade. |
A brief description of the fields in Requested section are given below:
Field |
Do this |
Requested Advance Amt |
View the requested advance amount |
Pmt Amt |
View the requested payment amount. |
Term |
View the requested term (number of payments). |
Requested Rate |
View the requested rate of interest. |
Down Pmt% |
View the down payment percentage |
Down Pmt |
View the down payment amount |
Approx Prc |
View the approximate cash price |
Promotion |
View the promotion type from the drop-down list. |
Balloon Amt |
View the balloon amount. |
Signing Dt |
View the signing date |
Probable Delivery Dt |
View the probable delivery date. |
7.8.2 Stipulations Sub Tab
The Stipulations sub screen allows to add any stipulations or reasons for adverse action you want to attach to the application. Stipulations are items that need to be addressed before the Line of credit can be funded.
If the application was automatically rejected during the application entry edits, the system displays the automatically generated adverse action codes in this sub screen. If the application is manually rejected by the Underwriter due to adverse action reasons received from bureau or otherwise, the same can be recorded for each of the applicant.
In addition, you can enter comments against specific stipulations as required. Whenever a Stipulation is marked as 'Not Applicable' it becomes mandatory to specify the reason in comments field. Else, system prompts for the reason while processing the application.
To add or view stipulations or reasons for adverse action
- Open the Underwriting screen and load the underwriting application you want to work with.
- Click Decision > Stipulations sub tab.
- Perform any of the Basic Operations mentioned in Navigation chapter.
A brief description of the fields is given below.
Field: |
Do this: |
Type |
Select the reason type. Type can be Stipulation Reasons or Adverse Action Reasons and Adverse Action Reasons can also be those received from Bureau. |
Name |
The system displays all applicant’s name in the drop down list. You can select the name of the applicant for whom adverse action reason needs to be recorded. In case the stipulation reason is at the application level, then select ALL. |
Code |
Select the reason. |
Description |
Specify the required description. |
Stips Satisfied |
Use the Yes/No/NA buttons to indicate if you verified the stipulation(s) in the Type field |
Comment |
Specify the comment. |
Verified By |
The system updates the user ID of the person who verified the details |
Verified Dt |
The system updates the date when the details are verified. |
- Perform any of the Basic Actions mentioned in Navigation chapter.
If your system is set up to manually load predefined stipulations, click the Load Stipulations button (For more information, refer the following section, Loading Stipulations.)
7.8.2.1 Add Multiple
The system enables you to add multiple records to stipulations using the 'Add Multiple' option.
To add multiple stipulations
- Click the drop down list adjacent to the 'Add Multiple' button.
- Select the check box against to the required stipulations. You can also select ’All’ to load all the available stipulations.
- Click Add Multiple.
- If required, you can perform any of the Basic Actions mentioned in Navigation chapter.
7.8.2.2 Copying Stipulations
The system enables you to automatically transfer stipulations from previous decisions on the Stipulations sub screen with the Copy Stipulations button. This is particularly useful when you are rehashing an application and want to use the same stipulations as those in place for the previous decision.
7.8.2.3 Loading Stipulations
The system supports the automatic generation of default stipulations on the Underwriting screen’s Stipulations sub screen. The default stipulations can be maintained by company, branch, product, state, application status and application sub-status. When the application status changes (either manually and automatically), the system populates the maintained stipulations with a Stips Satisfied indicator of ‘No’. You can review and update the stipulations accordingly.
You have the option to manually load predefined stipulations by clicking the Load Stipulations button on the Stipulation screen.
To load predefined stipulations
- Open the Underwriting screen and load the underwriting application you want to work with.
- Click Decision > Stipulations.
- Click Load Stipulations. The system loads the default stipulations on the Stipulations sub screen.
- Use the Yes/No/NA buttons in the Stips Satisfied column to indicate if you verified the stipulation(s) in the Type field.
- Click Save on the Stipulations sub screen.
7.8.3 Itemization Sub Tab
The Itemizations sub screen enables you to add or verify any itemized amounts associated with the application. The list of itemizations is determined by the product you selected in the master screen during the application entry process. The Itemizations sub screen displays an itemization record of the amount financed, such as the cash price, cash down payment, trade-in, unpaid cash price balance and so on. Information that was entered on the Itemization sub screen during the application entry process will appear in the Requested Amt column. Information that you enter as an underwriter in the Approved Amt column will appear in the Itemizations sub screen on the Underwriting screen.
To add or view itemizations
- Open the Underwriting screen and load the underwriting application you want to work with.
- Click Decision > Itemizations sub tab.
- Perform any of the Basic Operations mentioned in Navigation chapter.
A brief description of the fields is given below:
Field: |
Do this: |
Itemization |
View the itemization. |
+/- |
View whether the itemized amount is added or subtracted from the Line of credit amount. |
Requested Amt |
Specify the requested amount. |
Approved Amt |
Specify the approved amount. |
Discount Rate |
Specify the discount rate. |
Comment |
Specify a comment. |
- Perform any of the Basic Actions mentioned in Navigation chapter.
7.8.4 Trade-In Sub Tab
The Trade-In sub screen enables you to add or verify any trade-ins associated with the application. If there is any information regarding an itemized trade-in, use the Trade-In sub screen to enter the details in the system. (This sub screen might already contain information supplied during the application entry process.)
To complete the Trade-In sub screen
- Open the Underwriting screen and load the underwriting application you want to work with.
- Click Decision > Trade-In sub tab.
- Perform any of the Basic Operations mentioned in Navigation chapter.
A brief description of the fields is given below:
Field: |
Do this: |
Trade-in section |
|
Asset Type |
Select the asset type. |
Asset Sub Type |
Select the asset sub-type. |
Year |
Specify the year of the asset. |
Make |
Specify the make of the asset. |
Model |
Specify the model of the asset. |
Identification # |
Specify the identification number. |
Body |
Specify the body of the asset. |
Description |
View the asset description. |
Valuation section |
|
Wholesale Amt |
Specify the wholesale value. |
Base Retail Amt |
Specify the retail value. |
Addons Amt (+) |
Specify the add ons value. |
Payoff Amt (-) |
Specify the payoff amount. |
Total Amt = |
View the total value. |
Valuation Dt |
Specify the valuation date. |
Source |
Select the valuation source. |
Valuation Supplement |
Specify the valuation supplement. |
Edition |
Specify the valuation edition. |
- Perform any of the Basic Actions mentioned in Navigation chapter.
7.8.5 Rate Schedule Sub Tab
The Rate Schedule sub screen is only available for variable rate Line of credit and displays the rate adjustment frequency information based on product setup.
To view the Rate Schedule sub screen
- Open the Underwriting screen and load the underwriting application you want to work with.
- Click Decision > Rate Schedule sub tab. Click View.
A brief description of the fields is given below:
Field: |
View this: |
Seq |
The rate adjustment sequence number. |
Adjustment Frequency Type |
The rate adjustment frequency type. |
Period |
The rate adjustment period for the frequency. |
# of Adjustments |
The number of rate adjustments for the frequency. |
7.8.6 Subvention Sub Tab
With the Subvention sub tab, available only for Line of credit, you can review the subvention information from the application entry and calculate the subvention amount, as well as override the calculated subvention amount. The participant’s information is automatically populated based on the selected subvention plan.
To complete the Subvention sub tab
- Open the Underwriting screen and load the underwriting application you want to work with.
- Click Decision > Subvention sub tab.
- Perform any of the Basic Operations mentioned in Navigation chapter.
A brief description of the fields is given below:
Field: |
Do this: |
Plan |
Select the subvention plan. |
Description |
View the subvention plan description. |
Sub Plan |
Select the sub plan. |
Sub Plan Description |
View the subvention sub plan description. |
Subvention Type |
View the subvention type. |
Include |
Check this box to include this record in calculations on the Other Details sub section |
- Perform any of the Basic Actions mentioned in Navigation chapter.
- In Subvention Detail section, perform any of the Basic Operations mentioned in Navigation chapter.
A brief description of the fields is given below.
Subvention Detail section: |
|
Participant |
View the participant. |
Participant Type |
View the participant type. |
Collection Method |
View the collection method. |
Rate |
View the subvention rate. |
Rent Factor |
View the rent factor |
Calculation Method |
View the subvention calculation method. |
Factor |
View the factor. |
Calculated Amount |
View the calculated subvention amount. |
Subvention Amount |
Specify the subvention amount. |
Include |
View if the subvention is included in the application or not. |
Total Subvention Rate |
View the total subvention rate. |
Total Subvention Amt |
View the total subvention amount. |
- Perform any of the Basic Actions mentioned in Navigation chapter.
- Select the Initialize button to reset the subvention amount to zero.
- Select the Calculate button to calculate the subvention amount.
7.9 Customer Credit Limit tab
This tab is available only if the selected product has the ‘Customer Credit Limit’ check box in selected in Products setup screen (Setup > Products > Products).
Customer Credit limit in general refers to the maximum amount of credit that a financial institution can extend to a prospective customer which can then be leveraged by an underwriter while funding an application.
In Oracle Financial Services Lending and Leasing, you can define the Customer Credit Limit during underwriting stage based on the customer credit worthiness or historical customer data. Using this limit, applications can be funded up to the credit limit amount allowed. However, application funding with or without customer credit limit is controlled based on the setup and applications can still be funded with the normal process when a particular customer is not allocated with any credit limit.
A customer credit limit facilitates for quick decisioning by an underwriter and also facilitates for auto approval of accounts on-boarded from external system with basic validations. While approving, underwriter has to ensure that the sum of utilizations should always be equal to the financed amount which can be distributed within applicants primary / secondary or business categories.
A minimum of one application has to be funded to define customer credit limit for funding subsequent applications and the defined information is updated into credit limit details. A credit limit once defined can further be increased from servicing module by posting the required transaction which is referenced in origination module during application funding.
On receiving a payment, the amount is reinstated to the credit limit balance which can be re-used while funding next application. Similarly, the credit limit balance is also updated when account is moved to VOID status. On reversing a payment, the Total Utilization of credit limit is increased by the principal portion of the payment and decreased with the Available Amt field. Also, the Suspended and Hold amount fields are increased and decrease based on the respective transactions posted.
When two applications are being funded simultaneously (i.e. moving application to ‘Approved Funded’ status), the utilization amount will be considered for first application while the second one will be on HOLD since there could be a difference in the available credit limit after funding. In such a case, you need to re-hash the application, fetch the details in Origination > Decision tab, (if required) increase credit limit from servicing module, and then proceed for funding.
While processing applications using Customer Credit Limit, the ‘Update Customer Info’ (check box in applicant tab) and ‘Link to Existing Customer’ (check box in contract tab) are selected by default for all the existing customers. This is to ensure the application details are propagated to customer accounts.
On funding a new application for an existing customer using customer credit limit, the details are updated into the existing customer details in the Servicing module.
To define Credit Limit Details
- Open Underwriting screen and load the underwriting application you want to work with.
- Click ‘Customer Credit Limit’ tab.
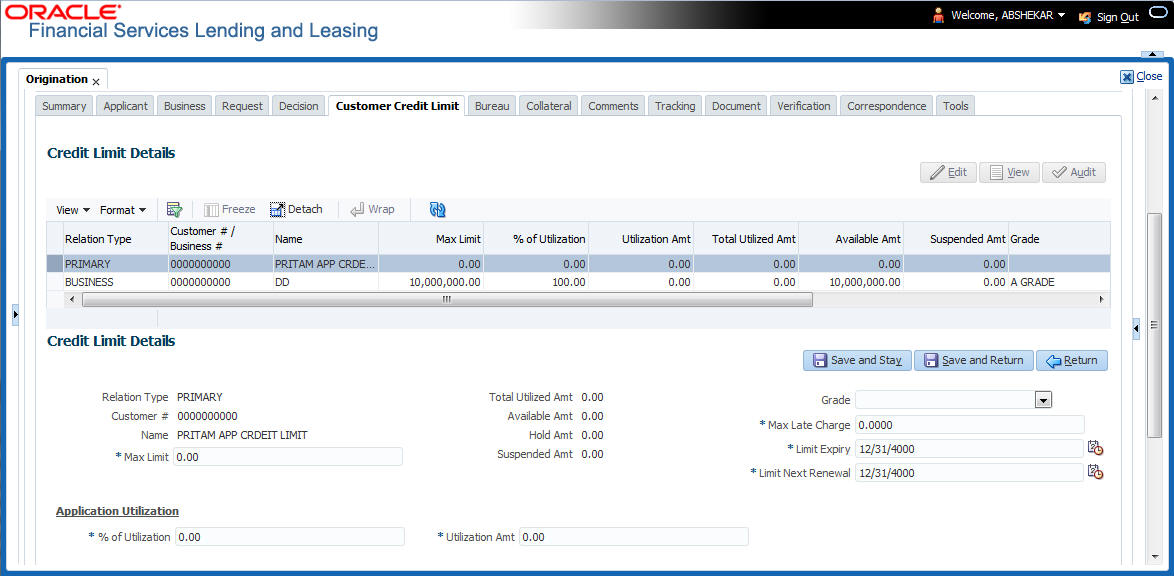
- Perform any of the Basic Operations mentioned in Navigation chapter. A brief description of the fields are given below:
Field:
Do this:
Relation Type
View the relationship type. This field is pre-populated with details from Applicant tab.
Customer # / Business #
This field is displayed blank for new customer/business and for an existing customer/business, the details are populated from Servicing > Customer Service > Customer details.
Name
View the customer name. This field is pre-populated with details from Applicant tab.
Max Limit
Specify the value of maximum credit limit amount that can be provided to the customer.
For new customer/business, the amount is pre-populated based on selected pricing in Decision tab for new applicant/business. However, you can override the amount by entering the required value.
Total Utilized Amt
View the total credit limit amount utilized for previously funded applications.
Available Amt
View the available credit limit amount on the account which is the difference of Max Limit - (Hold + Total Utilized + Suspended) amount.
Hold Amt
View the credit limit amount on hold which is based on the Hold transaction posted in servicing.
Suspended Amt
View the credit limit amount suspended which is based on suspended transaction posted in servicing.
Grade
Select the required grade from the drop-down list. There is no validation performed on the selected grade and can be selected based on customer credit worthiness.
Max Late Charge
Specify the maximum late charge amount.
Limit Expiry
Select the credit limit expiry date from the adjoining calendar. The expiry date is validated if application is being funded based on customer credit limit.
Limit Next Renewal
Select the date on which the credit limit has to be renewed from the adjoining calendar.
Application Utilization section - This section allows you to define the portion (either percentage or amount) of credit limit utilization against the financed amount.
For example,
if the amount financed it 10,000 $ and percentage of Utilization for Primary is 80% then Utilized amount should be 10,000*0.8 = 8000 $.
Similarly, if the percentage of Utilization for Spouse is 20% the Utilized amount should be 10,000*0.2 = 2000 $.
Note: On specifying either percentage or amount of utilization, the other field is auto calculated based on financed amount.
% of Utilization
Specify the percentage of credit limit utilization allowed against each applicant (Customer and business) added to the application.
Utilization Amt
Specify the amount of credit limit utilization allowed against each applicant (Customer and business) added to the application.
- Perform any of the Basic Actions mentioned in Navigation chapter.
7.10 Bureau Tab
The Bureau tab displays the credit report (if pulled) for an applicant. If there is a need for another pull for any applicant, it can be done here manually using the New Request section.
If there are any adverse comments received from the Bureau, system displays them under 'Exceptions/ Comments' section against the specific Bureau record to alert the User. Following are some of the reasons:
- Application Indicates Potential Fraud
- Bureau Indicates Social Security Number Variance
- Duplicate Application Exists
- Bureau Indicates a Possible Current Delinquency
- Bureau Indicates Bankruptcy
- Bureau Indicates Consumer Statement
- Bureau Indicates a Possible Repossession
- Bureau Reports OFAC hit
- Bureau Reports Applicant as Deceased
- Potential Delinquencies for Auto Loans in Past 12 Months
- Customer Rate (APR) Exceeds the State Usury Rate
- Open Consumer Credit Counselling
The reasons will also be displayed in the Summary tab in 'Bureau' details under 'Exceptions /Comments' section.
To verify the credit bureau data using the Bureau tab
- Open the Underwriting screen and load the underwriting application you want to work with.
- Click Bureau.
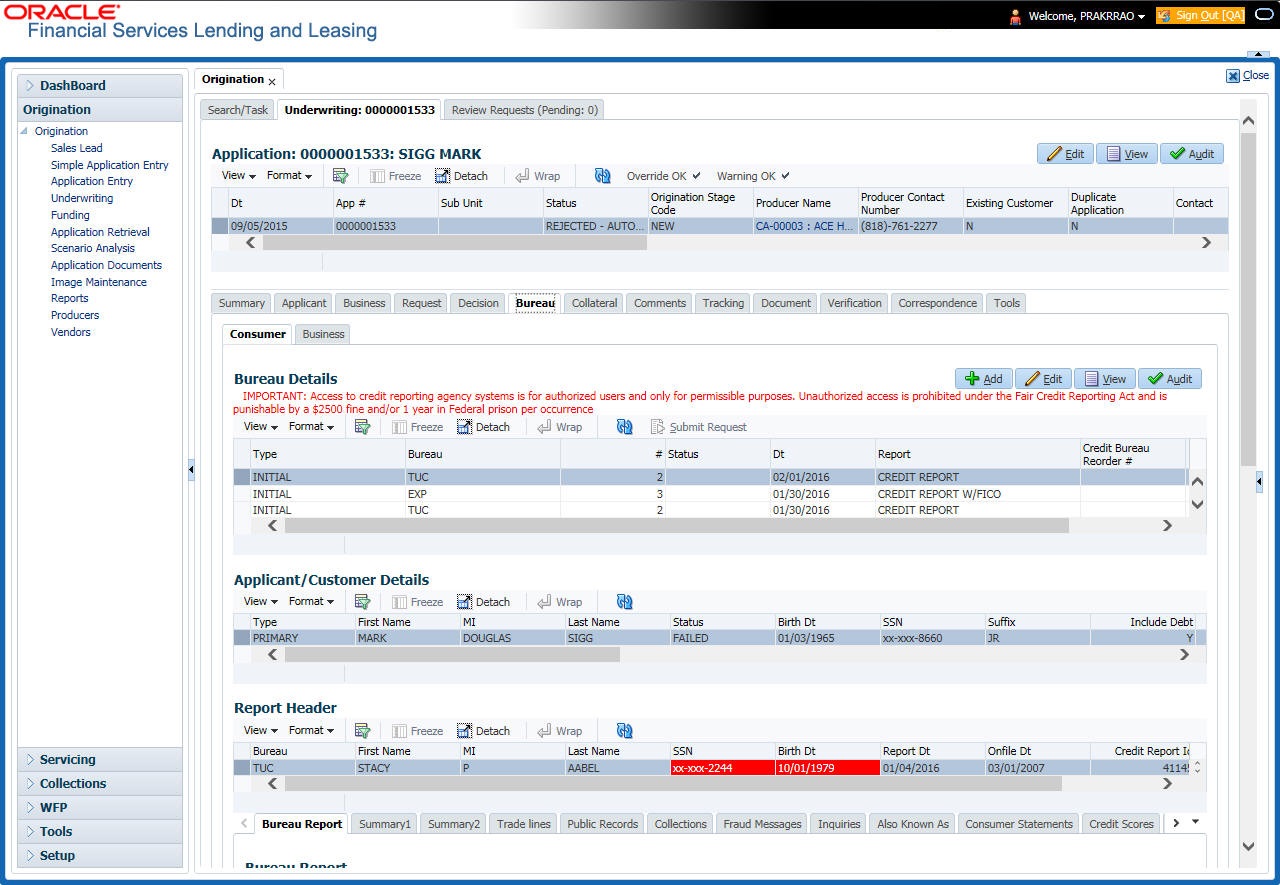
- In the Bureau Details section, view the following information:
Field:
View:
Type
The credit bureau request type.
Bureau
The credit bureau.
#
The credit bureau request number.
Status
The status of credit bureau request.
Dt
The credit bureau request date.
Report
The credit bureau report type.
Credit Bureau Reorder#
The credit bureau reorder number.
App Ind
If selected, indicates that a bureau was pulled for an application.
- In the Applicant/Customer Detail section, view the following information:
Field:
Do this:
Type
View the relation type.
First Name
Specify the first name.
MI
Specify the middle name.
Last Name
Specify the last name.
Status
View the credit bureau request status.
Birth Dt
Specify the date of birth.
SSN
Specify the social security number.
Note: If the organizational parameter UIX_HIDE_RESTRICTED_DATA is set to Y, this appears as a masked number; for example, XXX-XX-1234.
Suffix
Select the generation.
Include Debt
Select to include credit bureau information in the Liabilities section of the Summary sub screen.
Populate Debt
Select to load debt information from the credit bureau in the Liabilities section of the Summary sub screen.
Address Type
Select the address type.
Country
Select the country.
Address #
Specify the building number.
City
Specify the city.
State
Select the state code.
Street Pre
Select the street pre type.
Street Name
Specify the street name.
Street Type
Select the street type.
Street Post
Select the street post type.
Apt #
Specify the apartment number.
Address Line 2
Specify the address line 2.
Zip
Select the zip code.
For non US country, you have to enter zip code.
Zip Extn
Specify the zip extension.
Phone
Specify the phone number.
- In the Report Header section, view the following information:
Field:
View:
Bureau
The bureau.
First Name
The first name.
MI
The middle initial.
Last Name
The last name.
SSN
The social security number.
Note: If the organizational parameter UIX_HIDE_RESTRICTED_DATA is set to Y, this appears as a masked number; for example, XXX-XX-1234.
Birth Dt
The birth date.
Note: The SSN and Birth Dt fields in Report Header section are displayed in red if there is a mismatch in the respective data present in the above Applicant/Customer Details section.
Report Dt
The report date.
Onfile Dt
The on file date.
Credit Report Id
The credit report id.
Best Match
The best match.
- Click Bureau Report.
The system parcels out the details from the credit bureau report in the Bureau screen’s sub tabs (Summary 1, Summary 2, Tradelines, Public Records, Collections, Fraud Messages, Inquiries, Also Known As, Consumer Statements, and Credit Scores).
- Click Summary 1 sub tab.
- You can view the following information:
Field:
View:
Trades
Records of extended installment payments, mortgage and revolving credit, as detailed in the credit bureau report.
Bankruptcy
The total number of times the applicant has applied for Chapter 7, Chapter 11 and Chapter 13 bankruptcies, recently and throughout life.
Past Due
The total number of times the applicant has been past due on payments by 30, 60, or 90 days in the last year, two years, and throughout life.
Public Records
Number of legal actions, including liens, public records, and judgments over the course of the applicant’s life, as well as any that are currently open.
Collection
Trades referred to an outside vendor for collection.
Credit Scores
View the FICO and bankruptcy scores.
Statistical Trade Ages
Ages of the oldest and newest trades, as well as the average age of the open and total trades.
Derogatory Trades
Tradelines that an action other than being late was reported; this includes collections, repossessions, charge offs, and bankruptcies.
- Click Summary 2 sub tab
- You can view the following information:
In this section:
View:
Trades
Records of extended credit for auto, bank, credit card, retail, Line of creditfinance, and sales finance Line of credit, as detailed in the credit bureau report.
Inquiries
Requests for a credit report regarding Line of credit in the Trades section over the last six months, as well as total requests over 6, 12, and 24-month periods, as well as the newest and oldest request.
Balance
The total balance of retail and bank trades, as well as the high balance of each.
Open Derogatory
The following information for all of the customer’s open trade lines: the shortest and longest period of time (in months) since the customer’s most recent minor derogatory (30-60 days late), major derogatory (90-180 days late), and derogatory (bankruptcy, repossession, or charge off).
Derogatory
The following information for all of the customer’s total trade lines (open and closed): the shortest and longest period of time (in months) since the customer’s most recent minor derogatory (30-60 days late), major derogatory (90-180 days late), and derogatory (bankruptcy, repossession, or charge off).
- Click Tradelines sub tab to view information about trade lines, such as the creditor’s name, trade’s status, type and code and balance information
- View the following details:
Field:
View:
Creditors Name
The creditors name.
Status
The status of the tradeline.
Type
The type of tradeline, such as bank, first mortgage, travel card, and so on.
Type Code
The code for the type of tradeline.
Past Due Amt
The past due amount
Balance
The balance of the tradeline.
Balance Dt
The balance date.
Open Dt
The date the tradeline was opened.
History Dt
The trade line’s history date.
History Data
The trade line’s history data.
30
The number of times the tradeline was 30 days past due.
60
The number of times the tradeline was 60 days past due.
90
The number of times the tradeline was 90 days past due.
Creditors Subscriber #
The creditor’s subscriber number.
Mop
The method of payment.
Account #
The account number.
Credit Limit
The credit limit.
Term Pmt Amt
The term payment amount.
High Balance
The high balance of the tradeline.
Reported Dt
The reported date.
Duplicate
If selected, the tradeline is a duplicate.
Special Exclusion
If selected, the tradeline is a special exclusion.
- Click the Public Records sub tab to view information about public records, including each one’s type, status, and amount, as well as the date the record was filed and resolved
- View the following details:
Field:
View:
Record Type
The record type.
Status
The status.
Amount
The amount.
Filed Dt
The filed date.
Satisfied Dt
The satisfied date.
- Click the Fraud Messages sub screen to view information about fraudulent attempts to use the applicant’s credit.
- Click the Inquiries sub screen to view all the credit reports for the applicant in reverse chronological order
- View the following details:
Field:
View:
Inquirer Name
The inquirer’s name.
Inquirer Subscriber #
The inquirer’s subscriber number.
Inquirer Industry Code
The inquirer’s industry code.
Inquiry Dt
The inquiry date.
Rate Shopping
If selected, the inquiry concerned rate shopping.
Duplicate
If selected, if the inquiry was a duplicate.
- Click the Also Known As sub screen to view other names used by the applicant.
- Click the Consumer Statements sub screen to view statements that the applicant has issued to the credit bureau.
- Click the Credit Scores sub screen to view the score model, the score factor, and the score returned from the credit bureau report.
7.10.1 Printing the Credit Bureau Data as a Text/PDF Report
To print the credit bureau data as a text or PDF report
- Open the Underwriting screen and load the underwriting application you want to work with.
- In the Underwriting screen, click Bureau.
- In the Bureau Report tab, the system displays the report in text format. You can also view the report in PDF format by selecting ‘PDF’ option as View Report.
Note
Google Chrome does not support search functionality in the PDF format of the report. Hence you have to enable the ad-hoc plug-in in chrome to use the search facility.
- In the Print Report section, click Print Report to send the information to the default printer.
7.10.2 Requesting a Credit Bureau Report Manually
The Credit Bureau Summary screen enables you to manually request a credit pull. Information from a manual credit pull can be used to validate an application.
To manually request a credit bureau report
- Open the Underwriting screen and load the underwriting application you want to work with.
- Click Bureau tab.
- In the Bureau Details section click Add.
- Specify the following information:
Field:
Do this:
Applicant
Select the applicant.
Spouse
Select the applicant’s spouse (if applicable).
Bureau
Select the credit bureau.
Report
Select the credit bureau report type.
- Click Create Request.
The system displays this information in the Bureau Details section.
Note
If you are requesting a report from Experian Credit Bureau for Premier Attribute Consumer report, you can do so without impacting the consumer FICO score. To facilitate the same, the ‘Soft Pull’ check box is to be selected in Bureau Details section. This option is available only when the system parameter ‘EXP_PA_SOFT_PULL_IND’ is enabled in the System Parameters screen and Bureau is selected as ‘EXP’ with Report as ‘PREMIER ATTRIBUTE’ in the Bureau Details section.
- Select Include Debt and Populate Debt in the Applicant/Customer Detail section to populate the Liability section on the Applicants link’s Summary sub screen with data from the credit bureau pull.
- If you want to receive a copy of a previously pulled credit bureau report, enter the credit bureau reorder number in the Credit Bureau Reorder # field on the Bureau Details section. This enables you to receive a previously pulled credit report.
- In the New Request section, click Submit Request.
The system displays the latest status of the currently requested bureau report in the Bureau Details section. When the report pull process is complete, the Status field in the Bureau Details section changes from pending to Completed.
7.11 Collateral Tab
Having selected and loaded an application, you can view the information about the collateral of the Line of credit.
The Collateral link opens screens with information regarding any collateral associated with an application. Depending on the type of Line of credit, collateral can be a vehicle, home or something such as major household appliances. The Collateral tab is unavailable if this is an unsecured Line of credit.
To verify information about the collateral
- Open the Underwriting screen and load the application you want to verify.
- Click the Collateral tab.
Depending on the type of collateral, information about the vehicle, home, or other type of collateral appears.
If you are entering an unsecured Line of credit, the Collateral link is present but inactive; in which case, skip this step.
- In the Collateral Details section (This is information that was recorded during the application entry process or gathered during the credit pull.)
To enter collateral information
- On the Underwriting screen, click Collateral. If the collateral is a vehicle, the Collateral link displays information about the vehicle.
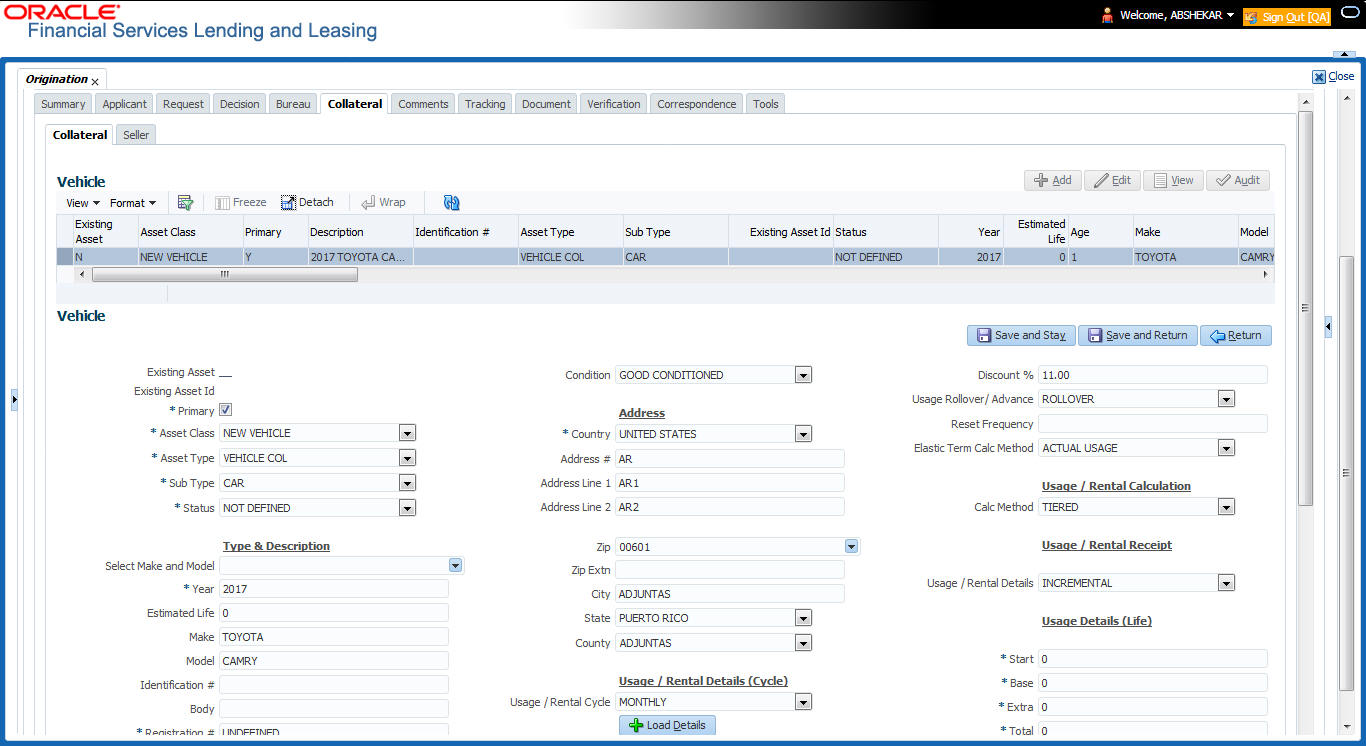
- Perform any of the Basic Operations mentioned in Navigation chapter.
A brief description of the fields is given below:
Field: |
Do this: |
Existing Asset |
Check this box to indicate that the vehicle is an existing asset. |
Existing Asset ID |
View the existing asset identification number. |
Primary |
Check this box if this is the main asset on the application. |
Asset Class |
Select the asset class. |
Asset Type |
Select the asset type. |
Sub Type |
Select the asset sub type. |
Status |
Select the asset status. |
Type and Description |
|
Select Make and Model |
Select the make and model of the vehicle from drop-down list. |
Year |
Specify the year of the vehicle. |
Age |
View the age of the vehicle |
Make |
Specify the make of the vehicle. |
Model |
Specify the model of the vehicle. |
Body |
Specify the body of the vehicle. |
Registration # |
Specify the vehicle registration number. |
Identification # |
Specify the vehicle identification number. |
Description |
View the vehicle description. |
Condition |
Select the vehicle condition. |
Address |
|
Country |
Select the country. |
Address # |
Specify the apartment number. |
Address Line 1 |
Specify the first address line. |
Address Line 2 |
Specify the second address line. |
Zip |
Select the zip code. For non US country, you have to enter zip code. |
Zip Extn |
Specify the zip extension. |
City |
Specify the city. |
State |
Select the state. |
County |
Select the county. |
Usage Details The details maintained in this section is used to calculate ‘EXCESS USAGE FEE’ in payoff quote and termination transactions. |
|
Start |
View/specify the start unit of asset usage. |
Base |
View/specify the base units. |
Extra |
View/specify the extra usage units. |
Total |
View/specify the total usage units. |
- Perform any of the Basic Actions mentioned in Navigation chapter.
Interface with VINTEK (If interface is installed)
Using the Vintek interface, the system retrieves the year, make, model and body of the vehicle when you choose Vehicle Details. This time saving feature reduces data entry errors. Using the VIN entered in the Identification Number field, the system populates following fields in the Type & Description section:
- Year
- Make
- Model
- Body
If the Vintek interface is unable to retrieve information based on the VIN entered in the Identification Number field, the system displays an error message.
If the collateral is a home, the Collateral link displays information about the home.

- Perform any of the Basic Operations mentioned in Navigation chapter.
A brief description of the fields is given below:
Field: |
Do this: |
Existing Asset |
Indicates that the vehicle is an existing asset. |
Existing Asset ID |
View the existing asset identification number. |
Primary |
Select if this is the main asset on the application. |
Asset Class |
Select the asset class. |
Asset Type |
Select the asset type. |
Sub Type |
Select the asset sub type. |
Occupancy |
Select owner occupancy type. |
Identification # |
Specify the vehicle identification number. |
Address section |
|
Country |
Select the country. |
Address # |
Specify the home number. |
Address Line 1 |
Specify the first address line. |
Address Line 2 |
Specify the second address line. |
State |
Specify the state. |
County |
Select the county. |
Zip |
Select the zip code. For non US country, you have to enter zip code. |
Zip Extn |
Specify the zip extension. |
City |
Specify the city. |
Type and Description |
|
Census Tract/BNA Code |
Specify census tract/BNA (block numbering area) code. |
MSA Code |
Specify the metropolitan statistical area (MSA) code. |
GEO Code |
Specify the geographical code for the property. |
Condition |
Select the condition of the home. |
Description |
Specify a description of the home. |
Select Make and Model |
Select the make and model from the drop-down list |
Year |
Specify the year when the property was built. |
Age |
View the age of the home. |
Make |
Specify the make of the home. |
Model |
Specify the model of the home. |
Width |
Specify the asset width. |
Length |
Specify the asset length. |
Area |
Specify the area of the collateral |
PO# |
Specify the asset purchase order number. |
Legal Description |
Specify the legal description. |
Lot |
Specify the asset lot. |
Sub Division |
Specify the asset sub division. |
Parcel ID |
Specify the parcel id of the home. |
Metes-Bounds |
Check this box to indicate the home is considered Metes-Bounds. |
Flood Zone |
Check this box to indicate the home is in a flood zone. |
1098 Not Required |
Check this box to indicate that the home does not require 1098 |
Deed Details |
|
Construction permit Dt |
Specify the date on when the construction is permitted. |
Deed Dt |
Specify the date on when the deed is issued |
Deed Place Of Issue |
Specify the place where the deed is issued. |
Properties Boundary from East |
Specify the boundary of the property from the east side. |
North |
Specify the boundary of the property from the north side. |
West |
Specify the boundary of the property from the west side. |
South |
Specify the boundary of the property from the south side. |
- Perform any of the Basic Actions mentioned in Navigation chapter.
If the collateral is any other, the Collateral link displays information about that collateral.
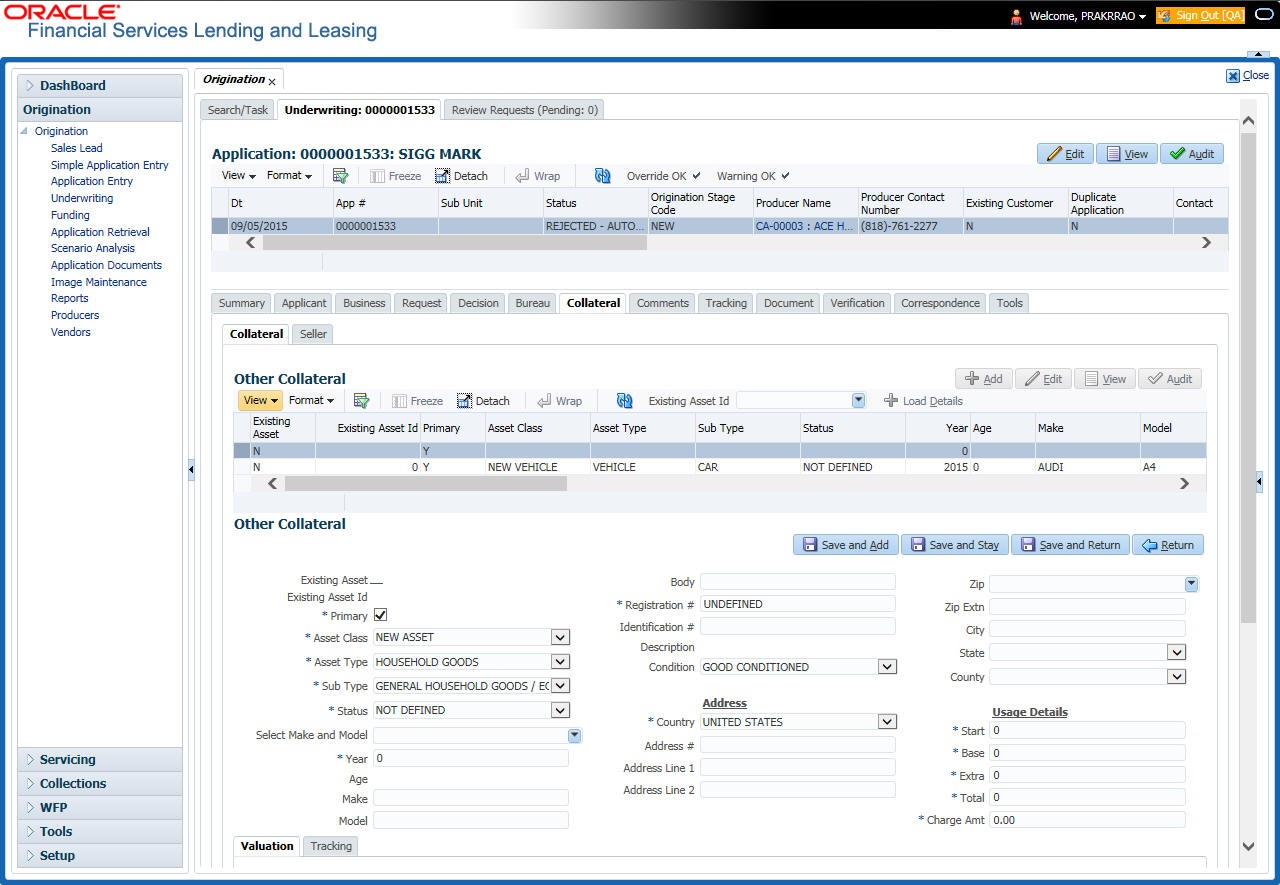
- Perform any of the Basic Operations mentioned in Navigation chapter.
A brief description of the fields is given below:
Field: |
Do this: |
Existing Asset |
Check this box to indicate that the vehicle is an existing asset. |
Existing Asset ID |
View the existing asset identification number. |
Primary |
Check this box if this is the main asset on the application. |
Asset Class |
Select the asset class. |
Asset Type |
Select the asset type. |
Sub Type |
Select the asset sub type. |
Status |
Select the asset status. |
Select Make and Model |
Select the make and model of the vehicle from drop-down list. |
Year |
Specify the year of the vehicle. |
Age |
View the age of the vehicle |
Make |
Specify the make of the vehicle. |
Model |
Specify the model of the vehicle. |
Body |
Specify the body of the vehicle. |
Registration # |
Specify the vehicle registration number. |
Identification # |
Specify the vehicle identification number. |
Description |
View the vehicle description. |
Condition |
Select the vehicle condition. |
Address |
|
Country |
Select the country. |
Address # |
Specify the apartment number. |
Address Line 1 |
Specify the first address line. |
Address Line 2 |
Specify the second address line. |
State |
Select the state. |
Zip |
Select the zip code. For non US country, you have to enter zip code. |
Zip Extn |
Specify the zip extension. |
City |
Specify the city. |
County |
Select the county. |
Usage Details The details maintained in this section is used to calculate ‘EXCESS USAGE FEE’ in payoff quote and termination transactions. |
|
Start |
View/specify the start unit of asset usage. |
Base |
View/specify the base units. |
Extra |
View/specify the extra usage units. |
Total |
View/specify the total usage units. |
- Perform any of the Basic Actions mentioned in Navigation chapter.
7.11.1 Valuations Sub Tab
The Valuation sub tab contains information about the value of the asset. The Values section enables you specify the value of the asset. The Addons section records information about any add ons associated with the collateral.
To complete the Valuations sub tab
- Click the Valuations sub tab.
- Perform any of the Basic Operations mentioned in Navigation chapter.
A brief description of the fields is given below:
Field: |
Do this: |
Value section |
|
Current |
Select if this is the current valuation. |
Valuation Dt |
Specify the valuation date. |
Source |
Select the valuation source. |
Currency |
Select the currency based on which the valuation is to be done. |
Edition |
Specify the valuation edition. |
Supplement |
Specify the valuation supplement. |
Whole Sale |
|
Line of Credit Currency Wholesale Base Amt |
Specify the Line of Credit currency wholesale value. |
WholesaleBase Amt |
Specify the wholesale value. |
Usage |
Specify the usage value; that is, the monetary effect that the current mileage has on the value of the vehicle. |
Retail |
|
Retail Base Amt |
Specify the retail value. |
Addons Amt (+) |
View the add-ons value. |
Usage Value Amt (+) |
Specify the usage. This pertains to Line of credit and usually is entered as the current mileage on the vehicle. |
Total Value Amt (=) |
View the total value. |
Line of CreditCurrency Retail Base Amt |
View the Line of Creditcurrency retail value. |
Line of CreditAddons Amt(+) |
View the Line of Credit addons. |
Line of Credit Currency Usage Value Amt (+) |
View the Line of Credit currency usage value. |
Line of Credit Currency Total Value Amt (=) |
View the Line of Credit total value. |
- Perform any of the Basic Actions mentioned in Navigation chapter.
- In the Addons Section, perform any of the Basic Operations mentioned in Navigation chapter.
A brief description of the fields is given below:
Field: |
Do this: |
Description |
Select the description for the attribute. |
Value |
Specify the value of the attribute. |
Amount |
Specify the add-on amount. |
Line of Credit Currency Amount |
Specify Line of Credit currency amount. |
- Perform any of the Basic Actions mentioned in Navigation chapter.
Complete the Addons/Attributes, Value, and Amt fields for each of the asset’s add-ons and attributes on the application.
7.11.2 Tracking Sub Tab
The Tracking sub screen enables you to record further information associated with the collateral. What items you choose to track are setup during implementation.
To track attributes for the collateral
- Click Tracking sub tab
- On the Tracking sub screen, click Load Details.
- In the Tracking Items section, select the item you want to track.
- Perform any of the Basic Operations mentioned in Navigation chapter.
A brief description of the fields is given below:
Field: |
Do this: |
Tracking Item |
View the tracking type |
Disposition |
Select the disposition. |
Start Dt |
Specify the tracking start date. |
End Dt |
Specify the tracking end date. |
Follow up Dt |
Specify the next follow-up date. |
Enabled |
Select to track the information from the start date in the Start Dt field. |
Comment |
Specify any comments regarding the tracking item. |
- Perform any of the Basic Actions mentioned in Navigation chapter.
- Complete the Tracking Item Details section by entering information about a parameter in the corresponding the Value field.
7.11.3 Seller Tab
The Collateral link’s Seller Details tab enables you to enter the seller details of the collateral of the Line of credit.
To enter the Seller details
- Click the Seller Details tab.
- Perform any of the Basic Operations mentioned in Navigation chapter.
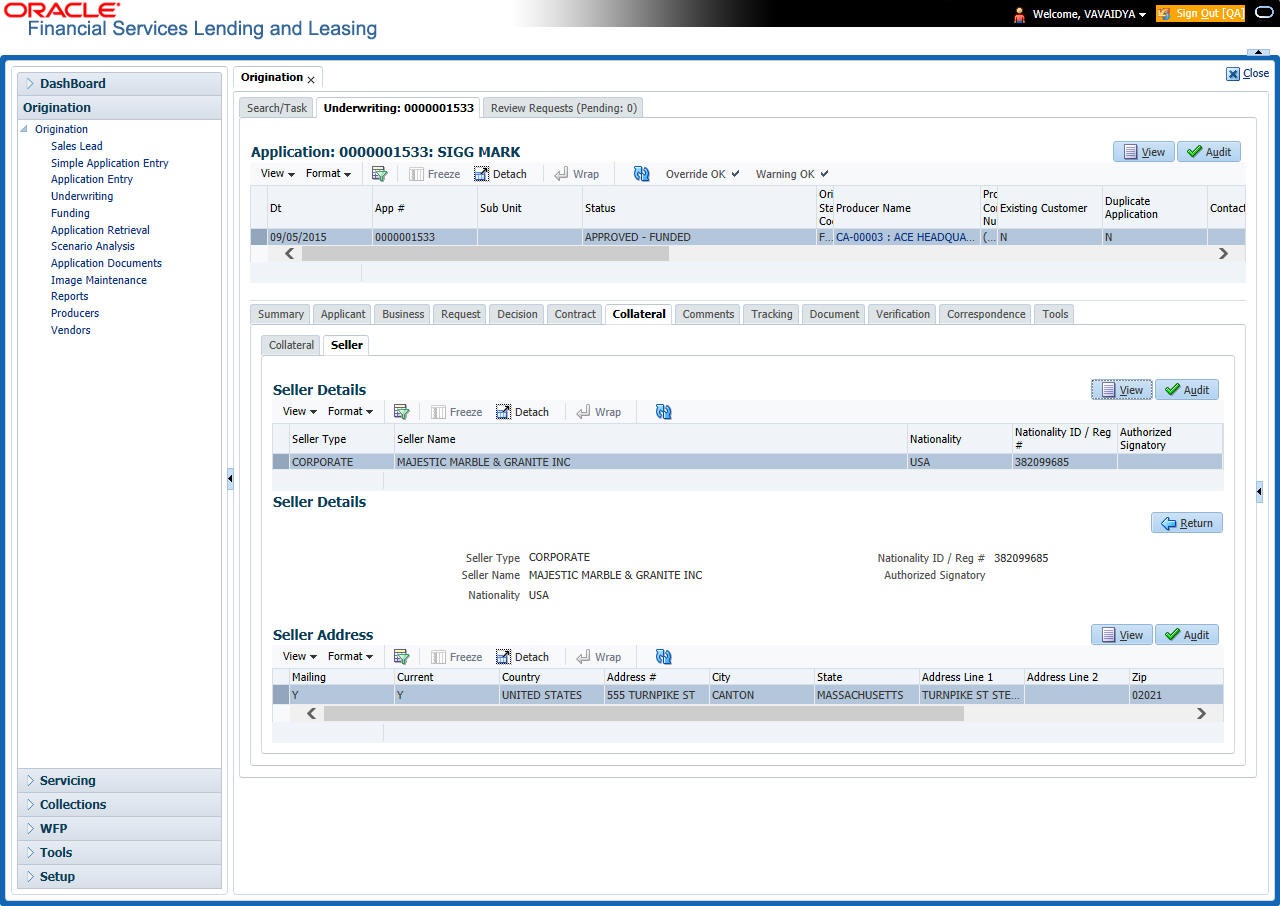
A brief description of the fields is given below:
Field: |
Do this |
Seller Information section |
|
Seller Type |
Select the seller type. |
Seller Name |
Specify the seller name |
Nationality |
Select the seller’s nationality. |
National ID/Reg # |
Specify the national identification number or registration number. |
Authorized Signatory |
Specify the authorized signatory of the seller. |
Seller Address section |
|
Mailing |
Select if this is the mailing address. Only one address entry can be marked as the mailing address. |
Current |
Select if this is a current address. The mailing address must be marked as current. |
Country |
Select the country code. |
Address # |
Specify the address number. |
Address Line 1 |
Specify the first address line. |
Address Line 2 |
Specify the second address line. |
State |
Select the state. |
Zip |
Select the zip code. For non US country, you have to enter zip code. |
Zip Extn |
Select the zip extension. |
City |
Specify the city. |
Phone |
Specify the telephone number. |
Extn |
Select the telephone extension. |
- Perform any of the Basic Actions mentioned in Navigation chapter.
7.12 Comments Tab
When using the Underwriting screen, you can add/delete comments to an application at any time in the underwriting process by using the Comments screen.
Whenever an application is decisioned by a proxy user, a system generated comment with timestamp is inserted in the comments tab in the format ‘<User 1> actioned as proxy for Underwriter <User2>’. Here, User 1 refers to the logged in user who has acted on behalf of User2, who is the concerned Underwriter. The concerned Underwriter’s name will also be selected in Application section > 'Proxy for Underwriter' field.
To add comments
- Click Comments tab.
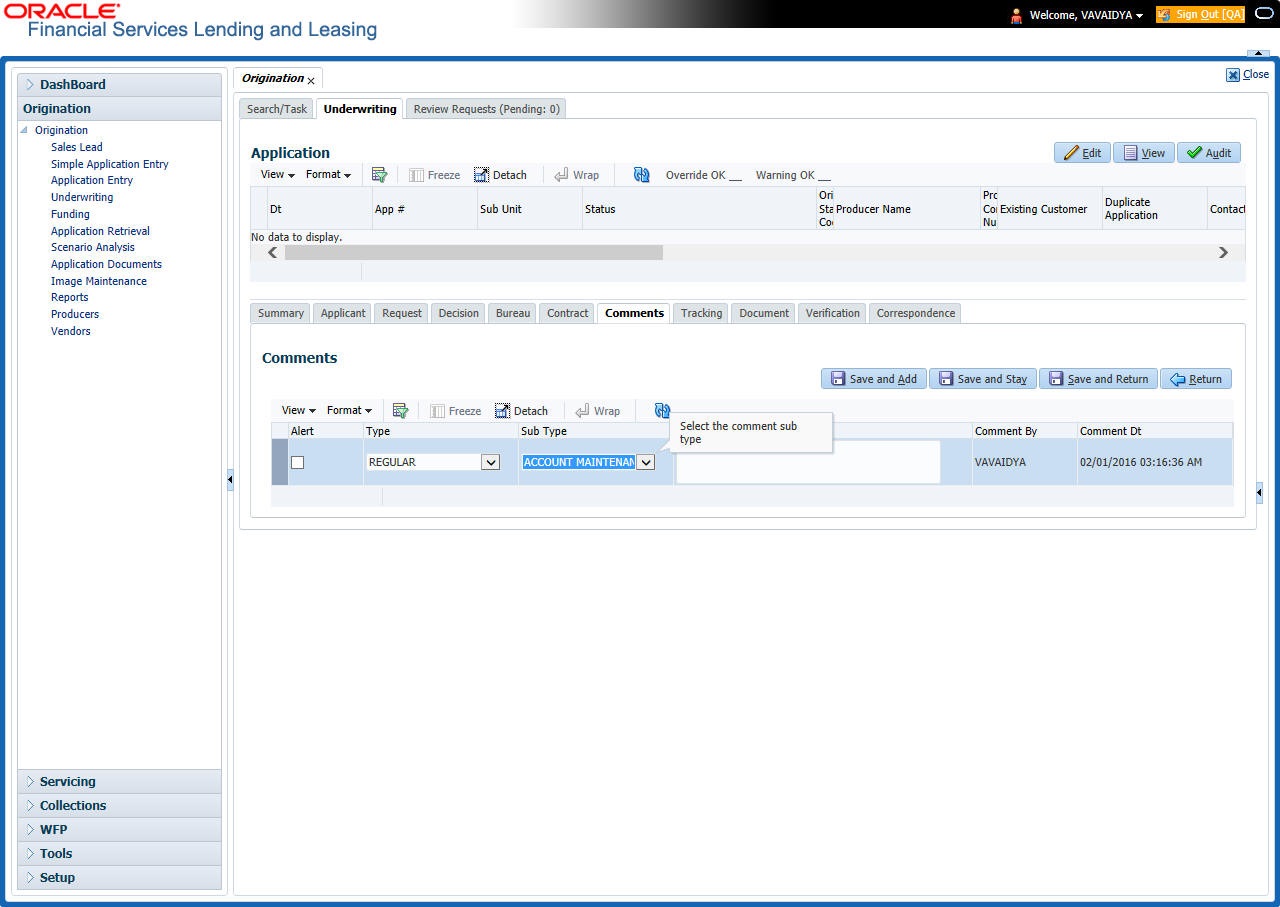
- Perform any of the Basic Operations mentioned in Navigation chapter.
A brief description of the fields is given below:
Field: |
Do this: |
Alert |
Check this box to make the comment appear on the Customer Service screen Alert section |
Type |
Select the type of comment you are adding. |
Sub Type |
Select the sub type of comment you are adding. |
Comment |
Specify your comment. |
Comment By |
The system displays your user ID. |
Comment Dt |
The system displays commented date and time stamp. |
- Perform any of the Basic Actions mentioned in Navigation chapter.
7.12.0.1 Deleting Comment(s)
You can delete ‘REGULAR’ type comments displayed in the Comments sub tab.
To delete a comment
- Select the row which consists of the comment and click Delete from the actions.
- Click ‘Yes’ to confirm delete in the warning message displayed.
7.13 Tracking Tab
When using the Underwriting screen, you can add tracking attribute information to an application at any time in the underwriting process by using the Tracking Attributes screen.
To enter the tracking attributes
- Click Tracking tab.
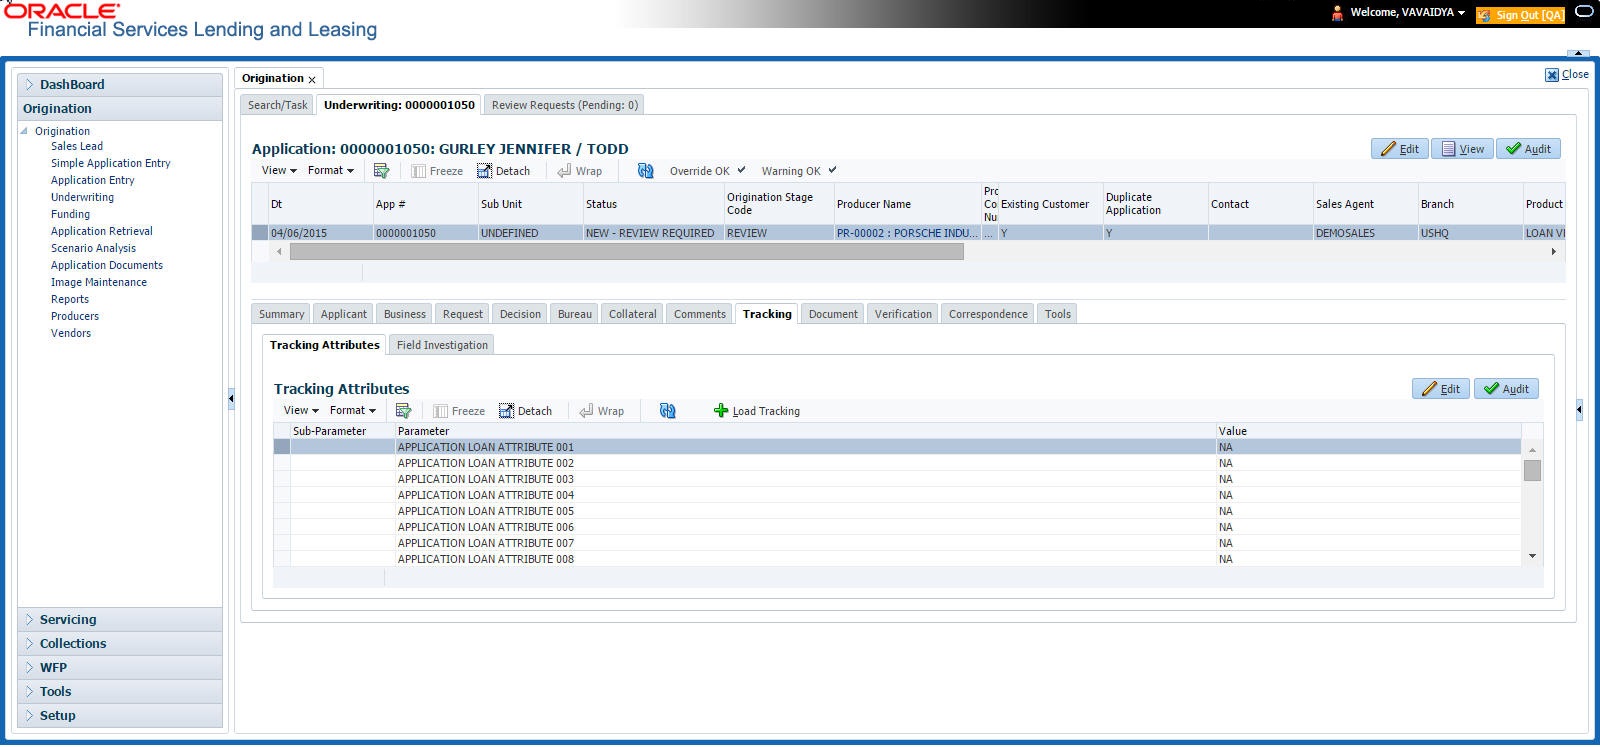
- On the Tracking Attributes screen, click Load Tracking to load the tracking attributes.
- Select the item you want to track.
- Click Edit to edit the following information:
Field
Do this
Sub-Parameter
View the sub-parameter
Parameter
View the parameter.
Value
Specify the information about the corresponding Value field.
- Save changes you made to the account.
7.13.1 Field Investigation Sub Tab
The Field Investigation link enables lending institutions to perform field investigations and verify an applicant’s contact points (address and employment information, for example) and credentials (such as asset details). Clients can chose the details to be verified (address, employment, asset or any combination of the three), as well as the verifying agency.
With the Underwriting screen’s Field Investigation screen, you can select which details from application entry are to be verified. The verifying agency performs a field investigation of the details and responds to the lending institution with either XML or a text file. The details are entered in the system for an underwriter to review when making a decision.
- Click Field Investigation sub tab.
- In Field Investigation section, perform any of the Basic Operations mentioned in Navigation chapter.
A brief description of the fields is given below:
Field |
Do this |
Applicant |
Select the applicant from the adjoining drop-down list |
Verification Type |
Select the verification type from the adjoining drop-down list. |
Verification Agency |
Select the verification agency from the adjoining drop-down list. |
Status |
Select the status from the adjoining drop-down list. |
Spoke to |
Specify the name of the person applicant spoke to |
Call Dt |
Specify the call date |
# of Attempts |
Specify the number of attempts made. |
Result |
Select the result from the adjoining drop-down list |
- Perform any of the Basic Actions mentioned in Navigation chapter.
- In Verification Details section, perform any of the Basic Operations mentioned in Navigation chapter.
A brief description of the fields is given below:
Field |
Do this |
Verification Match |
Check the box if the verification has matched. |
Remarks |
Specify remarks, if any |
- Perform any of the Basic Actions mentioned in Navigation chapter.
7.14 Document Tab
The Document tab allows you to view documents attached to the application in the form of GIF files, PDF files, DOC files, XLS files and TXT files and add comments regarding a selected.
For more information, see the chapter Document Management in this User Guide.
To view a document attached
- Click Document tab.
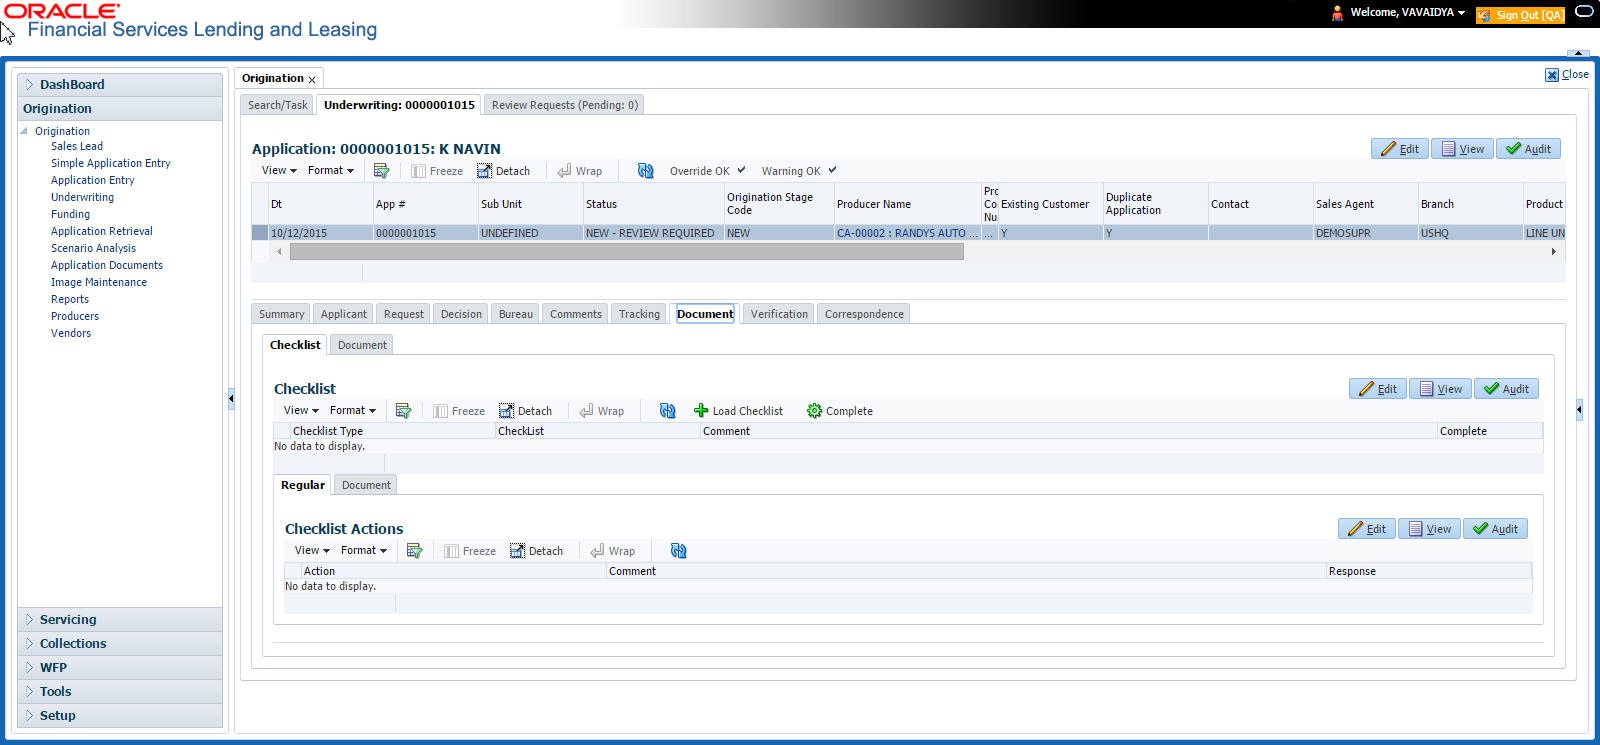
- In the Application Document section, perform any of the Basic Operations mentioned in Navigation chapter.
A brief description of the fields is given below.
Field: |
Do this: |
Document Type |
View the document type. |
Comment |
Specify any comments regarding the document. |
Field: |
View this: |
Document Sub Type |
The document sub type. |
Version |
The version. (Version numbers will be incremental by batch job, first version will start with 1.0.) |
Page # |
The page number. |
Document File Type |
The document file type. |
Tracking # |
The tracking number of the document. |
Docket # |
The docket number of the document. |
Location |
The location of the of the document. |
Received Dt |
The effective date of the document. |
Effective Dt |
The effective date of the document. |
Expiry Dt |
The expiration date of the document. |
Comment |
Any comments regarding the document. |
- Perform any of the Basic Actions mentioned in Navigation chapter.
- Click View Document.
The system opens a browser to display the actual document (which browser appears depends on what type of document you selected and what browsers are set up to work in conjunction with your system).
7.14.1 Checklist Sub Tab
The Checklist sub tab enables you to view tasks performed during the underwriting process.
To view the underwriting Checklist screen
- Click Document > Checklist.
- If the Checklist section is empty, click Load Checklist in the Checklist section.
- In the Checklist Actions section, click Regular sub tab.
- In Checklist Actions section, complete the tasks listed in the Checklist Action column.
- Use the Yes/No/NA buttons in the Yes No NA column to indicate whether you completed the task or not.
- Use the Comment field to add remarks regarding any of the tasks, if you choose.
- When you are finished completing the tasks, choose Complete in the Checklist section.
- Click Save.
- In the Checklist Actions section, click the Documents sub tab
- In the Documents section, select the record you want to work with and click View in the Details column.
- In the Documents section, view the following information:
Field:
Do this:
Action
View the action to be performed.
Document Type
View the document type.
Document Sub Type
View the document sub type.
Status
Select the status of the action.
Response
Use the Yes/No/NA buttons to indicate whether or not you completed the task.
Comment
Specify comment.
7.15 Verification Tab
The system can be configured to automatically validate portions of an application when you attempt to change its status. The results of this data check appear on the Verification link’s Edit screen as an Error, a Warning, or an Override.
If it is an Error, the system will not allow you change the application’s status and approve the Line of credit until you fix all the errors.
If it is a Warning, the system enables you to change an application’s status without correcting the matter. While you should still investigate the problem, Warning messages are of a lesser importance than Error messages.
If it is an Override, the system displays a dialog box informing you that an override is needed; your responsibility level does not have the authority required to process this step. (Choose Yes on the dialog box to move the application to the queue of the user with the required authority.)
The system can be configured to verify different sets of information; for example, the system could check one set of data when checking application entries for completeness and another when approving auto Line of credit. Each one of these ‘edit types’ has its own set of ‘edit details’.
Note
The Edit Details section’s errors and warnings are created during the setup process.
7.15.1 Edit Sub Tab
To complete the Edits section
- Open the Underwriting screen and load the application you want to work with.
- Click Verification > Edits.
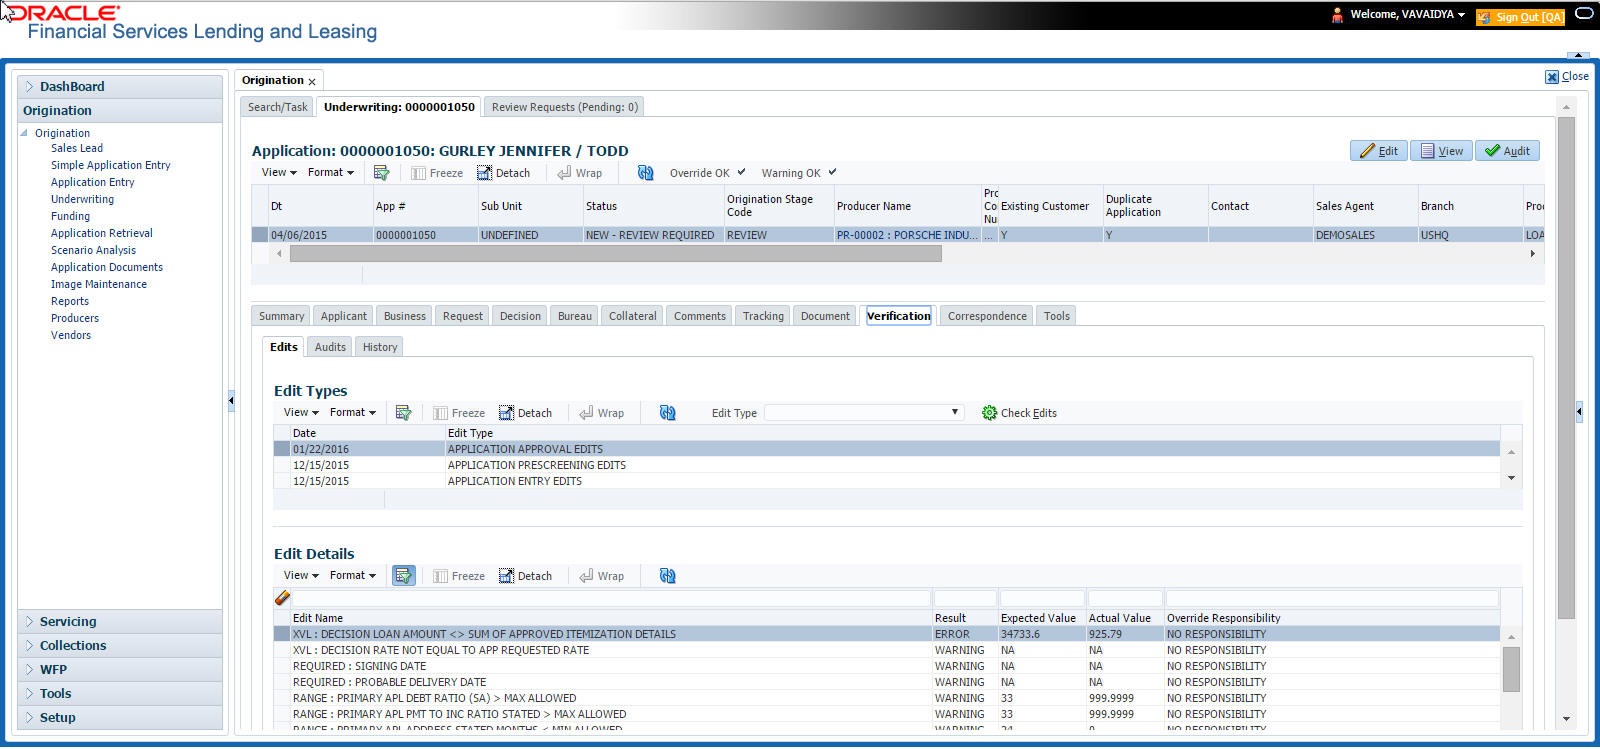
- In the Edits screen’s Edit Type section, select the type of edit you want to verify.
- Click Check Edits.
The system checks the data for the verification process selected in the Edit Type section and displays the results in the Edit Details section.
The Edit Details section contains the following display only information:
Field: |
View this: |
Edit Name |
The edit. |
Result |
The result. |
Expected Value |
The expected value. |
Actual Value |
The actual value. |
Override Responsibility |
The override responsibility, if an override is required. |
- In the Edit Details section, view the verification results and begin making corrections on the Underwriting screen. Remember, edits resulting in Error must be corrected. Edits resulting in warning can be by passed.
The system begins processing the credit application.
7.15.2 Audits Sub Tab
The Audits screen is a display only screen that enables you track changes to the contents of predetermined fields (which fields are determined during set up). For example, the Audits screen can be configured to monitor when the contents of the Status and Sub Status is changed. The Audits screen lists the field that was changed, who made the change, when the change was made, and the old and new values in the field.
To view the Audits
- Open the Underwriting screen and load the application you want to work with.
- Click Verification > Audits.
- In the Audit Details section, view the following display only information:
Field:
View:
Record Id
The record identifier for the record changed.
Field
The field which was changed.
Old Value
The old value of the column which was changed.
New Value
The new value of the column which was changed.
Changed By
The user code who made the change.
Changed Date
The date and time when the change was made.
7.15.3 History Sub Tab
You can track the time it took a user to complete each stage of the application process with the History section. It displays:
- The date and time when an application changed status / sub status
- The user who changed the status / sub status
- The elapsed time of how long an application was in a particular status / sub status.
- To view the History Open the Underwriting screen and load the application you want to work with.
- Click Verification > HistoryIn the Application Status History section, view the following display only information:
Field:
View this:
Status
The application status.
Sub Status
The application sub status.
User
The user name.
Start Dt
The date and time when the application moved to that status.
End Dt
The date and time when the application moved from that status.
Elapsed Time
The elapsed time between the status change.
7.16 Correspondence Tab
Ad-hoc correspondence enables you to include information from applications in document templates you create yourself without manually transferring the data. Ad-hoc documents can be generated as either Microsoft Word or PDF files.
Ad-hoc correspondence can be viewed on the Correspondence link’s Correspondence screen when you have opened an account. The screen enables you to generate a new letter or view a previously generated letter.
7.16.1 Correspondence Sub Tab
To generate an ad hoc correspondence
- Open the Underwriting screen and load the application you want to work with.
- Click Correspondence > Correspondence.
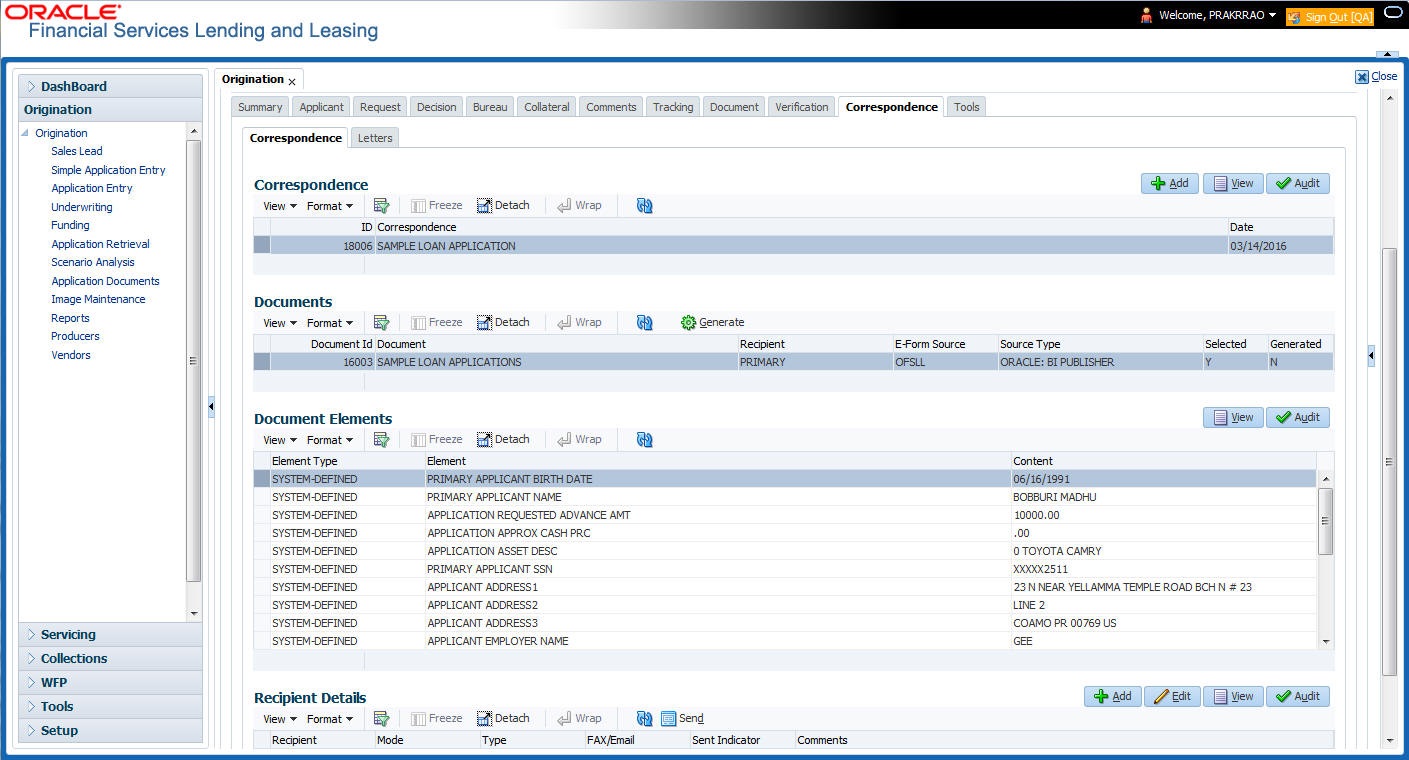
- Perform any of the Basic Operations mentioned in Navigation chapter.
A brief description of the fields is given below:
Field: |
Do this: |
Correspondence |
Select the correspondence you want to generated. |
ID |
System displays the correspondence ID. |
Date |
System displays the correspondence generation date. |
- Perform any of the Basic Actions mentioned in Navigation chapter.
The Documents section displays all the types of documents available for the type of correspondence you selected.
- In the Documents section, view the following information for each document:
Field:
View this:
Document ID
The document ID.
Document
The document description.
Recipient
The recipient description.
E-Form Source
The e-form source.
Source Type
The source type.
Selected
If selected, indicates that this document is selected to be included in the correspondence.
Generated
If selected, indicates that the system generated the document.
- In the Documents section, select the correspondence you want to view.
- The Document Elements section displays the elements the system used to generate the correspondence. You view the following information:
Field:
Do this:
Element Type
View the element type.
Element
View the element description.
Content
Specify/view the value of the element.
- Click All to view all elements in the correspondence.
- or -
- Click User Defined, to view user-defined elements in the correspondence.
- In the Document Elements section, click User Defined and complete the Content fields for the Document Element fields you want to include in the correspondence.
- In the Document Elements section, click Save.
- In the Documents section, click Generate.
The system ‘locks’ the information included in the correspondence and prevents it from being changed.
- In the Document Elements section, click View.
The system displays a PDF of the ad hoc correspondence.
7.16.1.1 Recipient Details Sub Tab
The recipient details sub tab facilitates you to send ad-hoc correspondence to Applicants, Customers, Producers, and Others as either Fax or Email.
To add recipient details
- Open the Underwriting screen and load the application you want to work with.
- Click Correspondence > Recipient Details.
- Perform any of the Basic Operations mentioned in Navigation chapter.
A brief description of the fields is given below:
Field: |
Do this: |
Recipient |
Select the recipient from the drop-down list. The list displays the following options: - Applicant - Customer - Producer - Others Note: Based on the type of recipient selected the other correspondence options are displayed for selection. |
Mode |
Select the mode of correspondence from the drop-down list. The list displays the following options: - Fax Note: When the recipient is selected as ‘Applicant’, the Mode is defaulted to Email. |
Type |
Based on the recipient selected, the following type of correspondence is listed for selection: - When the recipient is selected as Applicant, you can select the ‘Applicant Type’ from the drop-down list and ‘Type’ as either EMAIL/ADHOC. The ‘Mode’ is defaulted as ‘Email’. - When the recipient is selected as Customer / Producer, you can select the ‘Mode’ as either FAX/EMAIL and ‘Type’ as FAX/ADHOC or EMAIL/ADHOC respectively. - When the recipient is selected as Others, you can select the ‘Mode’ as either FAX/EMAIL and ‘Type’ as ADHOC only. |
FAX/Email |
Specify the FAX/Email details for correspondence. |
Comments |
Specify additional information as comments. |
- In the Recipient Details section, click Save.
- Click Send to FAX/Email the correspondence details to the specified recipients.
System validates the correspondence details and generates a PDF document through BI Publisher with the Correspondence details. The same is emailed to the specified recipient as an attachment and a system generated comment is updated in ‘Comments’ Tab. The correspondence consists of following header details::
Alert |
Type & Subtype |
Comment |
Comment By |
Comment Date |
N |
System Generated |
<Type> <Correspondence type> sent to <Recipient Type> through < Mode> to <'Email' id> |
Logged in user |
Current System date with time stamp |
7.16.2 Letters Sub Tab
The Letters link enables you to generate letters using predefined letter templates for Line of credit.
Letters can be sent in hard copy or Email / Fax. Among the two options provided for each of these options, you can select the required mode for sending letters.
- When 'Letters' option is selected the correspondences generated are displayed in a table below with a button 'View Letter'.
- When 'Fax' radio button is selected, the correspondence table displays all correspondence including those in Fax or email formats in the table below.
In addition to the above, a section for recording 'Recipient details' opens below. On clicking 'Add' you can specify recipient details, Mode, Type, provide comments and Save the same.
Comments captured will be appended to Fax / Email sent to recipient. You will then need to click on the 'Send' in the action block for email / fax to be sent from OFSLL. In case the correspondence generation is dependent on any job run, then on click of 'Send' system displays an error message "Fax / Letter not generated. Please try sending later”; else event successful message is displayed.
On the Underwriting screen, these predefined correspondences are as follows:
- Decision Letter
- Adverse Action Letter
- Adverse Conditional Letter
To generate letters on the Underwriting screen
- Open the Underwriting screen and load the application you want to work with.
- Click Correspondence > Letters.
- In the Letters screen, select the type of letter you want to generate, and click View Letter.
UNDERWRITING:
- If you select Decision Fax, and click View Letter, the system displays the decision letter.
The predefined Decision letter is automatically sent after an application receives a status of approved, rejected, or conditioned on the Underwriting screen.
The Decision fax/e-mail is available for Line of credit(fixed and variable rate).
- If you click Adverse Action, and click View Letter, the system displays the adverse action letter.
The predefined Line of creditAdverse Action letter is automatically sent to the producer after a configurable number of days when an application receives a status of rejected on the Underwriting screen.
The Adverse Action letter is available for Line of credit(fixed and variable rate).
- If you click Conditional Adverse Action, and click View Letter, the system displays the adverse conditional letter.
The predefined Conditional Adverse Action letter is automatically sent to the producer a configurable number of days after an application receives a status of conditioned on the Underwriting screen.
The Conditional Adverse Action letter is available for Line of credit(fixed and variable rate).
- In the Recipient Details section, you can send the ad-hoc correspondence. You can specify the following details:
Field:
Do this:
Recipient
Select the recipient from the drop-down list. The list displays the following options:
- Applicant
- Customer
- Producer
- Others
Note: Based on the type of recipient selected the other correspondence options are displayed for selection.
Mode
Select the mode of correspondence from the drop-down list. The list displays the following options:
- Fax
- Email
Note: When the recipient is selected as ‘Applicant’, the Mode is defaulted to Email.
Type
Based on the recipient selected, the following type of correspondence is listed for selection:
- When the recipient is selected as Applicant, you can select the ‘Applicant Type’ from the drop-down list and ‘Type’ as either EMAIL/ADHOC. The ‘Mode’ is defaulted as ‘Email’.
- When the recipient is selected as Customer / Producer, you can select the ‘Mode’ as either FAX/EMAIL and ‘Type’ as FAX/ADHOC or EMAIL/ADHOC respectively.
- When the recipient is selected as Others, you can select the ‘Mode’ as either FAX/EMAIL and ‘Type’ as ADHOC only.
FAX/Email
Specify the FAX/Email details for correspondence.
Comments
Specify additional information as comments.
- In the Recipient Details section, click Save.
- Click Send to FAX/Email the correspondence details to the specified recipients.
System validates the correspondence details and generates a PDF document through BI Publisher with the Correspondence details. The same is emailed to the specified recipient as an attachment and a system generated comment is updated in ‘Comments’ Tab. The correspondence consists of following header details:
Alert |
Type & Subtype |
Comment |
Comment By |
Comment Date |
N |
System Generated |
<Type> <Correspondence type> sent to <Recipient Type> through < Mode> to <'Email' id> |
Logged in user |
Current System date with time stamp |
7.17 Tools Tab
The Tools tab calculates the payment amount, term, interest rate, Line of credit amount, amortization schedule and allows for the printing of a report.
For detailed information on using the tools, refer “Tools” chapter in the document.
7.18 Review Request
The Review Requests screen is primarily a work flow tool used to flag an Application for the attention of another Oracle Financial Services Lending and Leasing user and ask for review / feedback. It allows the system users to send and receive requests (including e-mail) commenting on a specific Application. The Review Request tab supports iterative review of selected Application and also to process the review with multiple reviewers.
In this chapter, you will learn how to compete the following tasks:
- Filter and View Review Requests
- Create and Send Review Request
- Reviewing a Request
- Responding to Review Request
- Reassign Review Request
- E-mailing Review Request
- Closing Review Request
- Complete Review Request
Note
To complete the above mentioned tasks for an Application Review Request, use Review Request tab available in the Origination (Application Entry, Underwriting and Funding) screens.
7.18.1 Filter and View Review Requests
The Review Requests tab contains the following sections:
- Query Section
- Action Section
- Email Section
- Comment History Section
Query Section
The Query section enables you to filter records based on User and type of review requests using any of the following options:
The ‘User’ drop-down lists your User ID along with your Supervisor ID if the same has been defined in User Definition screen (Setup > Administration > User > Users). If you are the supervisor, you can view all your subordinates User ID’s along with yours for selection.
On selecting a particular User ID from the list, system displays all the requests which are created, reviewed, closed and completed by that user.
You can further filter the review request based on the following:
Query Options |
Descriptions |
Originator |
Displays the records of all the active review requests created by the selected User. |
Receiver |
Displays the records of all the active review requests received by the selected User. |
Both |
Displays all the review requests records created as well as reviewed by the selected User with the status other than ‘CLOSED’ and ‘COMPLETED’. |
View All |
Displays all the review requests records created as well as reviewed by the selected User with all the statuses. |
Forwarded Only |
Displays all the review requests records which are forwarded by the selected User to another user for review. |
Action Section
The Action section enables you to Send (create), Respond, Close, or Complete the review request.
Action Options |
Descriptions |
Open Application |
Displays the Application Entry screen with the Application details assigned for review. |
Send Request |
Sends a review request to another Oracle Financial Services Lending and Leasing user. |
Send Response |
Sends a response to a review request received from another Oracle Financial Services Lending and Leasing user. |
Close Request |
Changes the status of review request to CLOSED and can be viewed by selecting ‘View All’ option in the ‘Query’ section. |
Complete Request |
Changes the status of review request to COMPLETED and can be viewed by selecting ‘View All’ option in the ‘Query’ section. |
Remove Filter |
Removes the selected filters applied to narrow the view of review request. The option is available when a review request is accessed from DashBoard > My Pending Review Requests section. |
Email Section
The Email section enables you to send an email to either originator or receiver of the review request if an email setup is configured. However, note that a review request cannot be responded or replied back from email recipient.
Email Options |
Descriptions |
Originator |
Sends an email of review request information to the person listed in the Originator column on Review Request page. |
Receiver |
Sends an email of review request to the person listed in the Receiver column on Review Request page. |
The ‘Review Requests’ section in Origination screen displays the following information for each record:
Fields |
Descriptions |
Request # |
View the system generated review request number. The same can be used to query and track the review requests. |
Originator |
The user id of the review request originator. |
Priority |
The request priority: HIGH, NORMAL, or LOW. |
Receiver |
The recipient of the review request. |
Application # |
The Application number which needs review. |
Application Status |
The Application status of the request being reviewed. |
Applicant |
Applicant’s name in the review request. |
Phone |
Applicant’s phone number in the review request. |
Address |
Applicant’s address in the review request. |
Applicant’s email in the review request. |
|
Reason |
Stated reason in the review request. |
Status |
The current status of review request. Following status are tracked in this column: WAITING FOR RESPONSE - when request is sent to reviewer RETURN TO ORIGINATOR - when reviewer has responded to request CLOSED - when the request is closed COMPLETED - when the request is completed |
Date |
The date and time when the review request was created. |
Comment History
The ‘Comment History’ section displays the log of comments or additional information added by originator or receiver while creating or reviewing a request.
During an iterative review, where there are multiple trails of communication exchanged between originator and receiver, the ‘Comment History’ section tracks all the updates as individual records for reference.
The Comment History section also allows you to know the actually reviewer when an Application review request is forwarded to multiple reviewers and is reviewed or completed by second or third person other than the one assigned by originator.
In the Comment History section, you can view the following details of the selected review request:
Comments From |
Descriptions |
Type |
View the type of request and is indicated as REVIEW REQUEST by default as maintained in ‘COMMENT_TYPE_CD’ lookup code. |
Sub Type |
View the sub type of request which can be ORIGINATOR, RECEIVER, or SYSTEM GENERATED as maintained in COMMENT_SUB_TYPE_CD lookup code. Note: The sub type ‘SYSTEM GENERATED’ is automatically posted by the system when the review request is forwarded to another user by the assigned reviewer. The same is also updated with a comment in the next column. |
Comment |
View the Originator’s or Reviewer’s comment. SYSTEM GENERATED comments are posted in the format - REVIEW REQUEST: <Request #> FORWADED FROM <first assigned user id> TO <next assigned user id>. |
Comment By |
View the user who has posted the comment. SYSTEM GENERATED comments are marked as ‘INTERNAL’. |
Comment Dt |
View the Date and time when the comment was posted. |
7.18.2 Create and Send Review Request
The review request tab primarily allows you to flag an Application for the attention of another OFSLL user through a request asking for review / feedback. While doing so, you can either choose to send it to the reviewer immediately on creating the request or only create the request and later send for review.
To Create and Send Review Request
- On the Oracle Financial Services Lending and Leasing Application home page, click Origination > Simple Application Entry / Application Entry / Underwriting / Funding screen and select ‘Review Requests’ tab.
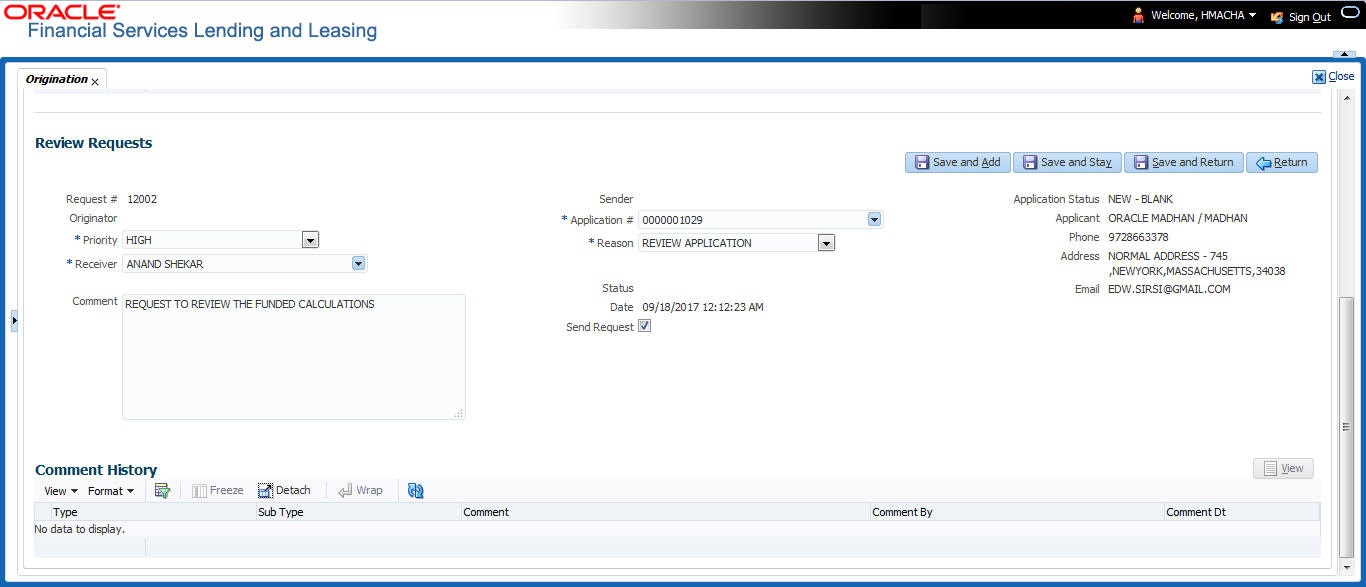
- In the Review Requests section, select ‘Originator’.
- Click ‘ADD’. You can also perform any of the Basic Operations mentioned in Navigation chapter. A brief description of the fields are given below:
In this field:
View this:
Request #
View the system generated request number.
Originator
View the requester’s user ID auto generated by system upon creating the request.
Priority
Select the priority of review request as High, Normal, or Low from the drop-down list. This helps the reviewer to prioritize the request while responding but does not affect the order in which messages are sent or received.
Receiver
Select the user ID of the reviewer from the drop-down list.
Comment
Specify additional details for review (if any) which can be sent to the reviewer along with the review request.
Sender
View the user ID of previous reviewer, if a request has been forwarded to another reviewer.
Note: A forwarded review request can only be viewed in the review request tab by filtering user ID of previous reviewer and selecting ‘Forwarded only’ check box.
Application #
Select the Application to be reviewed from the drop-down list. The following fields are auto-populated based on selection:
Application Status
Applicant
Phone
Address
Email
Reason
Select the purpose for request from drop-down list.
Status
View the status of review request auto updated by system upon creating the request.
Date
View the date and time when the request was created. System appends the current date by default.
Send Request
(Optional) Select this check box to send it to reviewer immediately on creating the request.
However, if the request still need changes, retain the check box unselected and proceed to create the request. The same can later be sent for review by selecting ‘Send Request’ option from the action section.
- Perform any of the Basic Actions mentioned in Navigation chapter.
The review request(s) appear on the recipient’s ‘My Pending Review Request’ window in DashBoard and also on the ‘Review Request’ tab header with (Pending: <count of unseen requests>). The status of request is updated as WAITING FOR RESPONSE.
7.18.3 Reviewing a Request
When you receive a review request, the system notifies you by creating an entry in ‘My Pending Review Requests By Priority’ section in DashBoard with the number of unseen messages. Clicking on the Application # link opens the Review Request tab.
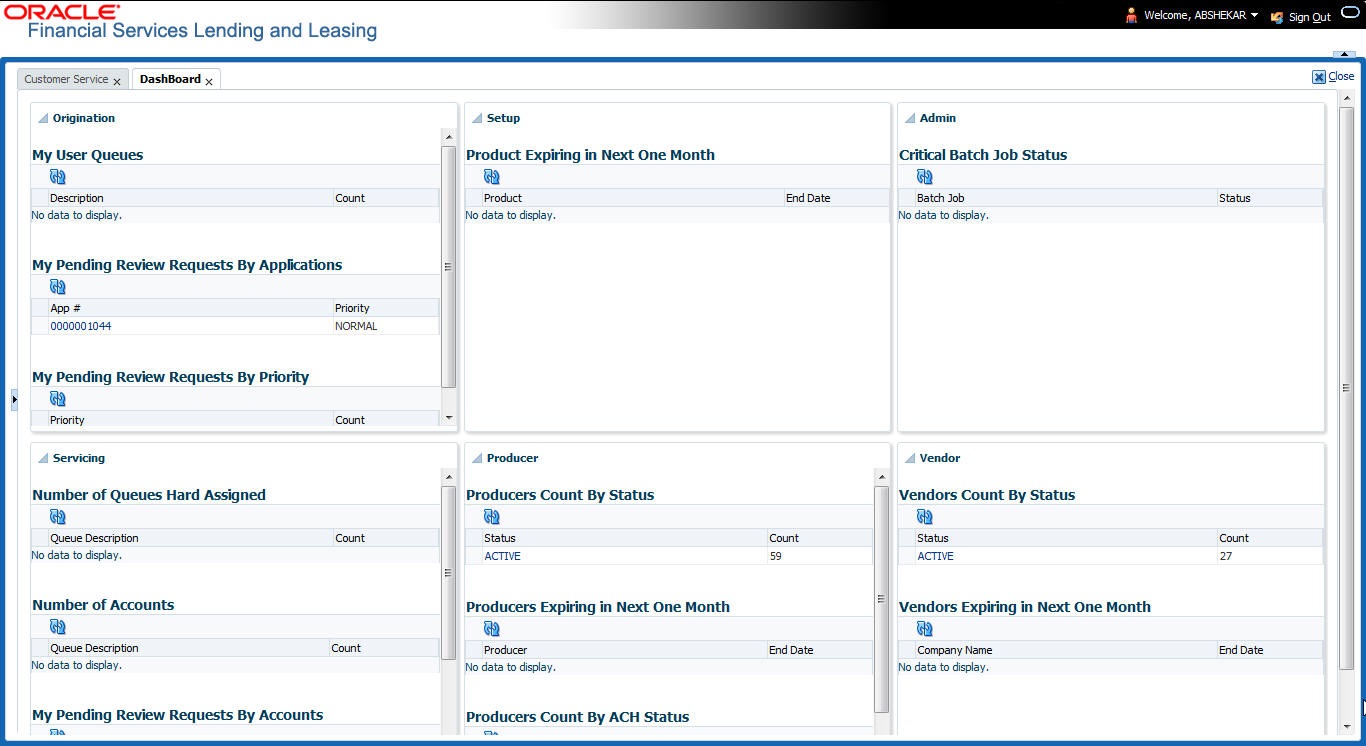
To review requests
- On the Oracle Financial Services Lending and Leasing Application home page, click Origination > Simple Application Entry / Application Entry / Underwriting / Funding screen and select ‘Review Requests’ tab.
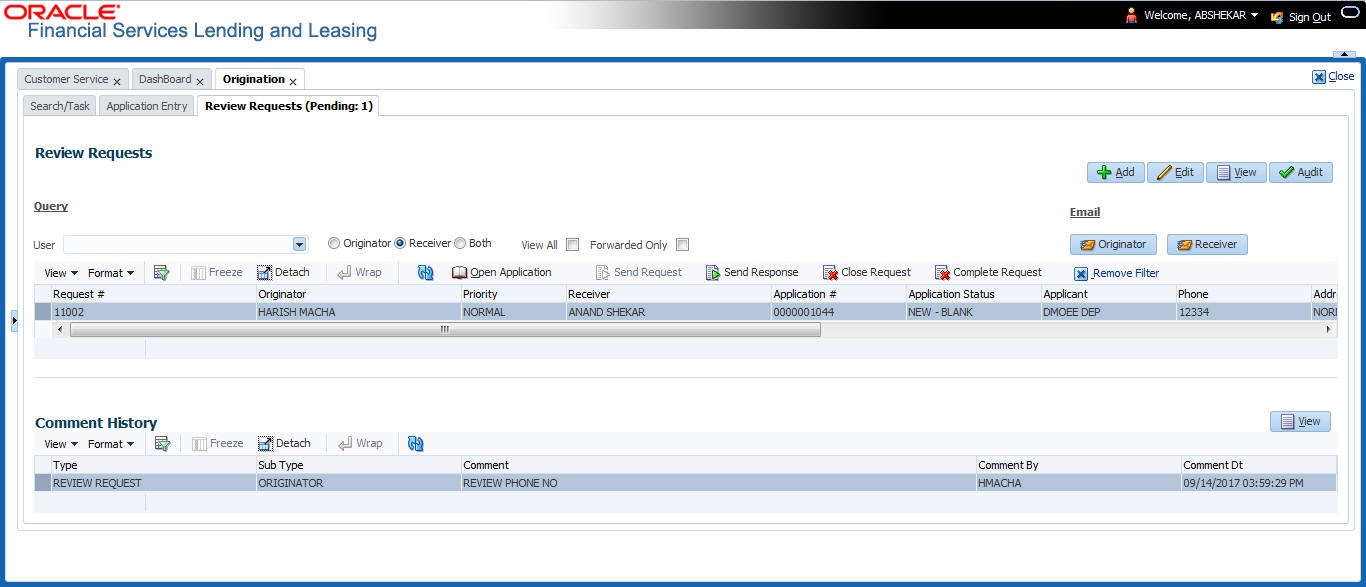
- In the Query section, click ‘Receiver’. System displays all open review request you have received.
- Click ‘Open Application’. The Application details are displayed in Application Entry > Summary tab.
- Review the details in particular to the details specified in the comment (if any).
7.18.4 Responding to Review Request
On completing the review, you can Send Response detailing the feedback of your review. It is ideally recommended to send a response back to the originator by providing your views on the review as a comment. The details are recorded in the ‘Comment History’ section as reference.
However, system also allows your forward the same request to another reviewer in case of additional clarifications.
To respond to review request
- On the Oracle Financial Services Lending and Leasing Application home page, click Origination > Simple Application Entry / Application Entry / Underwriting / Funding screen and select ‘Review Requests’ tab.
- In the Query section, click ‘Receiver’. System displays all open review request you have received.
- In the Review Request section, select the record that you have reviewed.Click ‘Edit’. Specify your review response in the ‘Comment’ field. Select the ‘Send Request’ check box to send the review response immediately to originator. In case of any further changes, retain the check box unselected and save the details. The response is not sent and the same can later be sent to originator by selecting the record and clicking on ‘Send Response’ option from the action section.

The details are updated in Review Request tab and status of request is updated as RETURN TO ORIGINATOR.
7.18.5 Reassign Review Request
While reviewing a request, system also facilitates you to reassign (i.e. forward) the review request to another user for review. In such a case, you become the ‘Sender’ and the assigned user will be the reviewer of the request. The request can further move to other reviewers if required.
When the request is reassigned or forwarded to another reviewer, the actual originator can still track the status of request by selecting user ID in Query section. As a ‘Sender’, you can view the reassigned review requests by selecting the ‘Forwarded Only’ check box in Query section. Also, on reassigning or forwarding a review request, system automatically posts a comment in ‘Comment History’ section in the format - REVIEW REQUEST: <Request #> FORWADED FROM <first assigned user id> TO <next assigned user id> with Sub Type as ‘SYSTEM GENERATED’ and Comment By as ‘INTERNAL’.
Note
It is recommended to limit the reassignment of review request since tracking the request status becomes difficult.
To reassign review request
- On the Oracle Financial Services Lending and Leasing Application home page, click Origination > Simple Application Entry / Application Entry / Underwriting / Funding screen and select ‘Review Requests’ tab.
- In the Query section, click ‘Receiver’. System displays all open review request you have received.
- In the Review Request section, select the record that you have reviewed and click Edit.
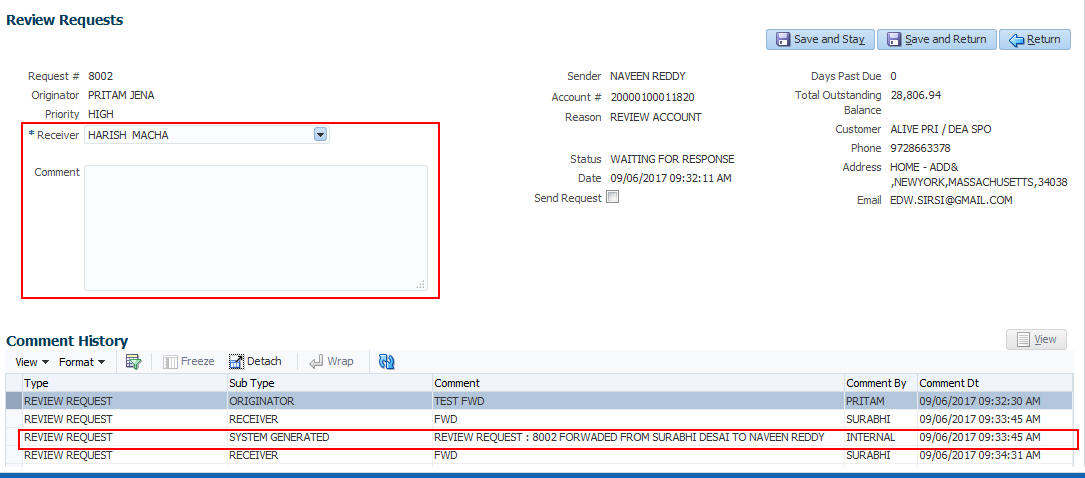
- Select the required reviewer from ‘Receiver’ drop down list.
- (Optional) Specify the reason for reassignment in the ‘Comment’ field. The same is tracked in ‘Comment History’ section.
- Select the ‘Send Request’ check box to reassign review request immediately on update. In case of any further changes, retain the check box unselected and save the details. The reassignment can later be completed by selecting the record and clicking on ‘Send Response’ option from the action section.
The details are updated in Review Request tab and status of request is updated as WAITING FOR RESPONSE.
7.18.6 E-mailing Review Request
While system updates ‘My Pending Review Requests By Priority ‘section in the DashBoard to notify you about the new requests, you can also e-mail a review request to both the originator and a receiver, as applicable. The system will use e-mail address recorded for both the originator and receiver in Setup > Administration > User > User Definition section.
To e-mail a review request
- On the Oracle Financial Services Lending and Leasing Application home page, click Origination > Simple Application Entry / Application Entry / Underwriting / Funding screen and select ‘Review Requests’ tab.
- In ‘Email’ section, click ‘Originator’ to send the message to the person listed in Originator field.
-or-
- Click ‘Receiver’ to send it to the person listed in the Receiver field.
The system emails the details of selected record to e-mail address recorded in user setup.
7.18.7 Closing Review Request
You can close a review request you created at anytime, regardless of status. However, you can only close review requests that have your user id in the Originator field. When you close a review request, the system removes it from Review Request tab.
To close a review request
- On the Oracle Financial Services Lending and Leasing Application home page, click Origination > Simple Application Entry / Application Entry / Underwriting / Funding screen and select ‘Review Requests’ tab.
- Select the request you want to close in the Review Request section.
- In the Action section, click ‘Close Request’.
The system assigns the request as Closed and removes it from your Review Request record. The closed review requests can be reviewed anytime by selecting ‘View All’ in the Query section.
7.18.8 Complete Review Request
When a particular review request has completed the review process from reviewer with required changes and confirmation, the same can be marked as ‘COMPLETE’ in the Review Request tab. However, you can complete a request only if you are the originator of the request. When you complete a review request, system removes it from Review Request tab.
To complete a review request
- On the Oracle Financial Services Lending and Leasing Application home page, click Origination > Simple Application Entry / Application Entry / Underwriting / Funding screen and select ‘Review Requests’ tab.
- Select the request you want to close in the Review Request section.
- In the Action section, click ‘Complete Request’.
The system assigns the request as ‘COMPLETED’ and removes it from your Review Request record. The completed review requests can be reviewed anytime by selecting ‘View All’ in the Query section.