FIRST SERVICE
Let us start with a Hello World Service. This section will help you in writing an end to end Hello World service. The following needs to be done:
- You will need the API Toolkit.
- Set the home of the toolkit by adding an environment variable for it.
- Once the above two steps are done and all the prerequisites are fulfilled, you will be able to proceed further with the execution of simple gradle tasks. Execution of the gradle tasks as mentioned below will get you the deployables (EARs) and the database scripts (The order in which the tasks are executed must be maintained as provided in the explaination)
- Carry out necessary modifications in the REST IDM EARs. Deploy the EARs and run the database scripts.
- You can test your generated services.
.The detailed steps for the first Hello World service is mentioned below:
Obtain Toolkit
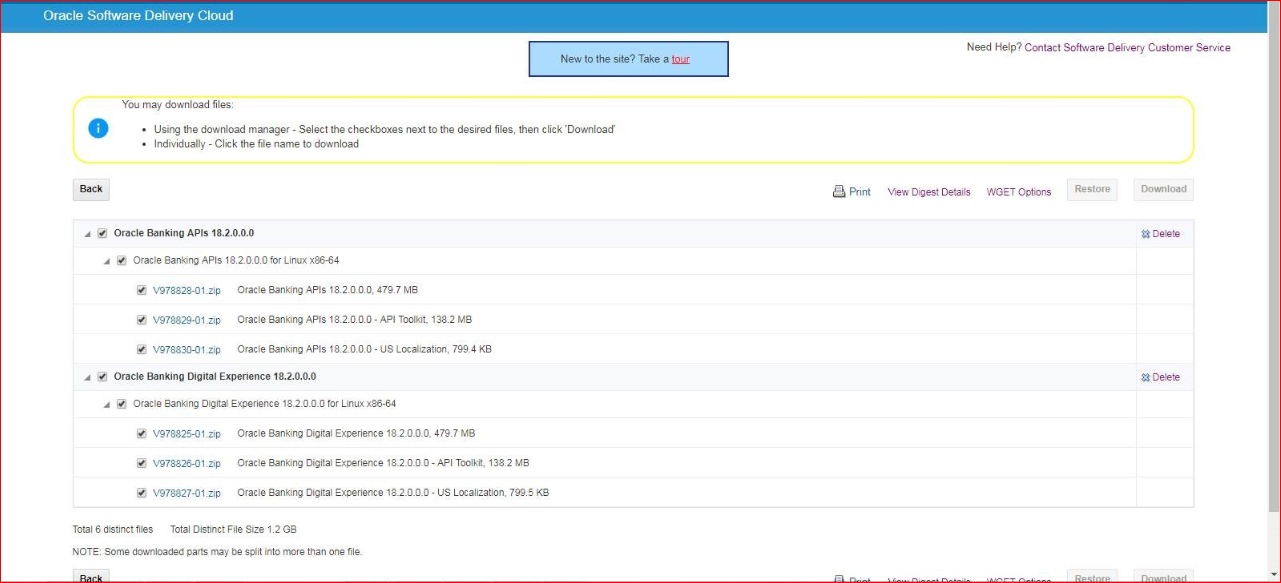
User should download the API ToolKit zip from the Oracle Software Delivery Cloud portal.
Set Environment Variables
Windows
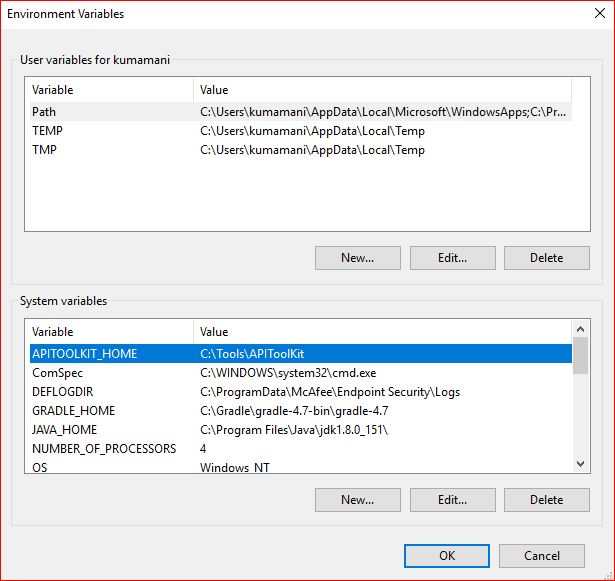
Right click on This PC and click → Properties→ Advanced System Settings → Environmental Variables. Under System Variables select Path, then click Edit.

Linux
User should run the following command on the terminal:
export APITOOLKIT_HOME=<Location of APIToolKit folder>
For Example:
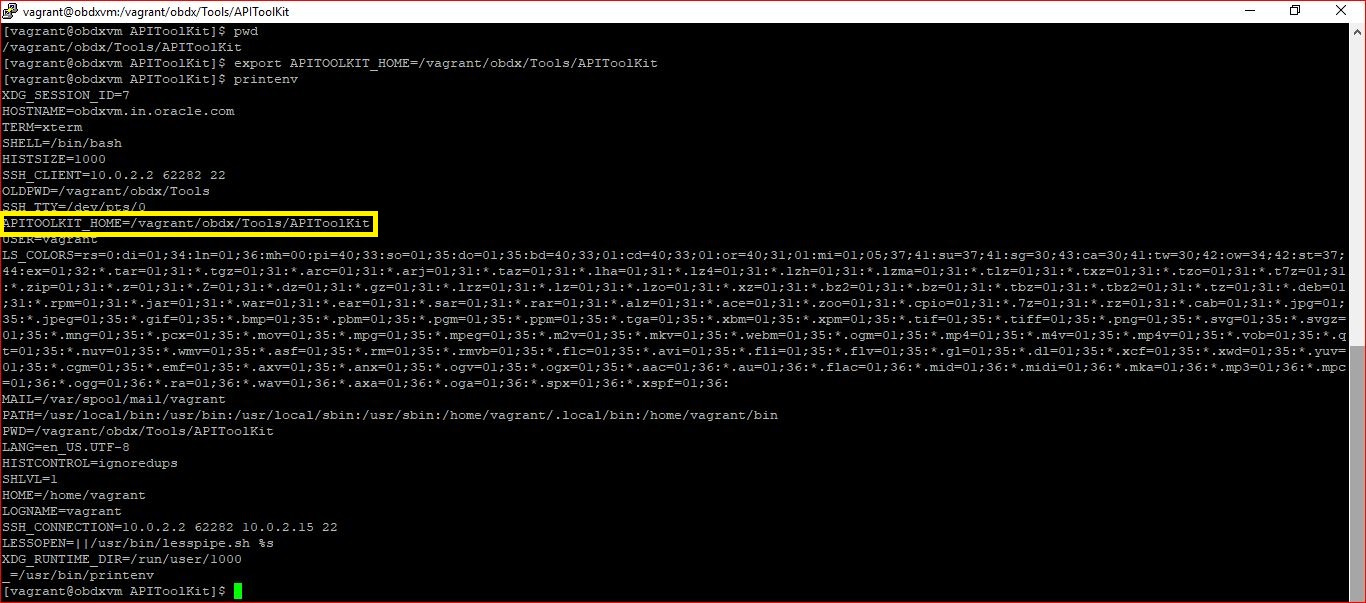
export APITOOLKIT_HOME=/vagrant/obdx/Tools/APIToolKit
The above mentioned step is depicted below:
IOS
User should run the following command on the terminal:
export APITOOLKIT_HOME=<Location of APIToolKit folder>
For Example:
export APITOOLKIT_HOME=/vagrant/obdx/Tools/APIToolKit
The above mentioned step is depicted below:
Write JSON
This is the most important part of toolkit. The toolkit takes this JSON as input in the form of JSON file. It is where you need to write the details pertaining to the Service to be generated.
The details for the “Hello World” service to be put in the JSON is given below :
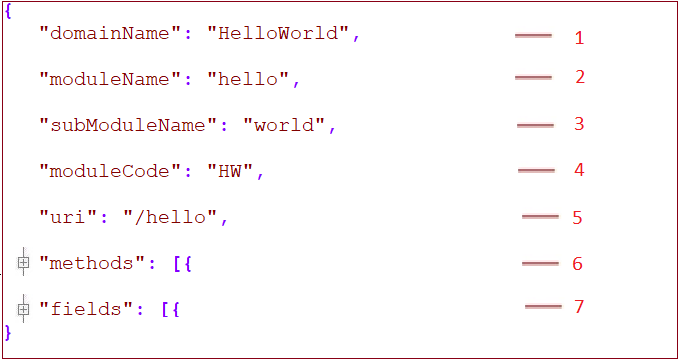
For details of each and every field of the input JSON please refer section 6(JSON Explained). It is known that every functionality in OBDX or OB API runs on underlying domain.
This JSON for the Hello World has a domain name “HelloWorld” which belongs to a submodule “world” of the “hello” module. You’ll be able to reach “HelloWorld” resource at path “/hello”.
HelloWorld functionality allows various operations such as ‘create’, ‘read’, ‘update’ which is provided in the JSON as an array of methods and it consists of various fields. The fields (7) and methods (6) details put in the HelloWorld input JSON is given below:
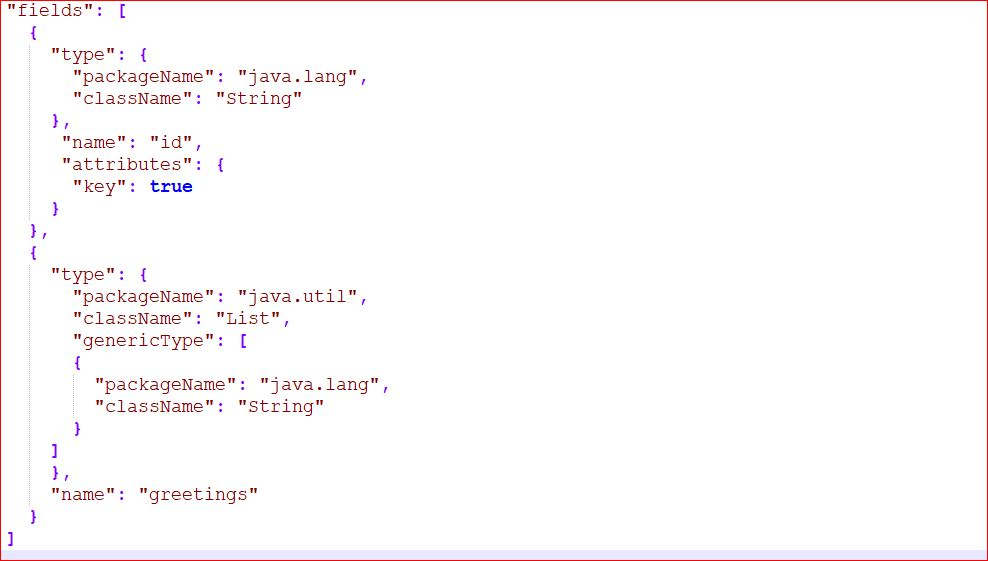
The above snippet is of the fields or variables to be declared in the HelloWorld. It is an array in which each element represents one field or variable. You have to define one of these fields as key of the HelloWorld domain. Here the key is ‘id’ variable (as can be seen its attributes ‘key’ carries ‘true’ value. Another field is a list of strings. For details of preparing fields array please refer ‘fields’ explanation in the JSON Explained section(Section 6).
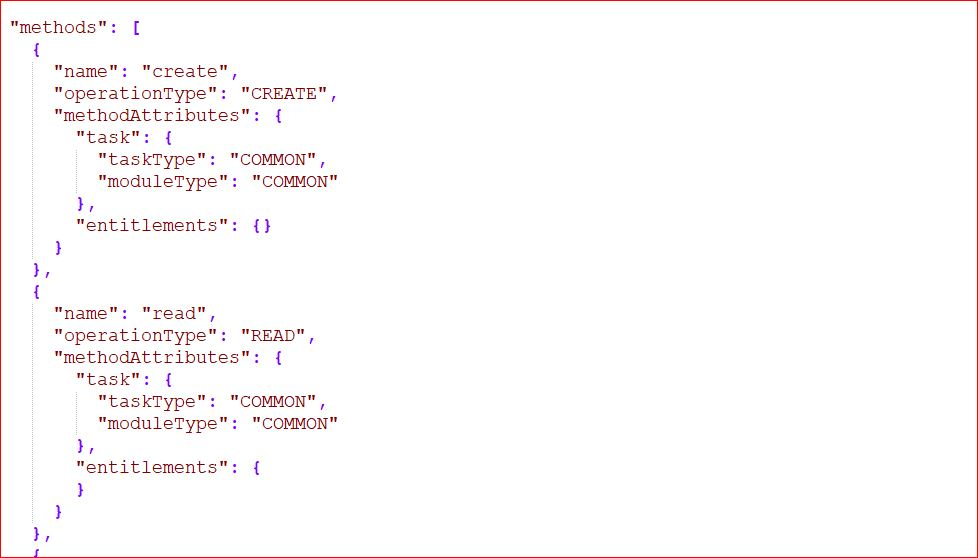

The above snippet is of the ‘methods’ in the HelloWorld, which again is an array, each element representing one method. In HelloWorld we have three methods create, read and update hence three elements. The methods has certain attributes like taskType and moduleType. Since the ‘entitlements’ is provided empty value the tool will generate default entitlements for it. For details regarding the possible values in there attributes please refer section 6 JSON Explained.
Include javax.ws.rs-api-2.0.jar
As part of the prerequisite for using this tool the “javax.ws.rs-api-2.0.jar” must be placed at the <APITOOLKIT_HOME>/ output/lib/provided-compile folder.
Execute Gradle tasks
Now that you are ready with your input JSON and the pre-requisites are done you are eligible to run required gradle tasks. There is a list of gradle tasks which needs to be run in the provided order. These tasks will generate source code, furnish eclipse projects for the generated code, build the source and provide the deployable EARs in the <APITOOLKIT_HOME>/ output/deployables folder.
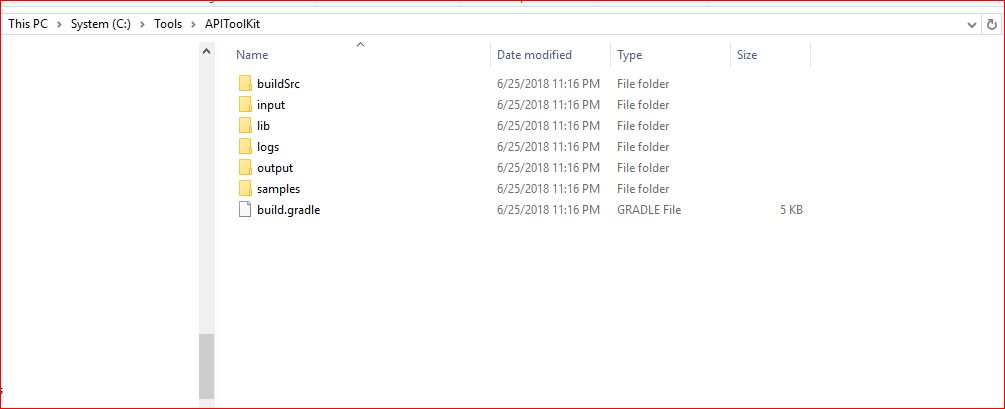
Before moving forward have a look at the folder structure of the toolkit. The <APITOOLKIT_HOME> has input, output , logs folders that are going to be required in further steps. The <APITOOLKIT_HOME> is depicted below in the snippet.
Input folder
It is where the input JSON has to be provided. The HelloWorld.json (input JSON for HelloWorld) can be seen below:

output folder
Output folder has deployables, scripts, swagger, etc.
deployables
It is where the deployables (EARs) will be generated. The exact location for the generated deployables can be seen below

It is currently empty since gradle tasks are not executed to generate it.
seed/oracle
It is where the required sql scripts will be generated.

Logs folder
It is where the logs of the toolkit will get generated.

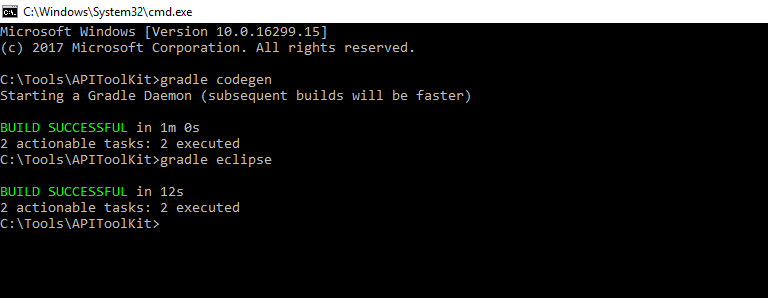
gradle codegen(*)
It generates the source code as per the input provided as JSON. So before you execute this task make sure you have the prepared input JSON placed at <APITOOLKIT_HOME>/ /input/json and have the external library “javax.ws.rs-api-2.0.jar” at <APITOOLKIT_HOME>/ output/lib/provided-compile

gradle eclipse
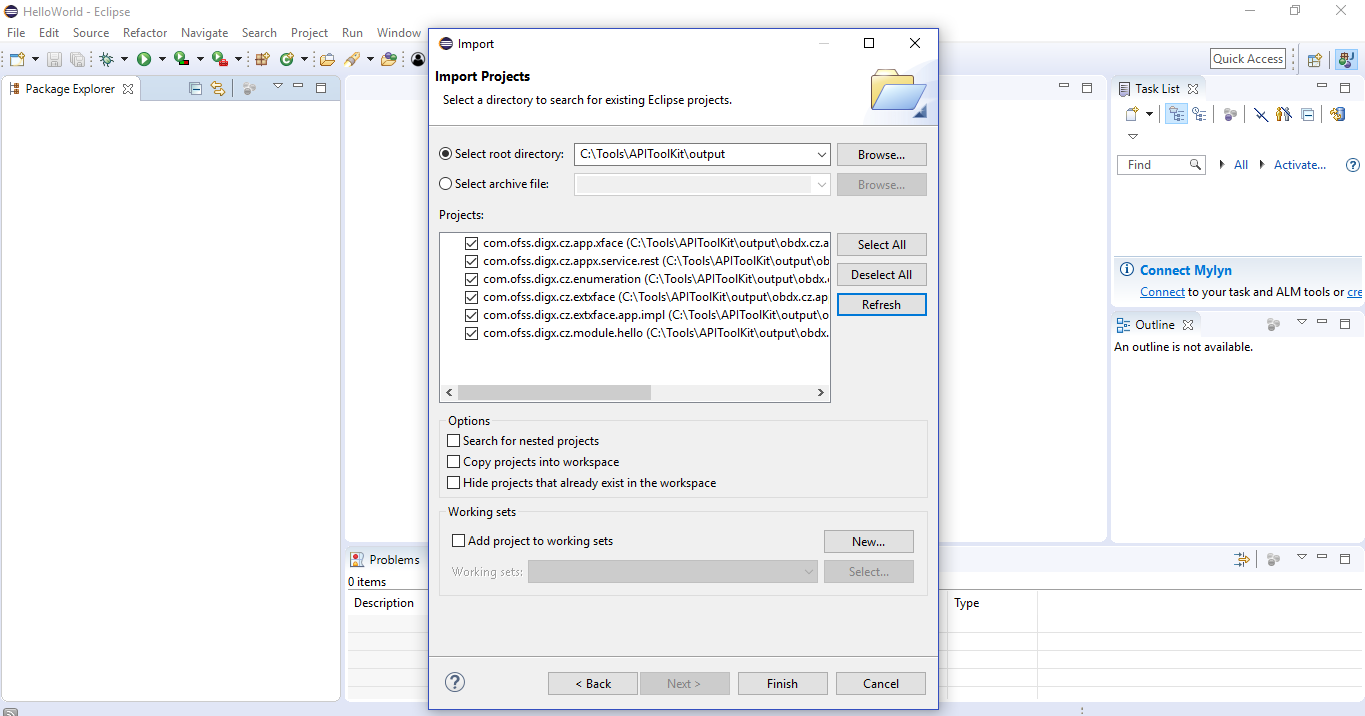
This task will get you the eclipse projects for the generated source code. It generates the required eclipse project and settings file for the purpose. It is not mandatory to execute this task. One needs to execute this task if he/she wants to check the code in the eclipse IDE or do some modifications in the generated code.
Now the project can be imported into eclipse IDE from the <APITOOLKIT_HOME>/ output folder.
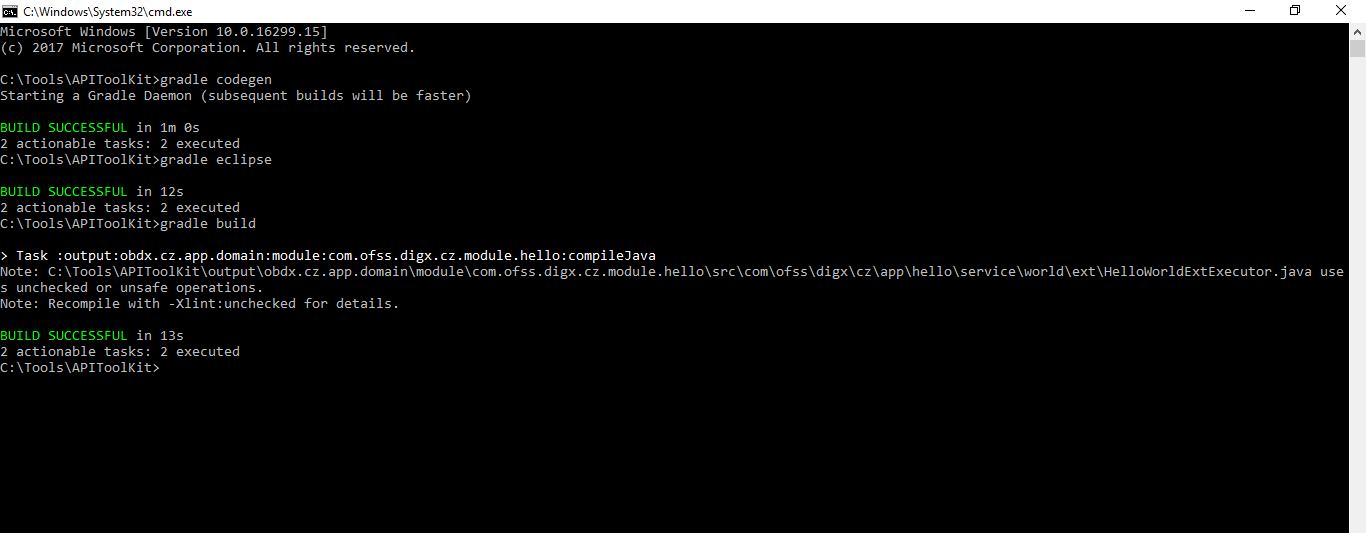
gradle build(*)
Browse to the <APITOOLKIT_HOME>/ output/deployables folder.

Here are the EARs generated through the build task. Currently it is missing the thirdparty EARs which will be generated through thirdparty scripts.
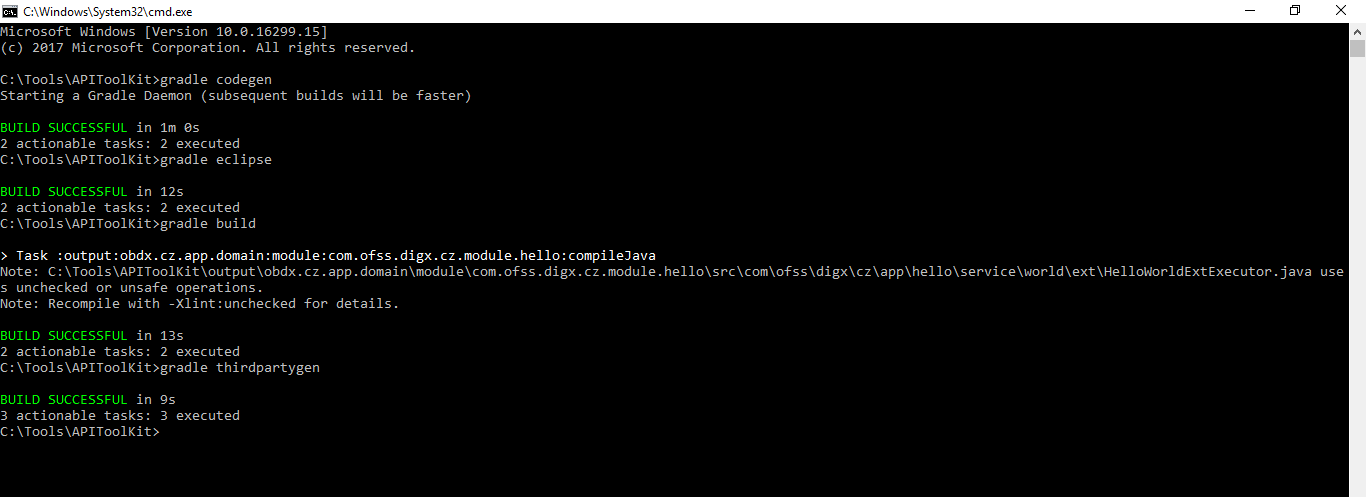
gradle thirdpartygen
This task will get you the third party deployables. It basically generates the simulation mdb EARs which mocks the third party host.
gradle docgen(*)
You will ger the swagger JSON here which can be consumed for generating swagger API.
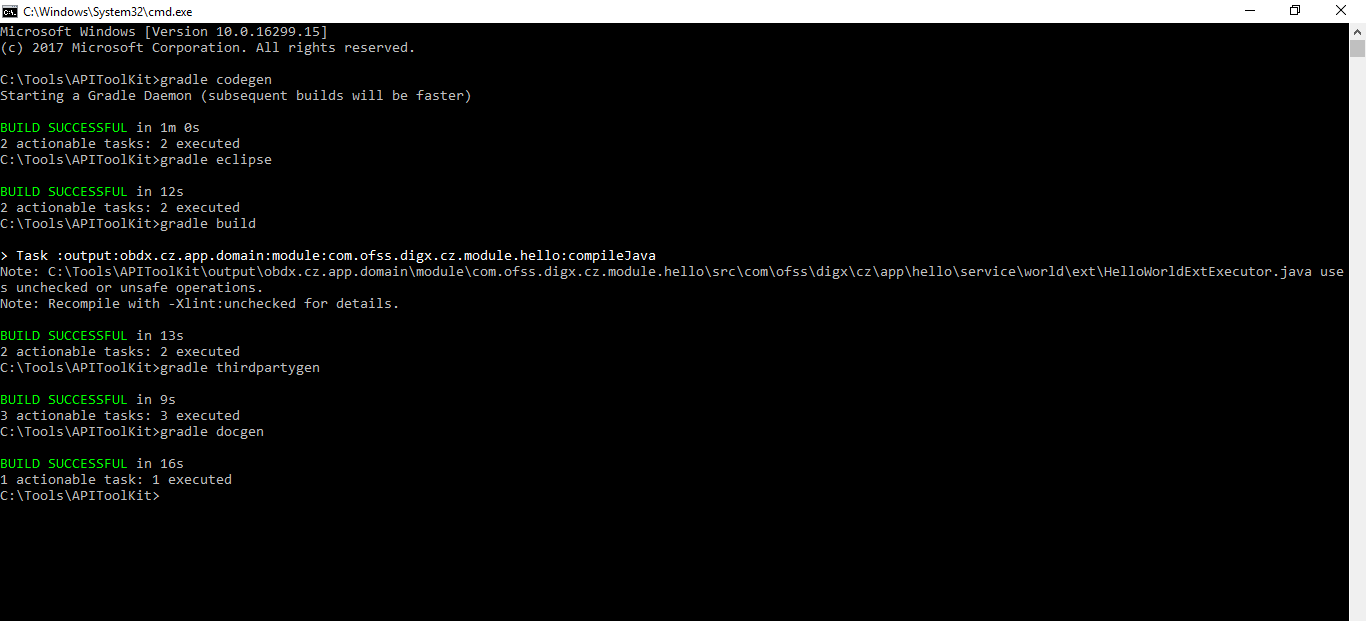
Note: In case the user needs to change the input JSON as per changed requirement please execute the below task before performing the above mentioned steps for the updated JSON: gradle clean.
Deploy EARs
CZ EARS Deployment
REST IDM Deployment
The REST IDM (“obdx.app.rest.idm.ear”) already deployed on the server must be modified in order to get the CZ EARs deployment working.
For this purpose two modifications must be done:
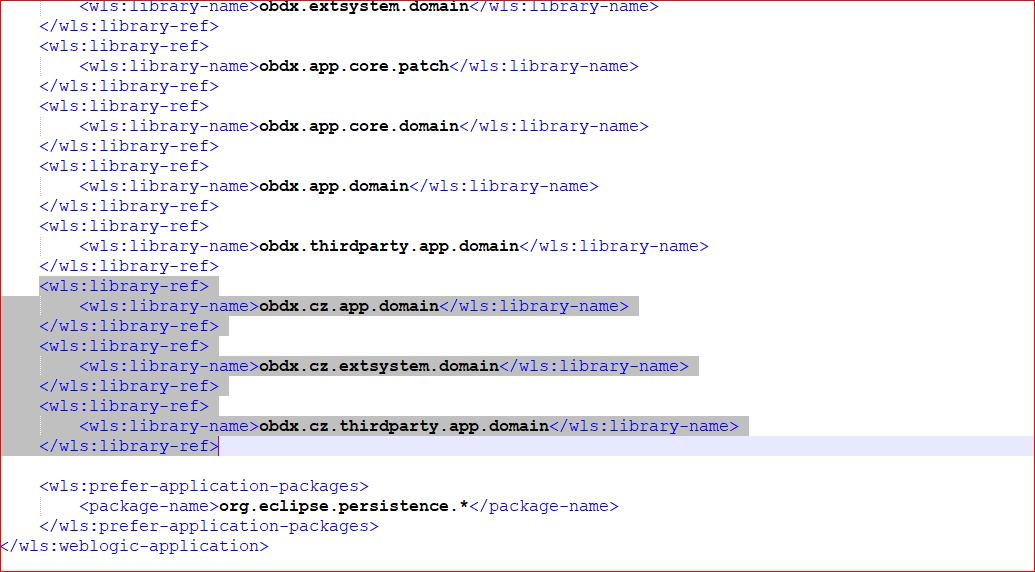
1. Add the CZ EARs in the weblogic-application.xml file located at obdx.app.rest.idm.ear/META-INF/ weblogic-application.xml. Changes are depicted below:

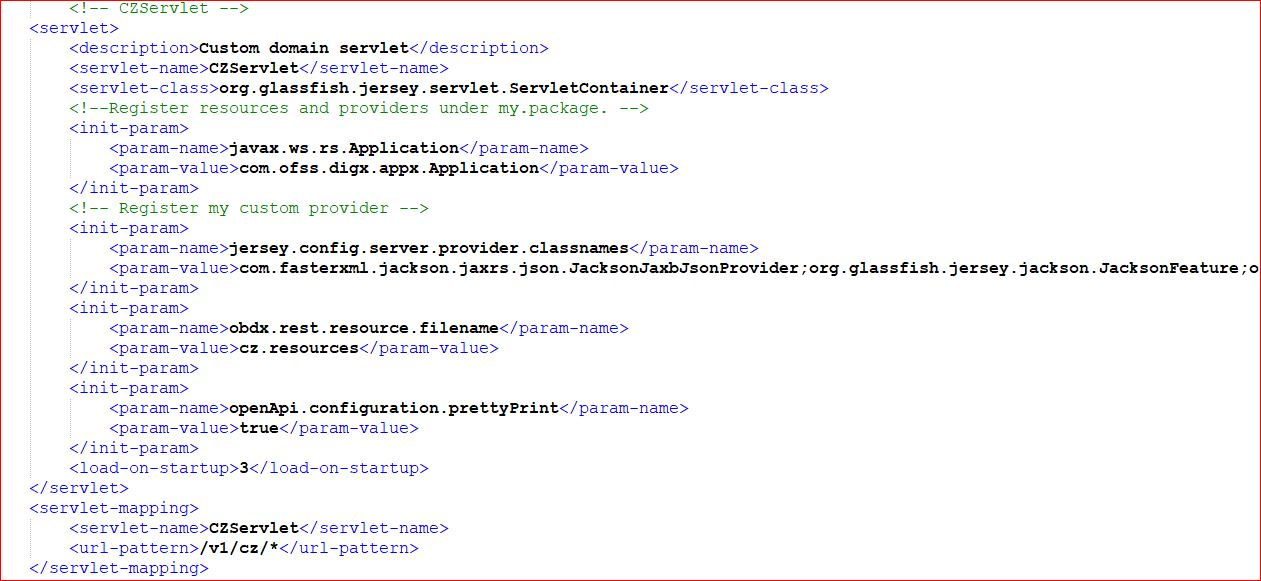
Add CZ Servlet and the servlet mapping in the web.xml file located at obdx.app.rest.idm.ear/com.ofss.digx.appx.service.rest.war/WEB-INF/web.xml. The changes are depicted below

web.xml file already has so many servlets, do not change them, just add the CZ Servlet.
