MULTI ENTITY
To add entity to existing OBDX with supported host system follow below steps.
- Add entity using OBDX Web application, using User Manual Oracle Banking Digital Experience System Configuration
- Running OBDX installer
Ensure that Managed server should be down and admin server should be running state.
Ensure ORACLE_HOME, JAVA_HOME variable are set and their binaries are available in PATH variable before proceeding.
Login with OS user which was used to perform OBDX software installation (or has ownership on Oracle Weblogic home directory)
Ensure OBDX installation details (OBDX DB; WLS etc) are maintained in installer.properties exists and user running the installer has read-write permissions.
- From your terminal navigate to <OBDX INSTALLER DIR>
- Enter the following command
python runInstaller.py
Select installation type as ‘New Entity Creation’
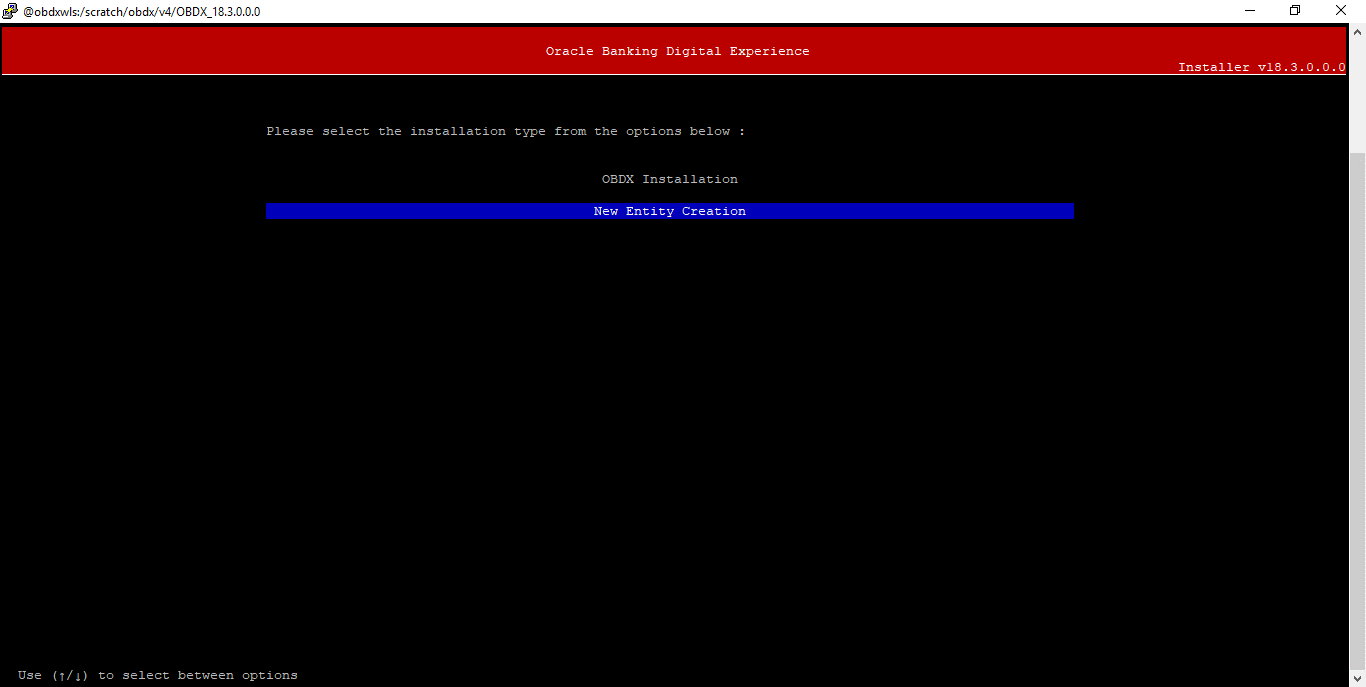
Below screen will appear after selecting add entity
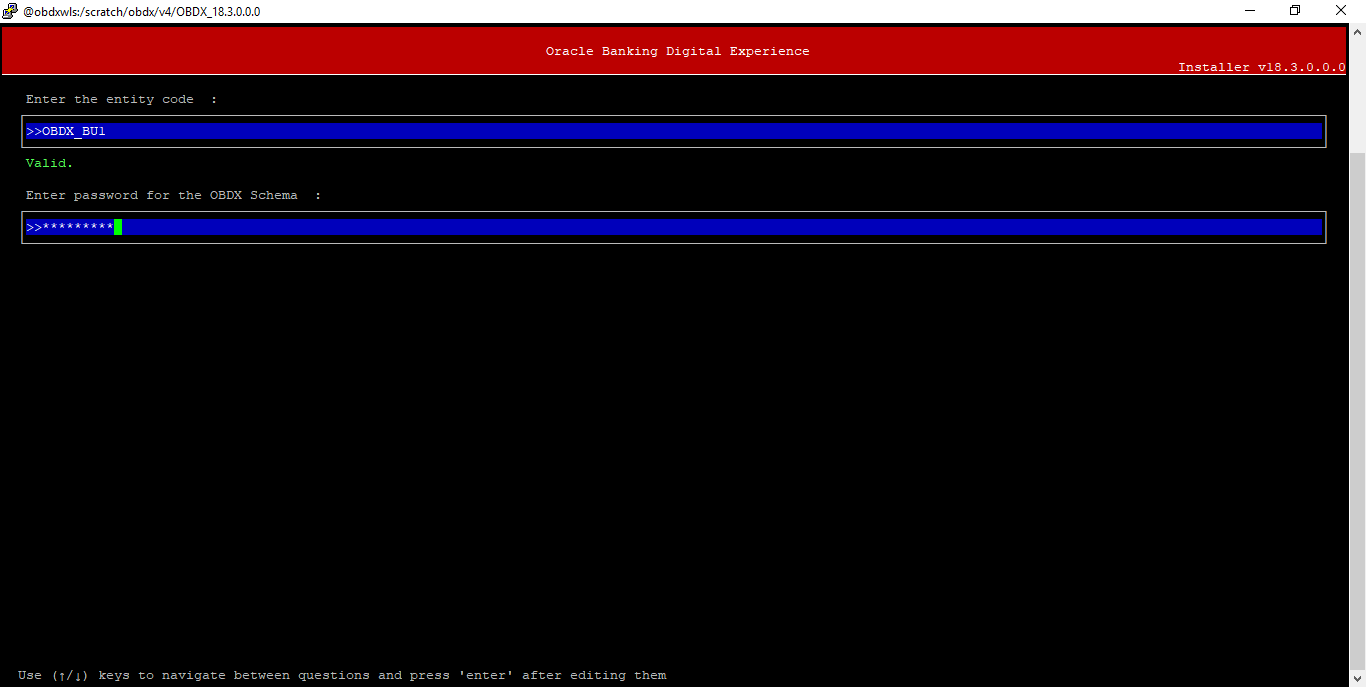
Enter below information:
- Entity code which has been added from screen
- OBDX schema password
If an entity code belongs to UBS host following screen will appear:
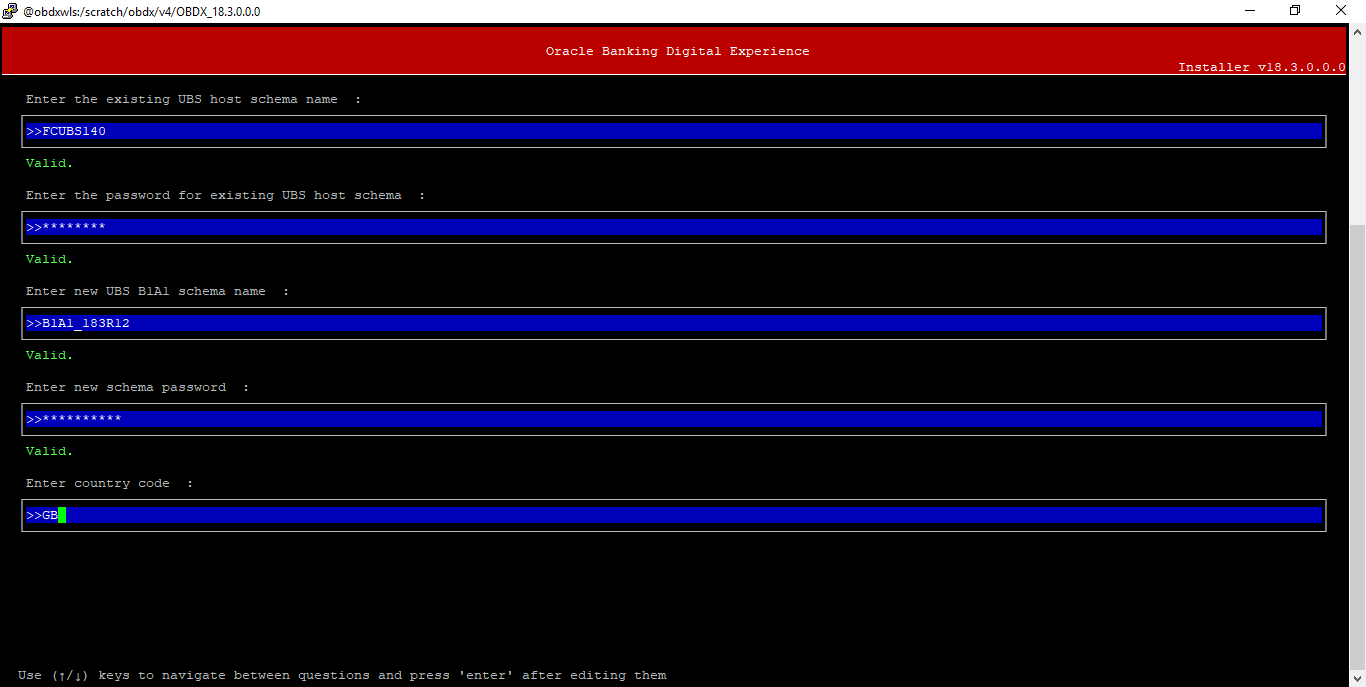
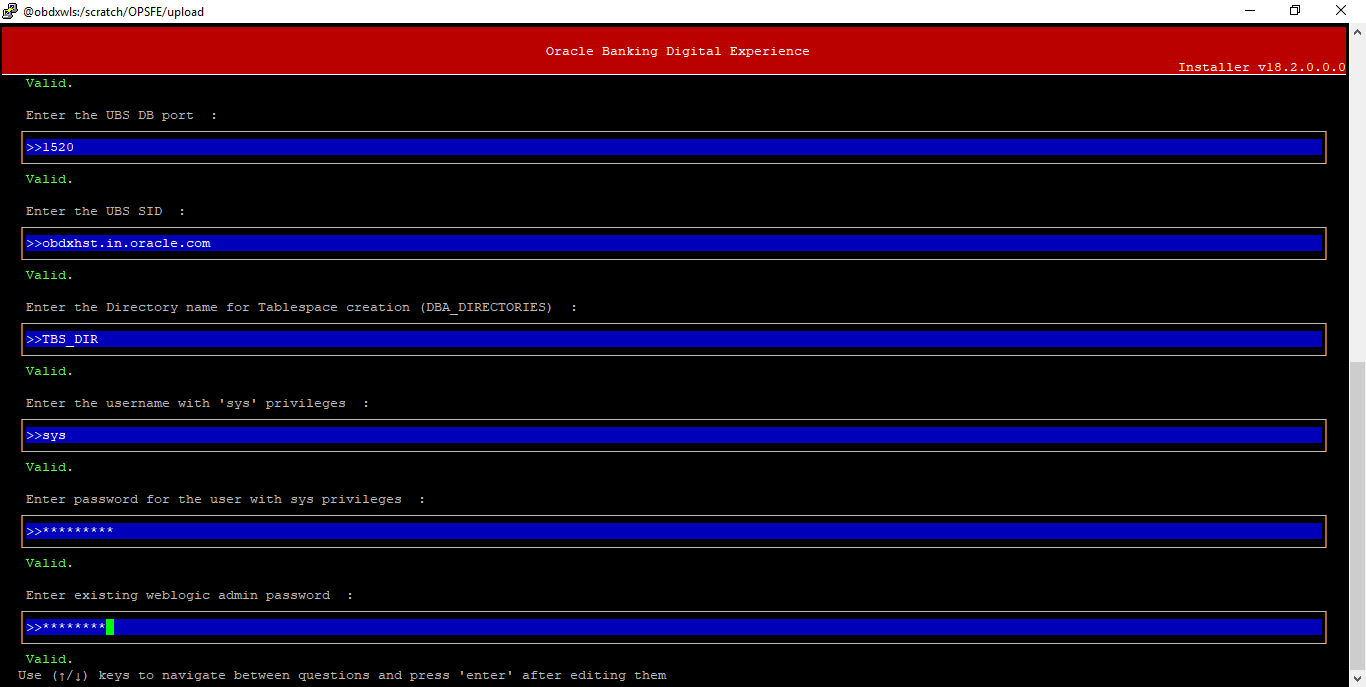
Enter below details:
- Hostname of the UBS database host server
- Port of the UBS database host server
- UBS Host database Service Name
- Oracle directory name in which you want the database datafile (dbf) to be created. Enter only the name NOT the path.
- Username with 'sys' privileges
- SYS privilege user password where UBS schema would be created
- Weblogic console administrator user password
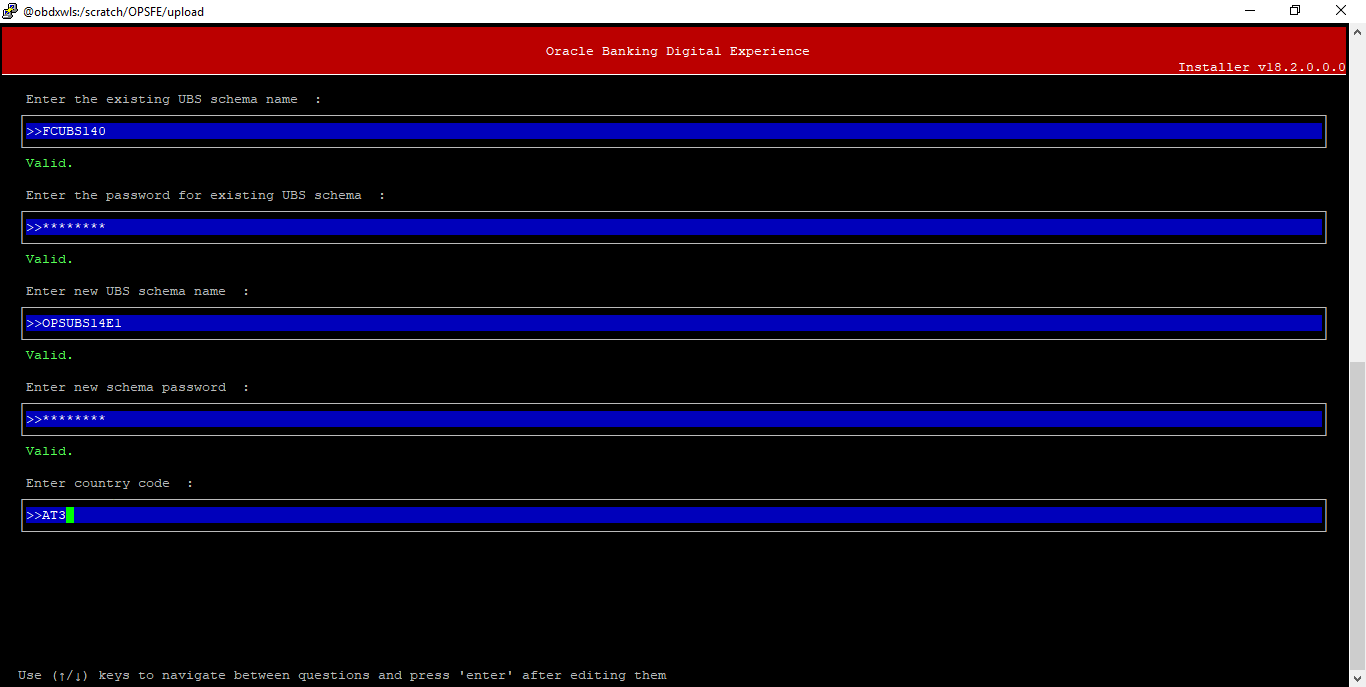
Enter below details:
- EXISTING UBS Host schema name
- Password for EXISTING UBS schema
- Complete EHMS (HostInterface) schema name you want installer to create as new schema
- Password for New UBS schema
- Country Code of entity branch
Installation Status in case of UBS
After entering all required details, the status is displayed (as shown below) on the terminal to indicate the progress of the installation.
When the installation completes, the below message is displayed
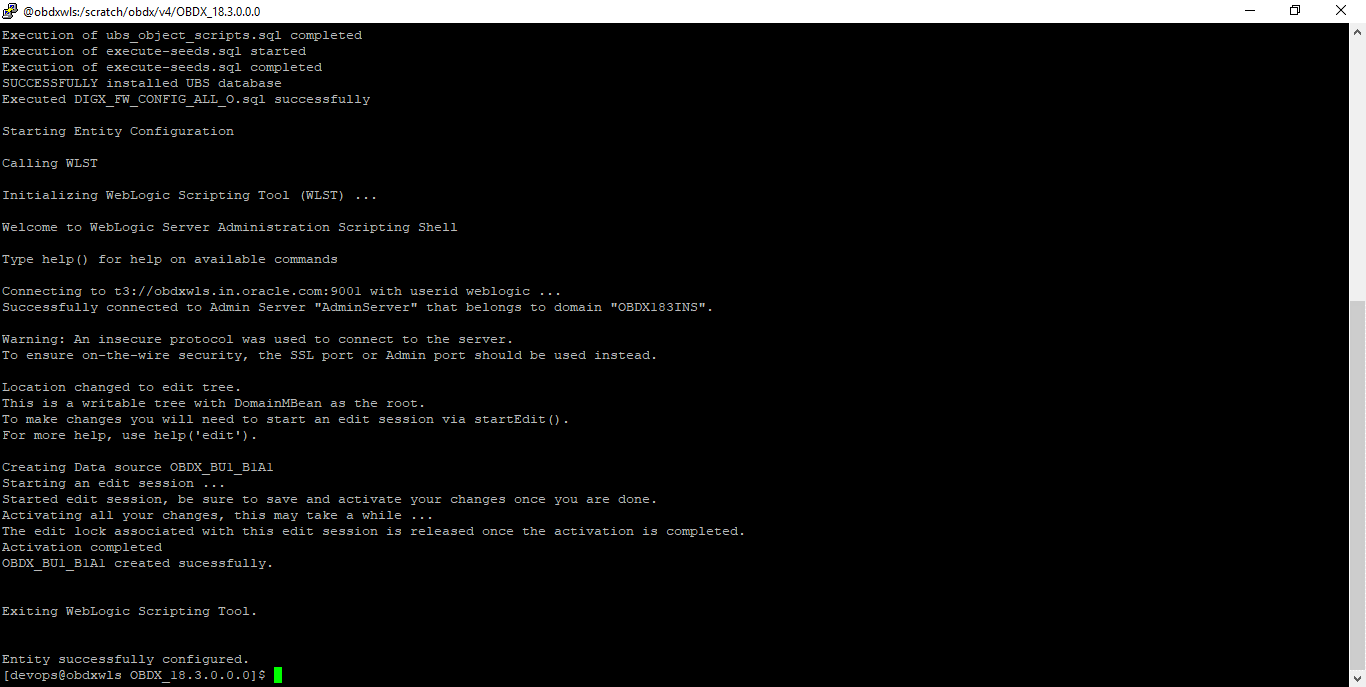
Post successful installation refer to “Section Post Installation steps” for manual steps to be performed for UBS additional entity (sub-section : Oracle FLEXCUBE Universal Banking (OBDX with UBS))
If an entity code belongs to Third-party host following screen will appear:

If an entity code belongs to Oracle Banking Platform host following screen will appear:
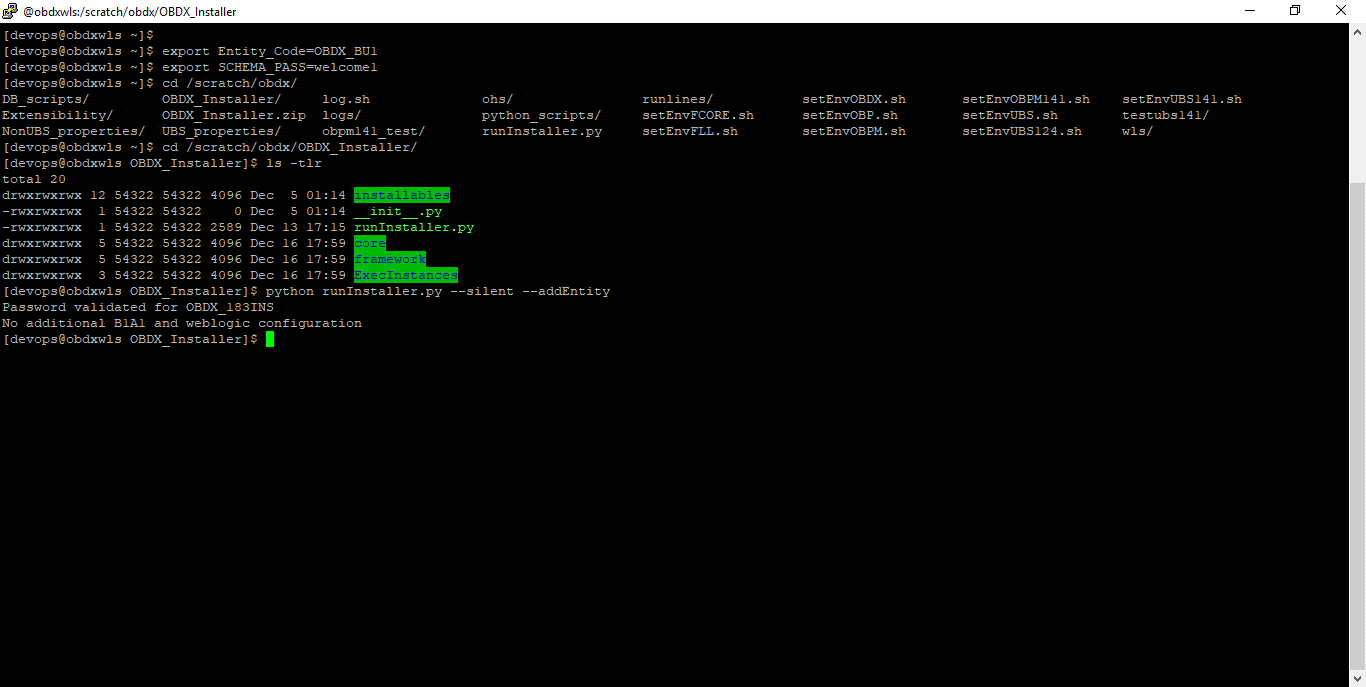
No additional steps/ configuration are required.
If an entity code belongs to Oracle Financial Services Lending and Leasing host following screen will appear:

No additional steps/ configuration are required.
If an entity code belongs to Oracle FLEXCUBE Core Banking host following screen will appear:
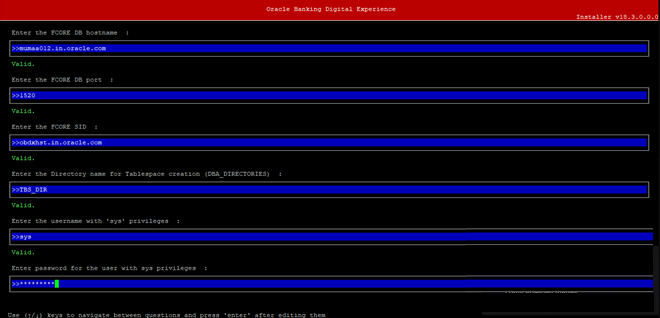
Enter below details:
- Hostname of the FCORE database host server
- Port of the FCORE database host server
- FCORE Host database Service Name
- Oracle directory name in which you want the database datafile (dbf) to be created. Enter only the name NOT the path.
- Username with 'sys' privileges
- SYS privilege user password where FCORE schema would be created
- Weblogic console administrator user password
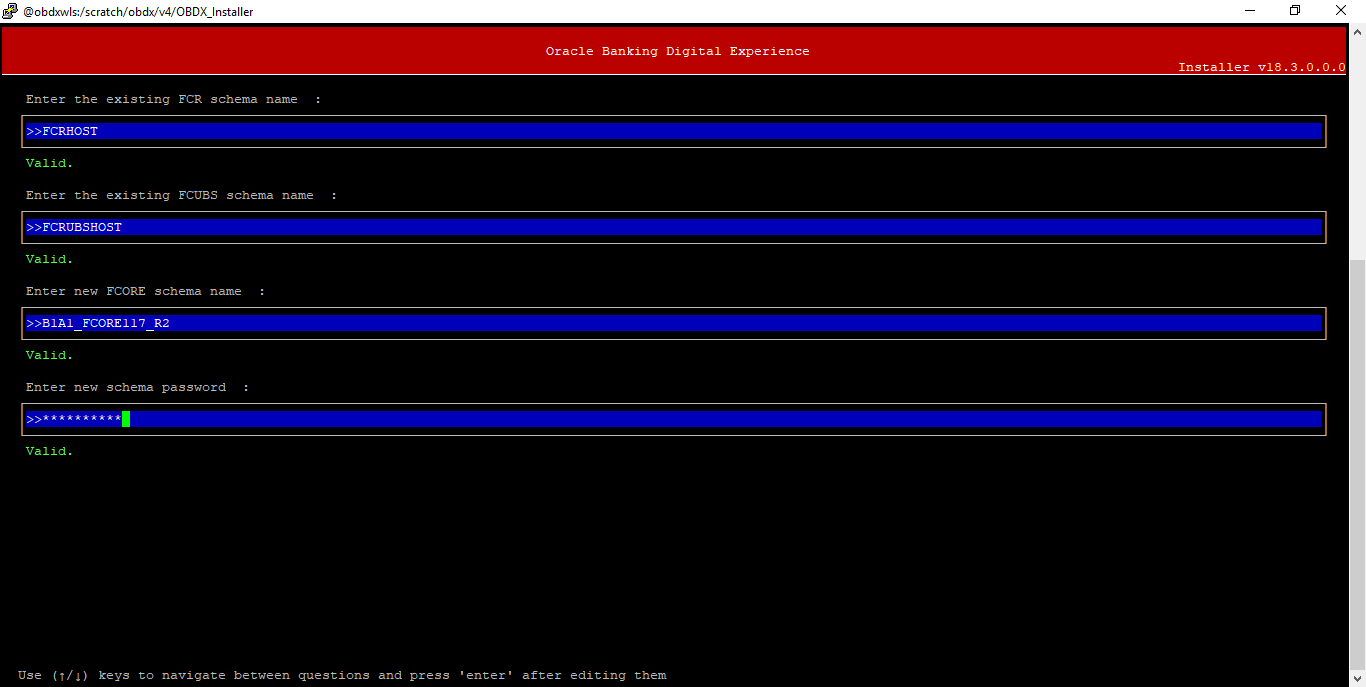
Enter below details:
- EXISTING FCORE HOST schema name
- EXISTING FCORE FCUBS schema name
- Complete EHMS (HostInterface) schema name you want installer to create as new schema
- Password for New EHMS schema
Installation status for FCORE Add entity
After entering all required details, the status is displayed (as shown below) on the terminal to indicate the progress of the installation.

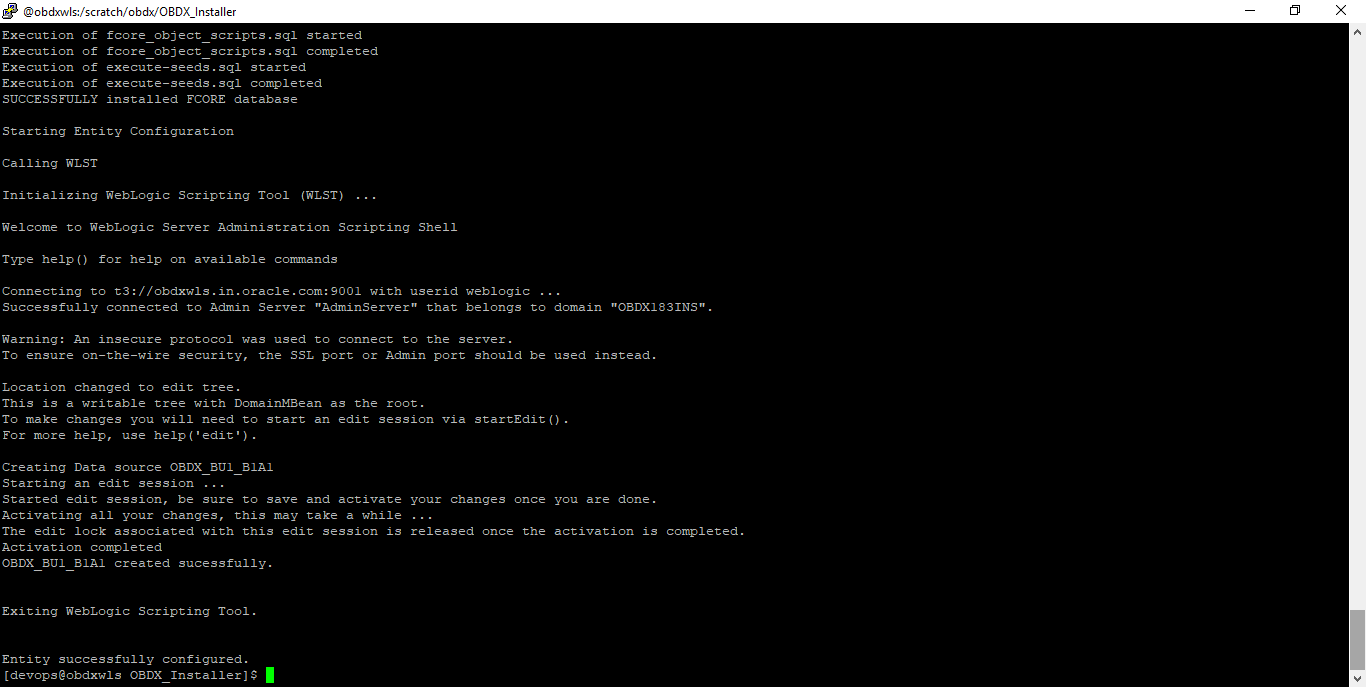
No additional steps/ configuration are required.
If an entity code belongs to Oracle FLEXCUBE Universal Banking with Oracle Banking Payments host following screen will appear:
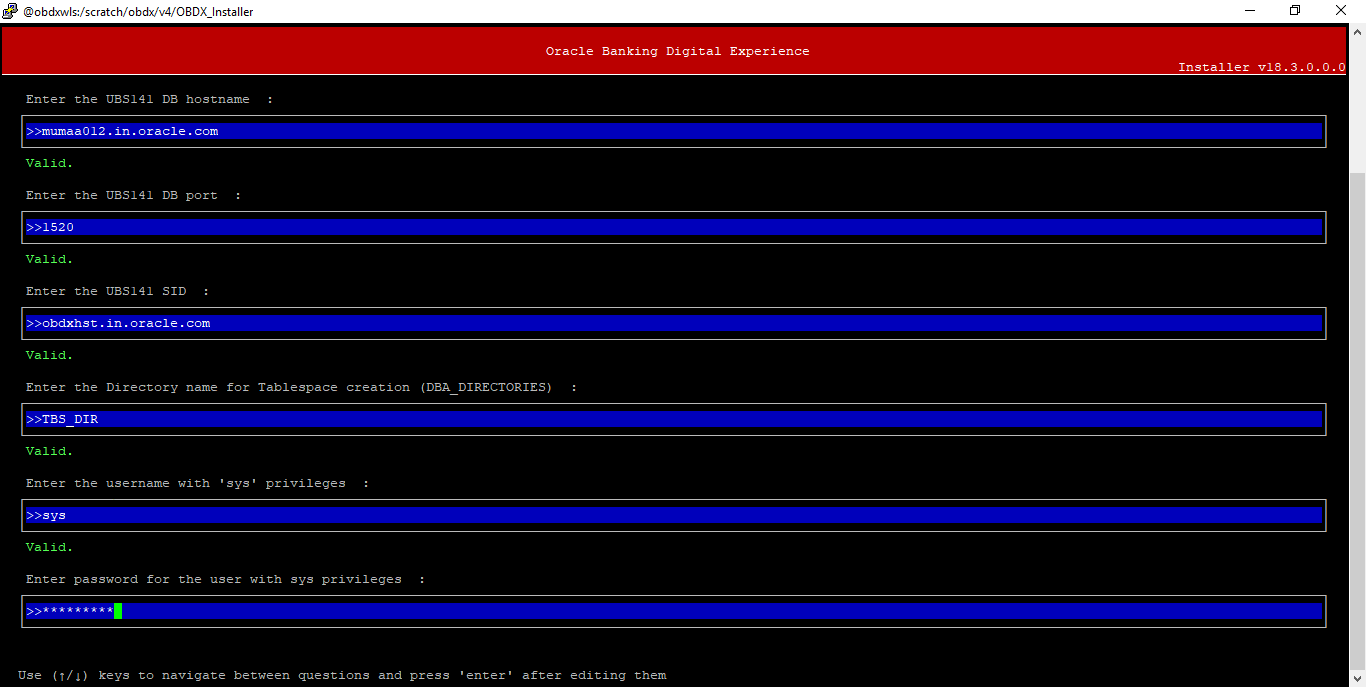
Enter below details:
- Hostname of the OBPM database host server
- Port of the OBPM database host server
- OBPM host database Service Name
- Oracle directory name in which you want the database datafile (dbf) to be created. Enter only the name NOT the path.
- Username with 'sys' privileges
- SYS privilege user password where OBPM schema would be created
- Weblogic console administrator user password
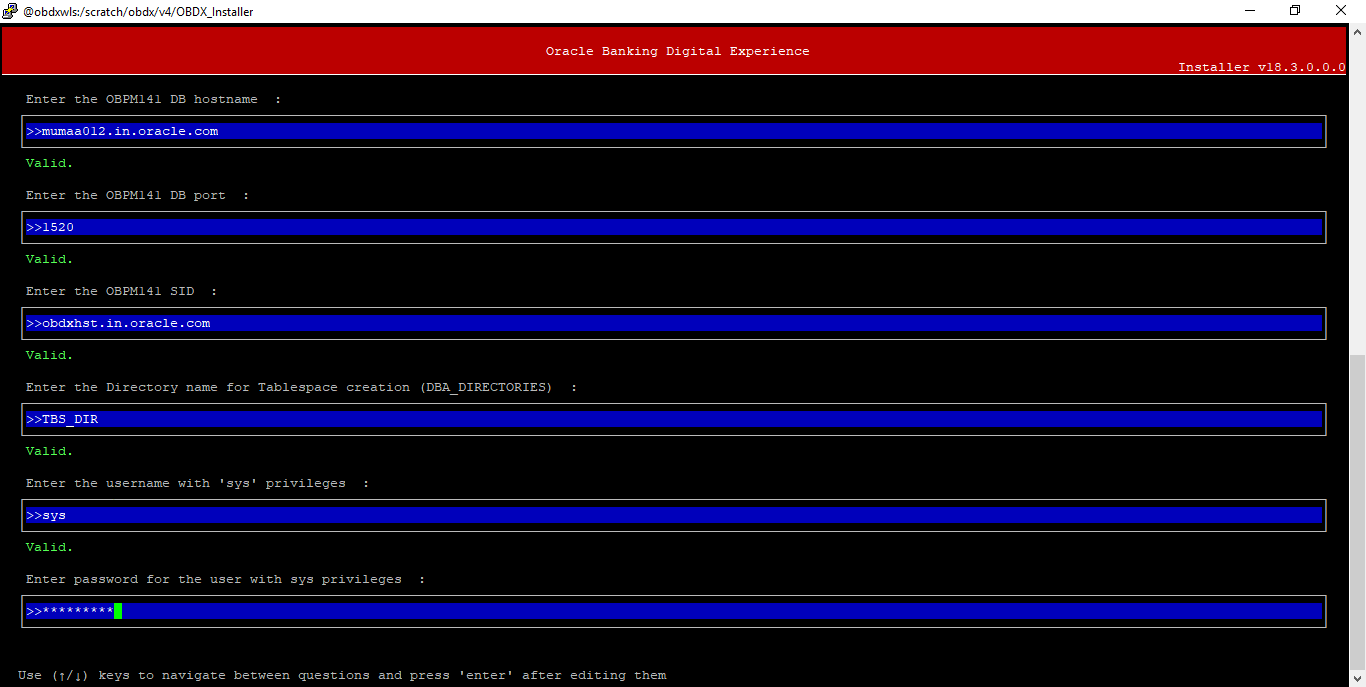
Enter below details:
- EXISTING OBPM HOST schema name
- EXISTING OBPM HOST password
- Complete EHMS (HostInterface) schema name you want installer to create as new schema
- Password for New EHMS schema
- Enter Country code for Additional entity
Installation status for OBPM Add entity
After entering all required details, the status is displayed (as shown below) on the terminal to indicate the progress of the installation.
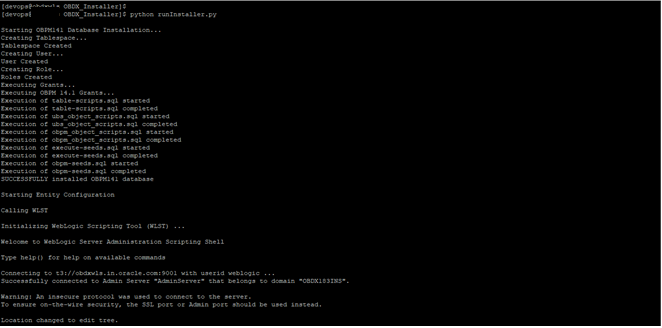
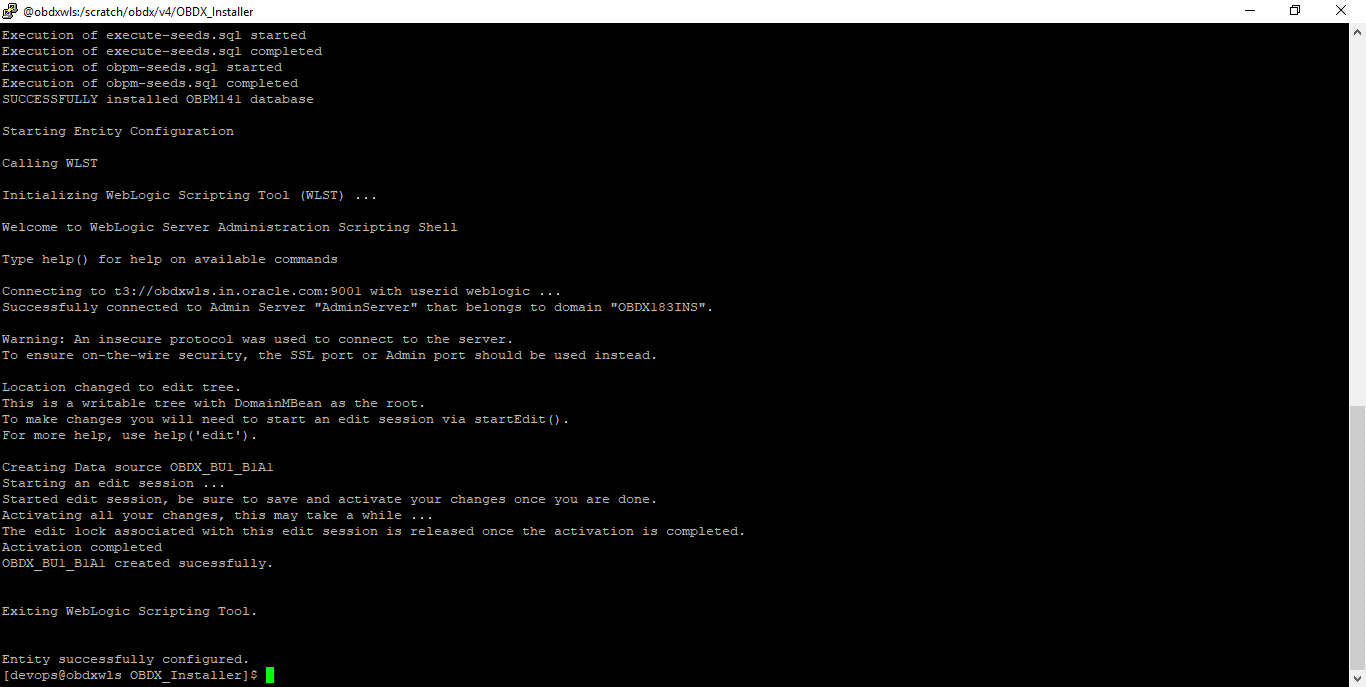
Post successful installation refer to “Section 8: Post Installation steps” for manual steps to be performed for OBPM additional entity (sub-section: Oracle FLEXCUBE Universal Banking with Oracle Banking Payments (OBDX with OBPM)).
Multi-entity installation Using Silent Mode
This chapter describes how to run the OBDX installer for add entity in silent mode.
Ensure that Managed server should be down and Admin server should be running.
Ensure ORACLE_HOME, JAVA_HOME variable are set and their binaries are available in PATH variable before proceeding.
Login with OS user which was used to perform OBDX software installation (or has ownership on Oracle Weblogic home directory)
Steps for Silent-Mode Installation
- Set the environment variables, as shown below:
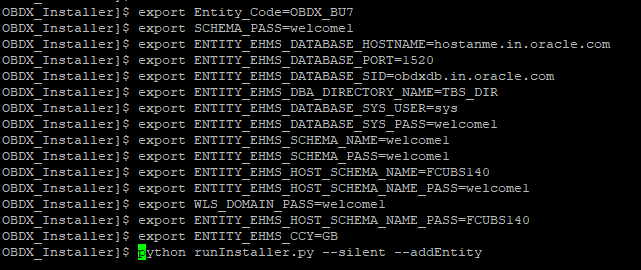
Below parameters should be set in environment variables
|
|
Parameter |
Dsecription |
Example |
|---|---|---|---|
|
Environment variables to set for flavor: FCORE UBS (14.0.0.0.0 and .14.1.0.0.0 release) OBPM (14.0.0.0.0 and.14.1.0.0.0 release) |
Entity_Code |
Entity code which has been entered from screen |
export Entity_Code=OBDX_BU7 |
|
SCHEMA_PASS |
Password for existing OBDX schema |
export SCHEMA_PASS=devops#obdx182 |
|
|
ENTITY_EHMS_DATABASE_HOSTNAME |
Hostname of the EHMS HOST database host server |
export ENTITY_EHMS_DATABASE_HOSTNAME=mumaa012.in.oracle.com |
|
|
ENTITY_EHMS_DATABASE_PORT |
Port of the EHMS HOST database host server |
export ENTITY_EHMS_DATABASE_PORT=1521 |
|
|
ENTITY_EHMS_DATABASE_SID |
EHMS Host database Service Name |
export ENTITY_EHMS_DATABASE_SID=obdxdb.in.oracle.com |
|
|
ENTITY_EHMS_DBA_DIRECTORY_NAME |
Oracle Directory name in which you want the EHMS (HostInterface) schema datafile (dbf). Enter only the name and NOT the path |
export ENTITY_EHMS_DBA_DIRECTORY_NAME=TBS |
|
|
ENTITY_EHMS_DATABASE_SYS_USER |
Username with 'sys' privileges |
export ENTITY_EHMS_DATABASE_SYS_USER=sys |
|
|
ENTITY_EHMS_DATABASE_SYS_PASS |
Password for EHMS sys user |
export ENTITY_EHMS_DATABASE_SYS_PASS=devops@sys |
|
|
ENTITY_EHMS_SCHEMA_NAME |
Complete EHMS (HostInterface) schema name you want installer to create as new schema. |
ENTITY_EHMS_SCHEMA_NAME=OBDXEHMS |
|
|
ENTITY_EHMS_SCHEMA_PASS |
Password for new EHMS schema on EHMS HOST database |
export ENTITY_EHMS_SCHEMA_PASS=devops#ehms |
|
|
ENTITY_EHMS_HOST_SCHEMA_NAME |
EXISTING EHMS Host schema name |
export ENTITY_EHMS_HOST_SCHEMA_NAME=EHMSHOST |
|
|
ENTITY_EHMS_HOST_SCHEMA_NAME_PASS **This parameter is only required for UBS & OBPM Host |
Password of existing HOST EHMS schema (Existing) |
export ENTITY_EHMS_HOST_SCHEMA_NAME_PASS=ehmshst |
|
|
WLS_DOMAIN_PASS |
Password for Weblogic admin console |
export WLS_DOMAIN_PASS=weblogic182 |
|
|
ENTITY_EHMS_CCY **This parameter is only required for UBS & OBPM Host |
Country Code for new or additional entity home branch |
export ENTITY_EHMS_CCY=GB |
|
|
|
ENTITY_EHMS_FCORE_FCUBS_SCHEMA_NAME **This parameter is only required for FCORE |
FCORE-FCUBS HOST schema name |
export ENTITY_EHMS_FCORE_FCUBS_SCHEMA_NAME=FCRUBSHOST |
|
Environment variables to set for flavor: OBDX (Third-party HOST) OBP |
Entity_Code |
Entity code which has been entered from screen |
export Entity_Code=OBDX_BU1 |
|
SCHEMA_PASS |
Password for existing OBDX schema |
export SCHEMA_PASS=welcome1 |
- Run the runInstaller.py file with ‘--silent ’ argument along with '--addEntity'.
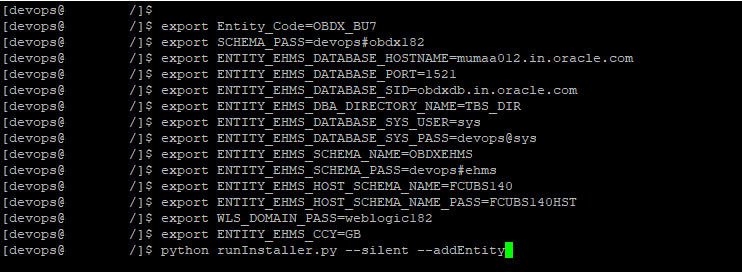
Installation Status in case of Oracle FLEXCUBE Core Banking, Oracle FLEXCUBE Universal Banking, Oracle FLEXCUBE Universal Banking with Oracle Banking Payments
After entering all required details, the status is displayed (as shown below) on the terminal to indicate the progress of the installation.
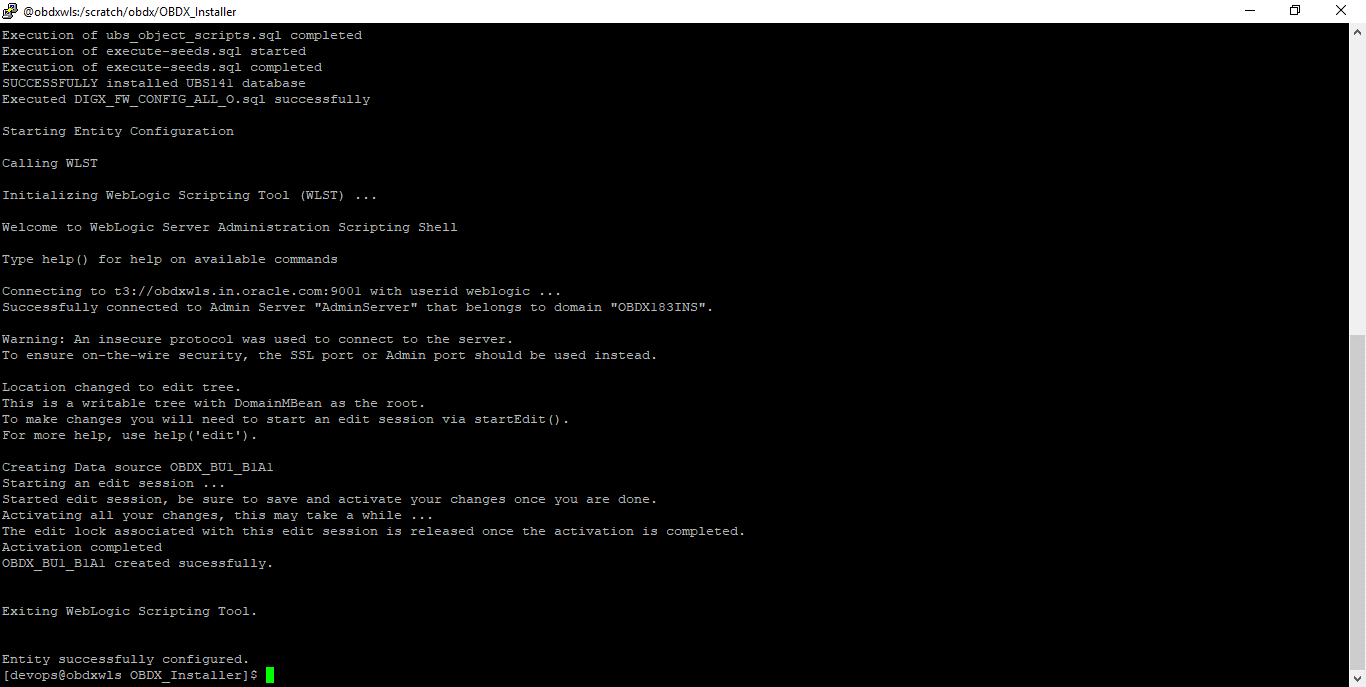
When the installation completes, the below message is displayed.
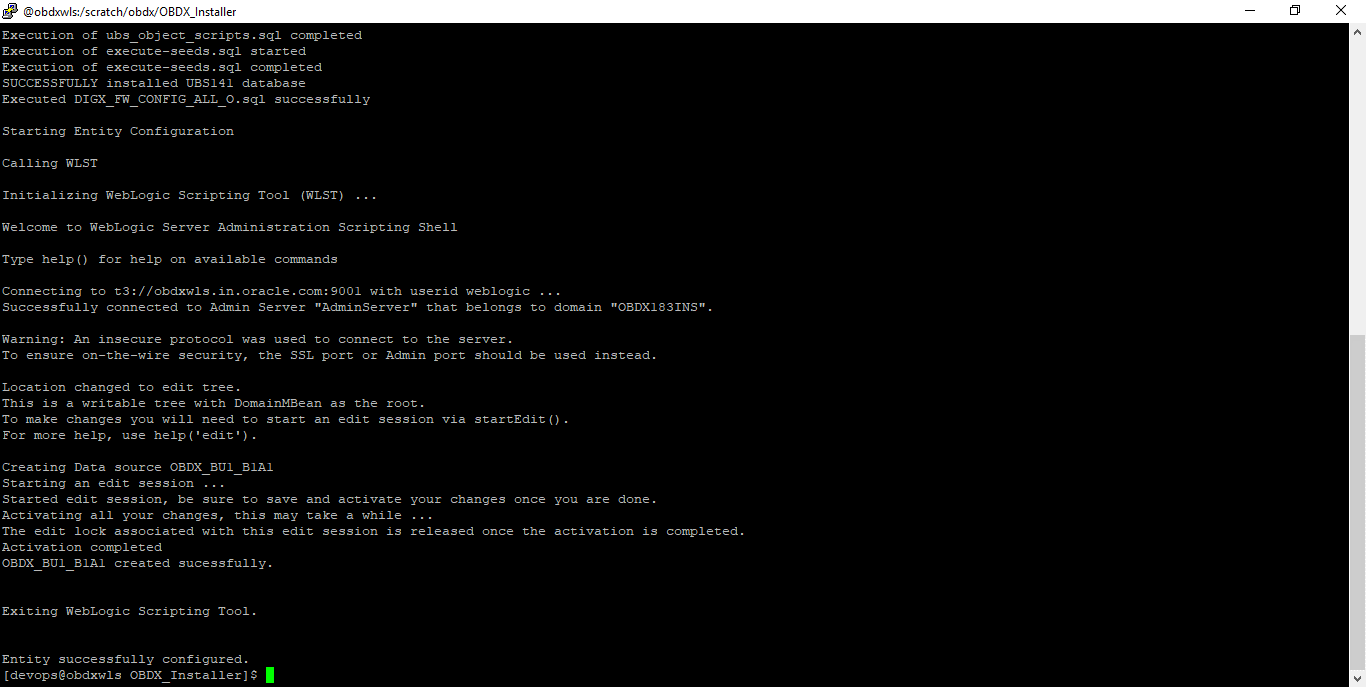
Post successful installation refer to “Section 8: Post Installation steps” for manual steps to be performed for
- UBS additional entity (sub-section : Oracle FLEXCUBE Universal Banking Solution (OBDX with UBS))
- OBPM additional entity (sub-section: Oracle FLEXCUBE Universal Banking with Oracle Banking Payments (OBDX with OBPM))
Installation Status in case of other hosts as Add Entity
After entering all required details, the status is displayed (as shown below) on the terminal to indicate the progress of the installation.
- THP(third party as entity)

- OBP

OBDX Product Security
Refer below document for OBDX product security configuration
Oracle Banking Digital Experience Security Guide