Configure Allocations Using the Default Method
Clients upgrading from V7 and V8 who would like to maintain configuring the previous way should select the Default method when setting up a plan. Then configure the AllocationScreen business rule and/or allocations in transaction rules according to the plan requirements.
| Important | Only use the AllocationScreen business rule when performing an upgrade from v7 or v8 and do not use Fund Models or Classes. V9 introduces new rules for configuring funds and allocations for the first time or when upgrading products that use Fund Models or Classes. |
Configuring Plan or Policy Level Allocations
The first step is to select Default as the plan allocation method when creating a new plan with the Plan Wizard. If the plan already exists, the allocation method can be edited by right-clicking on the plan in the Main Explorer and selecting Edit Plan. Make sure that Default is selected for the allocation method.
The AllocationScreen business rule defines plan, policy or segment level allocations. When configuring this rule, different allocation structures will be defined for different types of allocations at the plan, policy or segment level. Funds can limited to specific allocation structures.
| Important | When setting up allocations at the policy level, update the PolicyScreen business rule. This rule controls the allocation selection in OIPA via the Buttons pane. |
Steps to Configure Allocation
- Navigate the Plan | Plan Rules | AllocationScreen.
- Check out the AllocationScreen.xml file. The configuration information in the steps below will go between the opening and closing <AllocationScreen> elements.
- Add an <Allocations> sub-element with a TYPE attribute of Plan or Policy. Multiple allocation structures can be identified at this level.
- Enter any restrictions, formatting, or other guidelines for the allocation structure using the following attributes in the <Allocations> element.
- AMOUNTPRECISION: used to set the number of decimal places for the AllocationMethod(s). This is used when allocating money.
- UNITPRECISION: used to set the number of decimal places for the AllocationMethod(s). This is used when allocations are unit values.
- PERCENTPRECISION: used to set the number of decimal places for the AllocationMethod(s). This is used when allocations are in percentages.
- USEEFFECTIVEDATE: used to display different effective dates for a model and allows the selection of a group of allocations by model and effective date. The value Yes allows effective dates and No indicates effective dates aren’t used.
- ALWAYSEQUALPERCENT: when Yes is selected then allocation percents will be calculated irrespective of the number of funds. When No is selected, then allocation percents will be calculated only for the even number of funds. If there is an odd number of funds, the percentage boxes will be populated with zeros.
- Configure an actual allocation structure using the <Allocation> element.
- Each <Allocation> sub-element must use the TYPECODE attribute to identify the type of allocation. The value of the TYPECODE attribute is the typecode that is associated with the code located in AsCodeAllocationType. Add the code if it is missing.
- In the <Allocation> sub-element exclude any funds that should not be available to a user in OIPA. The following attributes are notable, but a complete list is in the XML guide.
EXCLUDEFUNDSTATUS: used to prevent the funds (that are in the specified fund status) from being available for allocation. For example: EXCLUDEFUNDSTATUS ="01,03" indicates that the funds that are in these statuses should not be available for allocation. 01 & 03 may indicate active and closed fund status, respectively.
EXCLUDEFUNDTYPE: used to identify fund types (comma separated codes) that should be excluded from the Allocation Fund drop down list.
FUNDLIMIT:used to set the limit on the number of funds that can be made available for allocation.
ALLOWMIXEDMETHOD: used to allow different method codes to be specified for each allocation.
- Add an <AllocationMethods> sub-element. In the value, enter the codes for the specific allocation methods that will be used. The codes are found in AsCodeAllocationMethod. For example, percent, amount or units.
- Check in the configuration to save the changes.
Configure Allocations that Transfer Money from One Fund to Another
Allocations can be configured to move money from one fund to another. Use the <AllocationTransfer> element along with the <AllocationFrom> and <AllocationTo> sub-elements to configure this feature. The XML Configuration Guide provides detailed explanations of all configuration syntax. It is located in the Help menu in the Rules Palette.
Schema Example
<AllocationTransfer REPEATFUNDS="[Yes|No]">
<AllocationFrom EXCLUDETYPE="[FundTypeCode]" PERCENTPRECISION="[Constant]" FUNDLIMIT="[Integer*]" EXCLUDEFUNDNAME="[FundName*]" EXCLUDEFUNDSTATUS="[FundStatus*]"></AllocationFrom>
<AllocationTo EXCLUDETYPE="[FundTypeCode]" PERCENTPRECISION="[Constant]" FUNDLIMIT="[Integer*]" EXCLUDEFUNDNAME="[FundName*]" EXCLUDEFUNDSTATUS="[FundStatus*]">
</AllocationTo>
</AllocationTransfer>
Disabling the Allocation Structure Fields By Policy Status
Allocation structures can be locked down after the policy moves into a certain status. For instance, if a policy is in canceled or death status then allocations cannot be set. Allocations can be disabled for a plan according to policy status or at the individual allocation level.
To disable allocations for a plan, configure the <DisableAllocationFields> element and <DisablePolicyStatus> sub-element. The value of <DisablePolicyStatus> should be the policy status codes where allocations are disabled.
Schema Example
<DisableAllocationFields>
<DisabledPolicyStatus>CodeValue, CodeValue</DisabledPolicyStatus>
</DisableAllocationFields>
Transactions that Use Allocations
Configuring transactions that use allocations uses a different syntax. The allocation structure is still created, but there are additional tags for moving money in funds to other funds and setting default allocations. Also transaction rules have an Allocations pane where the configuration is performed. Refer to the Transactions That Use Allocations section for additional information.
Configuring Allocations for Fund Models
This is not backwards compatible from v7 and v8. This must be done using the Allocation Model method.
Configuring Allocations for Asset Classes
This is not backwards compatible from v7 and v8. This must be done using the Allocation Model method.
The AllocationScreen business rule controls the allocation screen at the Plan and Policy level. While the Allocation Screen is not required for valuation or fund processing, it is commonly used to satisfy business workflow. For example, if a plan is configured to solely use policy-level allocations, and not plan-level allocations, the following configuration could be used:
<AllocationScreen>
<Allocations TYPE="Policy" AMOUNTPRECISION="2" PERCENTPRECISION="2"></Allocations>
</AllocationScreen>
The AllocationScreen can also support more complex configurations, such as having both a plan-level default allocation, and configurable policy-level allocations. The configuration can allow for specifc funds to be enabled or disabled for allocation, specific numbers of funds and specific types of funds, as needed.
Plan Level allocations are typically allocations that are established as part of business processing rules. For example, during the FreeLook period all deposits are invested in Fund A, or all deposits are moved into Fund B at notification of death. The plan level allocation is not unique to a specific policy or determined by the policy owner. There can be multiple plan level allocations; however, each allocation type must be assigned its own allocation typecode. Any unused code can be designated as a plan typecode. See Code Names for further information on setting up codes to be used for configuring typecodes.
Anallocationis defined as plan level in the <Allocations> element using the attribute TYPE="Plan".
Policy Level allocations determine the types of allocations that can be set-up for a policy such as in future payment, dollar cost averaging or a systematic withdrawal transaction.
Anallocationis defined as policy level in the <Allocations> element using the attribute TYPE="Policy".
General Pane
The Allocation screen General pane displays the name of the rule, the properties of the Allocation screen and their associated values.
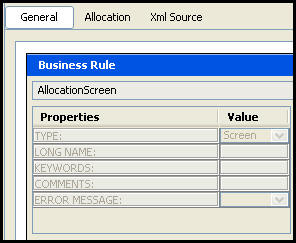
General Pane of Allocation Screen
Allocation Pane
The Allocation pane is used to configure how allocations are assigned for the plan and policy. The pane appears in a tree-structure with the same drag and drop functionality as in other dynamic editor rules.
Allocation Pane of AllocationScreen Business Rule
Depending on what is selected in the dynamic tree, a different list of default fields will appear on the screen below the tree. Drag and drop fields into the Dynamic Tree to configure the screen as required. The following is a list of potential fields that can appear and be configured on the screen.
|
Field Name |
Field Description |
|---|---|
|
Type |
Can be plan or policy. Corresponds with the level the allocation is on. |
|
AmountPrecision |
One of three attributes (AmountPrecision, UnitPrecision, and PercentPrecision) that can be used to set the number of decimal places for the AllocationMethod(s) used. Used when allocating money. |
|
UnitPrecision |
One of three attributes (AmountPrecision, UnitPrecision, and PercentPrecision) that can be used to set the number of decimal places for the AllocationMethod(s) used. Used when allocations are unit values.
|
|
PercentPrecision |
One of three attributes (AmountPrecision, UnitPrecision, and PercentPrecision) that can be used to set the number of decimal places for the AllocationMethod(s) used. Used when allocations are in percentages. |
|
UseEffectiveDate |
Used to display different effective dates for a model and allows you to select a group of allocations by model and effective date. The value Yes allows for effective dates and No indicates effective dates aren’t used.
|
|
AllocationMethods
|
The method used to allocate. The element value is the Code value from AsCodeAllocationMethod: 01(Percent), 02(Amount), 03(Units), 04(Pro Rata), 05(Mixed). |
|
TypeCode |
The allocation code number that is defined in AsCodeAllocationType. TYPECODE 01 is a system code reserved for plans. Any code defined in AsCodeAllocation can be designated as a plan TypeCode except the TypeCodes reserved by the system. If you do designate a different TypeCode you should only use it with an allocations type that equals plan.
|
|
Repeat Funds |
Presence of this element creates a fund transfer (i.e.To/From Fund selection for the particular allocation type). If Yes, allows user to select the same fund in the From and To sections for a transfer type transaction. |
|
FundLimit |
Can be used to limit the number of allocations that are allowed to be selected (plan)/attached to a policy, use integer number (policy). |
|
ExcludeFundStatus |
Allows you to exclude funds from the Allocation Fund drop-down box based on their status. Use the fund TypeCodes listed in AsCodeFundStatus. |
|
MethodCodes |
Code (as defined in AsCode/AsCodeAllocationMethod). Comma delimited list of allocation method codes (Amount, Percent, etc.). |
|
DisablePolicyStatus |
Sub-element of DisableAllocation fields. If used then the policy allocation screen fields will be disabled if the policy is currently in one of the listed status codes. Status codes are stored in AsCodeStatus. |
Steps to Create an Allocation
-
Drag the Allocations component from the Palette.
-
Select whether the Allocation screen type will be at the plan, policy, or segment level.
-
Enter any restrictions, formatting, or other guidelines for the allocation structure.
-
Drag allocation from the Allocation components in the Palette.
-
Enter the TypeCode of the Allocation from the AsCode table and the number of funds that may be selected.
-
Save the configuration.
Note: Each allocation must have a distinct typecode.
Button Security
Security is applied to the buttons on the Allocation screen in the Admin Explorer. Open the Security folder to reveal the options for applying security.
Steps to Add Security to Buttons
- Open Admin Explorer | Security | Application Security | Security Groups.
- Select the Security Group that has access to the Allocation screen.
- Open Plan Security |Name of the Company | Plan Pages.
- Right-click the PolicyAllocation node and select Check-out to open it in the Configuration Area.
- Check the box next to each button the users in the security group will have access to in OIPA.
- Check-in the file to save the changes to the database.
XML Source Pane
Configuration can also be done in XML via the XML Source pane. The XML Source pane includes XML Editor functionality that enhances the configuration experience. More detailed information on configuration using the XML Source pane can be found in the XML Source Editing section.
Important: Math associated with the Allocation screen needs to be configured using the XML Source Pane.
Please see the XML Configuration Guide topic in this help system for a list of all elements, attributes and values needed for configuration. View Business Rules | Screen Rules | Allocation Screen.