Implementing Discussion Service with a New Discussion Type
Creating new Discussion type and Discussion User group enables you to implement additional rules to auto-add dynamic participants and assign privileges to specific roles.
This topic provides an overview of discussion service configuration and describes how to:
Define Discussion User Group •
Define Discussion Type
|
Page Name |
Definition Name |
Usage |
|---|---|---|
|
Discussion User Group Page |
EOFD_DSCN_GROUP |
To create a new discussion user group. |
|
Discussion Type Page |
EOFD_DSCN_TYPE |
To create a new discussion type that can be assigned to components. |
Use the Discussion User Group page (EOFD_DSCN_GROUP) to define discussion groups which enable you to create dynamic list of participants for a discussion based on the context. For example all participants and the instructor of a course class can be added to a discussion attached to the Course class page with a context of the course class id.
Navigation
Image: Discussion User Group page
Discussion User Group page
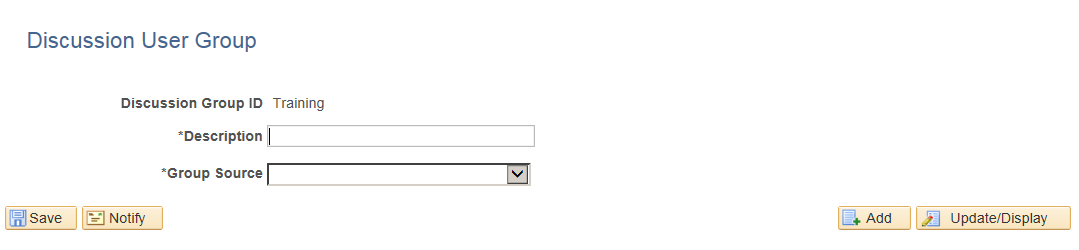
Defining Discussion User Group
To create a new discussion user group:
Login as an administrator.
Enter the required discussion group ID.
Click Add.
Type a meaningful description in the Description field.
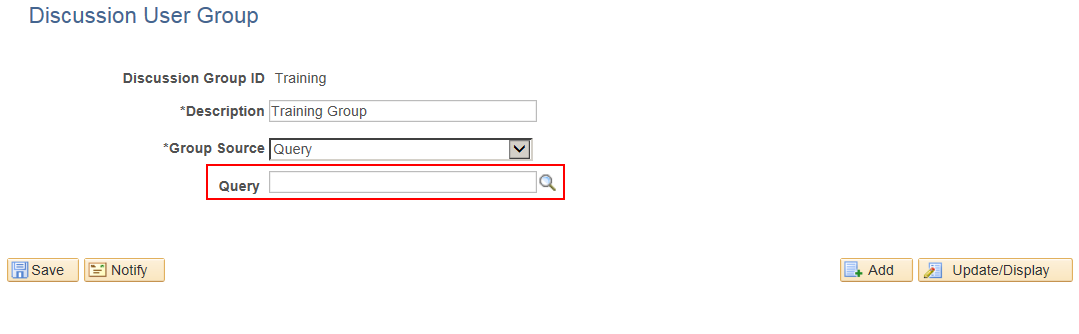
Select an appropriate value from the Group Source field. On selecting a value, corresponding field is displayed as shown:
Image: Discussion User Group Query Page
This example illustrates the fields and controls on the Discussion User Group Query Page
Use the Discussion Type page (EOFD_DSCN_TYPE) to define new discussion types. You can post attachments to the discussion, add default list of participant, define permissions for adding/removing participants, updating subject, and close or reopen discussion.
Image: Discussion Type Page
This example illustrates the fields and controls on the Discussion Type page.
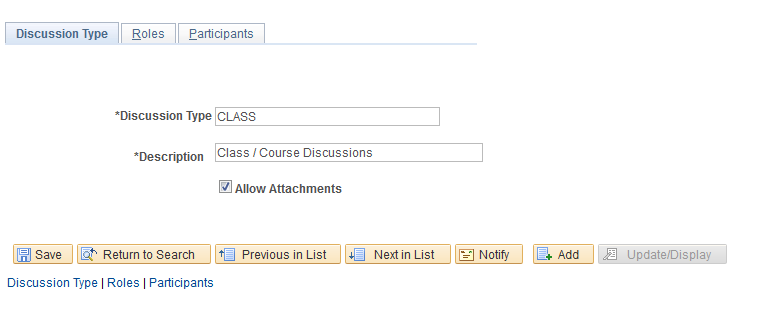
Defining Discussion Type
To create a new discussion type:
Login as an administrator.
Enter the discussion type and a meaningful description as per requirement.
To allow attachments, select the Allow Attachments check-box.
To configure the permissions for each type of user:
Select the Roles tab. The Discussion Type – Roles page appears as shown:
Image: Discussion Type — Roles page
This example illustrates the fields and controls on the Discussion Type — Roles page.
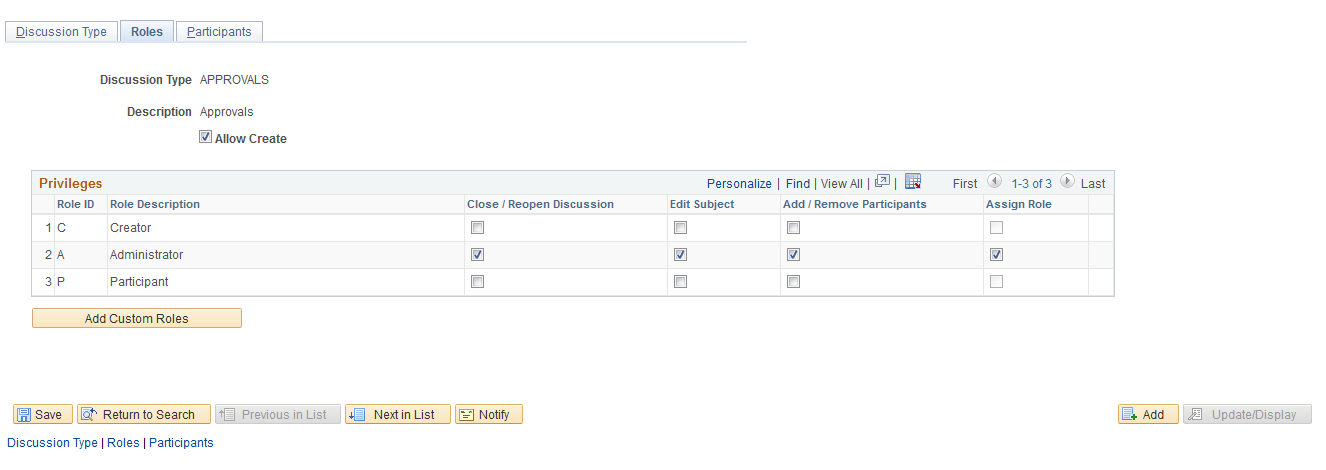
Select the Allow Create check-box, so that the user can create new discussions.
Note: When ‘Allow Create’ is turned off, Creator role is removed and the users will not be allowed to add new discussions. Add Discussion(+) Button on the Discussion List page will be hidden for users.
|
Field or Control |
Definition |
|---|---|
| Add Custom Roles |
Click this button to add new roles. |
To automatically add users while creating discussions:
Click the Participants tab. The Participants tab is displayed only when you saved the Roles page details.
Image: Discussion Type – Participants Page
This example illustrates the fields and controls on the Discussion Type – Participants Page:
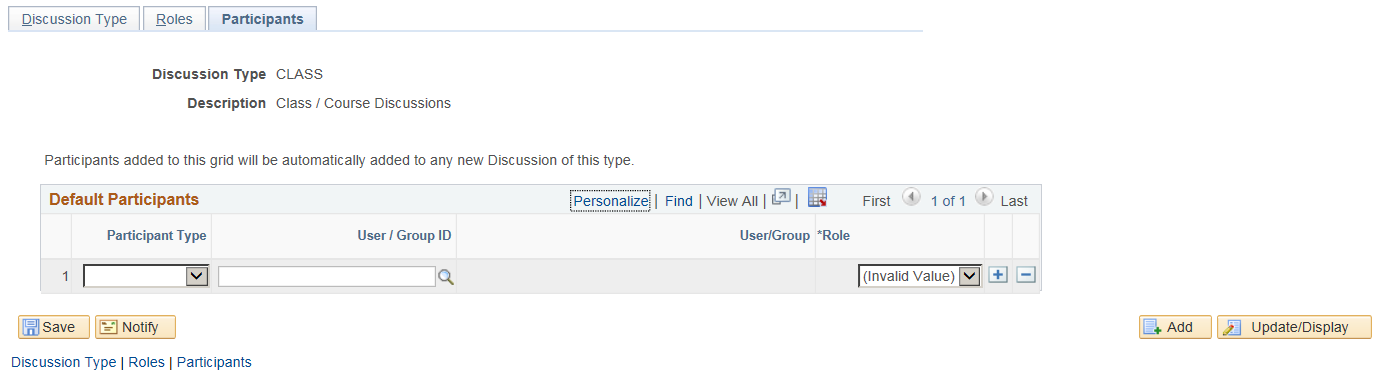
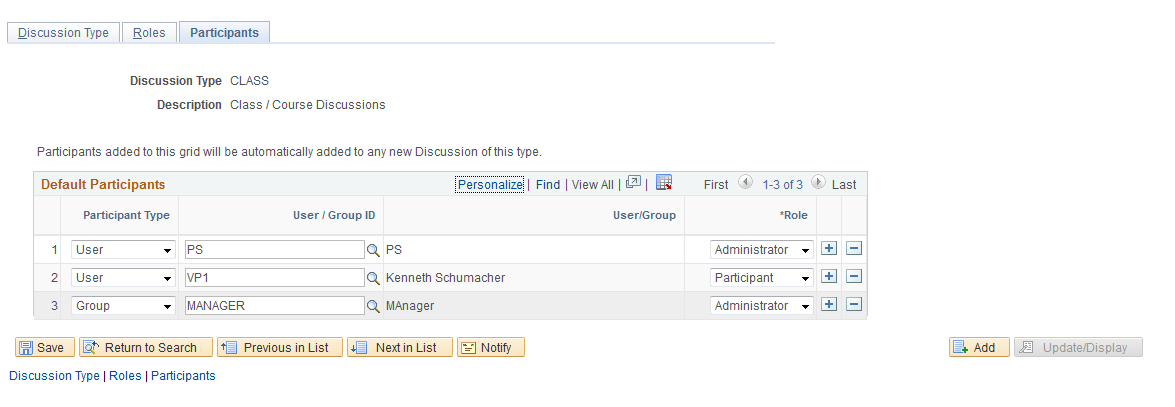
Include User/Group in Participants tab to automatically add users when discussion is created. Assign Participant/Administrators role to user/group using this tab as shown.
Image: Default Participants page
Default Participants page
To assign a new discussion type as a related action with context, perform the following:
Navigate to PeopleTools, Portal, Related Content, Maintain Related Content.
Clone the Service: EOFD_DEFAULT_DSCN.
Add the context fields to the new service. Add below additional parameters to the service definition:
EOFD_DSCN_TYPE_ID
EOFD_<Context Key Field 1>
EOFD_<Context Key Field 2>
You can add as many key fields as per your requirement. These parameters will be used to determine the context. If you want to use the same discussion type on multiple components then you can remove the Component parameter from the list. Save your changes.
Navigate to PeopleTools, Portal, Related Content, Manage Related Content.
Select the Cref to which you need to assign the default service.
Under Page-level Related Content, select the page in which Discussion Service link should be opened.
Select the new cloned service ID created in step 2.
Update the Service label.
Image: Assign Related Actions Page
Assign Related Actions Page
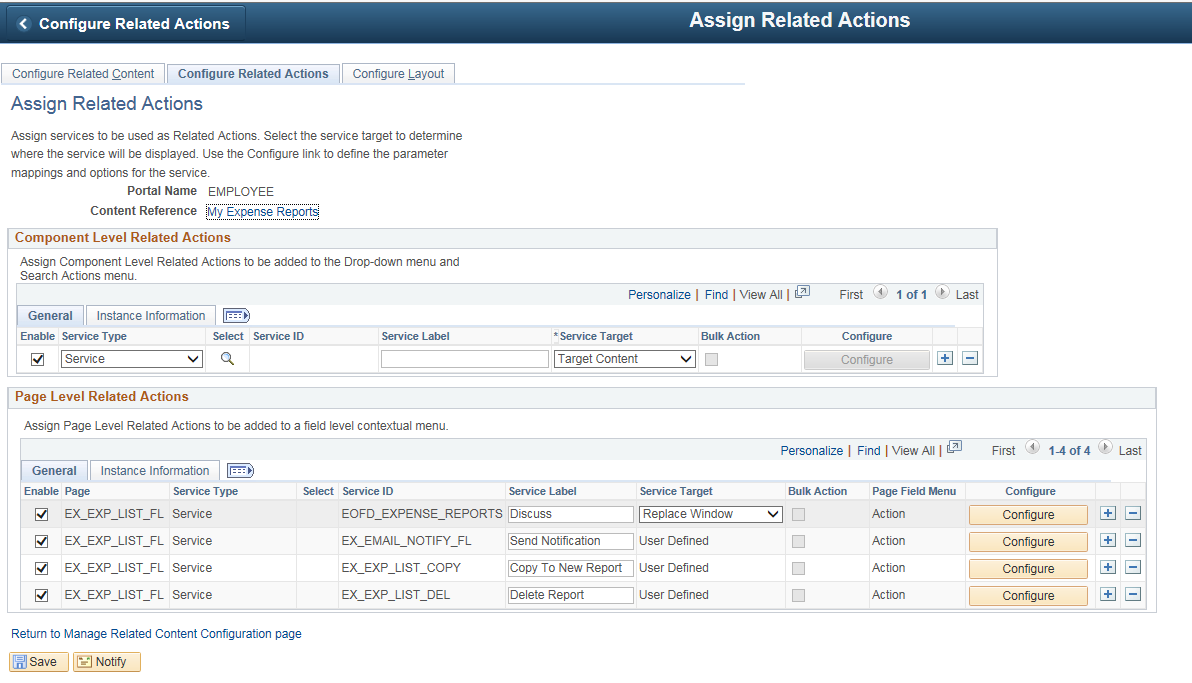
Click on Configure button to configure the service to pick the System variables.
For parameters EOFD_COMPONENT & EOFD_MARKET, choose Mapping Type as System Variable and Mapping data as %Component and %Market respectively.
Assign fields from the page as values for the context fields.
Specify the new Discussion Type ID as fixed value for the parameter: EOFD_DSCN_TYPE_ID.
Suppose the page in selected component reference is designed to have a Push button/Hyperlink for opening Discussion Service. Under Menu Options, select that field as Page Field Menu.
Image: Configure Service Modal Window
Configure Service Modal Window
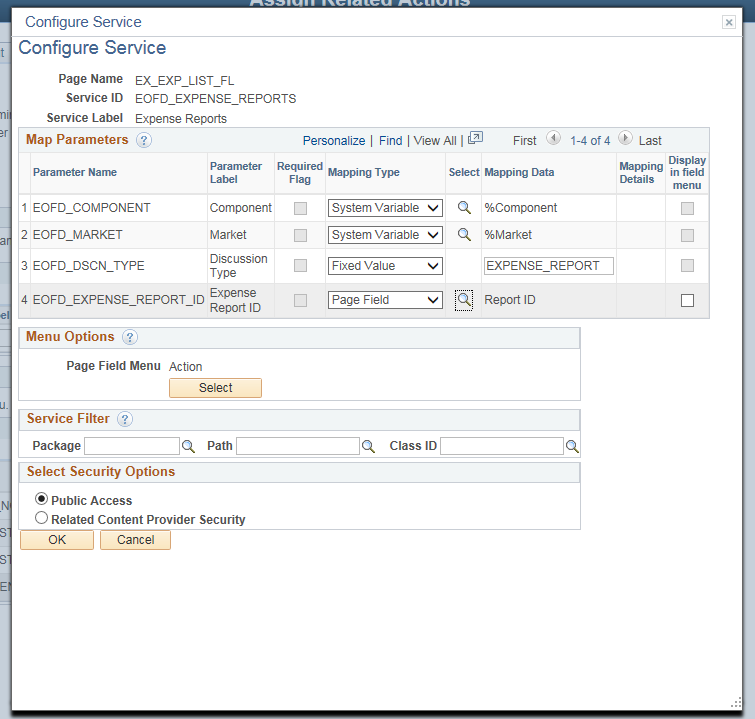
Select Security Options and Click Ok.
Save the details configured in Assign Related Actions page.