Setting Up the Integration between PeopleSoft Absence Management and Microsoft Outlook
There are some simple setup steps required before an employee can enter and receive absence request information through Microsoft Outlook:
Desktop Integration Setup
Absence Management Setup
Microsoft Outlook Setup
The Desktop Integration feature provides seamless integration between Microsoft Outlook and your PeopleSoft Absence management. To enable the submission and receipt of absence request information through Microsoft Outlook, you must complete the following Desktop Integration steps:
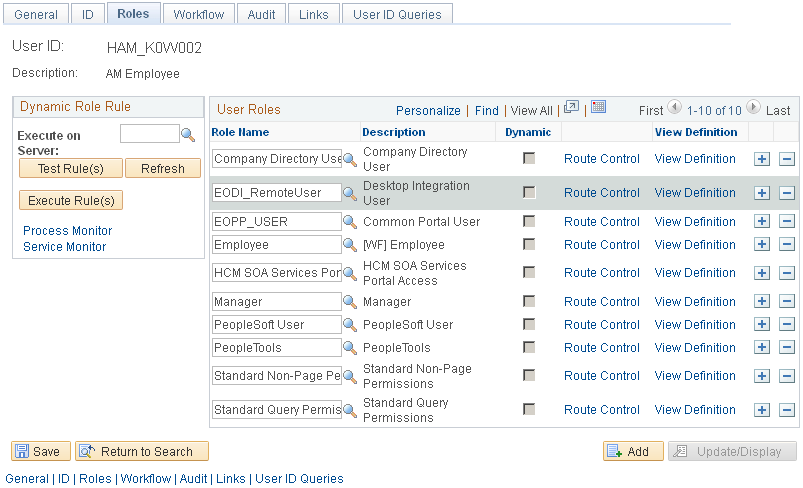
For users to be able to enter and receive absence request information through Microsoft Outlook, you must ensure that their User IDs include the EODI_RemoteUser role.
Image: Example of a User ID with the EODI_RemoteUser role
This example displays the User Profiles - Roles page for a User ID with the EODI_RemoteUser role.
For more information, see the product documentation for PeopleTools: Security Administration.
Oracle delivers and maintains the REQUESTABSENCE dynamic display definition. You can configure it to better meet your absence policy requirements.
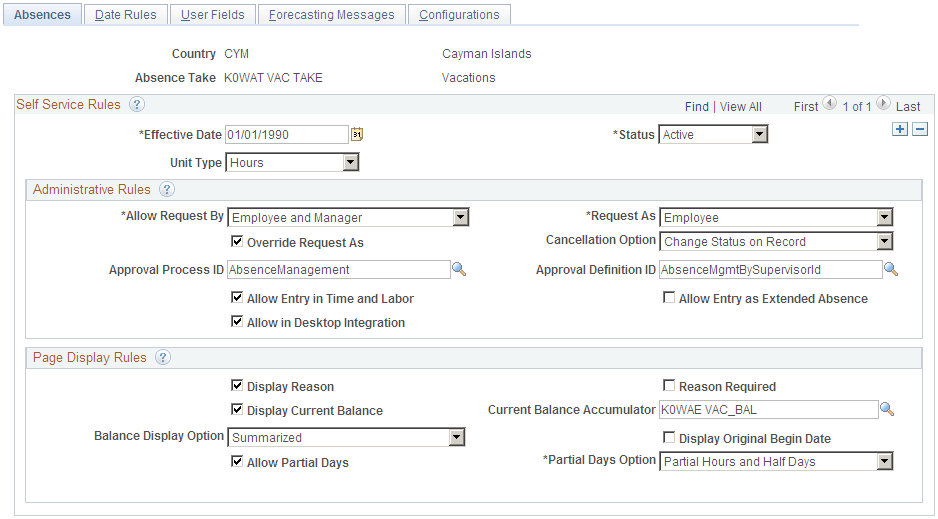
In PeopleSoft Absence Management, you need to define which absence takes can be used in the integration with Microsoft Outlook. You do this using the Allow in Desktop Integration check box on the Absences page of the Country Take component (GP_ABS_BAL_SS_DEF).
Image: Absences page
This example shows the page on which you can select the Allow in Desktop Integration check box.
For more information, see the documentation for the Country Take - Absences Page.
To set up Microsoft Outlook to integrate with PeopleSoft Absence Management, you must:
Install the Microsoft Outlook Add-in provided by Oracle.
Configure your account and server settings in Microsoft Outlook:
Navigate to PeopleSoft, Settings & Options to open the PeopleSoft Settings & Options window.
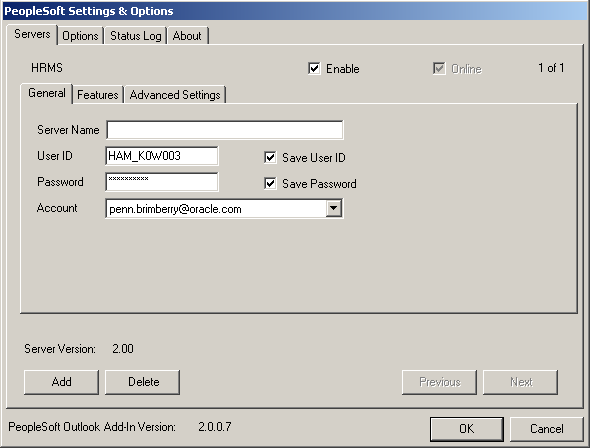
On the General tab of the Servers tab, enter your account information.
Image: PeopleSoft Settings & Options - General tab
This example illustrates the fields and controls on the PeopleSoft Settings and Options - General tab.
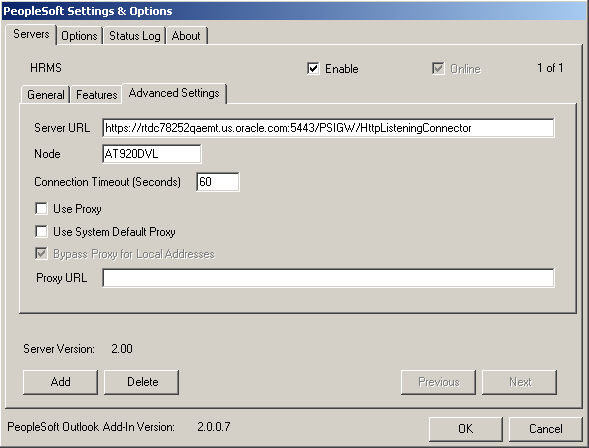
On the Advanced Settings tab of the Servers tab, enter your PeopleSoft Listening Connector URL and node information.
Image: PeopleSoft Settings & Options - Servers: Advanced Settings tab
This example illustrates the fields and controls on the PeopleSoft Settings and Options - Servers: Advanced Settings tab.
Field or Control
Definition
Server URL When entering your PeopleSoft Listening Connector URL information, enter only the string that includes the database and port, for example rtdc78252qaemt.us.oracle.com:5443. The system adds https:// at the beginning and appends /PSIGW/HttpListeningConnector to the end when you tab out of the field.
Enable Select this check box once you’ve completed entering the information on the Advanced Settings tab.
Online The system selects this check box to indicate a successful connection to the PeopleSoft Absence Management database.