Setting Up Recruitment Sources
To set up recruitment sources, use the AutoScreen Setup (HRS_AUTOSCREEN) and Recruitment Sources (HRS_SOURCE_SETUP) components.
|
Page Name |
Definition Name |
Usage |
|---|---|---|
|
HRS_SOURCE_BASIC |
Select a recruitment source type and define basic information for a source. |
|
|
HRS_SOURCE_CMPNY |
Define sites for a company recruitment source. |
|
|
HRS_SOURCE_MKT |
Define sites and subsources for marketing recruitment sources. |
|
|
HRS_SOURCE_EMP |
Define sites for employee recruitment sources. |
|
|
HRS_SOURCE_VNDR |
Identify a third-party vendor and enter additional processing rules for vendor recruitment sources. |
|
|
HRS_SOURCE_CONTACT |
Define contacts for all types of recruitment sources. |
Use the Recruitment Sources - Source Setup page (HRS_SOURCE_BASIC) to select a recruitment source type and define basic information for a source.
Navigation
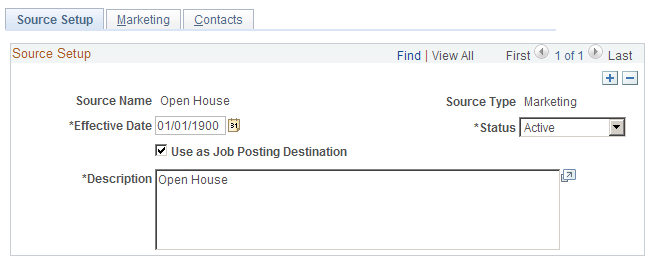
Image: Recruitment Sources - Source Setup page
This example illustrates the Recruitment Sources - Source Setup page.
|
Field or Control |
Definition |
|---|---|
| Source Name |
Enter a source name. This field is enterable only when you first add the source. |
| Source Type |
Select a source type: Company, Employee, Marketing, or Vendor. This field is enterable only when you first add the source. The source type that you select here controls the pages that appear in this component. When you select a source type, the Company, Marketing, Employee, or Vendor page appears, depending on the source type that you select. |
| Effective Date |
Enter an effective date. The only page in the system where you can select a source prior to the effective date is the Job Opening - Posting Information page. On this page, you can select a future-dated source as long as the effective date of that source is within the posting dates for that posting. |
| Status |
Select Active or Inactive. Inactive sources do not appear in system prompts. |
| Use as Job Posting Destination |
This check box appears only if the Source Type is Marketing. Select this check box to make a marketing source available as a posting destination. When you use the Posting Information Page to create a job posting, the drop-down list of posting destinations always includes all Company and Vendor recruiting sources, but Marketing sources appear only when they are explicitly configured for use as a posting destination. Unlike Company and Vendor destinations, marketing destinations cannot receive electronic posting information. Therefore, posting jobs to marketing sources is informational only, for tracking where you’ve published postings. If your organizations uses this mechanism to track where you market your postings, select the Use as Job Posting Destination check box for the appropriate Marketing recruiting courses. Otherwise, leave the check box deselected so that users do not see unnecessary options in the drop-down list of posting destinations. |
| Description |
Enter a description. This field is used only for informational purposes. |
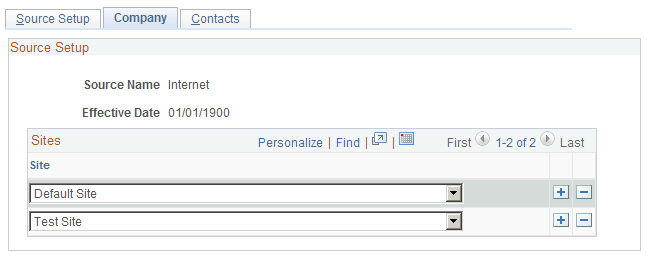
Use the Recruitment Sources - Company page (HRS_SOURCE_CMPNY) to define sites for a company recruitment source.
Note: This page appears only for recruitment sources with the source type Company.
Navigation
Image: Recruitment Sources - Company page
This example illustrates the Recruitment Sources - Company page.
|
Field or Control |
Definition |
|---|---|
| Site |
Select one or more sites. When a recruiter or hiring manager creates a job opening and selects to post the job opening to this source, the system posts the job opening to all of the sites that you select here. For example, if your organization has separate careers sites for separate business units, then you can create three Company recruitment sources, each associated with the appropriate site. If your organization additionally has a consolidated careers site, you can add that site to each of the business unit-specific recruitment sources so that jobs posted to a specific business unit’s site will always be posted to the consolidated site as well. |
Use the Recruitment Sources - Marketing page (HRS_SOURCE_MKT) to define sites and subsources for marketing recruitment sources.
Note: This page appears only for recruitment sources with the source type Marketing.
Navigation
Image: Recruitment Sources - Marketing page
This example illustrates the Recruitment Sources - Marketing page.
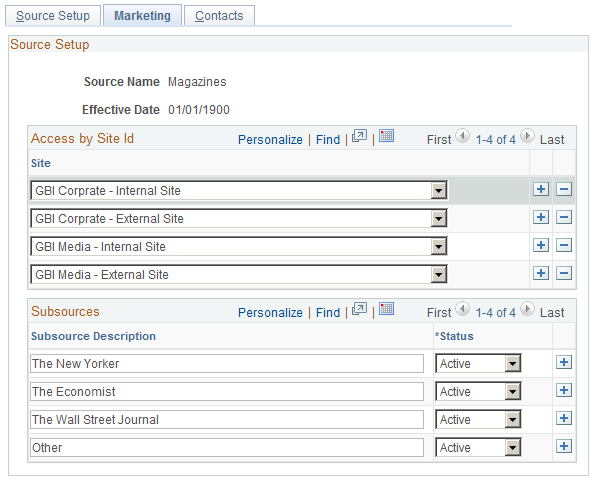
Access by Site ID
Use this grid to specify which Candidate Gateway sites list this recruitment source as a valid referral source. For example, if you are defining a recruitment source for your internal employee newsletter, you would associate that source with the internal sites used by the employees who receive that newsletter.
Once a source is associated with a site, applicants who apply for jobs on that site can select that source in the How did you find out about us? field in the online application form (if the resume template includes the Referrals section).
Subsources
Use this grid to define subsources for marketing sources. When a user selects a source on the online application pages in Candidate Gateway (or on the Load Resume - Prepare Load Parameters page), the user also can select a subsource from a list of values that you define here. Only active subsources appear as valid options.
Use the Recruitment Sources - Employee page (HRS_SOURCE_EMP) to define sites for employee recruitment sources.
Note: This page appears only for recruitment sources with the source type Employee.
Navigation
Image: Recruitment Sources - Employee page
This example illustrates the Recruitment Sources - Employee page.
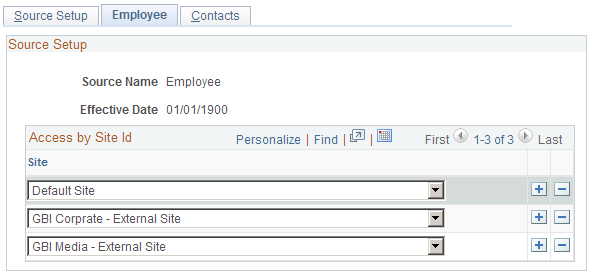
Access by Site ID
Use this grid to specify which Candidate Gateway sites list this recruitment source as a valid referral source.
Once a source is associated with a site, applicants who apply for jobs on that site can select that source in the How did you find out about us? field in the online application form (if the resume template includes the Referrals section).
Use the Recruitment Sources - Vendor page (HRS_SOURCE_VNDR) to identify a third-party vendor and enter additional processing rules for vendor recruitment sources.
Note: This page appears only for recruitment sources with the source type Vendor.
Navigation
Image: Recruitment Sources - Vendor page (1 of 2)
This is the first of two examples illustrating the Vendor page.
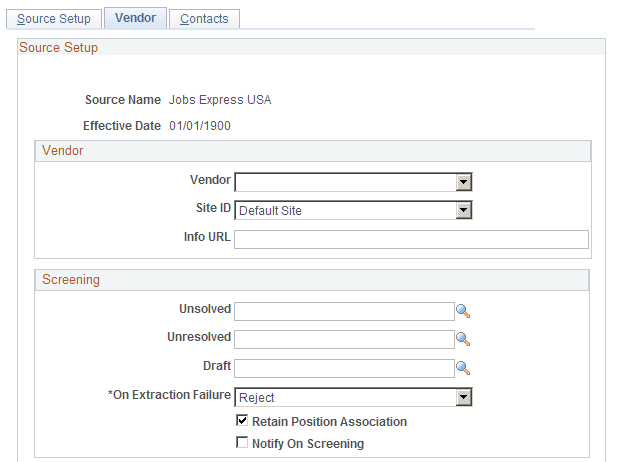
Image: Recruitment Sources - Vendor page (2 of 2)
This is the second of two examples illustrating the Vendor page.
Vendor
|
Field or Control |
Definition |
|---|---|
| Vendor |
Select a vendor to which organizations will post job openings or from which they will receive applicants. The only vendors that you can select from are vendors from the JobBoard transaction group. |
| Site ID |
Select the site to which applicants will be redirected when they receive an email notification that requires them to go to an online application site to enter or review information. |
| Info URL (information uniform resource locator) |
Enter the URL that determines where users can go to view the job postings for this source. |
Screening
|
Field or Control |
Definition |
|---|---|
| Unresolved, Reject, and Draft |
Select the autoscreen definition that you want to associate with each status. During the autoscreen process, the system processes the statuses in this order:
The system starts with the first status (Reject) and checks the associated autoscreen definition. If the applicant does not pass the autoscreening criteria, the process stops and the system assigns the Reject status to the resume. If the applicant passes the autoscreening criteria, or if no autoscreening definition is associated with the status, the process moves on to the next status (Unresolved). If the applicant passes all three statuses, the system assigns the status Success to the resume. Before any autoscreening can begin, the extraction process must be successfully complete. Define autoscreening criteria on the AutoScreen Setup page. |
| On Extraction Failure |
Select the status that you want to assign to a resume if resume extraction fails for the resume. |
| Retain Position Association |
Select to have the system retain the job opening with which the resume is associated. This option is valid only for applicants that the system receives through open integration framework. For all other cases, no association with a job opening exists. |
| Notify On Screening |
Select to notify applicants after the screening process is complete. If you select this option, the system uses the values that you specify in the Notifications group box to determine which notification to send. |
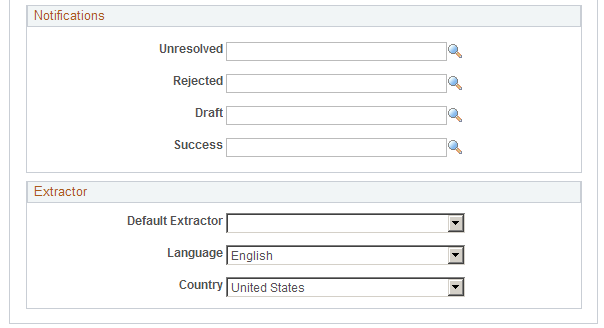
Notifications
Use this group box to select the notification that the system sends to each applicant whose based on the autoscreening results. For the system to send these notifications, you must select the Notify on Screening option in the Screening group box.
PeopleSoft delivers four templates, one for each status. When you create a new source, the system populates each of the fields with the associated notification. If you do not select a notification for a status, the system doesn't send a notification for that status.
These are the default templates:
|
Field |
Notification |
|---|---|
|
Unresolved |
HRS_HROI_UNRESOLVED |
|
Rejected |
HRS_HROI_REJECTED |
|
Draft |
HRS_HROI_DRAFT |
|
Success |
HRS_HROI_SUCCESS |
Extractor
|
Field or Control |
Definition |
|---|---|
| Default Extractor |
Select the default resume extractor that the system uses for non-XML resumes that come from this source. However, note that you can process resumes through another extractor by using the Manage Resumes (HRS_AL_LOG) component. |
| Language |
Select a language in which the resumes are written. Some resume extractors require a language to begin the extraction process. |
| Country |
Select a country. Some resume extractors require a country to begin the extraction process. |
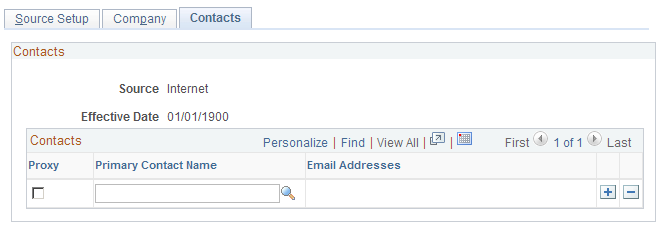
Use the Recruitment Sources - Contacts page (HRS_SOURCE_CONTACT) to define contacts for all types of recruitment sources.
Navigation
Image: Recruitment Sources - Contacts page
This example illustrates the Recruitment Sources - Contacts page.
|
Field or Control |
Definition |
|---|---|
| Proxy |
Select to have the system create a proxy for incoming applicants from this source. This proxy functionality applies only to Vendor source types. When a staffing supplier submits a resume, it is common not to contact the applicant to whom the resume belongs. Instead, all communication with the applicant, up until the interview with the applicant, is done through the staffing supplier. The person at the staffing supplier organization who handles this duty is referred to as a proxy. The proxy takes on all responsibilities of the applicant and is both responsible and expected to act in the best interest of the applicant. On system pages that show applicant contact information, the contact information for the proxy is also included. When you send correspondence to an applicant who uses a proxy, the system sends the correspondence to the proxy, not the applicant. |
| Primary Contact Name and Email Addresses |
Select a contact. You can select from any contact that has a contact type of general. When you select a contact, the system populates the Email Addresses field with the email address of the contact. Define contacts on the Contacts - Contacts Setup page. |