Installing Microsoft Internet Information Services (IIS) and Windows Communication Foundation (WCF) Features

This section reviews configuring Microsoft Internet Information Services (IIS) and Microsoft Windows Communication Foundation (WCF) Services (if necessary) on Simphony application servers. Microsoft WCF configuration only needs to be performed on servers where the Simphony Web Portal (Import/Export) and API are installed.

For more information about the Server Manager - Add Roles and Features Wizard, refer to the Microsoft TechNet Library at https://technet.microsoft.com/en-us/.

Access the Simphony application server (running Microsoft Windows Server 2012 R2):

  1. Access the Control Panel, click Programs, and then beneath Programs and Features, click Turn Windows features on and off.
  2. The Server Manager Dashboard loads and subsequently, the Add Roles and Features Wizard.
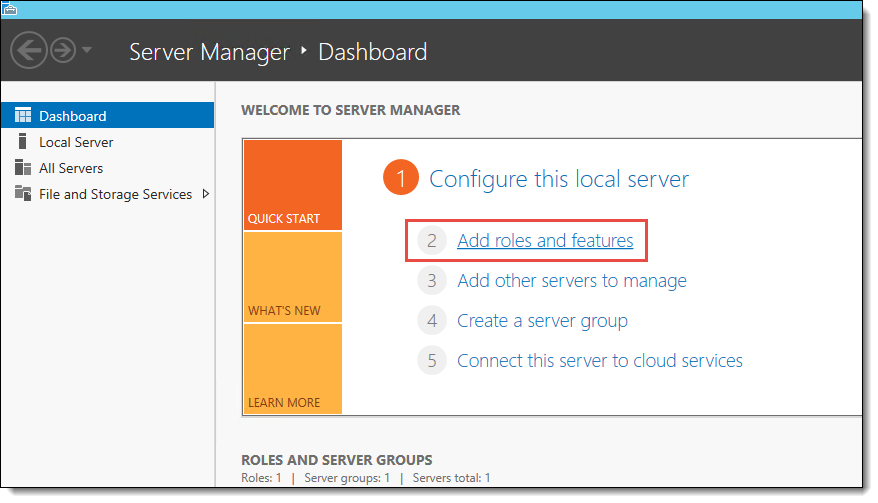
  3. Access the Server Manager and select 2 Add roles and features.

    Figure 2-8 Server Manager – Dashboard — Adding Roles and Features


    This figure shows the Server Manager Wizard’s Dashboard.
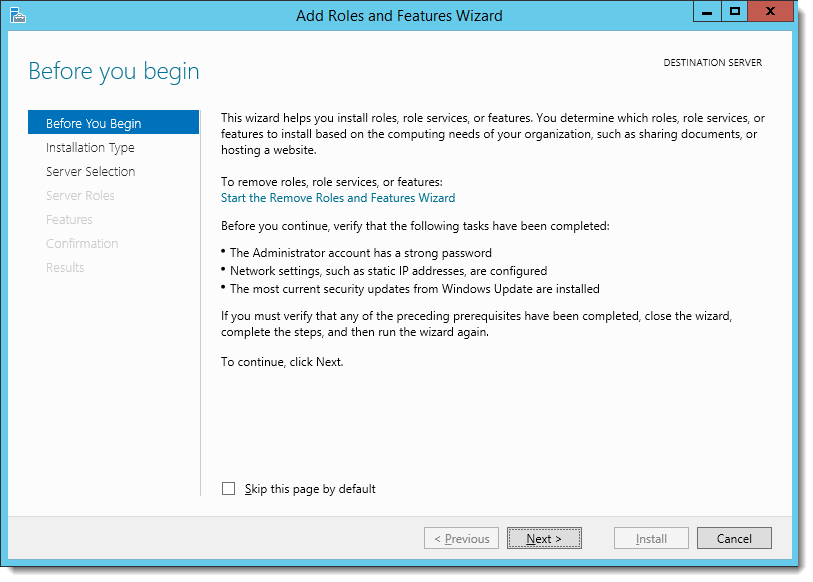
  4. Click Next.

    Figure 2-9 Server Manager — Before You Begin


    This figure shows the Before You Begin screen that states: 1. The Administrator account has a strong password. 2. Network settings, such as static IP addresses are configured. 3. The most current security updates from Windows Update are installed.
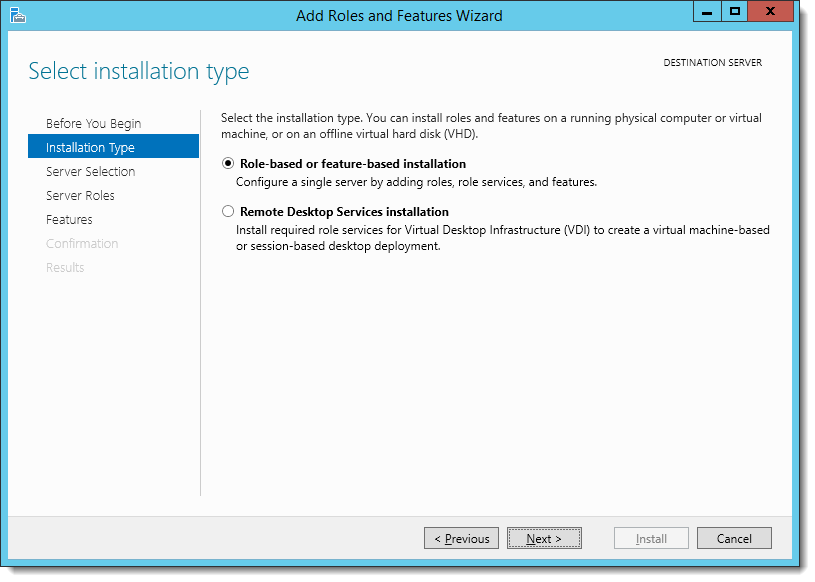
  5. Select Role-based or feature-based installation, and then click Next.

    Figure 2-10 Server Manager — Select Installation Type


    This figure shows the installation types that are available when adding roles, services, and features.
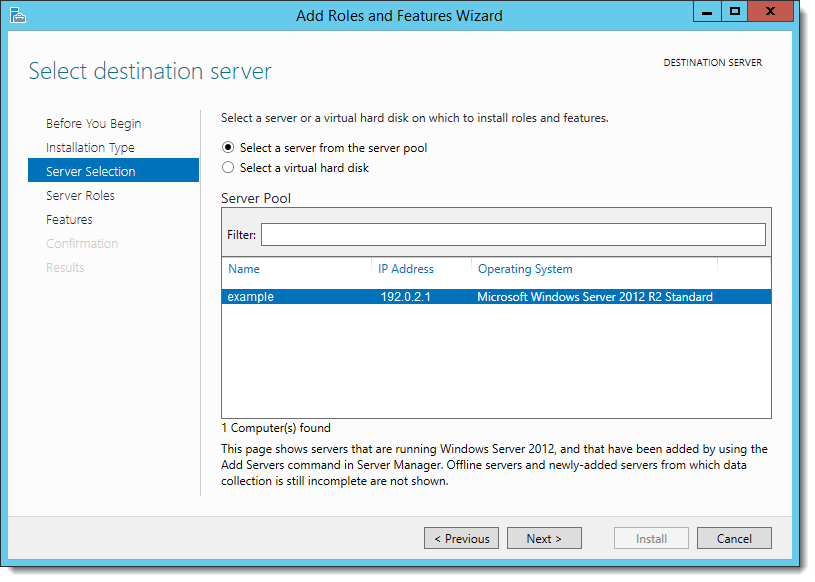
  6. Select the Select a server from the server pool option.
  7. Select the server you are configuring, and then click Next.

    Figure 2-11 Server Manager – Select Destination Server


    This figure shows the Add Roles and Features Wizard page where you select the server.
  8. Click Next.

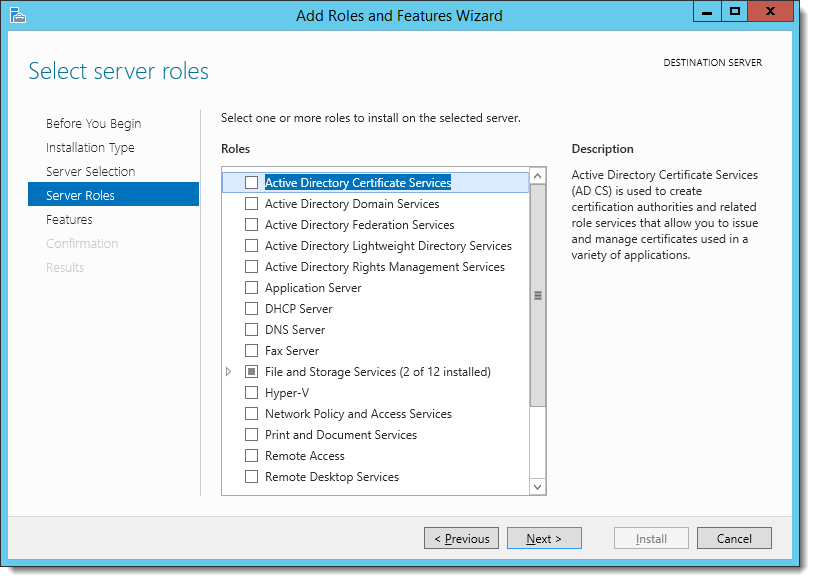
    Figure 2-12 Server Manager – Select Server Roles


    This figure lists the Server Role settings and all of the available services.
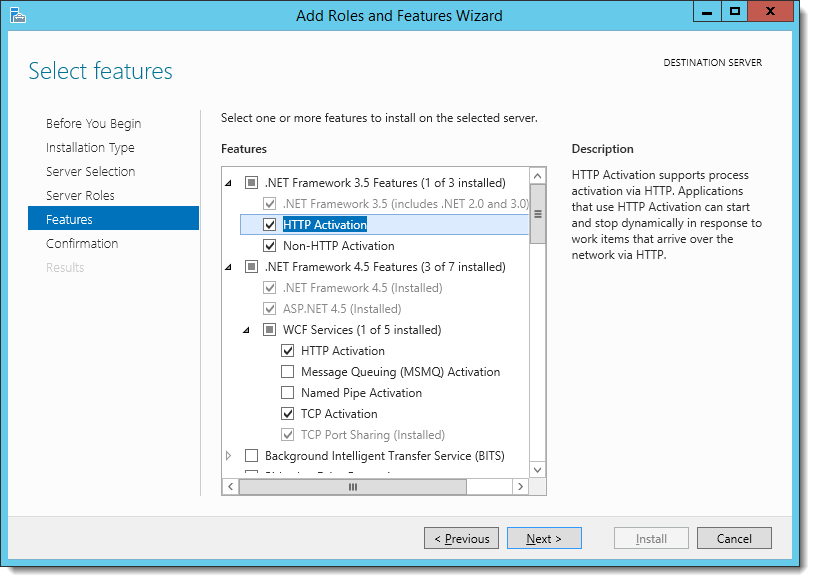
  9. Expand .NET Framework 3.5 Features and ensure that HTTP Activation and Non-HTTP Activation are selected.

    Figure 2-13 Server Manager — Select Features


    This figure shows the .Net Framework and WCF configuration options.
  10. Expand .NET Framework 4.5 Features, enable WCF Services, and then ensure that HTTP Activation and TCP Activation are selected.

    The WCF Services configuration only needs to be performed on servers where the Simphony Web Portal (Import/Export) and API are installed.

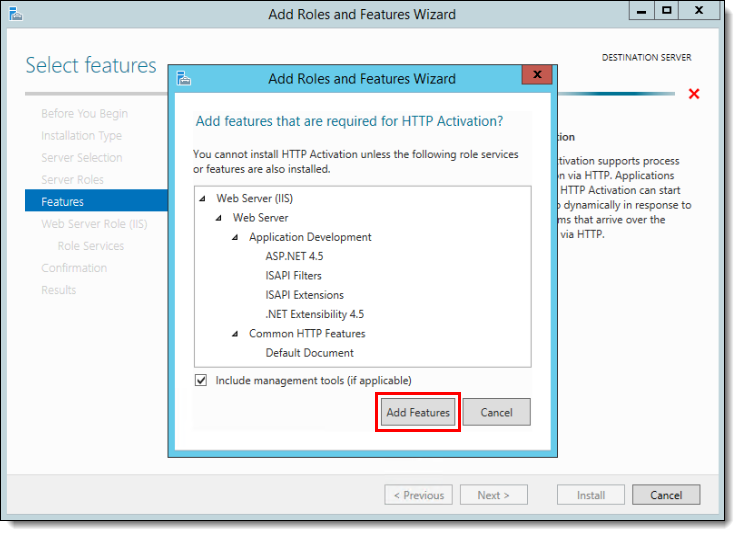
  11. Ensure that the Include management tools (if applicable) checkbox is selected, and then click Add Features.

    Figure 2-14 Server Manager — Add Roles and Features


    This figure shows the Add Features window that includes a listing of the features that were previously selected.
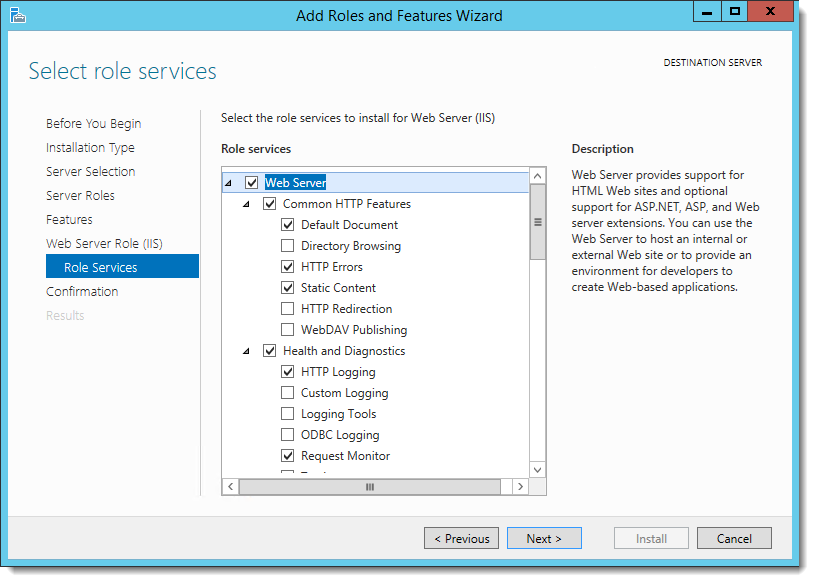
  12. Expand the Web Server role services and options and select the following Common HTTP Features:
    • Default Document

    • HTTP Errors

    • Static Content

    From a system security standpoint, the Directory Browsing role service should not be enabled.

    Figure 2-15 Server Manager – Web Server Role Services


    This figure shows the Add Roles and Features Wizard page where you expand and select the Web Server role services.
  13. Select the following Health and Diagnostics options:
    • HTTP Logging

    • Request Monitor

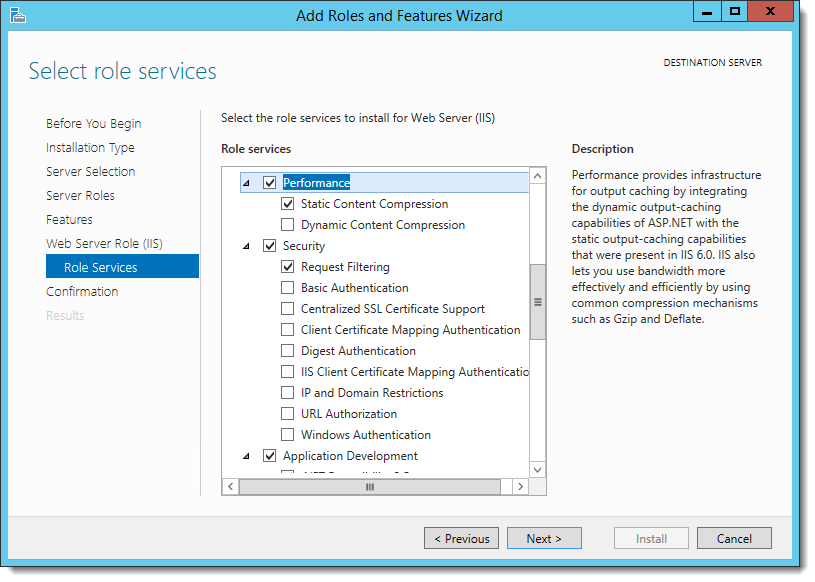
  14. Select the Performance option Static Content Compression.
  15. Select the Security option Request Filtering.

    Figure 2-16 Server Manager – Performance and Security Role Services


    This figure shows the Add Roles and Features Wizard page where you select the Performance and Security role services.
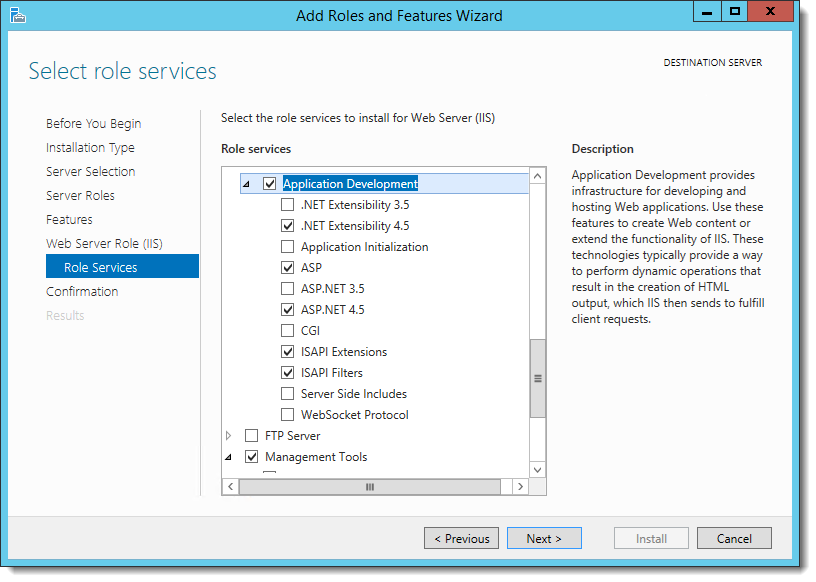
  16. Select and expand Application Development, and then select the following options:
    • .NET Extensibility 4.5

    • ASP

    • ASP .NET 4.5

    • ISAPI Extensions

    • ISAPI Filters

    Figure 2-17 Server Manager – Application Development Role Services


    This figure shows the Add Roles and Features Wizard page where you select the Application Development role services.
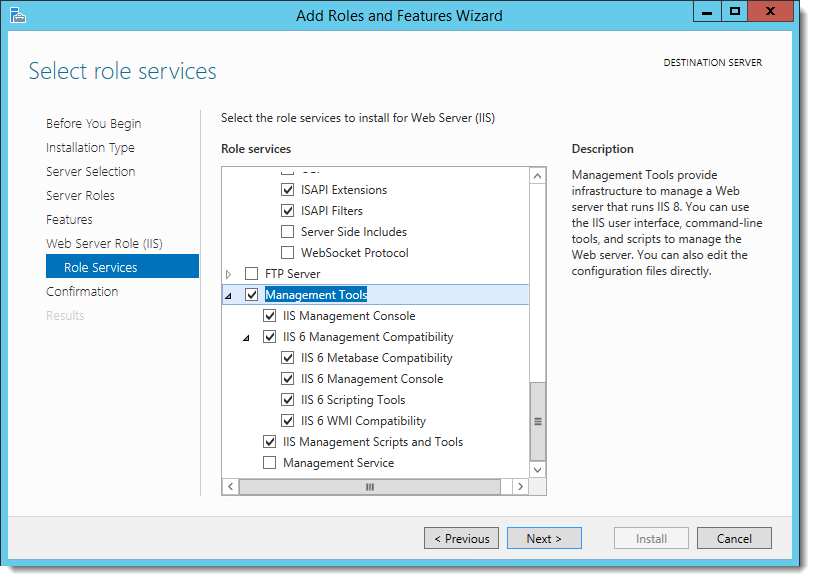
  17. Select and expand Management Tools, and then select the following options:
    • IIS Management Console

    • IIS Management Scripts and Tools

  18. Select IIS 6 Management Compatibility, and then select the following options:
    • IIS 6 Metabase Compatibility

    • IIS 6 Management Console

    • IIS 6 Scripting Tools

    • IIS 6 WMI Compatibility

    Figure 2-18 Server Manager – Management Tools


    This figure shows the Add Roles and Features Wizard page where you select the Management Tools.
  19. Click Next as needed, and then click Install.
    1. If you are performing an upgrade to the Simphony 18.1 release or later from an earlier version, the ImportExportAppPool is renamed to SimphonyAppPool.
    2. For fresh Simphony 18.1 and later installations, several Application Pools including the SimphonyAppPool are created for you.
      Locate the following Application Pools, click each one individually, right-click, and then select Recycle.
      • ImportExportAPIPool

      • Simphony2Pool

      • SimphonyAppPool

  20. Restart the server for the roles and features to become operative.