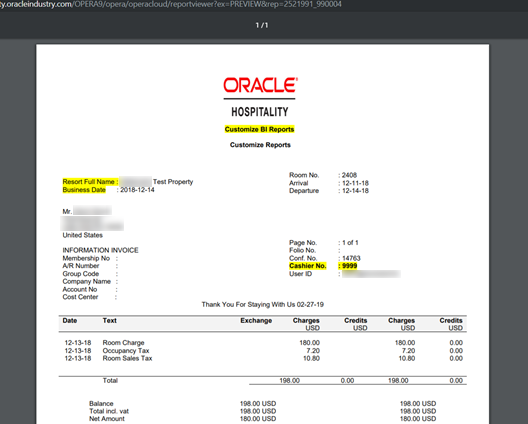
Creating and Running Custom Reports
Creating the custom report
-
Select Reports, select Configure Reports, and then select Create Reports.
-
Enter or select the Property.
-
Select a Report Group. For example, Confirmation Letter, Folios, Registration Cards, and so on.
-
Select Customized Report for the Report Type.
-
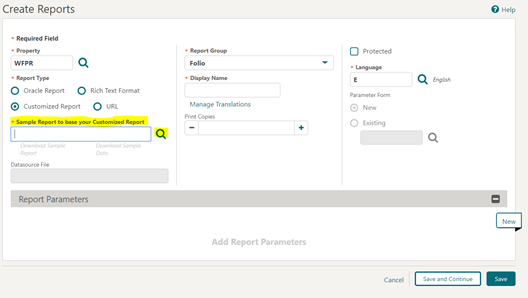
Select the Sample Report to base your Customized Report on by clicking the search icon next to the field, selecting a sample report, and then clicking Select. This is the Rich Text Format (RTF) file.
Figure 8-18 Sample Report to base your Customized Report
-
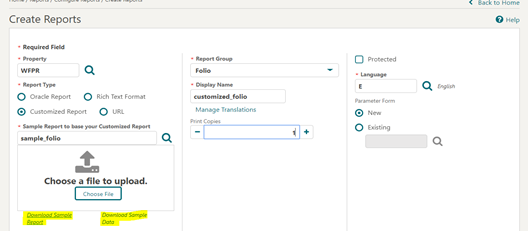
Click Download Sample Report and click Download Sample Data to download the sample report and sample data.
Figure 8-19 Download Sample Report and Sample Data links
Note:
Once downloaded, the files are located in the default download folder (that is, the Downloads Folder on your local machine).
-
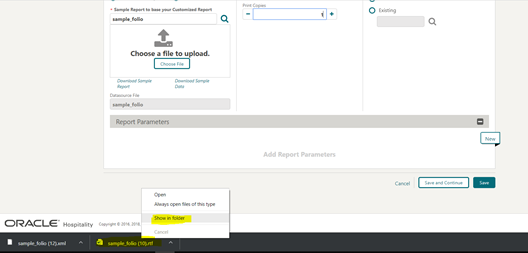
Navigate to the file location and right click the downloaded file and then click the Show in folder option. You can also navigate to the preset download folder to open or view the file.
Figure 8-20 Show in folder option
-
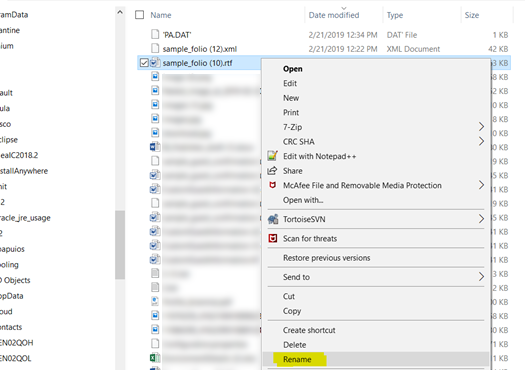
Rename the .rtf file (that is, the sample_folio) per your requirement and ensure the updated name does not begin with “SAMPLE.” No name changes are needed for the XML files. Right click the .rtf file and then select the Rename option to change the name.
Figure 8-21 Rename File
-
Customize the file as needed and then save the file.
-
Save the file and close it.
-
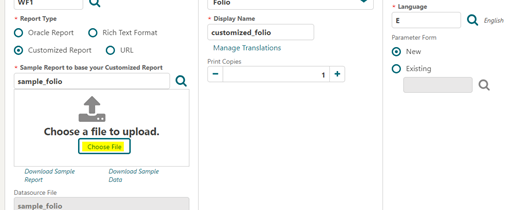
Upload the customized file by clicking Choose File and then select the .rtf file (that is, the customized file) from the location and click Open.
Figure 8-22 Choose File
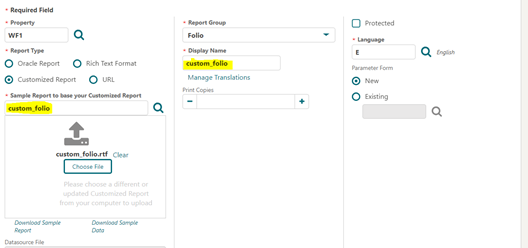
 Once Uploaded, the file display name in the Display Name field automatically updates to the uploaded .rtf file’s name.
Figure 8-23 Display Name matches the uploaded .rtf file’s name
-
Enter the number of Print Copies based on your requirements (for example, enter 1 or 2).
-
Enter or select a Language based on your requirements (for example, English).
-
Add Report Parameters if needed.
-
Click Save.
Running the report
This section describes the steps to validate the customization for the sample reports.
-
Select Bookings, Reservations, and then Manage Reservation.
-
Select Departures for the Search Type and then click Search. Verify the search results only contain departure reservations.
-
Select any reservation with a balance.
Figure 8-24 Select a reservation with a balance

-
Click I Want To... and then select Go To Billing.
-
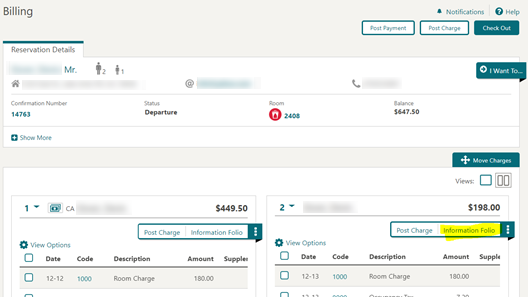
On the Billing screen, click the Information Folio link.
Figure 8-25 Information Folio link
-
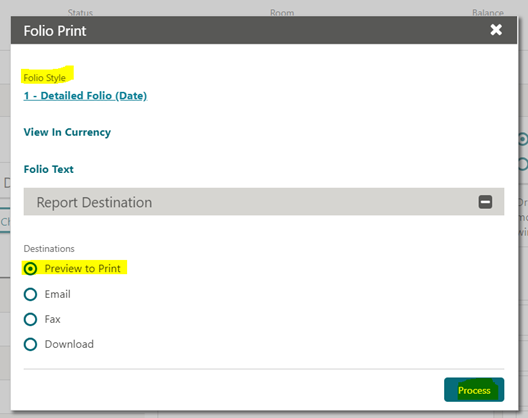
Select Preview to Print for the report destination option on the Folio Print screen. Click Process.
Figure 8-26 Folio Print
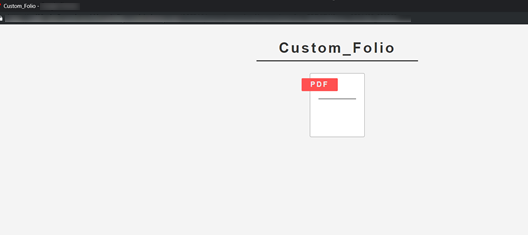
 The Folio appears with the configured customized report.
Figure 8-27 Custom Folio PDF
-
Open the PDF to view the report with folio details.
Figure 8-28 Custom Report Output
