2. Limits and Collaterals
The functions and actions provided by the Oracle FLEXCUBE Enterprise Limits and Collateral Management are explained below. All functions explained below, come under Limits and Collaterals in the Menu Browser.
This chapter contains the following sections:
- Section 2.1, "About Privacy By Design"
- Section 2.2, "Maintaining Credit Score"
- Section 2.3, "Maintaining Static Details"
- Section 2.4, "Maintaining Agency Details for Credit Rating"
- Section 2.5, "Maintaining User Defined Status"
- Section 2.6, "Liability Maintenance"
- Section 2.7, "Maintaining Customer to Liability Link"
- Section 2.8, "Covenant Maintenance"
- Section 2.9, "Collateral Types Maintenance"
- Section 2.10, "Collateral Category Maintenance"
- Section 2.12, "Issuer Maintenance "
- Section 2.13, "Securities Maintenance"
- Section 2.14, "Maintaining Insurance Company Details"
- Section 2.15, "Maintaining Insurance Types"
- Section 2.16, "Collaterals Maintenance"
- Section 2.18, "Collateral Pool Maintenance"
- Section 2.19, "Maintaining Line Code details"
- Section 2.20, "Facilities Maintenance"
- Section 2.21, "Maintaining User Data Restriction"
- Section 2.22, "Viewing User Data restriction"
- Section 2.23, "Track Exposure Maintenance"
- Section 2.24, "Exposure Analysis"
- Section 2.25, "Exposure Dashboard"
- Section 2.26, "Ear Marking Maintenance"
- Section 2.27, "Global Block Exposure Maintenance"
- Section 2.28, "Limit Block Maintenance"
- Section 2.29, "Breach Tracking for Main Line Facility Utilization Transactions"
- Section 2.30, "About Approval By Email"
- Section 2.31, "Maintaining Sector and Industry"
- Section 2.32, "Global Exposure Parameter Details"
- Section 2.34, "Facilities Amount Transfer Maintenance"
- Section 2.35, "Force Collateral Revaluation"
- Section 2.36, "Multi Authorization Maintenance"
- Section 2.37, "Dual Authorization of Utilization Transaction"
- Section 2.38, "Merging Liabilities"
- Section 2.39, "Maintaining Rule Criteria Code"
- Section 2.40, "Defining Alerts"
- Section 2.41, "Viewing Alerts"
- Section 2.42, "Defining Alert Selection Criteria"
2.1 About Privacy By Design
Oracle FLEXCUBE Enterprise Limits and Collateral Management implements ‘Privacy By Design’ by protecting PII (Personally Identifiable Information) data. In Oracle FLEXCUBE Enterprise Limits and Collateral Management, ‘Privacy By Design’ is achieved by following methods.
- Data Masking
- Right To Be Forgotten
- Granular Access
- Transparent Database Encryption
- Data Portability
2.1.1 Maintaining PII data
If the data comes under the following categories for an individual user, then it is considered as PII data.
- Customer Name
- Customer Contact Information
- Demographic Information
- Financial Information
- Unique Identifiers
2.1.2 Data Masking
Oracle FLEXCUBE Enterprise Limits and Collateral Management masks the PII (Personally Identifiable Information) data to protect the privacy of the customer.
2.1.3 Right to Be Forgotten
Oracle FLEXCUBE Enterprise Limits and Collateral Management provides ‘Right to be Forgotten’ PII data provision, if the customers are no longer associated with the bank. Once the customer is forgotten in the system, customer data is not available for any operation (including query/re open) in ‘Detail screen’ as well as in the ‘Summary screen’.
2.1.4 Granular Access
Oracle FLEXCUBE Enterprise Limits and Collateral Management provides granular access to PII data based on the access group restrictions maintained in the user definition. Each customer is mapped to the access group and each user is provided access to that group. Based on the access group, you can query, view, create, amend, re-open, and so on the customer information.
Example
For ‘USER1’, only ‘ACCGRP1’ is mapped as ‘Allowed’ in ‘Access Group Restriction’. In this case, ‘USER1’ can create, modify, view, and query only the customers under access group ‘ACCGRP1’. However, ‘USER1’ cannot create, modify, view or query the transactions for customers mapped to other access group.
For ‘USER2’, only ‘ACCGRP2’ is mapped as ‘Disallowed’ in ‘Access Group Restriction’. In this case, ‘USER2’ cannot create, modify, view, query for the customers under access group ‘ACCGRP2’. However, ‘USER2’ can create, modify, view or query the transactions for customers mapped to other access group.
2.1.5 Transparent Database Encryption (TDE)
It is required to encrypt sensitive application data on storage media completely transparent to the application itself. TDE encrypts data automatically when written to storage including backups, data dumps exports, and logs. Encrypted data is correspondingly decrypted when read from storage. Access controls that are enforced at the database and application layers remain in effect.
2.1.6 Data Portability
As part of 'Privacy By Design', data portability feature is available for the following summary screens.
- GCSCOLLT
- GCSCOLLG
- GCSCOLLI
- GCSCOLLP
- GESFACLT
- GESCULIK
2.2 Maintaining Credit Score
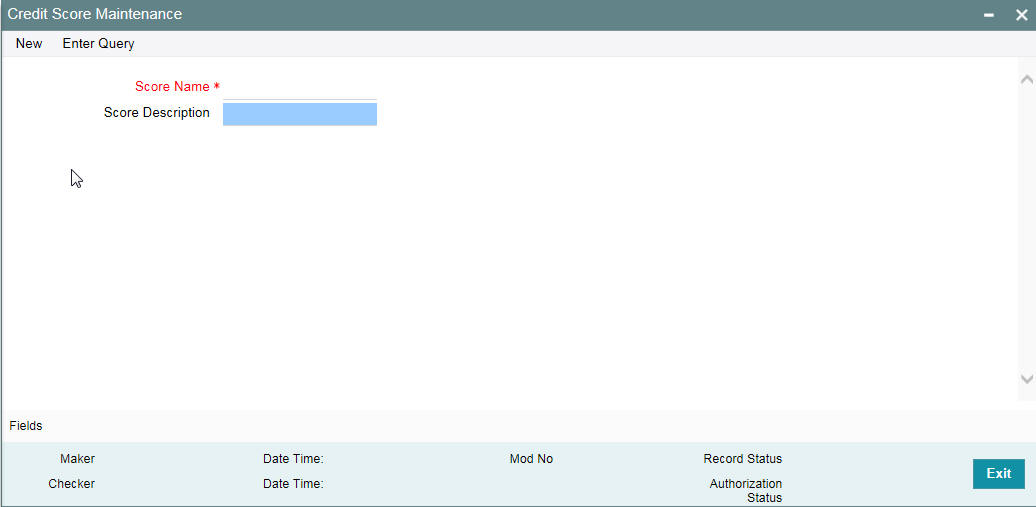
Before creating a Liability in the system, your bank assess the credit score of individual liabilities. You can create and maintain Credit Score names in the ‘Credit Score Maintenance’ screen. These credit scores can later be linked to Liability Maintenance (GEDMLIAB) for assessing the liability score.
Credit Score Maintenance is a bank level maintenance and it is accessible in all branches. You can invoke the ‘Credit Score Maintenance’ screen by typing ‘GEDCRSCR’ in the field at the top right corner of the Application tool bar and clicking the adjoining arrow button.
Credit Score Name
Specify a unique credit score name here.
Credit Score Description
Give a brief description of the score.
Note
This is only for information and not for processing.
2.3 Maintaining Static Details
Data that remains constant over a period of time is called static data. Usually, such data is commonly accessed by more than one module. The following static values can be maintained as part of the ELCM system.
- Section 2.3.1, "Product Maintenance"
- Section 2.3.2, "Amount Tag Maintenance"
- Section 2.3.3, "Category Maintenance"
- Section 2.3.4, "Exposure Type Maintenance"
- Section 2.3.5, "Group Maintenance"
- Section 2.3.6, "Haircut Maintenance"
- Section 2.3.7, "Location Maintenance"
- Section 2.3.8, "Maintaining Restriction Details"
- Section 2.3.9, "Static Type Maintenance"
2.3.1 Product Maintenance
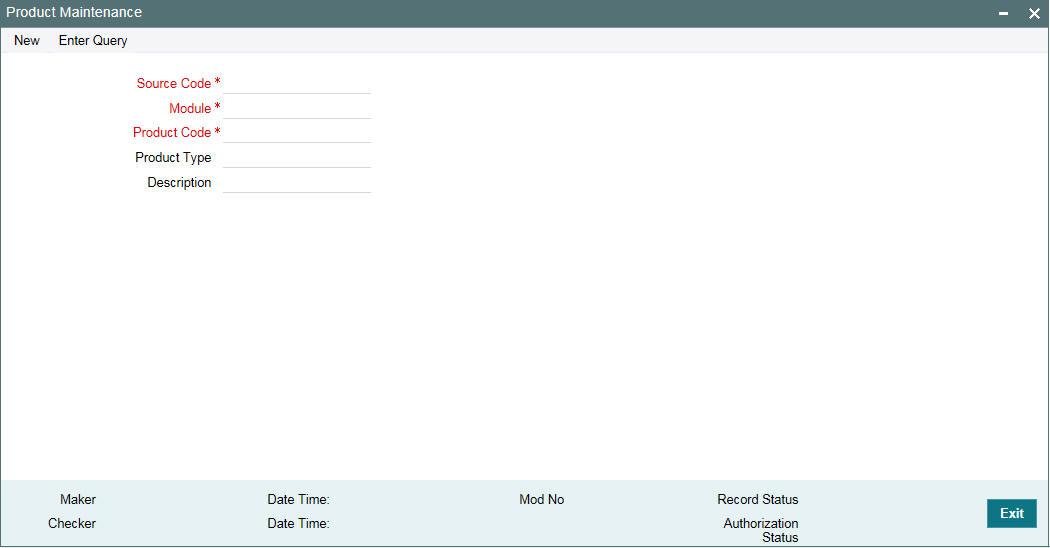
You can maintain Product details for ELCM in the ‘Product maintenance’ screen.
You can invoke this screen by typing ‘GEDPROD’ in the field at the top right corner
of the Application tool bar and clicking the adjoining arrow button.
Source
Specify the associated source for the product processor from the adjoining option list.
Module
Specify the associated module for the product from the adjoining option list.
Product Code
Specify the associated product code.
Product Type
Specify the type of the product.
Description
Specify the brief description of the product
Note
Product code and source code is used in product validation as a part of product maintenance.
2.3.2 Amount Tag Maintenance
You can maintain amount tag using the ‘Amount Tag’ screen. You can invoke this screen by typing ‘ ‘GEDAMTAG’ in the field at the top right corner of the Application tool bar and clicking on the adjoining arrow button.
The ‘Amount Tag’ screen is shown below.

You can specify the following here:
Amount Tag
Specify the amount tag.
Description
Enter a brief description of the amount tag.
After entering the details, click the ’Save’ button.
2.3.3 Category Maintenance
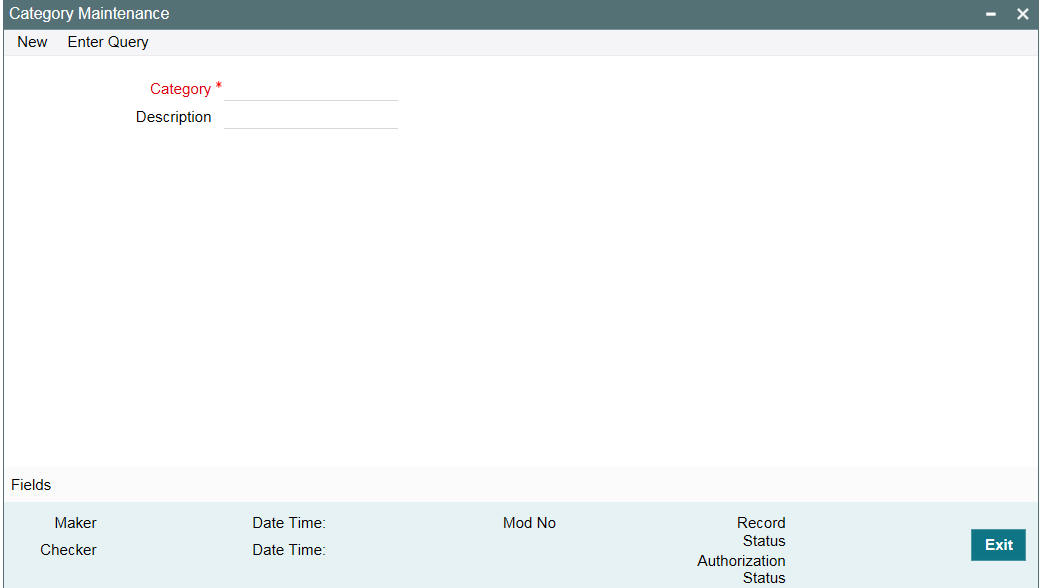
You can maintain categories using the ‘Category Maintenance’ screen. You can invoke this screen by typing ’GEDCATGY’ in the field at the top right corner of the Application tool bar and clicking on the adjoining arrow button.
The ‘Category Maintenance’ screen is shown below.
You can specify the following here:
Category Name
Specify the category name.
Description
Enter a brief description of the category.
After entering the details, click ’Save’ button.
2.3.4 Exposure Type Maintenance
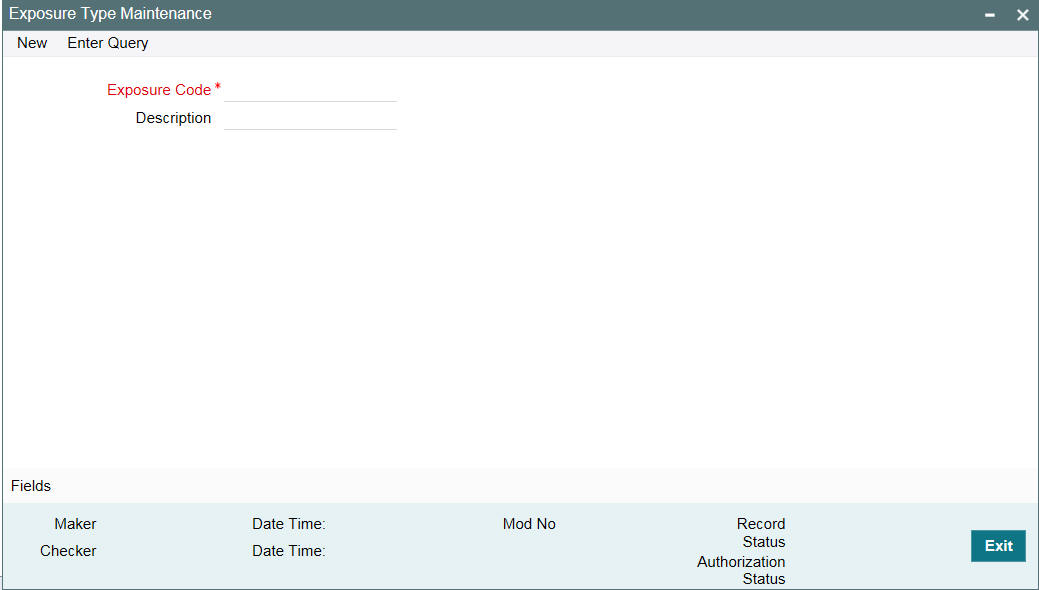
You can maintain exposure types using the ‘Exposure Type Maintenance’ screen. You can invoke this screen by typing ‘GEDEXPTY’ in the field at the top right corner of the Application tool bar and clicking on the adjoining arrow button.
The ‘Exposure Type Maintenance’ screen is shown below.
You can specify the following here:
Exposure Name
Specify the exposure name.
Description
Enter a brief description for the exposure.
After entering the details, click the ’Save’ button.
2.3.5 Group Maintenance
You can invoke the ‘Group Maintenance’ screen by typing ‘GEDGROUP’ in the field at the top right corner of the Application tool bar and clicking on the adjoining arrow button.
The ‘Group Maintenance’ screen is shown below
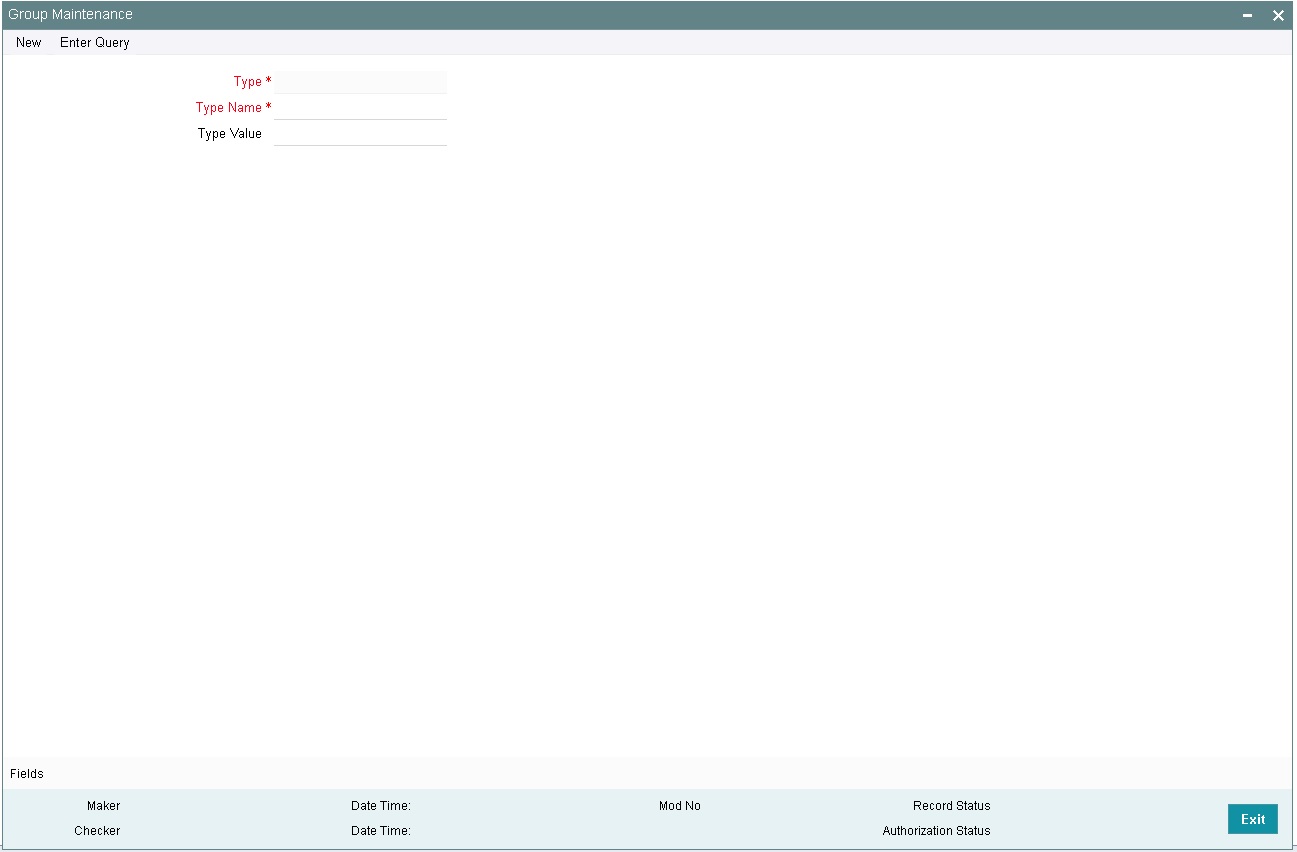
You can specify the following here:
Type Name
Specify the type name.
Type Value
Specify the type value.
After entering the details, click ’Save’ button.
2.3.6 Haircut Maintenance
You can invoke the ‘Haircut Maintenance’ screen by typing ‘GEDHCUTT’ in the field at the top right corner of the Application tool bar and clicking on the adjoining arrow button.
The ‘Haircut Maintenance’ screen is shown below:
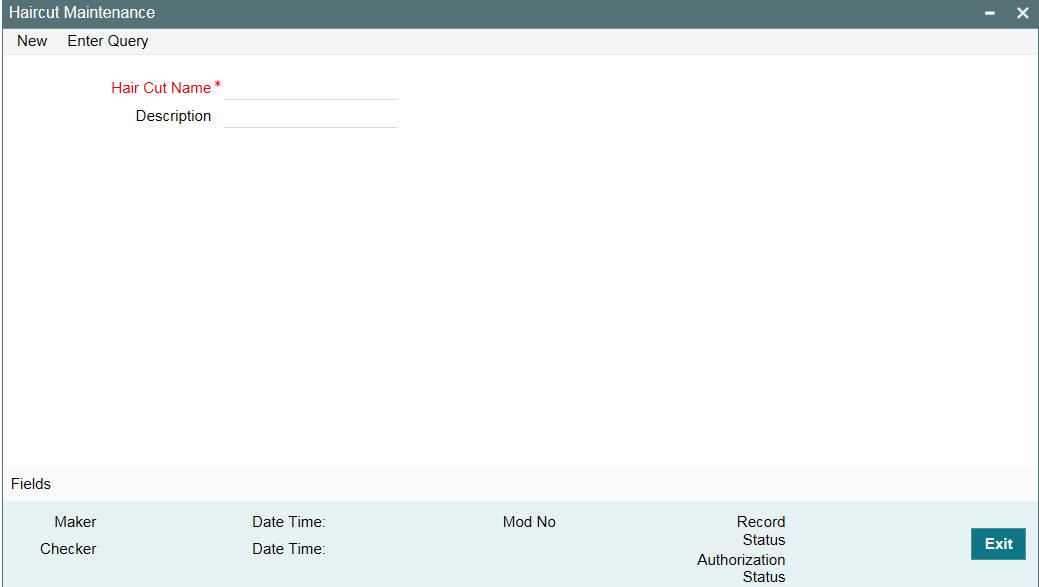
You can specify the following here:
HairCut Name
Specify the haircut name.
Description
Enter a brief description for the haircut.
After entering the details, click ’Save’ button.
2.3.7 Location Maintenance
You can maintain the location details using the ‘Location Maintenance’ screen. You can invoke this screen by typing ‘GEDLOCCD’ in the field at the top right corner of the Application tool bar and clicking on the adjoining arrow button.
The ‘Location Maintenance’ screen is shown below:
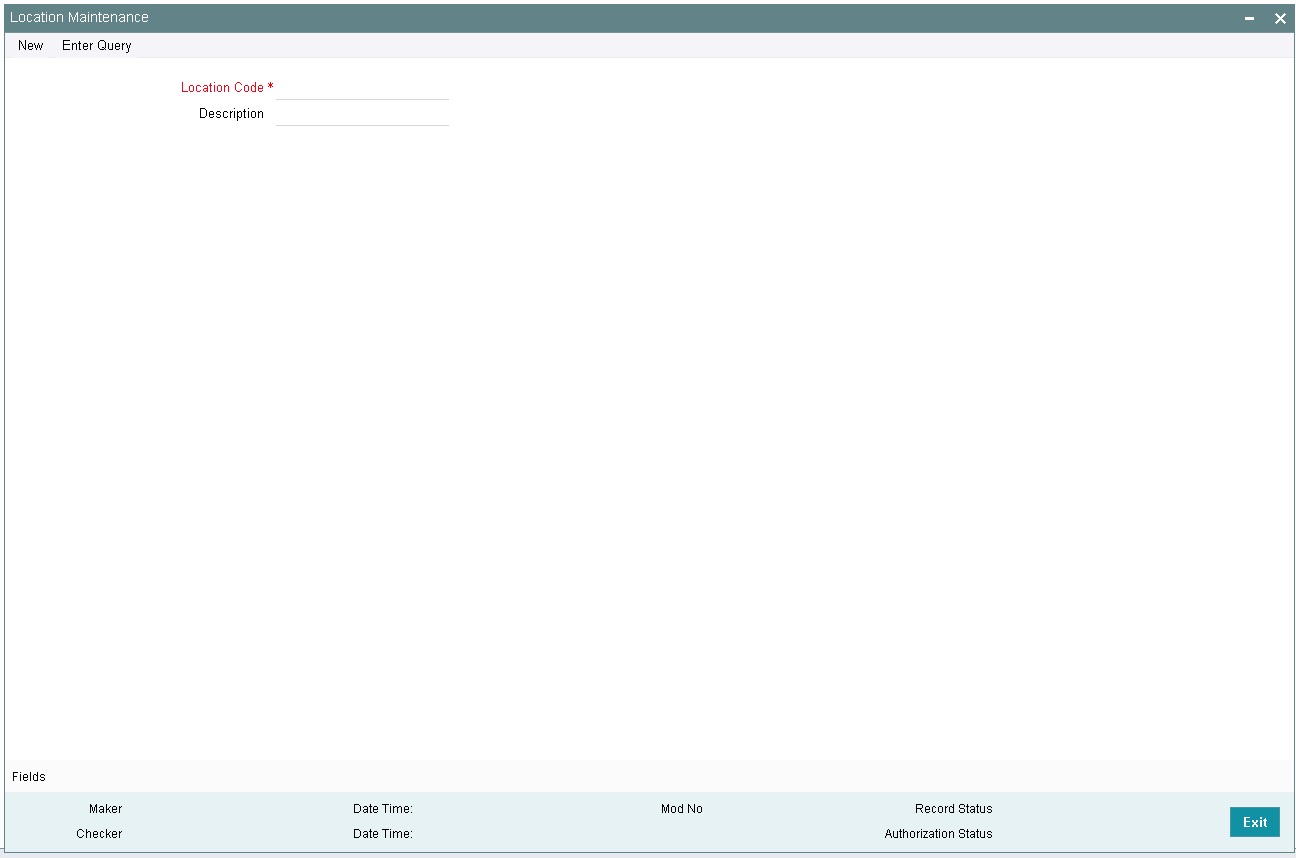
You can specify the following here:
Location Code
Specify the location code.
Description
Enter a brief description for the location.
After entering the details, click the ’Save’ button.
2.3.8 Maintaining Restriction Details
You can invoke the ‘Restriction Maintenance’ screen by typing ‘GEDRESTY’ in the field at the top right corner of the Application tool bar and clicking the adjoining arrow button.
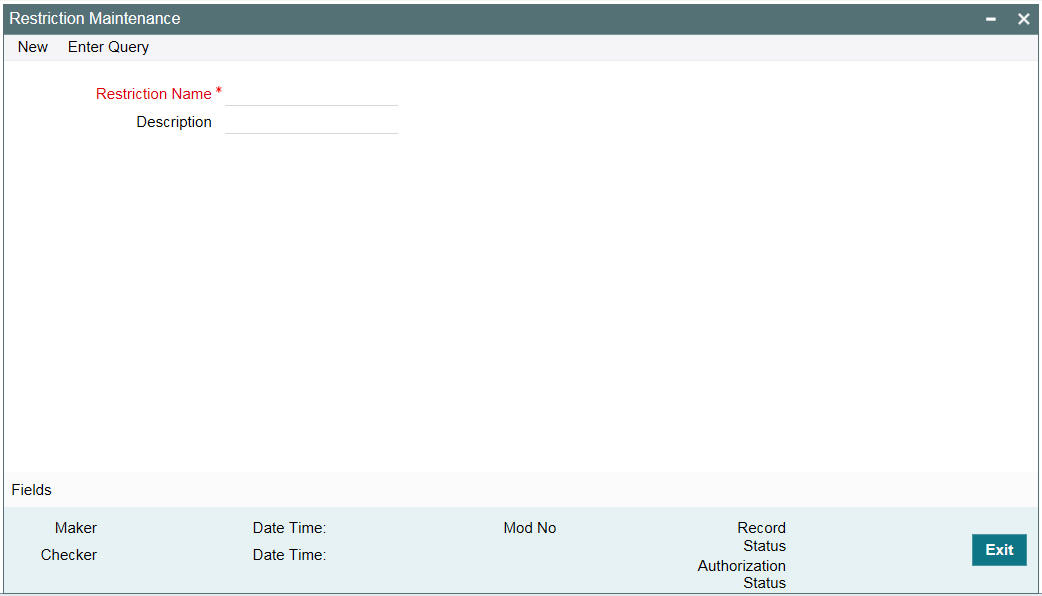
Here you can maintain Restriction names and their values.
2.3.9 Static Type Maintenance
You can maintain different type of channels in the ‘Static Type Maintenance’ screen. You can invoke the ‘Static Type Maintenance’ screen by typing ‘GEDTYPES’ in the field at the top right corner of the Application tool bar and clicking on the adjoining arrow button.
The ‘Static Type Maintenance’ screen is shown below:
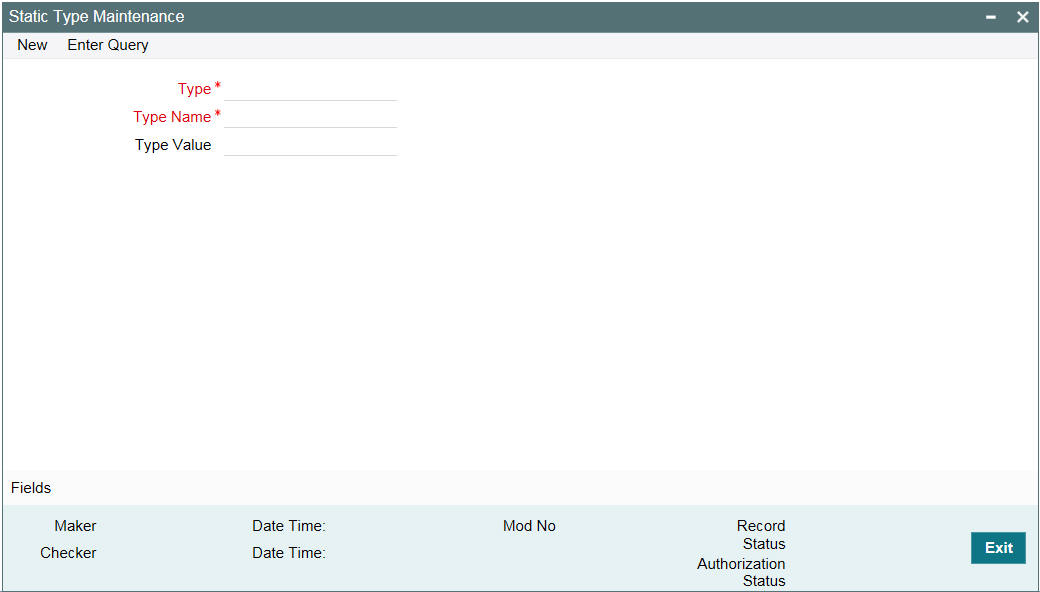
You can specify the following here:
Type
Specify the static type.
Type Name
Specify the type name.
Type Value
Specify the type value.
After entering the details, click the ’Save’ button.
2.4 Maintaining Agency Details for Credit Rating
You can maintain details regarding credit rating agencies in the ‘Credit Rating Agency Maintenance’ screen. Using this maintenance you can record the credit rating codes published by each credit rating agency. This can later be linked to Liability Maintenance (GEDMLIAB) for specifying customer rating published by an agency.
You can invoke the ‘Credit Rating Agency Maintenance’ screen by typing ‘GEDCREDT’ in the field at the top right corner of the Application tool bar and clicking the adjoining arrow button.
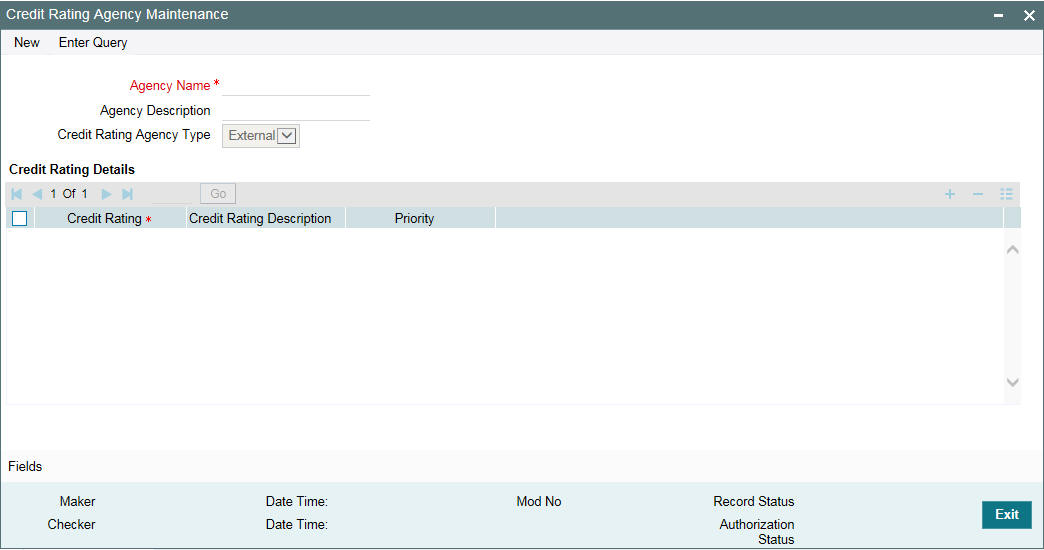
Agency Name
Specify the name of the credit rating agency here.
Agency Description
Give a brief description of the credit rating agency here.
Credit Rating Agency Type
You can select the credit rating agency type as ‘Internal’ or ‘External’. This gets defaulted to ‘Liability Maintenance’ and ‘Facilities Maintenance’ screen.
Credit Rating Details
Specify the following here:
Credit Rating
Specify the unique Credit Rating code/ID.
Credit Rating Description
Give a brief description of the Credit Rating code/ID.
Priority
Specify the priority of the credit rating to enable sequencing of the credit rating. According to this sequencing, an automatic review of the sanctioned limit facility offered to the customer is initiated if the customer’s credit rating is downgraded (Rule 6 as maintained in the GEDLMPRS screen). You can assign the credit rating to a specific customer in the STDCIFCR screen.
Note
This is only for information and not for processing.
2.5 Maintaining User Defined Status
You may want to specify certain statuses for liabilities such as Normal, Partially Defaulting, Defaulting, and so on. Such statuses can be maintained first in the ‘User Define Status Maintenance’ screen. You can name and describe statuses here. This can later be linked to Liability Maintenance (GEDMLIAB) and Facilities Maintenance (GEDFACLT) for choosing the status of the liability or facility respectively.
You can invoke the ‘User Define Status Maintenance’ screen by typing ‘GEDUDFNS’ in the field at the top right corner of the Application tool bar and clicking the adjoining arrow button.
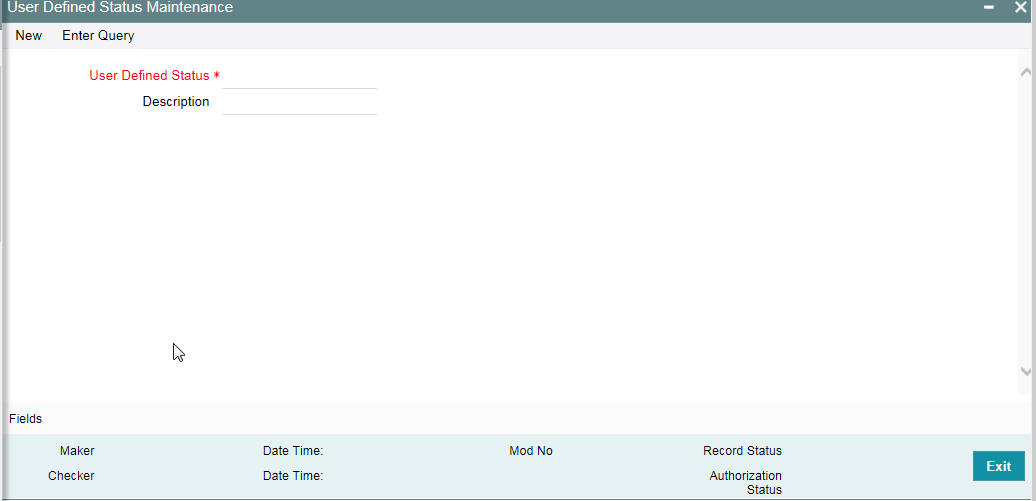
User Defined Status
Provide a name/ID for the status here.
Description
Give a brief description of the status.
2.6 Liability Maintenance
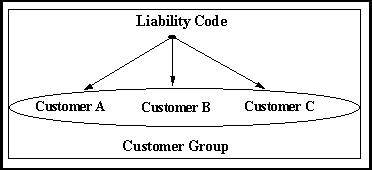
Every customer of your bank who enjoys credit facilities should be assigned or linked to a Liability Code category. Several customers can be linked to the same Liability Code. Liability linkage can be in two ways.
● Single Liability linked to multiple customers (that is, a Customer Group)
● Single Liability linked to only one customer
Single Liability Linked To Multiple Customers
Here multiple customers are linked to same the Liability Code and all restrictions/facilities maintained at liability level are shared to all the customers.
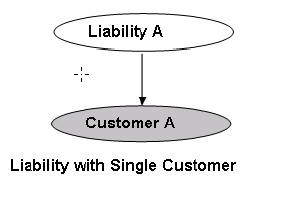
Single Liability Linked To Only One Customer
Here a liability is linked to only one customer and all restrictions/facilities maintained at liability level are applicable to that customer alone.
You can create or modify the Liabilities using the ‘Liability Maintenance’ screen.
You can invoke the ‘Liability Maintenance’ screen by typing ‘GEDMLIAB’ in the field at the top right corner of the Application tool bar and clicking the adjoining arrow button.
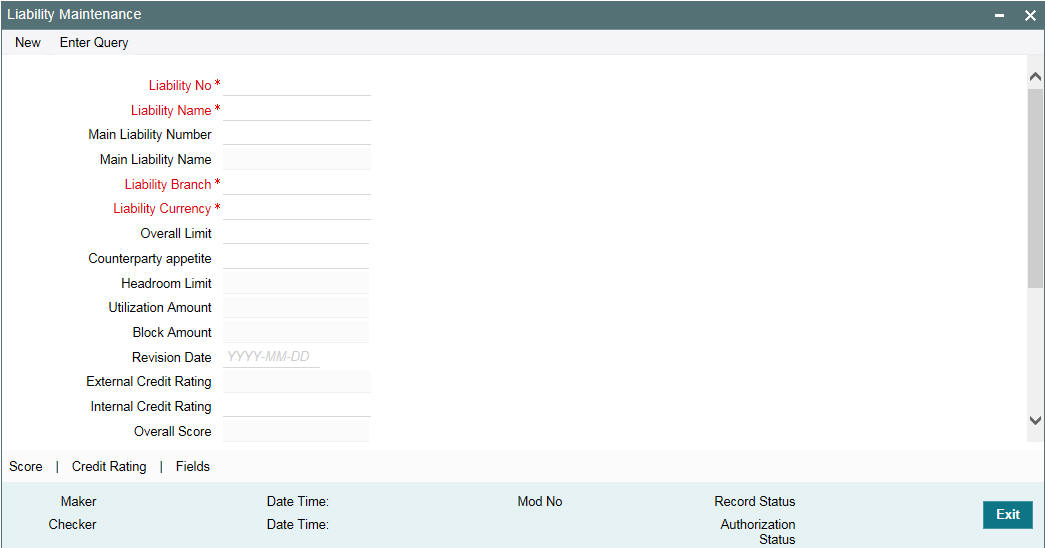
Liability Number
Specify the Liability Number. If the Liability Number is customer group then all customers under this group should have same Liability Number.
Liability Name
Specify the Liability Name here. A maximum of 35 characters are allowed in this field.
Main Liability Number
Specify the main liability number. The adjoining option list displays a list of liability numbers maintained in the system. Choose the appropriate one.
The child liability’s overall limit amount should not exceed the parent liability’s overall limit amount.
During Utilization transaction, the utilization is tracked for both the specified Liability and also the parent Liability to which it is linked.
Liability Branch
Specify the branch in which liability is associated.
Liability Currency
Specify the currency with which the liability is associated. If Liability currency is different from Limit currency specified in Global Exposure Parameter then the Liability amount is converted to the limit currency.
Overall limit amount $1 of the customer liability exceeds the maintained Internal Lending Limit Equivalent Amount $2.
Note
You can modify the Liability Currency after authorization if:
- There are no lines, collaterals or collateral pools linked to the liability.
- The liability is not utilized.
- The liability is not the parent liability for another child liability
Overall Limit
Specify the overall limit amount for that liability. Value entered in the field is in the currency stated above. If liability is of customer group then overall limits stated is common to all the customers.
Note
System validates the overall limit amount with the internal lending limit equivalent amount. If the overall limit amount is greater than the Internal Lending Limit Equivalent Amount then the system displays an override message as ‘Overall limit amount $1 of the customer liability exceeds the maintained Internal Lending Limit Equivalent Amount $2.’
Counterparty Appetite
Specify the total project limit which can be sanctioned to the customer. This value must be less than or equal to the overall limit of the liability. If it exceeds the overall limit under the liability, the system displays an error message.
Head Room Limit
The system displays the future dated headroom available to the customer.
Utilization Amount
This field displays the utilized amount for that liability Id at any point in time. You cannot edit this display.
Revision Date
Specify the date on which your bank would want to revise the limit for the liability. The limit check continues irrespective of the date maintained here. The revision date must be greater than the start date and can also be left blank.
Credit Rating
The primary credit rating maintained in the credit rating sub screen is displayed here.
Note
These details are maintained only for information and have no processing impact.
Overall Score
Specify the overall credit score for the liability. The given credit score is supplemented by the multiple credit score details, if any entered in the Credit Score sub screen.
Note
These details are maintained only for information and have no processing impact.
Liability Category
Select the Liability Category from the list available here. The 'Category' entered in 'Category Maintenance' screen is displayed here.
Liability Clean Risk Limit
This limit is captured in the 'Customer Maintenance' (STDCIF) screen. This field is populated only when the liability is created using 'Auto liability Creation' option in 'Customer Maintenance' screen.
This field is only display field and no other validations as such are supported.
Secondary Clean Risk Limit
This limit is captured in the 'Customer Maintenance' (STDCIF) screen. This field is populated only when the liability is created using 'Auto liability Creation' option in 'Customer Maintenance' screen.
This field is only display field and no other validations as such are supported.
Secondary PSTL Clean Risk Limit
This limit is captured in the 'Customer Maintenance' (STDCIF) screen. This field is populated only when the liability is created using 'Auto liability Creation' option in 'Customer Maintenance' screen.
This field is only display field and no other validations as such are supported.
User Defined Status
Specify status of the liability (For example, NORM for normal, BLOCKED, and so on).
Unadvised
Select this check box if the Liability is unadvised. For any transaction involving an unadvised liability, you are notified.
Netting Required
Select this check box to indicate that the netting amount defined in the 'Account/Contract Balance for Netting' screen is updated in the 'Netting Contribution' field for the specific facility for which 'Netting required' check box is enabled.
This is only for information and not for processing.
You can have the Facility to display the Netting Amount in the 'Netting Contribution' screen. For more details on this feature, refer the section 'Including Netting Amount in Facility’s Netting Contribution' in this document.
Note
Limits tracking at liability level is based on liability tracking at the parameterization level.
- If the liability tracking is enabled, then the system allows you to track the limit at the liability level.
- Disabling liability tracking does not allow tracking limits at liability level.
Tanked Utilization
The system computes and displays the utilization amount that can be set in the 'Tanked Utilization' field.
As part of EOD process, the utilization amount is set in the 'Tanked Utilization' field.
After BOD process, this utilization amount is updated for the liability which is linked to the transaction as per the contract and the amount is cleared from the 'Tanked Utilization' field.
2.6.1 Specifying Liability Scores
When a Liability is created, Bank assess the credit score for the liability. You can link score parameters in the Liability Score screen. Here you can also assign a score value to each. You can maintain multiple score parameters for the single Liability. To invoke the Liability Score screen, click ‘Score’ button.
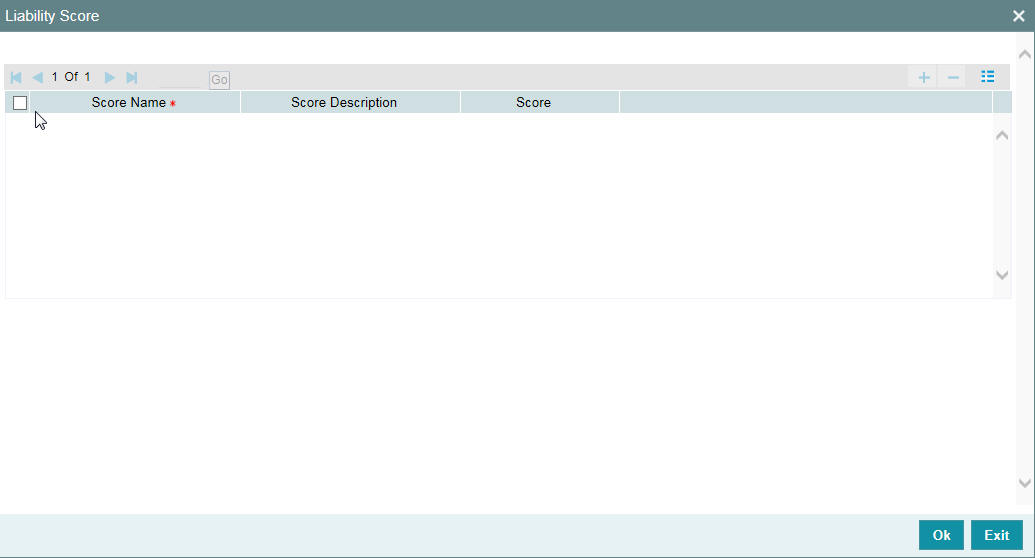
Score Name
Select the score name from the adjoining option list.
Score Description
Give a brief description on the liability score.
Score
Specify the liability score here.
2.6.2 Specifying Liability Credit Rating
When liability is created, bank assess the credit rating for the liability. You can link all the rating parameters to which the liability is associated to in the liability ‘Credit Rating’ screen. Click ‘Credit Rating’ button to invoke this screen.
Here you can select the ‘Agency Name’ with its credit rating for the liability. Out of all the credit ratings, you may select one as the primary rating for external ‘Credit Rating Agency Type’.
When credit rating from a particular credit agency is selected, it is mandatory to signify the effective date from which credit rating is applicable.
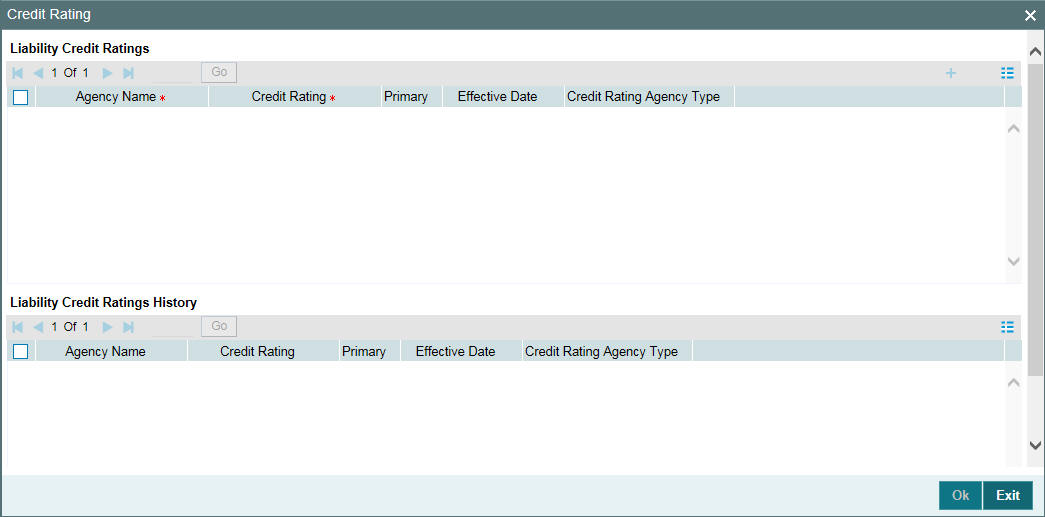
Liability Credit Ratings
Agency Name
Select the credit rating agency name from the adjoining option list.
Credit Rating
Select the credit rating from the adjoining option list. You can maintain multiple external credit rating agencies for a single liability. However, you can maintain only one internal credit rating agency for a single liability.
Primary
Select one of the credit ratings as the primary rating for liability.
The ratings from multiple agencies of external type can be assigned to a liability of which one should be marked as primary.
Only one internal credit rating can be maintained which by default is considered 'Primary'.
The internal credit rating marked as 'Primary' is shown in 'Internal Credit Rating' field of 'Liability Maintenance' screen. Similarly, external credit rating marked as 'Primary' is shown in 'External Credit Rating' field of 'Liability Maintenance' screen.
The modification of primary from one agency to another is allowed.
Note
When a primary credit rating at liability level is modified to a rating with a lower priority, then an alert is triggered. The alert of such liabilities is displayed in the dashboard.
Effective Date
Specify the effective date while associating a credit rating to a liability.
It is mandatory to select the effective date while associating the credit rating. Effective date can be backdated and not future dated. For the same agency, multiple ratings cannot be assigned for the same effective date.
If multiple modifications are done for a particular agency with the same effective date, then the last modification is taken into consideration.
Credit Rating Agency Type
Select the agency type as “Internal’ or External’. These values get defaulted from the ‘Credit Rating Agency Maintenance’ screen.
Liability Credit Ratings History
Credit Rating and Effective Date
If the credit rating for a specific agency is modified along with the Effective date at a liability level, then the existing is recorded in the ‘Liability Credit Ratings History’ section.
2.7 Maintaining Customer to Liability Link
You can link customers to liabilities using the ‘Customer to Liability Link Maintenance’ screen.
Multiple customers can be linked to a liability. But a customer cannot be linked to multiple liabilities. You can invoke the ‘Customer to Liability Link Maintenance’ screen by typing ‘GEDCULIK’ in the field at the top right corner of the Application tool bar and clicking the adjoining arrow button.
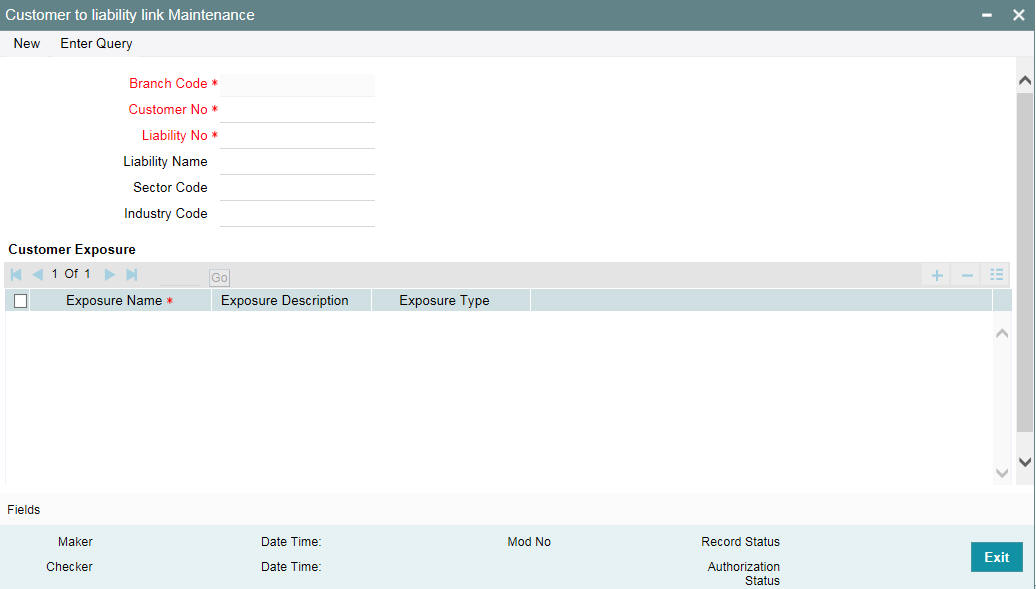
Branch Code
The branch code of the branch in which the Customer to liability link maintenance is done gets defaulted here.
Customer Number
Specify customer’s number to whom the liability has to be linked.
Liability Number and Liability Name
Specify the number and name of the Liability to be linked to the customer.
Customer Exposures
Here you can specify different Exposure Types for the customer. This allows you to track the exposure of a customer. Multiple exposure names can be linked (For example, IT for Sector exposure, INDIA for country exposure) to track exposures.
- Exposure Type - The exposure type for the exposure, as maintained in the 'Track Exposure Maintenance' screen gets defaulted here based on the 'Exposure Name' chosen.
- Exposure Name - Specify an exposure name which is maintained in the 'Track Exposure Maintenance' screen.
- Exposure Description - The description for the exposure, as maintained in the 'Track Exposure Maintenance' screen gets defaulted here based on the 'Exposure Name' chosen.
Note
- The Customer to Liability Link Maintenance is mandatory, when limits tracking are required under any of the Oracle FLEXCUBE modules.
- In the 'Customer Exposures' section, the 'exposure name' LOV displays the exposures having utilization type as 'Customer' maintained in the 'Track Exposure Maintenance' (GEDTREXP) screen.
- The Customer to Liability Link Maintenance is mandatory, when account for the customer is created using account class, for which limit check flag is set as ‘Y’ at preference sub-system screen.
- When account for the customer is created without maintaining liability and later the liability is created and linked to the customer, the ‘Limits tracking’ option at the cus- tomer level would be automatically selected by the system.
Note
In case of granular access, link customers to liabilities details maintained for allowed list of customers are allowed to view, query, modify, authorize, re-open, copy, delete, and so on based on the user/users preferences selected in ‘Access Group Restriction’ tab available in the ‘User Maintenance’ screen. For more information, refer to Common Core - Security Management System User Guide.
2.8 Covenant Maintenance
As a part of maintaining Collaterals/Facilities, you may collect certain required information and documents from the customer regularly. Based on the information you may revise the collateral/facility details. The information or documents collected from the customer is termed as a ‘Covenant’.
You can maintain Covenant details in the ‘Covenant Maintenance’ screen. You can invoke the ‘Covenant Maintenance’ screen by typing ‘GEDCOVNT’ in the field at the top right corner of the Application tool bar and clicking the adjoining arrow button.
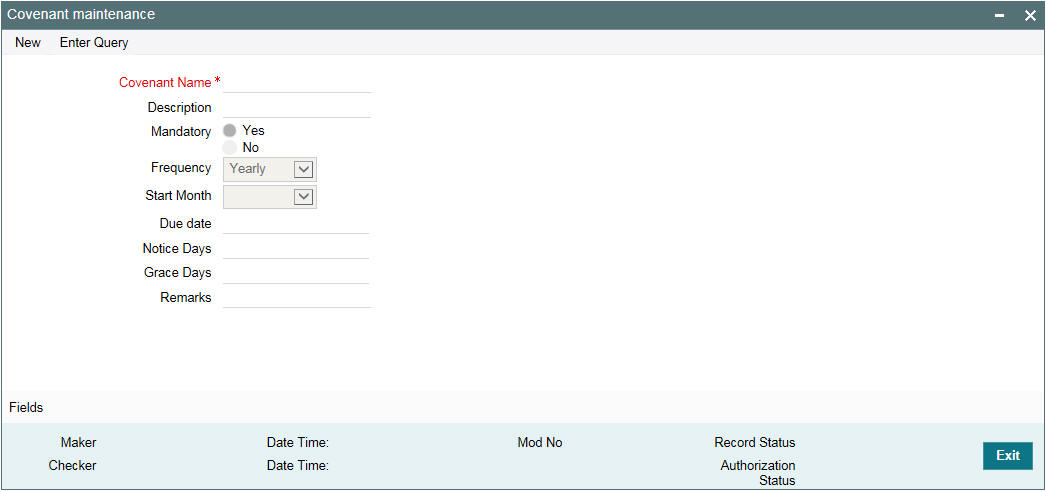
Covenant Name and Description
Specify the Covenant Name for which information is entered. A maximum of 50 alpha numeric characters are allowed in this field. You may also provide a brief description of the covenant maintained.
Mandatory
Indicate whether convent defined is mandatory as part of the process or not. You may change this preference when this convent is linked to a Collateral/Facility.
Frequency
Select a frequency according to which the Convent has to collected/revised. You may select any one of the following frequencies:
- Yearly
- Half Yearly
- Quarterly
- Monthly
- Weekly
- Daily
Start Month
If the Frequency select is Yearly, Half Yearly, Quarterly, or Monthly, then specify the start month here.
Due Date
Specify the number of days after which the covenant needs to be reviewed.
Grace days
Specify the Grace days past the next due/revision date allowed for renewal of the covenant.
Notice days
Specify the number of days in the notice period. The notice period starts from days prior to the revision date of the covenant.
Remarks
Specify the remarks about the covenant maintenance.
This can be linked to 'Collateral Category Maintenance' screen ( GCDCOLCA), 'Collaterals Maintenance' screen (GCDCOLLT) and 'Facilities Maintenance' screen (GEDFACLT) for choosing the covenant that is to be linked to the Collateral Category, Collaterals, and Facilities respectively. On choosing the covenant in these screens the values maintained for the covenant is defaulted. You can modify these defaulted values.
2.9 Collateral Types Maintenance
Collateral Types maintenance is used to capture all types of Collateral which your bank accepts. Collateral Types information would be required when creating a new collateral in the system.
You can maintain Collateral Types in the ‘Collateral Types Maintenance’ screen. You can invoke the ‘Collateral Types Maintenance’ screen by typing ‘’GCDCOLTY’ in the field at the top right corner of the Application tool bar and clicking the adjoining arrow button.
This maintenance is at done at the bank level and all branches would be able to access this information.
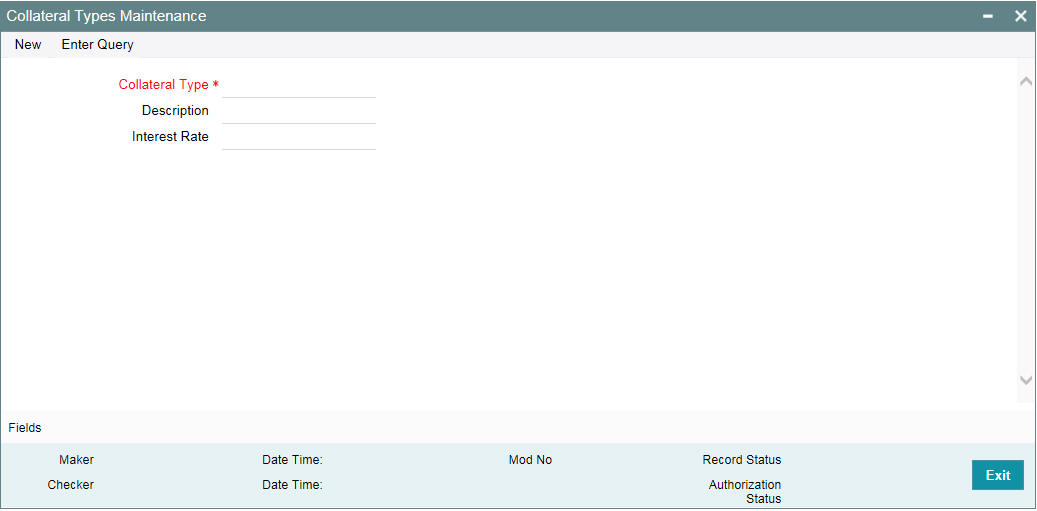
Collateral Type
Specify the Collateral Type. A maximum of 20 characters are allowed in this field.
Description
Give a brief description of Collateral Type. A maximum of 50 characters are allowed in this field.
Interest Rate
Specify the interest rate to be applied on the customer account when customer uses the overdraft facility against the collateral type.
This can later be linked to 'Collateral Category Maintenance' screen (GCSCOLCA), 'Issuer Maintenance' screen (GCSISSUR) and 'Securities' screen (GCSSECTY) for choosing the collateral type.
2.10 Collateral Category Maintenance
You can define the category to which collateral belongs to using the ‘Collateral Category Maintenance’ screen.
If you want to register charge for the collateral created under this category, then you need to configure charge registration details.
You can invoke the ‘Collateral Category Maintenance’ screen by typing ‘GCDCOLCA’ in the field at the top right corner of the Application tool bar and clicking the adjoining arrow button.

Category Name and Category Description
Specify the Category name and a brief category description of the category.
Collateral Type and Collateral Description
Specify the collateral type. Collateral description defaults from the ‘Collateral Types Maintenance’ screen based on Collateral type chosen.
Category Type
Indicate the category type from the following:
- Sovereigns
- Bank
- Corporate
Revision Date
Specify the date on which the Collateral Category has to be revised
Collateral Exposure Type
Indicate the Collateral Exposure Type from the following:
- Secured
- Unsecured
- Liquid Type
Asset Type
Specify the asset type here - Tangible or intangible
Charge Registration Required
Select this check box for recording registration details for the charge on collateral.
As part of charge registration, notice with required details to be sent to the appropriate registration authority. Filing statement has to be sent to registrar for charge creation.
Charge Renewal Frequency
A charge can be renewed as per the charge renewal frequency and units. For every charge type, a ‘Charge Renewal Frequency’ can be configured. You can select ‘Yearly’, ‘Half Yearly’, ‘Quarterly’, ‘Monthly’, ‘Weekly’, and ‘Daily’
Units
Specify the units.
For example, if 'Frequency' is selected as 'Monthly' and 'Unit' is selected as '2', then the system updates the charge end date considering perfection date + 2 months.
Filing Lead Days
Specify the lead days. The days before charge expiry date. You can renew the charge registration during these days
Reval Frequency
Select the frequency with which the collateral has to be re-evaluated. You can select one of the following:
- Yearly
- Half Yearly
- Quarterly
- Monthly
- Weekly
- Daily
Reval Start Month
If the Frequency select is Yearly, Half Yearly, Quarterly, or Monthly, then specify the start month here.
Due Date On
Specify the number of days after which the covenant needs to be reviewed.
Collateral Haircut Category
You can select a 'Haircut Name' created in 'Haircut Maintenance' screen and assign a 'Haircut Percentage' under 'Collateral Haircut Category' section.
Here you can maintain several collateral haircut categories for use in the credit risk mitigation process. Multiple haircut records for same collateral category can be maintained.
Specify the following haircut details for each record:
- Haircut Name and Description
- Haircut Percentage - Specify the final Haircut (offset margin)
- Primary - Select a haircut as the primary haircut value for the Collateral Category
2.10.1 Maintaining Covenant Details for Collateral Category
To maintain the Covenant details for the Collateral Category, use the ‘Collateral Category’ screen. Invoke this screen by clicking ‘Covenant’ button.
The Revision Date for the covenant is generated based on the Frequency and Due date.
For example, if the collateral category covenant for a particular covenant name the frequency is monthly and the due date is 15. Based on the date of creation of the collateral covenant category (say 20 JAN 2008) the revision date is 15-Feb-2008.
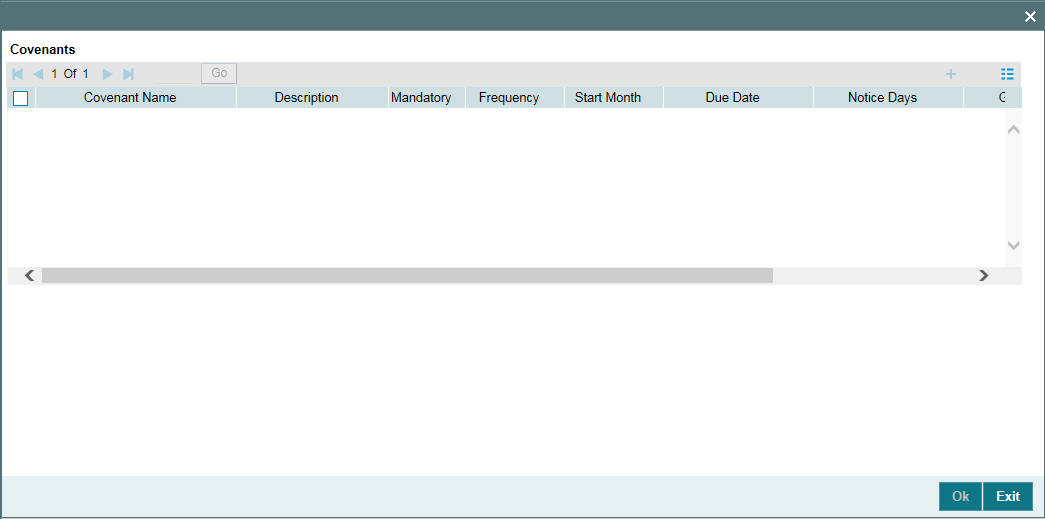
Covenant Name
Specify a covenant name which is maintained in the ‘Covenant Maintenance’ screen.
Description
The description for the covenant, as maintained in the 'Covenant Maintenance' screen gets defaulted here based on the 'Covenant Name' chosen.
Mandatory
The mandatory field for the covenant, as maintained in the 'Covenant Maintenance' screen gets defaulted here based on the 'Covenant Name' chosen.
Grace Days
The grace days for the covenant, as maintained in the 'Covenant Maintenance' screen gets defaulted here based on the 'Covenant Name' chosen.
This can later be linked to 'Collaterals Maintenance' screen (GCDCOLLT) for choosing the collateral category while maintaining the collateral.
Notice Days
Specify the notice days that is the number of days prior to next revision date of the covenant. The period during the notice days will be the notice period.
Frequency
Select the frequency with which the collateral has to be revaluated. You can select one of the following:
- Yearly
- Half Yearly
- Quarterly
- Monthly
- Weekly
- Daily
Due Date
Specify the number of days after which the covenant needs to be reviewed.
Start Month
If the Frequency select is Yearly, Half Yearly, Quarterly or Monthly, then specify the start month here.
Remarks
Specify the remarks about the covenant details for collateral category maintenance.
2.11 Maintaining Charge Type
In ‘Charge Type Maintenance’ screen, you can configure different charge type like mortgage, hypothecation, lien, and so on.
You can invoke the ‘Charge Type Maintenance’ screen by typing ‘GCDCHGTY ‘ in the field at the top right corner of the Application tool bar and clicking the adjoining arrow button.
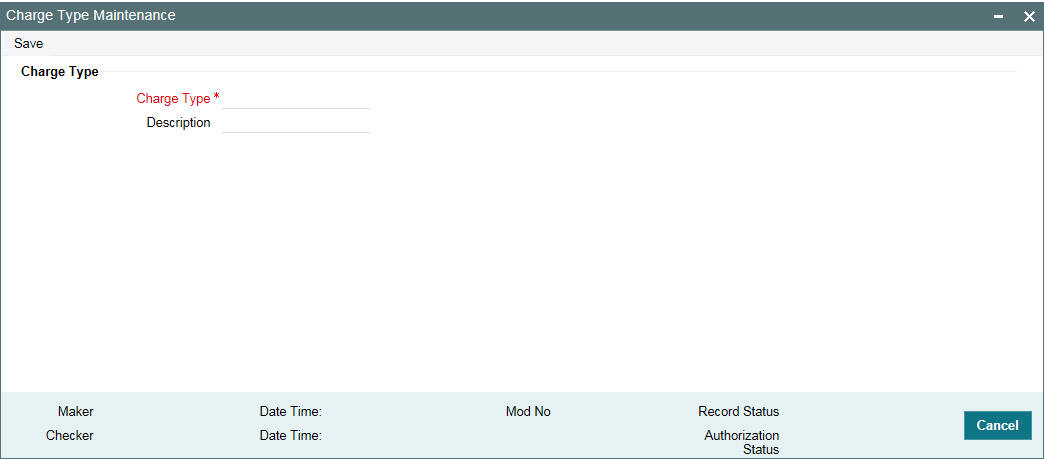
Charge Type
Specify the charge type like mortgage, hypothecation, lien and so on
Description
Specify brief description of charge type.
2.12 Issuer Maintenance
A customer is granted credit on the basis of his/her credit worthiness. The credit worthiness of a customer depends on the assets constituting the customer’s portfolio. The type of collateral that a customer offers can be in the form of marketable or non-marketable securities.
Marketable collaterals, driven by market forces, tend to fluctuate unpredictably. You may hence need to monitor your bank’s exposure to issuers of such collateral. The details of the issuer and limit for his securities can be defined using the ‘Issuer Maintenance’ screen.
You can invoke the ‘Issuer Maintenance’ screen by typing ’GCSISSUR’ in the field at the top right corner of the Application tool bar and clicking the adjoining arrow button.
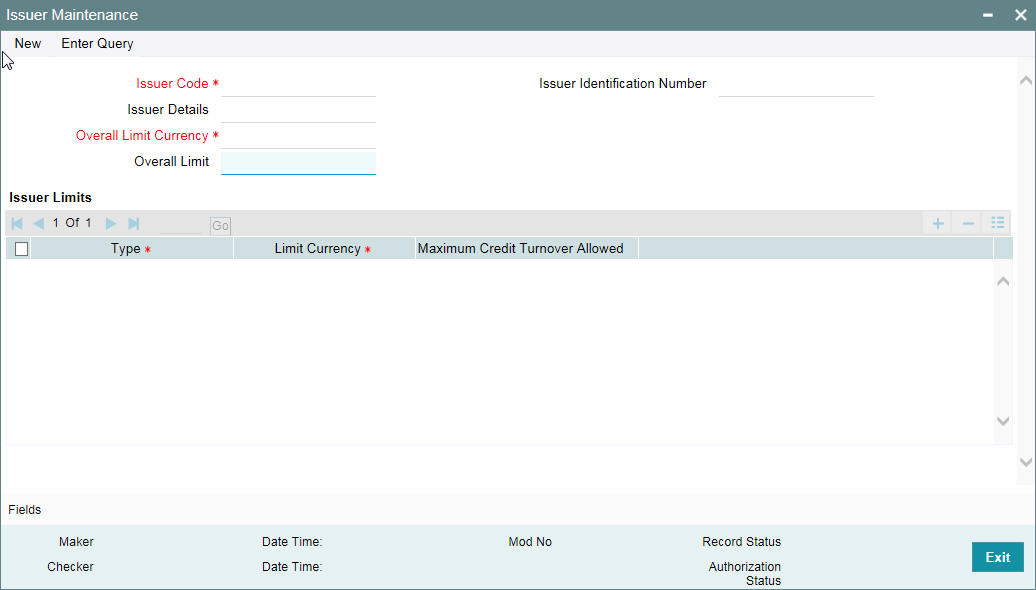
Limits for the issuers of Collateral can be setup at the following two levels:
- Overall limit for each Issuer
- Limit for the Securities issued by an Issuer
Issuer Code
Each Issuer whose securities the bank accepts should be assigned a unique code. The Issuer is identified by this code. This code can also be used to retrieve information about the issuer. Specify the Issuer Code here.
Overall Limit
Specify an Overall Limit for the issuer here. This limit indicates the maximum limit beyond which your bank would not like to expose itself to the Issuer.
An issuer can issue different types of market based securities; these could be debentures, shares, bonds, and so on. By defining an overall limit for an Issuer, the bank can limit its exposure to the issuer.
When the total of all the collateral given by the customer in the form of market- based securities exceeds the overall limit specified for the Issuer, the system shows an appropriate message indicating that the limit has been exceeded.
Overall Limit Currency
Specify the currency in which the Overall Limit is specified.
Issuer Identification Number
Select the Issuer Identification Number if any, from the adjoining option list.
The option list for 'Issuer Identification Number' displays only those customers that belong to the bank and those that have been created in the application using the screen 'Customer Maintenance' (STDCIF) with the check box 'Issuer Customer' enabled.
Issuer Details
Specify in brief any additional details of the issuer.
Issuer Limits for Collateral Types
An Issuer of Securities may issue different types of securities. These can be used by a customer as collateral for credit availed from the bank. The securities used as collateral can be debentures, shares, bonds, commercial papers, and so on. These securities can therefore be classified under different Collateral Types too.
For each security type that your bank accepts as collateral from the issuer, you can specify a limit indicating the maximum exposure amount (in value) to the issuer for this security type.
When the total of the collateral given by the customer in the form of a particular collateral type exceeds the limit set for the Issuer, the system will show you a notification.
You can define Issuer Limits for different collateral types under Issuer Limits. You can maintain several collateral types here, with their respective Limit Currencies and Limit Amounts.
Collateral Type
Select the collateral type for which issuer limits are being specified.
Limit Currency
Select the limit currency from the adjoining option list.
2.13 Securities Maintenance
The credit facilities granted to the customers of the bank under a credit line can be backed by the securities that the customer offers as collateral. You can maintain the details of all such securities in the Oracle FLEXCUBE ELCM system. These details can then be used for determining the:
- Limit granted under a particular security
- Credit worthiness of a security when it’s used as collateral
Since market based securities (Marketable Securities) are driven by market forces, the price of such securities tends to rise or fall in value. These fluctuations have a direct effect on the collateral value of the security. You can update the value of the collateral if the value of the security that backs it fluctuates beyond the increase and decrease sensitivity that has been specified.
You can capture details of marketable securities in the ‘Securities’ screen as shown below. You can invoke the ‘Securities Maintenance’ screen by typing ‘ GCDSECTY’ in the field at the top right corner of the Application tool bar and clicking the adjoining arrow button.
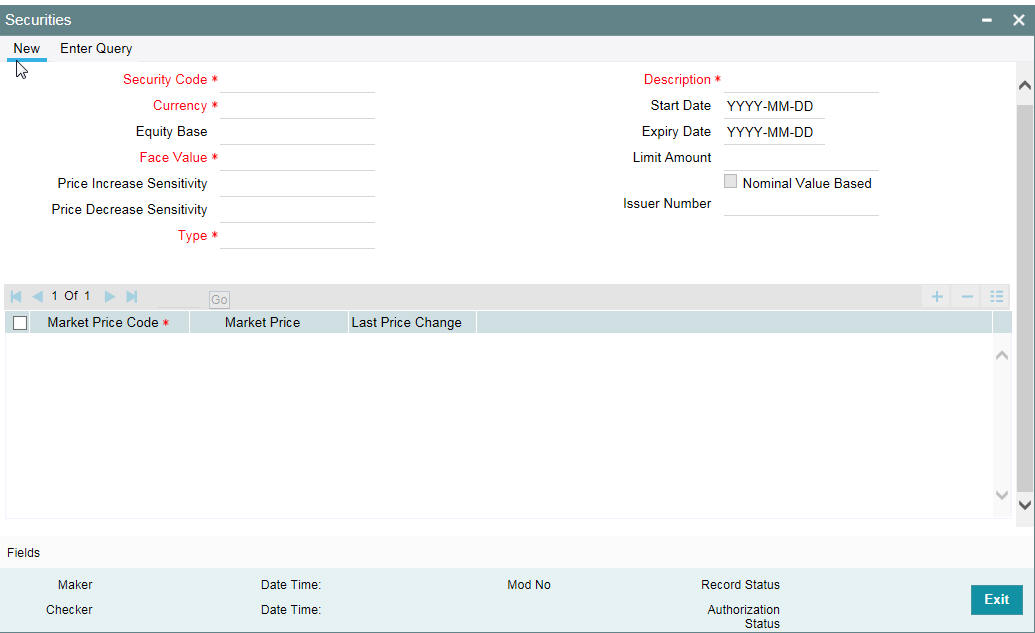
Details of the marketable security that your bank accepts as collateral can specified in the above screen.
Security Code
Assign a unique ID to identify the security. This ID is called the Security Code. This ID is used while maintaining Collateral for a market value based Security.
Description
Describe in brief the security maintained.
Equity Base
Here you can specify the equity base for the security, that is, the total amount raised by the issue of this security. This entry is for information purposes only.
For example, Gem granites have come out with Debentures 98 and have raised US $1 Million through this issue. This US $1M that Gem Granites has raised constitutes the equity base for Debentures 98.
Price Increase Sensitivity and Price Decrease Sensitivity
If the value of collateral is backed by a marketable security (whose value is driven by market forces) you may want to revalue the collateral, so that its value reflects the current market price of the security, which backs it. To do so, you should specify your sensitivity to the security.
The price sensitivity of a security is expressed as a percentage. You should specify the percentage increase or decrease (the upper and lower limits) above or below the current market price, which should trigger the revaluation process. The revaluation process revaluates the collateral if the price of the securities that backs it fluctuates above or below the sensitivity you have defined.
Price Increase Sensitivity
Denotes the percentage increase in the market price that should trigger a revaluation of the Collateral. This means, if the current market price of the security rises above the old market price by the percentage you have defined as the increase sensitivity for the security, then the revaluation process happens.
For example, Consider a case wherein you have specified the price increase sensitivity for Debentures 98 to be 15%. If the market price of the security has increased from $100 to $125. At this rise in the market price of the security (which is 25% above the old market value), the revaluation process is triggered off, so that the Collateral value of the security reflects its current market value.
Price Decrease Sensitivity
Denotes the percentage decrease in the market price of the security that should trigger a revaluation of the Collateral. This means, if the current market price of the security falls below the old market price by the percentage you have defined as the decrease sensitivity for the security, the revaluation process happens.
For example, Consider a case wherein you had specified the price decrease sensitivity of Debentures 98 to be 15%. If the market price of the security has decreased from US $100 to US $75. At this fall in the market price of the security (which is 33.33% below the old market value of the security), the revaluation process is triggered off, so that the Collateral value of the security reflects it s current market price.
Currency
Specify the currency to be associated with the Security using the list available here. Once authorized this entry cannot be changed.
Face Value
Specify the face value of the security. A maximum of 50 numeric characters are allowed here.
Collateral Type
Specify the collateral type here.
Issuer Code
Specify the issuer code for the customer for whom the securities are collected. The list of issuers is available here.
Start Date and Expiry Date
Specify Start date and Expiry Date of the security in these fields
Limit Amount
Specify the limit amount for the particular security.
Nominal Value Based
Select this check box if the collateral value is to be calculated on the nominal value based for a particular security.
Security Price
If the security is quoted in different markets, its value would differ in different markets. You can maintain the various market prices of the security under the Security Price table.
You can specify the following details here:
● Price Code - Indicates the market place for which the price is quoted
● Market Price - Price of the security in that market
● Last Price Change - Date on which the price was last changed
This can later be linked to 'Collaterals Maintenance' screen (GCDCOLLT) for maintaining market value based collaterals.
2.14 Maintaining Insurance Company Details
You can maintain the details of insurance companies using ‘Insurance Company Details’ screen. You can later use this information while maintaining details of collaterals offered by customers.
To invoke this screen, type ‘GCDINSCO’ in the field at the top right corner of the application toolbar and click the adjoining arrow button.
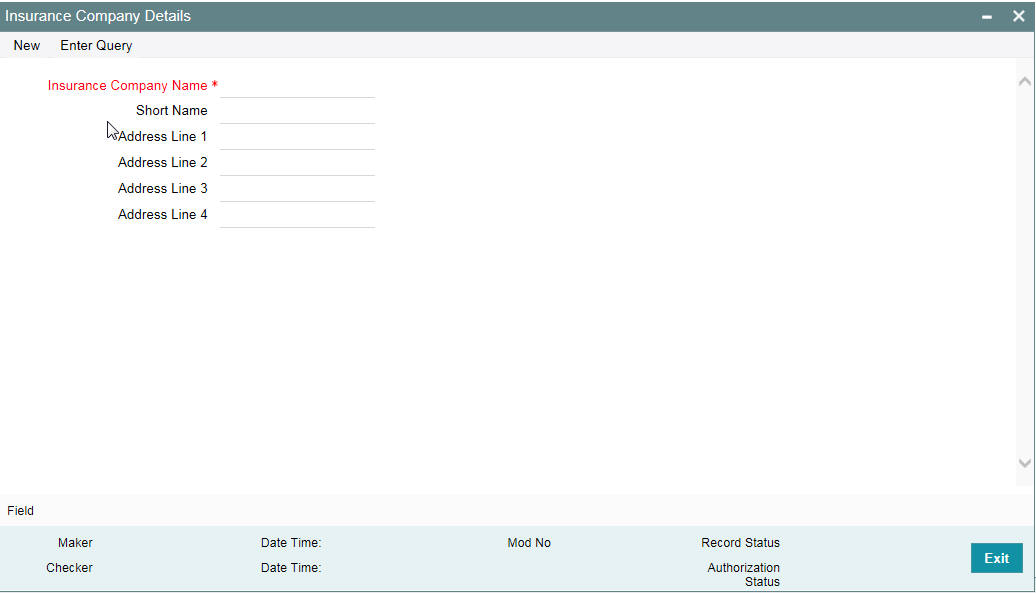
Specify the following details:
Insurance Company Name
Specify the name of the insurance company. This must be a unique name, using which you can identify the insurance company later.
Short Name
Specify a short name to identify the insurance company.
Address Line 1 to 4
Specify the address of the insurance company in the fields provided. Once you have specified the above details, save the maintenance.
2.14.1 Viewing Insurance Company Summary
You can view the summary of all insurance company details maintained in the system using ‘Insurance Company Details Summary’ screen. To invoke this screen, type ‘GCSINSCO’ in the field at the top right corner of the application toolbar and click the adjoining arrow button.
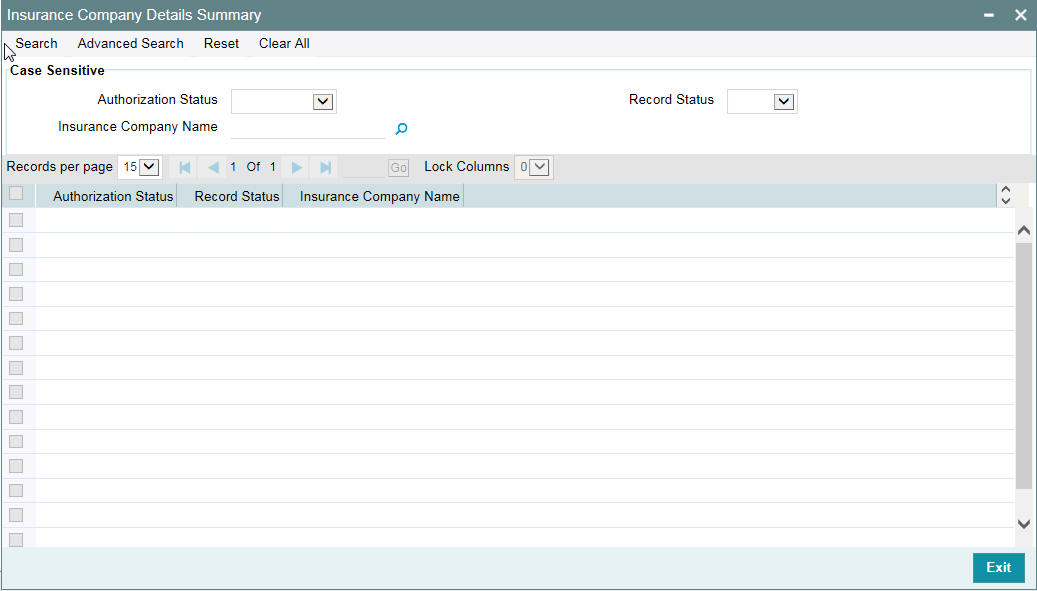
You can search for the records based on one or more of the following parameters:
- Authorization status
- Record status
- Insurance company name
Once you have specified the search criteria, click ‘Search’ button. The system displays the following details of the insurance companies that match the filter criteria.
- Authorization status
- Record status
- Insurance company name
2.15 Maintaining Insurance Types
You can maintain insurance types using ‘Insurance Type Details’ screen. You can later use this information while maintaining details of collaterals offered by customers.
To invoke this screen, type ‘GCDINSTY’ in the field at the top right corner of the application toolbar and click the adjoining arrow button.

Specify the following details:
Insurance Type
Specify the insurance type. This must be a unique value, using which you can identify the insurance type later.
Description
Specify a brief description of the insurance type.
Once you have specified the above details, save the maintenance.
2.15.1 Viewing Insurance Type Summary
You can view the summary of all insurance types maintained in the system using ‘Insurance Type Details Summary’ screen. To invoke this screen, type ‘GCSINSTY’ in the field at the top right corner of the application toolbar and click the adjoining arrow button.
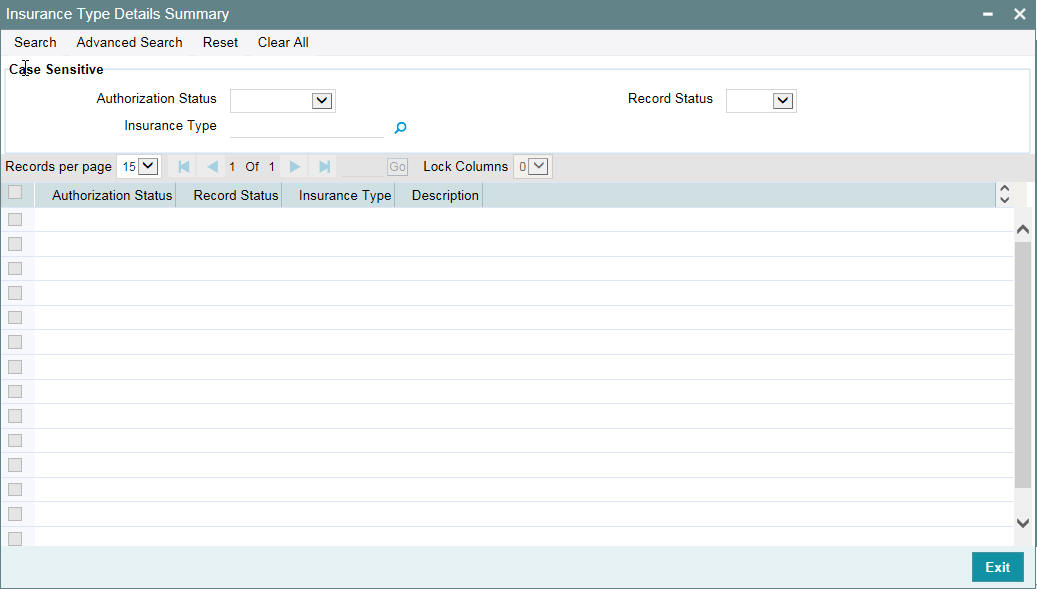
You can search for the records based on one or more of the following parameters:
- Authorization status
- Record status
- Insurance type
Once you have specified the search criteria, click ‘Search’ button. The system displays the following details of the insurance companies that match the filter criteria.
- Authorization status
- Record status
- Insurance type
- Description of the insurance type
2.16 Collaterals Maintenance
In the ‘Collaterals Maintenance’ screen, you can maintain the details of collateral offered by customers for the credit that the bank grants under a credit line. The collateral can either be market value based or non market value based.
You can invoke the ‘Collaterals Maintenance’ screen by typing ‘GCDCOLLT’ in the field at the top right corner of the Application tool bar and clicking the adjoining arrow button.
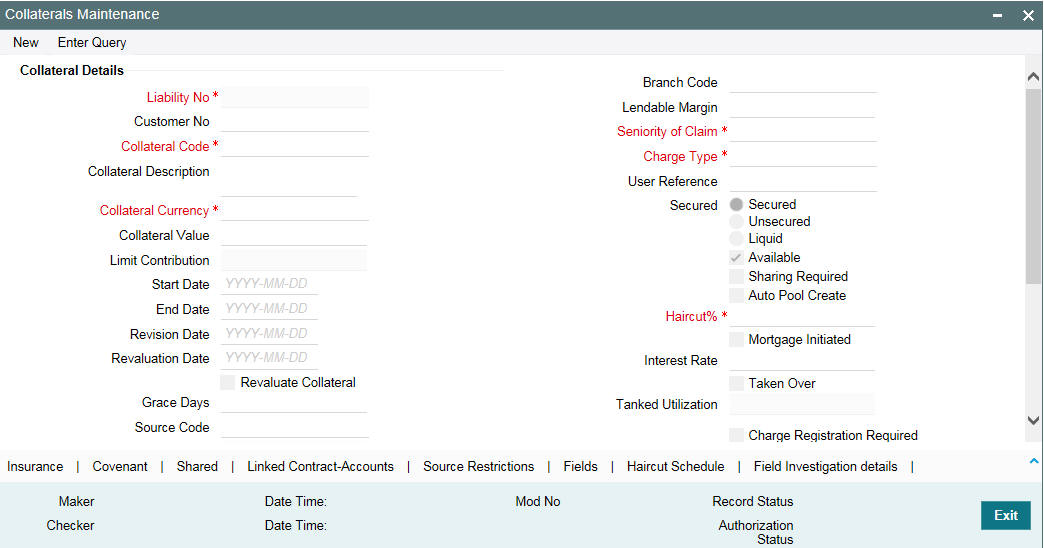
In the above screen you can specify the contribution that the collateral should make to the limit assigned to a customer under a credit line.
The collateral details which are associated with a collateral code can be picked up during collateral pool maintenance.
Liability Number
Collaterals issued have to be linked to a liability. Specify the liability Number for which the collateral is linked.
Customer Number
Specify the customer number to which the collateral is linked.
You must select the liability number before specifying the customer number. Once the liability number is specified, the system enables the option list for customer number. This option list displays all valid customer number that are linked to the liability number selected above. You can select the appropriate one.
The selection of collateral customer linkage is optional.
Collateral Code
Specify the Collateral Code here. A maximum of 20 alphanumeric characters are allowed in this field. Each Collateral code should be unique.
Collateral Description
Give a brief description of the collateral here.
Remarks
Specify remarks, if any.
Collateral Currency
Specify the currency in which the Collateral has to be maintained. Once authorized you cannot change this entry.
Collateral Value
The collateral value depends on whether the security is Market Value based or Non-Market Value based.
If it is market value based then the collateral value is calculated as shown in the following examples.
Example
Input in case of a nominal quoted security:
Nominal Amount |
Price Code |
Market Price |
Collateral Value [(Market price/100) * Nominal Amount] |
10,00,000 |
BOM1 |
65 |
(65/100) * 10,00,000=650000 |
5,00,000 |
BOM2 |
70 |
(70/100) * 5,00,000= 350000 |
7,00,000 |
BOM3 |
80 |
(80/100) * 7,00,000= 560000 |
Input in case of a unit quoted security:
Number of Units |
Price Code |
Market Price |
Collateral Value (Number of Units x Market price) |
65 |
BOM1 |
120 |
7800 |
70 |
BOM2 |
130 |
9100 |
40 |
CAL1 |
95 |
3800 |
If it is Non-Market Value based then the user has to enter the collateral value manually.
Note
- In case 'Collateral Value' is increased, then in the 'Collateral Pool Maintenance' screen, the 'Linked Amount' is modified only if the 'Amount Basis' is 'Percentage'. If the 'Amount Basis' is 'Amount', then the 'Linked Amount' is retained as is. However based on the changed 'Collateral Value', the 'Linked Percent Number' is re-calculated considering the retained amount.
- In case 'Collateral Value' is decreased, modified amount of collateral is validated with all the 'Linked Amount' in various pools (either percentage or amount) and if the total amount linked is less than modified amount then modification of collateral value is to be allowed. Wherever 'Percentage' is considered for linking collateral to pool, the linked amount is re-calculated accordingly with modified amount of collateral.
- If the 'Collateral Value' decreased amount is less than the total 'Linked Amount' in various pools, then an appropriate error message appears.
Limit Contribution
On save of the collateral, system calculates the amount contribution that will be applicable for the collateral after applying the hair cut percentage on the collateral value.
Example
Collateral is valued at $1000, and you want to offer the customer credit only worth $980. This amount is 98% of the collateral contribution.
(1000 - 980) / 1000 = 2% is the Hair cut percentage
This means you want to have a lendable margin of 98%.
For instance, if you enter the lendable margin percentage, then based on the value you enter, the hair cut is calculated as described above and the limit contribution is calculated.
Start Date and End Date
Specify the tenor of the collateral using the Start Date and End Date fields. The collateral is considered effective only during this period.
The start date indicates the date from which the collateral becomes effective. The end date that you specify indicates the date on which the collateral ceases to exist. On the end date, the credit limit, of the credit line backed by the collateral, it is reduced by the amount that the collateral contributes to the credit line.
Revaluation Date
Specify the date on which the next revaluation has to be done.
Revision Date
Specify the date on which this collateral has to be revisited for review.
Grace Days
Specify the grace days past the next due/revision date allowed for collateral.
Source Code
Indicates the product processor name from where the transaction has been originated. This field will be as part of Header section (Source Code).
Revaluate Collateral
Select the check box if the collateral is to be revaluated.
Category Name
Select the name of the category from the adjoining option list.
Utilization Amount
The system computes and displays the utilization amount to the Collateral, if a collateral is directly linked to a contract or account and not through a pool.
Available Amount
The system defaults the available amount for the collateral, on save of the collateral record.
Liability Name
Specify the liability name that needs to be linked with the collateral.
Block Amount
When the collateral is linked to the collateral pool, the system computes and displays the amount to be blocked. The blocked amount is computed based on the linked percentage or linked amount specified when a collateral is linked to a Collateral Pool.
For example, Collateral ‘Collat1’ is created with collateral value of 10000 USD. And 60% of Collat1 is linked to a Collateral Pool, then the blocked amount of the collateral is updated as 6000 (that is, 60% of 10000). The available amount of collateral is updated as 4000(10000-6000). The available amount of the collateral is arrived by using the below mentioned calculation
Available amount = Collateral value – utilization – blocked amount.
The available amount of pool is increased to the extent of linked amount in the pool currency. Any utilization to the pool will only impact the available amount and the utilization of the pool and not the collateral.
Commitment Reference Number
Specify the commitment reference number.
Collateral Zip Code
Specify the zip code of the collateral.
Branch
By default, the branch code in which collateral is created is displayed here and you cannot modify this value.
Lendable Margin
On save of the collateral, system calculates the lendable margin for the collateral. This value will be:
100 – Haircut (%).
Seniority of Claims
Specify the seniority of bank’s claim on the property.
Charge Type
Charge type is mandatory and available as LOV which comes from 'Charge Type Maintenance' screen.
User Reference Number
Specify the User Reference Number for the collateral.
Secured Type
Indicate the Collateral Exposure Type here. A particular collateral category can be of a Secured or Unsecured or Liquid Type.
Available
This check box is selected by default, indicating that the collateral is available for linking to the collateral pool. You can deselect this so as to manually freeze this collateral.
If the ‘Available’ check box is deselected then the collateral is frozen, that is, it is not available for subsequent linkages to new collateral pools. The collateral’s current links to collateral pools is not affected.
Note
- As a part of Collateral Pool creation for a Liability, only those collaterals which are checked as ‘Available’ is displayed in the list for collateral pool linkage.
- Collateral which was ‘Available’ and which has been linked to pool/pools can mod- ified as unavailable later on. Unavailable collateral is not available for subsequent new collateral pool linkages, but the old linkages is not affected.
Sharing Required
Select this check box to indicate that the collateral can be shared among several liabilities. If you choose this option, you can specify the details of such liabilities in the ‘Shared Details’ screen.
If this option is chosen then in collateral maintenance for a collateral pool, the list of collaterals will include shared collaterals too. As part of Collateral Revaluation, pools with the shared collaterals are considered for revaluation.
Auto Pool Create
Select this check box if you want to automatically create a collateral pool as and when you create collateral. To facilitate this, it is essential that the ‘Available’ option is selected for the collateral. The system then creates a collateral pool with the following characteristics when you save the record:
- The Pool Code, Pool Description, and Pool Currency are the Collateral Code, Collateral Description and Collateral Currency respectively.
- The Collateral Linked Percentage is set at 100%.
Note
You cannot modify this option after you authorize the collateral.
Haircut (%)
Specify the bank’s margin (Haircut) to be assigned for Collateral. Haircut% applied by the system as per the Haircut schedule would be displayed here.
Mortgage Initiate
On authorizing a mortgage loan account, the system creates collateral and collateral pool based on the property details maintained in the Mortgage Tab and ‘Mortgage Initiated’ option is checked automatically.
For more information about the 'Mortgage Initiated' field, refer to the ‘Linkages Tab’ section of the ‘Mortgages’ user manual.
Interest Rate
The interest rate to be applied if the customer uses overdraft facility against the collateral gets defaulted here when you select the ‘Collateral Category’.
Taken Over
Taken Over collateral is checked if the collateral linked to CI/CL account is taken over.
Tanked Utilization
The system computes and displays the utilization amount that can be set in the 'Tanked Utilization' field.
As part of EOD process, the utilization amount is set in the 'Tanked Utilization' field.
After BOD process, the utilization amount is updated for the collaterals that is linked to the transaction as per the contract and the amount is cleared from the 'Tanked Utilization' field.
Charge Registration Required
Select this check box for recording registration details for the charge on collateral.
As part of charge registration, notice with required details can be sent to the appropriate registration authority. Filing statement has can be sent to registrar for charge creation.
Note
Based on the collateral category selected, charge registration details are defaulted during customer collateral maintenance which can be modified.
Charge Renewal Frequency
A charge can be renewed as per the charge renewal frequency and units. For every charge type, a ‘Charge Renewal Frequency’ can be configured. You can select ‘Yearly’, ‘Half Yearly’, ‘Quarterly’, ‘Monthly’, ‘Weekly’.
Units
Specify the units.
For example, if 'Frequency' is selected as 'Monthly' and 'Unit' is selected as '2', then the system updates the charge end date considering perfection date + 2 months.
Filing Lead Days
The filing lead days is number of days prior to charge expiry date during this period charge can be renewed.
2.16.1 Specifying the Insurance Details
You may enter the Insurance details for a Collateral through the ‘Insurance Maintenance’ screen. Click ‘Insurance’ button to invoke this screen.
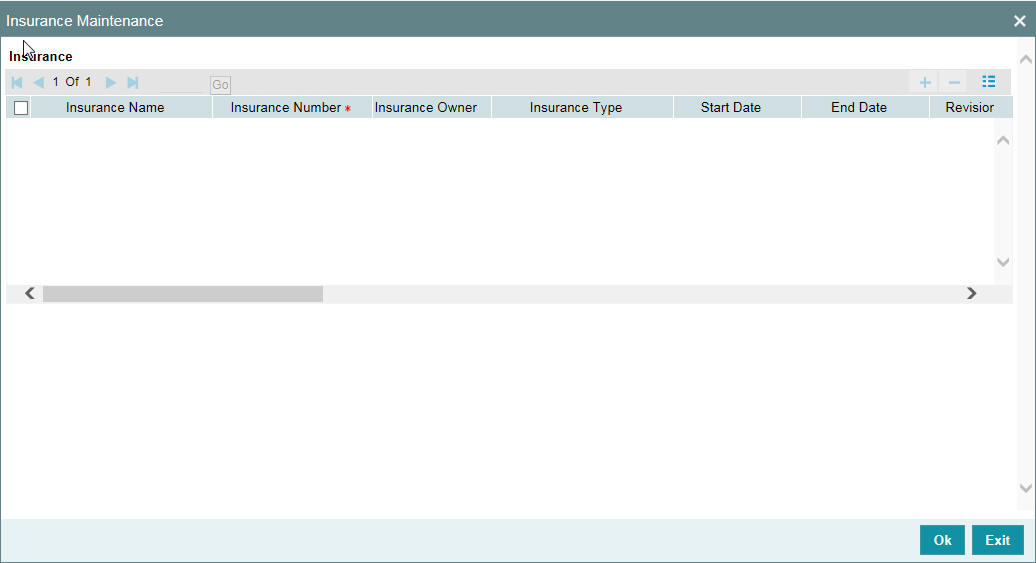
You can specify the following details:
Insurance Name
Specify the name of the Insurance/Insurance Company associated with the collateral. The option list displays all valid insurance company names maintained in the system. Select the appropriate one.
Insurance No
Specify the insurance number under which that insurance has been issued.
Insurance Owner
Select the owner of the insurance policy from the adjoining drop-down list. This list displays the following values:
- Bank
- Customer
Insurance Type
Specify the type of the insurance that is associated with that collateral. The option list displays all valid insurance types maintained in the system. Select the appropriate one.
Start Date
Specify the start date for that insurance.
End Date
Specify the end date for that insurance.
Revision Date
Specify the date of revision of the insurance.
Notice Days
On choosing a covenant name, system defaults the Notice Days details, that is, the number of days prior to next revision date of the covenant. You can modify this value. The period during the notice days is the notice period.
Insurance Premium Periodicity
Select the premium periodicity of the insurance. The list displays the following values:
- Daily
- Weekly
- Monthly
- Quarterly
- Half Yearly
- Yearly
Premium Status
Specify the insurance premium payment status.You can select one of the following premium payment statuses from the drop-down list.
- Paid
- Unpaid
Premium End Date
Specify the end date of the premium payment.
Insurance Amount
Specify the insured amount of the policy.
Insurance Currency
Specify the insurance currency of the policy.
Cover Date
Specify the date from which the insurance policy is valid. The insurance cover date cannot be greater than the collateral expiry date.
Insurance Code
Specify the insurance code of the policy for which you want to capture insurance details.
Premium Currency
Specify the currency of the premium to be paid.
Premium Amount
Specify the amount of the premium to be paid.
Remarks
Specify the remarks about the insurance details.
Policy Assigned to Bank
Specify whether the insurance policy has been assigned to the bank or not. You can select one of the following options.
- Yes
- No
Coverage
Specify the coverage details of the insurance.
2.16.2 Specifying Covenant Details
The covenant details can be captured for a collateral in the ‘Covenant Maintenance’ screen. Click ‘Covenant’ button to invoke this screen.
Multiple covenants can be entered in the screen shown below. You can customize the details of each covenant recorded here.
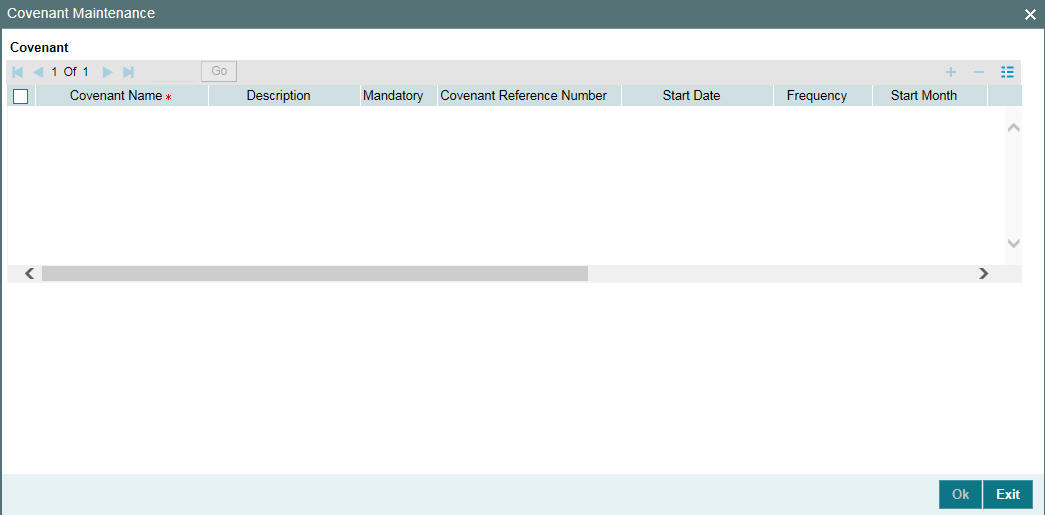
Covenant Name
Select the covenant name from the list available here. The list displays the covenant names maintained in Covenant Maintenance screen. Based on the covenant selected, all other details of the covenant maintenance are brought here.
Mandatory
Mandatory/Non mandatory details are shown on choosing a covenant name. You may change this.
Covenant Reference Number
Specify the covenant reference no for the covenant being maintained.
Start Date
Start date is defaulted to current business date when covenant is linked to a collateral and you cannot modify it.
Frequency
Frequency of the specified covenant is defaulted here based on the details maintained at ‘Covenant Maintenance’ screen. You may change the frequency shown here on choosing a covenant name.
Start Month
Start month of the specified covenant is defaulted here based on the details maintained at ‘Covenant Maintenance’ screen. You may change the 'Start Month' shown here on choosing a covenant name. Start month is mandatory when frequency is quarterly and above.
Due date
Due date of the specified covenant is defaulted here based on the details maintained at ‘Covenant Maintenance’ screen. You may change the Due Date shown here on choosing a covenant name. Due date is mandatory when frequency is monthly and above.
Revision Date
Indicates the date on which covenant has to be revisited for review. Revision date is derived by system and updated when covenant is saved – based on combination of start date + (combination of frequency and due date and start month).
Examples for the revision date calculation of different frequencies.
System date -5th April 2019
1. Daily-6th April 2019
2. Weekly-12th April 2019
3. Monthly-10th May 2019 (Due date provided-10)
4. Quarterly-2nd June 2019 (Due date provided-2, Start month- June)
5. Half yearly-1st Feb 2020 (Due date provided-1, Start month-Feb)
6. Yearly- 10th July 2020 (Due date provided-10,Start month-July)
System date -5th August 2019
1. Daily-6th August 2019
2. Weekly-12th August 2019
3. Monthly-10th September 2019 (Due date provided-10)
4. Quarterly-2nd June 2020 (Due date provided-2, Start month- June)
5. Half yearly-1st Feb 2020 (Due date provided-1, Start month-Feb)
Yearly- 10th July 2020 (Due date provided-10,Start month-July)
Notice Days
Specify the notice days, that is, the number of days prior to revision date of the covenant. The period during the notice days are the notice period. Notice days are mandatory when frequency is weekly and above. You can change the Notice Days details which are displayed here on choosing a covenant name.
Grace Days
Specify the grace days, that is, the number of days after the revision date of the covenant that the covenant will be available for tracking. You can change the Grace Days details which are displayed here on choosing a covenant name.
Remarks
Remarks if any specified for the covenant at the ‘Covenant Maintenance’ screen are defaulted here. It can also be changed here.
2.16.3 Specifying Shared Details
The details of the liabilities sharing the collateral can be captured for a collateral in the ‘Shared Details Maintenance’ screen. Click ‘Shared’ button to invoke this screen.
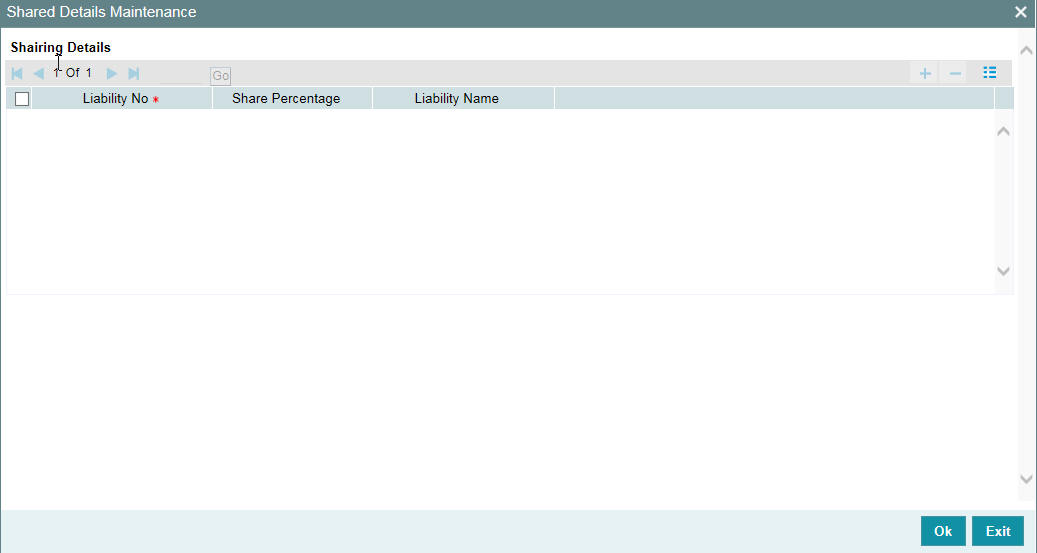
Liability Number
Specify the liability number of the liability that is sharing the collateral. Each liability mapped here cannot be more than 100% of the total collateral value.
Shared Percentage
Specify the percentage share of the liability in the collateral.
You can modify the above retails post authorization. However, the modification must be authorized.
2.16.4 Linking Contract as Collaterals
The Oracle FLEXCUBE ELCM system supports linking of Term Deposit Accounts or Contracts as collaterals. You can link the Term Deposit Account Number or Contract Reference Number as collateral to a Liability in the Collateral Maintenance screen. The system subsequently blocks/marks Lien on the linked Term Deposit.
Note
Once a Term Deposit has been linked as collateral, the system generates an output batch file to block/mark Lien on the linked Term deposits Accounts/Contracts. This output batch file is generated as a part of Out Bound Batch Transaction.
For linking a contract as collateral, click ‘Linked Contract-Accounts’. The Linked Contract-Accounts screen appears where in you can link the Term Deposit Contract Reference Numbers of all Term Deposits you want to link.
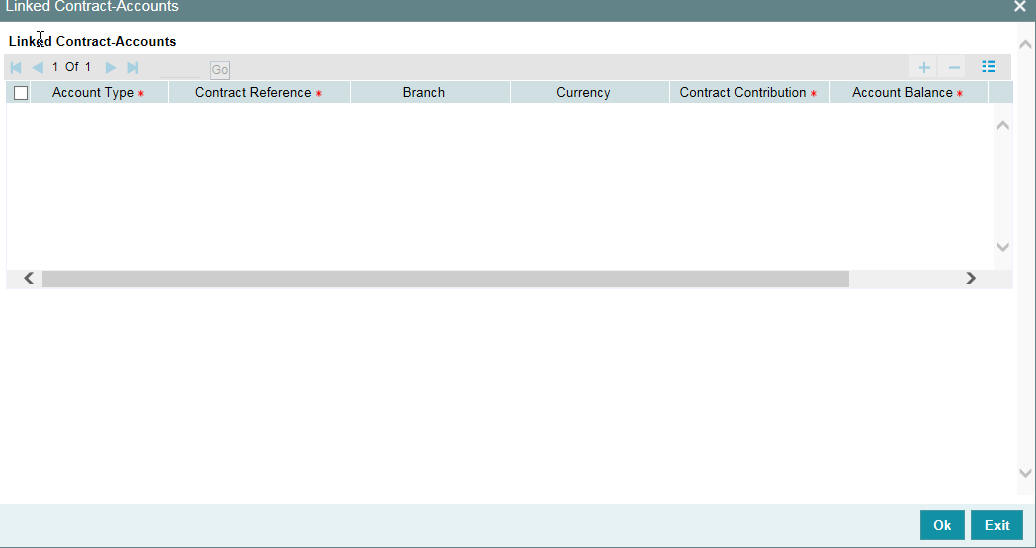
Modification of existing linked contracts can also be done in the above screen.
Account Type
Select the account type from the adjoining drop-down list.
Contract Reference
You can link the Term Deposit Account Number or Contract Reference Number as collateral for a Liability by specifying the ‘Contract Reference No’ here. The adjoining list of options in this field displays all contract types other than Contract Type ‘AC’.
Note
- The Term Deposit contract needed for Collateral Linkage must be maintained in Netting Maintenance with any contract type other than ‘AC’
- Once the contract is linked as collateral, then its collateral value cannot exceed its contract amount as maintained in the Account Netting screen.
- The start date of the collateral should be later than the value date of the respective contract netting maintenance. Likewise, the expiry date of the collateral should be earlier than the expiry date of the respective contract netting maintenance.
- The system blocks/marks Lien on the linked Term Deposit contract.
Contract Contribution
Specify here the amount being contributed from the contract as a collateral for the liability.
On saving the above maintenance, the system computes the sum of all the collateral values (specified under 'Contract Contribution') and updates the same in the 'Collateral Value' field of the 'Collaterals Maintenance' screen.
Note
You are allowed to link contracts associated to LC, BC, and MM modules as part collateral maintenance in ELCM. The amount which is contributed to the collateral is the sum of the contract amounts (specified under 'Contract Contribution') of the contracts linked.
If the collateral type is ‘Term Deposit and Transaction Account’, then the system displays the following Term Deposit and Transaction Account tab in the Specific Details sub-screen.
Account Balance
The system displays the account balance.
Maturity Date
Specify the maturity date of the TD.
Lien Amount
The system displays existing lien amount, if any.
2.16.5 Maintaining Source Restrictions
You can specify which sources are allowed or restricted to access the collateral in ‘Source Maintenance’ screen. Click ‘Source Restrictions’ button to invoke this screen.
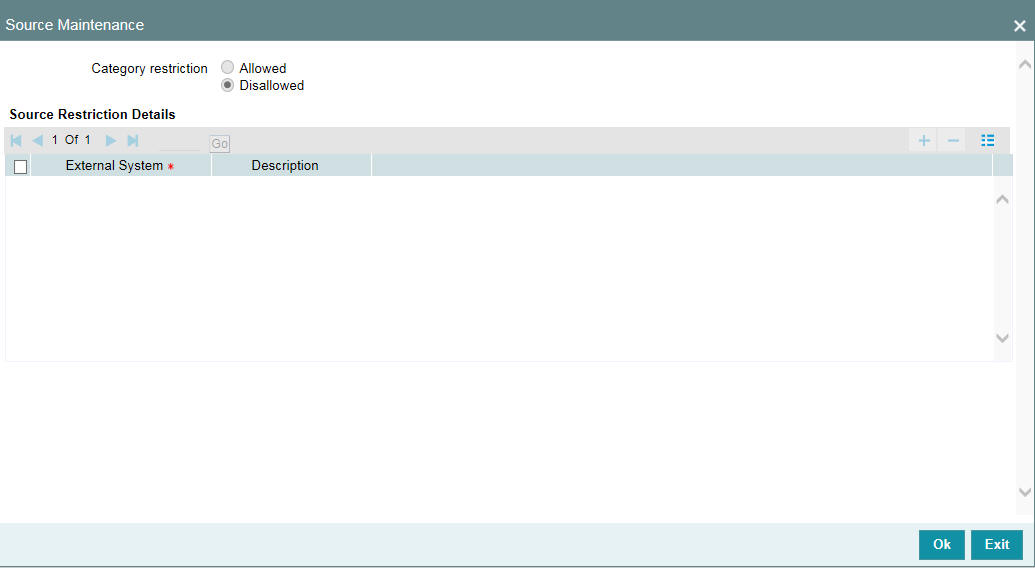
Restriction Type
Choose the ‘Allowed’ option to maintain an allowed list of liability restrictions. Choose the ‘Disallowed’ option to maintain a disallowed list of liability restrictions.
Default value of this field is’ Disallowed’. If you select restriction type as ‘allowed’, then you need to input at least one record.
Source
Specify the source from the adjoining option list.
2.16.6 Maintaining Haircut Schedules
You can specify the hair-cut revisions for the collateral in ‘Haircut Maintenance’ screen. Click ‘Haircut Schedule’ button to invoke this screen.
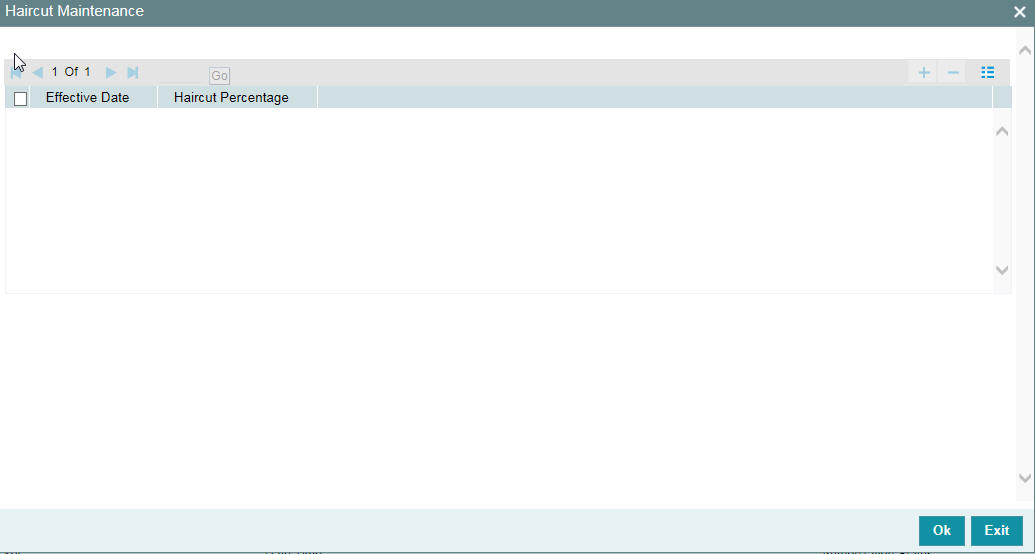
Effective Date
Specify the date on which the Haircut % becomes effective from the adjoining option list.
Haircut %
Specify the Hair cut% of the Collateral. You can enter values between 1 to 100.
Note
System applies the haircut% to the collateral on the schedule effective date during the BOD process of the collateral batch (GCBCOLAT).
The following validations are performed during save, For New operation,
- Effective date should be greater than the application date and start date of the collateral
- Multiple Haircuts for the same effective date is not allowed.
- Haircut% chosen at the main screen gets defaulted as the first schedule with collateral start date as the effective date, in the Haircut schedules sub-screen.
- For modify operation,
- Effective date should be greater than the application date and start date of the collateral
- Effective date should be less than the end date of the collateral.
- Deletion or Modification of existing Haircuts whose effective date are less than application date would not be allowed.
- Haircut schedules maintained in this sub screen would be applied on the effective date in the existing collateral batch process.
- Existing field Haircut% would show the latest haircut of the collateral.
2.16.7 Maintaining Field Investigation Details
You can maintain field investigation details in the Field Investigation Details screen. To invoke this screen click ‘Field Investigation Details’ button in Collateral Maintenance screen.
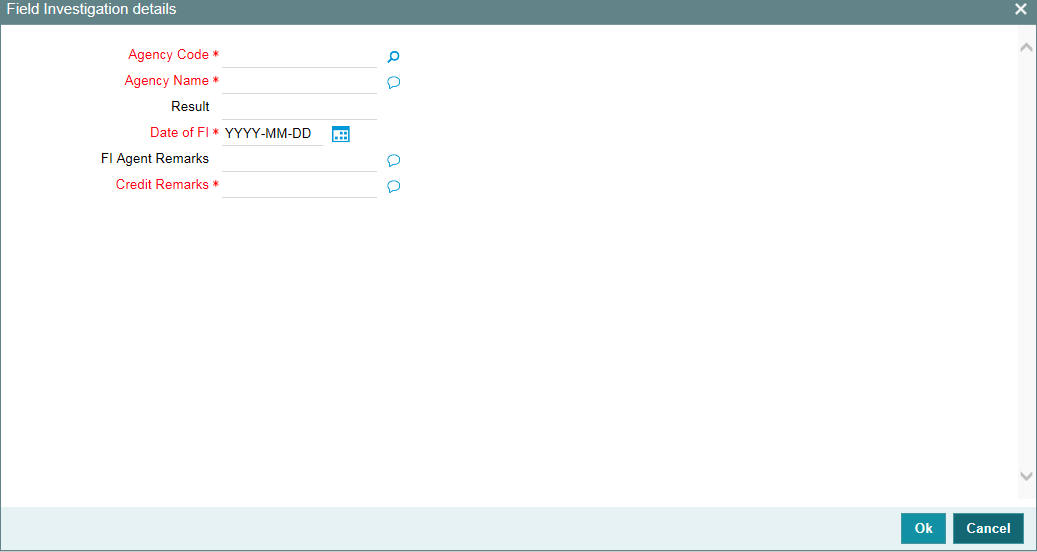
Agency Code
Specify the agency code of field investigation agency.
Agency Name
The system displays the field investigation agency name.
Result
Specify the result of the field investigation.
Date of FI
Enter the date of field investigation.
FI Agent Remarks
Specify the remarks by the field investigation agent.
Credit Remarks
Specify the remarks by credit team.
2.16.8 Maintaining Valuation Details
You can maintain valuation details of a collateral in Valuation Detail screen. Click ‘Valuation Details’ button in ‘Collateral Maintenance’ screen to invoke this screen.
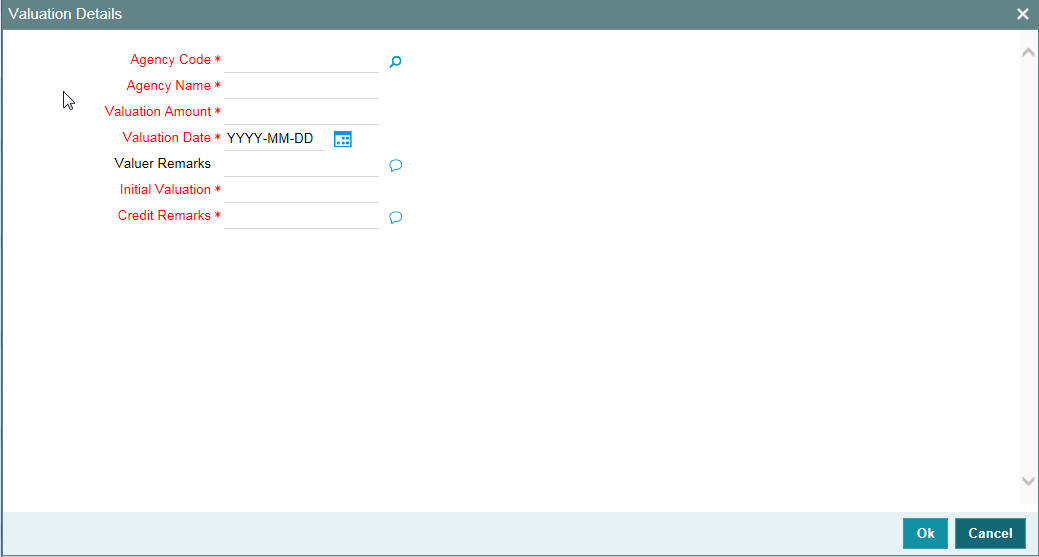
Agency Code
Specify the valuation agency code.
Agency Name
The system displays the valuation agency name.
Valuation Amount
Specify the valuation amount.
Valuation Date
Enter the date of valuation.
Initial Valuation
The system displays the initial valuation as ‘Yes’ if the valuation is done during collateral creation process.
Credit Remarks
Specify the remarks by credit team.
Valuer Remarks
Specify the remarks by valuation agent.
2.16.9 Maintaining External Check Details
You can maintain the details of external check in ‘External Check’ screen. Click ‘External Check’ button in Collateral Maintenance screen to invoke the following screen:
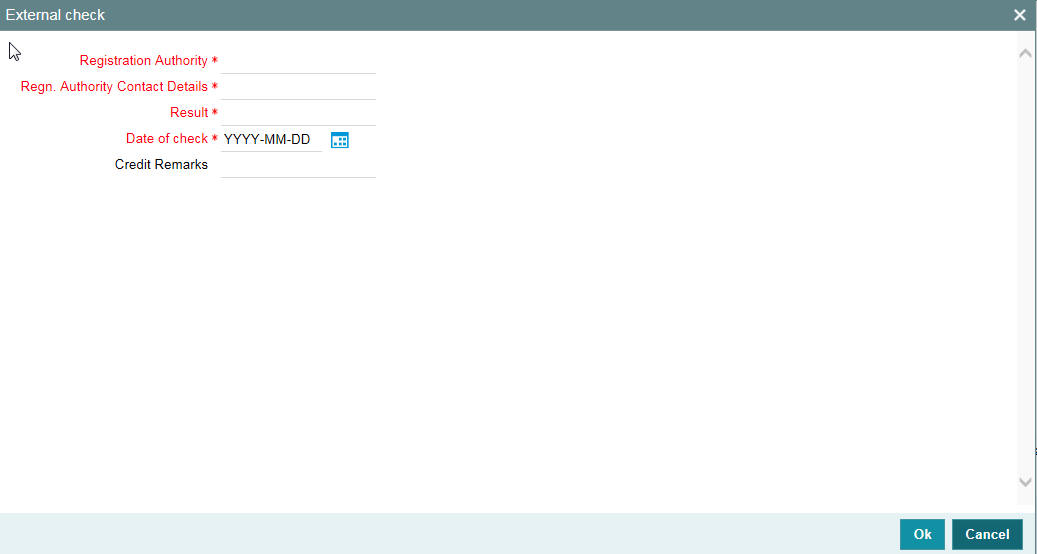
Registration Authority
Specify the registration authority details.
Registration Authority Contact Details
Specify he registration authority contract details.
Result
Specify the result of the external check.
Date of Check
Specify the date when the external check was started.
Credit Remarks
Specify credit remarks, if any.
2.16.10 Maintaining Legal Opinion
Click ‘Legal Opinion’ button in Collateral Maintenance screen to maintain legal opinion details.
.
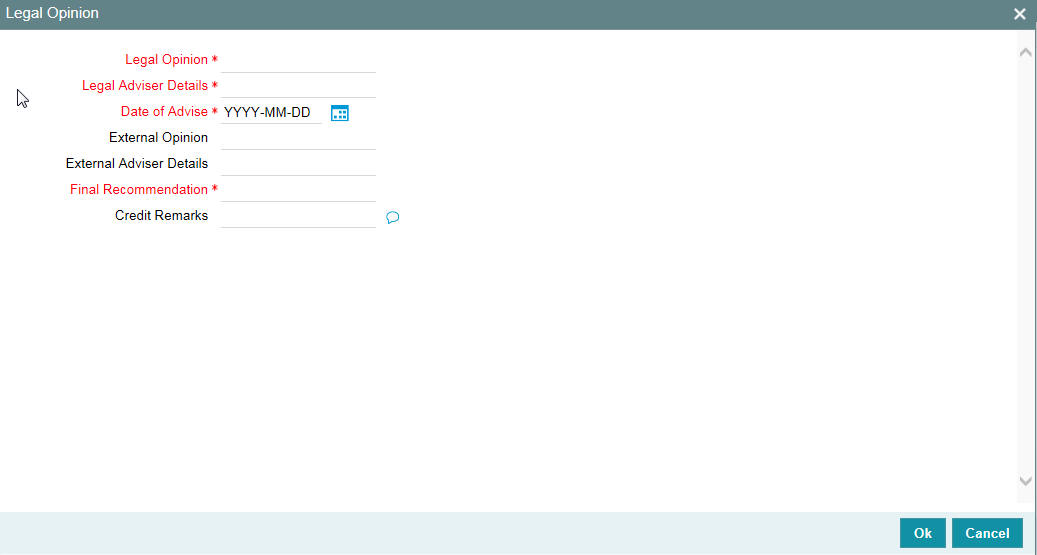
Legal Opinion
Specify the legal opinion on the acceptability of the proposed collateral.
Legal Adviser Details
Specify the legal adviser details.
Date of Advice
Specify the date when the advice was received from legal team.
External Opinion
Specify the external legal opinion.
External Adviser Details
Specify the external legal adviser details.
Credit Remarks
Specify remarks of the credit team, if any.
Final Recommendation
Specify the final opinion based on the internal and external legal opinion.
2.16.11 Risk Evaluation Details
You can maintain risk evaluation details in the Risk Evaluation screen. Click ‘Risk Evaluation’ button in Collateral Maintenance screen to invoke the following screen.
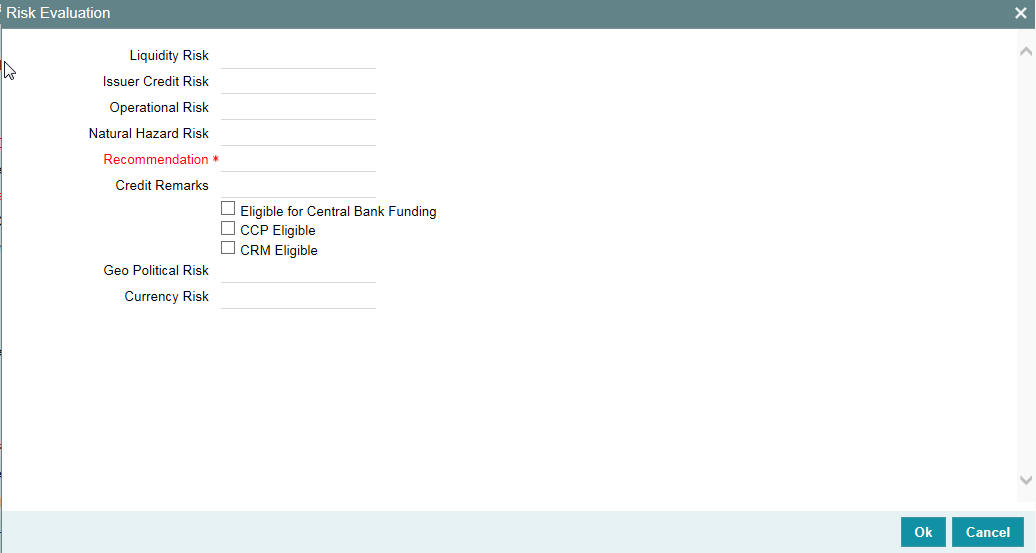
Eligible for Central Bank Funding
Select this check box if the collateral is eligible for central bank funding.
CCP Eligible
Select this check box if the collateral is part of the eligible collaterals accepted by Central Clearing Party.
CRM Eligible
Select this check box if the collateral is recognized as credit risk mitigant for base capital calculations.
Geo Political Risk
Specify geographical political risk involved in the collateral. For example: Oil assets situated in certain countries like Iraq.
Currency Risk
Specify if the collateral currency posses any currency risk.
Liquidity Risk
Specify the liquidity risk of the collateral.
Issuer Credit Risk
Specify the credit risk of the collateral issuer.
Operational Risk
Specify the operational risk involved in managing the collaterals like ship, aeroplane or a warehouse with goods.
Natural Hazard Risk
Specify if the location of the collateral is prone to natural hazards like floods, earthquake, and so on.
Recommendation
Specify the final recommendation after risk evaluation.
Credit Remarks
Specify credit remarks, if any.
2.16.12 Collateral Perfection Details
Banks have a right over the collateral in case of default by the customer so charges are recorded on customer collaterals.These charges need to be registered as part of charge perfection with relevant authorities.
Collateral perfection can be done as part of customer collateral creation and as also part of amendment.
Based on the charge status, data is generated for sending a notice to an external registration authority at the time of charge registration, charge renewal and charge termination.

Charge ID
Charge ID is generated by system. This ID is generated only if charge status is ‘Registered’ and charge perfection details are entered and saved, wherever ‘Charge registration required’ check box is enabled.
Charge Status
The charge status is used to track the status of the charge registration process. The charge status can be ‘Proposed’, ‘Registered’, ‘Expired’, ‘Discharged’ or ‘Renewal’.
- Proposed - The initial charge status
- Registered - When charge perfection details are entered and saved, charge status gets updated as ‘Registered’ and the data required for sending notice to the charge registration authority is generated.
- Renewal - Registered charge can be renewed upfront during lead days before charge end date by opting renewal. Charge can be renewed for a further period as per renewal frequency and unit configured. Charge status gets updated as 'Registered' once renewal is complete. Subsequent to renewal, charge renewal notice can be generated with the required data available.
- Expired - Charge status is updated as ‘Expired’ by the system in case charge is not renewed during lead days period. The system updates the status as ‘Expired’ during BOD date equal to charge registration end date + 1. An expired charge can be renewed by entering the registration details and charge status is updated as ‘Registered’ with a new charge end date.
- Discharged - When a loan provided for the collateral is repaid in full, charge noted for the collateral can be discharged.
Note
Once charge is discharged on a customer collateral, no further updates can be performed on the same.
Charge status is updated as 'Discharged', then the system generates a discharge notice that needs to be sent to the registration authority.
Registration Details
Charge Registration Number
Specify the unique charge registration number.
Registration Authority
Specify the registration authority with which collateral is perfected.
Regn. Authority Contact Details
Specify the contact details of registration authority.
Perfection Date
Specify the date on which bank’s charge has been registered.
Confirmation Date
Specify the date on which you received confirmation of perfection. That is, confirmation received from the registered authority. This date cannot be prior to perfection date.
Charge Registration End Date
Once charge perfection details are entered and saved, based on ‘Charge Perfection Date’ and ‘Charge Renewal Frequency’ multiplied with ‘Unit’, charge registration end date is calculated by the system.
For example, if 'Frequency' is selected as 'Monthly' and 'Unit' is selected as '2', then the system updates the charge end date considering perfection date + 2 months.
Charge Registration Amount
Specify the charge registration amount.
Chargee Name
Specify the chargee name
Documents Status
Specify if the perfection documents are received from registration authority.
Notes
Specify notes, if any.
Stamping Details
Stamping Required
Select this check box if stamping is required with relevant authority.
Stamping Date
Specify the stamping date.
Stamping Amount
Specify the stamping amount.
2.16.13 Collateral Perfection Log Summary
You can view the summary of all collateral perfection details maintained in the system using ‘Perfection Log Summary’.
To invoke this screen, type ‘GCSPFLOG’ in the field at the top right corner of the application toolbar and click the adjoining arrow button.
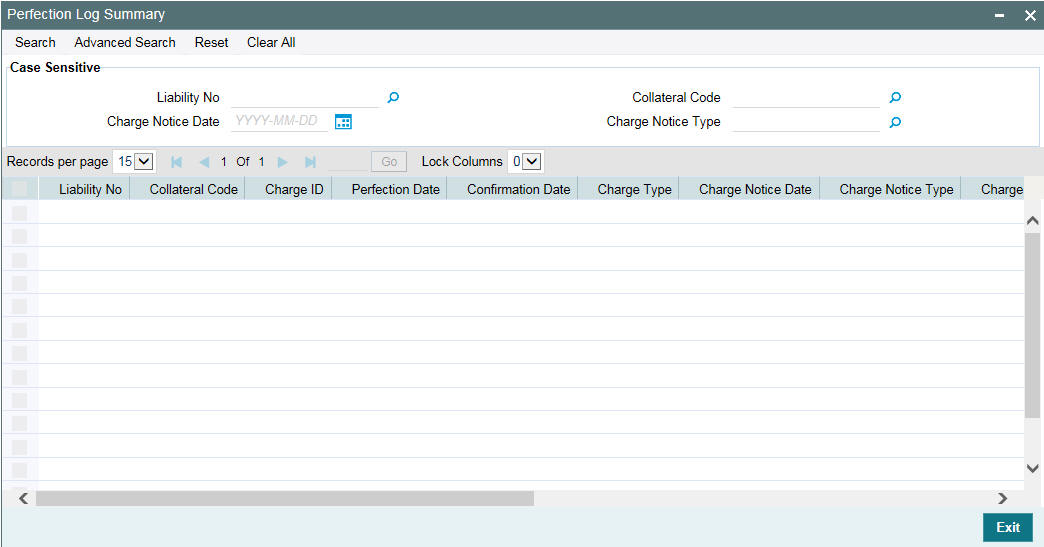
2.16.14 Viewing Collateral Covenant Tracking Summary
You can view summary of covenants attached to collateral for tracking using the ‘Collateral Covenant Tracking Summary’ screen. You can view applicable covenants for a particular collateral category from the list of covenants maintained in the system.
You can open detailed screen using this screen. You can query the records based on the search criteria.
You can invoke this screen by typing ‘GCSCOVTR’ in the field at the top right corner of the Application tool bar and clicking the adjoining arrow button.
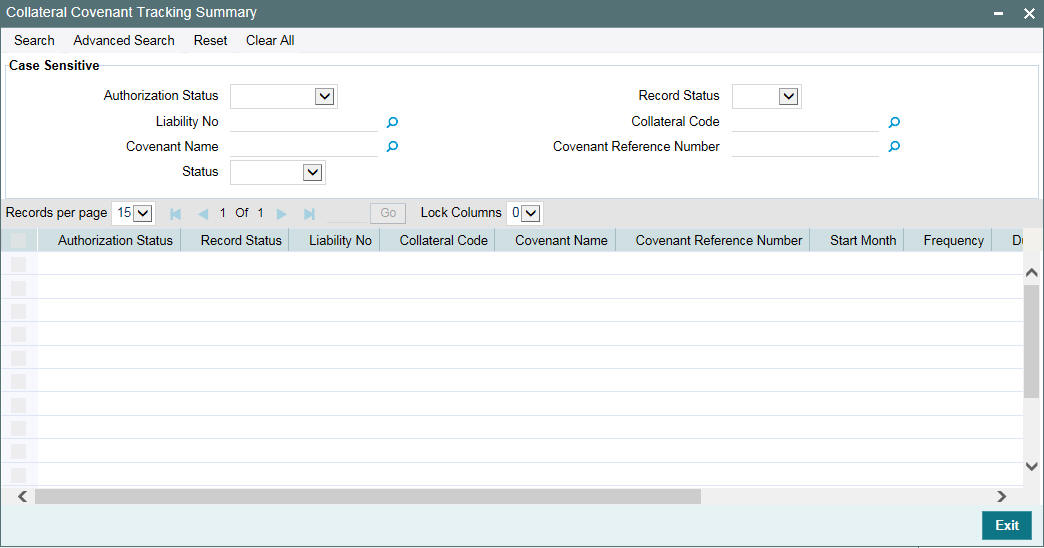
2.16.15 Tracking Collateral Covenant Details
The captured covenants as part of collaterals can be tracked using 'Collateral Covenant Tracking Details' screen.
You can invoke the ‘Collateral Covenant Tracking Details’ screen by typing ‘GCSCOVTR’ (Collateral Covenant Tracking Summary) and on clicking the queried record ‘GCDCOVTR’ (‘Collateral Covenant Tracking Details’) is opened with the details of the covenant.
You can unlock and update the status of the covenant here.
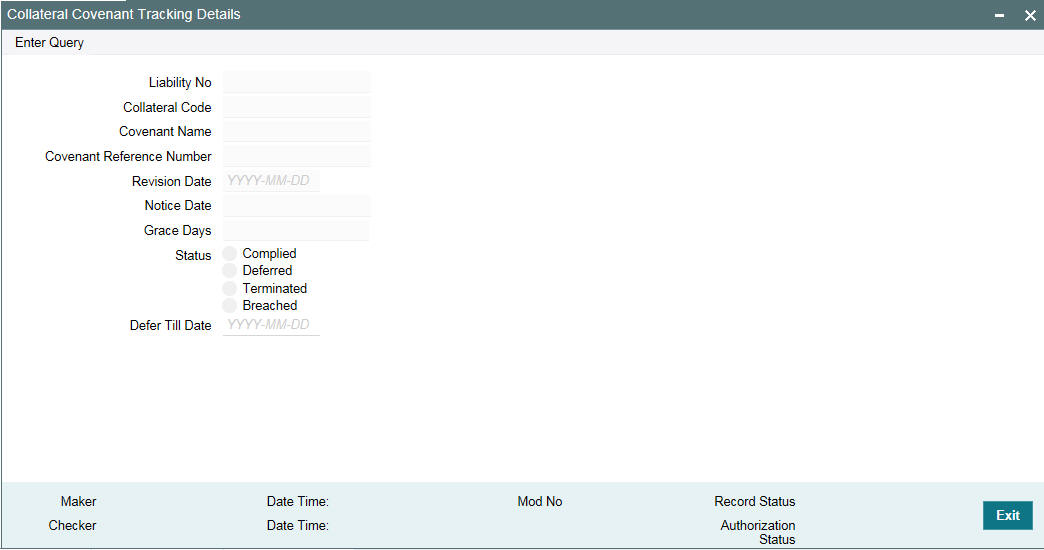
Liability Number
Indicates the liability Number for which the collateral is linked.
Collateral Code
Indicates the collateral code here. Each collateral code should be unique.
Covenant Name
Indicates the covenant name.
Covenant Reference Number
Indicates the covenant reference no for the collateral being maintained.
Revision Date
Indicates the date on which covenant has to be revisited for review.
Revision date is derived by system and updated when covenant is saved – based on combination of start date + (combination of frequency and due date and start month).
Notice Date
Indicates the date on which covenants can be tracked for compliance before revision date in advance based on notice days configured.
Grace Days
Indicates the grace days for the next due/revision date allowed for facility covenant.
Status
You can select the covenant status as the following:
- Complied
- If the status of the covenant is not compiled on or before revision date, then the status is updated as breached by batch process immediately after revision date.
- If the covenant has the grace days configured, compliance can be marked till the grace period end date. The status gets updated as breached only after grace period end date if compliance is not marked by then.
- Compliance on the breached covenant can be marked after which the covenant for next frequency is enabled with the next revision date duly considering the original revision date + frequency.
- Once compliance is marked for a particular frequency, record for the next frequency with blank status is available in DB and accordingly revision date get updated in collateral/facility
- Deferred
- Covenants can be deferred for a defined period during which time covenants are not available for tracking. When covenants are breached, it cannot be deferred. Deferment can be done before the covenant becomes breached.
- Terminated -
- Covenants can be stopped from further tracking by updating the status as 'Terminated'. Only covenants which are either complied or deferred status can be terminated. Breached covenants cannot be terminated.
- Breached
- Covenants which are not complied within revision date are marked as breached by batch process immediately after revision date is exceeded.
- When covenants pertaining to multiple frequency are breached, all of them are available for tracking
Defer Till Date
In case the status is ‘Deferred’, then you need to specify this date
You need to specify the date so that covenants falling during this period are not tracked. After end of deferment date, covenants are applicable and available for tracking.
2.17 Maintaining Specific Collateral Input Details
You can maintain details related to the collateral input type in their respective screens. The system allows to capture specific collateral details in relevant screens based on the collateral type selected. At the same time the system prevents you from entering other collateral details.
Note
In case of data masking, if ‘PII Allowed’ check box is not selected in ‘User Maintenance’ screen (SMDUSRDF), then the following field values are masked.
- Guarantee Details screen
- Guarantor Name
- Guarantor Address
- Property Details screen
- Country
- Property Address
- Life Insurance screen
- Insurer Address
In case of right to be forgotten, all the PII fields maintained in ‘Guarantee Details’, ‘Property Details’, and ‘Life Insurance’ screens are anonymized once the customer is forgotten in the ‘Forget Customer Process’ screen (STDCSFRT)
In case of granular access, collateral and guarantor details maintained for allowed list of customers are allowed to view, query, modify, authorize, re-open, copy, delete, and so on based on the user/users preferences selected in ‘Access Group Restriction’ tab available in the ‘User Maintenance’ screen.
For more information, refer to Common Core - Security Management System User Guide.
2.17.1 Property Details screen
You can invoke the ‘Property Details’ screen by typing ‘GCDCOLLP’ in the field at the top right corner of the Application tool bar and clicking the adjoining arrow button.
.

To invoke the sub-screen of ‘Property Details’ screen, click ‘Property Details’ button.
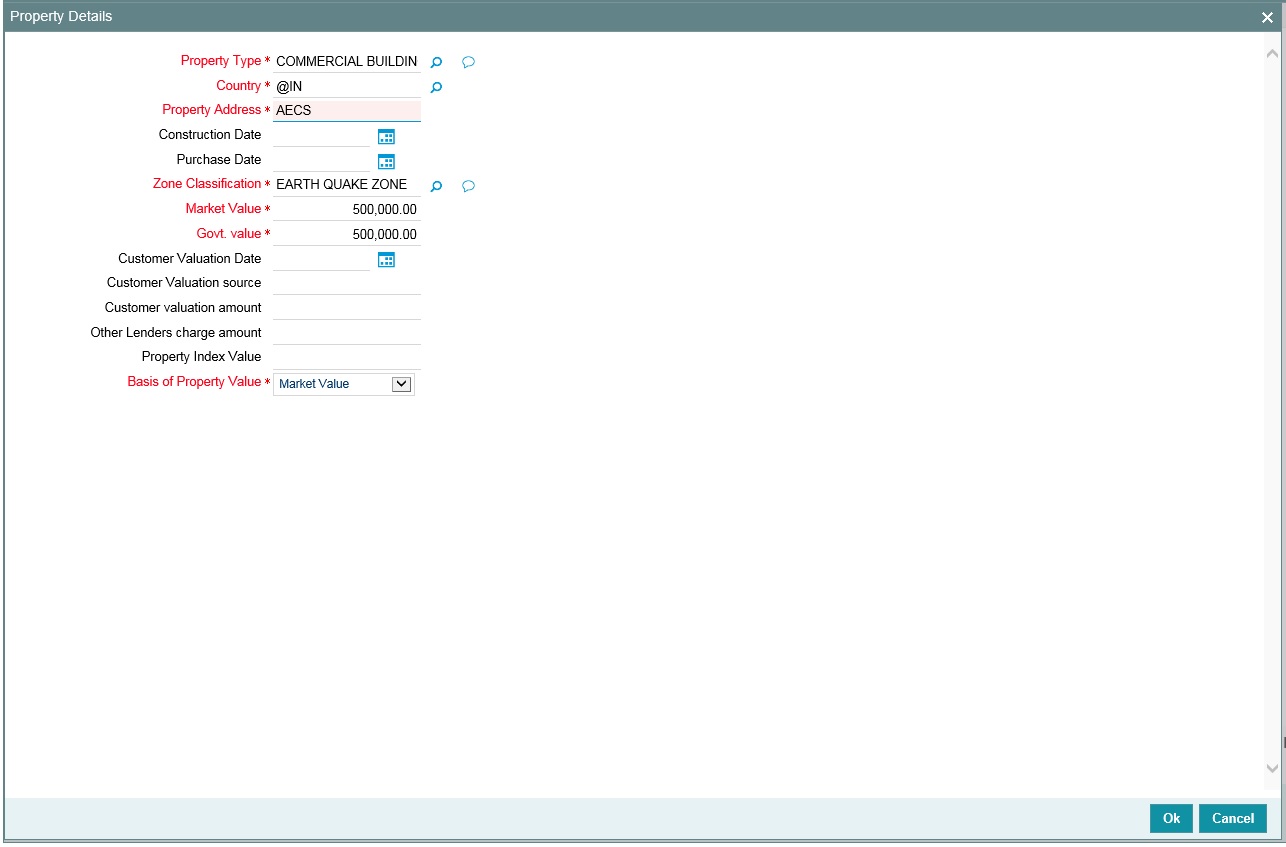
Property Type
Select the type of property from the adjoining option list.
Country
Select the country of the property location from the adjoining option list.
Property Address
Specify the address of the property.
Construction Date
Specify the construction date of the property.
Purchase Date
Specify the date of property purchase.
Zone Classification
Select the zone of the property from the adjoining option list.
Market Value
Specify the market value of the property.
Govt. Value
Specify the government value of the property.
Customer Valuation Date
Specify the last valuation date from the customer submitted valuation report.
Customer Valuation Source
Specify the source of valuation from the customer submitted valuation report.
Customer Valuation Amount
Specify the valuation amount from the customer submitted valuation report.
Other Lenders Charge Amount
Specify combined charge amount of other lenders in case the property is already mortgaged to other lenders.
Property Index Value
Specify the index value of the property.
Basis of Property Value
Select the basis of property value from the adjoining drop-down list. The options available are:
- Market Value
- Property Index Value
- Government Value
2.17.2 Vehicle Details screen
You can invoke the ‘Vehicle Details’ screen by typing ‘GCDCOLLV’ in the field at the top right corner of the Application tool bar and clicking the adjoining arrow button.
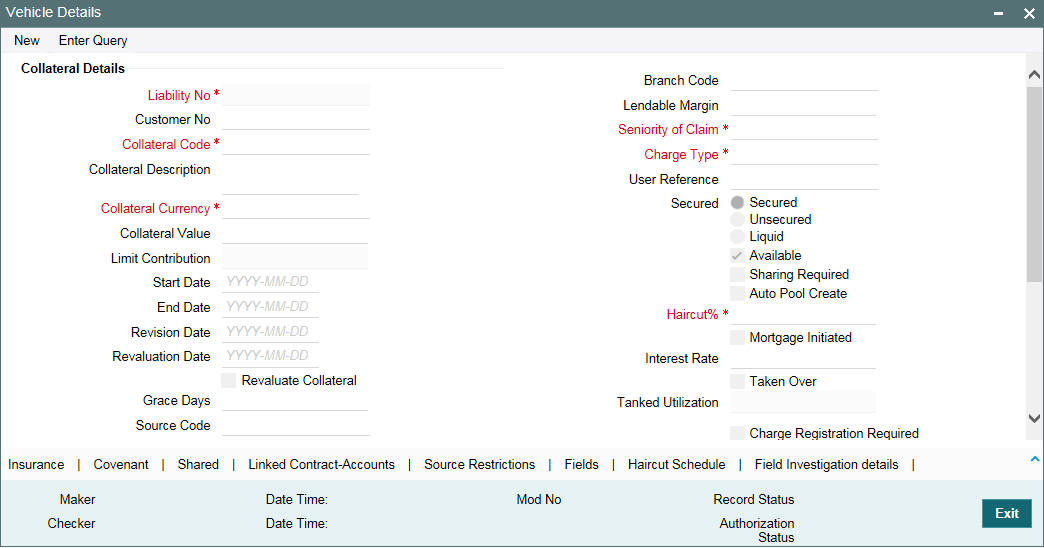
To invoke the sub screen of ‘Vehicle Details’ screen, click Vehicle Details button.
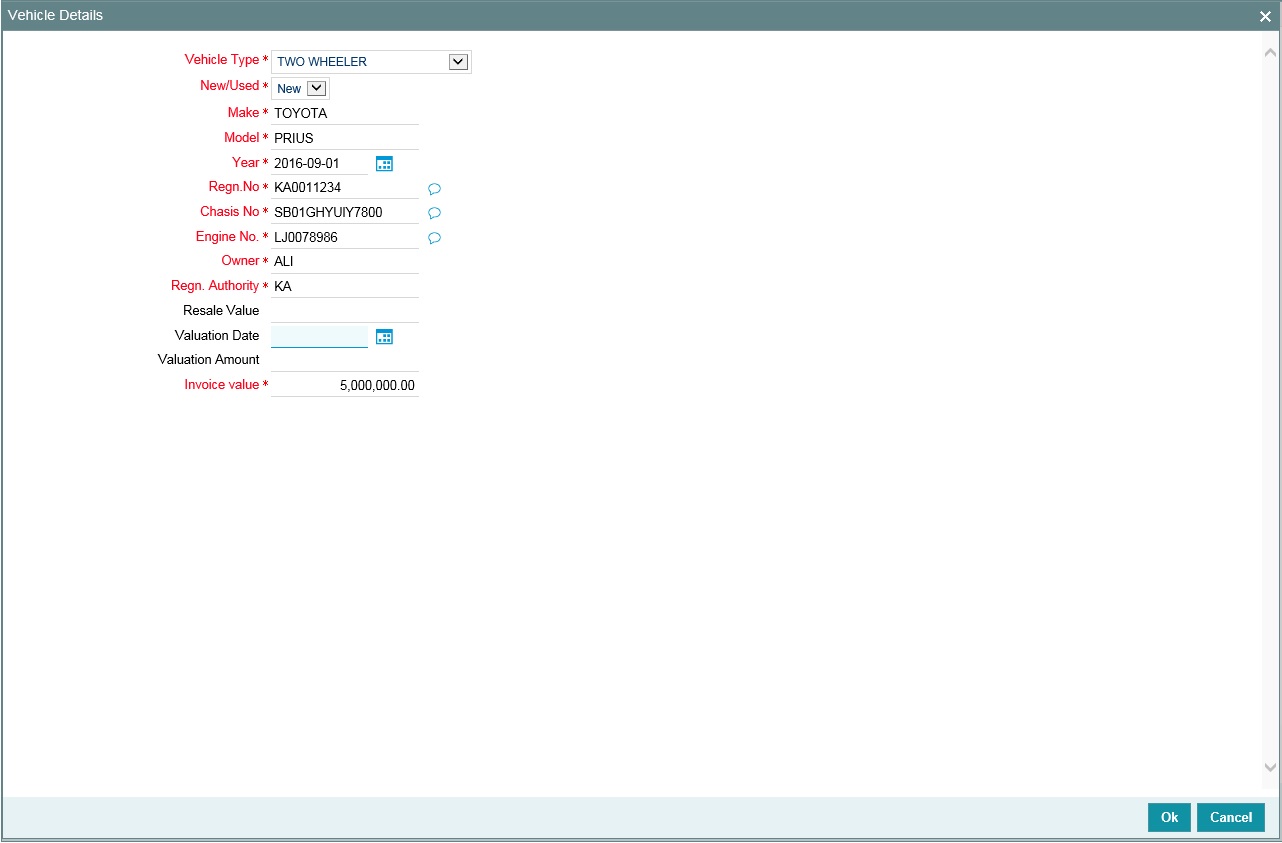
Invoice Value
Specify the invoice value of the vehicle.
Vehicle Type
Select the type of vehicle from the adjoining drop-down list.
New/Used
Specify if the vehicle is a new vehicle or a pre-owned vehicle.
Make
Specify the make of the vehicle.
Model
Specify the model of the vehicle.
Year
Specify the year of manufacturing of the vehicle.
Regn.No
Specify the vehicle registration number.
Chasis No
Specify the chasis number of the vehicle.
Engine No.
Specify the engine number of the vehicle.
Owner
Specify the ownership details of the vehicle.
Regn. Authority
Specify the registration authority details with whom the vehicle is registered.
Resale Value
Specify the resale value of the vehicle.
Valuation Date
Specify the valuation date from he customer submitted valuation report. This is applicable for used cars only.
Valuation Amount
Specify the valuation amount from he customer submitted valuation report. This is applicable for used cars only.
2.17.3 Marketable Securities screen
You can invoke the ‘Marketable Securities’ screen by typing ‘GCDCOLLS’ in the field at the top right corner of the Application tool bar and clicking the adjoining arrow button.
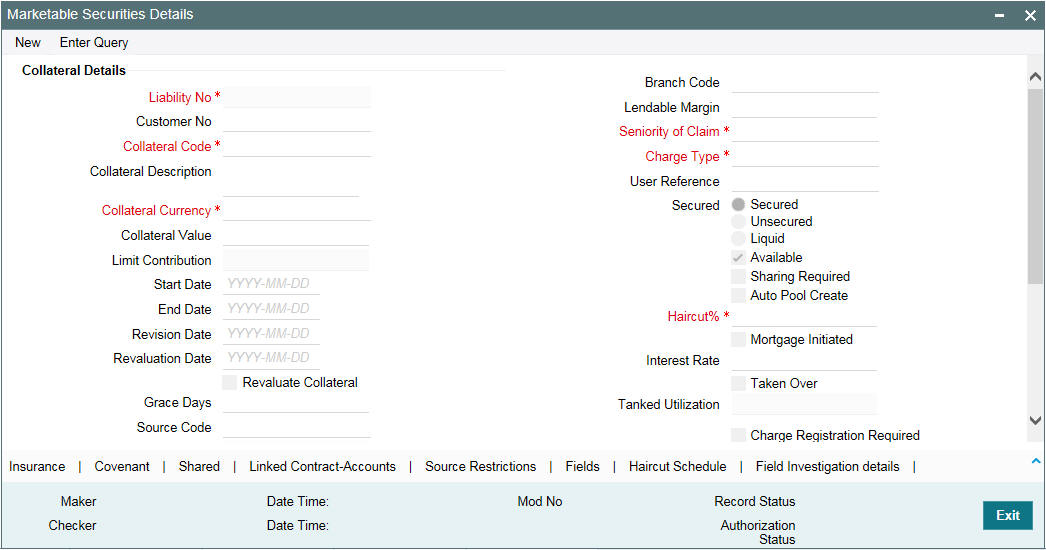
To invoke the sub screen of ‘Marketable Securities’ screen, click Marketable Securities button.
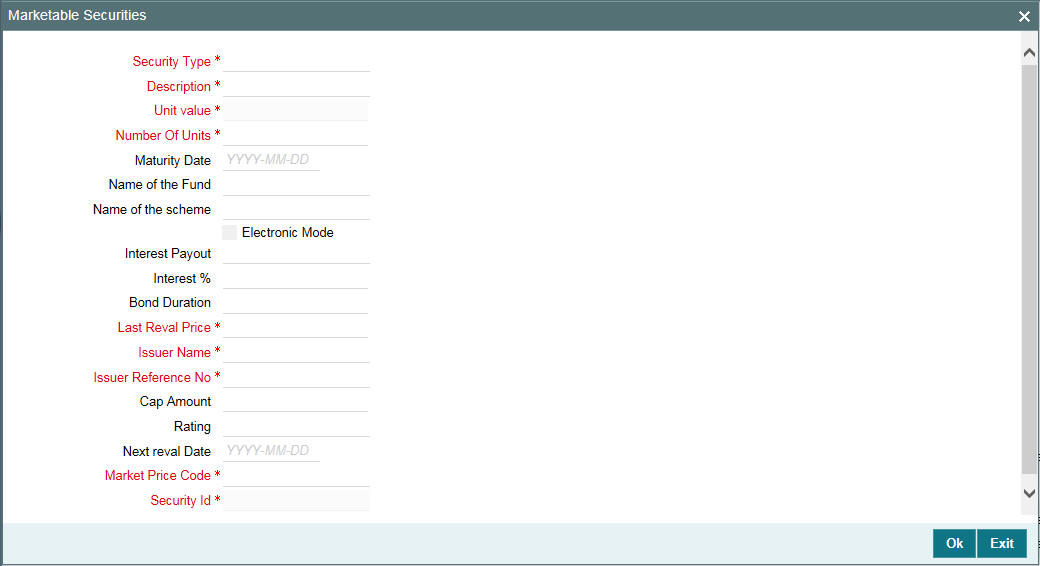
Security Type
Select the type of marketable security from the adjoining option list.
Security Id
Select the security code from the adjoining option list.
Description
The system displays the security code description.
Issuer Name
The system displays the issuer name from the Issuer Maintenance (GCDISSUR) screen.
Issuer Reference No
The system displays the issuer reference number from the Securities (GCDSECTY) screen.
Unit Value
The system displays the unit value from the Securities (GCDSECTY) screen.
Number of Units
Specify the number of units submitted by the customer.
Rating
Specify the rating of the securities.
Maturity Date
Specify the maturity date of bonds.
Name of the Fund
Specify the name of the mutual fund.
Name of the Scheme
Specify the mutual fund scheme name.
Electronic Mode
Select this check box if the securities are in electronic mode.
Interest Payout
Select the interest payout frequency from the adjoining option list.
Interest %
Specify the interest percentage on bonds.
Bond Duration
Specify the bond duration.
Last Reval Price
The last market price based on which the collateral value was revaluated is displayed.
Next Reval Date
Specify the next revaluation date for the security.
Cap Amount
As the price of marketable securities tend to fluctuate based on the forces of demand and supply, specify an upper limit on the contribution of this security to the collateral value, as a result of an increase in the price of the security. This upper limit is called the Cap Amount. The Cap Amount indicates that at any point in time the limit contribution of the collateral cannot exceed this amount, even though its actual computed value is much higher. However, if the actual computed value of the collateral is lower than the Cap Amount, then the system takes the collateral value as the actual computed value.
Market Price Code
Select the market price code from the adjoining option list.
2.17.4 Plant and Machinery screen
You can invoke the ‘Plant and Machinery’ screen by typing ‘ ‘GCDCOLLY’ in the field at the top right corner of the Application tool bar and clicking the adjoining arrow button.
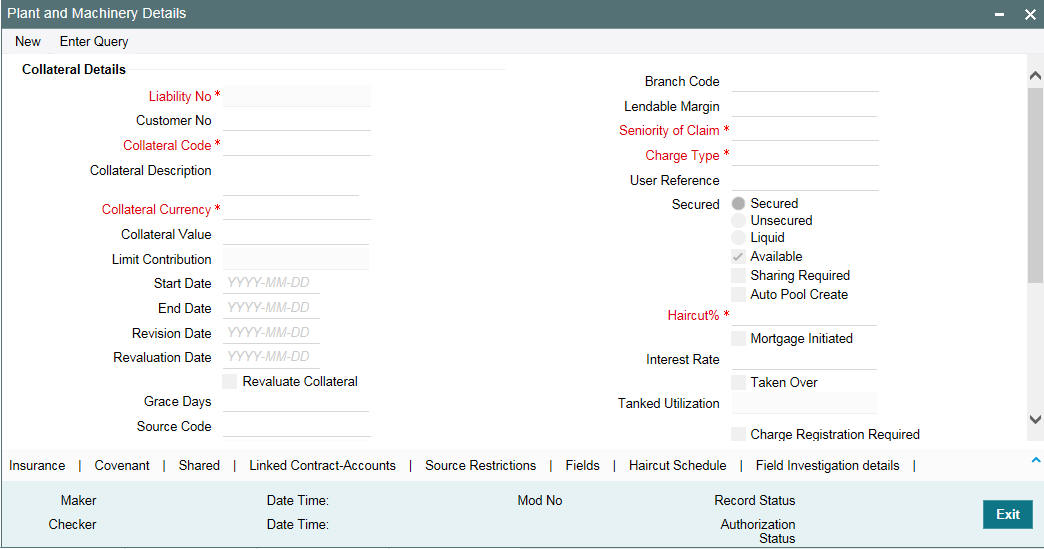
To invoke the sub screen of ‘Plant and Machinery’ screen, click Plant and Machinery button.
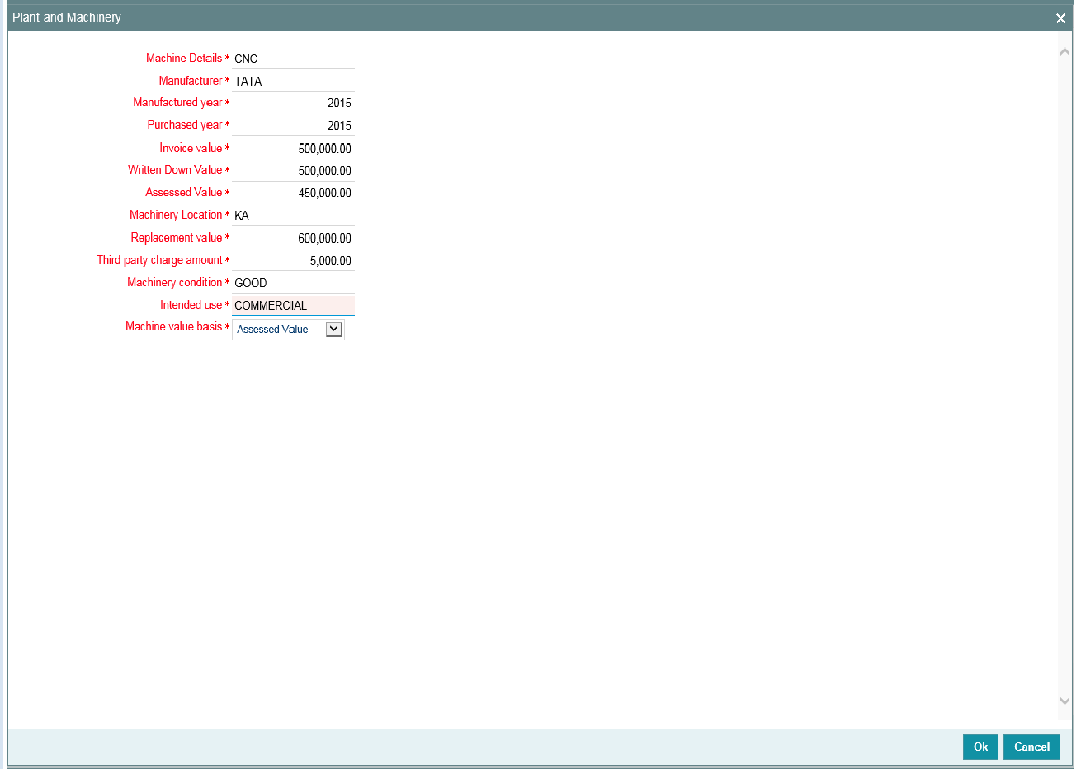
Machine Details
Specify the machine number of the machine submitted as collateral.
Manufacturer
Specify the manufacturer details of the machine.
Manufactured Year
Specify the manufactured year of the machine.
Purchased Year
Specify the year of purchase of the machine.
Invoice Value
Specify the invoice value of the machine.
Written Down Value
Specify the written down value of the machine after depreciation.
Assessed Value
Specify the assessed value of the machinery.
Machinery Location
Specify the machinery location.
Replacement Value
Specify the replacement value of e machinery.
Third Party Charge Amount
Specify the charge amount of other lenders, if any.
Machinery Condition
Specify the machinery condition.
Intended Use
Specify the intended usage of the machinery.
Machine Value Basis
Select the basis of machine value from the adjoining drop-down list. The options available are:
- Assessed Value
- Written Down Value
- Invoice Value
2.17.5 Life Insurance Details screen
You can invoke the ‘Life Insurance Details’ screen by typing ‘ GCDCOLLI‘ in the field at the top right corner of the Application tool bar and clicking the adjoining arrow button.
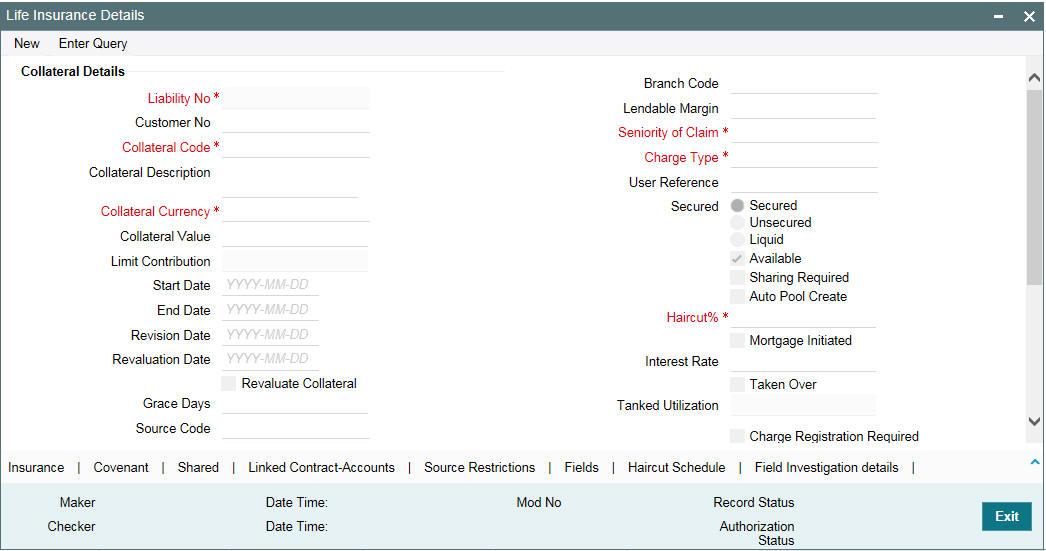
To invoke the sub screen of ‘Life Insurance Details’ screen, click Life Insurance Details button.
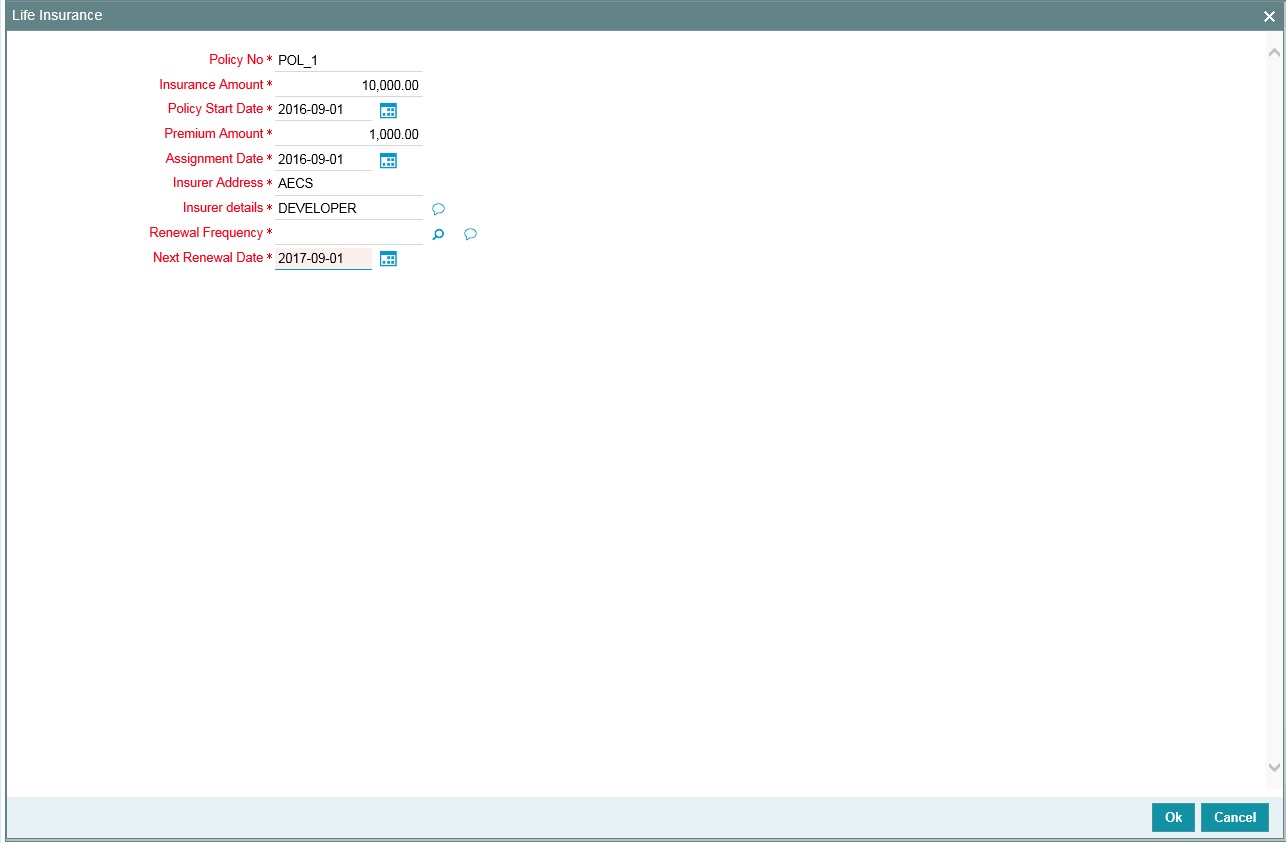
Policy No
Specify the life insurance policy number.
Insurance Amount
Specify the sum assured amount.
Policy Start Date
Specify the start date of the policy.
Premium Amount
Specify the premium amount.
Assignment Date
Specify the date of assigning the policy to the bank.
Insurer Address
Specify the insurance company address.
Insurer Details
Specify the details of insurance company like nature of policy, term, and so on.
Renewal Frequency
Select the insurance policy renewal frequency from the adjoining option list.
Next Renewal Date
Specify the next renewal date.
2.17.6 Precious Metal screen
You can invoke the ‘Precious Metal Details’ screen by typing ‘GCDCOLLL’ in the field at the top right corner of the Application tool bar and clicking the adjoining arrow button.
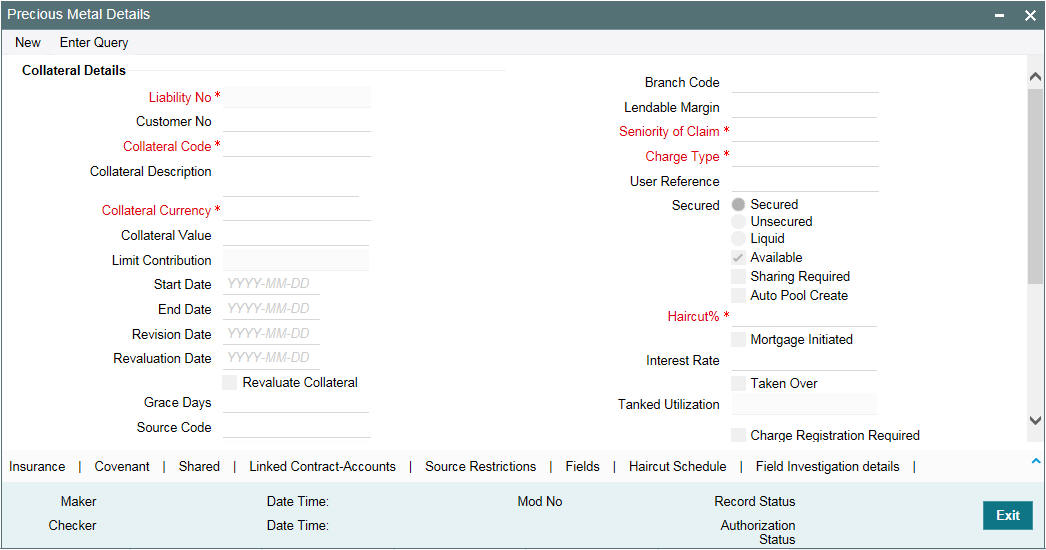
To invoke the sub screen of ‘Precious Metals Details’ screen, click Precious Metals Details button.
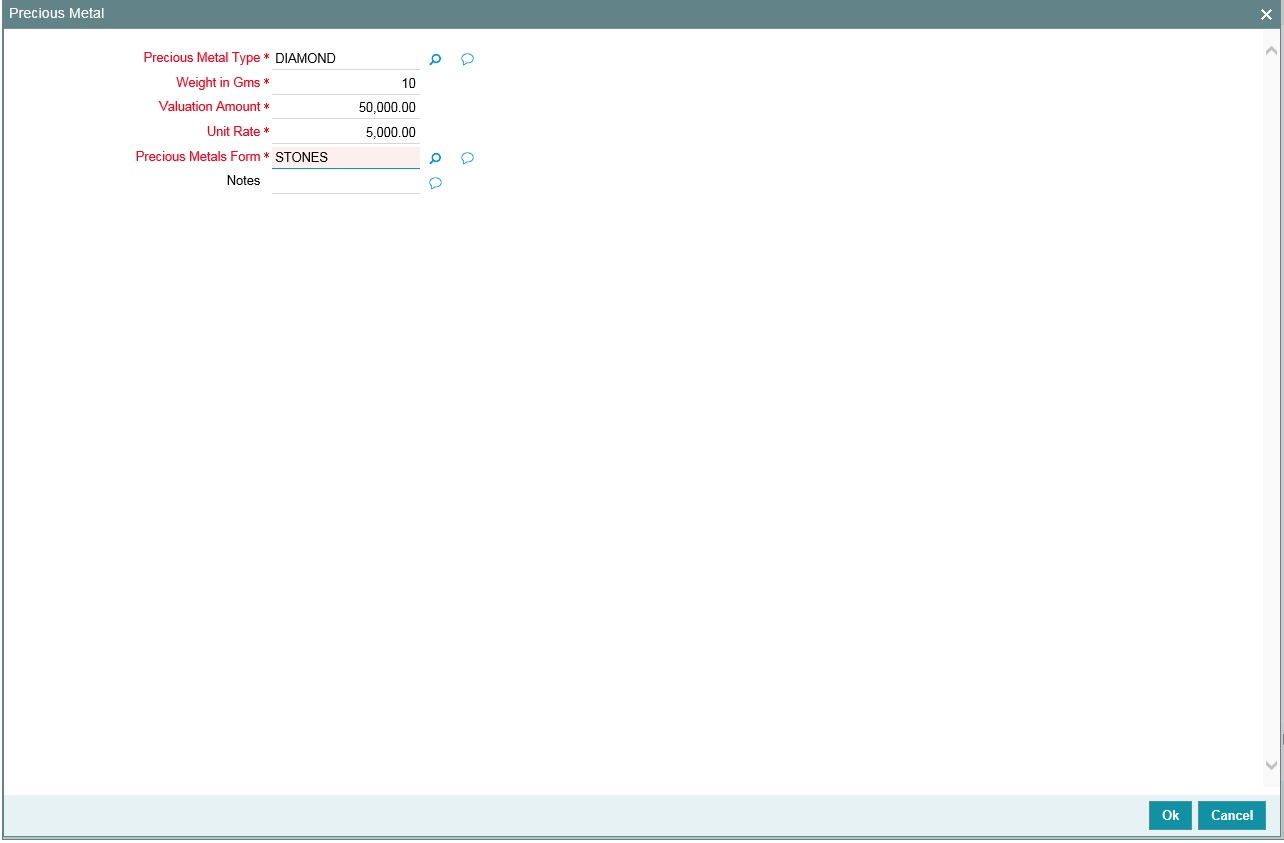
Precious Metal Type
Select the type of precious metal from the adjoining option list.
Weight in gms
Specify the weight of the precious metal in grams.
Valuation Amount
Specify the valuation amount of the precious metal.
Unit Rate
Specify the unit rate of precious metal.
Precious Metal Form
Select the form of precious metal from the adjoining option list.
Notes
Specify notes, if any, on the precious metal.
2.17.7 Guarantee Details screen
You can invoke the ‘Guarantee Details’ screen by typing ‘GCDCOLLG’ in the field at the top right corner of the Application tool bar and clicking the adjoining arrow button.
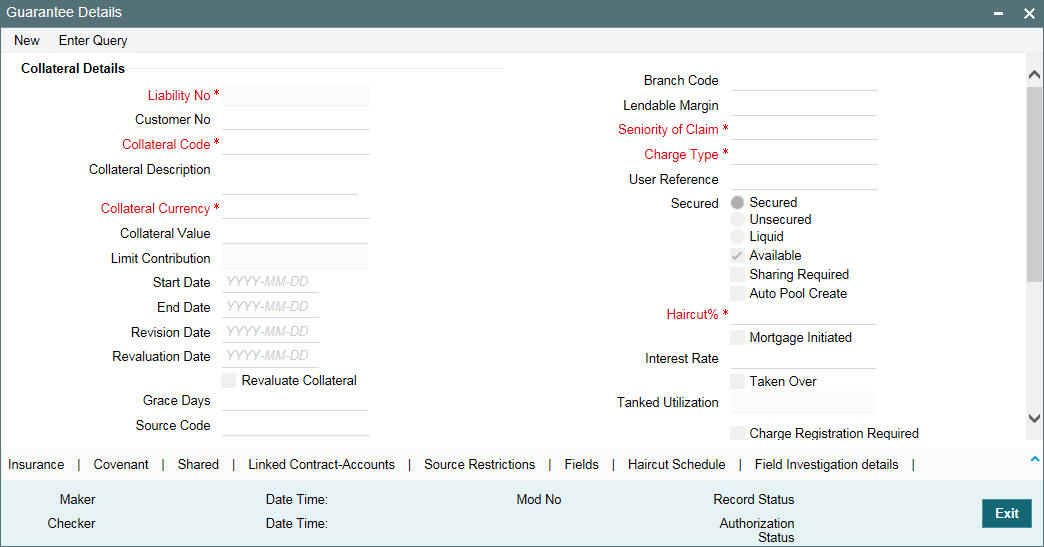
To invoke the sub-screen of ‘Guarantee Details’ screen, click Guarantee Details button.
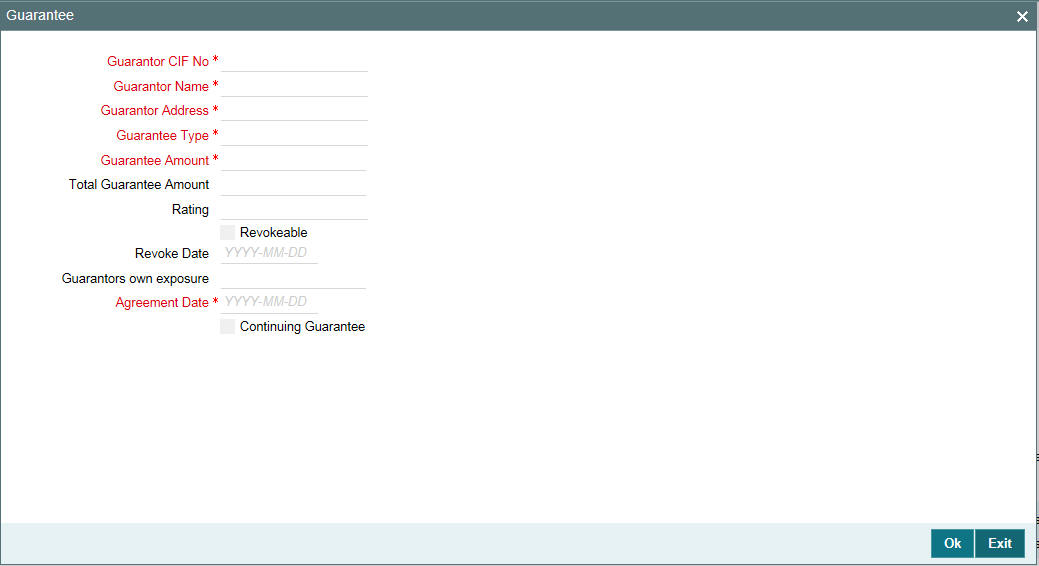
Guarantor CIF No
Specify the customer number (CIF ID) of the guarantor.
Guarantor Name
Specify the guarantor’s name. The system displays the guarantor’s name if guarantor CIF is entered.
Guarantor Address
Specify guarantor’s address.
Guarantee Type
Specify if the guarantee is personal or corporate guarantee.
Guarantee Amount
Specify the guarantee amount.
Agreement Date
Specify the guarantee agreement date.
Continuing Guarantee
Select this check box if the guarantee is a continuing guarantee.
Guarantor’s Own Exposure
The system displays the total exposure of the guarantor.
Total Guarantee Amount
Specify the combined guarantee amount of guarantor.
Revokeable
Indicate whether the Guarantor can revoke (withdraw) this guarantee provided or not.
Revoke Date
Indicate the date when the Guarantor revokes the guarantee. This field is enabled only when the Revoke check box is selected.
Rating
You can assign a credit rating to each Guarantor. Here specify the rating assigned to the Guarantor.
2.17.8 Miscellaneous screen
You can invoke the ‘Miscellaneous’ screen by typing ‘ ‘GCDCOLLM’ in the field at the top right corner of the Application tool bar and clicking the adjoining arrow button.
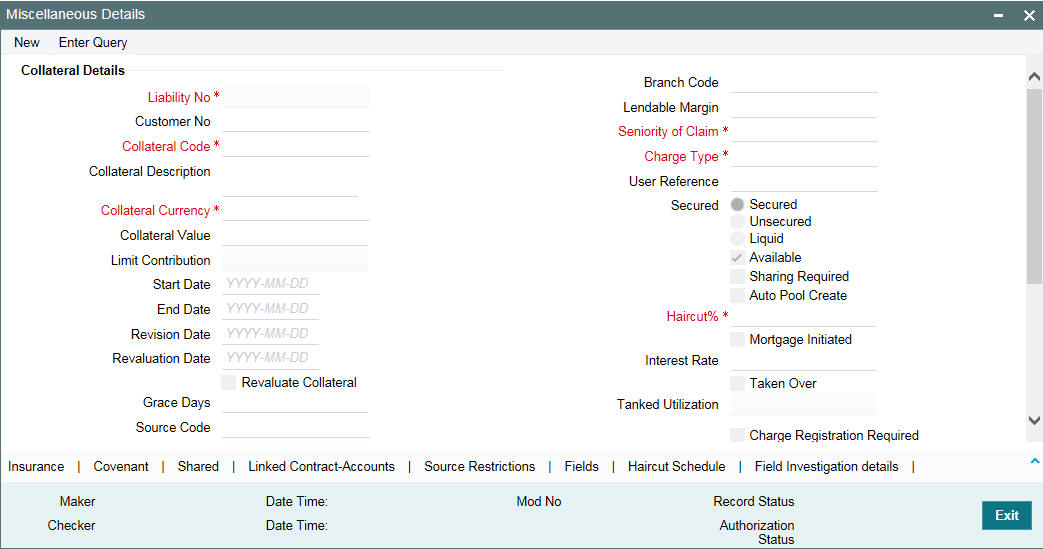
To invoke the sub-screen of ‘Miscellaneous’ screen, click Miscellaneous button.
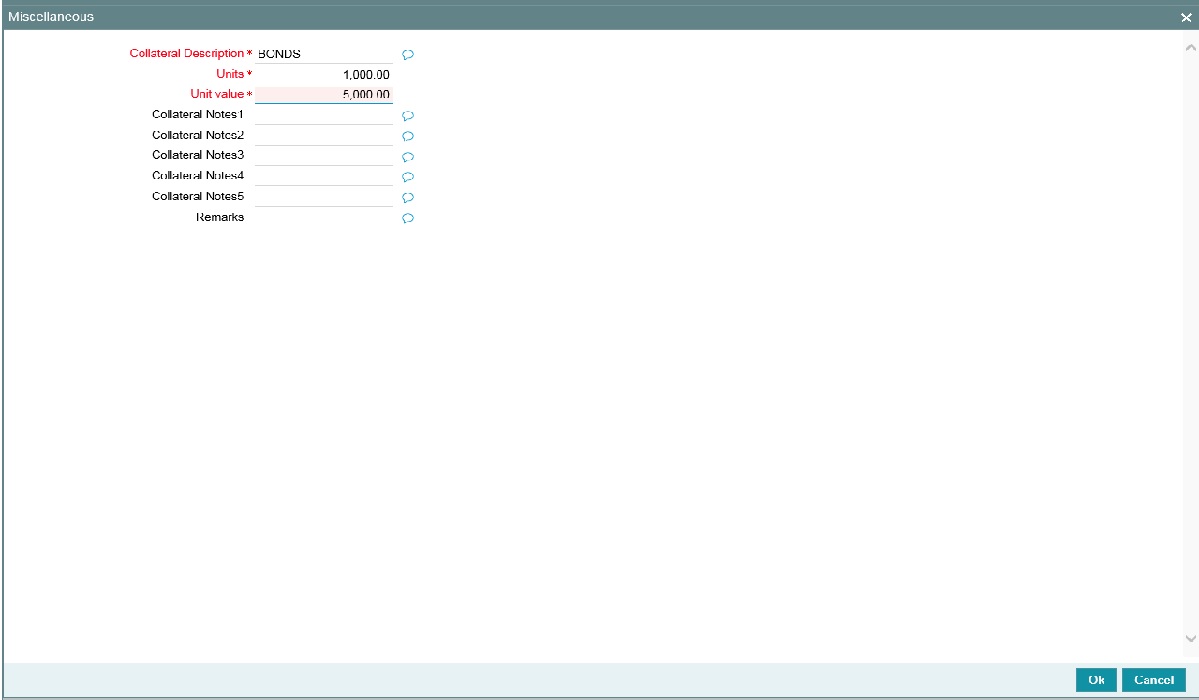
Collateral Description
Give a brief description on the collateral which does not belong to other standard collateral types. For example, Aeroplane, Ship, Live stock, and so on.
Units
Specify the number of collateral. For example, 100 live stock sheeps, 2 ships, and so on.
Unit Value
Specify the value of each unit.
Collateral Notes 1 - 5
Specify additional collateral details, if any.
Remarks
Specify remarks, if any.
2.18 Collateral Pool Maintenance
You may group together two or more collaterals to create a Collateral Pool. You can create and maintain collateral pools in the ‘Collateral Pools Maintenance’ screen.
You can invoke the ‘Collateral Pools Maintenance’ screen by typing ‘GCDMPOOL‘ in the field at the top right corner of the Application tool bar and clicking the adjoining arrow button.
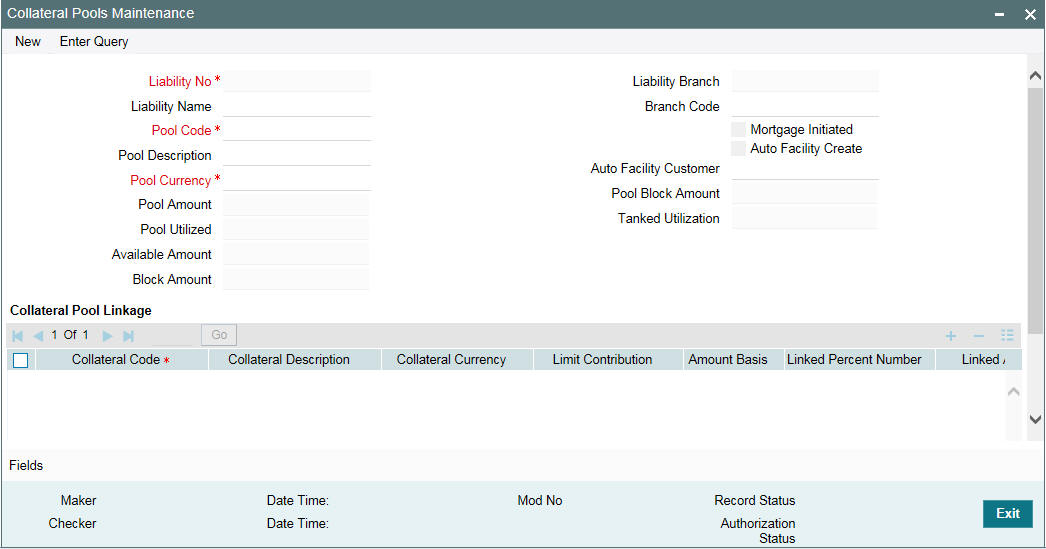
Liability Number
Specify the liability to which the collaterals need to be linked.
Pool Code
Specify the Pool Code here. The pool code assigned to each collateral pool can be linked to a liability while creating credit limits.
Pool Description
Specify a brief description of the collateral pool here.
Pool Currency
Specify the currency in which the Collateral Pool has to be maintained.
Available Amount
On save of the collateral pool record, system defaults the available amount for the collateral pool. It is the difference between Pool Amount and Pool Utilized.
Description (Collateral Pool Linkages)
The description for the collateral, as maintained in the 'Collaterals Maintenance' screen gets defaulted here based on the selected 'Collateral Code'.
Order
Specify the order for collateral utilization.
Type
The type for the collateral, as maintained in the 'Collaterals Maintenance' screen gets defaulted here based on the selected 'Collateral Code'
Branch Code
The branch code for the branch where the collateral is maintained in the 'Collaterals Maintenance' screen gets defaulted here based on the selected 'Collateral Code'.
Collateral Utilization
System updates the collateral utilization for each of the collateral codes linked in the 'Collateral Pool Linkages', based on the utilization, when the collateral pool comprising the collateral is linked to the facility.
Mortgage Initiated
This option is checked automatically for collateral and collateral pool created as a result of authorization of mortgage account and you cannot modify it.
Auto Facility Create
Select this check box to indicate that a facility should be created automatically for the given Liability number with line code as pool code.
Note
This automatically created line code can be used to maintain limits for customer account in ‘Account Limits’ screen, if required.
Auto Facility Customer
Specify the customer number to which the collateral pool is linked. The option list displays all valid customer numbers linked to the liability number selected on this screen. You can select the appropriate customer number from the option list.
Auto facility customer is enabled only if the option ‘Auto facility Create; is checked, For more details on maintaining Account Limits, refer Core Entities User Manual.
Tanked Utilization
The system computes and displays the utilization amount that can be set in the 'Tanked Utilization' field.
After BOD process, this utilization amount is updated for the transactions linked to collateral pool as per the contract and the amount is cleared from the 'Tanked Utilization' field.
2.18.1 Creating Collateral Pool Linkages
Under ‘Collateral Pool Linkages’ you can add the different collaterals pooled in for the particular Liability.
To add a new collateral click ‘Plus’ button, specify the relevant details and save the record. To delete an existing collateral, select it and then click ‘Minus’ button and save the record. While creating collateral pools, remember the following:
- Collateral can be linked to more than one pool if the collateral amount available is not zero.
- A credit line can be backed by only one pool but a single pool can back multiple credit lines.
You must maintain the following details for each of the collateral.
Collateral Code
Select the collateral code from the adjoining option list.
If the 'Linked Percent Number', is specified, on save of the record, system defaults the 'Linked Amount' calculated as Linked Percentage of 'Collateral Contribution'.
If the 'Linked Amount' is specified, on save of the record, system defaults the 'Linked Percent' calculated as percentage of 'Linked Amount' out of the 'Collateral Contribution.
Collateral Currency
The currency in which the collateral has been maintained is displayed when a collateral code has been picked.
Collateral Contribution
The collateral amount which has been maintained is displayed when a collateral code has been picked.
Amount Basis
You can either select ‘Percentage’ or ‘Amount’
If 'Percentage' is selected, then system allows you to enter the percentage only and not the 'Linked Amount'. The 'Linked Amount' is appropriately calculated by the system and it is not editable. The value of the percentage must be from range 0 to 100.
If 'Amount' is selected, then the system allows you to enter the amount only and not percentage. When amount is entered, the system appropriately calculates the percentage. Ensure to maintain amount in positive.
If the 'Amount Basis' is selected as ‘Amount’ and 'Collateral Value' is modified, then the percentage linked gets recalculated based on the modified 'Collateral Value'.
You can modify the linkage at collateral pool level from percentage to amount and vice-versa.
The system ensures that total of collateral value linked to one or multiple pools is not more than the collateral value maintained in 'Collateral Maintenance' screen. The system ensures that linkage of collateral to one or more pools cannot be more than 100% of collateral value
Linked Percent Number and Linked Amount
In case 'Collateral Value' is increased in 'Collateral Maintenance' screen, then the 'Linked Amount' is modified only if the 'Amount Basis' is 'Percentage'.
If the 'Amount Basis' is 'Amount', then the 'Linked Amount' is retained as is. However based on the changed 'Collateral Value', the 'Linked Percent Number' is re-calculated considering the retained amount.
In case 'Collateral Value' is decreased, modified amount of collateral is validated with all the 'Linked Amount' in various pools (either percentage or amount) and if the total amount linked is less than modified amount then modification of collateral value is to be allowed. Wherever 'Percentage' is considered for linking collateral to pool, the linked amount is re-calculated accordingly with modified amount of collateral.
If the 'Collateral Value' decreased amount is less than the total 'Linked Amount' in various pools, then an appropriate error message appears.
When a collateral pool comprising the collateral is linked to the facility, the system computes and displays the amount to be linked. The linked amount of Collateral pool is computed based on the pool percentage or pool amount specified when a collateral pool is linked to a Facility.
For example, Collateral Pool ‘Pool1’ is created with pool amount of 6000 USD. And 60% of Pool1 is linked to a Facility, then the linked amount of the collateral pool is updated as 3600 (that is, 60% of 6000). The available amount of collateral pool is updated as 2400 (6000-3600). The available amount of the collateral pool is arrived by using the below mentioned calculation
Available amount = pool amount – pool utilization – linked amount.
The available amount of facility is increased to the extent of linked amount in the facility currency. Any utilization to the facility only impacts the available amount and the utilization of the facility and not the collateral pool or the underlying collateral.
Pool Amount
The system computes and displays the utilization amount to the Collateral Pool, if a collateral Pool is attached to a contract or account and not through a facility.
Pool Utilized
This field displays the pool amount that has been linked to a various credit lines, hence displaying the total pool amount utilized at any point in time.
Linked Amount Pool Currency
.System defaults the 'Linked Amount Pool Currency' for each of the collaterals added in the 'Collateral Pool Linkages' as the linked amount in the pool currency.
For example, you have linked the pool ‘LOANP001’ to the liability ‘BIRLA0001’. LOANP001 is in turn backed by the following collaterals:
Collateral code |
Currency |
Collateral Amount |
Linked Amount |
ISDP16924 |
DEM |
100,000 |
75000 |
AC777228 |
GBP |
55,000 |
55,000 |
COLSHRS15 |
INR |
2,000,000 |
1,500,000 |
COLHS819 |
USD |
1,500,000 |
1,500,000 |
Now the pool currency specified is USD. Therefore, the system does the necessary calculations and converts the linked amount into the currency of the pool and displays the pool amount in the respective field.
Linked Percent Number
The part of the collateral amount which has to be linked to the pool can be specified as a percentage here. On save of the record, if Linked Percent Number is specified, system defaults the 'Linked Amount' calculated as Linked Percent Number Percentage of 'Collateral Contribution'.
Available Interest Rate
The interest rate maintained for the collateral code in ‘Collateral Type Maintenance’ screen gets defaulted here,
Interest Spread
Specify the interest spread to be applied on the customer account. The interest spread can be zero. However, if the collateral attached is a term deposit, then on rollover of the term deposit the interest spread is defaulted to the spread applicable for the term deposit on rollover.
Rate of Interest
The rate of interest applicable on the customer account when customer uses the overdraft facility against the collateral type is derived as follows:
Rate of Interest = Available Interest Rate + Interest Spread + Customer spread
Expiry Date
On save of the record, system defaults the expiry date based on the end date of the collateral maintained. However, if the collateral attached is of a deposit then on rollover of the term deposit the maturity date of the term deposit is updated as the expiry date of the collateral.
Note
The batch program ‘CASABAT’ is used to update the overdraft utilization at collateral level. If a rollover happens for a TD linked as collateral, during BOD, the interest rate applied on the TD gets updated to the interest rate value maintained at the collateral pool level.
2.19 Maintaining Line Code details
You can create and maintain line codes in the ‘Line Code Maintenance’ screen. Using this screen you can maintain line code details. These details are populated to ‘Facilities Maintenance screen’ (GEDFACLT).You can invoke the ‘Line Code Maintenance’ screen by typing ‘GEDLNCOD’ in the field at the top right corner of the Application tool bar and clicking the adjoining arrow button.
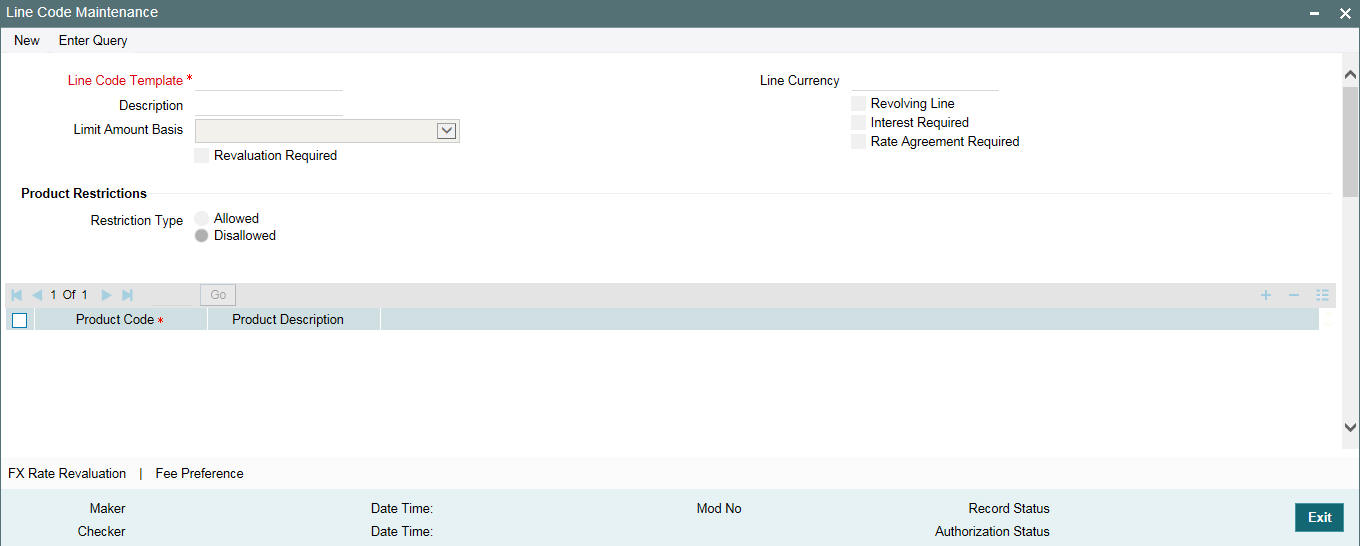
Line Code Template
Specify a unique code for the Line Code Template.
Description
Specify the description of the Line Code.
Limit Amount Basis
The value for Limit Amount can be maintained as the following:
- Limit Amount Basis
- Limit Amount + Collateral Contribution Limit Amount
- Min(Limit Amount, Collateral Contribution)
Line Currency
Specify the currency in which the Line Code is to be defined.
Revolving Line
Select this check box to indicate that the credit line is Revolving. A revolving credit line indicates that a repayment of the utilized credit should reinstate the credit limit of the customer.
Interest Required
Select this check box to indicate the facility is applicable for interest calculation.
Revaluation Required
Identifies if the facility has to revalued or not.
Rate Agreement Required
If this check box is selected, then rates are taken based on FX rate fixing. If this check box is not selected, then rates are taken from 'Currency Exchange Rates Input' screen based on the maintenance done in ‘Global Exposure Parameter’ screen.
The system picks the rate/rate code and updates the utilization across the facility linked to the contracts.
Product Restriction type
You can restrict the limit available under this line to a specific product by selecting allowed/ disallowed option.
If you choose the restriction type as 'Allowed', click the button and select the Product code from the
list to indicate that they are allowed to use the line.
If you choose the restriction type as 'Disallowed', click the button and select the Product code from the
list to indicate that they are not allowed to use the line.
Product Code
Specify the product code from the LOV for the Product Restriction.
Product Description
The product code description is displayed.
Branch Restriction type
You can restrict the limit available under this line to a specific branch by selecting allowed / disallowed option.
If you choose the restriction type as 'Allowed', click the button and select the Branch code from the
list to indicate that they are allowed to use the line.
If you choose the restriction type as 'Disallowed', click the button and select the Branch code from the
list to indicate that they are not allowed to use the line.
Branch
Specify the branch code from the LOV for the Branch Restriction.
Branch Description
Branch Code description is displayed.
Tenor Restrictions
You can define the limits based on the tenor of the contracts that utilize the limit.
Tenor
Specify the Tenor Name.
Days
Number of days corresponding to the tenor.
2.19.1 FX Rate Fixing
Provision to fix a rate between a 'Transaction Currency' and 'Facility Currency'.
Currently, system picks the rates for utilization transaction based on the maintenance at Parameter level in 'Global Exposure Parameter Detail’ screen.
A fixed rate can be provided or a set of parameters like rate type and rate indicators can be maintained, and the rate pick up is derived based on these parameters.
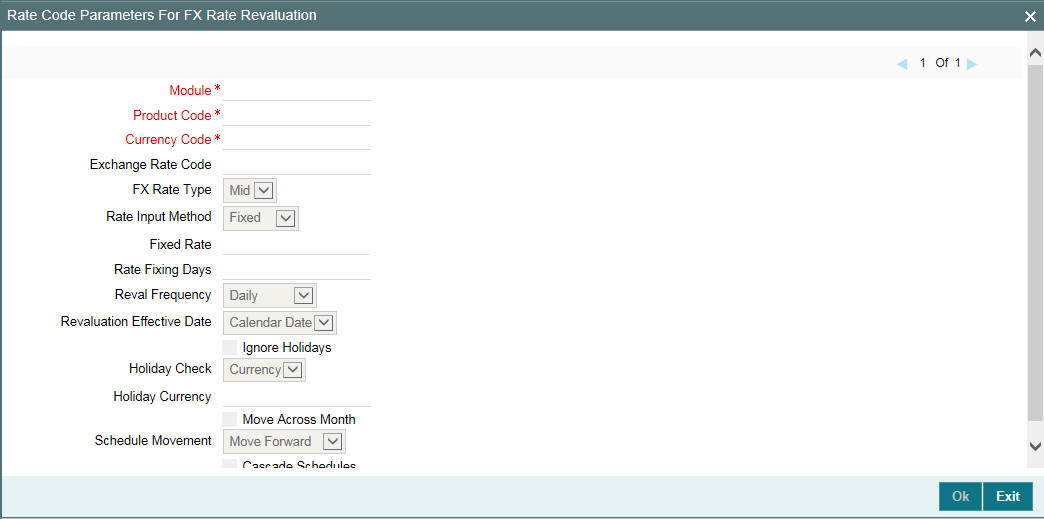
Module
Specify the associated module from the adjoining option list.
Product Code
Based on the module, the product code appears accordingly.
Currency Code
Specify the valid currency code. The ‘Currency Code’ cannot be same as ‘Line Currency’.
Exchange Rate Code
Specify the exchange rate code. These rate codes are picked from the Currency Rate Type Definition screen (CYDCRATY).
‘Exchange Rate Code’ field entry is required if the Rate Input Method is ‘Derived’. An error appears if 'Exchange Rate Code’ has a value and ‘Rate Input Method’ is ‘Fixed’.
FX Rate Type
You can either select ‘Mid’, or ‘Sell’ or ‘Buy’.
Rate Input Method
You can either select ‘Fixed’ or ‘Derived’.
- Fixed- Fixed rate provided at the FX level would be picked up.
- Derived- Based on Exchange Rate Code, FX Rate Type, and Rate Fixing Days provided, Rate would be derived.
The system revaluates only those contracts for which ‘Rate Agreement Required' and 'Revaluation Required' are selected.
The Next Reval Date is updated for each of the contracts created based on these FX Maintenances.
- Derived Rate Input Method Type -'Revaluation Frequency', 'Revaluation Effective Date' and ‘Holiday Treatment’ chosen at the facility level.
- Fixed Rate Input Method Type- Today’s Date.
After the End Of Day process, the facility would be revaluated with the modified values for Fixed and Derived Rate Input Method Type.
Fixed Rate
Specify the fixed rate.
‘Fixed Rate’ field entry is required if the ‘Rate Input Method’ is ‘Fixed’. An error appears if 'Fixed Rate' has a value and ‘Rate Input Method’ is ‘Derived’.
Rate Fixing Days
Specify the rate fixing days. The allowed values are 0-5.
In case of 'Derived', rate fixing days as T-0, Rate maintained at the 'Currency Exchange Rates Input' screen is taken.
Rate fixing days as T-1 to T-5, rate would be picked up from the History of 'Currency Exchange Rates Input' screen for the respective date.
Reval Frequency
You can either select ‘Daily’, ‘Weekly’, ‘Monthly’, ‘Quarterly’, ‘Half Yearly’, ‘Yearly’, ‘Ad Hoc’ or ‘None’.
Ensure to select 'Reval Frequency' if you have selected 'Revaluation Required' and 'Rate Agreement Required' check box in the 'Line Code Maintenance' screen.
Adhoc - Fixed rates are revaluated only on modification of rate at facility level. So, the frequency for fixed rates are maintained as ‘Ad Hoc’
None - If you need to suppress currency revaluation for a certain combination of ‘Module’, ‘Product Code’ and ‘Currency Code’, the ‘None’ can be selected as the Frequency.
For ‘Daily’, ‘Weekly’, ‘Monthly’, ‘Quarterly’, ‘Half Yearly’ and ‘Yearly’, next revaluation date is computed based on the Frequency selected.
Note
Reval frequency supported for 'Fixed' rate input method are 'ADHOC' and 'NONE'. For 'Derived' reval frequency except 'ADHOC' rate input method all other are supported.
Revaluation Effective Date
You can either select ‘Calendar Date’ or ‘Value Date’.
Calendar Date – For example, Revaluation date is 15th July, and Frequency is monthly, Next Reval Date would be 1st August.
Value Date - For Example, Revaluation date is 15th July, and Frequency is monthly, Next Reval Date would be 15th August.
Holiday Treatment
Ignore Holidays
If this check box is selected, then holiday treatment is not applied to calculate the next date. If this check box is not selected, then ‘Holiday Preferences’ settings are validated.
Move Across Month
If this check box is selected, then the system moves the date to next month. If this check box is unselected, then the system moves the date to next date.
Example
Working Day |
30-Aug |
1-Sep |
Holiday |
31-Aug |
|
Schedule Movement |
Move Forward |
|
Calculated Next Date |
31-Aug |
|
In above mentioned example, if ‘Move Across Month’ is selected, then the system moves next date to 1-Sep. If ‘Move Across Month’ is not selected, then the system changes next date to 30-Aug.
Schedule Movement
Move Forward
In case calculated next date is holiday then date should be moved forward. In this case fee liquidation moves to 1st Sep which is next working date
Move Backward
In case calculated next date is holiday then date should be moved backward. In this case, fee liquidation moves to 30th Aug which is previous working date
Cascade Schedules
If cascade schedules is selected, then the next date is calculated on based on previous schedule date instead of start date.
Holiday Check
If holiday treatment is applicable, then you can select ‘Local’, ‘Currency’ or ‘Both’ based on your holiday maintenance.
If 'Both' is selected and 'Branch' or 'Currency' is holiday, then holiday processing setting is considered.
Holiday Currency
If holiday check is maintained as ‘Currency’ or ‘Both’ then currency code to be maintained here.
2.19.2 Fee Preference
Branch
You can maintain branch code in this screen and this value gets defaulted in ‘Facilities Maintenance’ screen.
Account No
You can maintain account number in this screen and this value gets defaulted in ‘Facilities Maintenance’ screen.
Waive all fees
Select this check box if you want to waive all the fees.
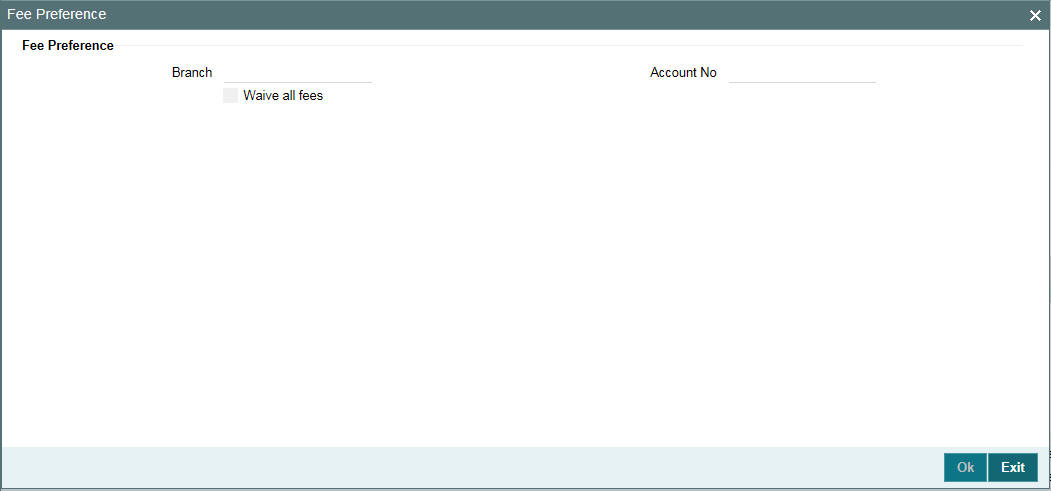
2.20 Facilities Maintenance
You can maintain credit limits for a Line Code - Liability Code combination in the ‘Facilities Maintenance’ screen. You can invoke the ‘Facilities Maintenance’ screen by typing ‘GEDFACLT’ in the field at the top right corner of the Application tool bar and clicking the adjoining arrow button.
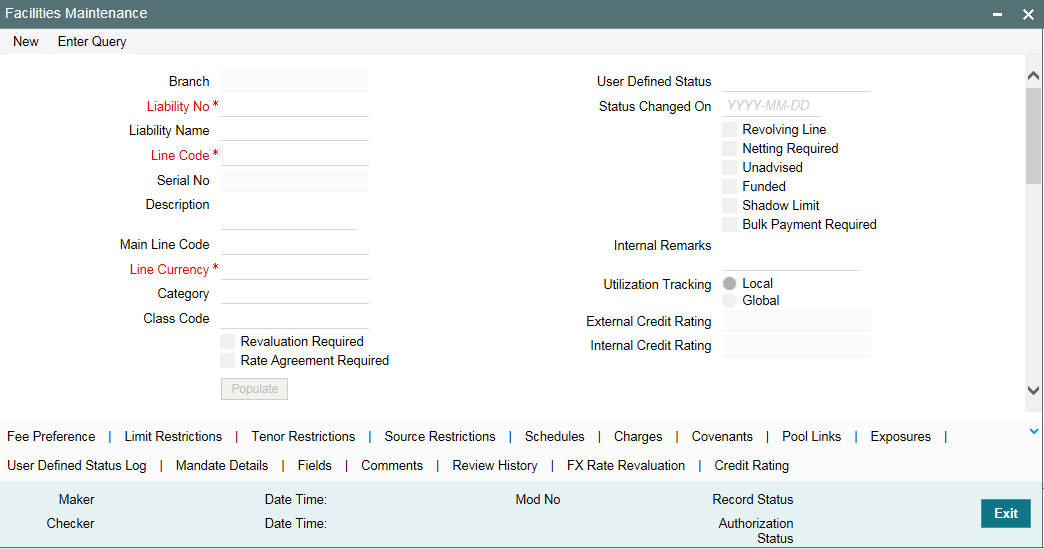
Specify the following details:
Facility Branch
By default, the system displays the branch code in which facility has been created.
Liability Number
Specify the Liability number here.
Line Code
Specify the Line Code to which the liability ID is to be associated with. Allocating credit limits for the Line-Liability combination can be done. The customer(s) who fall under this Liability Code avails credit facilities under this Credit line.
By linking a Credit Line to a Liability code the customer also gets linked to the Credit Line. This is true because a Liability code has been assigned to every credit seeking customer and the credit facilities granted to the customer are defined and tracked with this code.
You can either enter the Line Code or take from a LOV which picks the Line Code details maintained in the ‘GEDLNCOD’ screen.
Serial Number
Each time a Liability - line code combination is specified, Oracle FLEXCUBE ELCM system always defaults 1 as serial number. Thus, for every new record entered for a Liability No-Line Code combination, a serial number is defaulted to 1 . The Liability - Line- Serial number forms a unique combination for facility identification.
Note
If a second facility is created with the same line code then an error appears on save. To create multiple facilities, you can also select the line code from the LOV and default the values by clicking on ‘Populate’ button. Then value of line code can then be changed and save.
Description
Give a brief description of the facility here.
Main Line Code
Specify the main line code if the created facility is a sub line.
If the main line code is not specified, then the system defaults the line code as the main line code.
Line Currency
Specify the currency in which the facility is defined. The currency that has been selected have the following implications:
- The limit amount that has been specified for this Line-Liability combination is taken to be in this currency.
- The line that has been defined is available for Utilization only in the line currency, unless specified otherwise under Currency Restrictions in this screen.
Once the entry is authorized you cannot change the currency.
If the limit allotted to this Line-Liability combination can be utilized by accounts and transactions in currencies other than the limit currency, the limit utilization is arrived at by using the mid-rate for the currency pair as of that day.
Category
Select the facility category from the list available here.The list displayed here is based on maintenance done in 'Category Maintenance' screen.
Class Code
Select fee class from class code adjoining option list.
Revaluation Required
Identifies if the facility has to revalued or not.
Rate Agreement Required
If this check box is selected, then rates are taken based on FX rate fixing. If this check box is not selected, then rates are taken from 'Currency Exchange Rates Input' screen based on the maintenance done in ‘Global Exposure Parameter’ screen.
The system picks the rate/rate code and updates the utilization across the facility linked to the contracts.
Revolving Line
Select this check box to indicate that the credit line is Revolving. A revolving credit line indicates that a repayment of the utilized credit should reinstate the credit limit of the customer. You can modify the preference, as required.
Netting Required
This check box is deselected by default, indicating that netting is not required for the facility. You can select this check box to enable netting for the facility.
Unadvised
Select this check box to indicate that the facility is unadvised.
Note
Charges can be collected on the utilization transactions for facilities that are unadvised. For this purpose SDEs ADVISED_LINE and COMMITMENT_CUR_UTIL can be used while setting up the charge rule at the CL product creation level.
Funded
Indicate whether the line is fund based or non fund based.
Shadow Limit
Select this check box to indicate that utilization amounts should be updated only for the facility and mainlines for the facility. Thus, when a utilization request is processed, the system updates the utilization amount only at the facility level and leaves the utilization amount at the liability level untouched.
The mainline and sub-lines of a facility need to have the same preference. This implies that you can enable this option for a sub-line only if the mainline has this option already enabled. Similarly, you cannot create a sub-line as a ‘Shadow Limit’ if the mainline does not have this facility.
Note
You cannot modify this option after you authorize the facility.
Bulk Payment Required
Select this check box to indicate if bulk payment is required. If you specify here that bulk payment is required for the liner, then the same is maintained at the ‘Bulk Payments’ screen.
For more information about the ‘Bulk Payments’ screen, refer to the section, ‘Making Bulk Payments against loan or commitment’ under the Chapter ‘Operations’ of the ‘Retail Lending’ user manual.
Note
You can use this feature if ELCM standalone has FCUBS as the product processor.
User Defined Status
Specify status of the facility (For example, NORM for normal, BLOCKED, and so on) from the list available here The list displayed here is based on maintenance done in 'User Define Status Summary' screen.
Status Changed Date
Specify the date on which you want to change the status. You can specify a date before the line start date to block the line till the specified date. In addition, you can set a date prior to the application date.
Internal Remarks
Specify the internal remarks as limits terms and conditions.
Utilization Tracking
It signifies if the utilization tracking of the facility is done locally or globally.
Amounts
Specify the following details:
Limit Amount
Specify the limit for the facility. If you have maintained schedules for limits, the system automatically updates the limit amount here on the dates specified for each limit in the schedule.
Note
The charges can be collected on facility limit amount change. In this case commitment contract created should be capable of charging the customer on the facility limit amount change. For this purpose SDE INCREASED_PRINCIPAL can be used while setting up the charge rule at the CL product creation level. LIMIT_AMOUNT can be used while setting up the IC rule for interest calculation based on facility limit amount.
Collateral Amount
System defaults the Collateral Amount on save, based on the pools linked in the 'Pool Links' sub screen.
Transfer Amount
System displays the transfer amount resulting from 'Facilities Amount Transfer' transactions. The value displayed has either the sign "-" or "+", indicating whether the amount is transferred from or to the line. If the sign is "-", then the amount is transferred from the line and if it is "+", then the amount is transferred to the line.
Effective Line Amount
The system displays the effective line amount.
Effective Line Amount Basis
For defining drawing power of line the elements mentioned below are treated as the basis for the effective line amount calculation.
- Line Amount + Collateral
- Line Amount
- Minimum of Line Amount and Collateral
Note
EFF_LIMIT_AMOUNT can be used while setting up the IC rule for interest calculation based on facility effective limit amount.
Maintenance Value date
The value date on which facility amount is modified. That is, the date on which facility amount modified is earlier than ‘Line Start Date’ for an active credit line.
When an amendment is done on a facility like limit amount, basis, and so on, if maintenance value date is given as a back value date, modification takes effect from the given maintenance value date and appropriately value dated balance is updated. If maintenance value date is not entered during amendment, processing date is default updated. However, maintenance value date cannot be prior to line start date.
In case of future dated lines, any amendment done between the booking date and line start date, maintenance value date is updated as 'Line Start Date'.
Uncollected Amount
The system displays the uncollected amount.
Block Amount
Specify the block amount.
Approved Limit Amount
This is the maximum limit amount allowed for the facility and must be specified whenever you maintain schedule limits. System ensures that neither the ‘Limit Amount’ maintained here nor the schedule ‘Limit Amount’, maintained as part of the limits schedule is greater than the limit specified here".
Max Daily Limit
Specify the maximum daily limit.
Daily Light Limit
Specify the daily light limit.
Utilization
This section contains the following details:
Available Amount
The system displays the available amount.
Maximum Available Amount
Maximun available amount shows the mimimum available amount up in the hierarchy including main facilities, liability and main liabilities (The available amount for a liability is calculated as its overall limit amount minus utilized amount and block amount).
Date of First OD
The system displays the date of first OD.
Date of Last OD
The system displays the date of last OD.
Netting Contribution
The system displays the netting amount in GEDACCNT screen.
The system displays the netting contribution if:
- The facility is linked in the ‘Netting Account’ screen.
- ‘Netting Required’ is checked at Liability level, Facility level, and Netting Account level.
Last New Utilized Date
The system displays the last new utilized date.
Amount Utilized Today
The system displays the amount utilized on the current date.
Utilization Amount
The system displays the utilization amount.
Tanked Utilization
The system computes and displays the utilization amount that can be set in the 'Tanked Utilization' field.
As part of EOD process, the utilization amount is set in the 'Tanked Utilization' field.
During EOD process, this utilization amount is updated as indicated below:
- Based on the liability which is linked to the transaction as per the contract
- Based on the collaterals that is linked to the transaction.
- Based on the collaterals pool which is linked to the transaction.
After BOD process, the amount is cleared from the 'Tanked Utilization' field and it is updated in the utilization amount.
Processing future dated credit line
A future dated credit line is a credit line that has a value date later than the date on which it is booked. You can create credit line with value date as future date for the following lines.
- Main-Lines
- Sub-Lines
You can create future dated sub-lines only for active main-lines. Both main-line and sub-line cannot be created with future value date.
System validates that only active main lines can be linked to a future dated sub-line and only active lines are list in LOV against main line.
Availability
Specify the following details:
Line Start Date
Specify the line start date. If not specified, system defaults the line start date as the current application date. In case ‘Line Start Date’ is not specified line start date takes current application date. Once such a record is authorized, line start date cannot be edited.
However, if a line is created with future date, this ‘Line Start Date’ can be modified after authorization. However, modified date cannot be prior to current business date.
You can book a future dated credit line using ‘Line Start Date’.From this date the credit line becomes active. You cannot enter the back date, that is, the date prior to system date. If line start date falls on a holiday, an override message appears.Initiation event of the future dated facility is triggered on ‘Line Start Date’ with contingent entries.
Expiry Date
Specify the expiry date for the facility. If the limit amount assigned to the facility is not utilized within the specified expiry date then the Available check box remains deselected. This freezes the line for the respective liability.
The freezing of the line code is part of the Oracle FLEXCUBE ELCM EOD Batch.
The Oracle FLEXCUBE ELCM system does not allow the expiry date of a facility to exceed the expiry date of linked collateral(s).
When a Facility record is saved, the system compares the expiry date of all the collaterals in the Pool which is linked to the Facility. An error message is shown if any expiry dates are less than the expiry date of the Facility.
If the expiry date falls on a holiday maintained in the branch, then system displays the error message ‘Facility Expiry Date falls on a branch Holiday’.
The facility shall not be available on the maturity/expiry but you can modify the facility on the expiry date if required.
Available
If the Line facility is available then this check box is selected.
The Oracle FLEXCUBE ELCM system tracks the status of both the Contract and the Facility. When the status of the Contract changes to PDO, then the Facility becomes unavailable.
This check box is disabled if the ‘Line Start Date’ is provided as future date, that is the credit line is in inactive state. It is enabled on the date when the credit line becomes active.
The product processor gives an ASCII file including all the facilities which need to be frozen. Oracle FLEXCUBE ELCM initiates an amendment event and then deselects the 'Available' check box.
Book Date
Specify the date on which the credit line is booked in the system. The system date is defaulted. You cannot modify this date.
Note
Amendments to facility between booking date and line start date is considered at the time of initiation of contract on line start date
Available check box gets automatically selected on line start date BOD and facility is available for utilization.
Availment Date
Specify the availment date on which the first utilization should take place. If the limit amount assigned to the facility is not utilized within the specified availment date then the available check box is disabled. This freezes the line for the respective liability.
Exception
Specify the following details:
Exception Transaction Amount
Specify the Exception transaction amount. During utilization transaction when the utilization amount crosses the specified exception transaction amount, there is a breach of the limit amount. This is a credit exception in the transaction. You can use the ‘Multi-authorisation’ screen for authorising such a transaction.
Note
The utilization transaction can also be authorized or rejected using the "Multi Authorization Maintenance screen based on the system configuration.
Exception Breach Percentage
Specify the Exception Breach Percentage. During utilization transaction when utilization amount crosses the specified Exception Breach Percentage, there is a breach of the limit amount. This is a credit exception in the transaction. You can use the ‘Multi-authorisation’ screen for authorising such a transaction.
Note
The utilization transaction can also be authorized or rejected using the ‘Multi Authorization
Maintenance’ screen based on the system configuration.
Limit Status
Select the status of the limit from the adjoining drop-down list. The options available are:
- Active
- Closed
- Frozen
Next Review Date
Based on the review frequency, the system displays the next limit review date. This date is derived by adding the frequency days to the current date.
If you do not select any of the provided review frequency and set it to blank, then you need to manually enter the next review date.
The next review date must always be before the facility expiry date.
Review Frequency
Select the frequency at which the limit should be reviewed. The options available are:
- Monthly
- Quarterly
- Half yearly
- Yearly
- Blank - if you select this, you need to specify the next review date.
Closure Reason
Specify the reason for limit closure. The system also displays the closure reason based on CAM process flow.
Freeze Reason
Specify the freeze reason of the limit. The system displays this based on CAM process flow.
Note
The following SDEs are not applicable for ELCM based interest calculation.
- ELCM based interest calculation SDEs,
- Limit_Amount, Eff_Limit_Amount
- Matured_Amount - If you repay the already utilized amount, then the repay credit will update on the Matured_Util field of the 'Getm_facility' table.
Note
In case of granular access, facility details maintained for allowed list of customers are allowed to view, query, modify, authorize, re-open, copy, delete, and so on based on the user/users preferences selected in ‘Access Group Restriction’ tab available in the ‘User Maintenance’ screen. For more information, refer to Common Core - Security Management System User Guide.
2.20.1 Maintaining Facility Event Details
The 'Facility Event Details' screen is used to view the event details related to the facility online.
You can click ‘Events’ button or type’ GEDFEVNT’ in the field at the top right corner of the application toolbar and click the adjoining arrow button to invoke this screen.
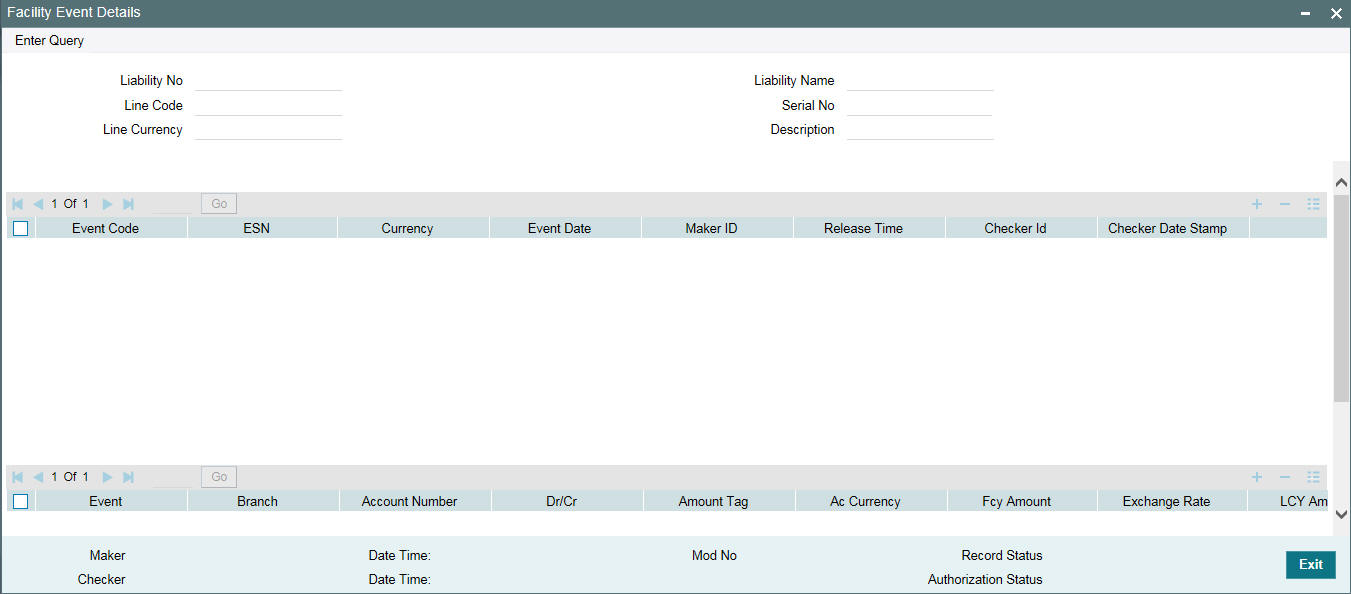
Liability No
Facilities have to be linked to a liability. Specify the liability number for which the facility is linked.
Liability Name
Specify the liability name.
Line Code
Specify the line code to be used for facility. If a line code is linked to a facility then it is required to track the limits of the linked line.
Serial No
Indicates the ELCM generated unique identifier for the facility. The ‘Serial No’ field is disabled and it gets defaulted from the ‘Facilities Maintenance’ screen.
Line Currency
Specify the currency in which the facility is defined. The currency that has been selected have the following implications:
- The limit amount that has been specified for this Line-Liability combination is taken to be in this currency.
- The line that has been defined is available for Utilization only in the line currency, unless specified otherwise under Currency Restrictions in this screen.
Once the entry is authorized you cannot change the currency.
If the limit allotted to this Line-Liability combination can be utilized by accounts and transactions in currencies other than the limit currency, the limit utilization is arrived at by using the mid-rate for the currency pair as of that day.
Description
Specify the facility description.
Event details can be fetched based on the following filter conditions.
- Liability Number
- Line Code
- Serial Number
2.20.2 Maintaining Fee Details
You can add fee details on the facility maintenance using ‘Fee Details’ screen. To invoke this screen, click ‘Fee Preference’ button on the ‘Facility Maintenance’ screen.
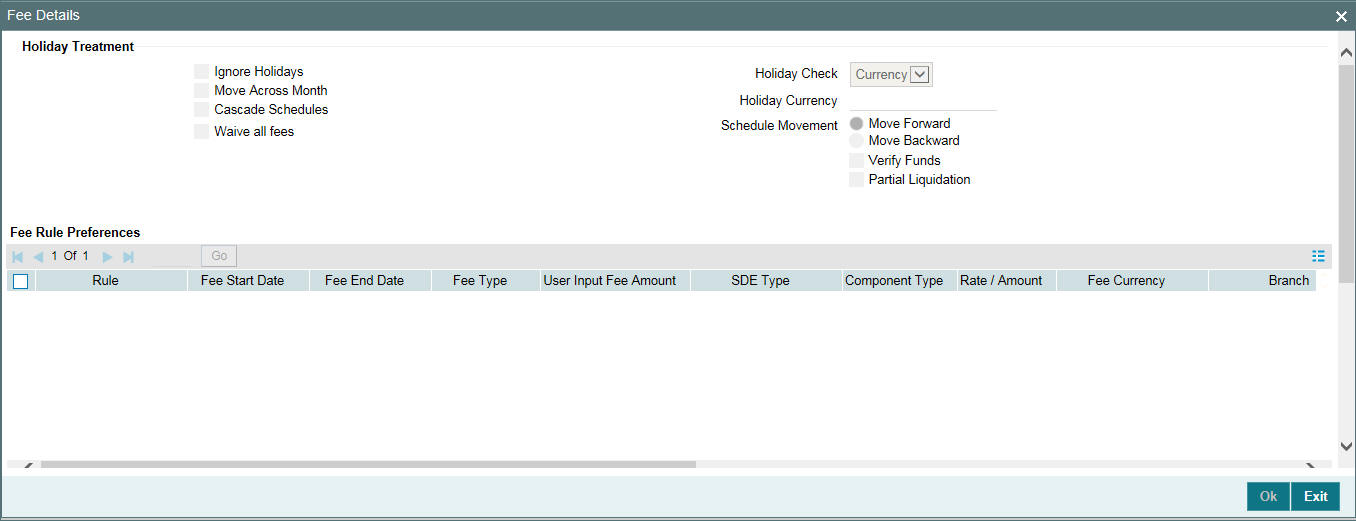
Fee Rule Preferences
Specify the following:
Holiday Treatment
Ignore Holidays
If this check box is selected, then holiday treatment is not applied to calculate the next date. If this check box is not selected, then ‘Holiday Preferences’ settings are validated.
Move Across Month
If this check box is selected, then the system moves the date to next month. If this check box is unselected, then the system moves the date to next date.
Example
Working Day |
30-Aug |
1-Sep |
Holiday |
31-Aug |
|
Schedule Movement |
Move Forward |
|
Calculated Next Date |
31-Aug |
|
In above mentioned example, if ‘Move Across Month’ is selected, then the system moves next date to 1-Sep. If ‘Move Across Month’ is not selected, then the system changes next date to 30-Aug.
Schedule Movement
Move Forward
In case calculated next date is holiday then date should be moved forward. In this case fee liquidation moves to 1st Sep which is next working date.
Move Backward
In case calculated next date is holiday then date should be moved backward. In this case, fee liquidation moves to 30th Aug which is previous working date.
Verify Funds
You can select this check box if ECA check is required. If this check box is selected, then liquidation of fees follows the ECA process (as opted for full or partial liquidation). If this check box is not selected, then the system does a force post for all fees components.
Partial Liquidation
If this check box is selected, then partial liquidation/recovery is allowed based on the balance amount of fees available in CASA. If this check box is not selected, then system will opt to recover full amount of fees and will not try for partial liquidation/recovery in case of insufficient CASA balance.
Note
If this check box is selected and ‘Verify Funds’ check box is not selected, then an error appears on save of facility. If this check box is not selected and ‘Verify Funds’ check box is selected an override appears on save of facility and then full liquidation happens. Only if both the check boxes are selected then partial liquidation is allowed.
Cascade Schedules
If cascade schedules is selected, then the next date is calculated on based on previous schedule date instead of start date.
If fee liquidation date for one of the liquidation cycle is changed based on holiday processing setting and if cascade schedule is selected future liquidation dates of corresponding fee gets modified as per the newly arrived liquidation date.
Holiday Check
If holiday treatment is applicable, then you can select ‘Local’, ‘Currency Holiday’ or ‘Both’ based on your holiday maintenance.
If 'Both' is selected and 'Branch' or 'Currency' is holiday, then holiday processing setting is considered.
Holiday Currency
If holiday check is maintained as ‘Currency’ or ‘Both’ then currency code to be maintained here.
Rule
Click 'Populate' of the 'Facility Maintenance' screen to display the fee rules linked to the fee classes in the 'Fee Preference' sub-screen.
Fee Start Date
Specify the date from which the fee needs to be calculated. If fee start date is left blank, then 'Line Start Date' is defaulted. The fee start date cannot be before 'Line Start Date'.
Fee End Date
Specify the date, till the fee needs to be calculated. If it is blank, on save system defaults the 'Line Expiry Date' as 'Fee End Date'.
Fee Type
Displays whether the 'Fee Type' is 'Rate' or 'Amount'. These values get defaulted from the 'Fee Rule Maintenance' screen.
User Input Fee Amount
The fee amount is entered if the fee is of ‘User Input Fee’.
SDE Type
If the fee is based on any SDEs, the SDE which is linked to that fee is displayed.
Component Type
Indicates the ‘Slab’ or ‘Tier’ fee component type. This value is fetched from the GEDRULES.
Rate Amount
Specify the applicable fee rate or amount. For ‘Slab’ component type both fee rate and amount are applicable whereas for ‘Tier’ component type only fee rate is applicable.
Fee Currency
The system defaults the fee currency as line currency on facility creation. It is a read -only field.
Branch
Indicates the Branch code. You can either enter the branch code or select the branch code from the adjoining option list.
Account Number
Account number configured in 'Fee Class Maintenance' screen (customer debit) for the corresponding fee rule which gets defaulted in this field. If required you can modify.
Select the account number from the adjoining option list. A list of all valid accounts related to customer linked to liability are displayed here.
Account Currency
Once you select the account number, the account currency is defaulted.
Liquidate Method
The liquidation method of fee maintained in 'Fee and Accounting Class Maintenance' screen, whether it is 'Arrears' or 'Advance' is displayed here.
Liquidation Preference
The liquidation preference of fee maintained in 'Fee and Accounting Class Maintenance' screen whether it is 'Auto' or 'Manual' is displayed here.
Start Date
The date in which the fee has to be calculated is defaulted from 'Fee and Accounting Class Maintenance' screen.
Start Month
The month in which the fee has to be calculated is defaulted from 'Fee and Accounting Class Maintenance' screen.
Waived
While maintaining a facility, we can waive the specific fee linked to class in the fee preference.
Defer Liquidation
If an individual fee in a facility is to be deferred for a fee liquidation cycle, then this check box allows you to defer liquidation of fees attached to a credit line.
Defer check box is not selected by default at the time of facility creation. If defer check box is selected during facility creation, entering defer liquidation days is mandatory.
Likewise for a fee which is attached during facility creation, defer check box is available for selected as part of amendment for the particular liquidation cycle.Fee which is marked as deferred gets liquidated on the deferred liquidation date after that the defer check box gets cleared and defer liquidation days field is blank which gets enabled if you mark the fee of next liquidation cycle as defer.
Defer Liquidation Days
The number of days fee liquidation is to be deferred. That is, number of days after which fee is liquidated from its original liquidation date.
Note
- Defer fee liquidation is applicable for all fees with 'Liquidate Method' as ‘Arrears’ and 'Liquidation Preference' as ‘Auto’.
- Defer fee liquidation is not applicable if the fee 'Liquidation Frequency' is ‘One time’ or ‘Daily’. If liquidation frequency is ‘Monthly’/’Quarterly’/’Half Yearly’/’Yearly’, then the maximum number of days deferred can be 30.
- Defer fee liquidation is not applicable for fees with 'Liquidate Method' as ‘Arrears’ and 'Liquidation Preference' as ‘Manual'.
- Deferment of fee liquidation is applicable only for the current fee cycle. Not applicable for future or previous fee cycles.
- Fee liquidation event and entries are triggered on the new liquidation date.
- Backdated utilizations triggers fee re-calculations only for the current cycle. It does not affect the previous cycle fees (both fee calculations and accruals). The fees, which have been liquidated (non-deferred) or are to be liquidated on new deferred date is not recalculated.
- For fees with holiday processing applicable, new deferred liquidation date is arrived at by adding the defer number of days to the original liquidation date calculated based on applicable holiday processing rule. However, if the deferred liquidation date falls again on a holiday, fee liquidation event is triggered on the same day with accounting.
- ECA processing considers the new fee liquidation date as a result of deferred fee liquidation.
Effective Dates
Specify the dates from which the fee rate details are applicable for the specific fee linked in the ‘Fee Rule Preference’ screen.
Fee Rate Details
Specify the following:
Basis Amount
Specify the fee basis amount.
Rate
Specify the fee rate in percentage
Amount
Specify the fee amount.
External Pricing Required
This value is defaulted based on the class selected in 'Fee and Accounting Class Maintenance' screen and you cannot modify this value.
Compute Ext Pricing
This button is enabled only if ‘External Pricing Required’ check box is selected in ‘Fee Rule Maintenance’ screen. You need to provide the effective date for fee component and click ‘Compute Ext Pricing’ button. The system fetches the pricing value for the date selected from the external pricing and billing system.
2.20.3 Maintaining Limit Schedules
The limit assigned to a customer under a revolving line can be reduced. You can define these details while maintaining limits for a customer. From the Facilities Maintenance screen, click ‘Schedules’ button.
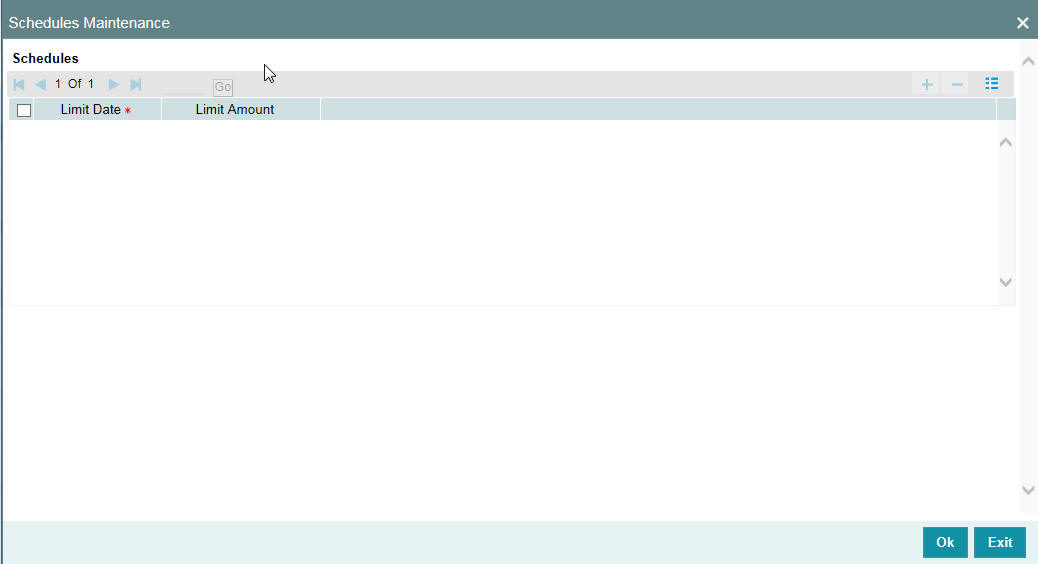
For a liability code and credit line combination, you can define limit schedules and indicate the limit that is applicable for the period. You can enter a negative limit amount. However, the ‘Limit Date’ should not be earlier than the ‘Limit start date’ and later than the ‘Limit Expiry Date’.
The Facility batch which runs at BOD checks the limits schedule for a facility and if a schedule is due on the current date in the branch. If so, it updates the limit amount for the facility for which the schedule is due with the schedule limit amount.
Limit Date
Specify the limit date. The limit date cannot be earlier than current business date.
The limit date cannot be earlier than 'Line Start Date'. It should be future date of 'Line Start Date'.
Schedules Limit Amount
Specify the limit amount for the specific limit date.
You need to enter details in this screen only for transactions that involve a Tenor (Example, Loans, Money market transactions, and so on). Through this screen you can specify a list of Tenors and the associated limit that tenor based transactions can utilize under this line.
For example, you have defined a limit schedule for a facility for your client ABC Corporation where the Limit Amount initially is USD 1 million and the start date for the facility is Jan 01,2009. The schedule is as shown below:
Limit Date |
Limit Amount |
February 01, 2009 |
500000 |
March 02, 2009 |
800000 |
April 03, 2009 |
400000 |
May 04, 2009 |
900000 |
In this case, during BOD on Feb 01, 200r, the limit mount is updated to USD 500,000 and on Mar 02, 2009 it is modified again to USD 800,000. If the batch does not run on Mar 02, 2009, it will be run on Mar 03, 2009. Accordingly, the ‘Scheduled Limit Amount’ defined for Mar 02, 2009 Schedule is updated as Facility Limit Amount.
During EOD, the system processes limits schedules and revision process takes place for the facilities as per the scheduled date. It processes the limit schedules till next working day and marks all the schedules till date as processed.
When the Facility Start Date and Schedule Date falls on the same day, then on save of Facility record, you get an override message for confirmation on updating the limit amount of Facility as per the schedule amount.
While processing, if there are any errors or overrides, it should be logged. The following are the possible errors:
- Available amount is negative for the facility.
- The Tenor Limit Amount exceeds the Line Approved Limit Amount as the validation of the Tenor Limit Amount is against the Approved Limit Amount.
- The amount cannot exceed the overall limit specified for the liability id.
- The Main Line Limit cannot be less than any of its Sub Line Limit.
- The Sub Line Limit cannot exceed the Main Line Limit.
Example
Assume the following:
- Liability - GROUPLIAB
- Line - SHTLLIMIT
- Serial - 1
- Start Date - 01-Jul-2009
- Limit Currency - USD
- Limit Amount - 50000
Schedules:
Limit Date |
Limit Amount |
15-July-2009 |
60000 |
28-July-2009 |
65000 |
30-July-2009 |
75000 |
15-Aug-2009 |
80000 |
- System Date - 14-Jul-2009
- Limit Amount - 50000
- On 14-Jul-2009 EOD, limit revision process takes the 15-Jul-2009 schedule and update 60000 as limit amount. The revised limit is enforced or effective on 15-Jul-2009.
- System Date - 15-Jul-2009
- Limit Amount - 60000
Schedules:
Limit Date |
Limit Amount |
15-July-2009 |
60000 |
28-July-2009 |
65000 |
30-July-2009 |
75000 |
15-Aug-2009 |
80000 |
- System Date - 27-Jul-2009
- Limit Amount - 60000
- Next working Day - 30-Jul-2009
On 27-Jul-2009 EOD, the limit revision process picks 28-Jul-2009 and 30-Jul-2009 schedules and update 75000 as limit amount. The revised limit is enforced / effective on 30-Jul-2009.
- System Date - 30-Jul-2009
- Limit Amount - 75000
Schedules:
Limit Date |
Limit Amount |
15-July-2009 |
60000 |
28-July-2009 |
65000 |
30-July-2009 |
75000 |
15-Aug-2009 |
80000 |
2.20.4 Specifying Covenant Details
The covenant details can be captured for facility in the ‘Covenant Details’ screen. Click ‘Covenants’ to invoke this screen.
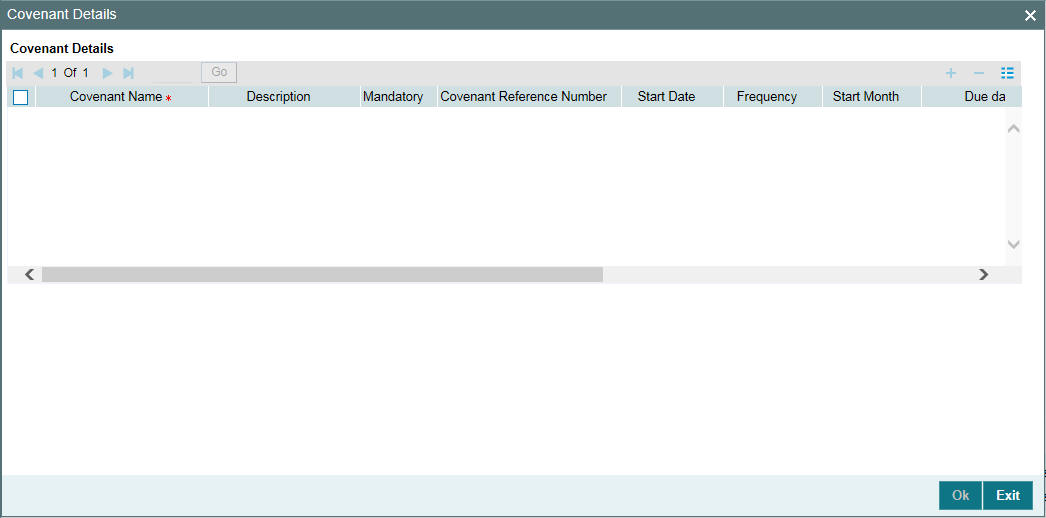
Multiple covenants can be entered in the screen shown below. You can customize the details of each covenant recorded here.
Covenant Name
Select the covenant name from the list available here. The list displays the covenant names maintained in Covenant Maintenance screen. Based on the covenant selected, all other details of the covenant maintenance will be brought here.
Mandatory
Mandatory/Non mandatory details are shown on choosing a covenant name. You may change this.
Covenant Reference Number
Indicates the covenant reference number.
Start Date
Start date is defaulted to current business date when covenant is linked to a facility and you cannot modify it.
Frequency
Frequency of the specified covenant is defaulted here based on the details maintained at ‘Covenant Maintenance’ screen.You may change the frequency shown here on choosing a covenant name.
Start Month
Start month of the specified covenant is defaulted here based on the details maintained at ‘Covenant Maintenance’ screen. You may change the 'Start Month' shown here on choosing a covenant name. Start month is mandatory when frequency is quarterly and above.
Due date
Due date of the specified covenant is defaulted here based on the details maintained at ‘Covenant Maintenance’ screen. You may change the Due Date shown here on choosing a covenant name. Due date is mandatory when frequency is monthly and above.
Revision Date
Indicates the date on which covenant has to be revisited for review.
Revision date is derived by system and updated when covenant is saved – based on combination of start date + (combination of frequency and due date and start month).
Examples for the revision date calculation of different frequencies.
System date -5th April 2019
- Daily-6th April 2019
- Weekly-12th April 2019
- Monthly-10th May 2019 (Due date provided-10)
- Quarterly-2nd June 2019 (Due date provided-2, Start month- June)
- Half yearly-1st Feb 2020 (Due date provided-1, Start month-Feb)
- Yearly- 10th July 2020 (Due date provided-10,Start month-July)
System date -5th August 2019
- Daily-6th August 2019
- Weekly-12th August 2019
- Monthly-10th September 2019 (Due date provided-10)
- Quarterly-2nd June 2020 (Due date provided-2, Start month- June)
- Half yearly-1st Feb 2020 (Due date provided-1, Start month-Feb)
Yearly- 10th July 2020 (Due date provided-10,Start month-July)
Notice Days
Specify the notice days, that is, the number of days prior to revision date of the covenant. The period during the notice days are the notice period. Notice days are mandatory when frequency is weekly and above. You can change the Notice Days details which are displayed here on choosing a covenant name
Grace Days
Specify the grace days, that is, the number of days after the revision date of the covenant that the covenant will be available for tracking. You can change the Grace Days details which are displayed here on choosing a covenant name.
Remarks
Remarks if any specified for the covenant at the ‘Covenant Maintenance’ screen are defaulted here. It can also be changed here.
Covenant Reference Number
Indicates the covenant reference number.
2.20.5 Tracking Exposure for a Line
The facility defined can be tracked for particular exposures.
The exposure details can be captured for facility in the ‘Exposure Details’ screen. Click ‘Exposure’ to invoke this screen.
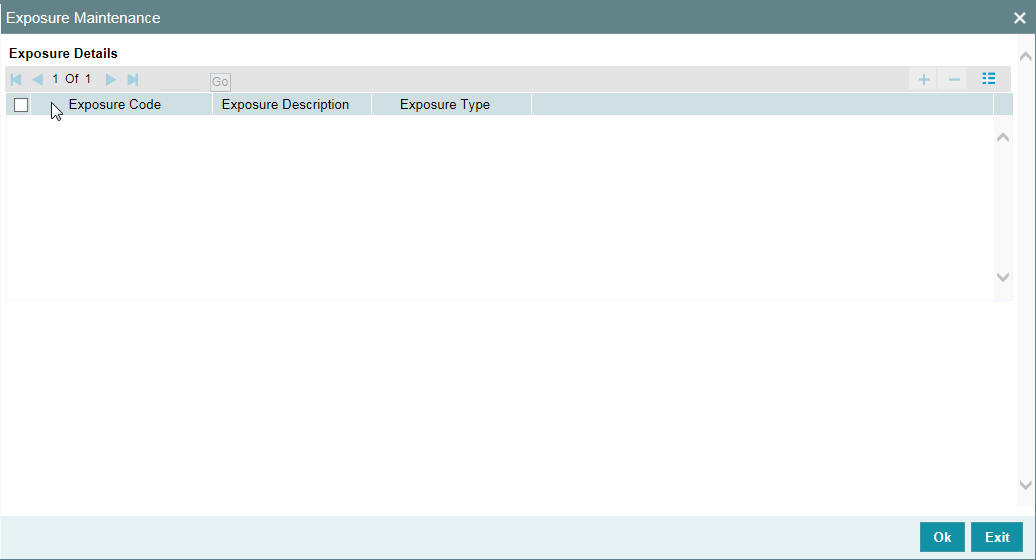
Exposure Code
Select the exposure code from the option list available here. The list displays the exposure codes maintained in Exposure Maintenance screen. Based on the exposure selected, all other details of the exposure maintenance is displayed here.
Description
The system displays the description of the selected exposure code.
Exposure Type
The system displays the exposure type to which the selected exposure code is associated.
2.20.6 Capturing Facility Main Line Change Maintenance Details
In case, if the main line has been changed, the utilization transactions linked to the sub-line also needs to be changed. Using this screen, all the utilization transactions done in facility which has a main-line change, would reflect the utilization transaction changes in the new main line. These changes happen after processing EOD.
You can invoke the ‘Facility Main Line Change Maintenance’ screen by typing ‘GEDFMLCG' in the field at the top right corner of the Application tool bar and clicking the adjoining arrow button.
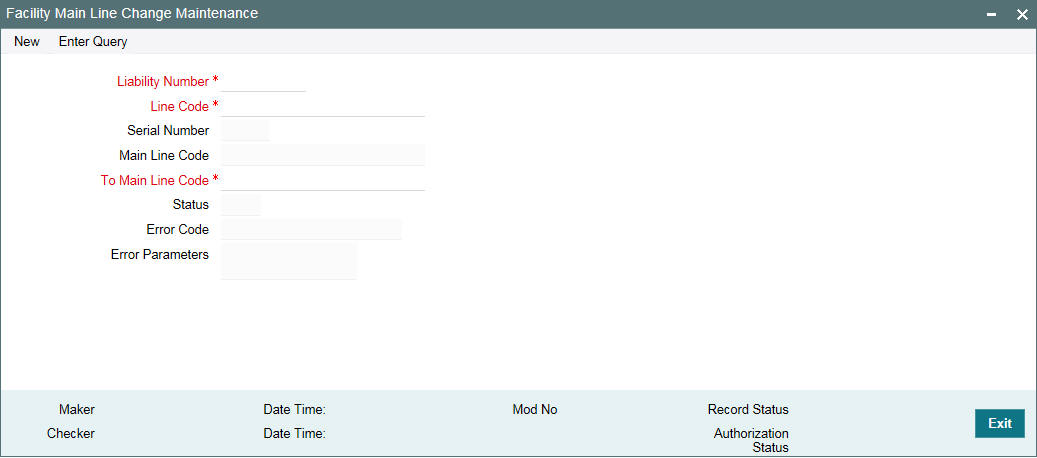
Liability Number
Specifies the liability number of the utilization transaction. Specify the valid liability number available in the ELCM system.
Line Code
Specify the Line Code to which the liability ID is to be associated with.
Serial Number
Each time a customer - line code combination is specified, ELCM module assigns a unique serial number to the combination. This serial number is unique to the line-liability code combination. Thus, for every new record entered for a Line-Liability combination, a new serial number is generated. The Line - Liability - Serial number forms a unique combination.
Main Line Code
Specify the main line code if the created facility is a sub line. If the main line code is not specified, then the system defaults the facility code as the main line code.
To Main Line Code
The new main line code to which the utilized amount is transferred.
Status
The status of the line is displayed.
Error Code
Specifies the error code of the transaction.
Error Parameters
Specifies the error parameters associated to the transaction.
2.20.7 Capturing Facility Maintenance Charges Details
To capture facility maintenance charge details, click ‘Charges’ button.
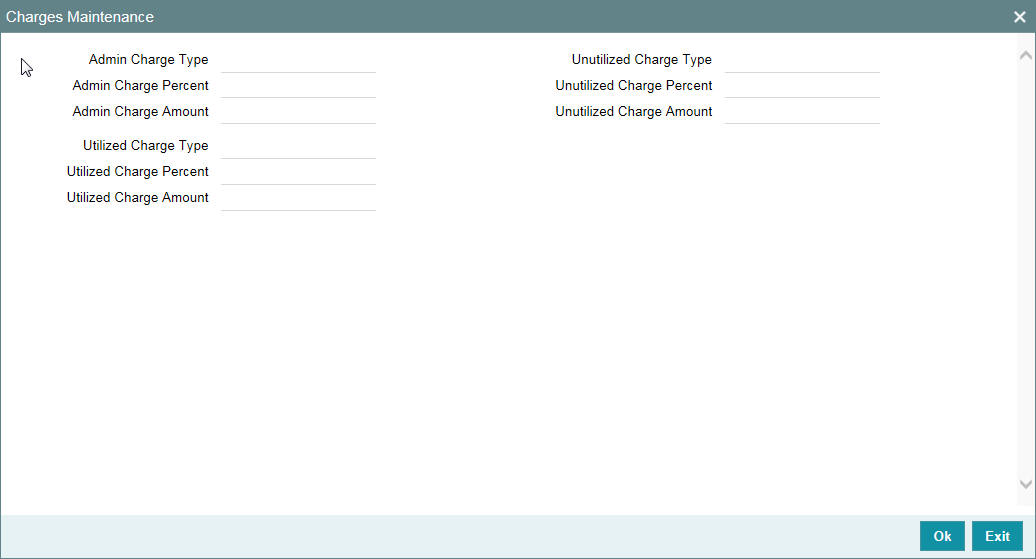
Admin Charge Type
Administrations charges as a part of creation of new line can be specified here. Charge can be a fixed amount or a percentage of the Limits amount.
Unutilized Charge Amount
Specify the charge amount that has to be collected on a certain frequency (daily, monthly, and so non) based on the unutilized amount. Charge can be a fixed amount or a percentage of the unutilized amount.
Utilized Charge Amount
Specify the charge amount that has to be collected on a certain frequency (daily, monthly, and so on) based on the utilized amount. Charge can be a fixed amount or a percentage of the utilized amount.
Note
‘Charge’ sub-screen captures the details and stores it. However, this information does not have any impact on the processing of charges in the application.
2.20.8 Maintaining Collateral Pool Linkages
For collateral Contribution in Total Effective line amount, the pool code maintained for that particular Liability ID has to been linked, which can be achieved using this sub-screen. From the Facilities Maintenance screen, click on the ‘Pool Links’ button.
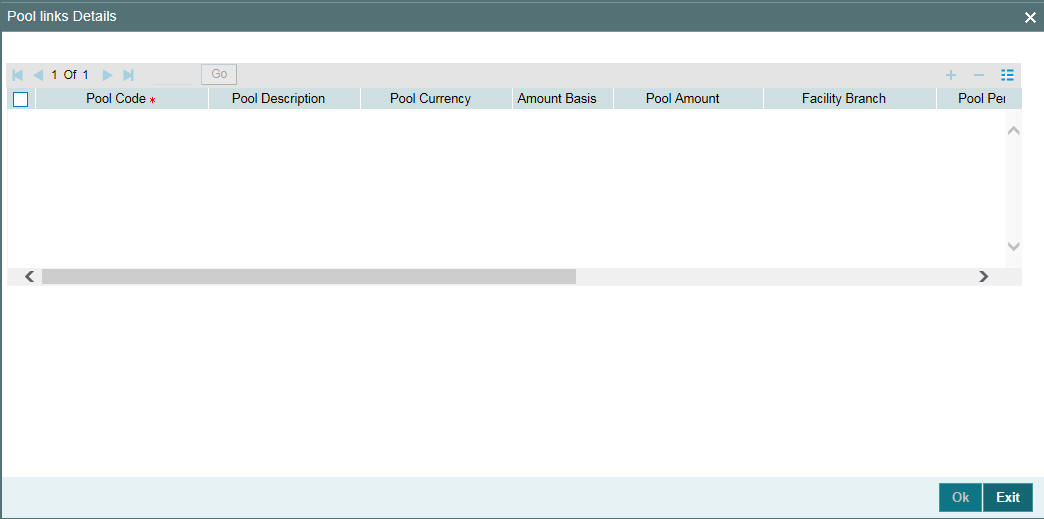
Pool Code
Select the pool code from the adjoining list. The list displays all the pool codes associated for that liability ID.
Pool Description
System displays the pool description based on the selected pool code.
Pool Currency
System displays the pool currency based on the selected pool code.
Amount Basis
You can either select ‘Percentage’ or ‘Amount’
If 'Percentage' is selected, then system allows you to enter the percentage only and not the 'Linked Amount'. The 'Linked Amount' is appropriately calculated by the system and it is not editable. The value of the percentage must be from range 0 to 100.
If 'Amount' is selected, then the system allows you to enter the amount only and not percentage. When amount is entered, the system appropriately calculates the percentage. Ensure to maintain amount in positive.
If the 'Amount Basis' is selected as ‘Amount’ and 'Collateral Pool Value' is modified, then the percentage linked gets recalculated based on the modified 'Collateral Pool Value'.
You can modify the linkage at facility level from percentage to amount and vice-versa.
The system ensures that total of pool value linked to one or multiple facilities is not more than the collateral pool value.
Pool Amount
System displays the pool amount based on the selected pool code.
Facility Branch
Select the branch code from the adjoining list.
Pool Percentage
System displays the pool %.
Linked Amount
System displays the facility amount In Pool currency.
Pool Percentage and Linked Amount
In case 'Collateral Pool Value' is increased in 'Collateral Pool Maintenance' screen, then the 'Linked Amount' is modified only if the 'Amount Basis' is 'Percentage'.
If the 'Amount Basis' is 'Amount', then the 'Linked Amount' is retained as is. However based on the changed 'Collateral Pool Value', the 'Pool Percentage' is re-calculated considering the retained amount.
In case 'Collateral Pool Value' is decreased, modified amount of collateral pool is validated with all the 'Linked Amount' in various facilities (either percentage or amount) and if the total amount linked is less than modified amount then modification of collateral pool value is to be allowed. Wherever 'Percentage' is considered for linking collateral pool value to facility
If the 'Collateral Pool Value' decreased amount is less than the total 'Linked Amount' in various facilities, then an appropriate error message appears.
Facility Currency
System displays the facility currency
Linked amount in Facility Ccy
System displays the facility amount.
Percentage Of Contract
System displays the percentage of contract.
Pool Linkages multi entry block does two functions:
Firstly, on clicking ‘Plus’ button you can link one row of the available pool amount (that is, Pool amount – Pool Utilized) to that Line code for which the collateral contribution is required. Secondly, it displays at any point in time the pool amount (in percentage terms) utilized by various Line Codes and Contracts.
2.20.9 Maintaining Restrictions for a Line
By default, all customers, branches, and products maintained in your bank can utilize the limit defined for a credit line. You can also define the limit for a line in any currency. However, you can opt to restrict the limit available under a credit line to specific customers, branches, products and currencies.
You can define these restrictions in the Limits Restrictions screen. To invoke this screen, click ‘Limit Restrictions’ button from the Facilities Maintenance screen.
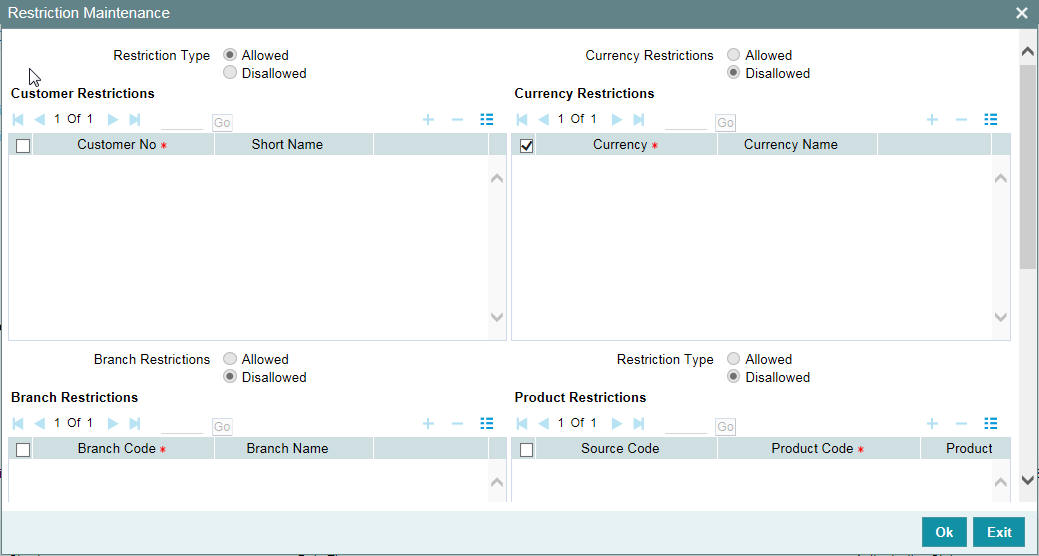
Restriction Type
Select the restriction type for each restrictions defined for the facility from the following options:
- Allowed
- Disallowed
Customer Restrictions
Customer No
Select the customer number from the adjoining option list.
Short Name
Specify the short name for the customer.
Currency Restrictions
Currency Code
Specify the currency code for the Currency Restriction.
Currency Name
System displays the currency name for the currency, as maintained in the 'Currency Definition' screen based on the selected 'Currency Code’.
Branch Restrictions
Branch Code
Specify the branch code for the Branch Restriction.
Branch Name
System displays the branch name for the branch, as maintained in the 'Branch Parameters Maintenance' screen based on the selected 'Branch Code’.
Ext System Restrictions
External System
Specify the external system for the External System Restriction.
Description
System displays the description for the external system, as maintained in the 'External System Maintenance' screen based on the selected 'External System' chosen Exposure Restrictions
Exposure Name
Specify the exposure name for the Exposure Restriction.
Exposure Description
System displays the description for the exposure, as maintained in the 'Track Exposure Maintenance' screen based on the selected 'Exposure Name'.
Product Restrictions
Product Code
Specify the product code for the Product Restriction.
Product Description
System displays the description for the product based on the selected 'Product Code'
2.20.10 Maintaining Customer Restrictions for a Line
To recall, you can assign a limit to a Line - Liability combination. A liability code can have several customers linked to it. By default, the line that you define is available to all customers linked to the liability code.
You can restrict the limit available under this line-liability combination to specific customers. If you choose the restriction type as 'Allowed', click on the ‘Plus’ button and select the customer code from the list to indicate that they are allowed to use the line. If you choose the restriction type as 'Disallowed', click on the ‘Plus’ button and select the customer code from the list to indicate that they are not allowed to use the line. Once you choose restriction type as 'Allowed', you can restrict a customer(s), from using the credit under a line by highlighting the code that identifies the customer and clicking on the ‘Minus’ button". You can remove the restrictions earlier imposed on a customer, that is, (allow a restricted customer usage of the limit under a line). To allow a restricted customer usage of a line, select the customer code from the list and click on the ‘Plus’ button.
2.20.10.1 Maintaining Branch Restrictions for a Line
You can restrict the usage of a credit line that you have defined to certain branches of your bank. If you choose the restriction type as 'Allowed', click on the ‘Plus’ button and select the branch code from the list to indicate that those branches of your bank can use the line.If you are choose the restriction type as 'Disallowed', click on the ‘Plus’ button and select the branch code from the list to indicate that those branches of your bank are not allowed to use the line.
Once you choose restriction type as 'Allowed', you can disallow a branch(s) from using this line by selecting code that identifies the branch and clicking on the ‘Minus’ button. You can remove the restrictions earlier imposed on a branch that is, to allow a restricted branch usage of the limit under this line. To allow a restricted branch usage of a line, select the code that identifies the branch from the option list and click on the ‘Plus’ button.
2.20.10.2 Maintaining Currency Restrictions for a Line
Just as you can restrict the limit defined for a line to specific customers, branches, and products, you can restrict it to specific currencies. Once you choose the restriction type as 'Allowed', select the currencies to which you would like to restrict application from the available option list.The list of currency codes you choose in this field is described in the adjacent column.
To remove a currency from the list of allowed currencies, highlight the currency code and click on the ‘Minus’ button. To add a currency to the list of allowed currencies, click on the ‘Plus’ button, and choose the currency from the option list available.
2.20.10.3 Maintaining Exposure Restrictions for a Line
You can also define the types of exposures that should be allowed (or disallowed) for a line. Based on the list you maintain, the system displays an error message if a utilization request with a transaction exposure is received where the exposure for the facility is either disallowed or not maintained as part of the allowed exposures.
Indicate if the exposure codes that you are specifying should be allowed or disallowed. From the option list available, select the exposure codes. The system defaults the description of the chosen exposure codes. To remove an exposure code from the list, highlight the code and click on the ‘Minus’ button. To add to the list, click on the ‘Plus’ button, and choose the exposure code from the option list available.
While saving the record, if the exposures disallowed here are found to be linked to existing Facility Exposures or Customer Liability Exposures, the system displays an error message and does not save the details.
2.20.10.4 Maintaining Product Restrictions for a Line
You can define the types of products that should be allowed or disallowed for a line. To add a product to the list of allowed products, click on the ‘Plus’ button and select the Source and Product Code from the adjoining option lists. The system defaults the description of the chosen source and product code.
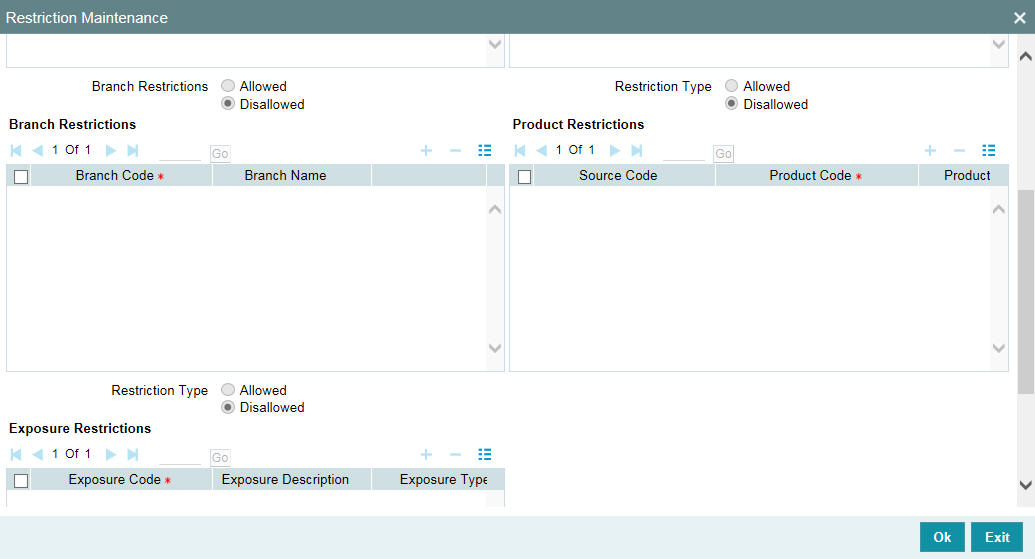
To remove a product from the list of Allowed Products, select the Product Code and click the ‘Minus’ button.
Note
System considers both the source and the product code to validate the restriction.
2.20.11 Defining Tenor Based Restrictions
You can define Limits based on the tenor of the contracts that utilize the limit.
Click ‘Tenor Restrictions’ button from the Facilities Maintenance screen to maintain Tenor restrictions for the limit you have specified for the Line-Liability combination.
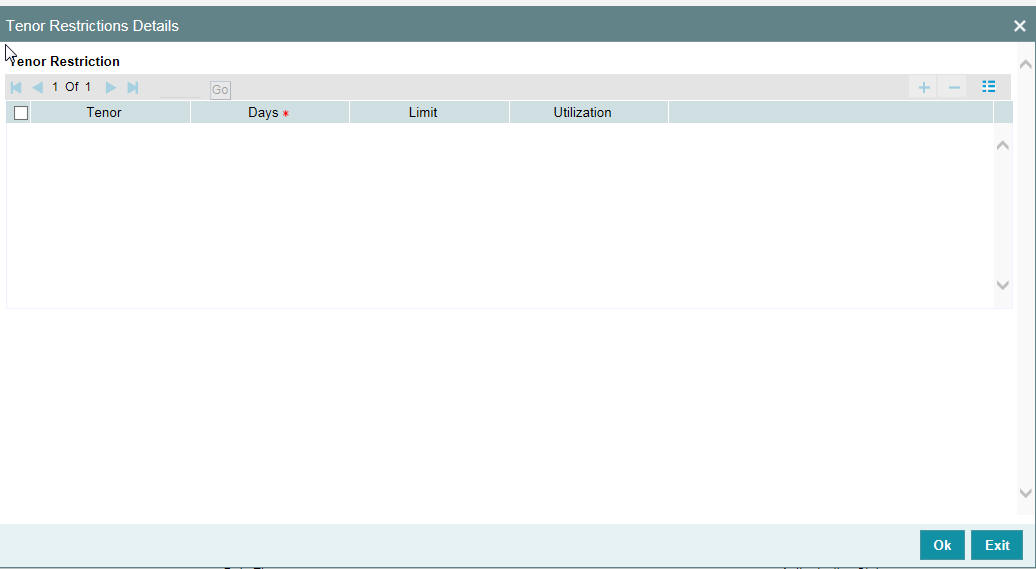
Tenor
Specify the name of the tenor.
Tenor (Days)
Specify the number of days.
Limit
Specify the limit for the tenor in days.
Utilization
System displays the utilization amount for the specific tenor in days, based on the utilization of the facility in 'Schedules' sub-screen.
2.20.11.1 Maintaining Tenor Restrictions for a Main Line
For a main line, you can:
- Specify the list of tenor restrictions for which you would like to limit your exposure.
- Assign limits for the Tenor restrictions.
2.20.11.2 Maintaining Tenor Restrictions for a Sub-Line
You can define a sub-line tenor list and also define limits for each of them. To recall, a sub- line falls under the umbrella of the Main Line to which it is linked. Therefore, the maximum tenor that you define for a sub-line should not exceed the maximum tenor defined for the main line to which it is linked. The limit amount that you define for each sub-line tenor cannot be higher than the tenor limit defined for the main line to which it is linked.
Tenors and limits can be placed at both the sub-line and main-line levels. But the maximum tenor of a sub-line cannot exceed the maximum tenor defined for the main-line to which it is linked.
Example
You define a Line LOANS and link it to the Liability Code CREATIVITY INC. (the Liability and the Customer Code in this case are the same). The limit set for this line - LOANS is $ 1million.
- Main Line Code
- Loans
You define a credit limit of $ 1 million for Creativity Inc. under this Credit Line. You also specify the tenor Restrictions for the line to be the following 30D, 60D, and 90D.
Main Line Tenor List |
Limit |
30D |
0.5M |
60D |
0.3M |
90D |
0.25M |
The loans that this customer can avail can be further classified into Short, Medium, and Long
Term Loans.
For our example we shall make Short Term, Medium Term and Long Term loans as sub-lines under the Main Line Loans. It is only when you link these credit lines to the Credit Line Loans that it becomes a Main line.
Sub-line code
- STLOANS
- MTLOANS
- LTLOANS
You can define a tenor list and have tenor based limits for both the Main Line and Sub-lines. So we shall also maintain tenor based limits for the sub-line STLOANS (as shown in the table below):
Sub- line Tenor List |
Limit |
30D |
0.3M |
60D |
0.2M |
90D |
0.1M |
You can add to the list of tenors maintained for a Main Line by specifying the Tenor restriction under the head Tenor and clicking on the ‘Plus’ button. If you want to remove a tenor restriction from the list of tenor restrictions highlight it and click the ‘Minus’ button.
2.20.12 Maintaining Source Restrictions
You can specify which sources are allowed or restricted to access the facility in ‘Source Restrictions’ screen. Click on ‘Source Restrictions’ button in ‘Facilities Maintenance’ screen to invoke this screen.
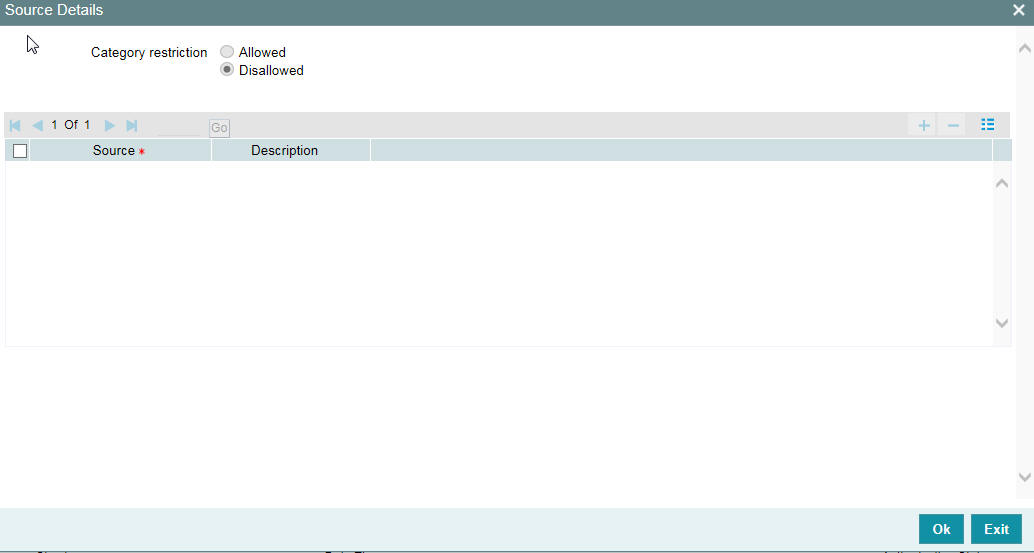
Restriction Type
To maintain an allowed list of liability restrictions choose the ‘Allowed’, option. To maintain a disallowed list of liability restrictions, choose the ‘Disallowed’ option.
Default value of this field will be’ Disallowed’. If you select restriction type as ‘allowed’, then you have to input at least one record.
Source
Specify the source from the adjoining option list.
Description
Give a brief description about the System restriction here.
2.20.13 Maintaining Mandate Details
You can maintain mandate information for specific line codes using ‘Mandate’ screen. Click ‘Mandate’ button on ‘Facility Maintenance’ screen.
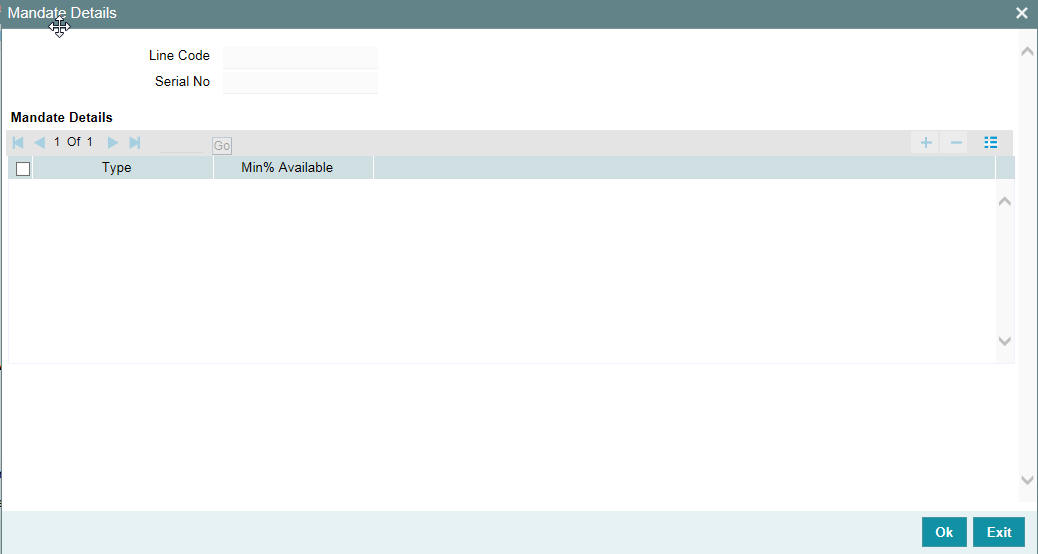
You can specify the following details here:
Line Code
Specify the line code for which the mandate has to be maintained. The system displays the line code from the main screen of facility.
Serial Number
The system displays the line serial number of the line code maintained.
Mandate Details
Collateral Type
Specify the collateral type required for validating mandate for the utilization transaction. The option list displays all valid collateral types maintained in the system. Choose the appropriate one.
You can add more rows to the list using add button.
Min % Available
Specify the minimum percentage of the specific collateral type to be collected while processing the utilization transaction against the line code specified. The system verifies whether the mandate percentage of the line utilization amount is greater than the collateral limit contribution. If the mandate percentage is higher, the system displays an override message. You may choose to continue or cancel the maintenance.
2.20.14 Comments on Facility
You can add your comments on the facility maintenance using ‘Comments’ screen. To invoke this screen, click ‘Comments’ button on the ‘Facility Maintenance’ screen.
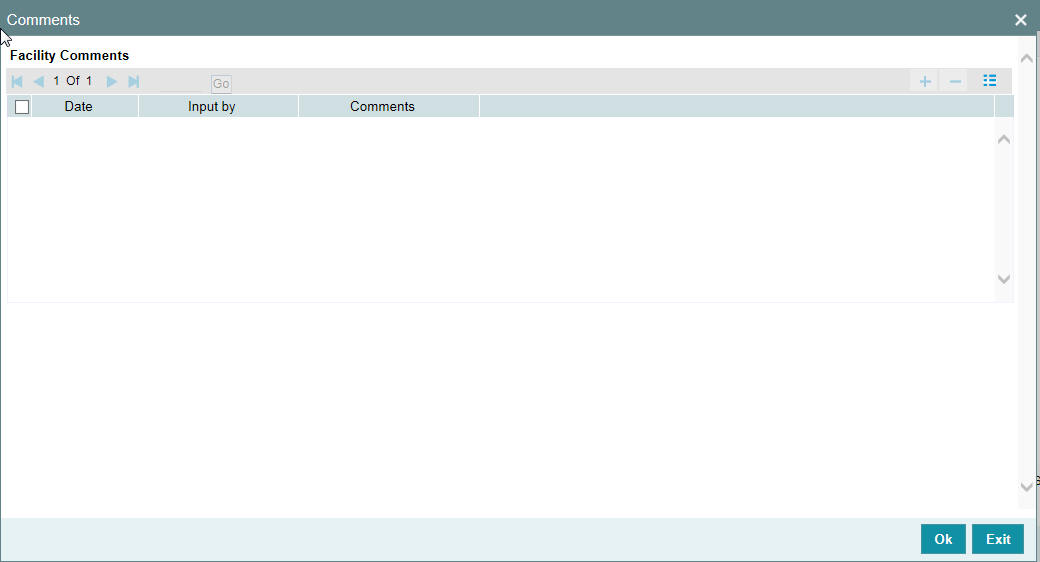
Following fields are available for capturing the comments.
Date
The system displays the current system date.
Input by
The system displays the user ID of the user of the current session.
Comments
Type in the comments that you wish save. This is a free text field where you can type in your comments.
The comments that you maintain here is displayed in the Credit Desktop also. For details, refer to the chapter ‘Credit Desktop’ in this user manual.
Once you have captured the above details, click ‘OK’ button to navigate to the ‘Facilities Maintenance’ screen.
2.20.15 FX Rate Revaluation
You can access this screen by clicking ‘FX Rate Revaluation’ in ‘Facilities Maintenance’ screen.
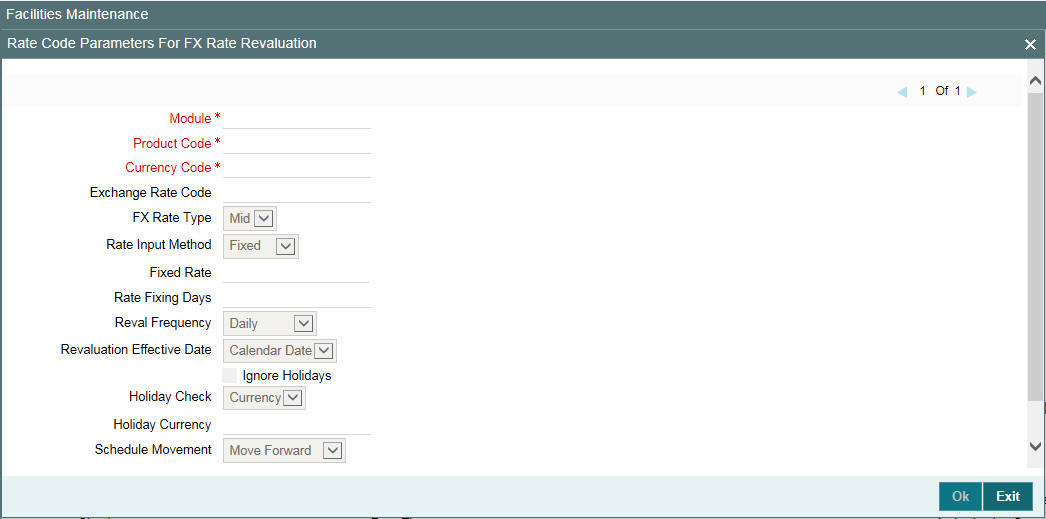
The values in this screen gets defaulted from ‘Line Code Maintenance’ screen on providing the 'Line Code' which is saved in ‘Line Code Maintenance’ screen and clicking 'Populate'.
Or
You can enter the ‘Line Code’ in ‘Facilities Maintenance’ screen and provide the ‘FX Rate Revaluation’ details.
You can change these values. On saving a facility with the ‘Module’, ‘Product Code’ and ‘Currency Code’ combination, it cannot be modified further.
For more information about this screen, refer to ‘Maintaining Line Code details’ section.
2.20.16 Facility Credit Rating and History
You can access this screen by clicking ‘Credit Rating’ in ‘Facilities Maintenance’ screen.
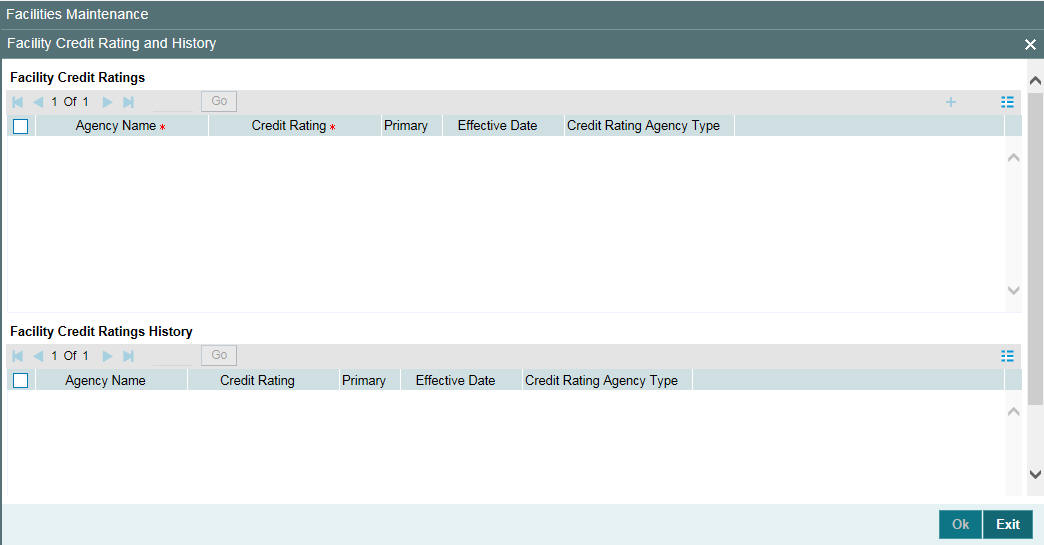
Facility Credit Ratings
Agency Name
Select the credit rating agency name from the adjoining option list.
Credit Rating
Select the credit rating from the adjoining option list. You can maintain multiple external credit rating agencies for a single facility.
However, you can maintain only one internal credit rating agency for a single facility.
Primary
Select one of the Credit ratings as the primary rating for facility
The ratings from multiple agencies of external type can be assigned to a facility of which one should be marked as primary.
Only one internal credit rating can be maintained which by default is considered 'Primary'.
The internal credit rating marked as 'Primary' is shown in 'Internal Credit Rating' field of 'Facilities Maintenance' screen. Similarly, external credit rating marked as 'Primary' is shown in 'External Credit Rating' field of 'Facilities Maintenance' screen.
The modification of primary from one agency to another is allowed.
Note
When a primary credit rating at facility level is modified to a rating with a lower priority, then an alert is triggered. The alert of such facilities is displayed in the dashboard.
Effective Date
Specify the effective date while associating a credit rating to a facility.
It is mandatory to select the effective date while associating the credit rating. Effective date can be backdated and not future dated. For the same agency, multiple ratings cannot be assigned for the same effective date.
If multiple modifications are done for a particular agency with the same effective date, then the last modification is taken into consideration
Credit Rating Agency Type
Select the agency type as “Internal’ or External’. These values get defaulted from the ‘Credit Rating Agency Maintenance’ screen.
Facility Credit Rating History
Credit Rating and Effective Date
If the credit rating for a specific agency is modified along with the Effective date at a facility level, then the existing is recorded in the ‘Facility Credit Ratings History’ section.
2.20.17 Viewing Facility Covenant Tracking Summary
You can view summary of covenants attached to the facility for tracking using the ‘Facility Covenant Tracking Summary’ screen. You can view applicable covenants for a particular facility from the list of covenants maintained in the system.
You can open detailed screen using this screen. You can query the records based on the search criteria.
You can invoke this screen by typing ‘GESCOVTR’ in the field at the top right corner of the Application tool bar and clicking the adjoining arrow button.
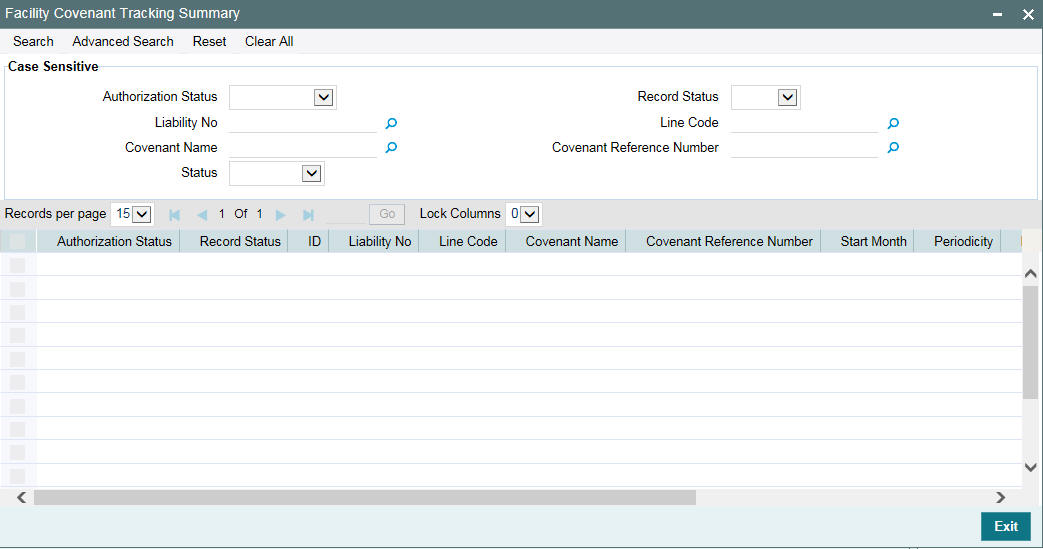
2.20.18 Tracking Facility Covenant Details
The captured covenants as part of facilities can be tracked using 'Facility Covenant Tracking Details' screen.
You can invoke the ‘Facility Covenant Tracking Details’ screen by typing ‘GESCOVTR’ (Facility Covenant Tracking Summary) and on clicking the queried record ‘GEDCOVTR’ (‘Facility Covenant Tracking Details’) is opened with the details of the covenant.
You can unlock and update the status of the covenant here.

Liability Number
Indicates the liability number for which the facility is linked.
Line Code
Indicates the line code.
Covenant Name
Indicates the covenant name.
Covenant Reference Number
Indicates the covenant reference number for the facility being maintained.
Revision Date
Indicates the date on which covenant has to be revisited for review.
Revision date is arrived by the system for a particular facility covenant based on start date + (combination of frequency & due date & start month) at the time of save.
Notice Date
Indicates the date on which covenants can be tracked for compliance before revision date in advance based on notice days configured.
Grace Days
Indicates the grace days for the next due/revision date allowed for facility covenant.Status
You can select the covenant status as the following:
- Complied
- If the status of the covenant is not compiled on or before revision date, then the status is updated as breached by batch process immediately after revision date.
- If the covenant has the grace days configured, compliance can be marked till the grace period end date. The status gets updated as breached only after grace period end date if compliance is not marked by then.
- Compliance on the breached covenant can be marked after which the covenant for next frequency is enabled with the next revision date duly considering the original revision date + frequency.
- Once compliance is marked for a particular frequency, record for the next frequency with blank status is available in DB and accordingly revision date get updated in collateral/facility
- Deferred
- Covenants can be deferred for a defined period during which time covenants are not available for tracking. When covenants are breached, it cannot be deferred. Deferment can be done before the covenant becomes breached.
- Terminated -
- Covenants can be stopped from further tracking by updating the status as 'Terminated'. Only covenants which are either complied or deferred status can be terminated. Breached covenants cannot be terminated.
- Breached
- Covenants which are not complied within next revision date is marked as breached.
- When covenants pertaining to multiple frequency are breached, all of them are available for tracking
Defer Till Date
In case the status is ‘Deferred’, then you need to specify this date
You need to specify the date so that covenants falling during this period are not tracked. After end of deferment date, covenants are applicable and available for tracking.
2.20.18.1 Including Netting Amount in Facility’s Netting Contribution
You can set the available amount under a Facility to include the Netting Amount too. To enable this feature you must check the ‘Netting Required’ check box in the following levels:
- Account Netting level
- Liability level
- Facility level
Once the netting option is enabled in the above levels the Netting amount maintained as a part of Account Netting screen is added to the available amount of the facility in facility currency. The netting amount field in the facility screen is displayed in the Netting Contribution field for the facility in facility currency.
Account Netting
When you authorize an account netting transaction with contract type ‘AC’ and netting enabled, then the netting amount is included in the facility in facility currency after netting has been enabled in Liability level & Facility level. Here the Netting Amount is updated accordingly.
When you modify an Account Netting Record and deselect the Netting check box, then the system automatically subtract the netting amount from the Available Amount and the Netting Amount for the corresponding facility
When you modify an Account Netting Record and select the Netting check box, then the system automatically add the netting amount to the Available Amount and the Netting amount for the corresponding facility.
When an Account Netting Record is closed and authorised, the system automatically subtract the netting amount from Available Amount and the Netting Amount for the corresponding facility.
When an Account Netting Record is re-opened and authorised, the system should automatically add the netting amount to Available Amount and the Netting Amount for the corresponding facility.
Facility
When the Netting option is deselected and the modification is authorised, the system automatically set the netting amount to zero and recalculate the available amount. Likewise, when the netting option is enabled, the system update the netting amount based on all the Account Nettings which have Netting option enabled for the facility.
Liability
When the Netting option is deselected and the modification is authorised, the system automatically set the netting amount of all its facilities to zero and recalculate the available amount. Similarly when the netting option is enabled the system updates the netting amount based on all the Facilities and Account Nettings records, which have Netting option enabled for the liability.
2.20.19 Viewing Previous Credit Limit Changes
You can view previous changes made to the credit limit using the ‘Facilities Summary’ screen. You can invoke this screen by typing ‘GESFACLT’ in the field at the top right corner of the Application tool bar and clicking the adjoining arrow button.
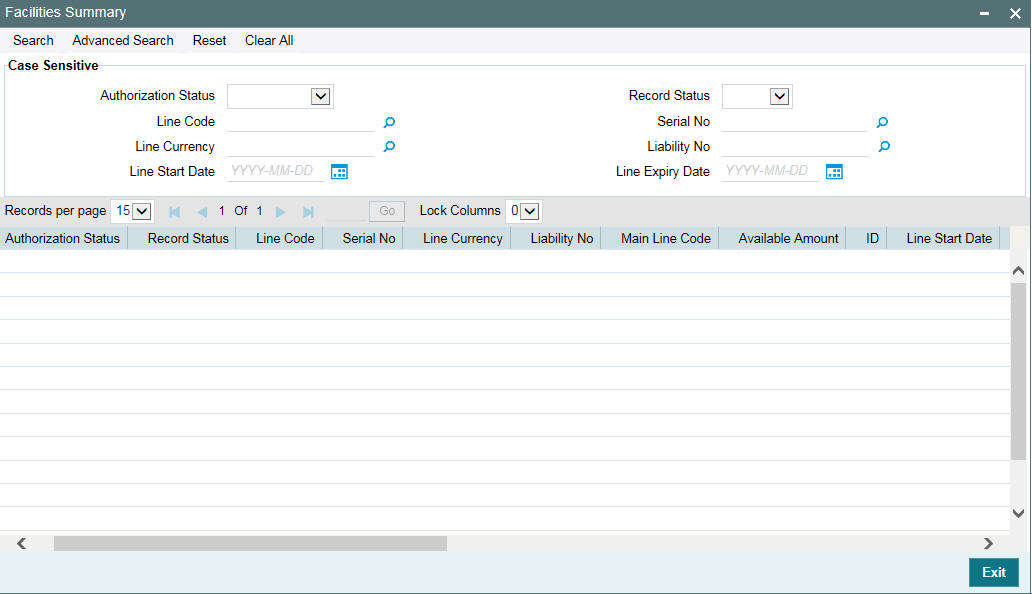
You can query on records based on all or any of the following criteria:
- Authorization StatusLine CodeLine Currency
- Line Start Date
- Record Status
- Serial No
- Liability No
- Line Expiry Date
Click ‘Search’ button. The system identifies all records satisfying the specified criteria and displays the following details for each one of them:
- Authorization Status
- Record Status
- Line Code
- Serial No
- Line Currency
- Liability No
- Main Line Code
- Available Amount
- ID
- Line Start Date
- Line Expiry Date
- Last New Util Date
- Availability Flag
- Date of First OD
- Date of Last OD
- Amount Utilized
- Utilization
- Available Date
- Tanked Util
- Netting Amount
- Branch
- Limit Amount
To view any previous changes made to the credit limit, double-click the corresponding record. A detailed screen appears containing changes made.

Note
This is a view-only screen hence you cannot make any modifications in this screen.
2.20.20 Viewing Facility Log Details
You can view the list of changes on the facility selected for a given date or range of dates. Facility log summary provides an option to search the record based on ‘Liability No’, ‘Line Code’, ‘Serial No’ ‘From Date’, and ‘To Date’.
You can view the 'Facility View Summary' screen by clicking on the queried record.
You can invoke this screen by typing ‘GEDFACHT’ in the field at the top right corner of the Application tool bar and clicking the adjoining arrow button.
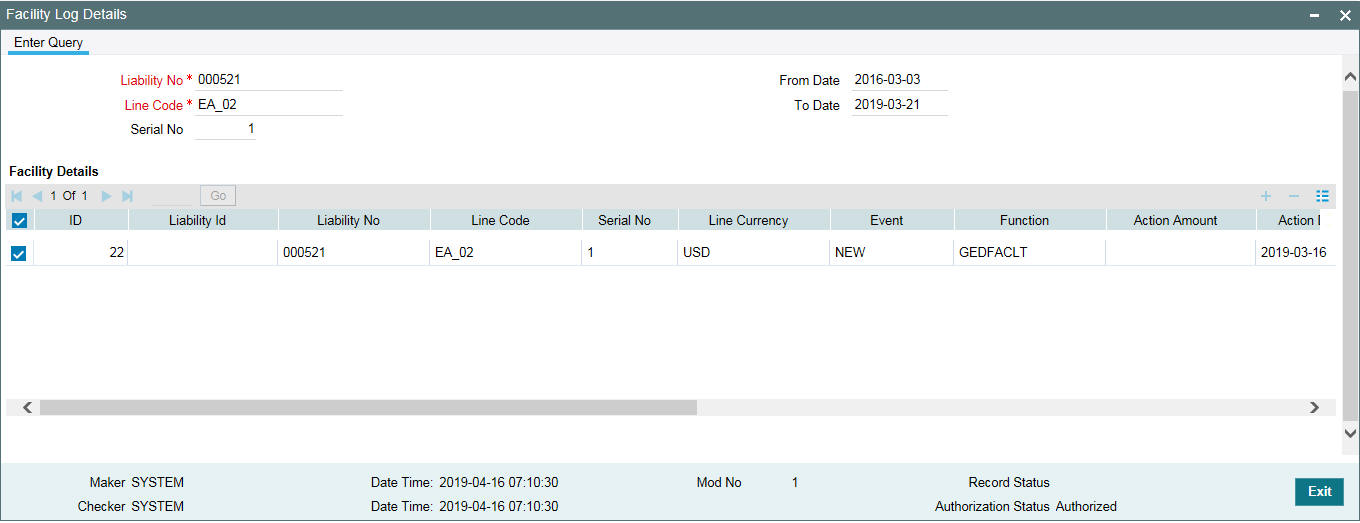
You can view the indicative list of changes as below.
- Revolving to non-revolving and vice-versa
- Adding a main line code/removing existing main line code
- Adding a category/removing a category
- Limit amount increase/decrease
- Facility expiry
- Reopening/enabling after expiry
- Linking collateral pool to facility
- Increasing/decreasing collateral pool value at facility level
- Adding/deleting a mainline before utilization
- Change effective line basis
- Amendment to approved amount
- Modification of limit expiry date
- Modification of exception transaction amount
- Modification of exception breach percentage
- Increase or decrease limit through limit schedule
- Increase or decrease collateral pool value
- FX rate revaluation – amendments which impact facility
- Exception breach transactions
Impact on facility on account of amendments in other functions or batches triggering
- Increase/decrease collateral value
- Facility transfer
- Facility blocking
- Facility utilization
- Facility de-utilization
- Currency revaluation impacting facility
- Fee liquidation/fee reversal
2.20.21 Viewing Facility Summary Details
You can view the list of changes made to the facility using the ‘Facility View Summary’ screen. You can invoke this screen by typing 'GEDFACHT' in the field at the top right corner of the Application tool bar and clicking the adjoining arrow button.and querying a record by providing a Liability no and Line code, clicking on the queried record opens the 'Facility View Summary’ (GEDFACDT) screen.
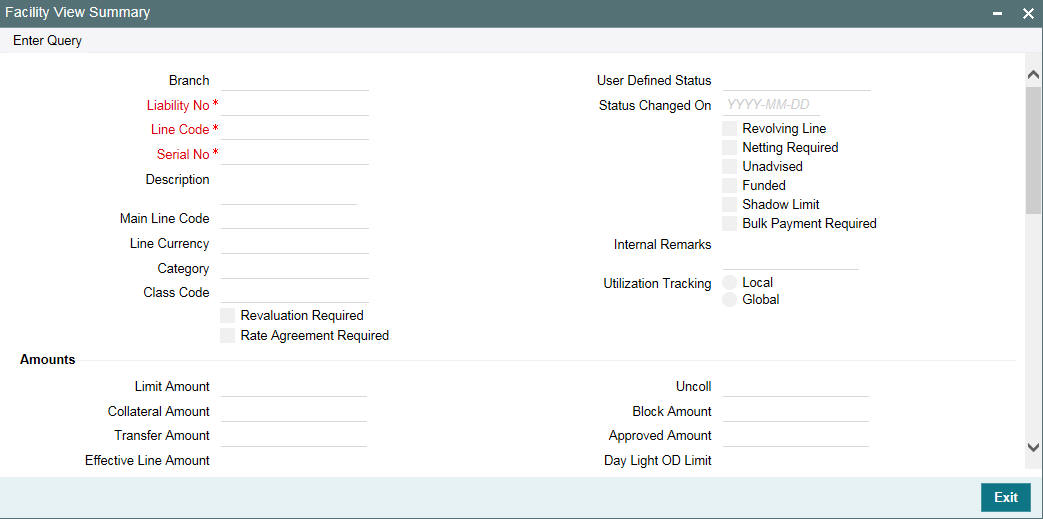
2.20.22 Processing of Advanced and Manual Facility Fees
Oracle FLEXCUBE ELCM supports 'Advanced Fee' and 'Manual Payment' of fee for facility.
The steps involved in processing advanced and manual fee payment is as follows:
Advanced Fee
You can capture ‘Liquidation Method’ as 'Advanced' in ‘Fee & Accounting Class Maintenance’ screen for a rule code in 'Rule Preferences' screen
At time of facility creation in 'Facility Maintenance' (GEDFACLT) screen, this value gets defaulted as ‘Advanced’ in ‘Liquidate Method’ field in facility ‘Fee Details’ screen.
You can choose your own schedule start by selecting ‘Start Date’ and ‘Start Month’ in ‘Fee Rule Preferences’ section.
The following are the various advanced fee scenarios:
- Advanced fee can be of type 'User Input' or 'Rate/Amount' selected in 'Fee Rule Maintenance' screen.
- 'User Input' can only be specified in terms of amount value
- 'Rate/Amount' is based on the underlying SDE selected in SDE Type
- For 'User Input' or 'Amount', the value specified is considered for the whole liquidation cycle (frequency) and accrued accordingly based on the day basis.
For example,
Fee Amount = 2400, Accrual Frequency = Daily, liquidation frequency = Monthly, Days in month = 30, Day Basis = Actual/Actual
Fee accrued per day is 2400/30 = 80. This process is repeated for every schedule (in this case every month)
- Advance fees can be collected/liquidated both manually or automatically (configured in liquidation preference in Fee & Account Class Maintenance screen as 'Manual' or 'Auto')
- If 'Manual' then fee type has to be ‘User Input’
- For fee type as ‘User Input’ and liquidation as 'Manual', advanced Fee is collected manually from 'Manual Fee Payment' screen.
- FLIQ event is triggered once the record is saved in 'Manual Fee Payment' screen.
- You are not allowed to make advance payments.
- If 'Auto' then fee type can be either 'User Input' or 'Rate/Amount'.
- For fees types as 'User Input' and liquidation as 'Auto', advanced fee is collected automatically on the day of facility creation and then based on the frequency.
- For fees types as 'Rate/Amount' and liquidation as 'Auto', advanced fee is collected automatically on the day of facility creation (and then based on frequency) if the underlying SDE’s have balances
Note
- If on facility start date, the SDE closing balance is 0 the fee is not collected.
- Fees are collected from the date the balances are updated
- In this case, if the balances are updated in mid of the fee liquidation cycle the fees are adjusted as part of PRLQ (PRLQ_REC/PRLQ_PAY) event triggered on cycle last date.
- Fee accrual starts from the date the balances are updated
Manual Fee
You can capture ‘Liquidation Method’ as 'Manual' in ‘ Fee & Accounting Class Maintenance screen for a rule code in 'Rule Preferences' screen
At time of facility creation in 'Facility Maintenance' (GEDFACLT) screen, this value gets defaulted as ‘Manual’ in ‘Liquidate Method’ field in facility ‘Fee Details’ screen.
Manual Liquidation screen
You can do manual fee payment by selecting facility detail and limit date in 'Manual Liquidation' screen.
You can invoke the ‘Manual Liquidation’ screen by typing ‘GEDFCFPT’ in the field at the top right corner of the Application tool bar and clicking the adjoining arrow button.

Once you select the 'Liability No', ‘Line Code’, and ‘Limit Date’ and click 'Populate', the 'Fee Rule Details' and 'Schedule Details' sections get displayed.
The ‘Serial No’ field is disabled and it gets defaulted from the ‘Facilities Maintenance’ screen.
It shows the summary of amount due and amount scheduled for a particular fee starting from start date to limit date.
Note
Payment can be done till today's date only. Reversal of payment is allowed for latest version and today paid payment only.
Accounting entries for facility fees
Event Code |
Description |
FLIQ |
Fee Liquidation |
REVP |
Reverse Payment |
PRLQ |
Pay/Receive Liquidation |
RPRL |
Reverse Pay/Receive Liquidation |
FACR: Fee Accrual
Accounting Entries
Accounting Role |
Amount Tags |
Dr/Cr. Indicator |
FeeRIA |
Fee_ACCR |
Dr |
FeeINC |
Fee_ACCR |
Cr |
FLIQ: Fee Liquidation
Accounting Entries
Accounting Role |
Amount Tags |
Dr/Cr. Indicator |
CUSTOMER |
FEE_LIQD |
Dr |
FeeRIA |
FEE_LIQD |
Cr |
2.20.23 Processing of (ECA) and Partial/Full Fee Liquidation
- ECA request for fee liquidation is not created from ELCM where GL is chosen as settlement account.
- For fees where liquidation start month and date are opted, ECA request
is triggered as below:
- Arrears Fees – On selected month and date with amount due till that day.
- Advance fees – ECA request on facility start date with amount from facility start date till selected month and date.
- ECA request is triggered for fee liquidation events (FLIQ and PRLQ - PRLQ_REC) and not for events like FACR.
- No ECA requests are triggered for fees associated with facilities in closed, expired or inactive status.
- No ECA requests are triggered for the fees that are waived.
- You can verify fee amount for each liquidation cycle, recovered and due from ‘Facility Fee Summary’ screen.
- You can Approve/Retry the rejected ECA request from ‘ECA Queue’ screen
- When you choose to approve, fee gets liquidated and force posted irrespective of available balance in CASA (in GESFRTRY)
- The different ECA request are below:
- P – Processed
- E - Error
- T – Timed Out
- A – Approved
- U - Unprocessed
ECA Request for Auto Liquidation
- As part of ELCM batch process, amount due for liquidation for a fee is sent to the DDA system for approval based on (ECA_CHECK_REQD) parameter maintained in GEDPARAM table and verify funds flag at account and contract level. Only after receiving an approval from the DDA system, the system proceeds with liquidation of the fee component.
- ELCM sends a consolidate request to the ECA - one for each facility contract. As the settlement account is configured for each fee component in ELCM, multiple settlement accounts for a facility is possible. ELCM for a due date groups the total amount due from each account and generate one ECA request for a facility and due date.
a. Full Liquidation
- Fees are liquidated if only balance is fully available
- Example
- Fee 1 = 100, Fee 2 = 300
- ECA Request for = 400
- Amount in CASA = 300
- ECA response will be Rejected and no liquidation takes place
- Fee 1 and 2 will be updated as due
b. Partial Liquidation
- Fees are liquidated to the extent of available
- Example
- Fee 1 = 100, Fee 2 = 300
- ECA Request for = 400
- Amount in CASA = 300
- ECA response is Approved and partial liquidation takes (Fee 1 liquidated to 100 and Fee 2 liquidated to 200)
- Fee 2 is updated as due with amount 200.
- The due amount when sent as part of ECA request will be in account/facility currency.
- As part of the ECA request, ELCM module sends the following additional preferences configured at a class/facility product level.
- Partial Liquidation Allowed (PARTIAL_BLOCK_REQUIRED): If the flag is set as ‘N’, then ECA system sends a fail approval in case the total amount requested is not available in the account.
- Partial Liquidation Allowed (PARTIAL_BLOCK_REQUIRED): If the flag is set as ‘Y’, then ECA system sends a pass approval in case the total amount requested is not available in the account. Block to the extent of available amount is put and whatever fees can be recovered (in the order sent) is recovered
- In case of multiple fees that are due from the customer as part of Auto Liquidation, ELCM places a ECA request based on internal order of fee maintenance in ELCM.
- Also applicable in case of multiple facilities using the same CASA and fees falling on same liquidation date – internal sequence of facility the same used for batch process is utilized for ECA request generation.
- First process in ELCM batch would compute the amount due for a fee as part of Auto liquidation and place the request into ECA table with the current status as ‘Unprocessed’. A Java program would constantly poll the table for any unprocessed records and transform the records into an ECA request XML and place the same into a IN queue of the external system configured.
- Upon receipt of any response from the DDA system in the OUT queue of ELCM module, the response would be parsed by the JAVA program and update the status response status (Approved/Rejected) in GETB_ECA_REQ_MASTER and GETB_ECA_REQ_DETAIL table.
- Single block reference is sent by UBS for all fee rules in the facility.
- When ECA block is successfully (APPROVED) created on the accounts (Partial / Full), liquidation happens in ELCM module and perform accounting.
- When ECA block is unsuccessfully (REJECTED) created on the accounts (Partial / Full), other activities continue and the exception is logged - Fee not liquidated
- ECA request for auto liquidation will not be created from ELCM where GL is chosen as settlement account. For example, for a contract having fee component and GL is chosen as a settlement account then no ECA request will be created by ELCM. However, if GL is chosen only for one of the fee component and for another a valid customer account is chosen as settlement account, then ECA request will be created only for that fee component.
- When Auto Liquidation process is run for more than one day as part of EOD processing (due to holiday settings), then Auto liquidation for the fees that are due for a day can be processed only after Auto liquidation is processed successfully for the preceding day.
- On account of holiday processing, fees pertaining to multiple liquidation cycles getting triggered together, order of processing will be based on the order in which request sent – oldest first and latest last. Request for each liquidation date will have separate block reference.
- In a situation where ECA block is successful, but subsequent processing in ELCM fails auto retry mechanism will be available.
- ECA check during auto liquidation is a batch process
- This is applicable for advance fees as well as the fees with auto liquidations are liquidated post successful completion of GEBUTILS batch
- PRLQ Event for Advance fee works as is and ECA requests are generated on the day they (PRLQ_REC) is triggered and work with the explained behaviour of blocking/recovery.
- Partial Liquidation Allowed option affects the fees that needs to be collected from customer as part of PRLQ (PRLQ_REC) – fees are collected from customer based on the flag
- If a PRLQ fee is unable to be collected (ECA REJECT or ECA APPROVE for partial), it will be marked as overdue.
- The uncollected PRLQ fee is tracked separately and retried for recovery
- Fees for new cycle continues the normal process but should be collected only when all overdue fees are cleared
- If an advanced fee is not collected on facility start date and the due amount increases (due to utilization), then ECA request will include the full due amount on cycle end date as part of PRLQ.
- Due fees (ECA response as REJECTED) is logged separately as OVERDUE and retried for recovery based on the defined frequency specified.
- Fees for new cycle continues the normal process but should be collected only when all overdue fees are cleared
- System allows user to Reject/Retry the Rejected ECA request from ECA Queue screen
- System passes the accounting entries to external system only for the authorized contract with handoff status as Y after unblocking of the amount
- Below scenarios depict the behaviour of fees with auto liquidation and ECA check.
Scenario |
Fee Rules |
Liquidation Amt |
CASA Balance |
Verify Funds |
Partial Liquidation Allowed |
Consolidated Request to UBS |
Amt Liquidated |
Remarks |
1 |
Fee1 |
100 |
500 |
Yes |
Yes* |
Sum of all fees = 750 |
100 |
Collected |
Fee2 |
200 |
200 |
Collected |
|||||
Fee3 |
150 |
150 |
Collected |
|||||
Fee4 |
250 |
50 |
Partially Collected |
|||||
Fee5 |
50 |
0 |
Not Collected as CASA balance exhausted |
Scenario |
Fee Rules |
Liquidation Amt |
CASA Balance |
Verify Funds |
Partial Liquidation Allowed |
Consolidated Request to UBS |
Amt Liquidated |
Remarks |
2 |
Fee1 |
100 |
500 |
Yes |
No* |
Sum of all fees = 750 |
0 |
Not Collected |
Fee2 |
200 |
0 |
Not Collected |
|||||
Fee3 |
150 |
0 |
Not Collected |
|||||
Fee4 |
250 |
0 |
Not Collected |
|||||
Fee5 |
50 |
0 |
Not Collected |
- When a fee is auto liquidated, verify funds (ECA check) is performed. It would depend upon maintenances for verify funds (ECA check) present at GEDPARAM, facility and account levels. Following scenarios are handled here:
a. Scenario 1: Verify funds (ECA check) is required and verify funds response is approved.
- For Partial Liquidation
- Normal fees Liquidation
- Fee liquidation as result of PRLQ
- For Full Liquidation
- Normal fees Liquidation
- Fee liquidation as result of PRLQ
b. Scenario 2: Verify funds (ECA check) is required and verify funds response is rejected
- For Partial Liquidation
- Normal fees Liquidation
- Fee liquidation as result of PRLQ
- For Full Liquidation
- Normal fees Liquidation
- Fee liquidation as result of PRLQ
c. Scenario 3: Verify funds (ECA check) is not required
- Normal fees liquidation
- Fee Liquidation as part of PRLQ
d. Scenario 4: Verify funds (ECA check) is required, contract is entered in unauthorized mode
- For Partial Liquidation
- For Full Liquidation
ECA Request for Manual Liquidation
- Manual Liquidation is applicable for both Advance and Arrears fees through GEDFCFPT screen
- Partial Liquidation Allowed option does not have any effect on fees with manual liquidation – this flag is not applicable for fees with manual liquidation.
- User can chose to enter the fee the fee that needs to be liquidated and can opt for partial if sufficient balance is not available.
- After capturing the necessary details in GEDFCFPT screen and click ‘Save’, ELCM will place an ECA request for the amount requested for the payment.
- System displays the success or failure message based on response received from DDA system
- When the ECA request is approved by the DDA system, the saved record in GEDFCFPT needs to be manually authorized.
- ELCM will process the payment request and update the tables and post liquidation entries as part of back ground process and payment status will be in unauthorized state.
- Authorization of payment is possible only after the liquidation process is completed and entries are posted.
- When the ECA request is rejected by the DDA system, the saved record in GEDFCFPT needs to be manually deleted.
- When manual payment is deleted for unauthorized contract, an undo
ECA should be sent to the DDA system.
- Block if processed should be unblocked
- If there are multiple fees to be manually liquidated and if for one the ECA request is rejected, user needs to manually delete the payment instruction for that fee component and proceed with the approved ones.
- Even in the case of rejection on account of insufficient CASA balance, UBS/DDA system will indicate the amount that can be blocked in CASA.
- User can then take a call how the amount needs to be apportioned across fee components.
- Similarly, ELCM generates reversal entries upon reversal of record (payment reversal) in GEDFCFPT.
- Block if processed should be unblocked.
- In case where actual accounting to DDA system is not generated post
ECA approval, ELCM generates both actual entries for liquidation with
block number and its reversal.
Actions
System Response
After getting ECA response as ‘Approved’, if you try to delete the payment
The system should undo ECA with the approved block number
- System allows you to ‘Reject/Retry’ the Rejected ECA request from ‘ECA Queue’ screen
- System passes the accounting entries to external system only for the authorized contract with handoff status as ‘Y’ after unblocking of the amount
- Below are the sample scenarios which depicts the functionality further.
Scenario 1:
Fee Rules |
Liquidation Amt |
CASA Balance |
Verify Funds |
Partial Liquidation Allowed |
Consolidated Request to UBS |
UBS Response |
Amt Liquidated |
Remarks |
Fee1 |
100 |
500 |
Yes |
NA |
Sum of all fees = 750 |
Rejected. |
100 |
User chooses to fully collect |
Fee2 |
200 |
200 |
User chooses to fully collect |
|||||
Fee3 |
150 |
150 |
User chooses to fully collect |
|||||
Fee4 |
250 |
50 |
User chooses to partially collect |
|||||
Fee5 |
50 |
0 |
User chooses not to collect. |
Scenario 2:
Fee Rules |
Liquidation Amount |
CASA Balance |
Verify Funds |
Partial Liquidation Allowed |
Consolidated Request to UBS |
UBS Response |
Amount Liquidated |
Remarks |
Fee1 |
100 |
500 |
Yes |
NA |
Sum of all fees = 750 |
Rejected. |
100 |
User chooses to fully collect |
Fee2 |
200 |
100 |
User choses to partially collect |
|||||
Fee3 |
150 |
150 |
User choses to fully collect |
|||||
Fee4 |
250 |
100 |
User chooses to partially collect |
|||||
Fee5 |
50 |
50 |
User chooses to partially collect |
- When a fee is manually liquidated through GEDFCFPT screen, verify funds (ECA check) is performed. It would depend upon maintenances for verify funds (ECA check) present at GEDPARAM, facility and account levels. Following scenarios are handled here:
a. Scenario 1: Verify funds (ECA check) is required and verify funds response is approved
- Sub Scenario a.1: Contract is authorized – fee liquidated
- User chooses to fully liquidate
- User chooses to partially liquidate
b. Scenario 2: Contract is reversed – Reverse option in GEDFCFPT
c. Scenario 3: Verify funds (ECA check) is required and verify funds response is rejected
- Sub Scenario c.1: CASA balance not available
- Sub Scenario c.2: User chooses to liquidate fees partially
- Sub Scenario c.3: User chooses to liquidate only selective fees
d. Scenario 4: Verify funds (ECA check) is not required
d.Scenario 5: Verify funds (ECA check) is required, contract is entered in unauthorized mode.
2.20.23.1 Facilities Fees Retry
You can Approve/Retry the rejected ECA request from 'Facilities Fees Retry' screen.
You can invoke this screen by typing ‘GESFRTRY’ in the field at the top right corner of the Application tool bar and clicking the adjoining arrow button.

2.20.23.2 Facility Fee Summary screen
Using 'Facility Fee Summary' screen you can verify what is the fee amount for each liquidation cycle, what is recovered and what is due.
You can invoke this screen by typing ‘GESFEEVW’ in the field at the top right corner of the Application tool bar and clicking the adjoining arrow button.
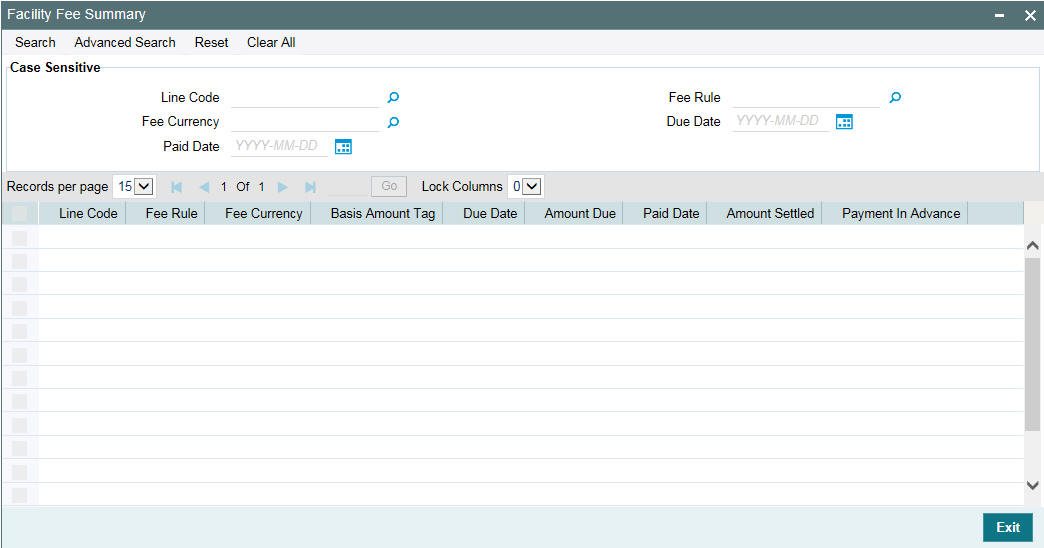
2.21 Maintaining User Data Restriction
Apart from restricting the operations like creating new, modifying, deleting, closing, and re-opening the function ID, you can also maintain the user restrictions for the following fields.- Category
- Liability Number
- Source
- Currency
When you try perform any operation like new, modify, delete, close, reopen, query on facility or collateral maintenance, before performing transaction in ELCM, the system checks whether the you have the rights to perform the transaction for the data. If you do not have rights, then following error appears.
"User does not have rights to perform transaction on this data."
You can maintain user restrictions in the ‘User Restriction Maintenance’ screen. You can invoke this screen by typing ‘GEDUSRES’ in the field at the top right corner of the Application tool bar and clicking the adjoining arrow button.
2.21.1 Category Restrictions Tab
You can maintain the category restriction from the ‘Category Restrictions’ tab.

Capture the following data to maintain user restriction for specific category:
User ID
Specify the user ID for which you want to set the category restriction.
Restriction Type
Choose the ‘Allowed’ option, to maintain an allowed list of category restrictions. Choose ‘Disallowed’ option to maintain a disallowed list of category restrictions. Default value of this field will be’ Disallowed’. If you select restriction type as ‘allowed’, then you need to input at least one record.
Category Restrictions
Category Name
Specify the category for the restriction from the adjoining option list.
2.21.2 Liability Restrictions Tab
You can maintain the liability restriction from the ‘Liability Restrictions’ tab.
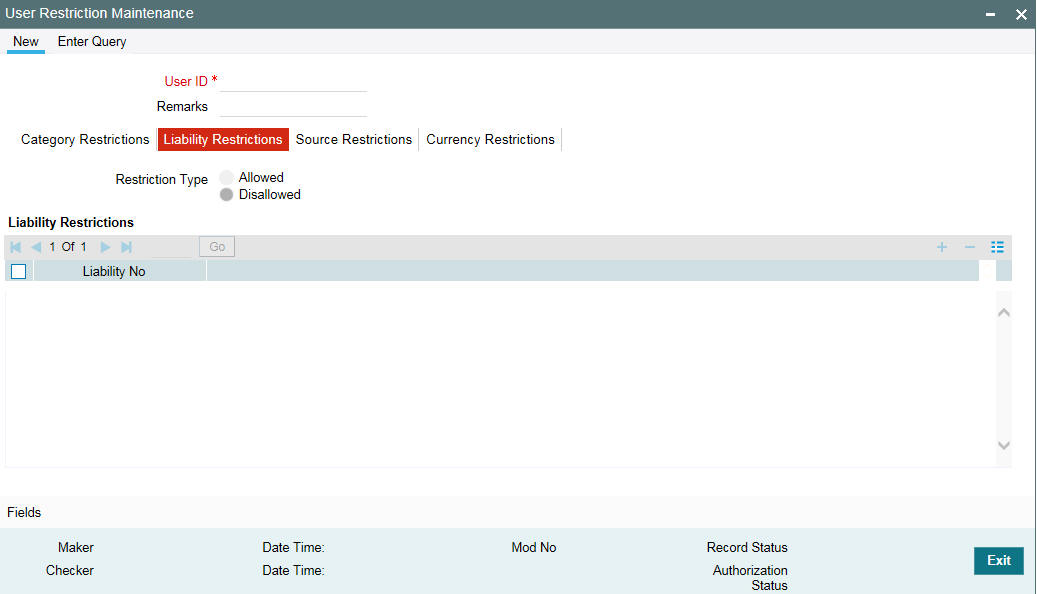
Capture the following data to maintain the user restriction for specific liability:
User ID
Specify the user ID for which you want to set the liability restriction.
Restriction Type
Choose the ‘Allowed’ option, to maintain an allowed list of category restrictions. Choose ‘Disallowed’ option to maintain a disallowed list of category restrictions.
Default value of this field will be’ Disallowed’. If you select restriction type as ‘allowed’, then you need to input at least one record.
Liability Number
Specify the liability number for the restriction from the adjoining option list.
2.21.3 Source Restrictions Tab
You can maintain the source restriction from the ‘Source Restrictions’ tab.
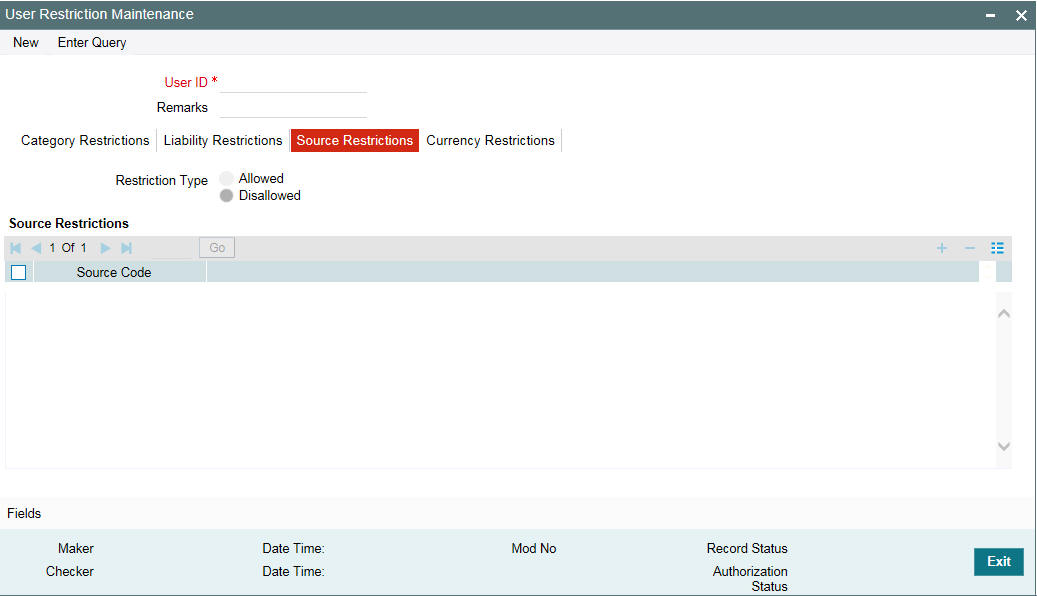
Capture the following data to maintain the user restriction for specific source:
User ID
Specify the user ID for which you want to set the source restriction.
Restriction Type
Choose the ‘Allowed’ option, to maintain an allowed list of category restrictions. Choose ‘Disallowed’ option to maintain a disallowed list of category restrictions.
Default value of this field will be’ Disallowed’. If you select restriction type as ‘allowed’, then you need to input at least one record.
Source Code
Specify the source code for the restriction from the adjoining option list.
2.21.4 Currency Restrictions Tab
You can maintain the currency restriction from the ‘Currency Restrictions’ tab.
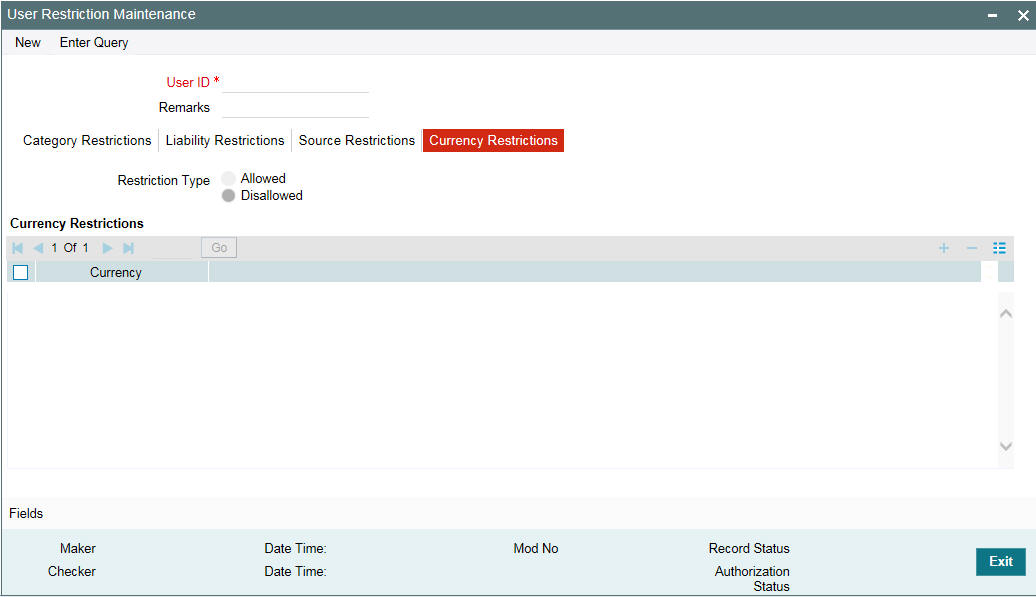
Capture the following data to maintain the user restriction for specific currency:
User ID
Specify the user ID for which you want to set the currency restriction.
Restriction Type
Choose the ‘Allowed’ option, to maintain an allowed list of category restrictions. Choose ‘Disallowed’ option to maintain a disallowed list of category restrictions.
Default value of this field will be’ Disallowed’. If you select restriction type as ‘allowed’, then you need to input at least one record.
Currency
Specify the currency for the restriction from the adjoining option list.
2.22 Viewing User Data restriction
You can view all the user data restrictions for Category, Liability, Source and Currency that have been maintained, and their status in the ‘User Restriction Summary’ screen. You can invoke this screen by typing ‘GESUSRES’ In the field at the top right corner of the Application tool bar and clicking on the adjoining arrow button.
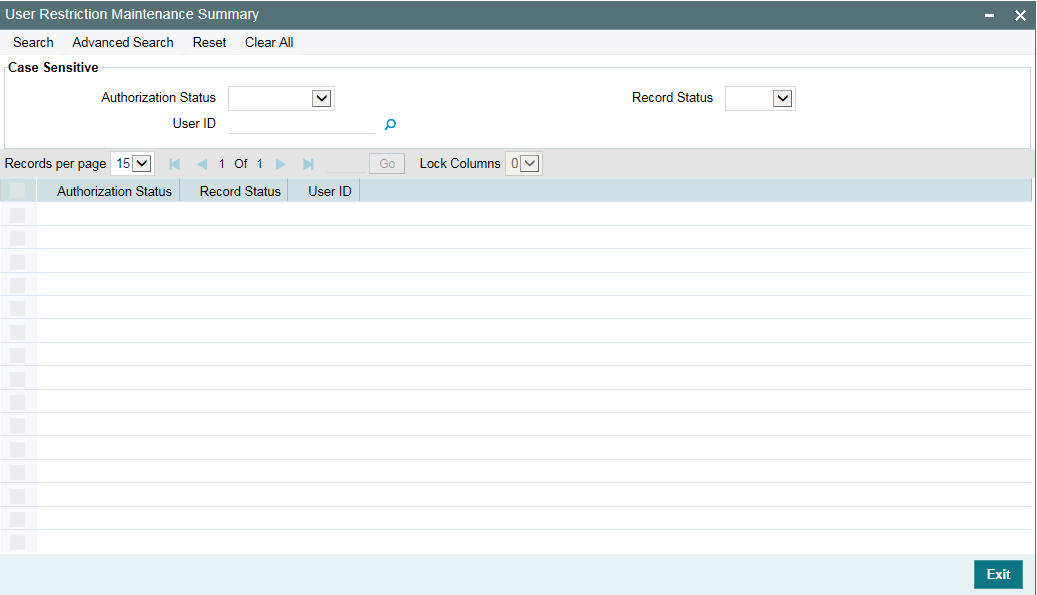
You can base your queries on any or all of the following parameters and fetch records:
- Authorization Status
- Record Status
- User ID
Select any or all of the above parameters for a query and click ‘Search’ button. The records meeting the selected criteria are displayed.
System displays the following details pertaining to the fetched records:
- Authorization Status
- Record Status
- Id
- User Id
2.23 Track Exposure Maintenance
Maintenances for exposure tracking can be done through the ‘Track Exposure Maintenance’ screen. This screen not only allows tracking, but also allows you to define a limit for a particular exposure. This means that when the utilization exceeds the limit, you have to provide a confirmation for process to proceed.
You can invoke the ‘Track Exposure Maintenance’ screen by typing ‘GEDTREXP’ in the field at the top right corner of the Application tool bar and clicking the adjoining arrow button.
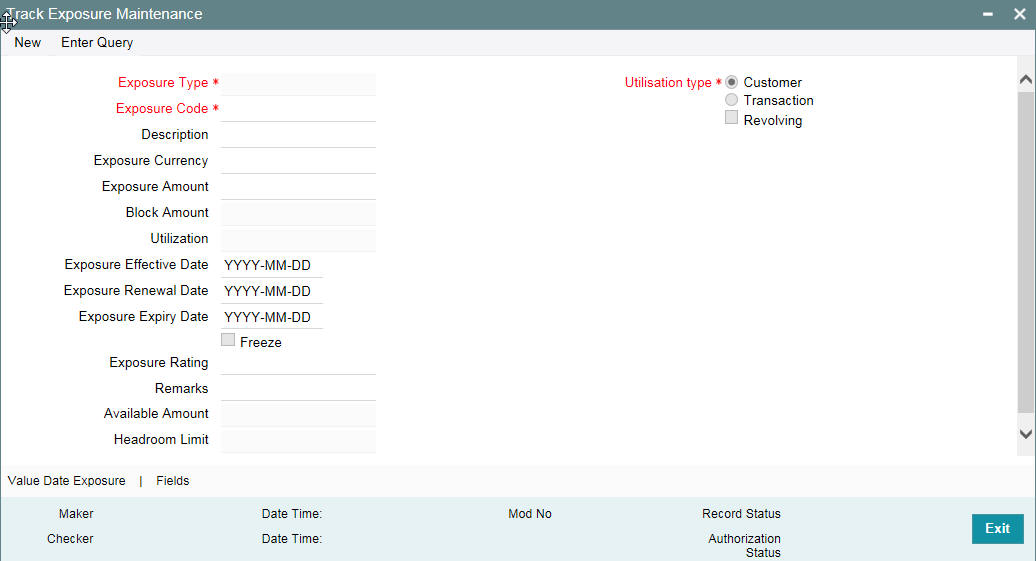
Specify the following details.
Exposure Type
Specify the exposure type. The option list displays all valid exposure types maintained in the system. Select the appropriate one.
The values allowed in field exposure code depends on the exposure type you select here. The validations are as follows.
Selected exposure type |
Value allowed for Exposure Code field |
Currency |
Active currencies maintained in the system |
Country |
Active country codes maintained in the system |
Industry |
Active industries maintained in ‘Sector -Industry Maintenance’ screen |
Sector |
Active sectors or industries maintained in ‘Sector-Industry Maintenance’ screen |
If you select any of the above exposure types, you cannot specify an exposure code that does not belong to the selected exposure type.
For other exposure types, you need to enter a unique exposure code.
Exposure Code
Specify the Exposure code.
If the exposure type is Currency, Country, Industry, or Sector, then you need to select the appropriate exposure code from the option list. For other exposure types, you need to manually enter a unique exposure code.
The exposure code maintained in this screen can be linked in the 'Customer to liability link Maintenance' screen if the 'Utilization type' is 'Customer’ and it can be linked in the 'Facilities Maintenance' screen if the 'Utilization type' is 'Transaction' to make exposure tracking possible. It is possible to track a customer in multiple exposures. For this multiple exposure names should be linked to the ‘Customer to liability link Maintenance' screen.
Description
Provide a brief description of the exposure here.
Exposure Type
Specify what kind of exposure it is. The exposure types are maintained in the Static Maintenance screen 'Exposure Maintenance' having function id CODEXPTY.
Utilization Type
Indicate whether exposure is linked with customer or transaction.
You can track any number of exposures by linking the exposure code to the facility.
Revolving
Check this box if the exposure is a revolving exposure. This implies that each time a repayment is made (revolving amount) against the exposure, the available limit for the exposure is increased by the amount of repayment. In case of non-revolving exposure, the available limit is the amount of exposure reduced by the loans already availed by the customer (if any); repayment does not increase the limit.
This can be denoted in terms of utilized amounts as follows:
- For revolving exposure: New Exposure utilization = Exposure utilization – Revolving amount
- For non-revolving exposure: New Exposure utilization = Exposure utilization
Exposure Currency
Specify the currency in which the Tracking of Exposure has to be maintained. Once authorized, this field will be non-amendable.
Exposure Amount
Specify the exposure limit amount which is to be maintained for each exposure tracking maintenance. A confirmation is sought during utilization when the utilization amount crosses the exposure amount.
Block Amount
The value of the ‘Block Amount’ field in the ‘Global Exposure Block Maintenance’ screen is displayed here.
Utilization
System displays utilization for the exposure here.
Exposure Effective Date
Specify the effective date after which the maintained exposure becomes valid or applicable.
Exposure Renewal Date
Specify the exposure Renewal date. This is only for information purposes.
Exposure Expiry Date
Specify the expiry date after which the maintained exposure is not applicable for tracking.
Freeze
Select this check box to indicate that the exposure is frozen and during utilization. Exposure tracking is not allowed for such an exposure (that is, Utilization under such exposures are not be allowed).
Exposure Rating
Specify the rating of the exposure (Example, Sovereign rating). This is only for information purposes.
Remarks
Add remarks about the track exposure maintenance, if any.
Available Amount
This is the limit amount that is considered when processing utilization requests for an exposure. It is the amount available after taking into account previous utilizations and amount block (earmark) in force for an exposure. It is calculated as shown below:
Exposure Available Amount = Exposure Limit Amount – Utilization – Exposure block amount
Head Room Limit
The system displays the head room limit. This amount is arrived by deducting sum of effective line amounts from exposure amount. The system displays the head room limit in terms of exposure currency of the facilities linked to the exposure.
Note
If the exposure records of type Transaction or Customer are linked to a facility or a customer, you cannot close the records.
2.23.1 Maintaining Value Date Exposure Details
Value dated exposure can be specified using the Value Date Exposure screen. Click ‘Value Date Exposure’ to invoke this screen.
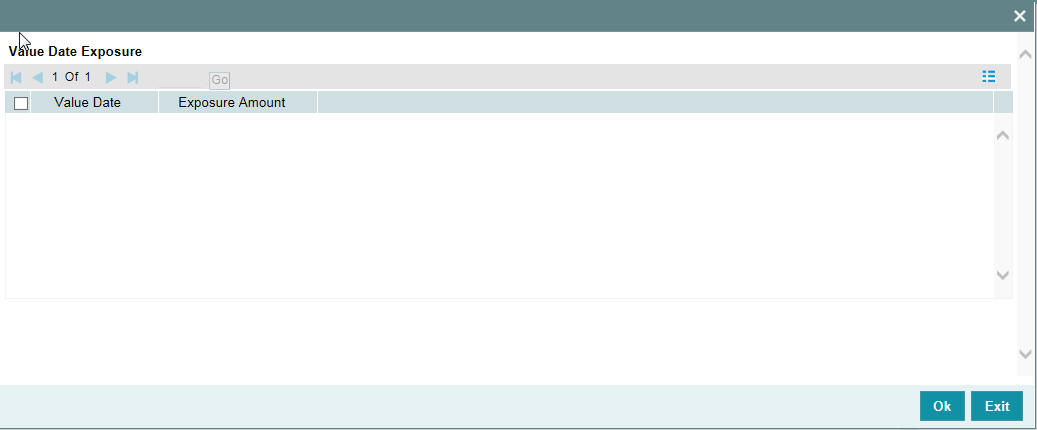
For each record added here you must specify the following:
- Exposure Amount - The value dated Exposure amount
- Value Date - The value date post which the mentioned amount is valid
2.23.2 Viewing Exposure Records
You can view exposure details using the ‘Exposure Query’ screen. You can invoke this screen by typing ‘GESQEXPD’ in the field at the top right corner of the Application tool bar and clicking the adjoining arrow button.
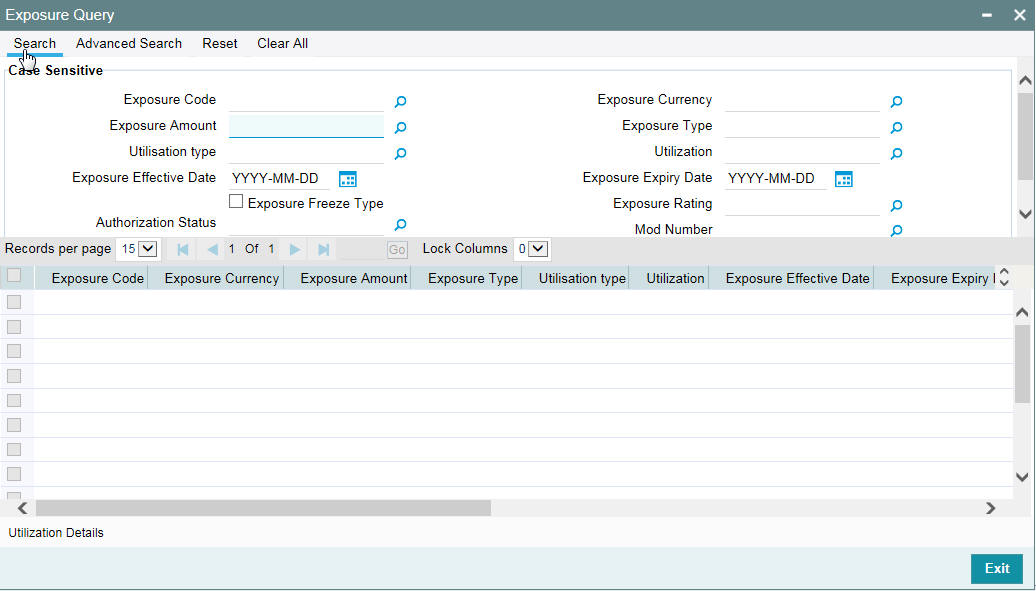
You can query on records based on all or any of the following criteria:
- Exposure Code
- Exposure Amount
- Exposure Currency
- Exposure Type
Click ‘Search’ button. The system identifies all records satisfying the specified criteria and displays the following details for each exposure:
- Exposure Code
- Exposure Currency
- Exposure Amount
- Exposure Type
- Utilization type
- Utilization
- Exposure Effective Date
- Exposure Expiry Date
- Exposure Freeze Type
- Exposure Rating
- Auth Status
- Mod Number
- Revolving Type
- Available Amount
- Revolving Amount
- Block Amount
Select particular record and click on ‘Utilization Details’ button to open the ‘Exposure Utilization Query’ screen. You can invoke this screen by typing ‘GESQEXPU’ in the field at the top right corner of the Application tool bar and clicking the adjoining arrow button.
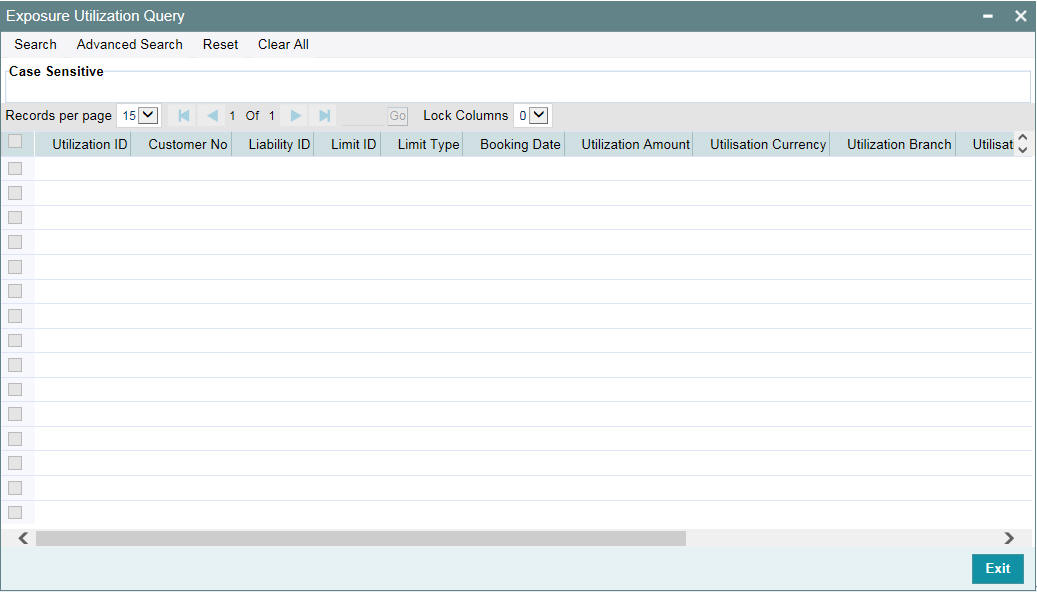
2.24 Exposure Analysis
You can simulate the facilities operations such as creation, modification and renewal of facilities and analyse the impact of such operations on the exposure. To invoke ‘Exposure Analysis’ screen, type ‘GEDEXPAN’ in the field at the top right corner of the application toolbar and click adjoining arrow button.
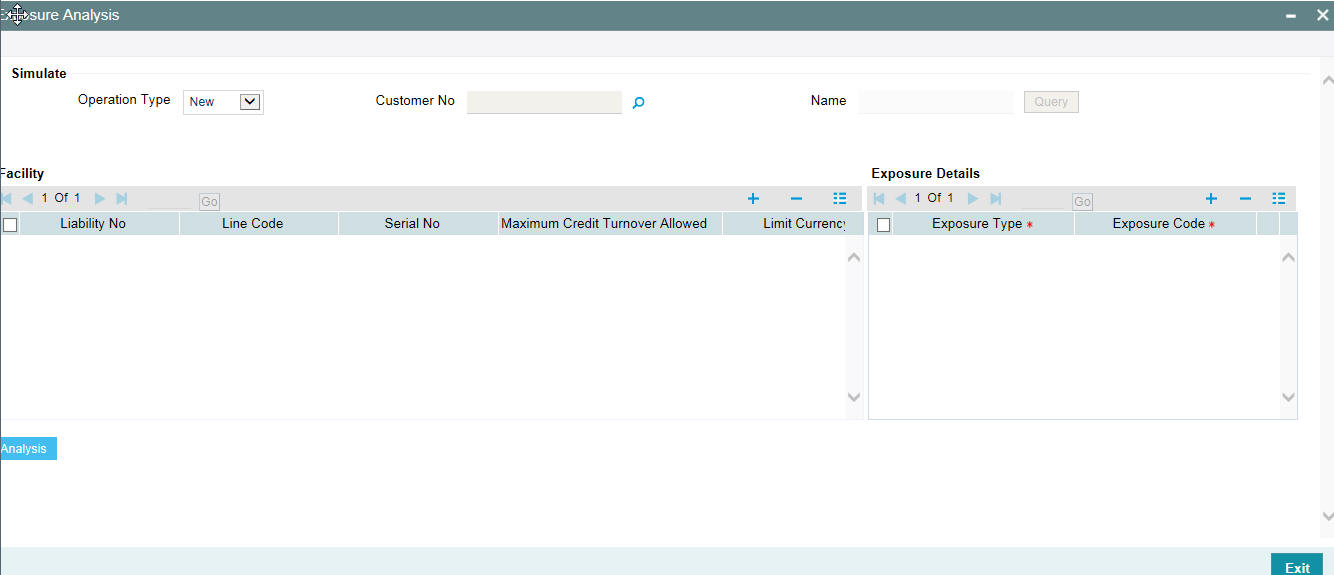
Specify the following details:
Operation Type
Select the operation that you want to simulate. You can select one of the following facility operations.
- New
- Modify
- Renewal
Details are given in the below table.
Operation Type |
Query Facilities |
Editable Fields |
Remarks |
New |
Not Applicable |
New Limit Amount Limit Currency Limit Expiry Date Exposure Type Exposure Code |
Select this to simulate creation of a new facility. Simulation fields other than the editable ones are disabled for this operation. |
Modify |
Based on Customer Number |
New Limit Amount Exposure Type Exposure Code
|
Select this to simulate modification of an existing facility. You can specify a customer ID and click ‘Query’ button to query all the facilities of that customer. The system defaults the Effective Line Amount as the New Limit Amount. The system also defaults the exposure details. You can modify the New Limit Amount and click ‘Analysis’ button to view the impact of modification on the exposure linked with the facility. You can also add a new limit, enter the New Limit Amount and Limit currency, and link the exposures to the new limit before the analysis. |
Renew |
Based on Customer Number |
Limit Expiry Date Exposure Type Exposure Code
|
Select this to simulate renewal of an existing facility. You can specify a customer ID and click ‘Query’ button to query all the facilities of that customer. Modify the Expiry Date to a later date and click ‘Analysis’ button to view the impact of the renewal operation on the exposure. |
Customer Number
You can search for existing facilities based on the customer number. This is applicable only for Modify and Renew operations.
For Modify and Renew operations, you can click ‘Query’ buttons to view the facility details of the selected customer.
Name
The system displays the name of the customer, based on the customer number you have selected for facility query.
Facility Details
For New operation, you can enter the details of the facility. For Modify and Renew operations, you can edit specific fields required for such operations.
Liability Number
The system displays the liability number. You cannot modify this.
Line Code
The system displays the line code. You cannot modify this.
Serial Number
The system displays the serial number. You cannot modify this.
Limit Amount
The system displays the limit amount. You cannot modify this.
Limit Currency
For New operation, you need to specify the limit currency.
For Modify or Renew operations, the system displays the limit currency. You cannot modify this.
Limit Expiry Date
The system displays the limit expiry date.
For Renew operation, you can modify the limit expiry date, For New and Modify operations, you cannot modify this.
New Limit Amount
For New and Modify operations, you can specify the new limit amount. For Renew operation, you cannot edit this field.
Exposure Details
Exposure Type
For New operation, you need to specify the exposure type.
For Modify and Renew operations, the system displays the exposure type. However, you can modify this.
Exposure Code
For New operation, you need to specify the exposure code.
For Modify and Renew operations, the system displays the exposure code. However, you can modify this.
Once you have specified/modified the details for simulation, click ‘Analysis’ button. The system analyses the impact of the operation on the exposure of the respective facility. You can view the details in ‘Exposure Analysis’ screen.
You can view the following details of the selected facility.
- Exposure code
- Exposure type
- Exposure currency
- Total appetite - this is the exposure amount in terms of exposure currency
- Granted appetite - this is the sum of effective line amounts of the facilities linked to this exposure in terms of exposure currency
- Head room - this is arrived by deducting granted appetite from total appetite
- Headroom with HO currency
- Pipe line deals - this is arrived as follows:
sum of new facilities in pipe line using CAM process + (plus)
sum of modified facilities using CAM process where the modified amount is greater than the original amount + (plus)
sum of (modified amount - original amount) modified facilities using CAM process where the expiry date is earlier than or equal to current date and new expiry date is later than current date - (minus)
sum of (original amount - modified amount) of modified facilities using CAM process where modified amount is lesser than the original amount in exposure currency
- Head room with pipe line deals (Head room - pipe line deals in exposure currency)
- Simulated head room
- For New operation, Head Room - New Limit Amount
- For Modify operation, if the limit amount is reduced, then Head Room - (Limit amount - New Limit Amount)
- For Modify operation, if the limit amount is increased, then Head Room + (New Limit amount - Limit Amount) in terms of exposure currency
- White text in green background indicates that it is a positive value
- White text in red background indicates that it is a negative value
- Simulated headroom in HO currency
- Simulated head room with pipe line deals
- Number of days to expire - difference between exposure expiry date and application date
You can view a bar chart that shows the exposure name, head room and head room with this limit fields. You can click an exposure name on the main table to view the following details.
- Liability number - liability number of the facility linked to the selected exposure of the bar chart
- Line Code - line code of the facility linked to the selected exposure of the bar chart
- Line Serial - serial number of the facility linked to the selected exposure of the bar chart
- Effective Line Amount - effective line amount of the facility linked to the selected exposure of the bar chart
- Limit Currency - limit currency of the facility linked to the selected exposure of the bar chart
- Utilization Amount - utilized facility amount
- Block Amount - blocked facility amount
- Number of days to expire - difference between facility expiry date and application date
2.25 Exposure Dashboard
Exposure dashboard helps you analyse the total and granted appetite of exposure codes as bar chart and pie chart. To invoke ‘Exposure Dashboard’, type ‘GEDEXDBD’ in the field at the top right corner of the application toolbar and clicking the adjoining arrow button.
Exposure Type
Select the exposure type whose details you want to analyse. The option list displays all valid exposure types. Select the check boxes adjoining each exposure type to include the details of that exposure type in the dashboard.
Utilisation Type
Select the utilization type that you want to analyse. The option list displays all valid utilisation types. Select the check boxes adjoining each utilization type to include the details of that in the dashboard.
As you select the required options and tab out of the field, the system displays the following details of the exposure codes associated with the selected exposure type.
- Exposure code
- Exposure type
- Exposure currency
- Total appetite
- Granted appetite
- Head room
- Head room in HO currency
- Pipe line deals
- Headroom with pipe line deals
- Simulated head room
- Simulate head room in HO currency
- Simulated head room with pipe line deals
- Number of days to expire
Bar Chart
The bar chart displays the total appetite and granted appetite in HO currency for each exposure code.
Pie Chart
You can view a pie chart of the total appetite in HO currency.
You can view the following details of the facilities linked with a selected exposure code and exposure type.
- Liability number
- Line code
- Line serial
- Effective line amount
- Limit currency
- Block amount
- Utilization amount
- Number of days to expire
2.25.1 Account/Contract Balance Maintenance for Netting
To pool balances across accounts/contracts for netting, account/contract balance information has to be maintained. You can perform this maintenance in the ‘Account/Contract Balance for Netting’ screen.
You can invoke the ‘Account/Contract Balance for Netting’ screen by typing ‘GEDACCNT’ in the field at the top right corner of the Application tool bar and clicking the adjoining arrow button.
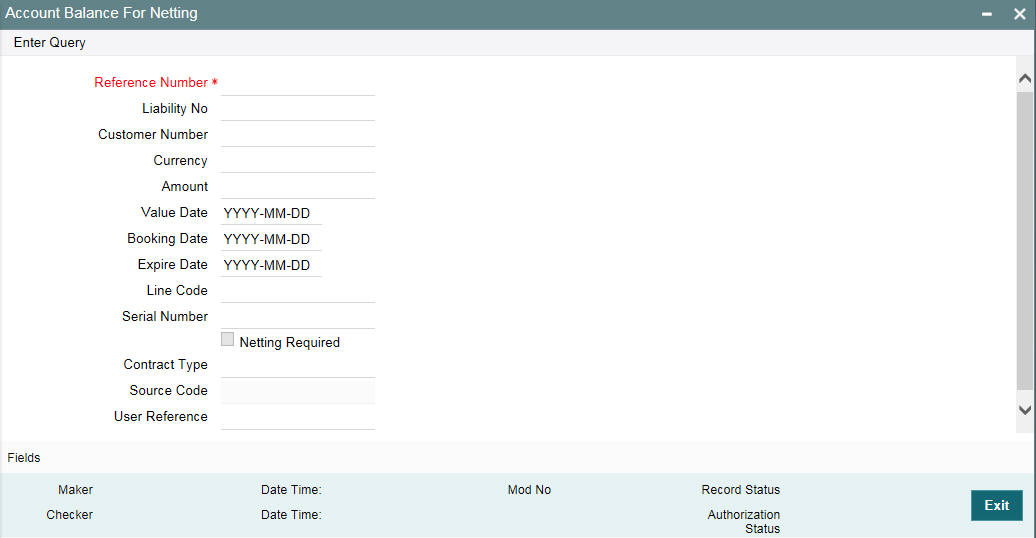
Reference Number
Specify the reference number, which is the account number or the contract reference number for which the balance has to be considered.
Contract Type
The ‘Contract Type’ field will show ‘AC’ by default for the account netting facility. In this case you must also define the facility code (Line Code) to which the netting amount is to be added.
If the account is a Term Deposit account which you wish to link as collateral to a collateral pool, then specify a Contract Type other than ‘AC’. Here you need not specify the facility code.
For more details on linking Term Deposit accounts/contracts as collaterals, refer the section ‘Collaterals Maintenance’.
Customer Number
Specify the customer number to which the Reference number belongs to.
Currency
Specify the currency based on which the balance amount of the account/contact has to be considered. Once authorized, this entry will be non-amendable.
Amount
Specify the account/contract balance amount for netting.
Value Date
Specify the date from when this account/contract is valid for netting.
Booking Date
Specify the booking date when the account/contract was created.
Expiry Date
Specify the date till when this account/contract is valid for netting.
Liability Number
Specify the liability number to which the Reference number is linked.
Line Code
Specify the line code for the account/contract.
Serial Number
System displays the Serial Number for the line chosen in the field 'Line Code'. The ‘Serial No’ field is disabled and it gets defaulted from the ‘Facilities Maintenance’ screen.
Netting Required
Select this check box to indicate that the netting amount defined in the 'Account/Contract Balance for Netting' screen is updated in the 'Netting Contribution' field for the specific facility for which 'Netting Required' check box is selected. You can have the Facility to display the Netting Amount in the 'Netting Contribution' screen. For more details on this feature, refer the section 'Including Netting Amount in Facility’s Netting Contribution' in this document.
2.26 Ear Marking Maintenance
You can use the ‘Ear Marking Maintenance’ screen for blocking of funds for a Facility.
You can invoke the ‘Ear Marking Maintenance’ screen by typing ‘GEDBLOCK’ in the field at the top right corner of the Application tool bar and clicking the adjoining arrow button.
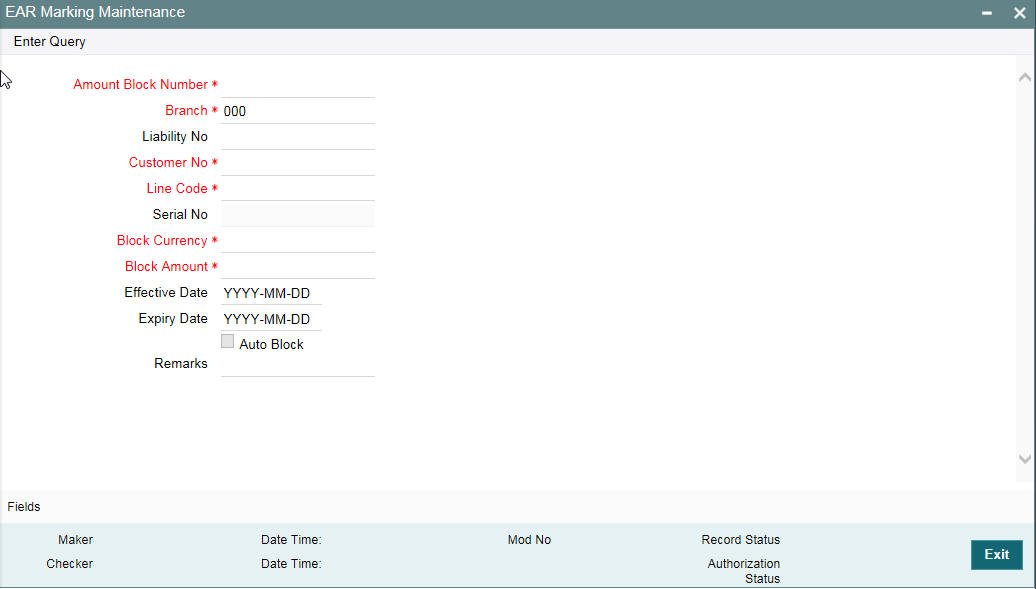
Block Number
Specify the unique number which is to be assigned for every block that has been created.
Branch
Specify the branch in which the block has been created.
Liability Code
Specify the liability code for which the amount block is to be done.
Customer Number
Specify the customer for whom the amount block is to be done.
Line Code
Specify the Line code for which the amount block is to be done.
Serial Number
System displays the serial number for the line chosen in the field 'Line Code'.
Block Currency
Specify the currency based on which the Block amount for the facility has to be considered. Once authorized, this entry is non-amendable.
Block Amount
Specify the amount to be blocked for ear marking. The block amount cannot be a negative value.
Effective Date
Specify the date from when this block amount for that facility becomes effective.
Expiry Date
Specify the date till when this block amount for that facility is applicable.
Auto Block
Check this box to indicate that the system should automatically create block for the specified amount for the specified facility. This check box is deselected by default indicating that the block on the facility is manual.
Remarks
Add remarks about the ear marking maintenance, if any.
2.27 Global Block Exposure Maintenance
You can block (earmark) a certain amount of an exposure limit using the ‘Global Block Exposure Maintenance’ screen. You can invoke the ‘Global Exposure Block Maintenance’ screen by typing ‘GEDEXPBL’ in the field at the top right corner of the Application tool bar and clicking the adjoining arrow button.
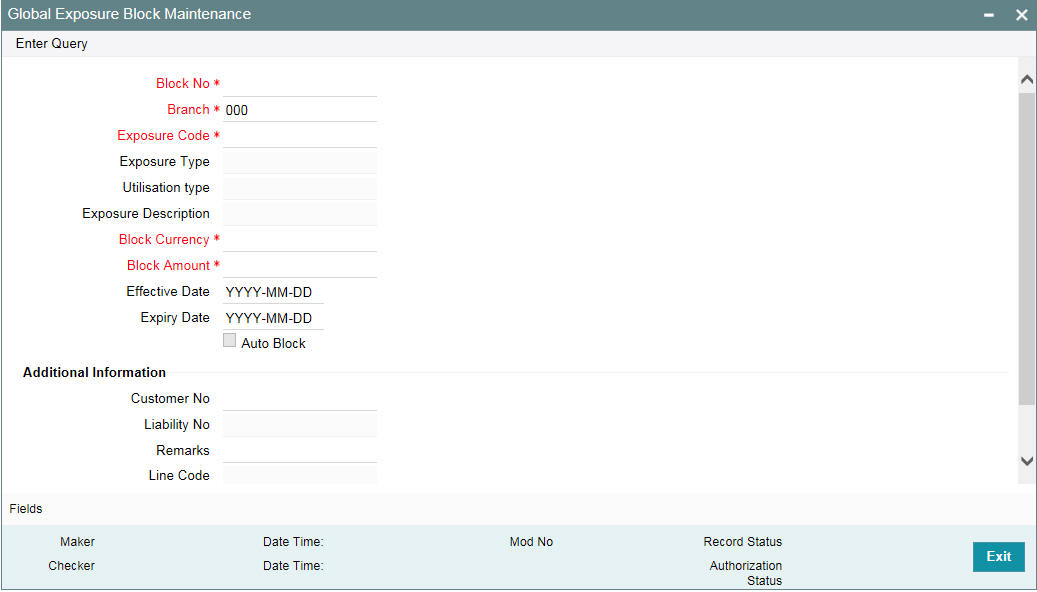
Block Number
Specify a unique number for the block you are creating. The system does not allow you to modify it after authorization of the maintenance.
Branch
Specify the branch from which the block is being maintained. You cannot change the branch after authorization of the maintenance.
Exposure Name
Specify the exposure code for which the amount block is to be done. The adjoining option list contains all the relevant codes. Select the appropriate one.
Exposure Description
The system defaults the exposure description here.
Block Currency
Specify the currency in which the amount block is to be applied. You cannot modify this once the maintenance has been authorized.
Block Amount
Specify the amount to be earmarked. This amount is deducted from the existing utilization of an exposure before additional utilization requests are processed.
Note
It is also updated as the ‘Block Amount’ in the ‘Track Exposure Maintenance’ screen.
Effective Date
Specify the date from which the amount block should be applied for the exposure.
Expiry Date
This is the date till which the amount block for the exposure is enforced.
Auto Block
The system automatically checks this option on the date the block on the exposure comes into force that is, the ‘Effective Date’.
2.27.1 Additional Information
As part of additional information for the exposure, you can capture the following details:
Customer Number
Specify the customer number for the global exposure block maintenance.
Liability Number
Specify the liability number for the global exposure block maintenance.
Remarks
Add remarks about the global block exposure maintenance, if any.
Line Code
Specify the line code for the global exposure block maintenance.
Line Serial
System displays the serial number for the line chosen in the field 'Line Code'.
2.28 Limit Block Maintenance
You can block the funds for facility liability, collateral, and collateral pool using 'Limits Block' screen.You can invoke the ‘Limits Block’ screen by typing ‘GEDBLCKS’ in the field at the top right corner of the Application tool bar and clicking the adjoining arrow button.
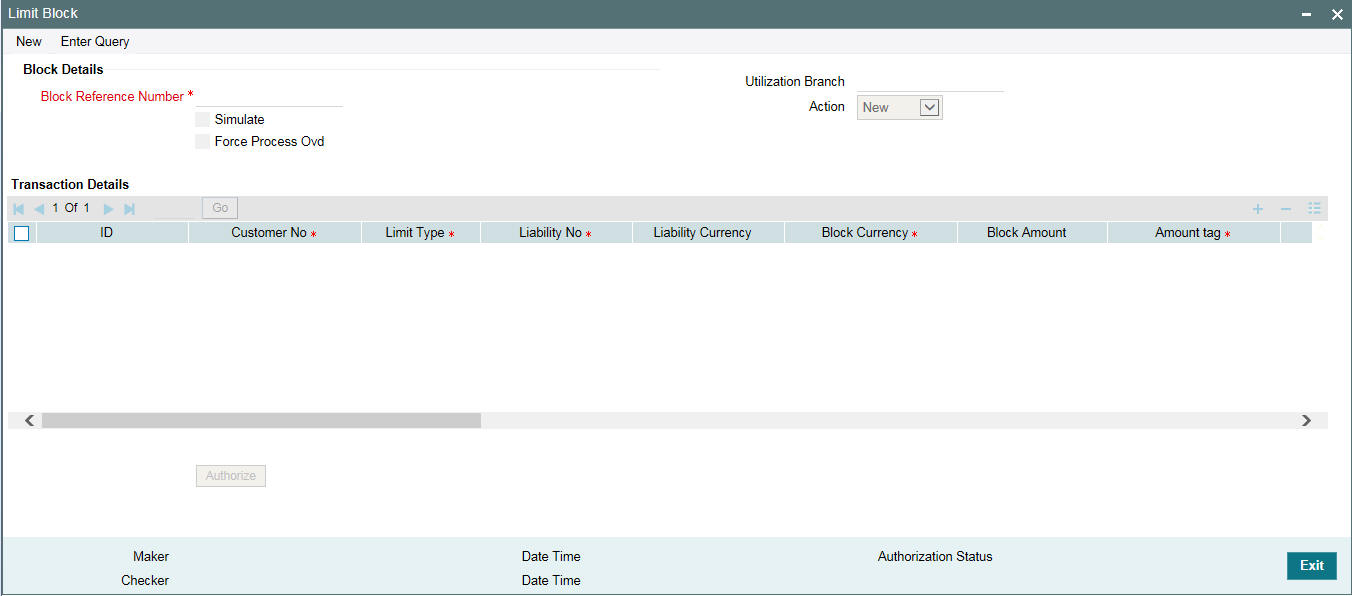
Block Details
Block Reference Number
Specify the unique number which is to be assigned for every block that has been created.
Simulate
Select this check box to indicate that the details for the transaction being entered should be used only for simulation and not stored permanently within the system. After a successful simulation of a transaction, the system displays the utilized amount for the facility and the for the liability.
Force Process Ovd
Indicates whether transaction should ignore the overrides occurred in the process or not.
Utilization Branch
Branch code is displayed here. It indicates the transaction branch code.
Action
During new block, you can perform below mentioned operations for all entities.
- New Block
- Increase Block
- Decrease Block
- Alter Block
- Reverse Block
- Re-open Block
- Mature
- Query Block
The following examples depict block applied on a facility for different block operations.
New Block
Before Block
Facility Available Amount |
Block Amount |
Block Status |
10000 |
0 |
A |
After Block of 1000
Facility Available Amount |
Block Amount |
Block Status |
9000 |
1000 |
A |
Alter Block
After New Block of 1000
Facility Available Amount |
Block Amount |
Block Status |
9000 |
1000 |
A |
After Alter Block of 3000
Facility Available Amount |
Block Amount |
Block Status |
7000 |
3000 |
A |
After Alter Block of 2000
Facility Available Amount |
Block Amount |
Block Status |
8000 |
2000 |
A |
Increase Block
After New Block of 1000
Facility Available Amount |
Block Amount |
Block Status |
9000 |
1000 |
A |
After Increase of 1000
Facility Available Amount |
Block Amount |
Block Status |
8000 |
2000 |
A |
Decrease Block
After New Block of 1000
Facility Available Amount |
Block Amount |
Block Status |
9000 |
1000 |
A |
After Decrease of 1000
Facility Available Amount |
Block Amount |
Block Status |
9500 |
500 |
A |
Reverse Block
After Block
Facility Available Amount |
Block Amount |
Block Status |
8000 |
2000 |
A |
After Reverse of Block
Facility Available Amount |
Block Amount |
Block Status |
10000 |
0 |
A |
Reopen Block
After Block
Facility Available Amount |
Block Amount |
Block Status |
10000 |
0 |
A |
After Reopen of Block
Facility Available Amount |
Block Amount |
Block Status |
10000 |
0 |
A |
Liquidate Block
After Block
Facility Available Amount |
Block Amount |
Block Status |
8000 |
2000 |
A |
After Liquidate of Block
Facility Available Amount |
Block Amount |
Block Status |
10000 |
0 |
A |
Transaction Details
ID
Indicates the transaction ID
Customer No
The system displays the customer number to which the Facility, Liability, Collateral, Collateral Pool are linked. The option list displays all valid customer numbers linked to the facility and liability number selected on this screen. You can select the customer number from the option list.
Limit Type
The system displays the limit type to which the limit is associated.
Liability No
Liability which is linked to customer in ‘Customer to Liability Link Maintenance’ screen (GEDCULIK).
Liability Currency
The currency with which the liability is associated.
Block Currency
Specify the currency based on which the Block amount for the limit has to be considered.
Block Amount
Specify the amount to be blocked
Amount Tag
The 'Amount Tag' entered in 'Amount Tag Maintenance' screen is displayed here.
Amount tag would be required when there are multiple utilization for the same reference number. This tag would indicate which component needs to be authorized.
Block Product
Specify the product for the transaction.
Liability Block Amount
Displays the liability blocked amount.
Line Code
Specify the facility here.
Serial No
Indicates the ELCM generated unique identifier for the facility. The ‘Serial No’ field is disabled and it gets defaulted from the ‘Facilities Maintenance’ screen.
Collateral Code
Specify the Collateral Code here. Each Collateral code should be unique.
Pool Code
Specify the Pool Code here. The pool code assigned to each collateral pool can be linked to a liability while creating credit limits.
Limit Currency
The limit currency of the facility.
Limit Block Amount
Block amount of entity
Utilization Status
Indicates the utilization status, possible values are A-Active, R-Reverse, L- Liquidated.
Tenor Basis
Select this check box to indicate that the utilization should be tracked tenor wise for the facility.
Tenor
Enter the basis on which tenor tracking should be done for the utilization. You must have selected the ‘Tenor Basis’ option before you can specify the basis here.
Maturity Date
Specify the date on which the transaction matures.
Value Date
Specify the value date for the transaction.
Module
The module from which the transactions are triggered is displayed.
Source Code
Indicates the product processor name from where the transaction has been originated. This field will be as part of Header section (Source Code).
Exposure Block Number
Specify a unique number for the block you are creating. The system does not allow you to modify it after authorization.
2.29 Breach Tracking for Main Line Facility Utilization Transactions
Oracle FLEXCUBE ELCM allows you to track all the utilizations of a facility which includes the following:
- Main line facility level
- Child facility level
2.29.1 Breach tracking at main line and child facility level
- In case a utilization transaction breaches the exception transaction then the transaction goes for dual authorization. Likewise, because of the utilization transaction, if the total utilization breaches the exception breach percentage configured at facility level, then also the exception transaction goes for dual authorization.
- The dual authorization transaction is routed to appropriate role based on the queue maintenance.
- Dual authorization transaction is routed to appropriate queue considering the utilization transaction amount considering slabs configured for branch and category through ‘Exception Queue Slab Maintenance’ screen.
- Utilization transaction done at a facility level looks into exception transaction amount and exception breach percentage configured at that particular facility level for sending to dual authorization. For a child line having a main line attached, since the utilization transaction at child line level also updates the main line, utilization transaction goes for dual authorization if the transaction amount breaches the configurations at respective child and main line.
- Currency and amount of utilization transaction at line level is to be considered to decide the appropriate queue to which dual authorization transaction is to be sent for approval.
- Based on facility level configurations for exception transaction amount/percentage, if utilization transaction breaches the configured amount/percentage at both child and main line level, then multiple dual auth transactions are triggered based on configuration.
- Both dual authorization transactions pertaining to child and main lines have to be authorized.
- For a facility where in facility transfer out has taken place because of which the available amount would have come down, utilization transaction will be sent to dual authorization if the overall utilization breaches the exception breach percentage configured considering this available balance after facility transfer.
- If multiple users are available in a particular role and if one of the users approves the transaction, transactions gets approved. Likewise, if one of the users rejects the transaction, same gets rejected.
- Both child and main line level dual auth transactions are to be approved by the configured users for approval of the utilization transaction. If either of the child or main line dual auth transaction is rejected, then the utilization transaction gets rejected.
- If the utilization currency is different from facility currency, then the utilization amount is converted to facility amount currency and validated with exception transaction amount and if the same is breaching, appropriate queue/slab applicable for the amount/currency is picked for routing the transaction.
- When different branches involved in utilization transactions, that is main line in one branch and child line in a different branch, then appropriate branch/category combination configuration is considered.
2.29.1.1 Examples
When a single line configured with both breach transaction amount and breach exception percentage.
Scenario 1 - Utilization transaction resulting in breach of EITHER exception transaction amount or exception breach percentage – single transaction will go for dual authorization
- If one role is configured for a particular queue – all users in the role will get dual auth transaction. If one of them approves, entire transaction gets approved. If one of them rejects, entire transaction gets rejected. No action required from other users.
- If multiple roles are configured for a particular queue – all users in all configured roles will get dual auth transaction. If one of them approves, entire transaction gets approved. If one of them rejects, entire transaction gets rejected. No action required from other users.
Scenario 2 – Utilization transaction resulting in breach of BOTH exception transaction amount AND exception breach percentage – two transactions will go for dual authorization
- Since it is for the same facility both the transactions will go for the same queue considering the amount of utilization transaction considering the following.
- If one role is configured for a particular queue – all users in the role will get dual auth transaction. If one of them approves, entire transaction gets approved. If one of them rejects, entire transaction gets rejected. No action required from other users.
- If multiple roles are configured for a particular queue – all users in all configured roles will get dual auth transaction. If one of them approves, entire transaction gets approved. If one of them rejects, entire transaction gets rejected. No action required from other users.
When a child line having main line and both the lines configured with both breach transaction amount and breach exception percentage
Scenario 1 - Utilization transaction resulting in breach of EITHER exception transaction amount or exception breach percentage of both child and main lines - TWO transactions will go for dual authorization
- If one role is configured for a particular queue – all users in the role will get dual auth transaction. If one of them approves, entire transaction gets approved. If one of them rejects, entire transaction gets rejected. No action required from other users.
- If multiple roles are configured for a particular queue – all users in all configured roles will get dual auth transaction. If one of them approves, entire transaction gets approved. If one of them rejects, entire transaction gets rejected. No action required from other users.
- Action to be taken on both the transactions for ensuring completion of the transaction. If both the transactions are approved, utilization transaction gets approved. If either of the transactions is rejected then utilization transaction gets rejected.
Since two different facilities are involved, considering queue configuration for different slabs for a combination of branch and category, appropriate queue is selected for routing dual authorization transaction for approval.
- If one role is configured for a particular queue – all users in the role will get dual auth transaction. If one of them approves, entire transaction gets approved. If one of them rejects, entire transaction gets rejected. No action required from other users.
- If multiple roles are configured for a particular queue – all users in all configured roles will get dual auth transaction. If one of them approves, entire transaction gets approved. If one of them rejects, entire transaction gets rejected. No action required from other users.
- Action to be taken on all the transactions for ensuring completion of the transaction. If all four the transactions are approved, utilization transaction gets approved. If any one of the transactions is rejected then utilization transaction gets rejected.
2.30 About Approval By Email
An automated e-mail with transaction details (breach) to be sent to checker (dual authorization) on utilization transaction/overall utilization breaching the signified values to authorize the transaction.
- Approval by e-mail is applicable for breach tracking mechanism for:
- Either main or child lines (Single Line)
- Both main and child lines
- You can configure approval by e-mail functionality for specific (usually high valued) transactions breach requiring authorization from select group of authorizers.
- This is also applicable when a utilization transaction updates the main line and requires checker’s approval (dual authorization) based on the configuration.
- Checker can approve/reject the transaction on e-mail by giving comments
- On approval, transaction is authorized and is in completed queue of maker.
- On rejection, transaction is rejected and is in pending queue of maker.
- E-mail is sent to user attached to role with the e-mail id maintained in ‘User Maintenance’ (SSDUSRDF) screen.
2.30.1 Approval By Email - Breach Tracking Mechanism
The following are common scenarios that happens for breach tracking mechanism.
- Assign multiple roles to the same queue to enable dual authorization
for a particular transaction within a particular amount range by users
belonging to different roles.
- Email approval is triggered for all the users attached to multiple roles.
- Even for auto auth user, breach transaction has to go for dual auth.
- Email Approval is triggered to multiple authorizers (as configured) and subsequent behaviour similar to breach functionality.
- Single utilization transaction can result in 4 dual auth –
2 for exception transaction breach and 2 for exception percentage breach,
that is for main line and child line separately.
- Number of email approvals triggered is 4, triggered to all the users assigned to roles in queue maintenance.
2.30.1.1 Either main or child line (Single Line)
- If multiple authorizers belonging to different role are involved based on amounts configured for different queues.
- Email approval is triggered for multiple authorizers belonging to different roles (as per the configuration)
- If either 'Exception Transaction Amount' and 'Exception Breach Percentage' is configured and assigned to multiple users for dual auth.
- Assume Queue 1 is configured to handle either 'Exception Transaction Amount' or 'Exception Breach Percentage'.
- Email Approval is triggered to all the users attached to roles of Queue1 (amount or percentage).
- System considers the first response (either ‘Approved or ‘Rejected’) within the users of Queue 1 to authorize the transaction.
- Based on the first response received within Queue1 either ‘Approved’
or ‘Rejected’.
- System send an intimation mail to other users in Queue 1 about the approval or rejection.
- Any further response is ignored and removed from the Queue1
- System either authorizes (for approved) or reject (for rejected) the utilization transaction.
- If both the breach dual authorization (amount and percentage) transactions are approved by multiple authorizer involved transaction.
- Assume Queue 1 is configured to handle ‘Exception Transaction Amount’ and Queue 2 for ‘Exception Breach Percentage’.
- Email Approval is triggered to all the users attached to roles of different queues (Queue 1 and Queue 2 ) for both amount and percentage.
- System considers the first response within the users of an individual queue (Queue 1 and Queue 2 ) to authorize the transaction.
- Approve/Reject response can be triggered in any of the queues irrespective
of each other.
- The first response from either queue is stored and wait for the response from other one.
- System considers the ‘Approved’/’Reject’ response from both queues (Queue1 and Queue 2 ) to authorize/reject the utilization transaction.
- Assuming the first response received within Queue 1 is ‘Approved’.
- System sends intimation mail to other users in Queue 1 about the approval.
- Any further response is ignored and removed from the Queue 1
- System waits for other response of other queue (Queue 2) before authorizing the utilization transaction.
- Assuming the first response received within Queue 2 is also ‘Approved’
- System send an intimation mail to other users in Queue 2 about the approval.
- Any further response is ignored and removed from the Queue 2
- Since Queue 2 response is also ‘Approved’, the system then authorizes the utilization transaction.
2.30.1.2 Both main and child lines
- If exception transaction is given both at child and main line level
- Email Approval is triggered as per the respective configuration for main and child lines
- Approve/Reject response can be triggered in any of the queues irrespective
of each other.
- The first response from either queue is stored and wait for the response from other one.
- If same role authorizer gets dual auth transactions for both main and child facilities and if both the transactions are approved
- Assume Queue 1 is configured to handle Exception for main line and Queue2 for Exception handling of child line (both for Amount and percentage).
- Email approval is triggered to the all the users (including same role authorizer) attached different queues (Queue1 and Queue 2) for both main and child lines (both amount and percentage).
- Approve/Reject response can be triggered in any of the queues irrespective
of each other.
- The first response from either queue is stored and wait for the response from other one.
- System considers the ‘Approved’/’Reject’ response from both main line (Queue 1) and child line (Queue2) to authorize/reject the utilization transaction.
- Assuming the first response received within Queue1 for main line
is ‘Approved’.
- System sends and intimation mail to other users in Queue1 about the approval.
- Any further response is ignored and removed from the Queue 1
- System waits for other response of other queue (Queue 2) before authorizing the utilization transaction.
- Assuming the first response received within Queue 2 is also ‘Approved’
- System sends an intimation mail to other users in Queue 2 about the approval.
- Any further response is ignored and removed from the Queue 2.
- Since Queue 2 response is also ‘Approved’, system then authorizes the utilization transaction in both main and child lines.
- If same role authorizer gets dual auth transactions for both main and child facilities and if one of the transaction is approved and the other is rejected, then the entire transaction should be rejected.
- Assume Queue 1 is configured to handle Exception for main line and Queue2 for Exception handling of child line (both for Amount and percentage).
- Email Approval is triggered to the all the users (including same role authorizer) attached different queues (Queue1 and Queue2) for both main and child lines (both amount and percentage).
- Approve/Reject response can be triggered in any of the queues irrespective
of each other.
- The first response from either queue is stored and wait for the response from other one.
- System considers the ‘Approved’/’Reject’ response from both main line (Queue 1) and child line (Queue2) to authorize/reject the utilization transaction.
- Assuming the first response received within Queue 1 for main line
is ‘Approved’.
- System sends an intimation mail to other users in Queue 1 about the approval.
- Any further response is ignored and removed from the Queue 1
- System waits for other response of other queue (Queue 2) before authorizing the utilization transaction.
- Assuming the first response received within Queue 2 is ‘Reject’
- System sends an intimation mail to other users in Queue2 about the rejection.
- Any further response sends ignored and removed from the Queue2.
- Since Queue 2 response is ‘Reject’, system rejects the utilization transaction in both main and child lines.
- When different branches involved in utilization transaction – main line in one branch and child line in a different branch, appropriate branch/category combination configuration is considered.
- Email approval is triggered to multiple authorizers (as configured) and subsequent behaviour similar to breach functionality.
- If dual authorization of breach transaction pertaining to child and main lines goes two different users, then the transaction will not get approved till both the transaction are approved. If multiple users are attached to a role configured for receiving email, all of them will get email for dual authorization approval. If one of them approves, then the transaction goes through. However, if one of them rejects, other users will be informed appropriately by e-mail.
2.30.2 Exception Queue Maintenance
You can maintain exception queue records with their respective user roles allowed for authorization in the ‘Exception Queue Maintenance’ screen.
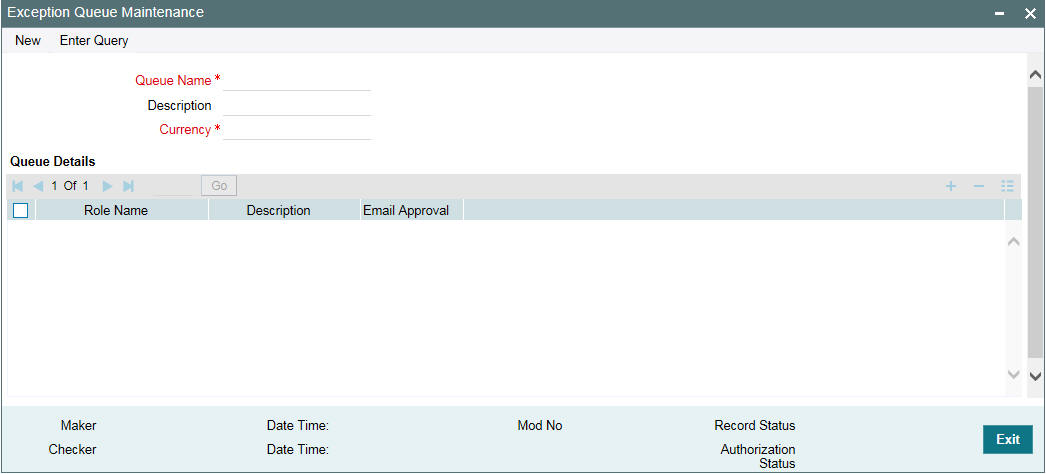
You can invoke the ‘Exception Queue Maintenance’ screen by typing ‘GEDQUEMN’ in the field at the top right corner of the Application tool bar and clicking the adjoining arrow button.
Queue Name
Specify the Queue Name.
Description
Give a brief description of the queue here.
Currency
You can choose the appropriate currency from the option list.
You can configure different queues with currency combination. Queue configured with a particular currency when used in 'Exception Queue Slab Maintenance' determines the queue which needs to be considered for routing dual auth transaction for approval based on utilization amount in facility currency.
Queue Details
Here you can specify multiple user roles for a Queue name. For each record you must specify the Role Name, that is, the user role allowed for authorization. System then defaults the description for the role.
Email Approval
You can select this check box in case e-mail needs to be sent to the users attached to role.
2.30.3 Exception Queue Slab Maintenance
As a part of Credit Exception management, the Transaction authorizer details and breached authorizer details can be entered in the ‘Transaction Authorize Maintenance’ screen.
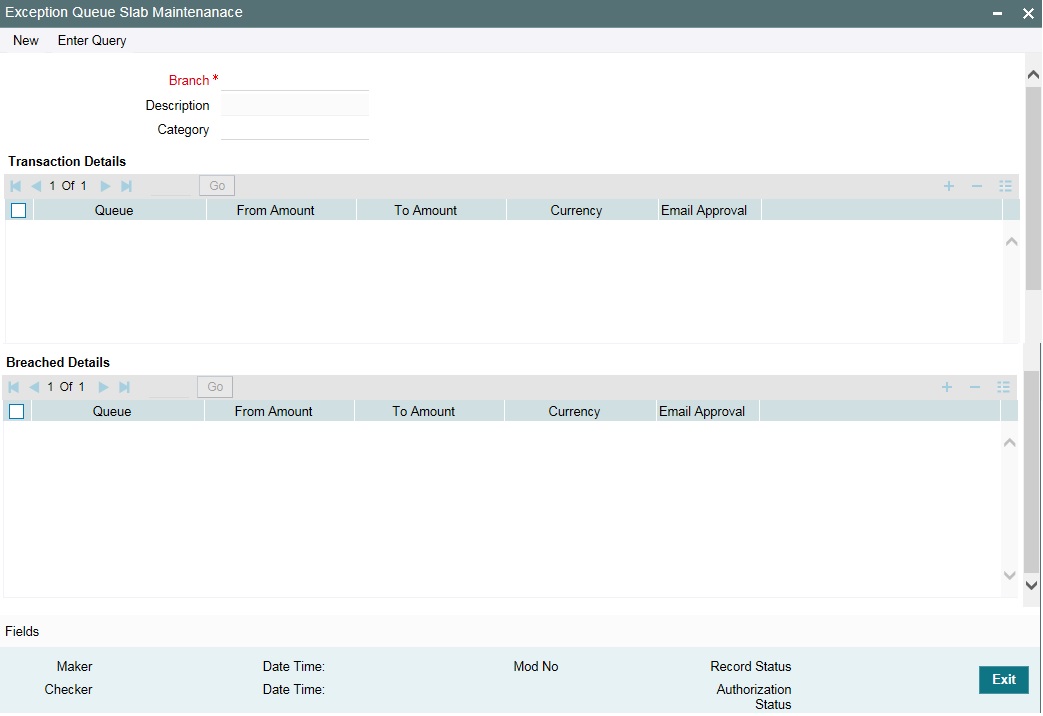
You can invoke the ’Exception Queue Slab Maintenance’ screen by typing ‘GEDTAUTH’ in the field at the top right corner of the Application tool bar and clicking the adjoining arrow button.
The transaction authorizer queue first checks for authorizers maintained for that particular branch and category during a utilization transaction for that branch. If no authorizers are maintained for that branch then a default authorizer is assigned to all branches.
The Default Authorizer details are used for processing Credit Exception management.
Branch
Specify the branch for which the maintenance is being done.
Description
The description for the branch chosen in the field 'Branch' is displayed here.
Remarks
Specify the remarks about the Transaction Authorize Maintenance.
Category
Specify the category for which the transactions authorize maintenance is being done. Having specified the category for the liability and the facility, the transaction authorize maintenance can be done for the same category. When the Exception Txn Amount or Exception Breach Percentage gets breached for a line belonging to the same category as defined in the transaction authorize maintenance, the transaction is available in the queue defined in the transaction authorize maintenance for the specific category.
Transaction Details
Here for each record you can specify the following:
- Queue Name – Specifying this in turn fetches all the user roles attached to the queue name. During utilization transaction users having these roles have to perform the authorization for the corresponding amount range.
- From Amount and To Amount – For specifying the amount range
- Currency - In this screen while creating different slabs, the currency is defaulted from 'Exception Queue Maintenance' screen. This feature allows in picking appropriate queue based on utilization transaction amount in a particular currency.Thereby, dual authorization transaction can be sent to appropriate role.
- Email Approval - If selected, e-mail is sent to the users attached to the role if the breach falls in particular slab
Breached Details
Here for each record you can specify the following:
- Queue Name – Specifying this in turn fetches all the user roles attached to the queue name. During utilization transaction users having these roles have to perform the authorization on Breached Transaction amount blocks.
- From Amount and To Amount – For specifying the amount range to define the block of amount
- Currency - In this screen while creating different slabs, the currency is defaulted from 'Exception Queue Maintenance' screen. This feature allows in picking appropriate queue based on utilization transaction amount in a particular currency.Thereby, dual authorization transaction can be sent to appropriate role.
- Email Approval - If selected, e-mail is sent to the users attached to the role if the breach falls in particular slab.
2.30.4 Approval By Email format
This section contains the following topics:
- Section 2.30.4.1, "Email Format to the Approvers"
- Section 2.30.4.2, "Reply Format by the Approvers/checkers"
- Section 2.30.4.3, "Intimation Mail Format"
2.30.4.1 Email Format to the Approvers
The below mentioned is an example that is associated with the transaction and assists in decision making. The fields are all display fields and cannot be edited in the email. Only ‘Approve’ or ‘Reject’ for authorization of the breached transaction is allowed.
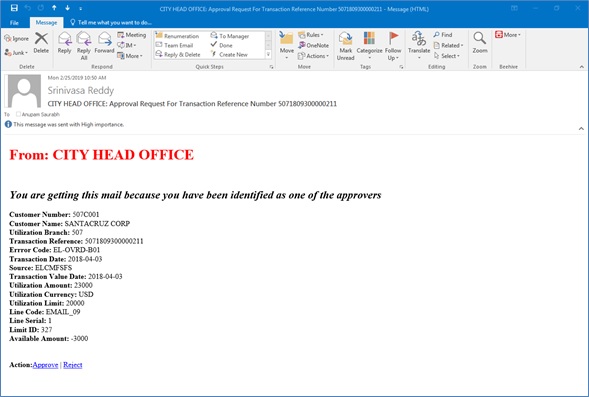
- Customer Number -Indicates the Customer Number of the utilization transaction
- Customer Name - Indicates the Customer Number of the utilization transaction
- Utilization Branch - Indicates the transaction branch.
- Error Code - Indicates the error code of the transaction.
- Transaction Date - Indicates the date and time when the transaction is entered in system.
- Transaction Value Date - Indicates the value date of the transaction
- Utilization Amount - Indicates the Utilization Amount.
- Utilization Currency - Indicates the currency of the utilization transaction
- Line Code - Indicates the facility code of the utilization transaction
2.30.4.2 Reply Format by the Approvers/checkers
This e-mail has basic transaction details and override information. On click of Approve/Reject, the below screen is displayed. Checker can enter the comments in curly brackets {}and click ‘Send’

2.30.4.3 Intimation Mail Format
If transaction is already authorized or rejected then an intimation e-mail is sent to other users (checker) of the queue. It is also sent if the transaction has been approved/rejected from GEDDAUTH screen.
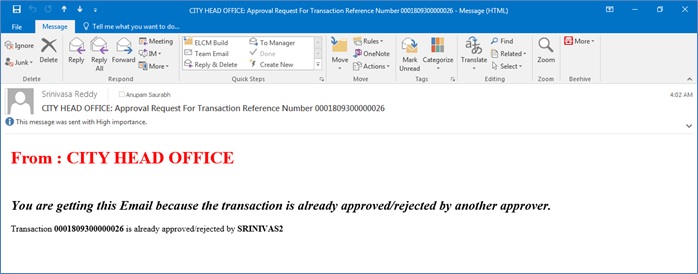
2.30.5 Approval By Email Status
You can invoke the ’Approval By Email Status’ screen by typing ‘GESEMQUE’ in the field at the top right corner of the Application tool bar and clicking the adjoining arrow button.
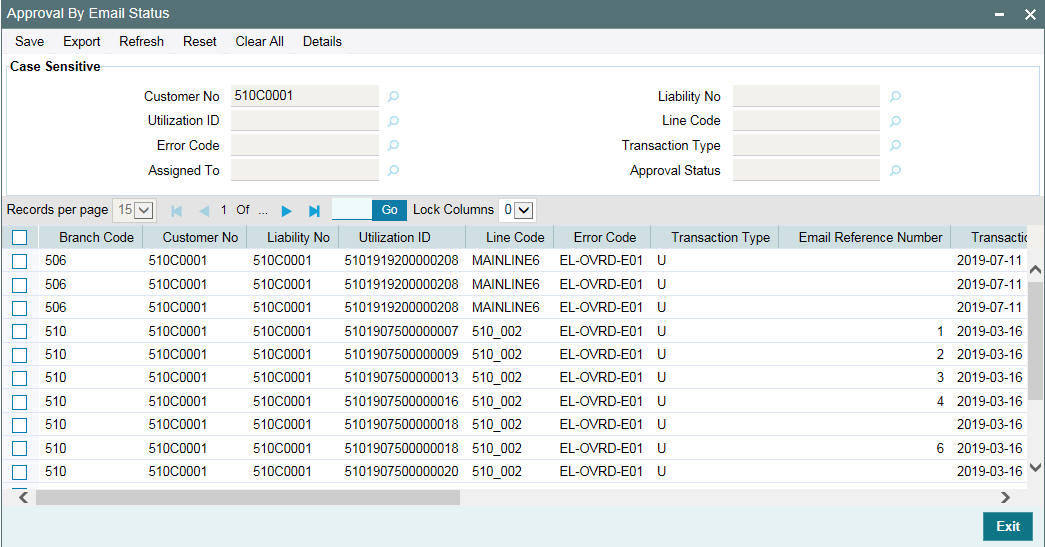
You can search for the records based on one or more of the following parameters:
- Customer No
- Utilization ID
- Error Code
- Assigned To
- Liability No
- Line Code
- Transaction Type
- Approval Status
Once you have specified the search criteria, click ‘Search’ button. The system displays the following details that match the filter criteria.
- Branch Code - Indicates the Branch Code.
- Customer No - Indicates the Customer No
- Liability No - Indicates the Liability No
- Utilization ID - Indicates the utilization transaction ID that led to breach.
- Line Code - Indicates the facility code of the utilization transaction.
- Error Code -Indicates the error code of the transaction
- Transaction Type - Indicates whether the transaction is ‘Authorized’ or ‘Unauthorized’.
- Email Reference Number - Indicates Email reference number.
- Transaction Date - Indicates the transaction date.
- Source Code - Indicates the product processor name from where the transaction has been originated
- Exception Queue - Indicates the exception queue
- Assigned To - Indicates to whom the transaction is assigned that is, checker Name
- Assignee Email - Indicates to whom the transaction is assigned that is, checker Email
- Approval Status - Indicates transaction is approved or rejected by the checker.
- Remarks - Indicates approved or rejected remarks of the transaction done by the checker.
- Approval Date- Indicates approved or rejected date of the transaction done by the checker
- Authorized - Indicates the transaction authorization status (Approved ‘A’ or Rejected ‘R’)
- Email Status - Indicates 'Y' or 'N'. If mail is sent to the checker or e-mail not sent
- Intimation Sent - Indicates 'Y' or 'N'.If intimation mail is sent to the remaining checker for that transaction or intimation mail not sent.
2.31 Maintaining Sector and Industry
You can maintain sectors and industries associated each sector using ‘Sector-Industry Maintenance’ screen. To invoke this screen, type ‘GCDSECMT’ in the field at the top right corner of the application toolbar and click the adjoining arrow button.
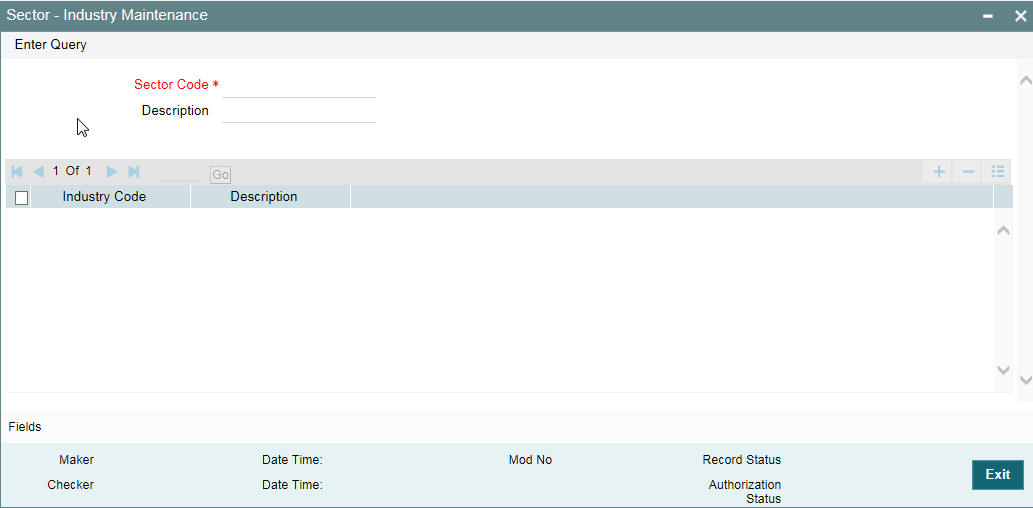
Specify the following details:
Sector Code
Specify a unique code to identify the sector you are defining.
Description
Specify a brief description of the sector.
Industry Code
Specify the industry code to be associated with the sector code. You can associate multiple industry codes with a sector code.
Description
Specify a brief description of the industry.
Once you have captured the above details, save the maintenance.
2.32 Global Exposure Parameter Details
You can specify certain parameters relating to the End Of Day operations in the ‘Limits & Collaterals Parameter Details’ screen.
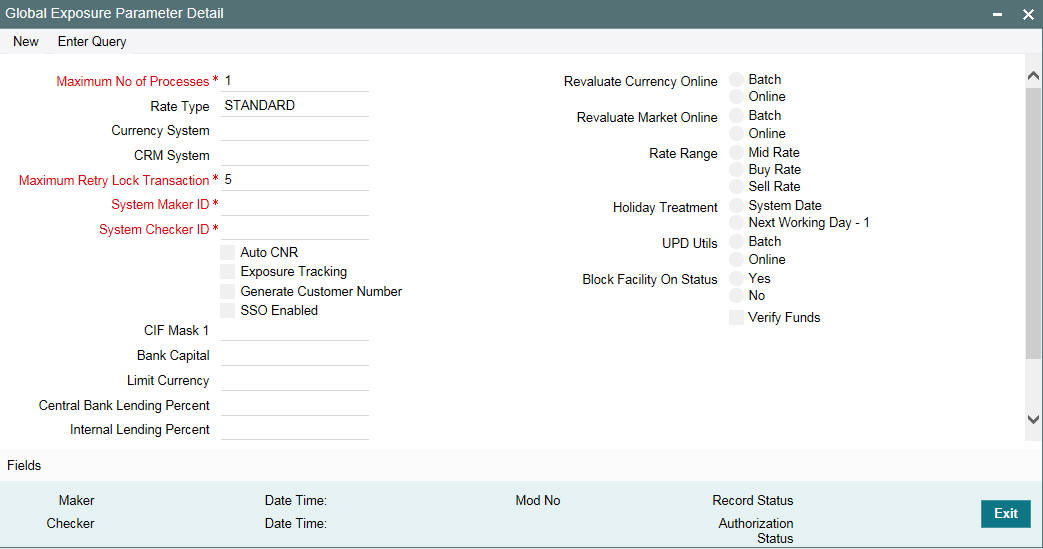
You can invoke the ‘Global Exposure Parameter Detail’ screen by typing ‘GEDPARAM’ in the field at the top right corner of the Application tool bar and clicking the adjoining arrow button.
The following details are maintained here.
System Maker ID and System Checker ID
During the processing of user entries, if the maker ID and checker ID is not mentioned, then IDs specified here are recorded.
Maximum Retry Lock Transaction
Specify the number of times authorization can be tried before the transaction is locked.
Maximum Number of Processes
Multi threading feature in Oracle FLEXCUBE ELCM can be controlled by specifying the max number of processes here. In case of load balancer during End Of Day batch operations the maximum process for load sharing can be specified using this field.
Rate Type
Specify the rate type that has to be considered for all amount conversions in Oracle FLEXCUBE ELCM.
Currency System
Specify the external currency system if the Bank is using a external currency system other than the one provided in Oracle FLEXCUBE ELCM.
CRM System
Specify the external CRM system if the Bank is using an external CRM system other than the one provided in Oracle FLEXCUBE ELCM.
Generate Customer Number
Check this box to generate the customer number automatically at the time of customer creation and customer replication from the Oracle FLEXCUBE as per the specified customer mask.
Auto CNR (Auto Closure of Non Revolving Line)
Select this box to close the non-revolving line automatically on expiry date.
Exposure Tracking
Select this check box if exposure tracking is to be enabled in the system.
Customer Mask
If you have selected ‘Generate Customer Number’ option, you need to specify the customer mask.
The customer mask is maximum nine characters length, out of which it is mandatory to use three characters from the branch code of the customer number and the rest six can be numbers. E.g. bbbnnnnnn. If branch code is not part of customer mask, then maximum characters of number digit will be nine else it would be six characters and minimum characters of number digit would be four. E.g. nnnnnnnnn.
If the customer number is less than nine digits, then the system left pad it with ‘0’ that is, zero.
Note
Character ‘b’ indicates the branch code and character ‘n’ indicates number digits.
Bank Capital
Specify the amount to calculate internal lending equivalent amount.
Limit Currency
The System defaults the local currency of the bank.
Central Bank Lending Limit%
Specify the percentage of central bank lending limit. Central Bank Lending Limit percentage of the bank capital is considered as limit amount allowed by the central bank. The central bank lending limit percentage should be between 0 and 100.
Internal lending Limit%
Specify the percentage of internal lending limit. The internal lending limit percentage should be between 0 and 100.
Note
If Bank Capital is specified then Central Bank Lending Limit% and Internal Lending Limit% fields are mandatory.
Revaluate Currency Online
Indicate whether the currency revaluation should be an online or a Batch (EOD) process. Revaluation of the line amount takes place online if the parameter is set to online.
Revaluate Market Online
Indicate whether Market price revaluation should be Online or Batch. Market price based security Revaluation takes place online if the parameter is set to online.
UPD Utils
Specify whether Value date utilization updating can be Online or Batch. Value date updating takes place online if the parameter is set to online.
Block Facility on Status
Indicate whether, depending on the worst status of a liability, the EOD process should block the facility or not.
Rate Range
Specify the rate - Mid Rate, Buy rate, Sell rate - which has to be considered during all Conversion Amount calculations in Oracle FLEXCUBE ELCM.
Batch Process
Indicate whether the EOD Batch Process should be set up as part of the Database Server or the Application Server. Application server is the recommended choice.
Holiday Treatment
The revaluation process for the securities, collaterals and covenants may fall on a bank holiday. You can specify which of the following actions must be taken in such cases:
- System Date – Choose this to indicate that only collaterals with a Reval Date prior to or same as the system date is considered for revaluation.
- Next Working Date -1 – Choose this to indicate that all the collaterals with the Reval
Date prior to or same as the day before the next working date is considered.
The EOD process closes all the active non-revolving lines automatically when the check box ‘Auto CNR’ is checked. Example
Limits:
Facility |
Expiry Date |
Revolving |
FACILITY1 |
15-Jul-2009 |
N |
FACILITY2 |
16-Jul-2009 |
Y |
FACILITY3 |
16-Jul-2009 |
N |
FACILITY4 |
15-Jul-2009 |
N |
System Date - 15-Jul-2009
Next Working Day - 17-Jul-2009
On 15-Jul-2009 EOD, the system closes FACILITY1 and FACILITY3.
Note
This process does not close the following lines:
- If there are any underlying active transactions on that line
- If there are any active sub lines reporting to this main line
If line is not closed due to the above exceptions then the system logs the same into an exception table ‘GETB_EXCEPTION_LOG’. If particular line is not closed on expiry date due to the above exception then same line is taken up for auto closure process on next EOD.
Verify Funds
Select this check box if ECA check is required bank wide.
If ECA parameters are not maintained in any of the screens, then the system does a force debit of fees.
2.33 External Customer Account Input
You can invoke ‘External Customer Account’ screen by typing ‘STDCRACC’ in the field at the top right corner of the Application tool bar and clicking on the adjoining arrow button.
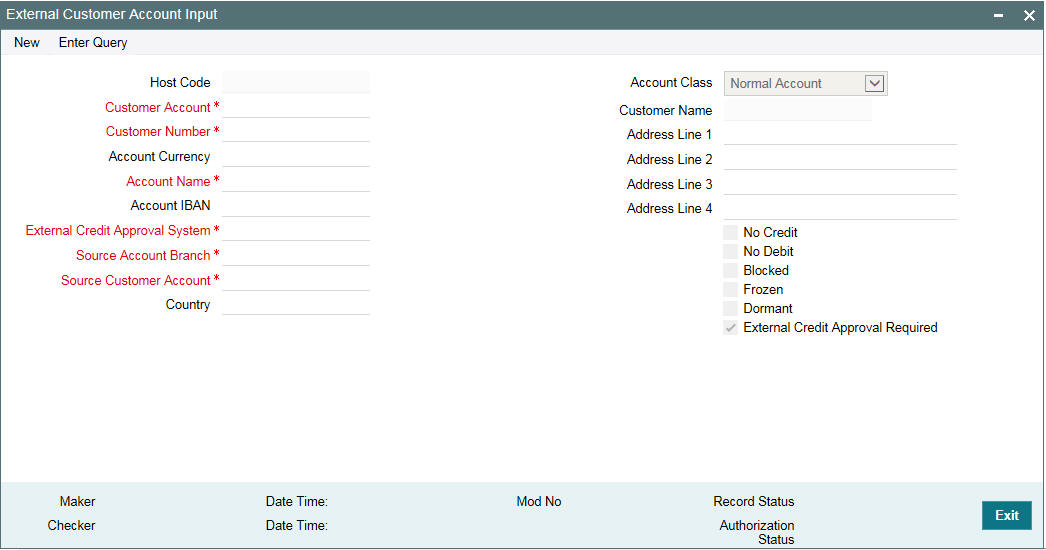
External Credit Approval Required
You can select this check box if ECA check is required. If this check box is selected, then fund is verified for particular CASA account. If this check box is not selected, then the system does a force post for that component.
You can edit this check box before first time authorization. Once authorization is done you cannot edit this check box.
For more information on 'External Customer Account Input' screen, refer to Common Core -Core Entities and Services User Guide.
2.34 Facilities Amount Transfer Maintenance
Transfer of full or partial limit amounts from one facility to other within or across liabilities for certain periods is possible. It is also possible to close/cancel this transfer operation before a specified End Date.
Upon manual closure/cancellation or on automatic expiry, the system transfers the transferred amount back to the original line.
For the above functionality you must do the following maintenances.
Limit transfer details can be defined through the ‘Facilities Amount Transfer Maintenance’ screen. You can invoke the ‘Facilities Amount Transfer Maintenance’ screen by typing ‘GEDTRANS’ in the field at the top right corner of the Application tool bar and clicking the adjoining arrow button.
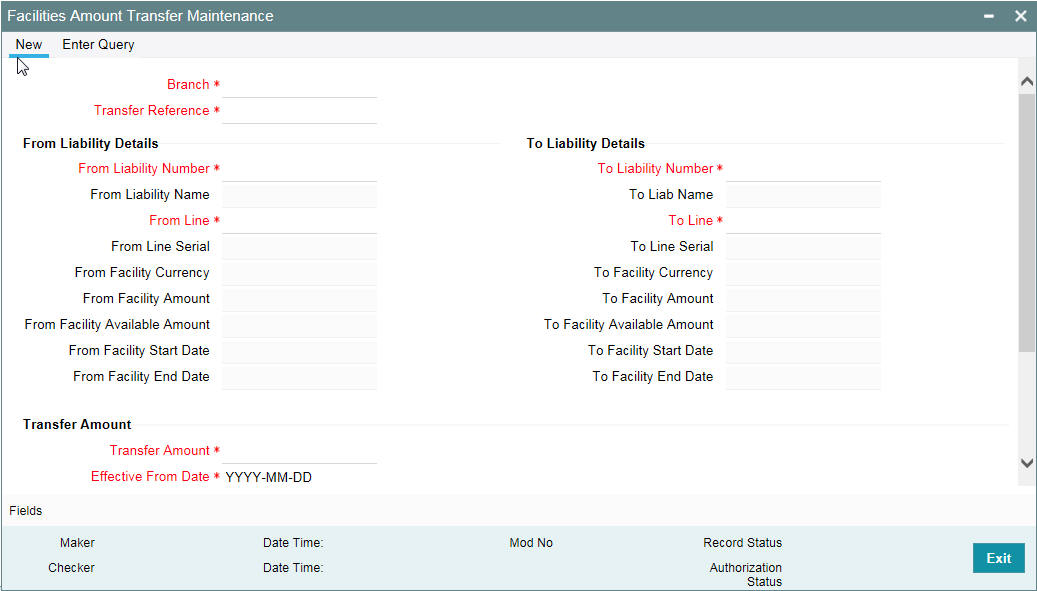
From Liability Number and To Liability Number
- Specify the ‘From Liability No’,that is, for whom the limit amount is to be transferred.
- Specify the ‘To Liability No’ that is, to whom the liability amount is allocated.
From Liability Name and To Liability Name
System defaults the names of the ‘From Liability’ and ‘To Liability’ when the 'From Liability Number' and 'To Liability Number' are chosen respectively.
From Line and To Line
- Specify the ‘From Line’ that is, the Line from which the line amount is transferred.
- Specify the ‘To Line’ that is, the Line to which the line amount is transferred to for a specified period.
From and To Facility Currencies
System defaults the names of the from facility currency and to facility currency when the 'From Line' & 'To Line' are chosen respectively. For effective line transfer from one line to another, the currency of both the lines has to be the same.
From Facility Start Date and End Date
System defaults the from facility start date and from facility end date when the 'From Line' is chosen. To Facility Start Date and End Date
System defaults the ‘To Facility Start Date’ and ‘To Facility End Date’ when the 'To Line' is chosen.
From Facility Available Amount and To Facility Available Amount
System defaults the ‘From Facility Available Amount’ and ‘To Facility Available Amount’ when the 'From Line' & 'To Line' are chosen respectively.
Effective From Date and Effective To Date
Specify the Effective From Date of transfer that is, the date from when the transfer of limits is effective.
Specify the Effective To Date of transfer that is, the date till when the transfer of limits is effective. This date must be greater than the Effective From Date
Transfer Amount
Specify the transfer amount to be transferred, from the 'From Line' to the 'To Line', from the 'Effective From Date' onwards.
2.35 Force Collateral Revaluation
You can run the Ad-hoc revaluation process for market based collaterals using the ‘Ad Hoc Revaluation’ screen. For such collateral values to be revised, an input file containing the latest security prices must to be given to the system before using this facility.
You can invoke the ‘Ad-hoc Revaluation’ screen by typing ‘ ‘GCDADREV’ in the field at the top right corner of the Application tool bar and clicking the adjoining arrow button.
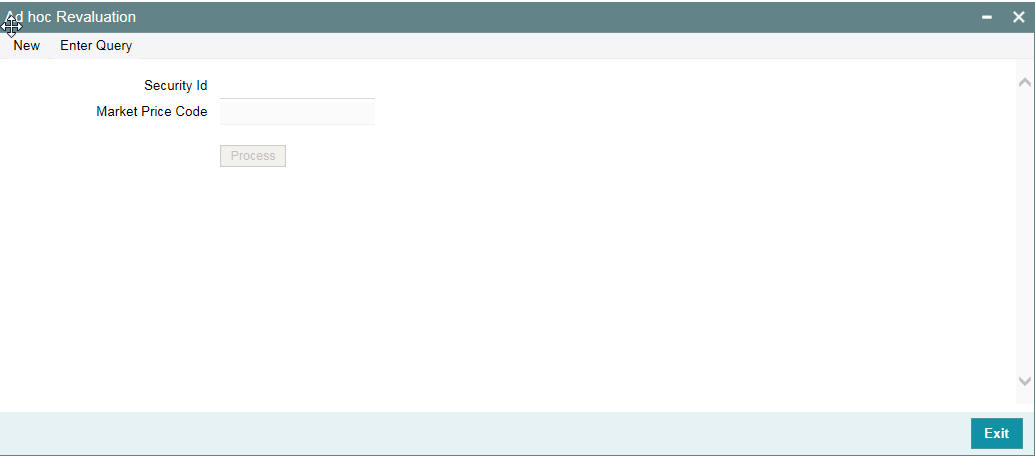
Security Id
Specify the security id for which Ad-hoc Revaluation is to be done.
Security Price
System displays the price code as maintained in the 'Securities' screen. Click the ‘Process’ button to process the Ad-hoc Revaluation.
2.36 Multi Authorization Maintenance
Multi authorisation maintenance can be done through the ‘Multi Authorization Maintenance’ screen. Using this screen, user you can get a list of transactions which requires authorization.
You can invoke the ‘Multi Authorization Maintenance’ screen by typing ‘GEDDAUTH’ in the field at the top right corner of the Application tool bar and clicking the adjoining arrow button.
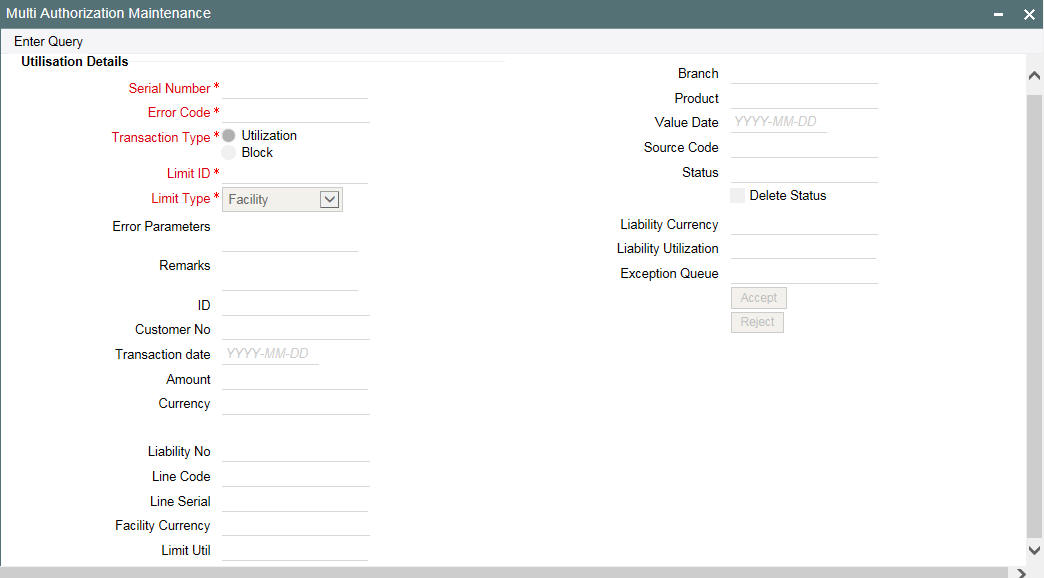
Whenever Utilization Transactions has been breached then the utilization transaction would require multiple authorizations. Transactions which are breached can be authorized using UI Multi Auth screen.
Whenever utilization transaction has been breached this screen has to be used by the authorizer to either ‘Accept’ or’ Reject’ the breached transaction. The following fields mentioned below indicate all the values that is associated with the transaction. The fields are all display fields and cannot be edited for a transaction using this screen. Only ‘Accept’ or ‘Reject’ for authorization of the breached transaction is allowed.
Serial Number
Indicates the Oracle FLEXCUBE ELCM generated unique identifier for the transaction.
Specifies the exception queue in which transaction has been parked.
Error Code
Specifies the error code of the transaction.
Transaction Type
You can either select the transaction type as ‘Utilization’ or ‘Block’
Limit ID
The authorizer can select the appropriate dual authorization transaction by selecting the list of values against the 'Serial Number' along with 'Limit ID'.
Limit Type
You can either select ‘Facility’, ‘Liability’, ‘Collateral’, or ‘Collateral Pool’.
Error parameter
Specifies the error parameters associated to the transaction.
Remarks
You can enter your remarks associated with the transaction.
Utilization ID
Specifies the Oracle FLEXCUBE ELCM utilization ID.
Customer Number
Specifies the Customer Number of the utilization transaction. Customer Number entered should be valid Customer Number in Oracle FLEXCUBE ELCM system.
Transaction Date
Indicates the date and time when the transaction was entered in the external system.
Utilization Amount
Indicates the Utilization Amount.
Utilization Currency
Indicates the currency of the utilization transaction. Currency code entered should be a valid currency code in Oracle FLEXCUBE ELCM system.
Liability Number
Specifies the liability number of the utilization transaction. Liability Number entered should be valid Liability Number in Oracle FLEXCUBE ELCM system.
Line Code
Specifies the facility code of the utilization transaction. Facility Code entered should be valid Facility Code in Oracle FLEXCUBE ELCM system.
Serial Number
Specifies the facility serial number of the utilization transaction.
Facility Currency
Specifies the facility currency.
Limit Util
Indicates the limit utilization amount.
Utilization Branch
Indicates the transaction branch.
Utilization Product
Indicates external product code of the utilization transaction. This is only if the utilization has been done from an external product
Value Date
Specifies the value date of the transaction. If value is not passed then system defaults to Oracle FLEXCUBE ELCM present branch date.
Source
Indicates the product processor name from where the transaction has been originated. This field is as part of Header section (Source Code). This is only if the utilization has been done from an external product
Utilization status
Indicates the utilization status, possible values are A-Active, R-Reverse, L- Liquidated
Delete
Indicates whether the transaction is deleted or not. If the check box is selected then it is deleted.
Liability Currency
Specifies the liability currency.
Liability utilization
Indicates the liability utilization amount.
Exception Queue
2.37 Dual Authorization of Utilization Transaction
During Utilization Transaction process if the utilization amount crosses the breach amount specified, then the transaction requires dual authorization. Transactions which are breached can be authorized using UI Multi Auth screen. You can specify the facility maintenance breach amount and breach percentage in ELCM.
When the transaction amount entered is more than breach amount or percentage, during utilization process ELCM would flag dual authorized indicator and updates the dual authorization error code as part of response. If response from the ELCM contains dual authorization error code, then Oracle FLEXCUBE logs the transaction details in dual authorization tables and processes it completely.
The authorization for the breached (dual auth) transactions are authorized using function ID ‘GEDDAUTH’ of ELCM.
However till the dual authorization happens Oracle FLEXCUBE does not allow you to authorize the main transaction. You can also perform dual authorization using Oracle FLEXCUBE screen, but system performs certain validations to ensure that Oracle FLEXCUBE does not authorize the ELCM breach transactions.
Example
Assume that for liability ‘TATA’ line ‘TATABILL’ is created with below details. Limit amount - 10,000.00
Collateral amount - 0.00
Breach percentage - 110 (which is equal to 11,000) Breach amount - 15,000
The system calculated values: Available amount - 10,000.00
Utilized amount - 0
Assume that as part of BC, a contact line ‘TATABILL’ is linked. As part of the contact data input, when you link the line ‘TATABILL’ and press ‘Save’ button during transaction processing in ELCM, if the transaction requires dual authorization then the system displays this information to the user.
Till the dual authorization error code (breached transaction) is authorized in ELCM, Oracle FLEXCUBE does not allow the contact to be authorized. In case, if the breached transaction is rejected, then you have to delete the contact Information irrespective of whether the error code has been authorized or Contracts requiring multilevel authorization can be viewed using Oracle FLEXCUBE function ‘OVDAUDET.
If you delete the dual authorization contract in Oracle FLEXCUBE, then the system deletes the contract details in Oracle FLEXCUBE and ELCM deletes the utilization ELCM.
Note
ELCM deletes the utilization transaction if any dual authorization error is not authorized and the system updates the status as ‘Ignored’ so that this information is not shown to the user. However if the error code is authorized, then this information is ignored.
2.38 Merging Liabilities
You can merge any two liabilities existing in the system into one single liability. Oracle FLEXCUBE ELCM allows you to merge one liability into another. Upon merger, both liabilities assumes the same liability code. The structure of the liabilities does not change.
The merging of liabilities is done in the following two steps:
- Step 1 – Liability Merger Maintenance
- Step 2 – Liability Merger Process
The above steps are described in the sections below.
2.38.1 Liability Merger Maintenance
You must first maintain the details of liabilities to be merged using the ‘Liability Merger Maintenance’ screen. You can invoke the ‘Liability Merger Maintenance’ screen by typing ‘GEDMERGE in the field at the top right corner of the Application tool bar and clicking the adjoining arrow button.
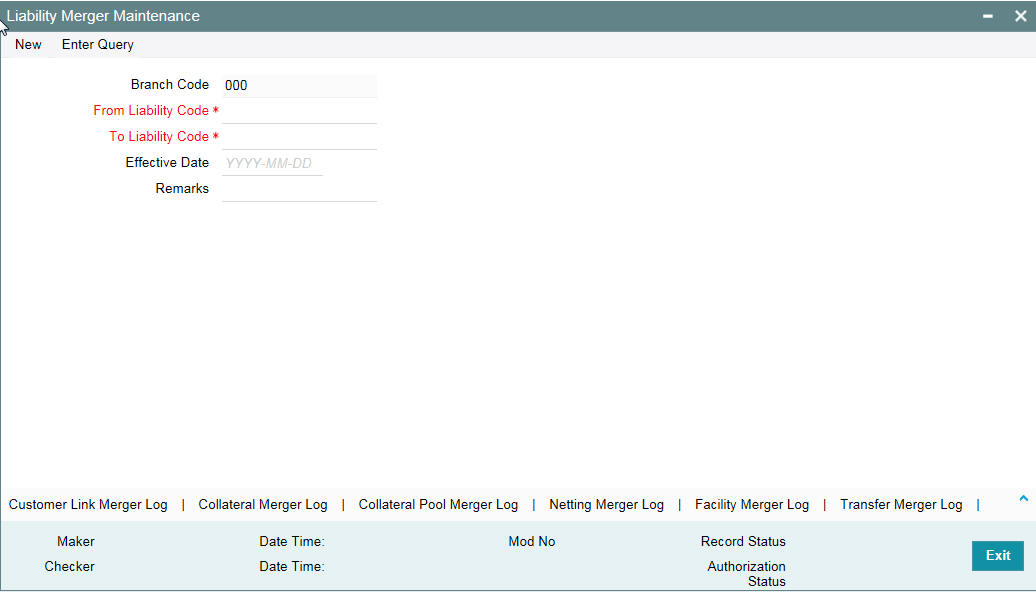
In the above screen you must maintain the following details for merger of two liabilities.
From Liability Code
Specify using the adjoining list of options the code of the liability which is to be merged into another liability.
To Liability Code
Specify using the adjoining list of options the code of the liability into which the liability specified under ‘From Liability Code’ must be merged into.
Branch Code
System defaults the branch code as the branch from which the 'Liability Merger Maintenance' screen is launched and 'New' button is clicked.
Effective Date
Specify the date from which the merger of liabilities must take effect.
Remarks
Specify the remarks about the Liability Merger Maintenance.
Once you have maintained the above merger details, you must initiate the Merger Batch Process using an Intra Day Process so as to complete the merger. During this batch process all liability IDs for all the related maintenances are modified. These include the following maintenances:
- Liability Customer
- Collateral
- Collateral Pool
- Facility
- Netting
- Facility Transfer
- Ear Marking
Upon merger, all the Utilizations point at the new liability. The liability utilization is then be moved from the old liability to the new liability and the old liability is closed.
You may view the following merger logs from the above screen:
- Customer Link Merger Log
- Collateral Merger Log
- Collateral Pool Merger Log
- Netting Merger Log
- Facility Merger Log
- Transfer Merger Log
- EarMarking Merger Log
- Utilization Merger Log
2.38.2 Liability Merger Process
Once you maintained the details of liabilities to be merged, you can initiate the process of merger using the ‘Liability Merger Process’ screen.
You can invoke the ‘Liability Merger Process’ screen by typing ‘GESMRGTR’ in the field at the top right corner of the Application tool bar and clicking the adjoining arrow button.
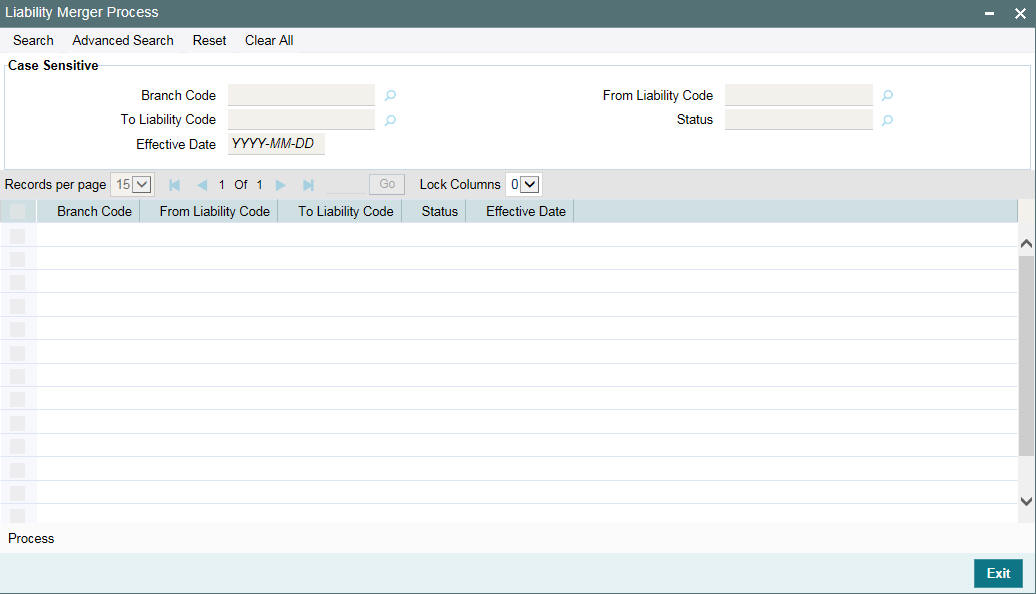
Click ‘Process’ button to initiate the merger of maintained liabilities.
Note
Merger between Liabilities that form part of a hierarchy is not allowed.
2.39 Maintaining Rule Criteria Code
Review rules are configured in the ‘Rule Criteria Code Maintenance’ screen which will allow for automatic review of the sanctioned facilities that are offered to the customer. The review rules and pre-defined configurable parameters are maintained in this screen. You can invoke this screen by typing ‘GEDLMPRS’ in the field at the top right corner of the application tool bar and clicking the adjoining arrow button.
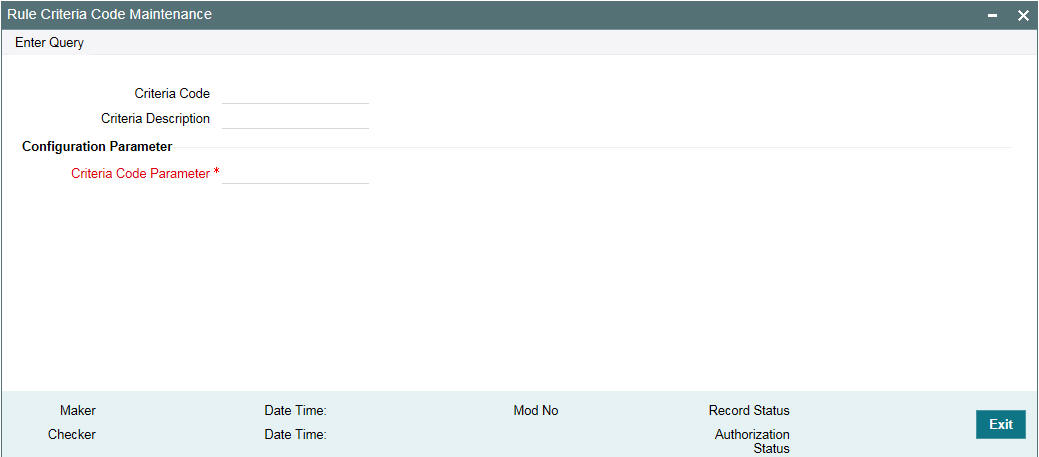
Specify the following details in this screen:
Criteria Code
Specify anyone of the following pre-defined criteria codes and press the F8 function key. The criteria codes available for selection are as follows:
Criteria Code |
Rule Name |
Rule Description |
Rule1 |
Limits Due for Expiry |
Limits which are due for expiry in next N days. Alerts are generated for limits which are expiring in next N days. |
Rule 2 |
Limits where Collateral is due for expiry |
Collaterals which are due for expiry in next N days. Alerts are generated for collaterals which are expiring in next N days. |
Rule 3 |
Limits where the Utilization Threshold% is breached with respect to Sanctioned Limit |
Alerts are generated for limits which have been utilized equal or more than the limit |
Rule 4 |
Limits where the Utilization Threshold% is breached with respect to Collateral Value |
Alerts are generated for collaterals which has been utilized equal or more than the limit. |
Rule 5 |
Frequency Based Limit Review |
Alerts are generated N days before the limit review date in GEDFACLT. |
Rule 8 |
Documents due for Expiry |
Alerts are generated for collaterals whose covenants are due for expiry in next N days. |
* where X is the Notice Days defined in the ‘Notice Days or Threshold Value%’ field.
Threshold% is defined in the ‘Notice Days or Threshold Value%’ field.
Criteria Description
The system displays the description based on the criteria code selected.
Configurable Parameters Details
Criteria Code Parameter
Enter the parameter value in this field.
Note
Note
- For notice days the calendar days are considered to generate alerts.
- The notice days for Rule 1, Rule 2, and Rule 5 should be 0 or more than 0.
For Rules 3 and 4, the threshold % is applicable. The value should be greater than or equal to 1%. An override message is displayed if the value is less than 1%.
Based on the review rules maintained in this screen, alerts can be defined in the CODADMNT screen. These alerts are generated for a bank user and are generated on a daily basis as per the frequency set in the Alert Definition Screen (CODADMNT). Based on the parameters defined in the CODADMNT screen, when a review rule is satisfied, then an alert is triggered in the ELCM dashboard or Credit Desktop (GEDSKTOP). In the ELCM Dashboard, when an alert is generated, the ‘Review’ or ‘Dismiss’ buttons are displayed against the alert. You can either Review or Dismiss these alerts by clicking the relevant buttons as shown in the following screen shot.
The Review button is displayed for only Rule 1, Rule 3, and Rule 5. On clicking the ‘Review’ button the limit review process flow is initiated. For the remaining rules, besides the limit review rules, the ‘Dismiss’ button is displayed. If you click the ‘Review’ or ‘Dismiss’ buttons against any alert, then the system removes the alert from the Dashboard. If the target user at alert definition is ‘ALLROLES’, then the alert generated is available for all the users accessing the dashboard. If any user clicks the ‘Review’ or ‘Dismiss’ button, then the system removesthe alert from the dashboard and the remaining users are unable to view the same alert in the dashboard.
If a user dismisses an alert and no corrective action is taken within a day, then the alert is regenerated the next day with a new effective date that is considered to be the current date. The alerts are generated based on the ITALRM and ITPURGE batch jobs. The frequency for these alert batch jobs should be set as daily in the Alert Definition Screen. All the alerts that are reviewed, dismissed, or have expired are archived in the ITPURGE batch. This archival is an automated process which happens based on the system date (physical date) and time.
Note
The dashboard and relevant alerts are displayed for only those users for whom the ‘Show Dashboard and Alerts’ flag is set as Yes in the Home Page.
In the Credit Desktop screen, the ‘Review’ button is enabled for all facilities mapped to a liability and is not only applicable for those facilities where alerts are generated. If a facility has a CIF ID mapped to it, then the CIF ID will be listed. The ‘Dismiss’ button option is not available in the Credit Desktop. Also, all alerts are available in a report format with ‘Exception’ or ‘Warning’ stated against each alert.
For more information about Credit Desktop, refer to the section “Credit Desktop” in this User Manual.
For more information about defining Alerts refer to the section “Defining Alerts” in this User Manual.
2.39.1 Viewing Rule Code Criteria
You can view the criteria codes maintained for a branch using the ‘Rule Code Criteria Summary’ screen. You can invoke this screen by typing ‘GESLMPRS’ in the field at the top right corner of the Application tool bar and clicking the adjoining arrow button.
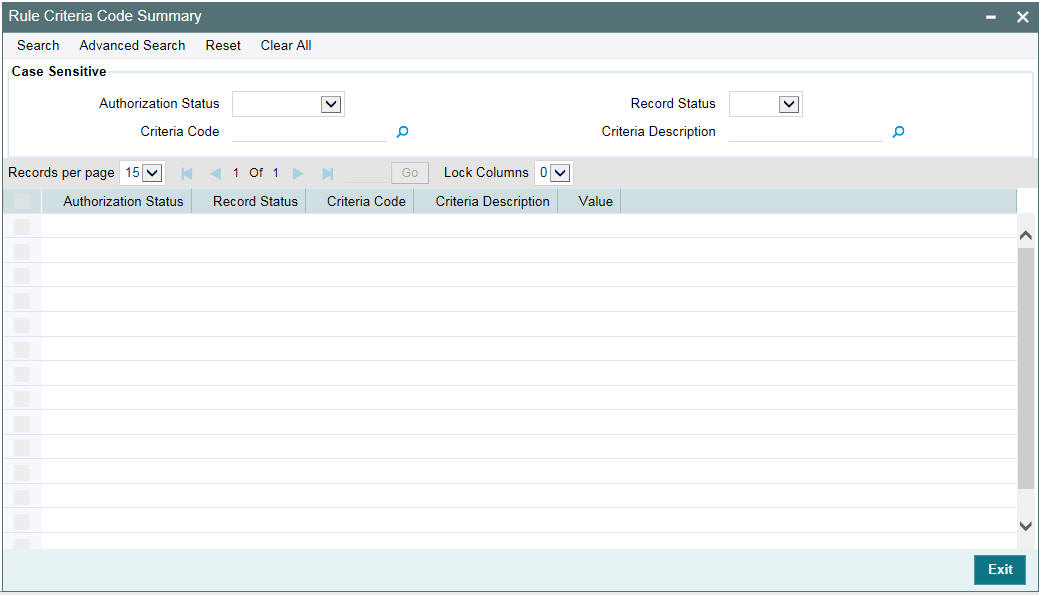
You can query the records based on all or any of the following criteria:
- Authorization Status
- Record Status
- Criteria Code
- Criteria Description
You can alternatively perform a wildcard search by entering the ‘%’ sign in the any of the above mentioned fields.
Click ‘Search’ button. The system identifies all records satisfying the specified criteria and displays the following details for each one of them:
- Authorization Status
- Record Status
- Criteria Code
- Criteria Description
- Value
2.40 Defining Alerts
You can define specific alerts to be sent to the bank users. You need to define the alert codes and map the alert code to the bank user using ‘Alert Definition Maintenance’ screen. To invoke this screen, type ‘CODADMNT’ in the field at the top right corner of the Application toolbar and click the adjoining arrow button.
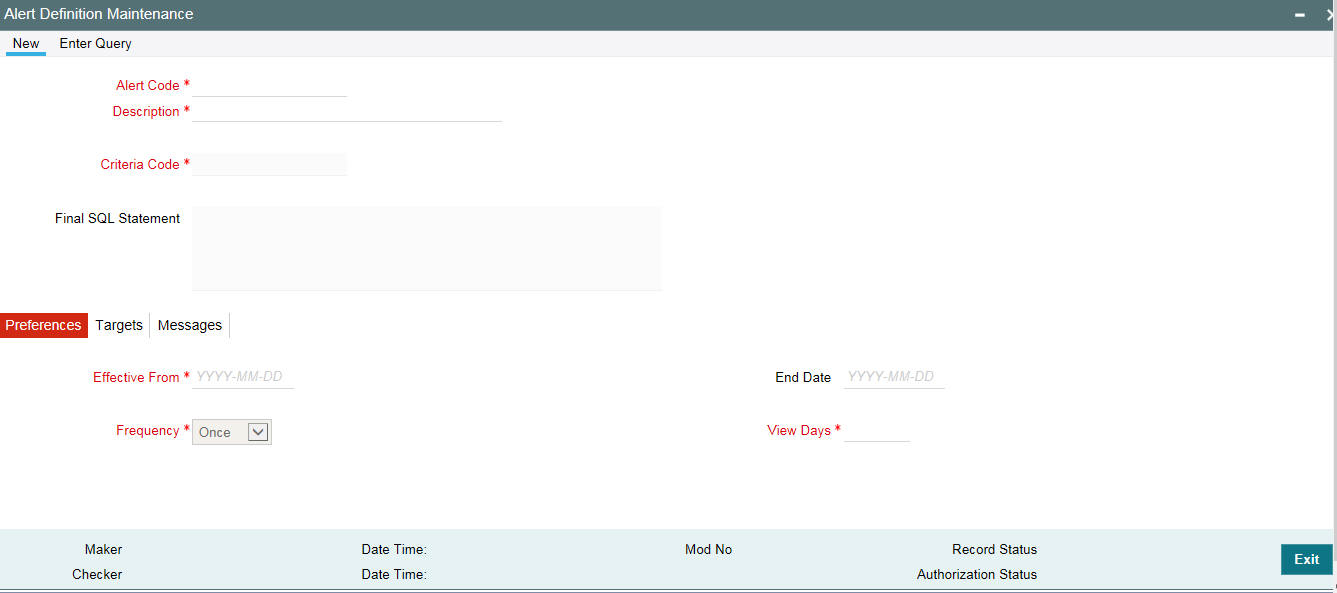
Specify the following details:
Alert Code
Specify the alert code to be mapped to the customer or bank.
Description
System displays the description of the alert based on the alert code specified.
Criteria Code
Specify the selection criteria code to be used for the alert. The option list displays valid criteria codes (Rules 1 to 9 which are factory shipped) that are maintained in the system. Choose the appropriate one. The description of each criteria code is explained in the following table:
Rule Code |
Rule Name |
Rule Description |
Parameter Configured |
Trigger for Alert |
Alert Message Description |
RULE1 |
Limits Due For Expiry |
Review required X days before Limit Expiry Date, where X is configurable parameter |
Notice Days (GEDLMPRS) Screen |
Limit Expiry Date |
<FACILITY_ ID> - Limit <LIAB_ ID> - <LINE_CO DE> due for expiry |
RULE2 |
Limits where Collateral due for Expiry |
Review required X days before Collateral Expiry Date, where X is a configurable parameter |
Notice Days (GEDLMPRS Screen) |
Collateral Expiry Date |
<COLLATERAL_ID> - Collaterals <COLLATERAL CODE> for Limit <LIABILITY ID> due for expiry |
RULE3 |
Limits where the Utilization Threshold % is breached with respect to Sanctioned Limit
|
Review required for Limit Utilization % breached with respect to Sanctioned Limit, where Threshold % is a configurable parameter |
Threshold % (GEDLMPRS Screen)
|
Sanctioned Limit Amount |
<FACILITY_ ID> - Sanctioned Limit for Limit <LIABILITY ID> - <LINE CODE> has breached the predefined threshold percentage |
RULE4 |
Limits where the Utilization Threshold % is breached with respect to Collateral Value
|
Review required for Limit Utilization % breached with respect to Collateral Value, where Threshold % is a configurable parameter |
Threshold % (GEDLMPRS Screen)
|
Collateral Value |
<COLLATERAL_ID> - Collaterals Value for Limit <LIABILITY ID> has breached the predefined threshold percentage |
RULE5 |
Frequency Based Limit Review |
Frequency based Limit Review. |
Frequency maintained in the Facilities Maintenance (GEDFACLT) screen.
|
Frequency and Next Review Date on the Facilities Maintenance Screen (GEDFACLT) |
<FACILITY_ ID> - Limit Review for Limit <LIABILITY ID> - <LINE CODE> is due |
RULE6 |
Counter Party Grade Lowered |
Review required when the Counter Party’s Credit Grade is lowered |
From Customer Account Creation (STDCIFCR) level |
Credit Rating Grade |
<CUSTOMER ID> - Customer - <CUSTOMER NAME> Credit Rating Grade lowered |
RULE7 |
Counter Party Blacklisted
|
Review required when the Counter Party is blacklisted |
From Customer Account Creation (STDCIFCR) level |
Blacklisting flag
|
<CUSTOMER ID> - Customer + <CUSTOMER NAME> is blacklisted |
RULE8 |
Documents due for Expiry |
Review required when the documents are expired |
Frequency, Start Month, Due date on field on the Covenant Maintenance Screen (GEDCOVNT) and Notice Days on the Rule Criteria Code Screen. Notice days on the Covenant Maintenance Screen will not be considered for Alert generation |
Revision Date on the Covenants tab on the Collateral Maintenance (GCDCOLLT)
|
<COVENANT_ ID> - Documents/ Covenants <COVENANT NAME> for Limit <LIABILITY ID> due for expiry |
RULE9 |
Marketable/non-marketable securities value decrease |
Review required when the marketable or the nonmarketable securities value is decreased |
From Securities Maintenance Level |
Securities Value |
<SECURITY_ID> - Securities <SECURITY CODE> for Limit <LIABILITY ID> value decreased |
Final SQL Statement
Based on the criteria code selected, the system displays the final SQL statement.
2.40.1 Preferences Tab
You can set the preferences for alert message generation under ‘Preferences’ tab. Click ‘Preferences’ tab on ‘Alert Definition’ screen:
Under this tab, you can set the following preferences for the alert generation.
Effective From
Specify the start date of the alert message generation. Click the date button to choose a date from the calendar.
The system generates the alerts for the users/customers from this date.
End Date
Specify the end date of the alert message generation. Click the date button to choose a date from the calendar.
The system generates the alerts for the users/customers until this date.
Frequency
Specify the frequency of the alert message generation as Daily only from the drop down list.
View Days
Specify the number of days you wish to keep the alert message in the dashboard or the portal. The user or customer can view the alert message in the dashboard or portal for the number view days maintained here. After that, the message disappears from the dashboard or portal.
2.40.2 Target Tab
You can capture the details of the customer and bank users for who will receive the alert message. Click ‘Target’ tab.
Specify the following details:
Target Type
The target type indicates the receiver of the alert message. The system displays the default value as a Bank User.
Customer No Column Position
Specify the position of the customer number column in the SQL statement. If you have selected the target type as ‘Customer’ or ‘Both’, it is mandatory to specify the customer number column position.
Bank User Type
Specify the bank user type to receive the alert message. The drop-down list displays the following user types:
● Role
● User ID
Choose the appropriate one.
This is applicable only if the target type is ‘Bank User’.
Target ID
Specify the target ID. If the Bank User Type is ‘Role’, you need to specify the particular user role. If the Bank User Type is ‘User ID’, you need to specify the respective user ID.
You can choose the appropriate target ID from the option list. The alert message is generated to the target IDs selected here.
Description
The system displays the description of the selected target ID.
You can add more bank user types by clicking the add button. You can also delete a bank user type using delete button.
2.40.3 Message Tab
You can capture the details of the message to be sent to the customers and users under ‘Message’ tab. Click ‘Message’ tab.
You can capture the following details under this tab:
Channel
Select the mode of message delivery. You can select any one of the following options only:
● Dashboard – applicable to bank users only
● Credit Desktop - applicable to bank users only
Choose the appropriate one. The alert message is delivered to the bank user by the mode specified here.
Language
Specify the language of the alert message. The option list displays all valid languages that are applicable. Choose the appropriate one.
Subject
Specify a subject that is significant to the alert message to be generated.
Customer Message
Enter the message to be generated for the customer. The message may contain two types of text, namely, static and dynamic.
The static text is generated as they are defined here. The dynamic text varies based on the intended customer and the nature of the message.
This field is enabled only if the alert message is generated for the customer.
User Message
Enter the message to be generated for the bank user or RM. The message may contain two types of text, namely, static and variables.
The static text is generated as they are defined here. The variable text varies based on the intended user and the nature of the message.
This field is enabled only if the alert message is generated for the bank user.
2.40.3.1 Viewing Alert Definition Summary
You can view a summary of the alerts defined in Oracle FLEXCUBE using ‘Alert Definition Summary’ screen. To invoke this screen, type ‘COSADMNT’ in the field at the top right corner of the Application toolbar and click the adjoining arrow button.

You can search for the records based on one or more of the following parameters:
● Authorization status of the record
● Alert code
● Alert description
● Frequency of the alert
● End date
● Target type
● Record status
● Criteria code
● Effective date
● View days
● Customer number column position
● Customer/both
Once you have set the search parameters, click ‘Search’ button. The system displays the records that match the search criteria. Double-click a record to view the detailed screen of the record.
2.41 Viewing Alerts
You can view alerts which satisfy the rules criteria using this screen. This screen displays alerts generated for all users. You can filter the alerts on the basis of the User ID.
You can view this screen by typing ‘GESLMRVW’ in the field at the top right corner of the Application tool bar and clicking the adjoining arrow button.
You can query the records based on all or any of the following criteria:
● Alert Code
● Frequency
● Alert Description
● Effective Date
● Rule Code
● Expiry Date
● Rule Description
● Process Status
● User
You can alternatively perform a wildcard search by entering the ‘%’ sign in the any of the above mentioned fields.Click ‘Search’ button. The system identifies all records satisfying the specified criteria and displays the following details for each one of them:
● Alert Code
● Frequency
● Alert Description
● Effective Date
● Rule Code
● Expiry Date
● Rule Description
● Process Status
● Message
● User
2.42 Defining Alert Selection Criteria
You can define alert selection criteria in Oracle FLEXCUBE. The system identifies the set of customers who receive the alerts based on the selection criteria.
The system generates the alerts based on the selection criteria defined in ‘ Criteria Code Maintenance’ screen. To invoke this screen, type ‘GEDACMNT’ in the field at the top right corner of the Application toolbar and click the adjoining arrow button.
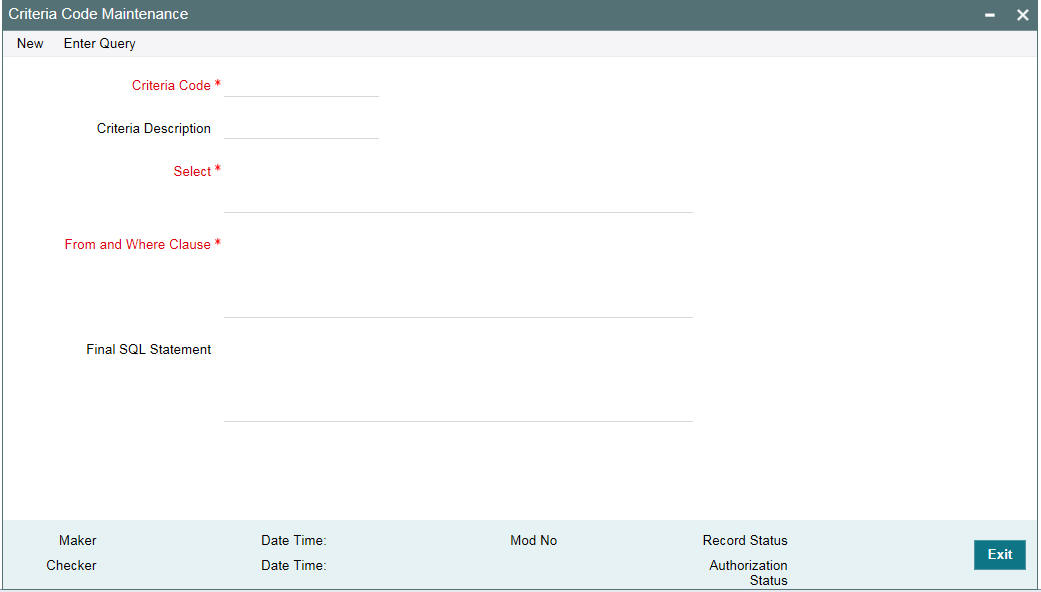
Specify the following details:
Criteria Code
Select a unique code that identifies the criterion that you are defining. To retrieve the criteria code click the F7 and F8 function keys. This code is the unique identifier of the criterion based on which alert is generated.
The system does not allow you to modify the criteria code after saving it.
Description
Specify a brief description of the selection criterion that you are defining.
Select
Specify the ‘Select’ part of the selection criterion.
The criterion must be defined as an SQL statement with aliases. However, you need not enter the keyword ‘SELECT’.
The alias naming convention is ‘ColX’. Here, ‘X’ refers to the sequential number of the column in the ‘Select’ clause.
Examples are s1.cust_ac_no Col1 ,s1.cust_no Col2 ,s1.ccy Col3 ,s1.account_class Col4
,s1.ACY_OPENING_BAL Col5, s2.customer_name1 Col6, s2.language Col7, s2.default_media Col8
Based on the columns defined under ‘Select’ and ‘From and Where Clause’, the system forms the final SQL statement. You need to ensure that the final SQL statement is a syntactically correct SQL statement.
From and Where Clause
Specify the remaining part of the selection criterion. You need not enter the keyword ‘From’.
Based on the columns defined under ‘Select’ and ‘From and Where Clause’, the system forms the final SQL statement. You need to ensure that the final SQL statement is a syntactically correct SQL statement.
Note
The ‘From and Where Clause’ values and ‘Alert Criteria Code’ values are already pre-de- fined in the system as these are factory shipped values.
Final SQL Statement
The system concatenates the values defined under ‘Select’ and ‘From and Where Clause’ and displays the final SQL statement. This must be a valid SQL statement. The system generates the alert messages based on this final SQL statement. Once you have captured the details, save the record.
To define the criteria as SQL statement, you need to have sufficient understanding about the data model of Oracle FLEXCUBE and SQL programming language.
2.42.1 Viewing Alert Criteria Definition Summary
You can view a summary of the alert criteria maintained in Oracle FLEXCUBE using ‘ Criteria Code Summary’ screen. To invoke this screen, type ‘GESACMNT’ in the field at the top right corner of the Application toolbar and click the adjoining arrow button.
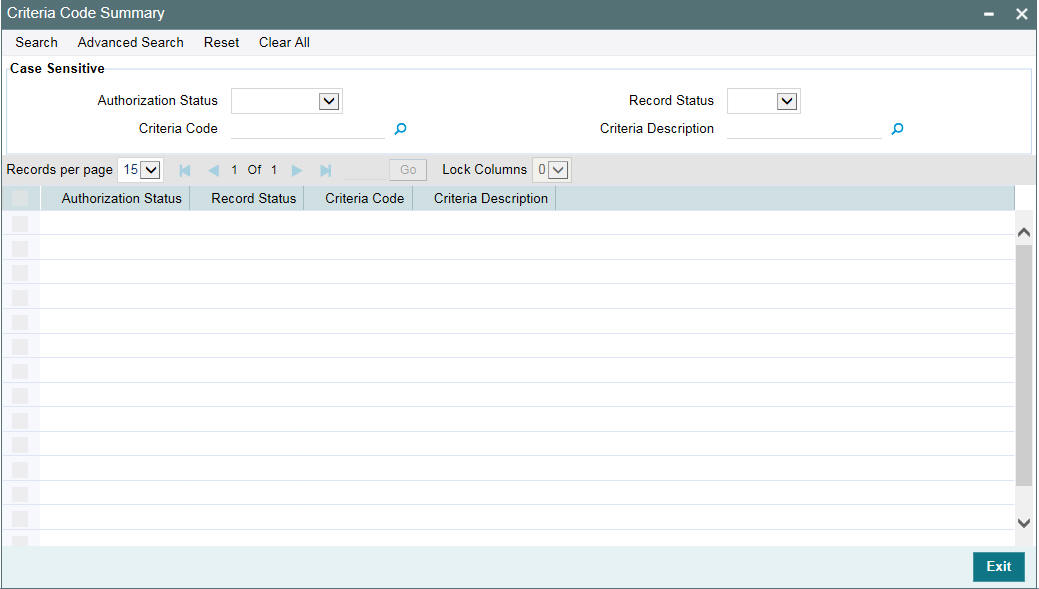
You can search for the records based on one or more of the following parameters:
● Authorization status of the record
● Status of the record
● Selection criteria code
● Selection criteria description
Once you have set the search parameters, click the ‘Search’ button. The system displays the records that match the search criteria. Double-click a record to view the details.
2.43 ELCM - OFSAA Integration
The integration between ELCM and OFSAA enables you transfer data from ELCM module to OFSAA. The transfer of data from ELCM to OFSAA is performed using staging table.
The following data is transferred in ELCM staging table:
- AATB_STG_EL_ACCOUNT_MITIGANT_MAP - Extraction for Mitigant Map
- AATB_STAGE_EL_COLLATERALS - Extraction for Collaterals
- AATB_STG_EL_COLLATERAL_MASTER - Extraction for Collateral Master
- AATB_STG_EL_CREDIT_LINE_DETAILS - Extraction for Line Details
- AATB_STG_EL_CREDIT_LINE_MASTER - Extraction for Credit Line Master
- AATB_STG_EL_CR_LINE_TYPE_MASTER -Extraction for Line Type Master
- AATB_STG_EL_MITIGANT_ISSUER_MST - Extraction for Issuer Master
- AATB_STG_EL_MITIGANT_MASTER - Extraction for Mitigants Masters
- AATB_STG_EL_MITIGANTS - Extraction for Mitigants
- AATB_STG_EL_COLLAT_CONT_CONTRIB - Extraction for Collateral Contribution
- AATB_STG_EL_POOL_LINK - Extraction for Collateral Pool Link
- AATB_STG_EL_SECURITY_MASTER - Extraction for Security Master
- AATB_STG_EL_COLLAT_MSECRITES - Extraction for Collateral Securities
- AATB_STAGE_EL_LIAB_DETAILS - Extraction for Liability Details
- AATB_STAGE_EL_LIAB_CREDIT_RATING - Extraction for Liability Credit Rating
2.43.1 Maintaining Batch Programs
You need to maintain the batch program ‘GEBXTRAC’ using ‘Mandatory Batch Program Maintenance’ (EIDMANPE) screen. This batch extracts the data from Oracle FLEXCUBE during end of financial input (EOFI) stage. You also need to maintain the extraction routine.
For further details on the maintenances in FLEXCUBE Information Server, refer FLEXCUBE Information Server user manual.