Integrating ADFS 2.0 and 3.0 SP with OAM IdP
This article describes how to integrate ADFS 2.0/3.0 as an SP and OAM as an IdP. Be sure to read entry covering the pre-requisites.
The SAML 2.0 integration is based on:
-
Email address will be used as the
NameIDformat -
The
NameIDvalue contains the user’s email address -
The HTTP POST binding is used to send the SAML Assertion to the SP
-
Users exist in both systems, with each user having the same email address so that it can be used as the common user attribute.
ADFS 2.0 is available in Windows 2008 R2, while ADFS 3.0 is available in Windows 2012 R2. The article showcases screenshots for ADFS 3.0, while the documented steps applies to both versions.
ADFS Setup
To add OAM as an IdP in ADFS SP, perform execute the following steps:
-
Go to the machine where ADFS is deployed.
-
If ADFS 2.0 is used
-
Click Start Menu , Programs , Administrative Tools , AD FS 2.0 Management
-
Expand ADFS 2.0 , Trust Relationships
-
-
If ADFS 3.0 is used
-
In Server Manager, click Tools , AD FS Management
-
Expand AD FS , Trust Relationships
-
-
Right click on Claims Provider Trusts and select Add Claims Provider Trust.
-
Click Start.
-
Select Import data about the claims provider from a file.
-
Click browse and select the local OAM IdP SAML 2.0 Metadata file (it is required for the OAM endpoints to be SSL terminated, otherwise ADFS will not import the metadata. See pre-requisites article about SSL).
-
Click Next.
-
If a Warning window appear about unsupported features in ADFS, continue by clicking OK (this relates to the SAML Attribute Authority feature listed in the OAM IdP SAML 2.0 Metadata).
- Enter a name for the new SAML 2.0 Identity Provider.
- Click Next. A summary window displays
-
Click Next.
-
Leave Open the Edit Claims box checked
- Click Close. The Edit Rule window appears
-
Click Add Rule.
-
Select Pass Through or Filter an Incoming Claim
-
Click Next.
-
Enter a name for the Claim Rule.
-
Select
NameIDas the Incoming Claim Type. -
Select Email as the Incoming name ID format.
-
Select Pass through all claim values if you want to accept any email addresses Pass through only claim values that match a specific email suffix value if you want to only accept a specific set of email addresses (in this example, select this choice as all users will have an
@acme.comemail address). -
Click Finish. A list of claim rules is displayed
-
Click OK.
The Add Claims Provider Trust window appears
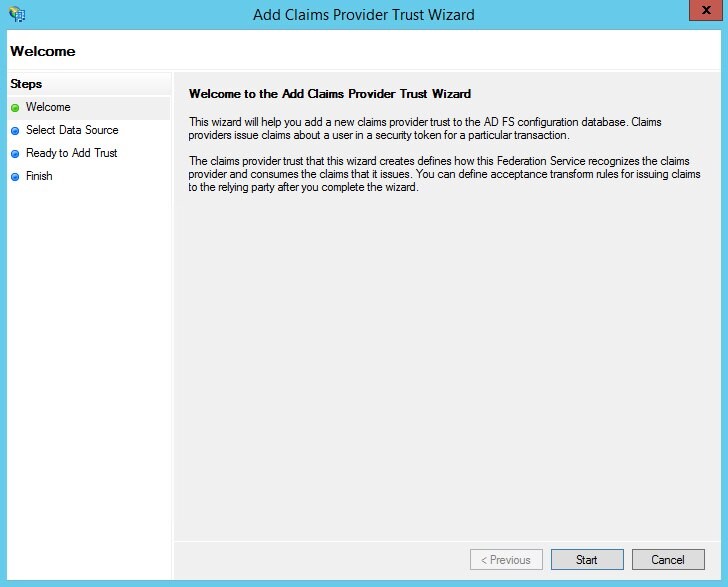
Description of the illustration Add_Claims_Provider.jpg
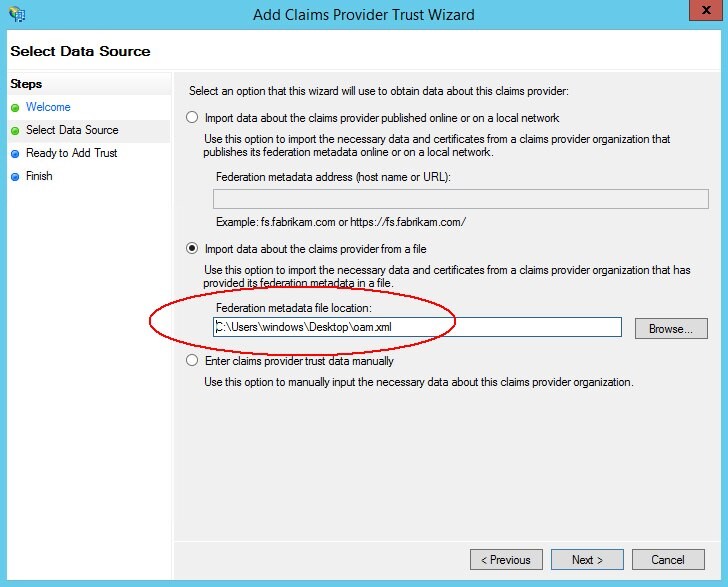
Description of the illustration Import_Data.jpg

Description of the illustration Warning_Message.jpg
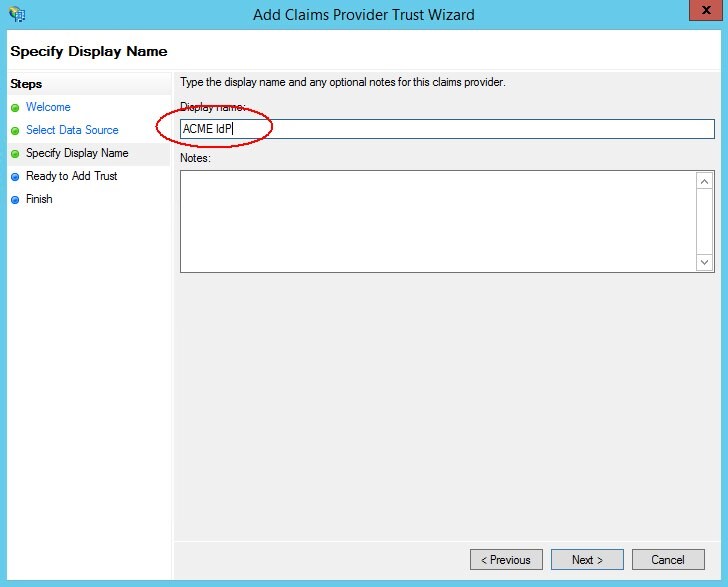
Description of the illustration Identity_Provider.jpg
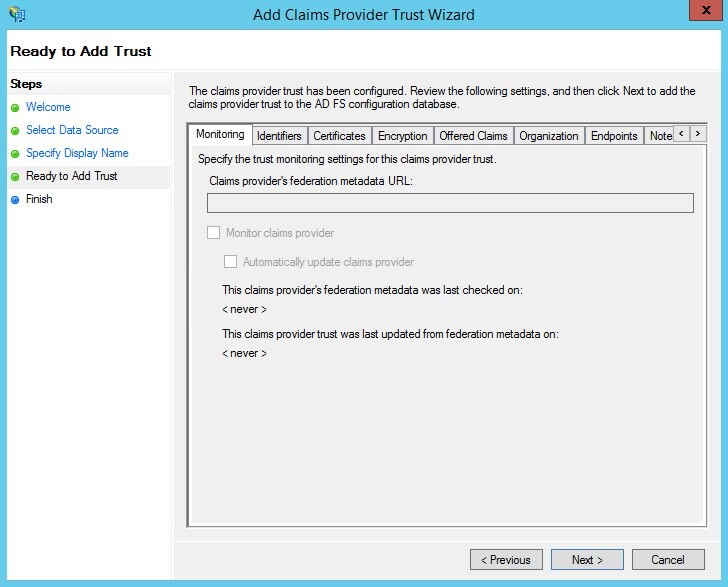
Description of the illustration summary_window.jpg
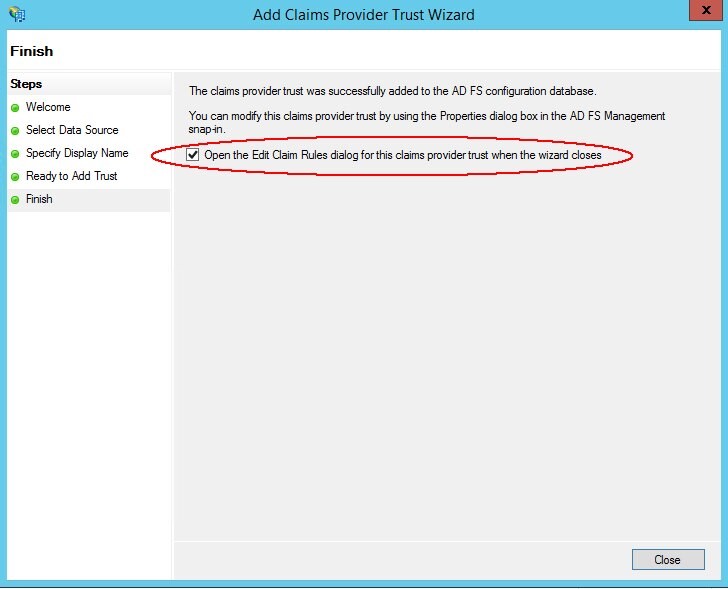
Description of the illustration Edit_Claims.jpg
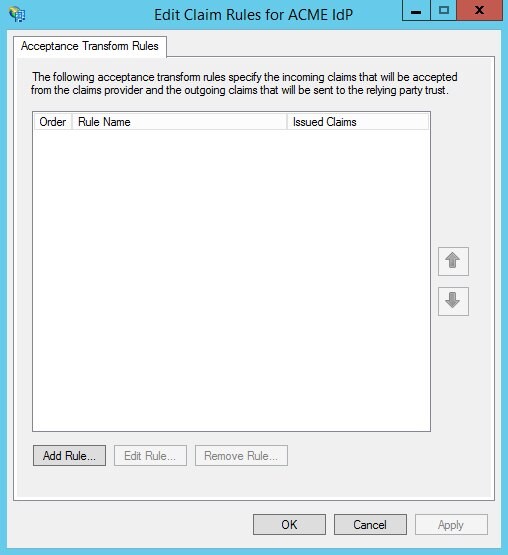
Description of the illustration Edit_Rule_Window.jpg
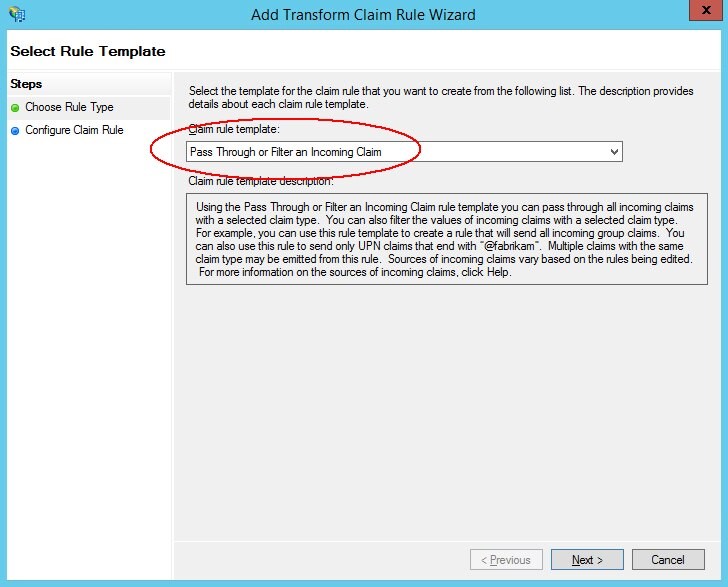
Description of the illustration Select_Rule_Template.jpg
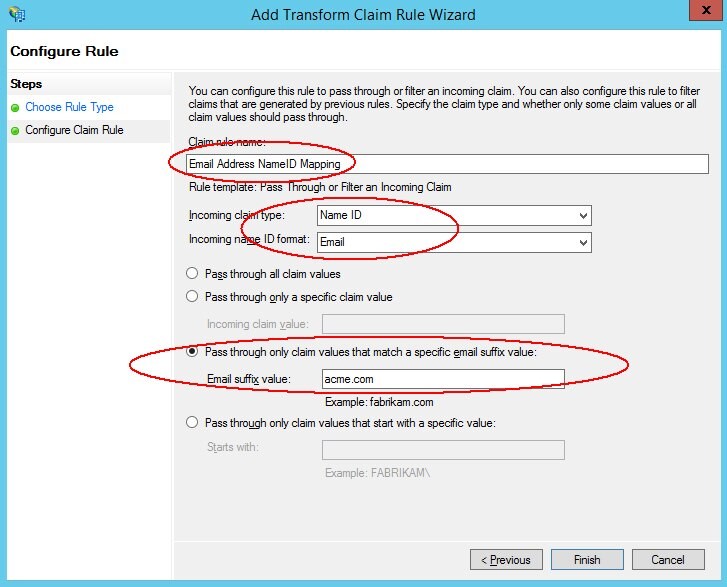
Description of the illustration Configure_Rule.jpg
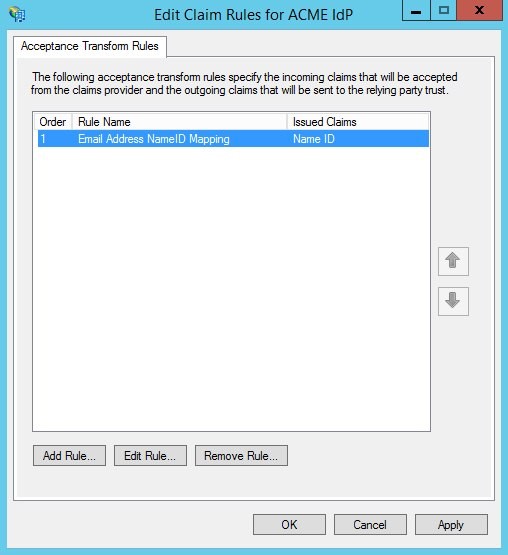
Description of the illustration list_of_claim_rules.jpg
As mentioned in the pre-requisites article, if you want to configure ADFS to use/accept SHA-1 signatures, perform the following steps (Note: if you don’t configure ADFS to use/accept SHA-1 signatures, you must configure OAM to use SHA-256 for signatures):
-
Go to the machine where ADFS is deployed.
-
If ADFS 2.0 is used
-
Click Start Menu , Programs , Administrative Tools , AD FS 2.0 Management
-
Expand ADFS 2.0 , Trust Relationships
-
-
If ADFS 3.0 is used
-
In Server Manager, click Tools , AD FS Management
-
Expand AD FS , Trust Relationships
-
-
-
Right click on the newly created Claims Provider Trust and select Properties.
-
Select the Advanced Tab.
-
Select SHA-1.
-
Click OK.
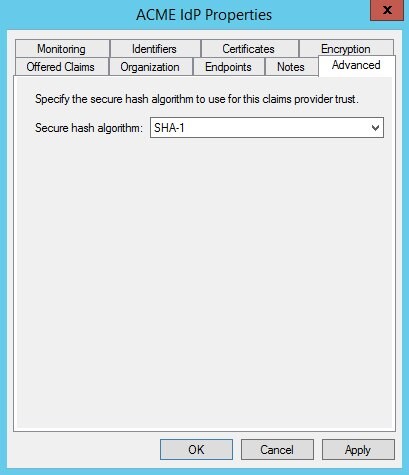
Description of the illustration Secure_Hash_Algorithm.jpg
OAM Setup
To add ADFS as an SP partner in OAM, execute the following steps:
-
Go to the OAM Administration Console:
http(s)://oam-admin-host:oam-adminport/oamconsole. -
Navigate to Identity Federation , Identity Provider Administration.
-
Click on the Create Service Provider Partner button.
-
In the Create screen:
-
Enter a name for the partner
-
Select SAML 2.0 as the Protocol
-
-
Click Load Metadata and upload the SAML 2.0 Metadata file for the SP.
-
Select the
NameIDformat to set in the SAML 2.0 Assertion (Email AddressNameIDformat in this case). -
Enter how the
NameIDvalue must be set: User ID. -
Store Attribute, and mail attribute in this case.
-
Select the default Attribute Profile that indicates how to populate the SAML Assertion with attributes.
-
Click Save.
As mentioned in the pre-requisites article, if you want to configure OAM to use SHA-256 for signatures, perform the following steps (Note: if you don’t configure OAM to use SHA-256 for signatures, you must configure ADFS to use/accept SHA-1 signatures):
-
Enter the WLST environment by executing:
$IAM_ORACLE_HOME/common/bin/wlst.sh. -
Connect to the WLS Admin server:
connect(). -
Navigate to the Domain Runtime branch:
domainRuntime(). -
Execute the
configureFedDigitalSignature()command:configureFedDigitalSignature(partner="PARTNER_NAME", partnerType="idp/sp", algorithm="SHA-256/SHA-1"). -
Replace PARTNER_NAME with the name of the partner added
-
Set the partnerType to idp or sp
-
Set the algorithm to SHA-256 or SHA-1 An example is:
configureFedDigitalSignature(partner="ADFSSP", partnerType="sp”, algorithm="SHA-256")
-
-
Exit the WLST environment:
exit().
Test
To test, access the OAM IdP initiated SSO page:
-
URL:
http(s)://oam-runtime-host:oam-runtimeport/oamfed/idp/initiatesso?providerid=PARTNER_NAME -
Replace
PARTNER_NAMEwith the name of the SP partner
An example is: https://acme.com/oamfed/idp/initiatesso?providerid=ADFSSP
- OAM challenges for authentication
You will be redirected to ADFS SP with a SAML Assertion
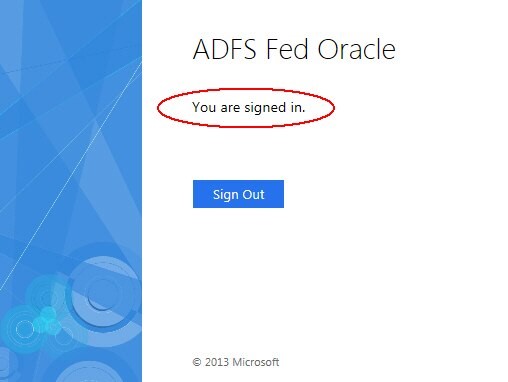
Description of the illustration SAML_Assertion.jpg
More Learning Resources
Explore other labs on docs.oracle.com/learn or access more free learning content on the Oracle Learning YouTube channel. Additionally, visit education.oracle.com/learning-explorer to become an Oracle Learning Explorer.
For product documentation, visit Oracle Help Center.
Integrating ADFS 2.0 and 3.0 SP with OAM IdP
F60451-01
September 2022
Copyright © 2022, Oracle and/or its affiliates.