Integrating Google IdP with OAM SP
Google Apps recently introduced a new SAML 2.0 feature, where Google can now act as an Identity Provider with remote SAML 2.0 Service Providers.
This allows using Google as:
-
The authentication authority for end users
-
The server that provides true SSO capabilities as the user authentication state is propagated from the Google IdP to remote domains
This article describes step by step how to integrate Google IdP with OAM as an SP via the SAML 2.0 SSO protocol.
User Mapping
Users in Google Apps are uniquely identified by their email addresses which was set when those users were created.
During a SAML 2.0 SSO flow, the Google IdP provides the user’s email address to the remote SP:
-
In the SAML 2.0 NameID field
-
With the NameID value set to the user’s primary email address
The next steps show how to determine the user’s primary email address in Google Apps.
To view a user account in Google Apps, perform the following steps:
-
Launch a browser
-
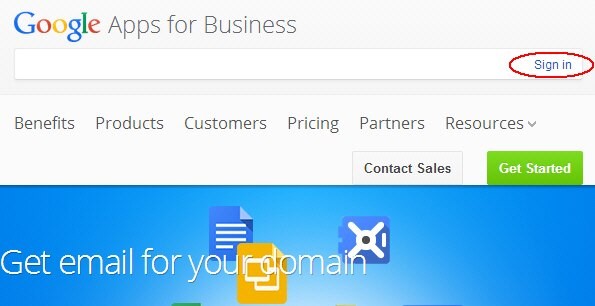
Go to http://www.google.com/a
-
Click Sign In
-
In the domain field, enter the name of your domain (in this example, www.acme.com)
-
Select Admin Console
-
Click Go
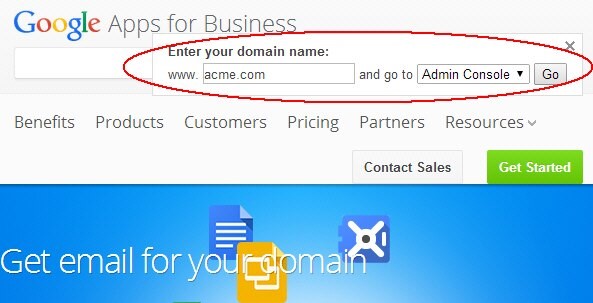
Description of the illustration Admin_Console_Page.jpg
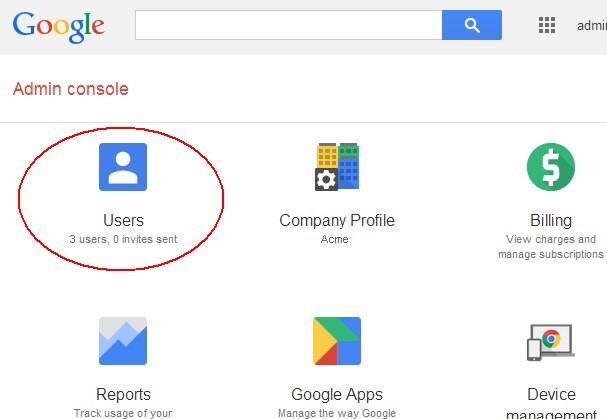
Description of the illustration Users_Page.jpg
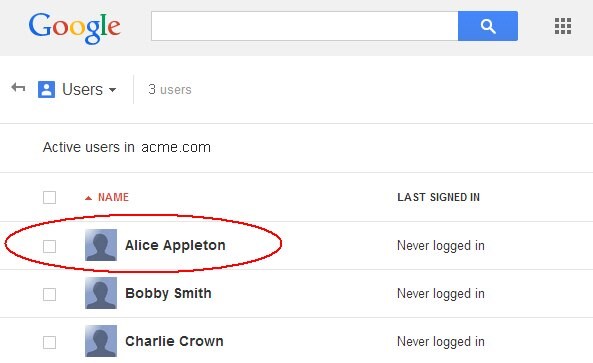
Description of the illustration Active_Users_Page.jpg
The next screen shows details about the user. The email address is displayed underneath the user’s identity. In this example, the Google IdP sends alice@acme.com to the remote SP during the SAML 2.0 SSO operation:
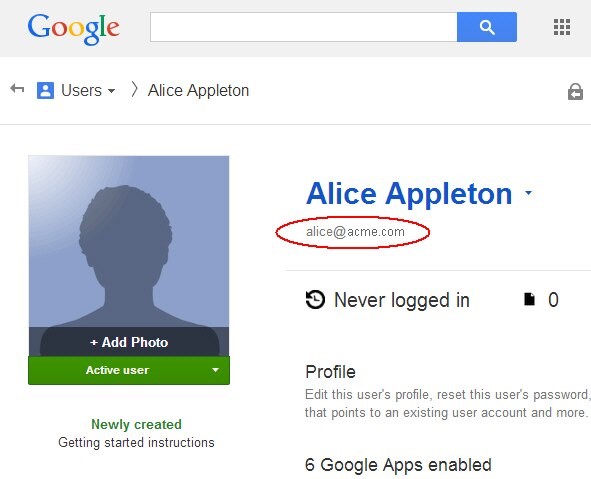
Description of the illustration User_Details_Page.jpg
Google IdP Configuration
Collecting OAM Information
The following information needs to be provided into the Google IdP SSO Admin console:
-
SAML 2.0 SSO SP endpoint
-
ProviderID
In the earlier article, we listed the endpoints published by OAM. The SAML 2.0 SSO IdP endpoint and the SAML 2.0 logout endpoint would be http(s)://oam-publichostname:oam-public-port/oamfed/idp/samlv20, with oam-public-hostname and oam-public-port being the values of the public endpoint, where the user accesses the OAM application (load balancer, HTTP reverse proxy…).
If you are unsure about the oam-public-hostname and oam-public-port, you can:
-
Go to the OAM Administration Console:
http(s)://oam-admin-host:oam-adminport/oamconsole -
Navigate to Configuration , Settings , Access Manager
The oam-public-hostname is the OAM Server Host, the oam-public-port is the OAM Server Port and the protocol (http or https) is listed in OAM Server Protocol.
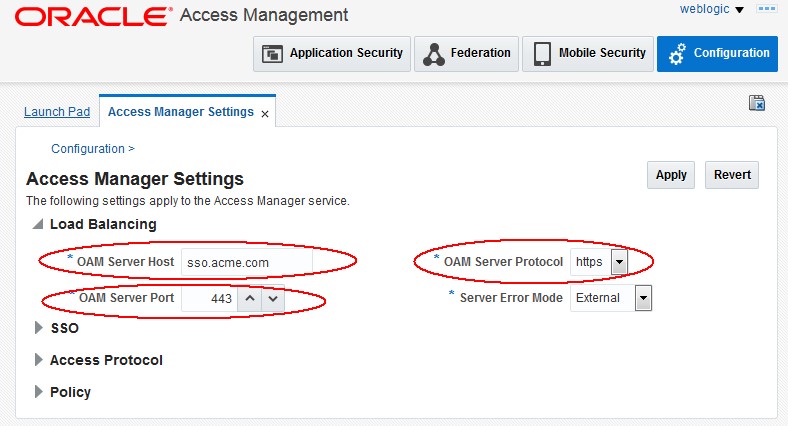
Description of the illustration Load_Balancing.jpg
In the same article, we also explained how to determine the ProviderID used by OAM:
-
Go to the OAM Administration Console:
http(s)://oam-admin-host:oam-adminport/oamconsole -
Navigate to Configuration , Settings , Federation
-
Write down the
ProviderID
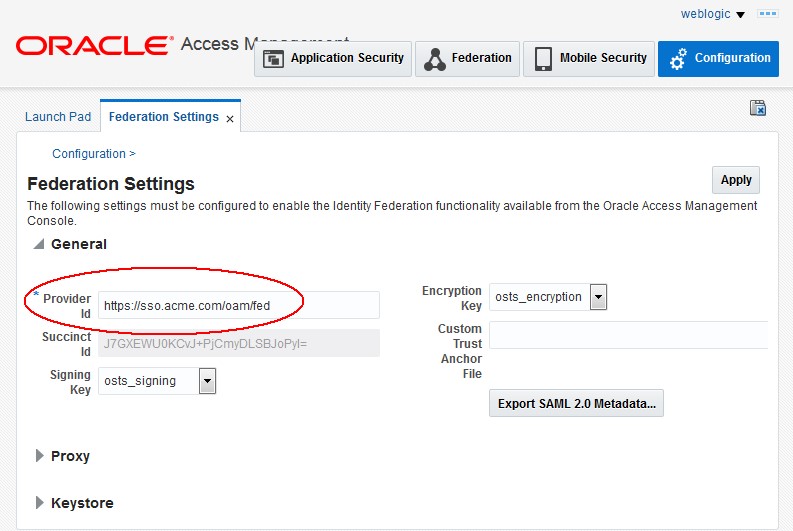
Description of the illustration Provider_ID.jpg
Configuring the Google IdP
To configure Google as an IdP, perform the following steps:
-
Launch a browser
-
Go to
https://www.google.com/enterprise/apps/business/ -
Authenticate and go to the Admin Dashboard
-
Click on Apps
- Click on SAML Apps
- Click on Add a service/App to your domain
- Click on SETUP MY CUSTOM APP
-
In the section Option 2, click the Download button to download the Google IdP SAML 2.0 Metadata file on your local machine
-
Once done click Next
-
Enter an Application Name
-
Optionally upload a logo
-
Once done click Next
- Enter the ACS (Assertion Consumer Service URL)
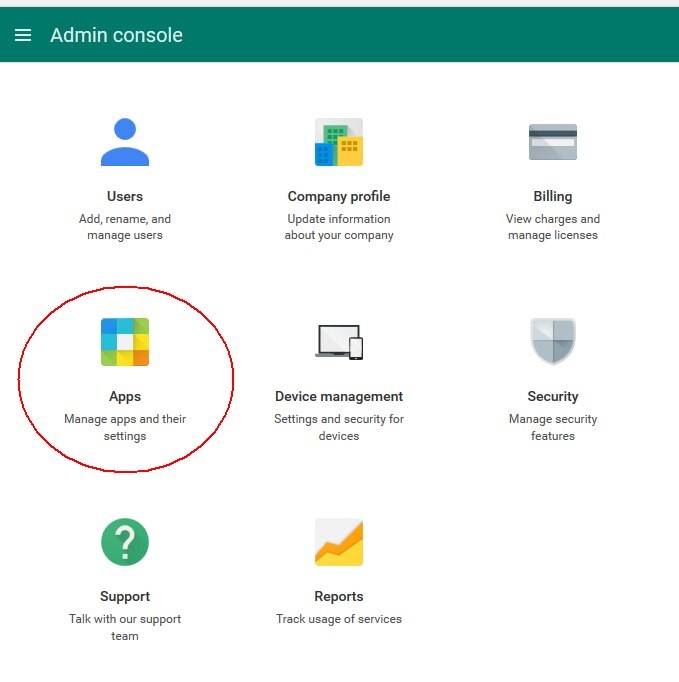
Description of the illustration Apps_Page.jpg
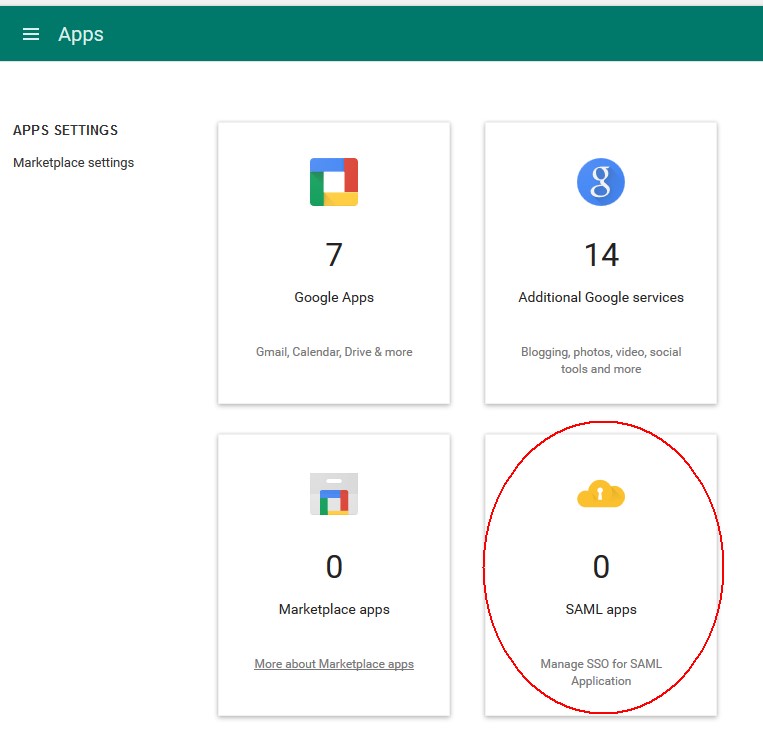
Description of the illustration SAML_Apps_Page.jpg
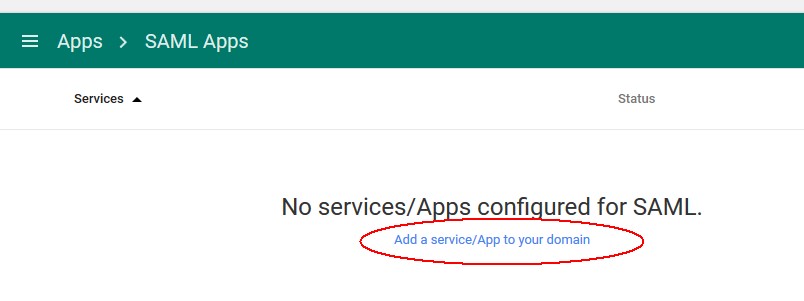
Description of the illustration Add_Service.jpg
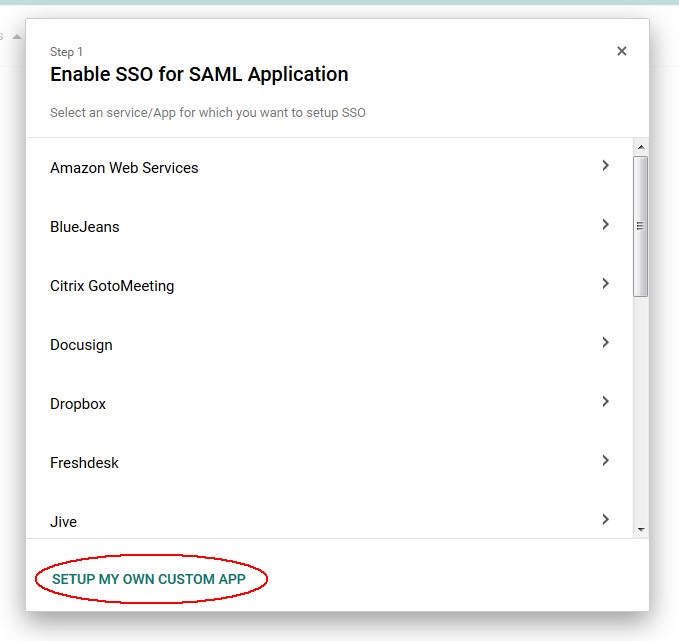
Description of the illustration Setup_My_Custom_App.jpg
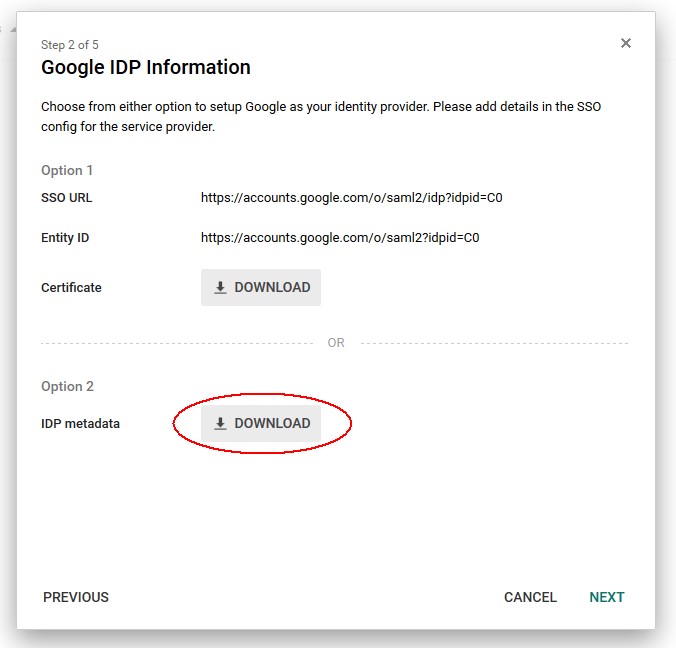
Description of the illustration Metadata_Download.jpg
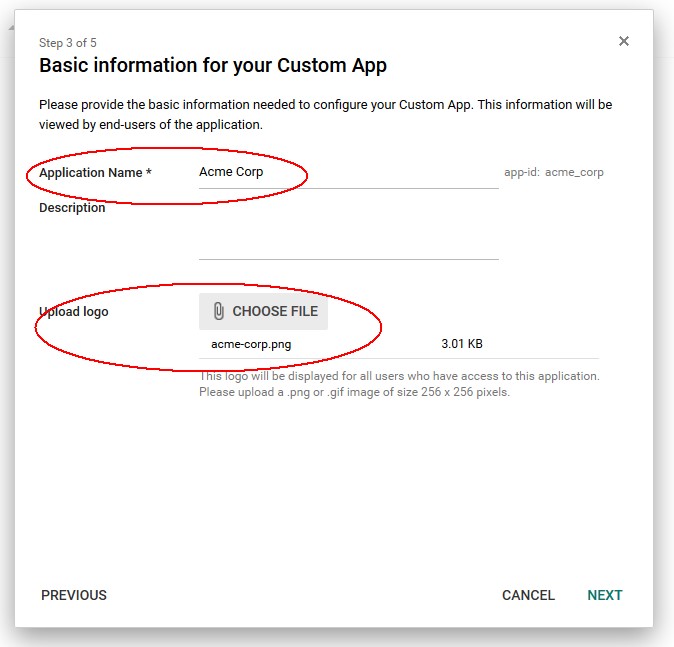
Description of the illustration Basic_Info.jpg
http(s)://oam-public-hostname:oam-publicport/oam/server/fed/sp/ss
Based on the OAM information collected earlier replace http(s) by the OAM public endpoint protocol and the oam-public-hostname and oam-public-port by their values
- Enter the
ProviderIDcollected earlier in the Entity ID field -
Optionally enter a Start URL for Google IdP Initiated SSO operations, where the user clicks on the SAML Application partner at Google to be redirected to the Application at OAM: this is the protected application URL, or unsolicited Relay State.
-
Click Next
Leave Primary Email as the NameID, as we will use the email contained in the NameID to map the user in OAM/SP
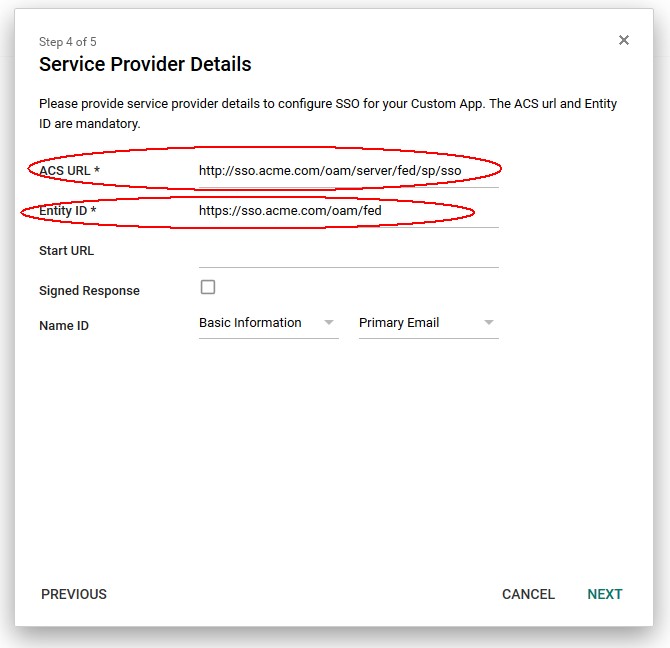
Description of the illustration Service_Provider_Details.jpg
In this section, you can add attributes that is sent by the Google IdP. To add an attribute:
-
Click ADD NEW MAPPING
-
Enter the name as it appears in the SAML Assertion in the first field
-
Select the category of the User attribute from the Google LDAP you wish to send
-
Select the attribute you wish to send
-
Once done click FINISH
-
To enable the SP Application, you need to turn it on:
-
Click on the Menu for the SAML application
-
Click on ON for Everyone
- Confirm by clicking TURN ON FOR EVERYONE
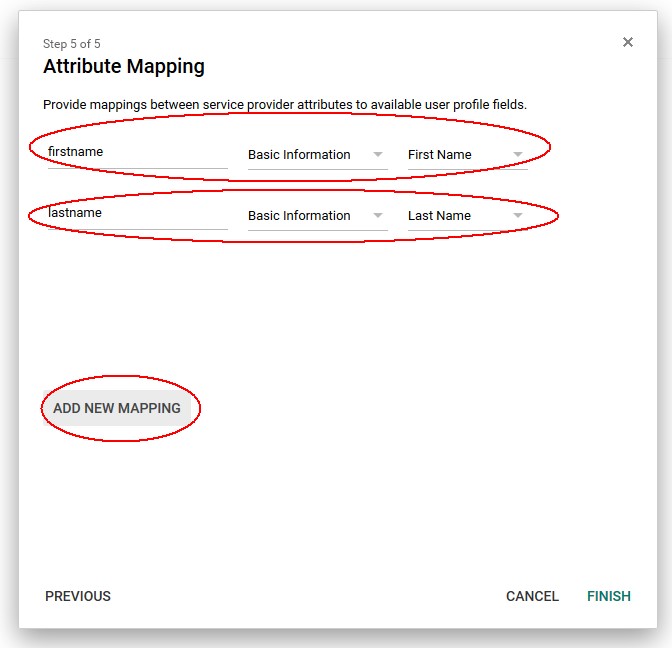
Description of the illustration Attribute_Mapping.jpg
If the setup was successful, a success message displays:
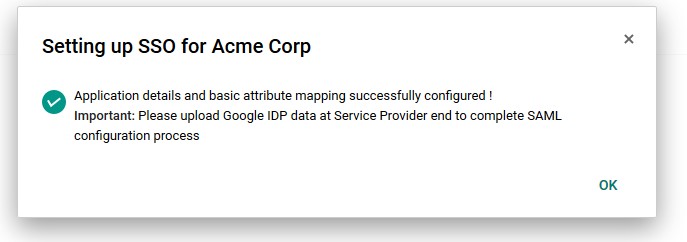
Description of the illustration Message_Page.jpg
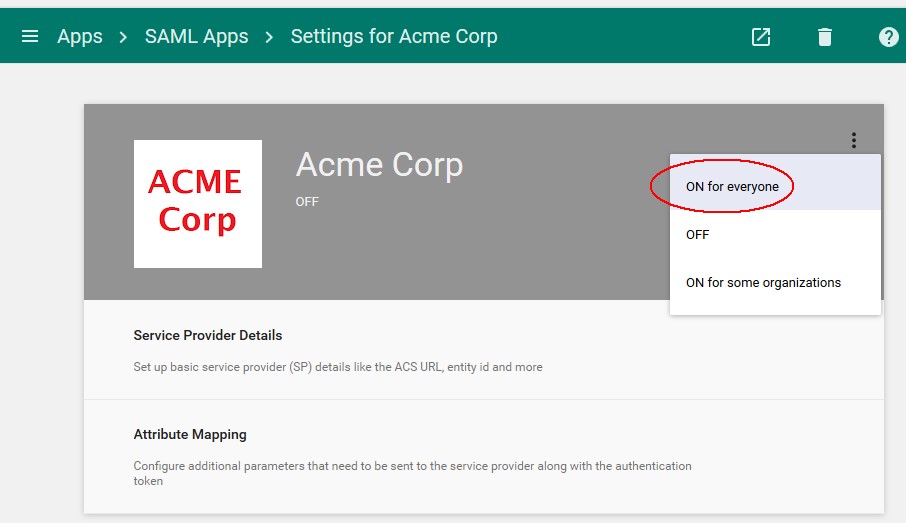
Description of the illustration SP_Application.jpg
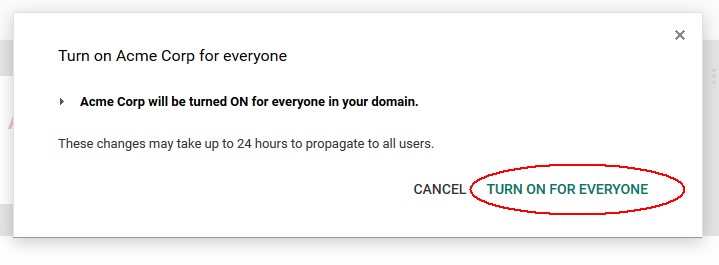
Description of the illustration Confirm_Message.jpg
OAM Setup
To add Google as an IdP partner in OAM, execute the following steps:
-
Go to the OAM Administration Console:
http(s)://oam-admin-host:oam-admin-port/oamconsole -
Click on Federation
-
Navigate to Federation , Service Provider Management
-
Click on the Create Identity Provider Partner button
-
In the Create screen:
-
Enter a name for the Google IdP
-
Check whether or not this partner should be used as the IdP by default when starting a Federation SSO operation, if no IdP partner is specified. (in this example set it as the default IdP)
-
Select SAML 2.0 as the Protocol
-
Click Load Metadata and upload the SAML 2.0 Metadata file for the Google IdP Assertion Mapping section:
-
Optionally set the OAM Identity Store that should be used Note: In the example, we left the field blank to use the default OAM Identity Store
-
Optionally set the user search base DN Note: In the example, we left the field blank to use the user search base DN configured in the Identity Store
-
Select how the mapping occurs Note: In the example, we are mapping the Assertion via the
NameIDto the LDAP mail attribute -
Click Save
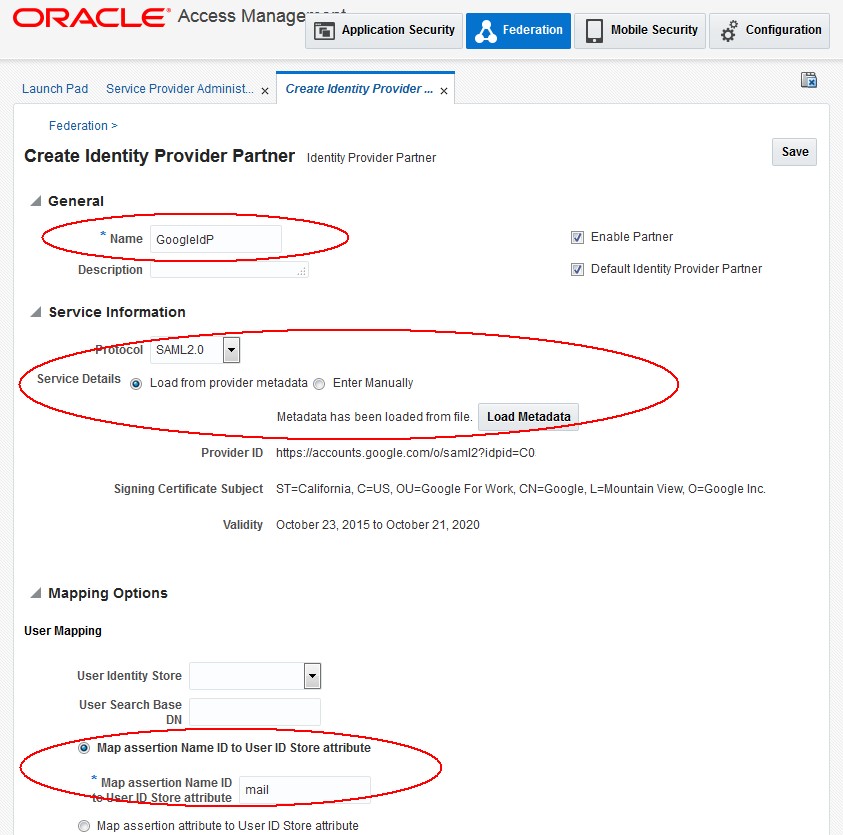
Description of the illustration OIF_Setup.jpg
Test
To test:
-
Either protect a resource with WebGate and a FederationScheme with ADFS IdP being the Default SSO Identity Provider for OAM
-
Or use the OAM Test SP application and select Google as the IdP
To test using the Test SP:
-
Ensure that the Test SP Application has been enabled
-
Navigate to
http(s)://oam-publichostname:oam-public-port/oamfed/user/testspsso -
Select the Google IdP
-
Click Start SSO
- At the Google IdP, enter the user’s email address
- Enter the user’s password
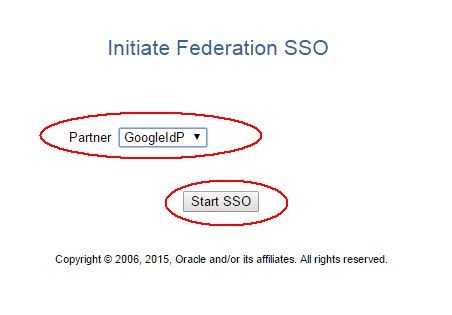
Description of the illustration Initiate_SSO.jpg
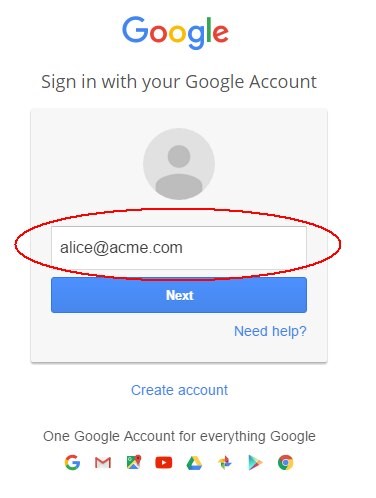
Description of the illustration Google_Sign_in.jpg
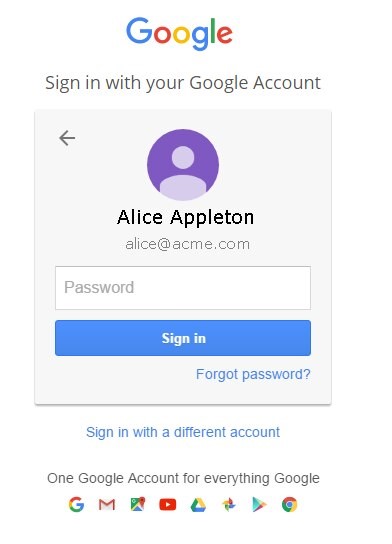
Once entered, the Google IdP authenticates you and redirect you to the OAM SAML SP that shows the result of the Federation SSO.
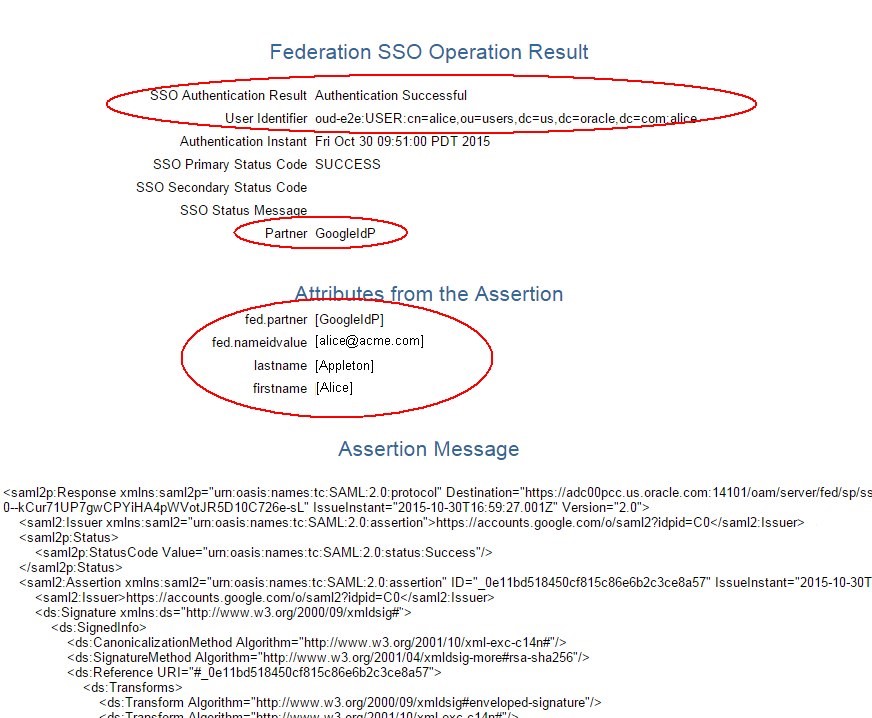
Description of the illustration Google_Idp.jpg
More Learning Resources
Explore other labs on docs.oracle.com/learn or access more free learning content on the Oracle Learning YouTube channel. Additionally, visit education.oracle.com/learning-explorer to become an Oracle Learning Explorer.
For product documentation, visit Oracle Help Center.
Integrating Google IdP with OAM SP
F60936-01
September 2022
Copyright © 2022, Oracle and/or its affiliates.