1. Welcome to Core Maintenance
This user guide is designed to help you quickly get acquainted with the many functions routinely executed everyday in Oracle Banking.
This chapter contains the following sections:
- Section 1.1, "Local Holiday"
- Section 1.2, "Country Code"
- Section 1.3, "BIC Directory"
- Section 1.4, "Currency Pair Definition"
- Section 1.5, "External Customer"
- Section 1.6, "Host Code"
- Section 1.7, "Currency Rate Type"
- Section 1.8, "External Branch Parameters"
- Section 1.9, "Language Code"
- Section 1.10, "External Credit Approval (ECA) System"
- Section 1.11, "Currency Exchange Rate"
- Section 1.12, "External Customer Account"
- Section 1.13, "External Bank Parameters"
- Section 1.14, "Customer Category"
- Section 1.15, "Currency Definition"
- Section 1.16, "Currency Holiday"
- Section 1.17, "Forget Customer"
1.1 Local Holiday
You can configure a local holiday.
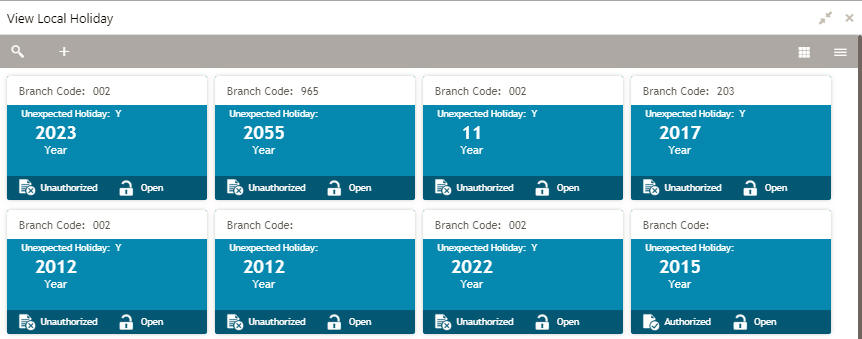
1.1.1 Local Holiday Summary
The summary screen provides a list of configured local holidays. You can configure a local holiday using the Local Holidays Maintenance.
How to reach here:
Core Maintenance > Local Holiday > View Local Holiday
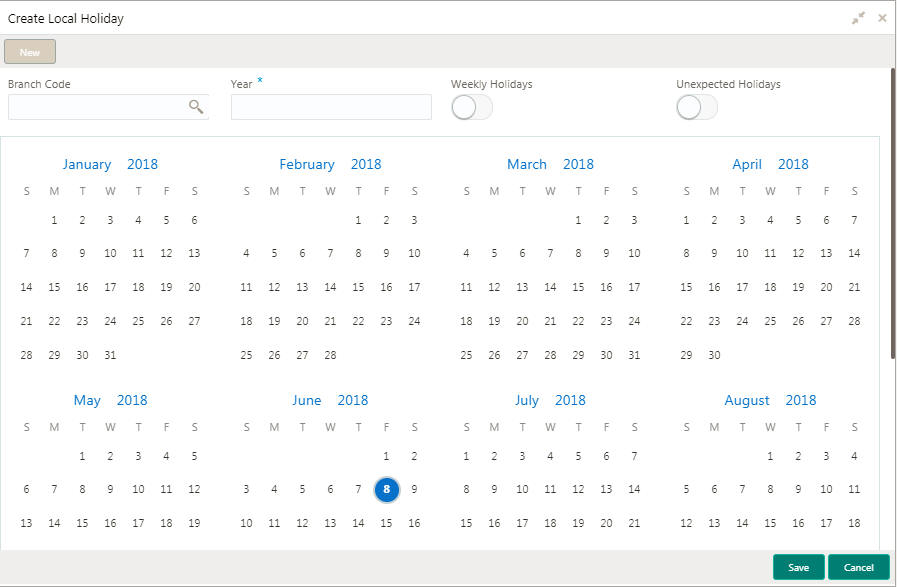
1.1.2 Local Holidays Maintenance
The maintenance screen allows you to configure local holidays.
How to reach here:
Core Maintenance > Local Holiday > Create Local Holiday
Field |
Description |
Branch Code |
Displays the code of the branch. |
Unexpected Holiday |
Indicates if the record is an unexpected holiday. |
Year |
Displays the year of the holiday. |
Status |
Displays the status of the record. |
How to add a local holiday:
- In the Create Local Holiday screen, provide the required details:
● Branch Code: Click Search to view and select the required branch code.
● Year: Enter the year details.
● Weekly Holidays: By default, this is disabled. If selected, you can define weekly holidays.
● Unexpected Holidays: By default, this is disabled. If selected, you can define unexpected holidays.
- Select the dates using the calendar. The selected dates appear in blue highlighted circle.
- Click Save. You can view the configured local holiday details in the Local Holiday Summary.
1.2 Country Code
You can configure a country code.
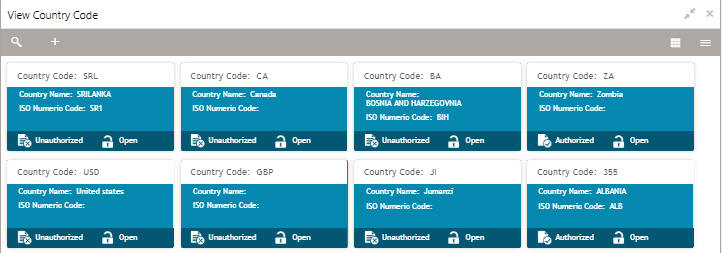
1.2.1 Country Code Summary
The summary screen provides a list of configured country code. You can configure a country code using the Country Code Maintenance.
How to reach here:
Core Maintenance > Country Code > View Country Code
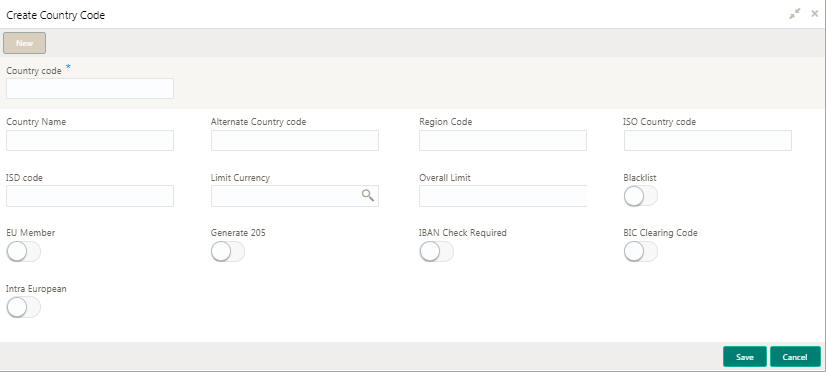
1.2.2 Country Code Maintenance
The maintenance screen allows you to configure Country Code.
How to reach here:
Core Maintenance > Country Code > Create Country Code
Field |
Description |
Country Code |
Displays the country code details. |
Country Name |
Displays the name of the country. |
ISO Numeric Code |
Displays the ISO numeric code details of the country code. |
Status |
Displays the status of the record. |
How to add a country code:
1. In the Create Country Code screen, provide the required details:
● Country Code: Enter the country code.
● Country Name: Enter the name of the country.
● Alternate Country Code: Enter an alternate country code.
● Region Code: Enter the region code.
● ISO Country Code: Enter the ISO country code.
● ISO Code: Enter the ISO code.
● Limit Currency: Enter the limit currency.
● Overall Limit: Enter an overall limit.
● Blacklist: By default, this is disabled. If enabled, indicates whether the country is blacklisted.
● EU Member: By default, this is disabled. If enabled, indicates whether the country is recognized by Swift as a part of the Intra European countries.
● Generate 205: By default, this is disabled. If enabled, indicates the cover message 205COV or 205 need to be generated for transactions involving this country. If you do not select this option, RTGS, 202 or 202COV message is generated.
● IBAN Check Required: By default, this is disabled. If enabled, indicates check required for an IBAN is mandatory.
● BIC Clearing Code: By default, this is disabled. If enabled, indicates the National ID in the BIC plus file is the clearing code. During upload of clearing codes from BIC plus file, the records belong to countries against which this box is selected.
● Intra European: By default, this is disabled. If enabled, indicates the country is an intra European country.
2. Click Save. You can view the configured country code details in the Country Code Summary.
1.3 BIC Directory
As part of setting up basic information, you must maintain Bank Identifier Codes (BIC). You can configure the BIC directory for a customer.
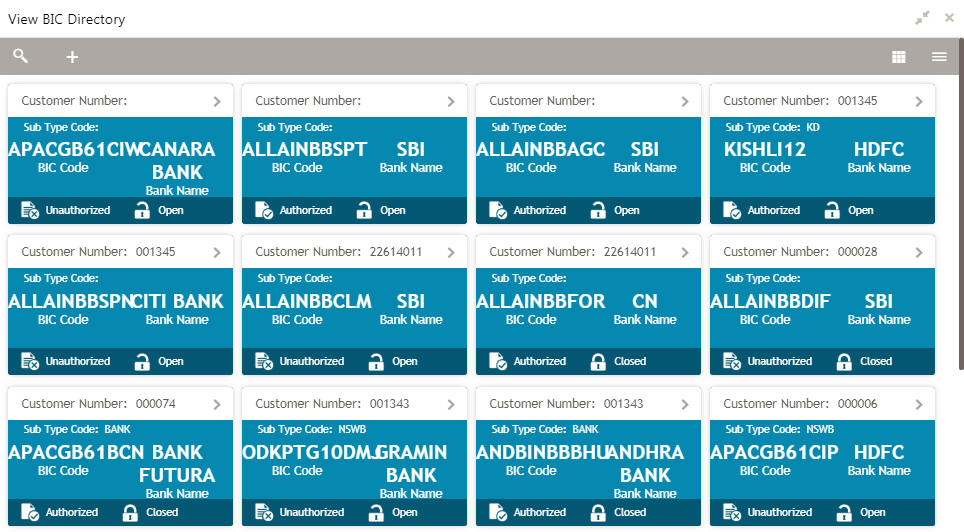
1.3.1 BIC Directory Summary
TheSummary screen provides a list of configured BIC directory. You can configure the BIC directory using the BIC Directory Maintenance.
How to reach here:
Core Maintenance > BIC Directory > View BIC Directory
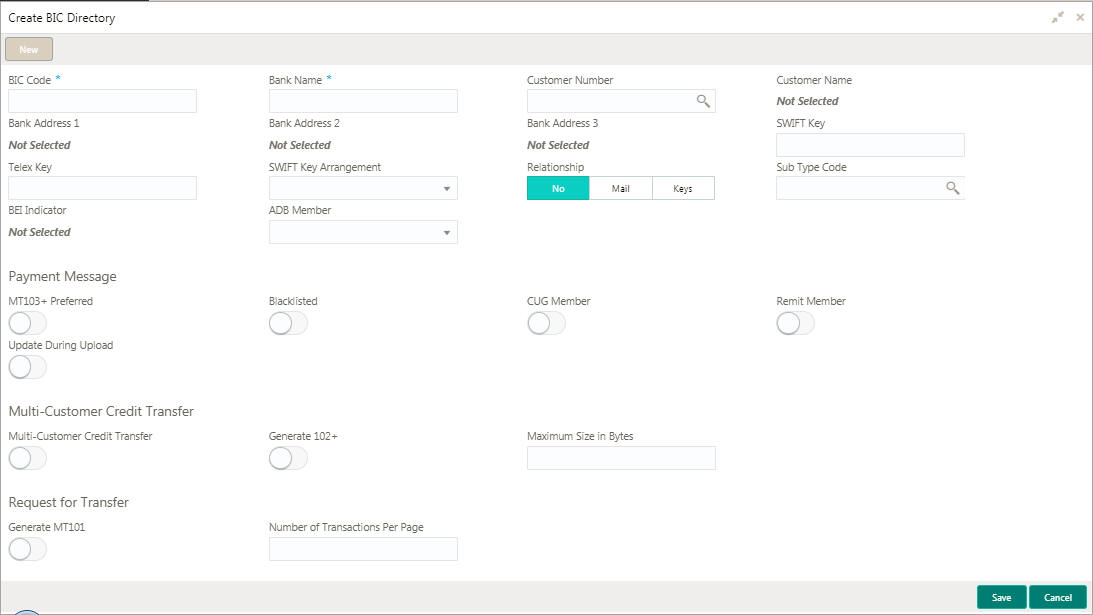
1.3.2 BIC Directory Maintenance
The maintenance screen allows you to configure a BIC directory for a customer.
How to reach here:
Core Maintenance > BIC Directory > Create BIC Directory
Field |
Description |
Customer Number |
Displays the number of the customer. |
Sub-type Code |
Displays the sub-type code associated with the customer number. |
BIC Code |
Displays the defined BIC code for the associated customer number. |
Bank Name |
Displays the name of the bank. |
Status |
Displays the status of the record. |
How to add a BIC directory:
1. In the Create BIC Directory screen, provide the required details:
● BIC Code: Enter a unique BIC Code by which the bank is identified by SWIFT.
● Bank Name: Enter a name for the bank.
● Customer Number: Click Search to view and select the required customer number.
● Customer Name: Based on the Customer Number selected, information is auto-populated.
● Bank Address 1-3: Based on the Customer Number selected, information is auto-populated.
● SWIFT Key: Enter a unique SWIFT key for the BIC directory.
● Telex Key: Enter a unique telex key for the BIC directory.
● SWIFT Key Arrangement: Select a SWIFT key arrangement from the dropdown list,
● Relationship: Select one of the following options:
– No: If selected, indicates that the BIC Entity is not a customer of your bank
– Mail: If selected, the BIC entity is not a recognized SWIFT entity but an address internal to your bank. In such cases, all correspondence directed to the particular BIC entity is sent as mail messages.
– Keys: If selected, a SWIFT/Telex connectivity exists between your bank andthebank for which you are maintaining details. Subsequently, you mustspecifythe SWIFT/TelexKey in theadjacent field.
● Sub-type Code: Click Search to view and select the required sub-type code.
● BEI Indicator: Based on the Sub-type Code selected, information is auto-populated.
● ADB Member: Select an ADB member from the dropdown list.
Payment Message
● MT103+ Preferred: By default, this is disabled. If enabled, indicates the counter party whose BIC code details you are capturing capacitates to receive payment messages in the MT 103 format.
● Blacklisted: By default, this is disabled. If enabled, indicates the BIC entity is blacklisted.
● CUG Member: By default, this is disabled. If enabled, indicates the BIC entity is a closed user group member.
● Remit Member: By default, this is disabled. If enabled, indicates the customer is registered with MT 103 Extended Remittance Information Multi User Group.
● Update During Upload: By default, this is disabled. If enabled, updated the BIC directory during an upload.
Multi-Customer Credit Transfer
● Multi-Customer Credit Transfer: By default, this is disabled. If enabled, indicates whether or not a Multi Credit Transfer Feature [MT102 support] exists between the bank and the BIC entity.
● Generate 102+: By default, this is disabled. If enabled, generates 102+ message.
● Maximum Size in Bytes: Enter the maximum size.
Request for Transfer
● Generate MT101: By default, this is disabled. If enabled, indicates whether an MT101 can be sent/ received from this BIC. Select this option to generate MT101 message.
● Number of Transactions Per Page: Enter the number of transactions to view per page. If you do not specify a value it is defaulted to 10.
● Real Customer Number: Click Search to view and select the required real customer number.
● Real Customer Name: Based on the Real Customer Number selected, information is auto-populated.
2. Click Save. You can view the configure BIC directory in the BIC Directory Summary.
1.4 Currency Pair Definition
In the foreign exchange markets, the exchange rates for some currency pairs such as the USD-GBP or USD-JPY are easily obtainable, sincethese are frequently traded. The exchange rates of other currencies such as the ZAR-INR (South African Rand - Indian Rupee), which is not traded very often, is determined through a third currency. The third currency is usually the US dollar, since the US dollar is quoted in all trading centres.
You can define the static attributes of currency pairs for which a regular market quote is readily available. For other pairs, which do not have a regular market quote, you need to specify the third currency through which the system should compute the exchange rate. The currency pair is maintained at the bank level by the Head Office branch.
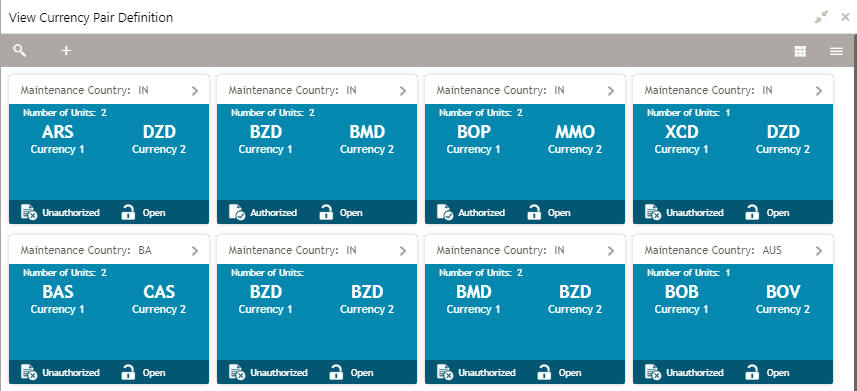
1.4.1 Currency Pair Definition Summary
The summary screen provides a list of define a currency pair. You can define a currency pair using the Currency Pair Definition Maintenance.
How to reach here:
Core Maintenance > Currency Pair Definition > View Currency Pair Definition
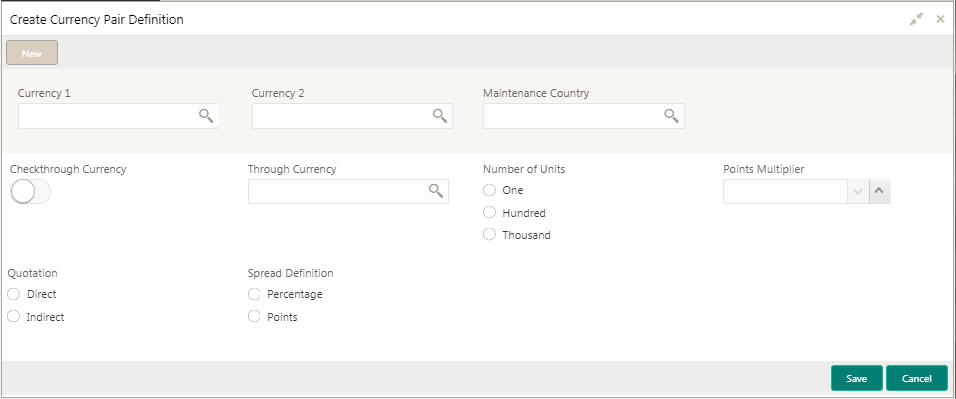
1.4.2 Currency Pair Definition Maintenance
The maintenance screen allows you to define currency pair.
How to reach here:
Core Maintenance > Currency Pair Definition > Create Currency Pair Definition
Field |
Description |
Maintenance Country |
Displays the maintenance country details. |
Number of Units |
Displays the number of units. |
Currency 1-2 |
Displays the currency associated with the country. |
Status |
Displays the status of the record. |
How to define a currency pair:
1. In the Create Currency Pair Definition screen, provide the required details:
● Currency 1-2: Click Search to view and select the required currency. A currency pair (specified as currency 1 and currency 2, in the currency pair) represents the two currencies for which you need to maintain exchange rates.
To specify the pair, choose from the list provided against Currency 1. Select the pair for which you want to maintain parameters. The pair must be selected according to the quotation method followed by the market, which can be direct or indirect. Exchange rates can be defined for currency 1 against currency 2 or currency 2 against currency 1.
● Maintenance Country: Click Search to view and select the required maintenance country.
● Check through Currency: By default, this is disabled. If selected, indicates a check through currency.
● Through Currency: Click Search to view and select the required through currency for which the exchange rate between the currencies must be calculated.
● Number of Units: Select one of the number of units.
● Points Multiplier: Select the points multiplier.
● Quotation: Select one of the required quotation
– Direct method the exchange rate for the currency pair is quoted as follows:
Buy rate = mid rate - buy spread
Sell rate = mid rate + sell spread Ccy 1 = Rate x Ccy 2
– Indirect method the exchange rate for the currency pair is quoted as follows:
Buy rate = mid rate + buy spread
Sell rate = mid rate - sell spread Ccy 2 = Rate x Ccy 1
● Spread Definition: Select one spread definition. There are two ways of defining the spread - in points and in percentage.
The effective spread can be calculated using any of the following two methods:
– In points - spread x points multiplier
– In percentage - spread/100 x mid rate
The method of spread definition that you specify here applies to two instances:
– While maintaining exchange rates for the currency pair
– While maintaining customer spread for the currency pair
2. Click Save. You can view the defined currency pair details in the Currency Pair Definition Summary.
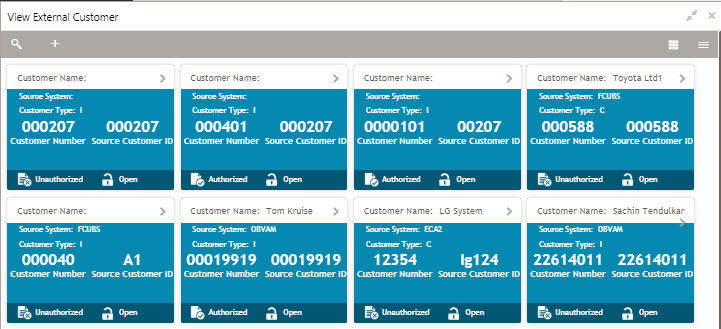
1.5 External Customer
You can configure the external customer details.
1.5.1 External Customer Summary
The summary screen provides a list of configured external customer details. You can configure the external customers using the External Customer Maintenance.
How to reach here:
Core Maintenance > External Customer > View External Customer
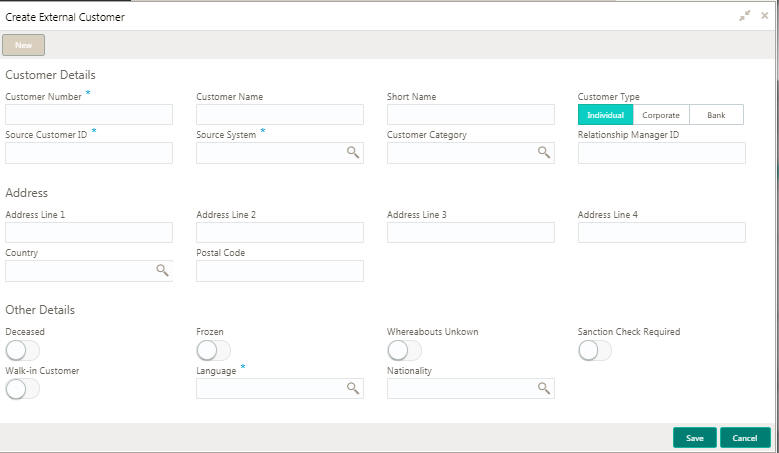
1.5.2 External Customer Maintenance
The maintenance screen allows you to configure the external customer details.
How to reach here:
Core Maintenance > External Customer > Create External Customer
Field |
Description |
Customer Name |
Displays the name of the customer. |
Source System |
Displays the source system details. |
Customer Type |
Displays the type of the customer. |
Customer Number |
Displays the customer number associated with the customer name. |
Source Customer ID |
Displays the source of the customer ID associated with the customer name. |
Status |
Displays the status of the record. |
How to add an external customer:
1. In the Create External Customer screen, provide the required details:
Customer Details
● Customer Number: Enter a number for the customer.
● Customer Name: Enter a name for the customer.
● Short Name: Enter a short name for the customer.
● Customer Type: Select one of the options:
– Individual: If selected, the customer is an individual customer.
– Corporate: If selected, the customer is a corporate customer.
– Bank: If selected, the customer is a bank employee.
● Source Customer ID: Enter the source customer ID.
● Source System: Click Search to view and select the required source system.
● Customer Category: Click Search to view and select the required customer category.
● Relationship Manager ID: Enter the relationship manager ID.
Address
● Address Line 1-4: Enter the customer address details.
● Country: Click Search to view and select the required country.
● Postal Code: Enter the postal code details.
Other Details
● Deceased: By default, this is disabled. If enabled, indicates the customer is deceased.
● Frozen: By default, this is disabled. If enabled, indicates the customer account is frozen.
● Whereabouts Unknown: By default, this is disabled. If enabled,indicates the customer’s whereabouts are unknown.
● Sanction Check Required: By default, this is disabled. If enabled, indicates the sanction check is required.
● Walk-in Customer: By default, this is disabled. If enabled, indicated a walk-in customer.
● Language: Click Search to view and select the required language.
● Nationality: Click Search to view and select the required nationality.
2. Click Save. You can view the configure external customer details in the External Customer Summary.
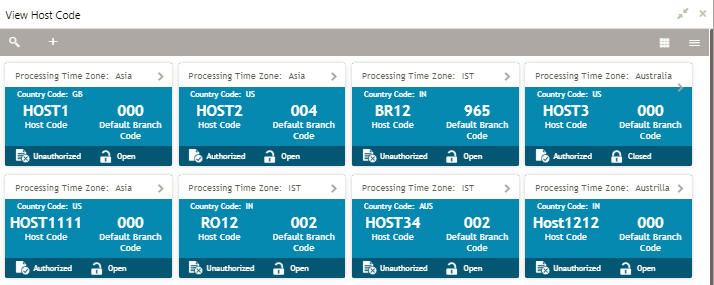
1.6 Host Code
You can group branches in the same zone or region under a host for specific processing. You can have multiple hosts depending on processing requirements.
1.6.1 Host Code Summary
The summary screen provides a list of configured host codes. You can configure the host code using the Host Code Maintenance
How to reach here:
Core Maintenance > Host Code > View Host Code
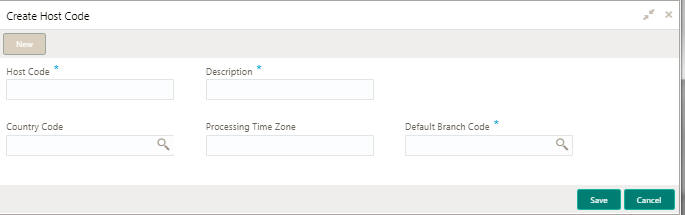
1.6.2 Host Code Maintenance
The maintenance screen allows you to configure host code.
How to reach here:
Core Maintenance > Host Code > Create Host Code
Field |
Description |
Processing Time Zone |
Displays the processing time zone. |
Country Code |
Displays the country code details. |
Host Code |
Displays the host code details. |
Default Branch Code |
Displays the default branch code associated with the host code. |
Status |
Displays the status of the records. |
How to add a host code:
1. In the Create Host Code screen, provide the required details:
● Host Code: Enter the host code details.
● Description: Enter additional information about the host code.
● Country Code: Click Search to view and select the required country code.
● Processing Time Zone: Enter the processing time zone details.
● Default Branch Code: Click Search to view and select the required default branch code.
2. Click Save. You can view the configured host code details in the Host Code Summary.
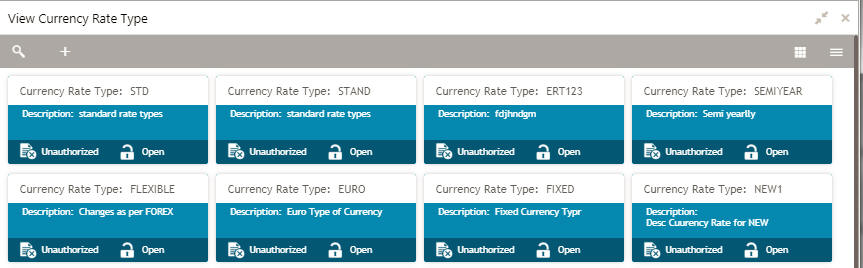
1.7 Currency Rate Type
You can configure a currency rate type.
1.7.1 Currency Rate Type Summary
The summary screen provides a list of configured currency rate type. You can configure a currency rate type using the Currency Rate Type Maintenance.
How to reach here:
Core Maintenance > Currency Rate Type > View Currency Rate Type
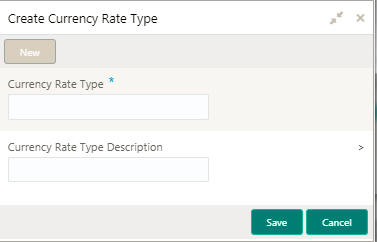
1.7.2 Currency Rate Type Maintenance
The maintenance screen allows you to configure currency rate type.
How to reach here:
Core Maintenance > Currency Rate Type > Create Currency Rate Type
Field |
Description |
Currency Rate Type |
Displays the currency rate type. |
Description |
Displays additional information about the currency rate type. |
Status |
Displays the status of the record. |
How to add a currency rate type:
1. In the Create Currency Rate Type screen, provide the required details:
● Currency Rate Type: Enter a currency rate type.
● Currency Rate Type Description: Enter additional information about the currency rate type.
2. Click Save. You can view the configured currency rate type details in the Currency Rate Type Summary.
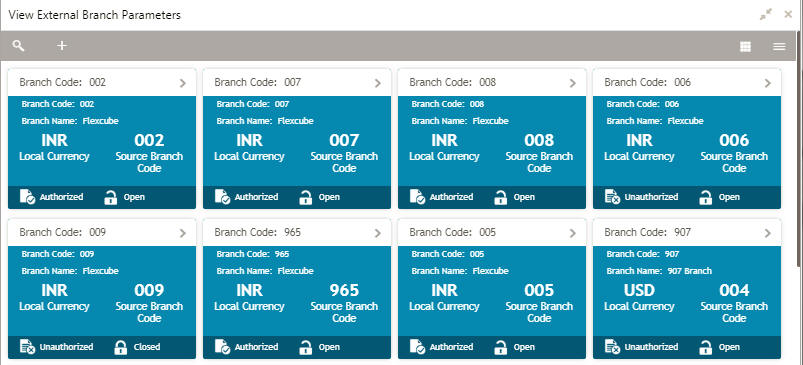
1.8 External Branch Parameters
You can configure branch level parameters.
1.8.1 External Branch Parameters Summary
The summary screen provides a list of configured external branch parameters. You can configure the external branch parameters using the External Branch Parameters Maintenance.
How to reach here:
Core Maintenance > External Branch Parameters > View External Branch Parameters
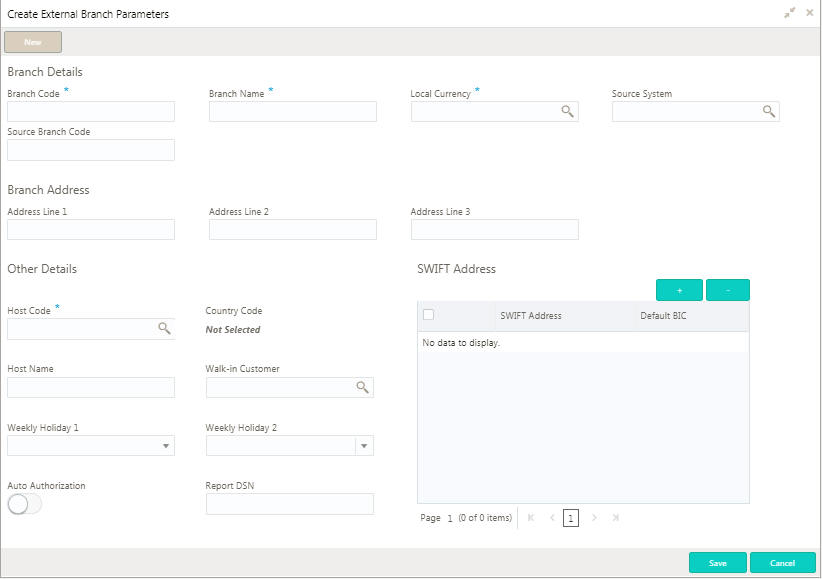
1.8.2 External Branch Parameters Maintenance
The maintenance screen allows you to configure the branch parameters.
How to reach here:
Core Maintenance > External Branch Parameters > Create External Branch Parameters
Field |
Description |
Branch Code |
Displays the code of the branch associated with the bank. |
Branch Name |
Displays the name of the branch associated with the bank. |
Local Currency |
Displays the local currency details. |
Source Branch Code |
Displays the code of the source branch. |
Status |
Displays the status of the record. |
How to configure an external branch parameter:
1. In the Create External Branch Parameter screen, provide the required details:
Branch Details
● Branch Code: Enter a branch code.
● Branch Name: Enter a name for the branch.
● Local Currency: Click Search to view and select the required local currency.
● Source System: Click Search to view and select the required source system.
● Source Branch Code: Enter a source branch code.
Branch Address
● Address Line 1-3: Enter the address details.
Other Details
● Host Code: Click Search to view and select the required host code.
● Country Code: Based on the Host Code selected, information is auto-populated.
● Host Name: Enter a name for the host.
● Walk-in Customer: Click Search to view and select the required walk-in customer.
● Weekly Holiday 1-2: Select a weekly holiday from the dropdown list.
Note
There are two days of weekly holiday depending on the geographical zone.
● Auto Authorization: By default, it is disabled. If enabled, the record is automatically authorized.
● Report DSN: Enter the details of the report DSN.
SWIFT Address
2. Click + to add a row and provide the required details:
● SWIFT Address: Click Search to view and select the required SWIFT address.
● Default BIC: If selected, indicates the selected SWIFT address as the default BIC.
3. Click Save. You can view the configure branch parameter details in the External Branch Parameters Summary.
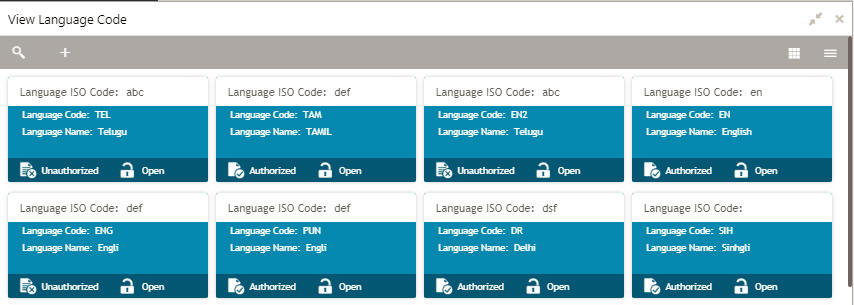
1.9 Language Code
You can configure a language code.
1.9.1 Language Code Summary
The summary screen provides a list of configured language code. You can configure a language code using the Language Code Maintenance.
How to reach here:
Core Maintenance > Language Code > View Language Code
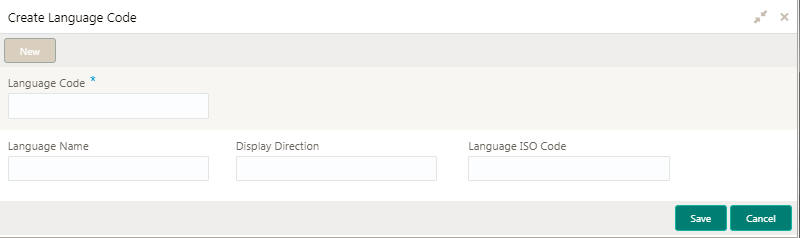
1.9.2 Language Code Maintenance
The maintenance screen allows you to configure a language code.
How to reach here:
Core Maintenance > Language Code > Create Language Code
Field |
Description |
Language ISO Code |
Displays the ISO code of the language. |
Language Code |
Displays the code of the language. |
Language Name |
Displays the name of the language. |
Status |
Displays the status of the record. |
How to add a language code:
1. In the Create Language Code screen, provide the required details:
● Language Code: Enter a code for the language.
● Language Name: Enter a name for the language associated with the language code.
● Display Direction: Enter the display direction.
● Language ISO Code: Enter the language ISO code.
2. Click Save. You can view the configured language code details in the Language Code Summary.
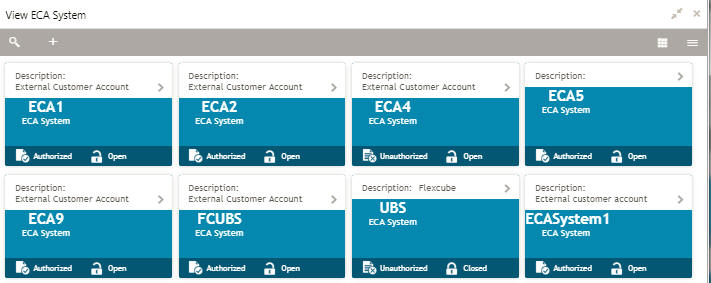
1.10 External Credit Approval (ECA) System
You can configure the ECA system.
1.10.1 ECA System Summary
The summary screen provides a list of configuredECA system. You can configure the ECA system details using the ECA System Maintenance.
How to reach here:
Core Maintenance > ECA System > View ECA System
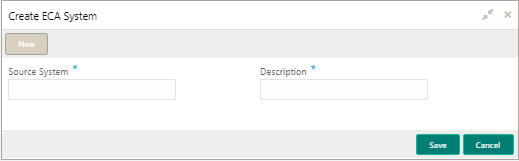
1.10.2 ECA System Maintenance
The maintenance screen allows you to configure ECA system details.
How to reach here:
Core Maintenance > ECA System > Create ECA System
Field |
Description |
Description |
Displays any additional information of the ECA system. |
ECA System |
Displays the name of the ECA system. |
Status |
Displays the status of the record. |
How to add an ECA system:
1. In the Create ECA System screen, provide the required details:
● Source System: Enter the source system.
● Description: Enter additional information about the ECA system.
2. Click Save. You can view the configure ECA system details in the ECA System Summary.
1.11 Currency Exchange Rate
You can maintain exchange rates for a currency pair, the rates at which you buy and sell one currency for another. A bank determines its buy and sell rate for a currency pair by applying a spread (that is, its profit margin) to the mid-rate of the currency pair. Mid rate is the basic rate at which a currency pair is exchanged.
The spread applied for a currency pair varies with the transaction type, while the mid-rate usually remains constant. Consequently, different rates are applicable to different transaction types. For instance dollars in currency are purchased at a certain rate, while USD traveller’s checks are bought at a different rate. You can define a rate type which you would like to associate with a transaction type example: CASH, TRAVCHKS, and so on.
You can define the mid-rate, buy and sell spread applicable to each rate type; the buy and sell exchange rates are computed by the system. Buy rates and sell rates can either be maintained by individual branches or can be input by the HO and propagated to all the branches.
If the branch for which the rate is being uploaded or maintained is the head office branch, then the rate would be copied to all those branches that have the same country code as the head office branch.
If the branch for which the rate is being uploaded or maintained is not the head office branch, but it has the same country code as the head office branch, then the rate being uploaded or maintained would be specific to the branch and would not be copied to any other branch.
If the branch for which the rate is being uploaded or maintained is not the head office branch and also does not have the same country code as the head office branch, then the rate being maintained would be copied to all the branches that has the same country code linked as the branch for which the rate is being maintained or uploaded.
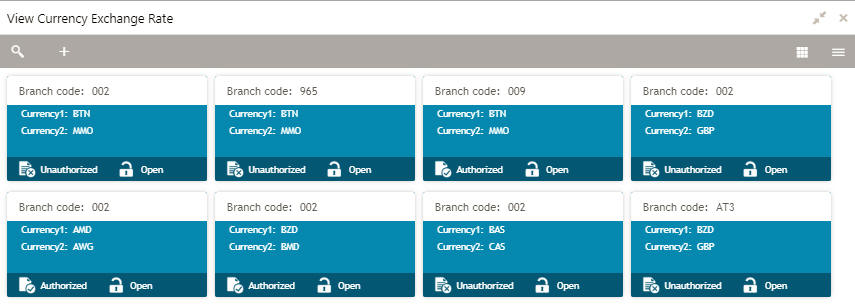
1.11.1 Currency Exchange Rate Summary
The summary screen provides a list of configured currency exchange rates. You can configure a currency exchange rate using the Currency Exchange Rate Maintenance.
How to reach here:
Core Maintenance > Currency Exchange Rate > View Currency Exchange Rate
1.11.2 Currency Exchange Rate Maintenance
The maintenance screen allows you to configure a currency exchange rate.
How to reach here:
Core Maintenance > Currency Exchange Rate > Create Currency Exchange Rate
Field |
Description |
Branch Code |
Displays the code of the branch. |
Currency 1-2 |
Displays the currency associated with the branch code |
Status |
Displays the status of the record. |
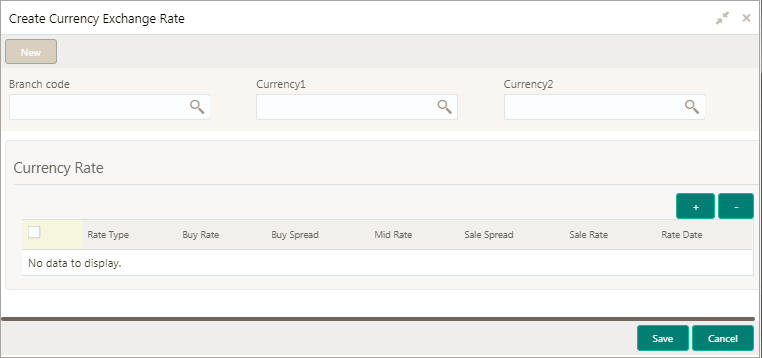
How to add a currency exchange rate:
1. In the Create Currency Exchange Rate screen, provide the required details:
● Branch Code: Click Search to view and select the required branch code.
● Currency 1: Click Search to view and select the required currency.
● Currency 2: Click Search to view and select the required currency.
Currency Rule
2. Click + to add a row and provide the required details.
● Rate Type: Select a rate type from the dropdown list.
● Buy Rate: Enter the buy rate details.
● Buy Spread: Enter the buy spread details.
● Mid Rate: Enter the mid rate details.
● Sale Spread: Enter the sale spread details.
● Sale Rate: Enter the sale rate details.
● Rate Date: Select a rate date from the dropdown calendar.
3. Click Save. You can view the configured currency exchange rate details in the Currency Exchange Rate Summary.
1.12 External Customer Account
You can configure the external customer account details.
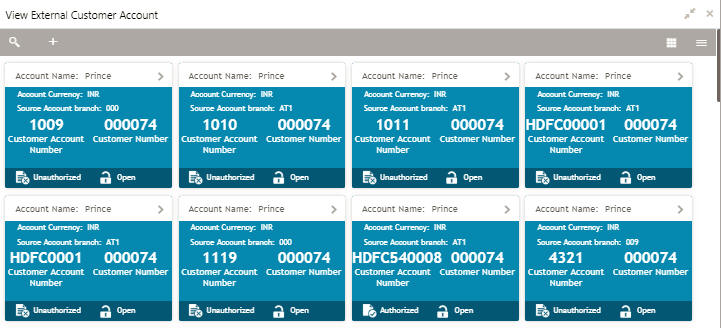
1.12.1 External Customer Account Summary
The summary screen provides a list of configured external customer accounts. You can configure the external customer accounts using the ECA System Maintenance.
How to reach here:
Core Maintenance > External Customer Account > View External Customer Account
1.12.2 External Customer Account Maintenance
The maintenance screen allows you to configure external customer account details.
How to reach here:
Core Maintenance > External Customer Account > Create External Customer Account

Field |
Description |
Account Name |
Displays the name of the account. |
Account Currency |
Displays the currency associated with the account. |
Source Account Branch |
Displays the branch details associated with the source account. |
Customer Account Number |
Displays the customer account number associated with the account name. |
Customer Number |
Displays the customer number associated with the account name. |
Status |
Displays the status of the record. |
How to add an external customer account:
1. In the Create External Customer Account screen, provide the required details:
Account Details
● Customer Account Number: Enter the customer account number.
● Account Name: Enter the name for an account.
● Customer Number: Click Search to view and select the required customer number.
● Customer Name: Based on the Customer Number selected, information is auto-populated.
● Account Currency: Click Search to view and select the required account currency.
● Account Class: Select the account class from the dropdown list.
● Source Account Branch: Click Search to view and select the required source account branch.
● Source Customer Account: Based on the Source Account Branch selected, information is auto-populated.
● Account IBAN: Enter the account IBAN details.
Address
● Address Line 1-4: Enter the address details.
● Country: Click Search to view and select the required country.
Other Details
● No Credit: By default, this is disabled. If enabled, indicates the account does not have any credit facility.
● No Debit: By default, this is disabled. If enabled, indicates the account does not have any debit facility.
● Blocked: By default, this is disabled. If enabled, indicates the account status is blocked.
● Frozen: By default, this is disabled. If enabled, indicates the account status is frozen.
● Dormant: By default, this is disabled. If enabled, indicates the account status is dormant.
● External Credit Approval Required: By default, this is disabled. If enabled, indicates ECA check is required for the external customer account.
● External Credit Approval System: Click Search to view and select the required external credit approval system.
● Host Code: Enter the host code details.
● Account Open Date: Select an effective date for the account from the drop down calendar.
2. Click Save. You can view the configure external customer account details in the External Customer Account Summary.
1.13 External Bank Parameters
You can configure bank level parameters.
1.13.1 External Bank Parameters Summary
The summary screen provides a list of configured external bank parameters. You can configure the external bank parameters using the External Bank Parameters Maintenance.
How to reach here:
Core Maintenance > External Bank Parameters > View External Bank Parameters

1.13.2 External Bank Parameters Maintenance
The maintenance screen allows you to configure external bank parameters.
How to reach here:
Core Maintenance > External Bank Parameters > Create External Bank Parameters
Field |
Description |
Head Office Branch |
Displays the head office branch details. |
Maker |
Displays the name of the user who has configured the bank details. |
Once Authorized |
Indicates if the record is authorized once or not. |
Bank Code |
Displays the code of the bank. |
Bank Name |
Displays the name of the bank. |
Status |
Displays the status of the record. |
How to configure a external bank parameter:
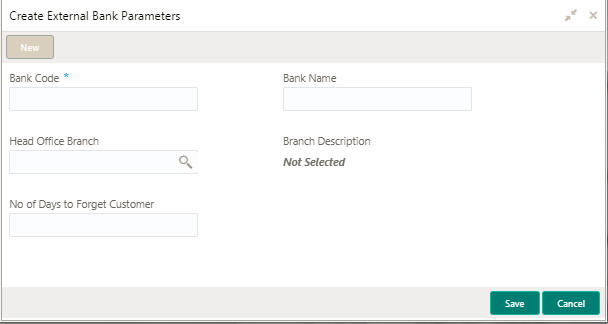
1. In the Create External Bank Parameter screen, provide the required details:
● Bank Code: Enter the code for the bank.
● Bank Name: Enter the name of the bank.
● Head Office Branch: Click Search to view and select the required head office branch.
● Branch Description: Based on the Head Office Branch selected, information is auto-populated.
● Number of Days to Forget Customer: Enter the number of days to inactive/forget the customer.
2. Click Save. You can view the configure core bank parameter details in the External Bank Parameters Summary.
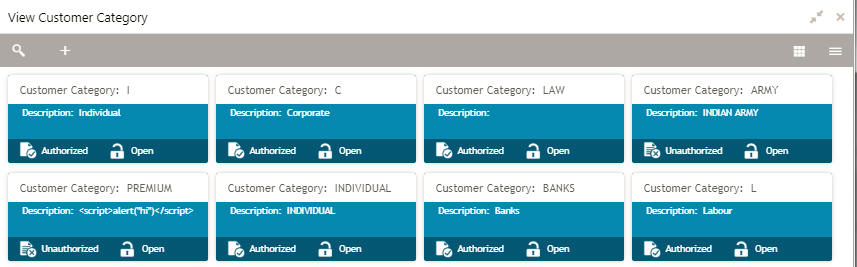
1.14 Customer Category
You can configure a customer category.
1.14.1 Customer Category Summary
The summary screen provides a list of configured customer category. You can configure a customer category using the Customer Category Maintenance.
How to reach here:
Core Maintenance > Customer Category > View Customer Category
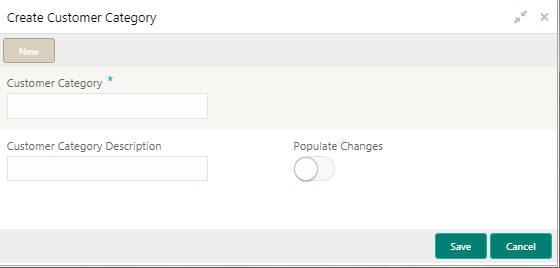
1.14.2 Customer Category Maintenance
The maintenance screen allows you to configure a customer category.
How to reach here:
Core Maintenance > Customer Category > Create Customer Category
Field |
Description |
Customer Category |
Displays the customer category. |
Description |
Displays additional information about the customer category. |
Status |
Displays the status of the record. |
How to add a customer category:
1. In the Create Customer Category screen, provide the required details:
● Customer Category: Enter a customer category.
● Customer Category Description: Enter additional information about the customer category.
● Populate Changes: By default, this is disabled. If enabled, displays the changes.
2. Click Save. You can view the configured customer category details in the Customer Category Summary.
1.15 Currency Definition
You can define the attributes of the currencies in which the bank can deal. For each currency, you can define attributes such as, the SWIFT code for the currency, the country the currency belongs, the interest method, the spot days, the settlement days, and so on.
Currencies can be maintained only at the Head Office. The list of currencies are available to the branches based on the currencies defined for the country linked to the branch.
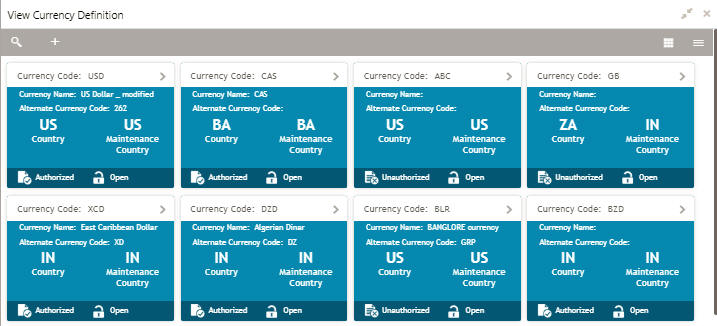
1.15.1 Currency Definition Summary
The summary screen provides a list of defined currency. You can define a currency using the Currency Definition Maintenance.
How to reach here:
Core Maintenance > Currency Definition > View Currency Definition
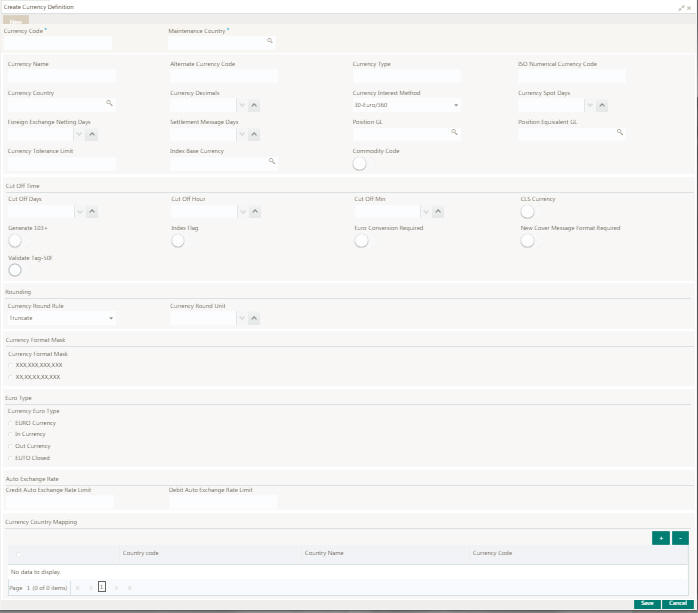
1.15.2 Currency Definition Maintenance
The maintenance screen allows you to define currency.
How to reach here:
Core Maintenance > Currency Definition > Create Currency Definition
Field |
Description |
Currency Code |
Displays the code of the currency. |
Currency Name |
Displays the name of the currency. |
Alternate Currency Code |
Displays the code of the alternate currency. |
Country |
Displays the country associated with the currency. |
Maintenance Country |
Displays the maintenance country. |
Status |
Displays the status of the record. |
How to define a currency:
1. In the Create Current Definition screen, provide the required details:
● Currency Code: Enter the currency code.
● Maintenance Country: Click Search to view and select the required maintenance country.
● Currency Name: Enter the name of the currency.
● Alternate Currency Code: Enter the code of the alternate currency.
● Currency Type: Enter the currency type.
● ISO Numerical Currency Code: Enter the International Standardization Organization numerical currency code.
● Currency Country: Click Search to view and select the required currency country.
● Currency Decimals: Select the currency decimals.
● Currency Interest Method: Select the currency interest method from the dropdown list.
● Currency Spot Days: Select the number of spot working days applicable for the currency.
● Foreign Exchange Netting Days: Select the number of days for the foreign exchange netting.
● Settlement Message Days: Select the settlement message days.
● Position GL: Click Search to view and select the required position GL.
● Position Equivalent GL: Click Search to view and select the required position equivalent GL.
● Currency Tolerance Limit: Enter the currency tolerance limit.
● Index Base Currency: Click Search to view and select the required index base currency.
● Commodity Code: By default, this is disabled. If selected,
Cut Off Time
Refers to the time by which all transactions involving a currency should be generated. For a currency, you can indicate the cut-off hour and minute. This time should be expressed in the local time of the bank.
The maintenance of a cut-off time for a currency has particular reference to outgoing funds transfers involving it.
Example: The value date of a funds transfer transaction (incoming payment) involving USD, is 3rd June 2018. The number of cut-off days specified for the currency is 2. This means that the payment must be received on or before 1st June 2018. If the payment is received on 1st June, it must be received before the cut-off time specified for USD.
If the USD cut-off time is 1200 hrs, if the payment is received on 1st June 2018, it must be received before 1200 hrs.
● Cut Off Days: Select the cut off days for the payment transaction involving the currency.
● Cut Off Hour: Select the hour of the day for the cut off.
● Cut Off Min: Select the minute of the hour for the cut off.
● CLS Currency: By default, this is disabled. If selected, allow customers of your bank to settle their FX deals via the CLS (Continuous Linked Settlements) Bank, you can identify the currency to be a CLS Currency. FX deals in the CLS currency is only eligible to be routed through the CLS bank.
● Generate 103+: By default, this is disabled. If selected, generate outgoing MT 103 messages in the MT 103 + format.
● Index Flag: By default, this is disabled. If selected, derives index rate of the currency.
● Euro Conversion Required: By default, this is disabled. If selected, indicates the Euro conversion is required.
● New Cover Message Format Required: By default, this is disabled. If selected, indicates a new cover message format is required.
● Validate Tag-50F: By default, this is disabled. If selected, indicates validations must be performed for the 50F details captured for the ordering customer during contract input.
Rounding
● Currency Round Rule: Select the currency round rule from the drop
down list.
● Currency Round Unit: Select the currency round unit.
Currency Format Mask
● Select one of the currency format.
Euro Type
● Currency Euro Type: Select one of the currency Euro type.
Auto Exchange Rate
● Credit Auto Exchange Rate Limit: Enter the credit automatic exchange rate limit.
● Debit Auto Exchange Rate Limit: Enter the debit automatic exchange rate limit.
Currency Country Mapping
2. Click + to add a row and provide the required details:
● Country Code: Click Search to view and select the required country code.
● Country Name: Enter the name of the country.
● Currency Code: Click Search to view and select the required currency code.
3. Click Save. You can view the defined currency in the Currency Definition Summary.
1.16 Currency Holiday
You can configure a yearly list of holidays, for the currencies, defined in the currency screen. The system uses the information maintained to check if any settlement involving a foreign currency (in the foreign Exchange, Money market, Funds Transfer, Loans and Deposit modules) falls on that currency’s holiday. If yes, the system displays a message stating and ask the user for an override.
For any schedule or contract maturing at a future date, five years hence, you can input the future date, only if the calendar for that year is maintained. The currency holiday is maintained at the bank level by the Head Office.
1.16.1 Currency Holiday Summary
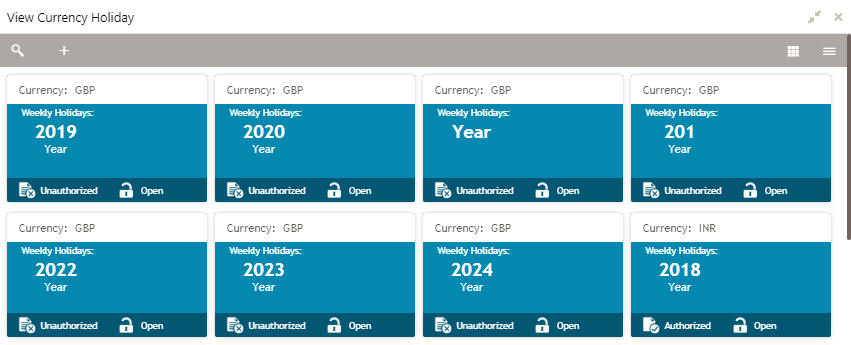
The summary screen provides a list of configured currency holiday. You can configure a currency holiday using the Currency Holiday Maintenance.
How to reach here:
Core Maintenance > Currency Holiday > View Currency Holiday
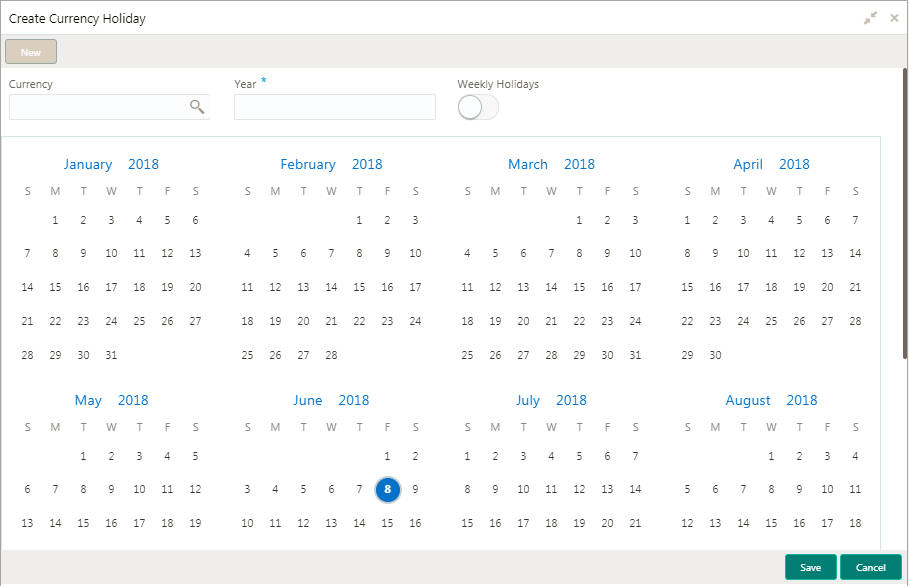
1.16.2 Currency Holiday Maintenance
The maintenance screen allows you to configure a currency holiday.
How to reach here:
Core Maintenance > Currency Holiday > Create Currency Holiday
Field |
Description |
Currency |
Displays the currency details. |
Weekly Holidays |
Displays the weekly holidays associated with the currency. |
Status |
Displays the status of the record. |
How to add a currency holiday
1. In the Create Currency Holiday screen, provide the required details:
● Currency: Click Search to view and select the required currency.
● Year: Enter the year details.
● Weekly Holidays: By default, this is disabled. If selected, you can define the weekly holidays.
2. Select the dates using the calendar. The selected dates appear in blue highlighted circle.
3. Click Save. You can view the configured currency holidays in the Currency Holiday Summary.
1.17 Forget Customer
You can configure the forget customer details.
1.17.1 Forget Customer Maintenance
The maintenance screen allows you to configure forget customer details.
How to reach here:
Core Maintenance > Core Maintenance > Forget Process > Forget Customer
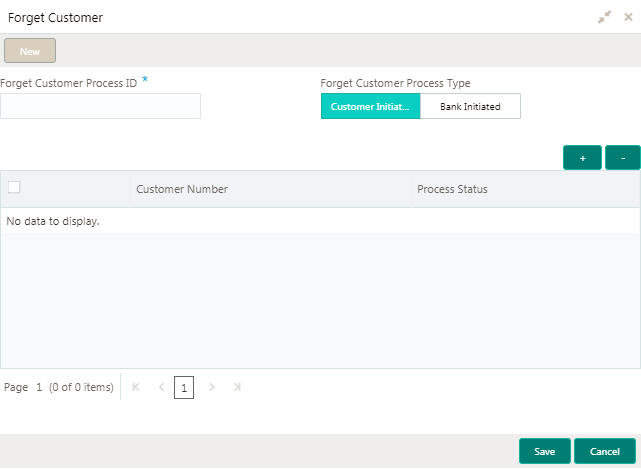
How to add forget customer:
1. In the Forget Customer screen, provide the required details:
● Forget Customer Process ID: Enter the forget customer process ID.
● Forget Customer Process Type: Select one of the options:
– Customer Initiated: If selected, you can initiate the forget option for the customer.
– Bank Initiated: If selected, you can initiate the forget option for the bank.
Note
Depending on the options selected, the grid options appears.
2. Click + to add a row and provide the customer/bank details.
3. Click Save.