3. Operations
3.1 Introduction
Oracle FLEXCUBE allows you to configure Queues, Landing and Sub-stages in the workflow layer to suit your bank’s requirements. It also keeps track of duplication of transactions on the basis of the fields that you indicate.
This chapter contains the following sections:
- Section 3.2, "Configuring Landing Page"
- Section 3.3, "Configuring Queues"
- Section 3.4, "Configuring Sub-Stages"
3.2 Configuring Landing Page
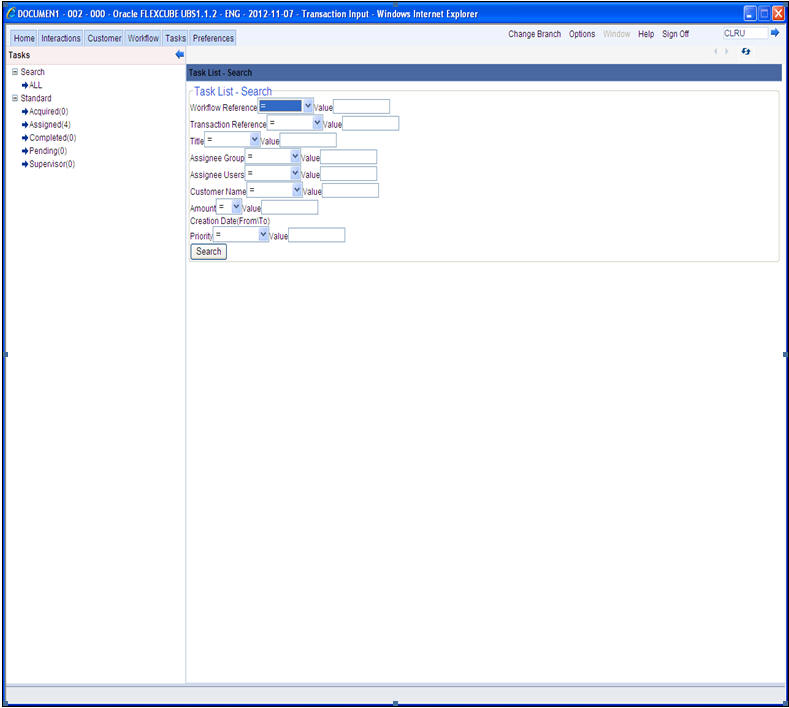
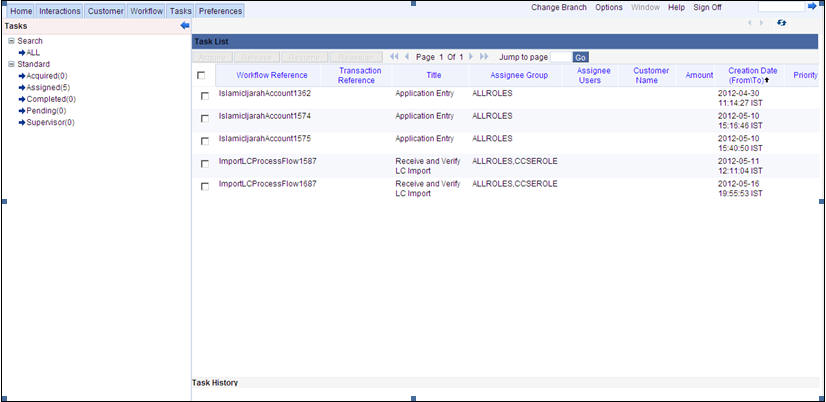
The page that is displayed on invoking the application is called as the ‘Landing Page’. As mentioned above, you can launch a search for a particular task on the basis of the fields displayed in the Task List pane under the ‘All’ sub-menu in the ‘Search’ main menu item. The fields under this sub-menu (All) are pre-defined in the system and represent all process flows. The search fields under the ‘All’ sub-menu are displayed as shown in the screen below:
You can also choose to maintain additional fields for specific process flows, When you maintain additional fields for search operation for a process flow, the process flow is displayed under the ‘Search’ main menu and all the fields (pre-defined and the additional ones maintained for the process flow) become available for you to search on.
You can define the process-flow specific additional fields in the ‘Landing Page Configuration’ screen, which you can invoke by typing SMDLNDPG’ in the field at the top right corner of the Application tool bar and clicking the adjoining arrow button. The following screen is displayed:
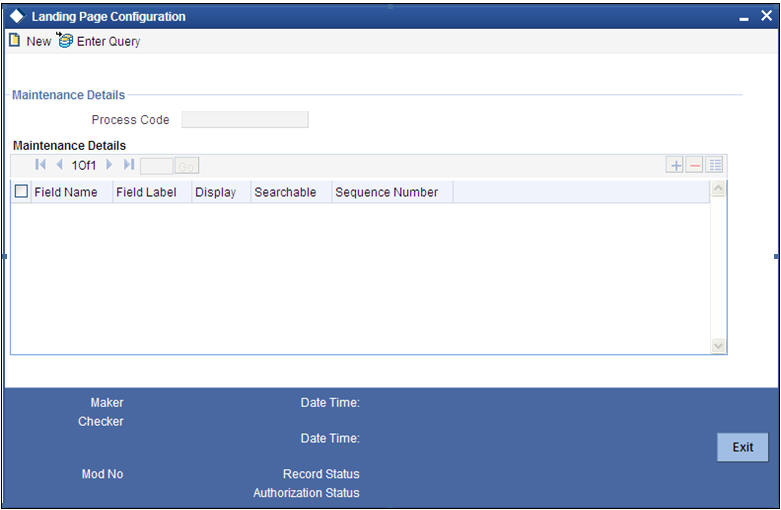
Here, you can capture the following details:
Process Code
Specify the function ID associated with the process work flow for which you are defining additional details.
Field Name
Select the field name which should appear in the Task List pane when you carry out a search for a task under the process flow mentioned above.
Field Label
Specify the name that should be displayed in the Task List pane.
Display
Check this box if the value of the field specified should be displayed as part of task details when you click on a task. This is applicable only when the ‘Process Code’ field is ‘specified as ‘All’.
Searchable
Check this box to indicate that the field should be made available for searching tasks. This facility is available for any ‘Process Code’.
Seq No
Specify the order of display for the filed.
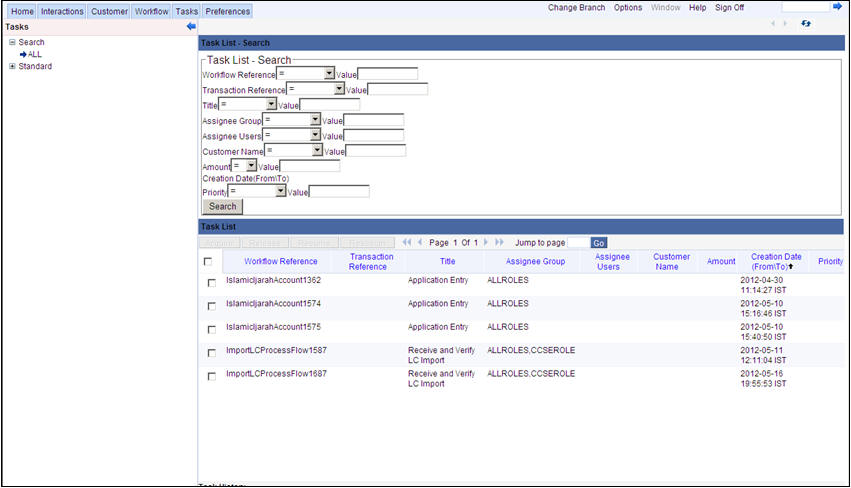
For instance, if you have maintained the fields ‘Currency’ and Product ID as an additional field for the Export LC process flow, you can see these fields along with the ones available under the ‘All’ sub-menu, when you click the ‘Export LC’ queue under the ‘Search’ main menu item as shown in the screen below:
3.3 Configuring Queues
A queue represents a set of human tasks that are grouped on the basis of the common characteristics they share. For instance, you could have groups based on whether the tasks have been completed, deleted or the type of transaction
You can define the basis for grouping for each queue in the ‘Queue Maintenance’ screen. To invoke this screen, type ‘SMDQUEMT’ in the field at the top right corner of the Application tool bar and click the adjoining arrow button. The following screen is displayed:
In this screen, you are required to specify the following details:
Queue ID
Specify a unique identification code for the queue.
Queue Type
Indicate the type of tasks that should be displayed for the queue you are defining. Select one of the following values from the adjoining drop-down list:
- Editable tasks: Tasks where the user will be allowed to modify existing data.
- Read-only Tasks: Tasks where the user can only view existing information.
- Normal Tasks – All the tasks for which the user has rights (editable/read-only)
- Supervisor – All tasks pertaining to the all the subordinates of the user.
- Current stage – The current stage of a process instance in which the user has performed at least one task.
- Dashboard - Select this queue type to define the queue as a dashboard. Dashboard queues will not be displayed in the queue navigation tree in the landing page.
- Audit - Select this option to define this queue as an audit queue.
Sub Queues
The system displays the names of sub queues mapped to this queue.
You can map additional sub queues using ‘Map Sub Queues’ button.
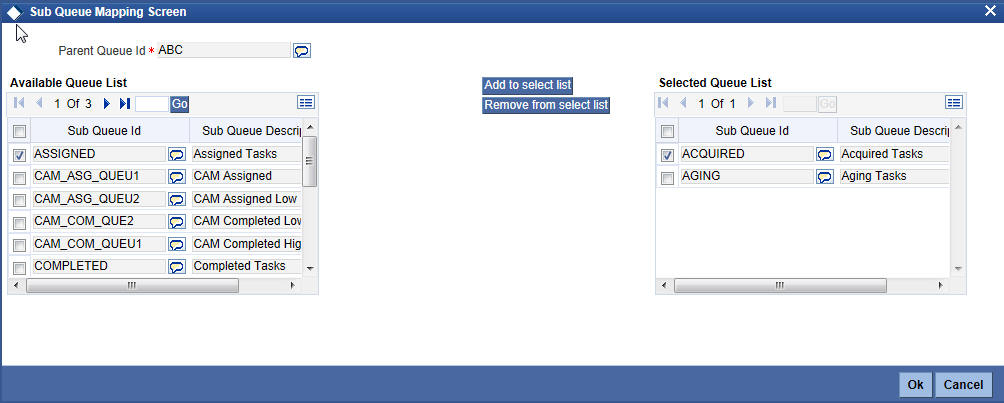
Available Queue List displays the sub queue IDs available for selection. You can add one or more sub queues to the Selected Queue List using ‘Add to select list’ button. Identify the required sub queues, check the adjoining check box and click ‘Add to select list’ button. The selected queues are added to Selected Queue List.
You can also remove a sub queue from the Selected Queue List. From the Selected Queue List, identify the queue to remove, check the adjoining check box and click ‘Remove from select list’ button. The selected queues are removed from the list.
You can view the sub queues under the respective parent queues in the queue navigation tree.
Queue Criteria
Specify the criteria to be used to filter all tasks. The criteria specified here and the queue type you have indicated earlier determine the tasks that are displayed under each queue.
You can also associate Function IDs to queues by specifying them here. If you do so, only those Function IDs that have been associated can be accessed by the user. If there is no such association in the criteria, all Function IDs will be made available for the queue.
Filter Column
Indicate the basis for filtering the tasks.
Operator
Indicate the operator.
Filter Value
Specify the value to be considered for filtering.
Others
If ‘Filter Value’ chosen is ‘Others’, you can specify the value here.
Language Code
Indicate the language code to be used for the queue ID.
Main Menu
Indicate the name of the group under which the queue should be placed.
Sub-Menu
Specify the name for the queue. This will appear under the Main Menu.
Description
Specify a relevant description that will be displayed when you point the mouse on the Sub-Menu.
Workflow places the tasks that meet the criteria specified for each queue as shown below:
3.4 Configuring Sub-Stages
In the BPEL workflow layer, there are several points at which human tasks are generated. These tasks can be further divided into sub-stages which have entry conditions, exit outcomes etc. You can capture these details in the ‘Task Sub Stage Maintenance’ screen. You can invoke this screen by typing ‘SMDSUBST’ in the field at the top right corner of the Application tool bar and clicking the adjoining arrow button. The following screen is displayed:
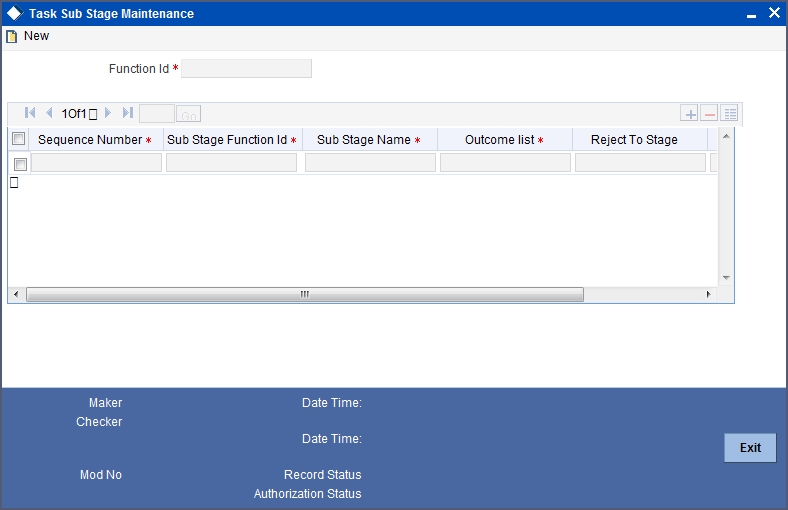
You are required to maintain the following details in this screen:
Function ID
Specify the Function ID associated with the human task for which you are defining sub-stages. The adjoining option list displays all valid function IDs available in the system. You can select the appropriate one.
Seq No
The system displays the sequence number for the current sub-stage.
Sub Stage Function Id
Specify the Function ID for the sub-stage. The adjoining option list displays all valid function IDs available in the system. You can select the appropriate one. The roles and the screen displayed for the sub-stage are fetched accordingly. This can be the same as the main Function ID for the task.
Sub Stage Name
Specify a unique name for the sub-stage.
Outcome List
Specify the possible outcomes allowed for this sub-stage. You can have any of the following:
- MOVENXT: If this is chosen, the current Function ID screen will be closed and the process will move on to the next sub-stage in sequential order
- AUTOMOVENXT: If this option is selected, the task will go to the next stage. The next sub-stage will be acquired automatically (provided the user has the relevant rights). The Function ID of the next sub-stage will be displayed in the screen.
- MOVEPREV: If this is chosen, the task will be moved to the previous stage mentioned or to the sub-stage sequence number specified in the ‘Reject To Stage’ field.
To facilitate this configuration, you need to map the first sub-stage to the Function ID of the human task. Also, you will be allowed to select only the ‘MOVEPREV’ option for the last sub-stage you have defined.
Entry Rule
Specify the conditions that need to be fulfilled for this sub-stage to be initiated. The specification is done in the same syntax as that for the queue configuration. If the criteria specified are satisfied, then the transaction comes to this sub-stage. If not, it moves to the next sub-stage.
Reject To Stage
This is the sub-stage to which a task is sent to in case the task is rejected at any point in the sub-stage process. If you do not specify any value for this, a rejected task will be sent to the previous level.