10. Account Switching Service
Oracle FLEXCUBE allows you to switch from your old account to a new or a different account. You can either transfer the services fully or partially to your new current or savings account using this Account Switching Service. You can initiate the switch service once you have passed all the necessary ID checks with your new bank. The new bank will intimate whether the switch is in progress or if it is rejected.
The following are the two types of account switches:
Full Switch Service - This service also known as Current Account Switch Service (CASS) allows you to transfer all balances and payment arrangements to the new bank and closes the existing account. Any payments that should be made to, or collected from the old account will be redirected to the customer’s new account.
Partial Switch Service - This service allows you to switch selective payment arrangements from old bank. Partial switch service does not include closing of the existing account or transferring all payment arrangements to the new account.
This chapter contains the following sections:
- Section 10.1, "Full Switch Service Process"
- Section 10.2, "Partial Switch Service Process"
- Section 10.3, "Processing Account Switch Service"
10.1 Full Switch Service Process
The following are the steps to process Full Switch service:
- The new bank captures and initiates the account switch information request message.
- The old bank receives and uploads the incoming information request message.
- The old bank performs response action on the incoming request and initiates Information Response message. This can be accept or reject response based on the status.
- The new bank receives and uploads the incoming Information Response message. In case of rejection, the new bank may choose to terminate the request and initiate Terminate message. In case of acceptance, the new bank initiates Request Redirection message.
- The new bank initiates Balance Transfer Request to the old bank on the previous day of the switch date.
- The old bank receives and uploads Balance Transfer Request message.
- On the switch date, the old bank acts on the Balance Transfer Request message to acknowledge the message by calculating the closing balance
- The old bank responds to the balance transfer request through Acknowledge Balance Transfer.
- The old bank initiates the positive balance payment.
- The new bank receives the acknowledge balance transfer message.
- If the closing balance is negative then the new bank initiates the payment to the old bank.
- The new bank sends Switch Complete message.
10.2 Partial Switch Service Process
The following are the steps to process Partial Switch service:
- The new bank captures and initiates the account switch Information Request message indicating the switch type as PARTIAL.
- The old bank receives and uploads the incoming Information Request message.
- The old bank then provides the response along with payment arrangements (Direct Debit and Standing Orders) in the response message.
- The new bank will select the payments to be cancelled by the old bank and initiates cancel payment arrangement message.
- The old bank will receive and upload the incoming cancel payment arrangements message.
10.3 Processing Account Switch Service
This section contains the following topics:
- Section 10.3.1, "Maintaining Account Switching Service Parameters"
- Section 10.3.2, "Viewing Account Switching Service Parameter Details"
- Section 10.3.3, "Maintaining Outgoing Information Request for Account Switching"
- Section 10.3.4, "Account Switching Service Outgoing Message Browser"
- Section 10.3.5, "Account Switching Service Incoming Message Browser"
- Section 10.3.6, "Incoming Information Request and Response Operations"
- Section 10.3.7, "Incoming Request Workflow"
- Section 10.3.8, "Outgoing Request Workflow"
- Section 10.3.9, "Redirecting the Requests"
- Section 10.3.10, "Outgoing Balance Transfer Request and Response"
- Section 10.3.11, "Incoming Balance Transfer Request and Response"
- Section 10.3.12, "Notify Switch Completion"
- Section 10.3.13, "Switch Termination"
- Section 10.3.14, "Cancelling Payment Arrangements"
- Section 10.3.15, "Auto Completion for Partial Switch"
10.3.1 Maintaining Account Switching Service Parameters
You can maintain account switching parameters in Account Switching Service Parameter screen. To invoke this screen type ‘ STDASPRM’ in the field at the top right corner of the Application tool bar and clicking the adjoining arrow button.
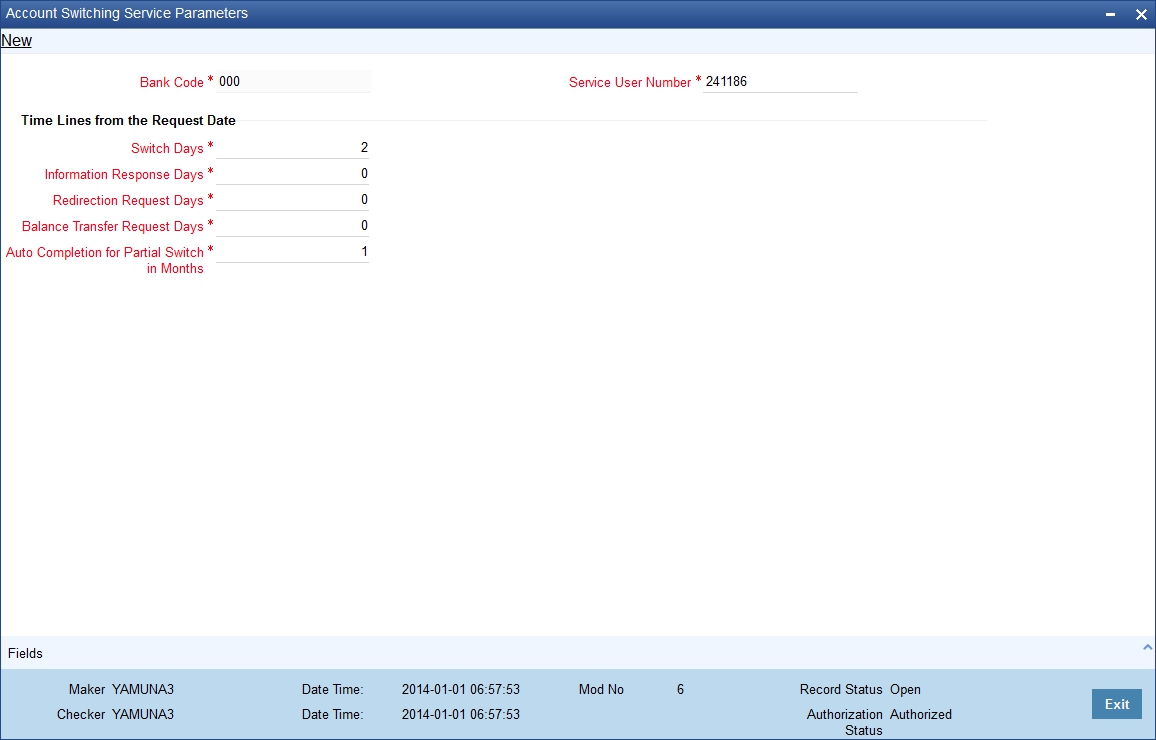
You can maintain the following in this screen:
Bank Code
The system displays the bank code
Service User Name
Specify the service user name. This is a 6 digit service user number allocated by Bacs member bank for current account switching.
Time Lines from the Request Date
Switch Days
Specify the number of branch working days within which the switch process should be completed for full switch service.The system calculates the switch date by adding the switch days to request booking date.
Information Response Days
Specify the number of branch working days within which the bank should respond to the information request. Information response days should be less than redirection request days
Redirection Request Days
Specify the number of branch working days on which the new bank should send redirection request to the Account Switching Service. Redirection request days should be less than balance transfer request days but greater than information response days.
Balance Transfer Request Days
Specify the number of branch working days on which the balance transfer request should be raised by the new bank. Balance transfer request days should be less than switch days but greater than redirection request days.
Auto Completion for Partial Switch
Specify the number of months on which the system will automatically process the action on partial switch request.
10.3.2 Viewing Account Switching Service Parameter Details
You can view the account switching parameter details maintained in the Account Switching Service Parameter screen. You can invoke this screen by typing ‘STSASPRM’ in the field in the top right hand corner of the application toolbar and clicking on the adjoining arrow button.

In the above screen, you can base your queries on any of the following parameters and fetch records-
- Authorization Status
- Record Status
- Bank Code
- Service User Number
- Switch Days
- Information Response Days
- Redirection Request Days
- Balance Transfer Request Days
- Auto Completion for Partial Switch in Months
Select any or all of the parameters for a query and click ‘Search’ button. The records meeting the selected criteria are displayed.
10.3.3 Maintaining Outgoing Information Request for Account Switching
You can capture the data required for sending the Information Request message in ‘Account Switching Service - Outgoing Information Request and Response’ screen. To invoke this screen type ‘ STDASORQ’ in the field at the top right corner of the Application tool bar and clicking the adjoining arrow button.
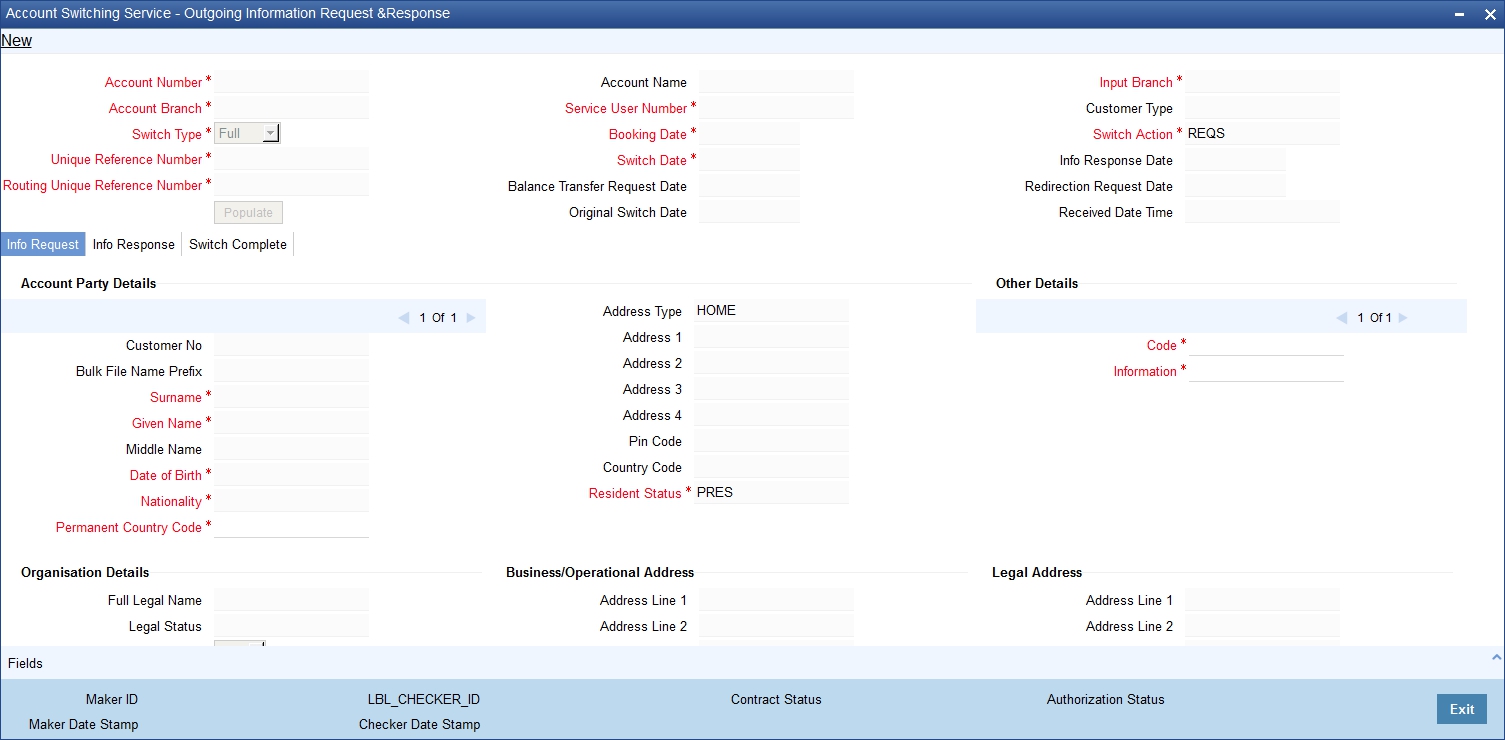
You can specify the following in this screen:
Branch Code
The system displays the branch code.
Account Number
Select the account number to which account switching from old account is required. Alternatively, you can select the account number from the option list. The list displays all valid account numbers maintained in the system.
Switch Type
Select the account switching service type from the drop-down list. The list displays the following values:
- FULL - Full Switch Service
- PARTIAL - Partial Switch Service
Click ‘Populate’ to display the following details:
- Unique Reference Number
- Routing Unique Reference No
- Account Name
- Service User Number
- Booking Date
- Switch Date
- Balance Transfer Request Date
- Original Switch Date
- Customer Type
- Switch Action
- Info Response Date
- Received Date Time
- Switch Service Status
10.3.3.1 Info Request Tab
The system displays the following details based on the values maintained in Customer Maintenance (STDCIF) screen:
Account Party Details
- Prefix
- Surname
- Given Name
- Middle Name
- Date of Birth
- Nationality
- Resident Status
If the account is a joint account then the details of all the account holders will be defaulted in the account party details.
Postal Address
- Address Type
- Address 1 - 4
- Pin Code
- Country Code
Other Details
Code
Specify the code. Alternatively, you can select the code from the option list. The list displays all valid options.
Information
Specify the information. Alternatively, you can select the information from the option list. The list displays all valid options.
Organizational Details
Full Legal Name
The system defaults the full legal name based on Customer Maintenance screen.
Legal Status
Select the legal status from the drop-down list. The list displays the following values:
- IAPS - Industrial and Provident Society
- PCLS - Private company limited by shares (Ltd.)
- PCLG - Private company limited by guarantee (Ltd.)
- PCLC - Public limited company (Plc.)
- GENP - General partnership
- LLPP - Limited liability partnership (LLP)
- LIMP - Limited partnership (LP)
- UNLC - Unlimited company
- UNLT - Unlimited trust
- CICC - Community Interest Company (CIC)
- CIOC - Charitable Incorporated Organisation (CIO)
- SOLE - Sole proprietorship/Sole trader
- CHAR – Charity
Board Resolution Indicator
Select the board resolution indicator from the drop-down list. The list displays the following values:
- Yes
- No
The system displays the following details based on the Customer Maintenance screen:
Business Address/Operational Address
- Address 1-4
- Pin Code
- Country Code
Legal Address
- Address Line 1 - 4
- Pin Code
- Country Code
Old Account Details
Account Number
Specify the account number of the old bank that you want to switch.
Account Name
Specify the name as in the old account.
Financial Institution Member ID
Specify the member ID of the financial institution. Alternatively, you can select the member ID from the option list. The list displays all valid bank codes maintained in the Bank Directory Maintenance (PCDBNKMT) screen.
The system displays an error message if the ‘Account Switch Participant’ check box in Bank Directory Maintenance screen is not enabled for the selected financial institution member ID.
Others
Funding Limit
Specify the amount that new bank covers for the negative balance of the old account.
Funding Limit Currency
The system displays the currency of the funding limit amount.
Balance Transfer Window
Specify the processing window in which the balance transfer will be processed on the switch date.
Message Details
The details about the message.
Technical Rejection Details
Response Code
The system displays the response code for technical rejection.
Additional Information
The system displays additional information, if any, on the response code.
10.3.3.2 Info Response Tab
Information response message from the old bank is uploaded and displayed in the Info response tab of Account Switching Outgoing Information Request Input (STDASORQ) screen. Click ‘Info Response’ tab of Account Switching Outgoing Information Request screen to view the below screen.
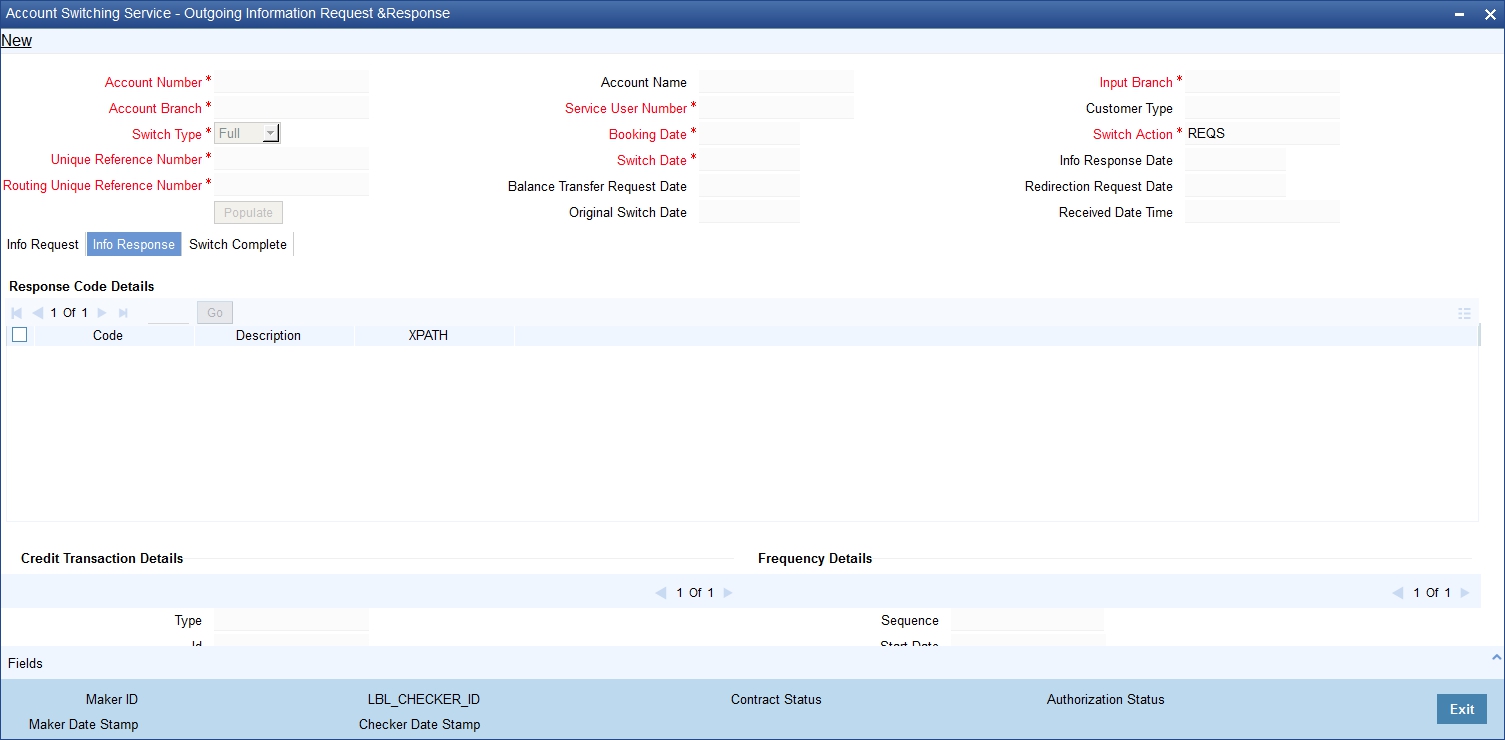
The system displays the following details in Info Response tab:
Response Code Details
- Code
- Description
- X PATH
Credit Transaction Details
- Type
- ID
- Transferable
- Tax Rt Marker
- Credit Account
- Credit Account Name
- Financial Institution Member ID
- Other Details Code
- Other Details Description
Frequency Details
- Sequence
- Start Date
- No of Payments
- Last Payment Date
- Required Freq Pattern
- Amount
- Currency
Direct Debit Details
- Mandate ID
- Automated DD Instruction
- Transferable
- Name
- Organisation ID
- Message ID
- Last Collection Date
- Last Collection Amount
- Last Collection Currency
- Other Details Code
- Other Details Description
- Creation Date Time
10.3.3.3 Switch Complete Tab
The switch complete notification message will be displayed in the switch complete tab. Click ‘Switch Complete’ tab in the Account Switching Outgoing Information Request Input screen to view the following screen.
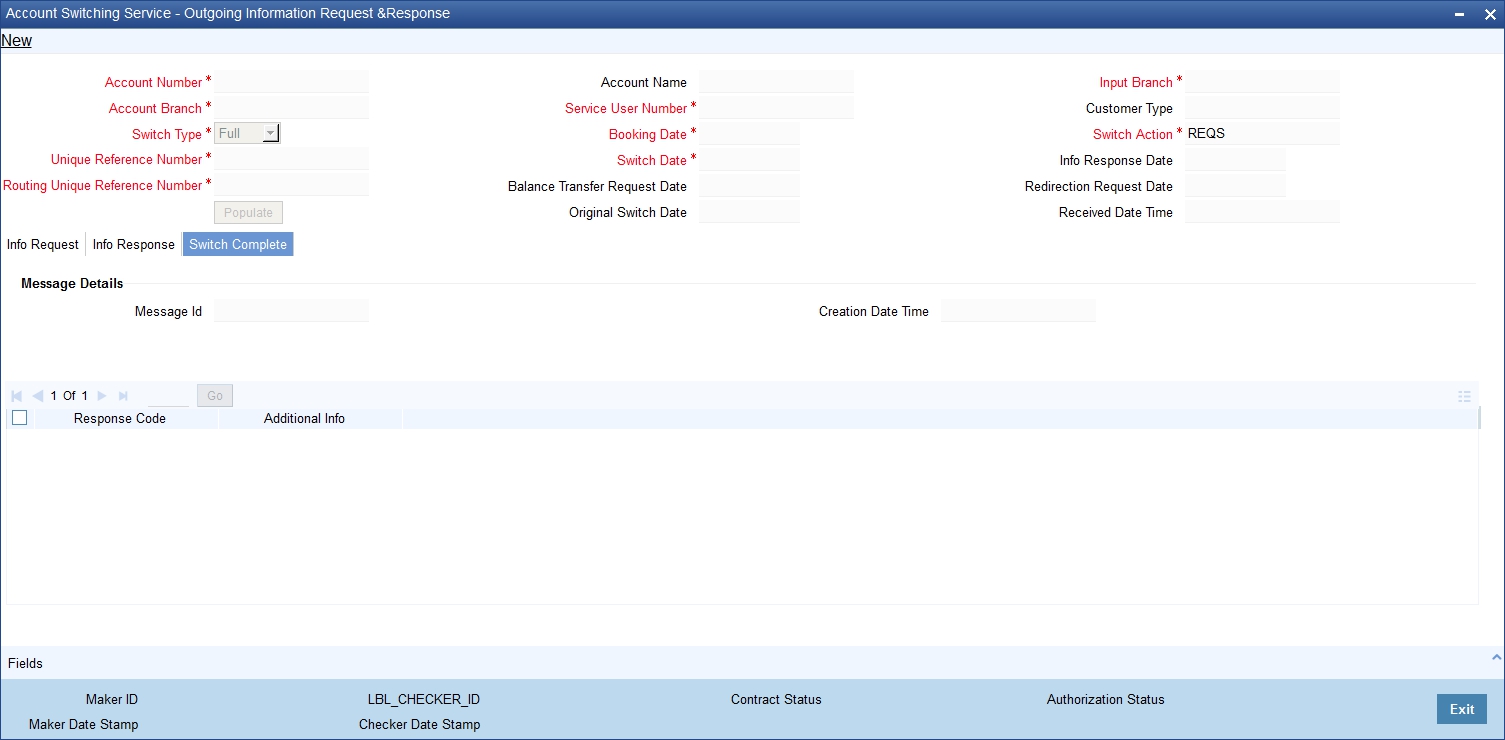
The system displays the following details in this screen:
- Message ID
- Creation Date Time
Technical Rejection Details
- Response Code
- Additional Information
The system uploads the technical rejection on outgoing information request based on the unique reference number with switch action as TRJT. Once the request is marked as TRJT, then further actions are not allowed in this request. You need to create a new request with new unique reference number.
10.3.3.4 Outgoing Information Request Messaging
You can generate the outgoing information request message by configuring intra day or end of day batch. All the authorized outgoing information request records with ‘Switch Action’ as REQS will be generated through this batch process.
A message ID in the following format is generated and stored in the Account Switching Outgoing Message Browser:
- Position1 to 6 - Service User Number
- Position 7 to 8 - 2 digits year
- Position 9 to 11 - 3 digits day of year (001 to 366)
- Position 12 to 13 - 2 digits Message number. For Information Request Message it is 01
- Position 14 to 28 - 15 characters. Unique Reference Number by stripping the SWI and having only F or P as the first character.
- Position 29 to 35 - 6 digits running sequence number
10.3.3.5 Uploading Incoming Information Response Message
The incoming information message from the old bank is processed from Account Switching Service Incoming Message Browser. This message is uploaded to Account Switching Service Incoming Information Request (STDASORQ) of the account branch.
During the upload if a response code W401 is generated and if switch date is modified, then system updates the switch date as in the message.
10.3.4 Account Switching Service Outgoing Message Browser
You can view the outgoing messages and its status in ‘Account Switching Service Outgoing Message Browser’ screen. To invoke this screen type ‘STSASIMS’ in the field at the top right corner of the Application tool bar and click the adjoining arrow button.

You can view the following in this screen:
Unique Reference Number
Select the unique reference number of the account switch request.
Account Number
Select the account number for which account switching is initiated.
Generated Status
Select the status of the message.
Message Type
Select the message type from the drop-down list. The list displays the following values:
- Acmt.027
- Acmt.028
- Acmt.029
- Acmt.030
- Acmt.031
- Acmt.032
- Acmt.033
- Acmt.036
- Acmt.037
Select any of the above parameters. The records meeting the selected criteria are displayed.
- Unique reference Number
- Message ID
- Message Type
- Account Number
- Status
- Message
- Error Reason
10.3.5 Account Switching Service Incoming Message Browser
You can view and upload the incoming account switching service in the ‘Account Switch - Incoming Message Browser’ screen. To invoke this screen type ‘STSASIMS’ in the field at the top right corner of the Application tool bar and click the adjoining arrow button.

You can view the following details in this screen:
Processing Date
The system displays the date on which the message is picked for processing.
The system displays the following details depending upon the file name and processing date:
- Message ID
- Unique Reference Number
- Message
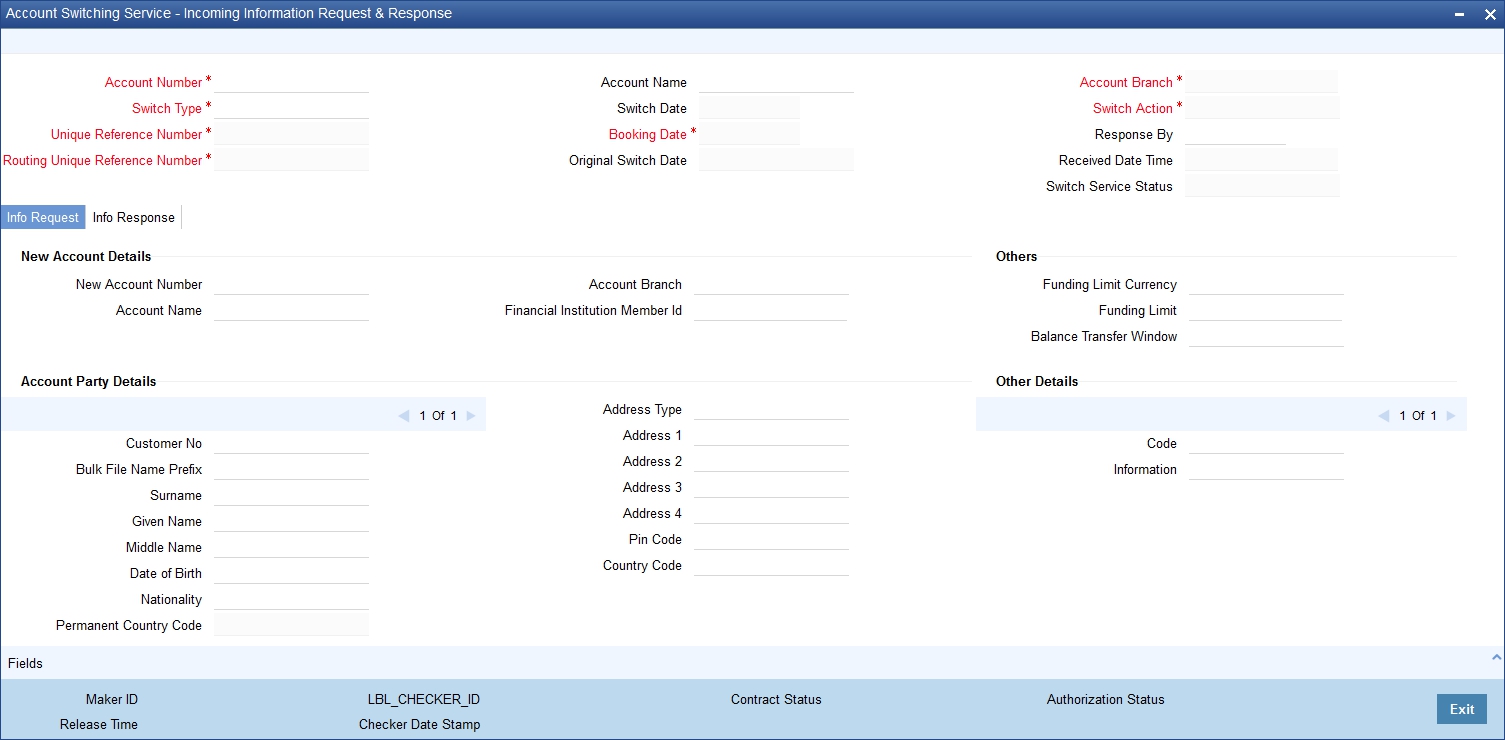
10.3.6 Incoming Information Request and Response Operations
You can view and respond to the information request details received from the new bank through Account Switching Service - Incoming Information Request and Response screen. You can opt to accept or reject an incoming information request. To invoke this screen type ‘STDASIRQ’ in the field at the top right corner of the application toolbar and click the adjoining arrow button.
You can view the following details in this screen:
Branch Code
The system displays the branch code.
Account Number
The system displays the account number from which account switching is required.
Account Name
The system displays the account name.
Switch Type
The system displays the account switching service type.
Unique Reference Number
The system displays the unique reference number.
Routing Unique Ref No.
The system displays the routing unique reference number.
Switch Date
The system displays the date on which the switch process will be completed.
Booking Date
The system displays the booking date.
Original Switch Date
The system displays the original switch date.
Switch Action
The system displays the action code during the course of full switch workflow process.
Response by
The system displays the date on which the response to the information request is expected.
Received Date Time
The system displays the message received date and time.
Switch Service Status
The system displays the switch status.
10.3.6.1 Info Request Tab
New Account Details
Account Number
Specify the account number of the old bank that has to be switched.
Account Name
Specify the account name as in the old bank.
Financial Institution Member ID
Specify the bank code of the old bank.
Others
Funding Limit
Specify the amount that the new bank covers for the negative balance of the old account.
The system displays the following details in this tab:
- Funding Limit Currency
- Balance Transfer Window
Account Party Details
- Prefix
- Surname
- Given Name
- Middle Name
- Date of Birth
- Nationality
Postal Address
- Address Type
- Address 1- 4
- Pin Code
- Country Code
Other Details (2)
- Code
- Information
Organization Details
- Legal Name
- Legal Status
Business Address
- Address Line 1 - 4
- Pin Code
- Country Code
Operational Address
- Address Line 1 - 4
- Pin Code
- Country Code
Legal Address
- Address Line 1- 4
- Pin Code
- Country Code
Message Details
- ID
- Creation Date Time
10.3.6.2 Info Response Tab
You can Click ‘Info Response’ tab to view the following screen.
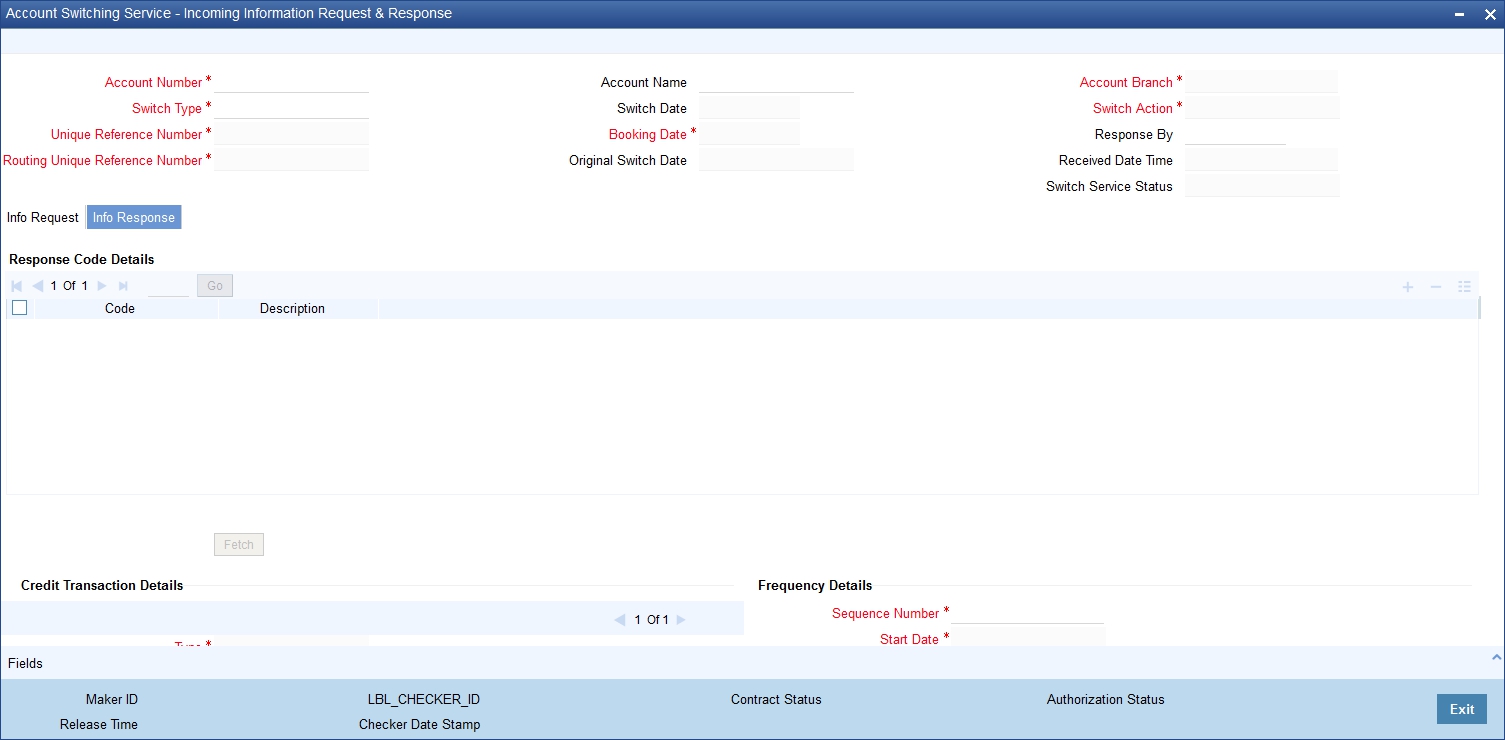
Response Code Details
Code
Specify account switching service response code. Alternatively, you can select the response code from the option list. The list displays all valid response codes in the system.
Description
The system displays the account switching service response code description.
Click ‘Fetch’ to fetch the credit transaction and direct debit details from the system for the account number.
Credit Transaction Details
You can view the following details in this section:
- Type
- ID
- Credit Account
- Credit Account Name
- Financial Institution Member ID
Transferable
Check this box to transfer the credit payment arrangement.
Tax Rate Maker
Specify the tax rate marker.
Other Details Code
Specify the details of non-transferable credit payment arrangement.
Other Details Description
Specify the details of non-transferable credit payment arrangement
Frequency Details
Sequence
Specify the sequence number.
Start Date
Specify the date of the first payment to be made for this payment schedule as defined by the Schedule Code (PSC070) and its associated parameters.
No of Payments
The system displays the number of patterns.
Last Payment Date
The system displays the last payment date.
Required Freq Pattern
Specify the required frequency pattern.
Amount
The system displays the payment amount.
Currency
The system displays the payment currency.
Direct Debit Details
Mandate ID
The system displays the mandate ID.
Automated DD Instruction
Indicate if the Direct Debit Instructions are automated or not. The options are ‘Yes’ or ‘No’.
Transferable
Check this box to transfer the direct debit instruction.
Name
Specify the counter party name from Debtor Direct Debit Details.
Organization ID
Specify the organization ID.
Message ID
The system displays the message ID.
Last Collection Date
The system displays the date of the most recent collection.
Last Collection Amount
The system displays the most recent collection amount.
Last Collection Currency
The system displays the most recent collection currency.
Other Details Code
Specify the details of the non-transferable direct debit instruction.
Other Details Info
Specify the details of the non-transferable direct debit instruction.
Creation Date Time
The system displays the message creation date and time.
Technical Rejection Details
The system displays the following technical rejection details:
- Response Code
- Additional Information
The system uploads the technical rejection based on the unique reference number with switch action as TRJT. The response action ‘Accept’ or ‘Reject’ is allowed again when the information response is marked as TRJT.
10.3.6.3 Outgoing Information Response Message
You can generate the outgoing information response message by configuring intra day or end of day batch. All the authorized outgoing information response records with ‘Switch Action’ as ACCT or REJT will be generated through this batch process.
A message ID in the following format is generated and stored in the Account Switching Outgoing Message Browser:
- Position1 to 6 - Service User Number
- Position 7 to 8 - 2 digits year
- Position 9 to 11 - 3 digits day of year (001 to 366)
- Position 12 to 13 - 2 digits Message number. For Information Response Message it is 02
- Position 14 to 28 - 15 characters. Unique Reference Number by stripping the SWI and having only F or P as the first character.
- Position 29 to 35 - 6 digits running sequence number
10.3.7 Incoming Request Workflow
You can query records, view the details of a record, accept, reject or acknowledge balance transfer actions through ‘Account Switching Incoming Request Workflow’ screen. To invoke this screen type ‘STSASIRW’ in the field at the top right corner of the application toolbar and click the adjoining arrow button.

In the above screen, you can base your queries on any or all of the following parameters and fetch records:
- Unique Reference Number
- Account Number
- Account Name
- Switch Type
- Switch Date
- Switch Status
The system displays the following details depending upon the selection criteria:
- Unique Reference Number
- Account Number
- Switch Type
- Switch Status
- Previous Switch Action
- Next Action Due
10.3.8 Outgoing Request Workflow
You can query and process or terminate an outgoing request through Account Switching Outgoing Request Workflow screen. To invoke this screen type ‘STSASORW’ in the field at the top right corner of the application toolbar and click the adjoining arrow button.

In the above screen, you can base your queries on any or all of the following parameters and fetch records::
- Unique Reference Number
- Account Number
- Account Name
- Switch Type
- Switch Date
- Switch Status
The system displays the following details depending upon the selection criteria:
- Unique Reference Number
- Account Number
- Switch Type
- Switch Status
- Previous Switch Action
- Next Action Due
10.3.9 Redirecting the Requests
You can redirect a request through Account Switching Redirection Request screen. To invoke this screen type ‘STDASRDT’ in the field at the top right corner of the application toolbar and click the adjoining arrow button. The request can be redirected from Outgoing Workflow screen. If the Switch Status of a record is ACCT or TRJT, then the next action is request redirection.
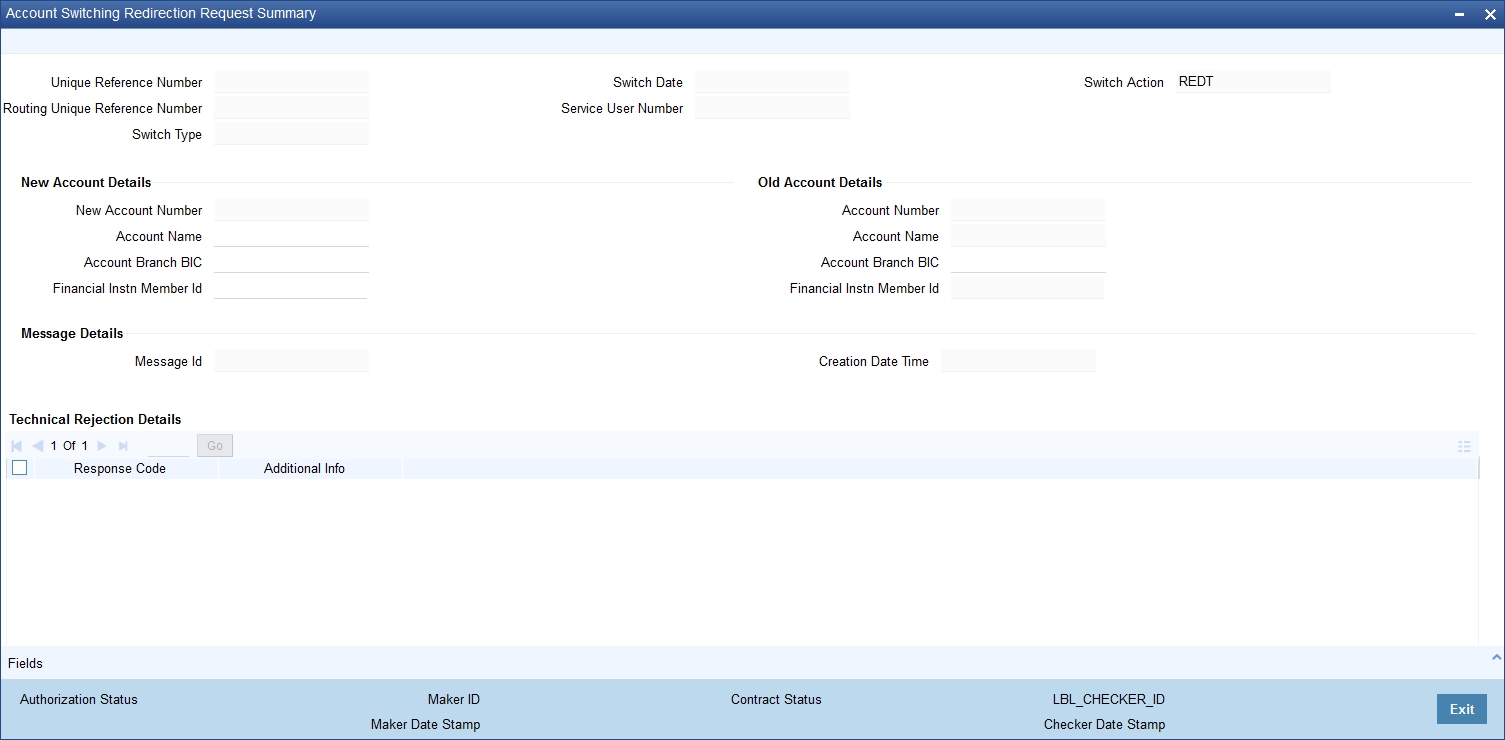
You can view the following details in this screen:
- Unique Reference Number
- Routing Unique Ref No
- Switch Type
- Switch Date
- Service User Number
- Switch Action
New Account Details
- Account Number
- Account Name
- Account Branch BIC
- Financial Institution Member ID
The system allows you to modify the defaulted account number.
Old Account Details
- Account Number
- Account Name
- Financial Institution Member ID
Account Branch BIC
Specify the BIC of the old account.
Message Details
- ID
- Creation Date Time
Technical Rejection Details
- Response Code
- Additional Information
The system uploads the technical rejection based in the unique reference number and switch action ‘TRJT’. The next action as Request Redirection will be allowed again when the previous redirection request is marked as TRJT.
10.3.9.1 Request Redirection Message
You can generate the outgoing request redirection message by configuring it as intra day or end of day batch. All the authorized redirection request records with ‘Switch Action’ as REDT will be generated through this batch process.
A message ID in the following format is generated and stored in the Account Switching Outgoing Message Browser:
- Position1 to 6 - Service User Number
- Position 7 to 8 - 2 digits year
- Position 9 to 11 - 3 digits day of year (001 to 366)
- Position 12 to 13 - 2 digits Message number. For Information Request Message it is 04
- Position 14 to 28 - 15 characters. Unique Reference Number by stripping the SWI and having only F or P as the first character.
- Position 29 to 35 - 6 digits running sequence number
10.3.10 Outgoing Balance Transfer Request and Response
You can initiate the balance transfer request to the old bank through ‘Account Switching Balance Transfer Request’ screen. To invoke this screen type ‘STDASOBQ’ in the field at the top right corner of the application toolbar and click the adjoining arrow button.
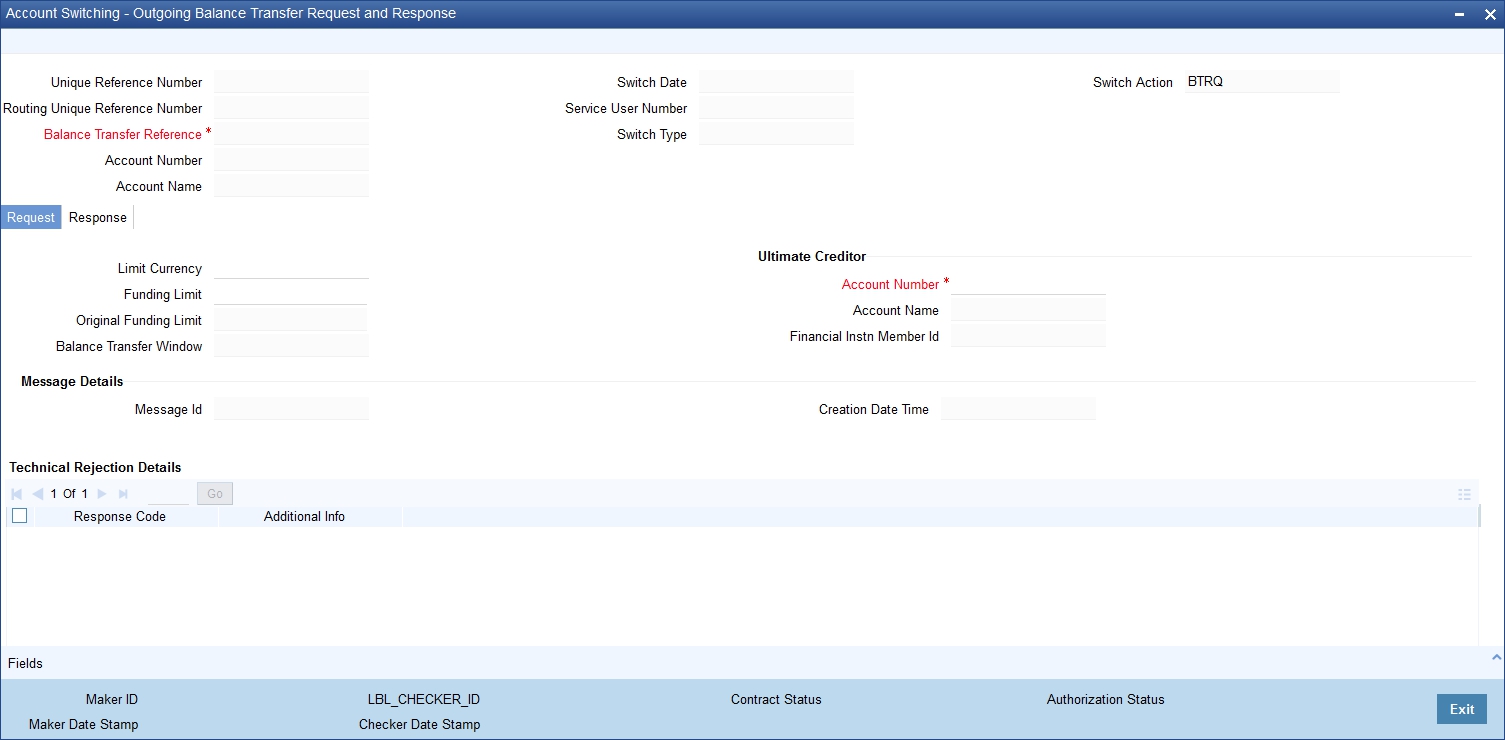
You can view the following details in the Balance Transfer Request message:
- Unique Reference Number
- Routing Unique Ref No
- Balance Transfer Reference
- Account Number
- Account Name
- Switch Date
- Service User Number
- Switch Type
- Switch Action
10.3.10.1 Request Tab
Original Funding Limit
The system displays the original funding limit based on Account Switching Outgoing Information Request and Response screen.
Original Funding Limit Currency
The system displays the original funding limit currency.
Funding Limit
The system displays the funding limit. You can modify this. Funding limit cannot be less than the original funding limit.
Balance Transfer Window
The system displays the balance transfer window.
Ultimate Creditor Details
Account Number
The system displays the account number. You can modify it.
The system displays the following details:
- Account Name
- Financial Institution Member ID
- Message ID
- Creation Date Time
10.3.10.2 Response Tab
The incoming acknowledge balance transfer message will be processed from the Account Switching Service Incoming Message Browser. The message will be decomposed and uploaded into the Account Switching Outgoing Balance Transfer Request and Response of the account branch. You can view the message data in the response tab. Click ‘Response’ tab in the Account Switching Balance Transfer Request and Response screen.
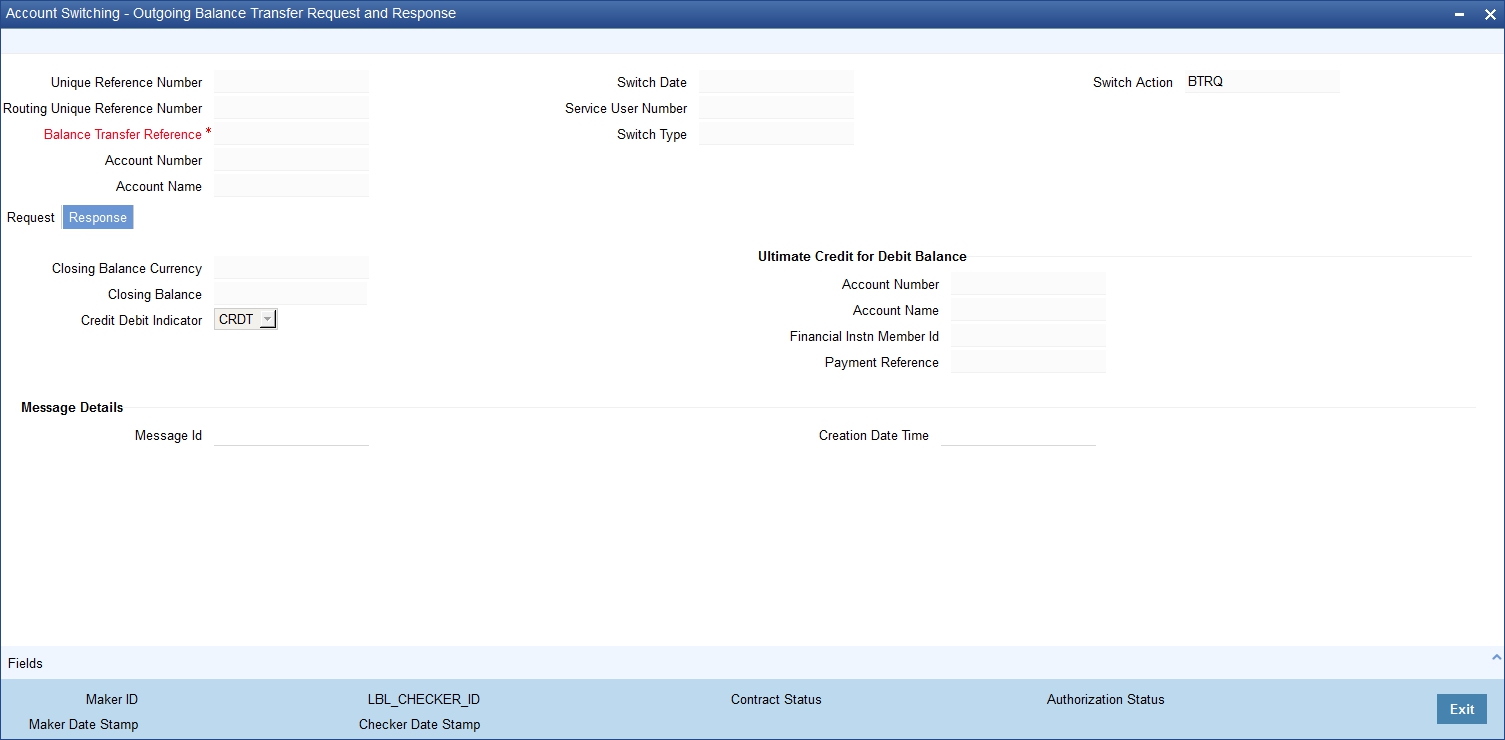
You can view the following details:
- Closing Balance
- Credit Debit Indicator
- Ultimate Creditor for Debit Balance
- Account Number
- Account Name
- Financial Institution Member ID
- Payment Reference Number
- Message ID
- Creation Date Time
Technical Rejection Details
- Response Code
- Additional Information
The system uploads the technical rejection based on the unique reference number and switch action TRJT. The next action as Balance Transfer Request will be allowed again when the Balance Transfer Request is marked as TRJT. You can then resubmit the balance Transfer request.
10.3.10.3 Outgoing Balance Transfer Message
You can generate the outgoing balance transfer request by configuring intra day or end of day batch. All the authorized balance transfer records with ‘Switch Action’ as BTRQ will be generated through this batch process.
A message ID in the following format is generated and stored in the Account Switching Outgoing Message Browser:
- Position1 to 6 - Service User Number
- Position 7 to 8 - 2 digits year
- Position 9 to 11 - 3 digits day of year (001 to 366)
- Position 12 to 13 - 2 digits Message number. For Information Request Message it is 05
- Position 14 to 28 - 15 characters. Unique Reference Number by stripping the SWI and having only F or P as the first character.
- Position 29 to 35 - 6 digits running sequence number
10.3.11 Incoming Balance Transfer Request and Response
You can initiate acknowledgement response for Balance Transfer Request through Account Switching Incoming Balance Transfer request and Response. To invoke this screen type ‘STDASIBQ’ in the top right corner of the application toolbar and click the adjoining arrow button.
Acknowledge Balance Transfer is allowed for only FULL switch type and for previous switch actions like BTRQ and TRJT. The Incoming Balance Transfer Request and Response screen will be opened in unlock mode with switch action as BTRS. The system performs the existing account closure checks for the account number.if acknowledge balance transfer is not as part of the switch action TRJT.
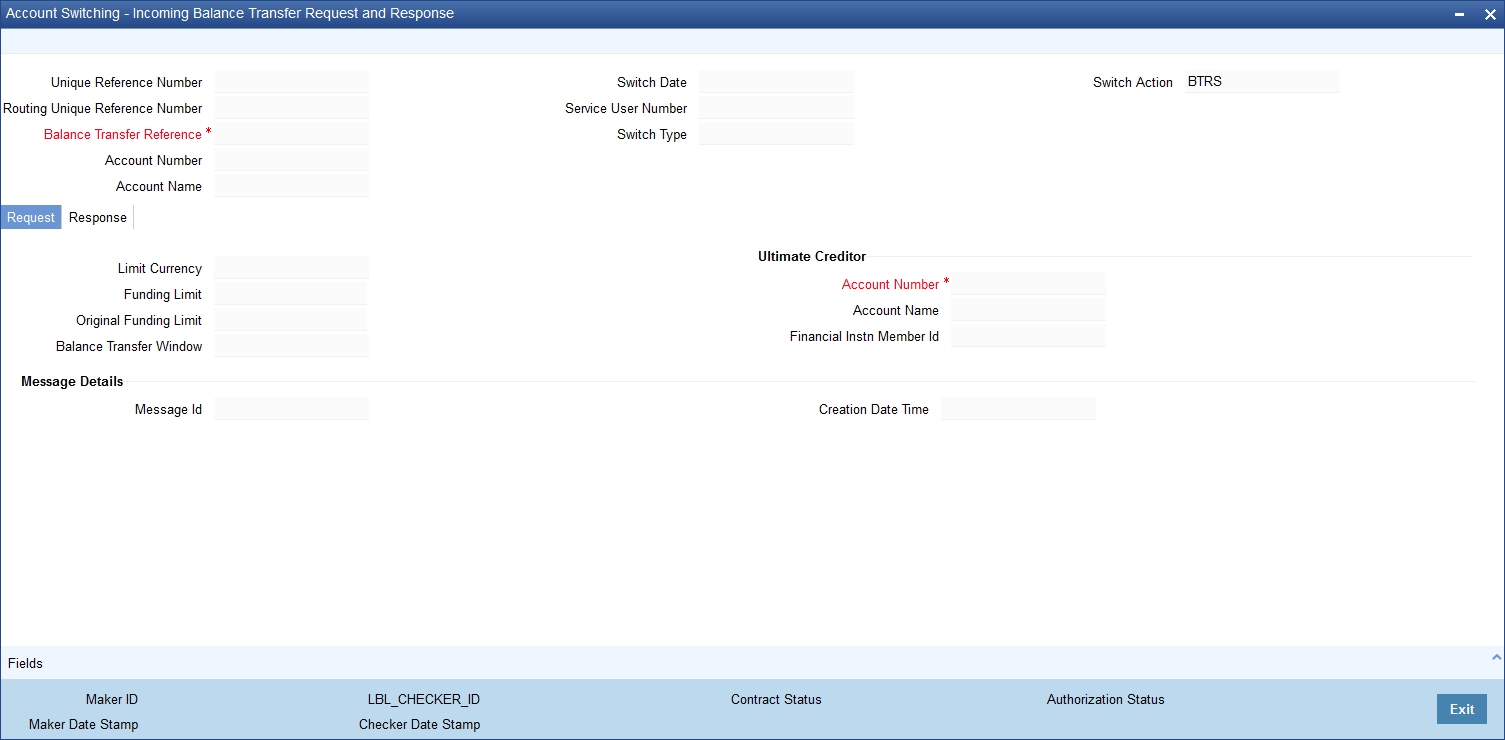
You can view the following incoming balance transfer request details in this screen:
- Unique Reference Number
- Routing Unique Ref No
- Balance Transfer Reference
- Account Number
- Account Name
- Switch Date
- Service User Number
- Switch Type
- Switch Action
10.3.11.1 Request Tab
The incoming balance transfer request message is processed from the Account Switching Service Incoming Message Browser. The message will be decomposed and uploaded into the Account Switching Incoming Balance Transfer Request and Response of the account branch. You can view the following message data in the Request tab of Account Switching Incoming Balance Transfer Request and Response screen.
- Original Funding Limit
- Original Funding Limit Currency
- Funding Limit
- Balance Transfer Window
Ultimate Creditor for Positive Balance
- Account Number
- Account Name
- Financial Institution Member ID
- Message ID
- Creation Date Time
10.3.11.2 Response Tab
Click ‘Response’ tab in the Account Switching Incoming Balance Transfer Request and Response screen.
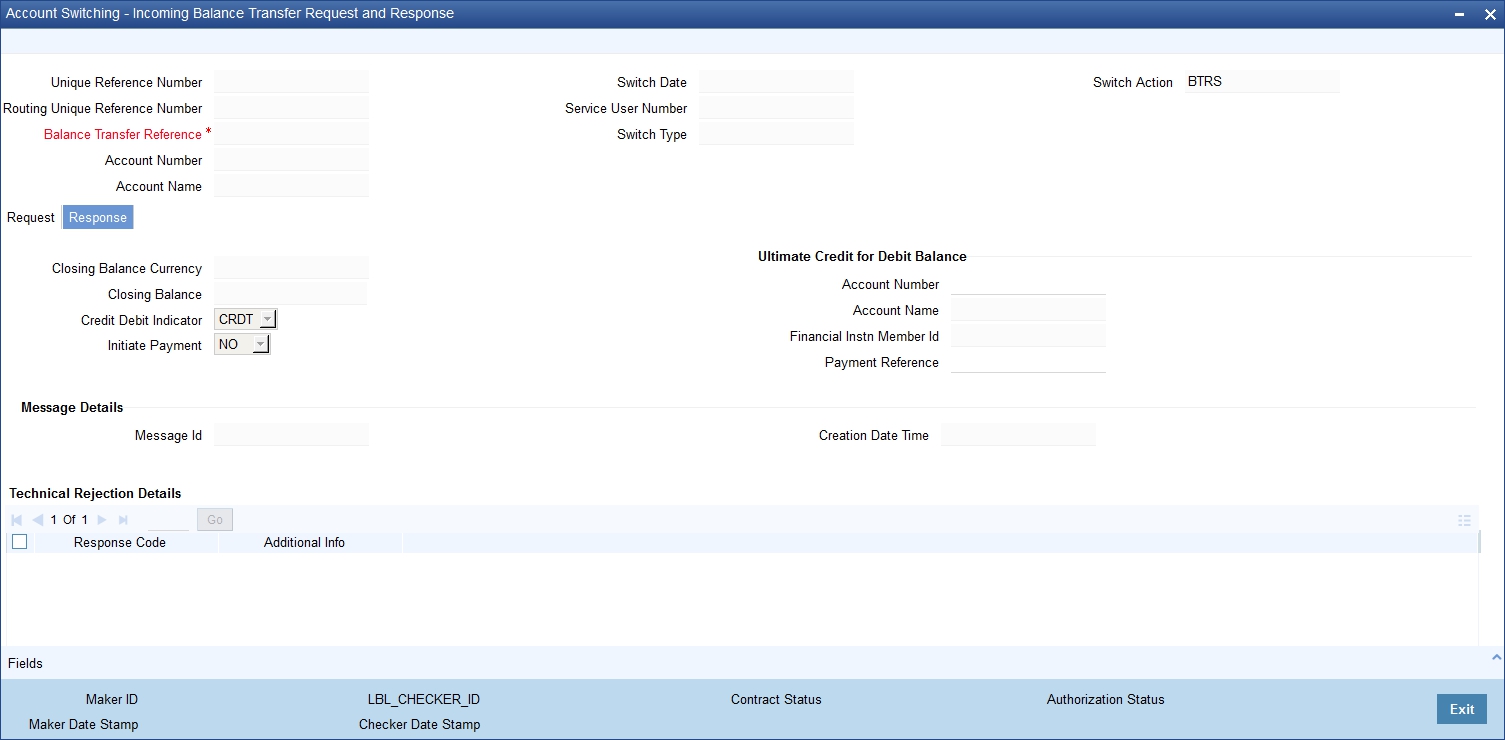
You can view the following details:
- Closing Balance
- Closing Balance Currency
- Credit Debit Indicator
- Initiate Payment
Ultimate Creditor for Debit Balance
- Account Number
- Account Name
- Financial Institution Member ID
- Payment Reference Number
- Message ID
- Creation Date Time
Technical Rejection Details
- Response Code
- Additional Information
The system uploads the technical rejection on acknowledge balance transfer message based on the unique reference number and switch action ‘TRJT’. To resubmit the acknowledge balance transfer, the response action Acknowledge Balance Transfer will be allowed again when the previous acknowledge response is marked as TRJT.
10.3.11.3 Acknowledge Balance Transfer Message
You can generate the outgoing acknowledge balance transfer message by configuring intra day or end of day batch. All the authorized balance transfer response records with ‘Switch Action’ as BTRQ will be generated through this batch process.
A message ID in the following format is generated and stored in the Account Switching Outgoing Message Browser:
- Position1 to 6 - Service User Number
- Position 7 to 8 - 2 digits year
- Position 9 to 11 - 3 digits day of year (001 to 366)
- Position 12 to 13 - 2 digits Message number. For Acknowledge Balance transfer Message it is 06
- Position 14 to 28 - 15 characters. Unique Reference Number by stripping the SWI and having only F or P as the first character.
- Position 29 to 35 - 6 digits running sequence number
10.3.12 Notify Switch Completion
You can complete the switch action from Account Switching Outgoing Request Workflow if the switch actions are ‘BTRS’ and ‘TRJT’.Switch complete action can be performed only after receiving the payment or initiating the payment. You have to update the switch action as ‘COMP’ in Account Switching Outgoing Information Request and Response (STDASORQ) screen to complete the switch action.
10.3.12.1 Outgoing Switch Complete Message
You can generate the outgoing switch complete message by configuring it as intra day or end of day batch. All the authorized records with ‘Switch Action’ as COMP will be generated through this batch process.
A message ID in the following format is generated and stored in the Account Switching Outgoing Message Browser:
- Position1 to 6 - Service User Number
- Position 7 to 8 - 2 digits year
- Position 9 to 11 - 3 digits day of year (001 to 366)
- Position 12 to 13 - 2 digits Message number. For Switch Complete Message it is 07
- Position 14 to 28 - 15 characters. Unique Reference Number by stripping the SWI and having only F or P as the first character.
- Position 29 to 35 - 6 digits running sequence number
10.3.12.2 Technical rejection on Switch Complete Message
The system uploads technical rejection on Switch Complete message based on the unique reference number and switch action TRJT. To resubmit the switch complete message, the next action Switch Complete will be allowed again when the Switch Complete is marked as TRJT.
10.3.13 Switch Termination
You can terminate a switch anytime after the Information Request input. If switch termination action is done before generating the Information Request message, then the system populates the switch action as ‘CANC’ indicating that the Information Request is cancelled.
If the switch termination action is done after generation of Information Request, then the system populates the switch action as ‘TERM’ and will open the Account Switching Termination screen to capture the response code. You can invoke this screen by typing ‘STDASTRM’ in the field at the top right corner of the application toolbar and click the adjoining arrow button.
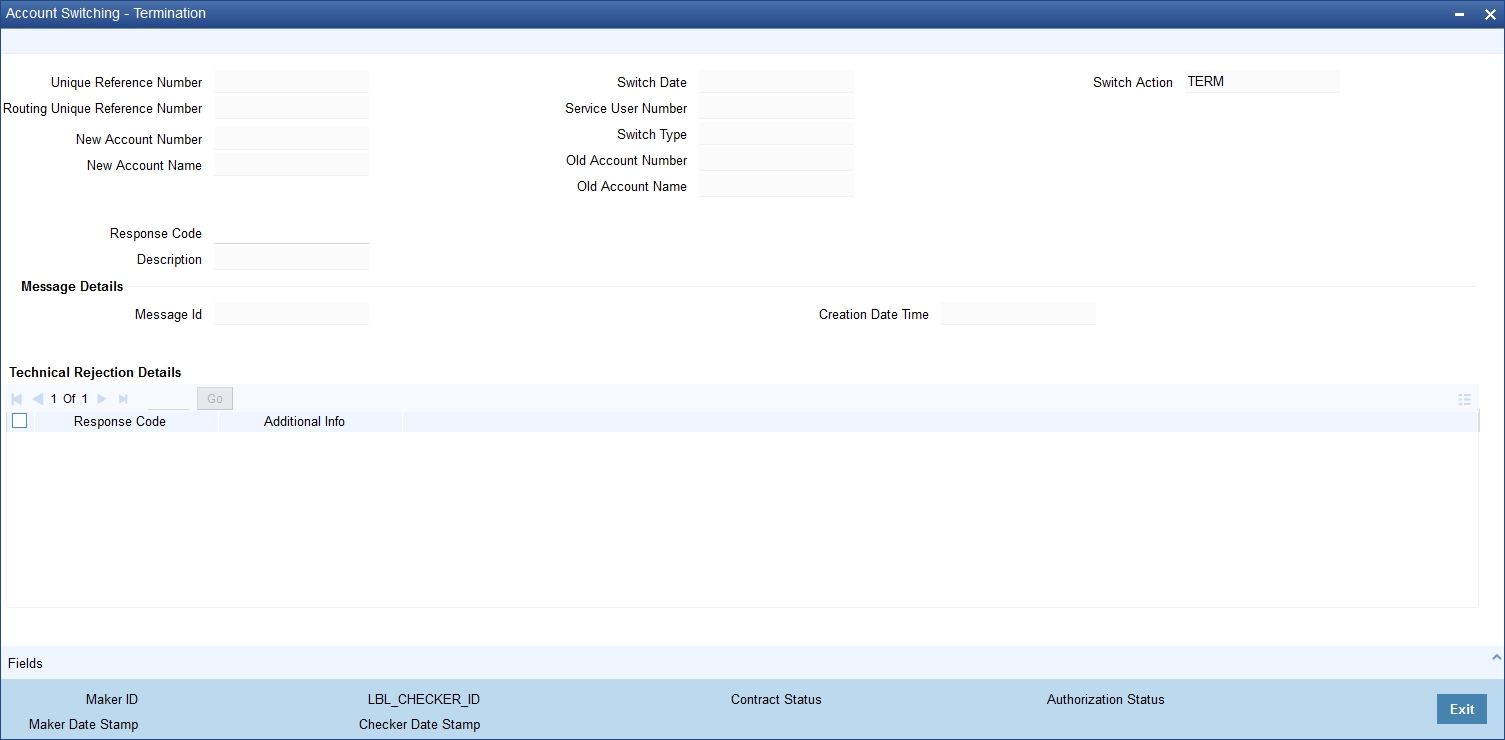
You can view the following details in this screen:
- Unique Reference Number
- Routing Unique Ref No.
- Switch Date
- Service User Number
- Switch Type
- Old Account Number
- Old Account Name
- Switch
- New Account Number
- New Account Name
- Response Code
- Description
- Message ID
- Creation Date Time
Technical Rejection Details
- Response Code
- Additional Information
The system uploads technical rejection on Switch Terminate message based on the unique reference number and switch action TRJT. To resubmit the switch terminate message, you can mark the info response as TRJT.
10.3.13.1 Outgoing Switch Terminate Message
You can generate the outgoing switch terminate message by configuring it as intra day or end of day batch. All the authorized switch termination records with ‘Switch Action’ as TERM will be generated through this batch process.
A message ID in the following format is generated and stored in the Account Switching Outgoing Message Browser:
- Position1 to 6 - Service User Number
- Position 7 to 8 - 2 digits year
- Position 9 to 11 - 3 digits day of year (001 to 366)
- Position 12 to 13 - 2 digits Message number. For Switch Termination Message it is 010
- Position 14 to 28 - 15 characters. Unique Reference Number by stripping the SWI and having only F or P as the first character.
- Position 29 to 35 - 6 digits running sequence number
10.3.13.2 Uploading Incoming Switch Terminate Message
The incoming switch terminate message is processed from the Account Switching Service Incoming Message Browser. This message is then decomposed and uploaded to Account Switching Terminate of the account branch.
10.3.14 Cancelling Payment Arrangements
You can cancel the payment arrangements of a partial switch service through ‘Account Switching Cancel Payments’ screen.To invoke the screen type ‘STDASCNP’ in the field at top right corner of the application toolbar and click the adjoining arrow button.
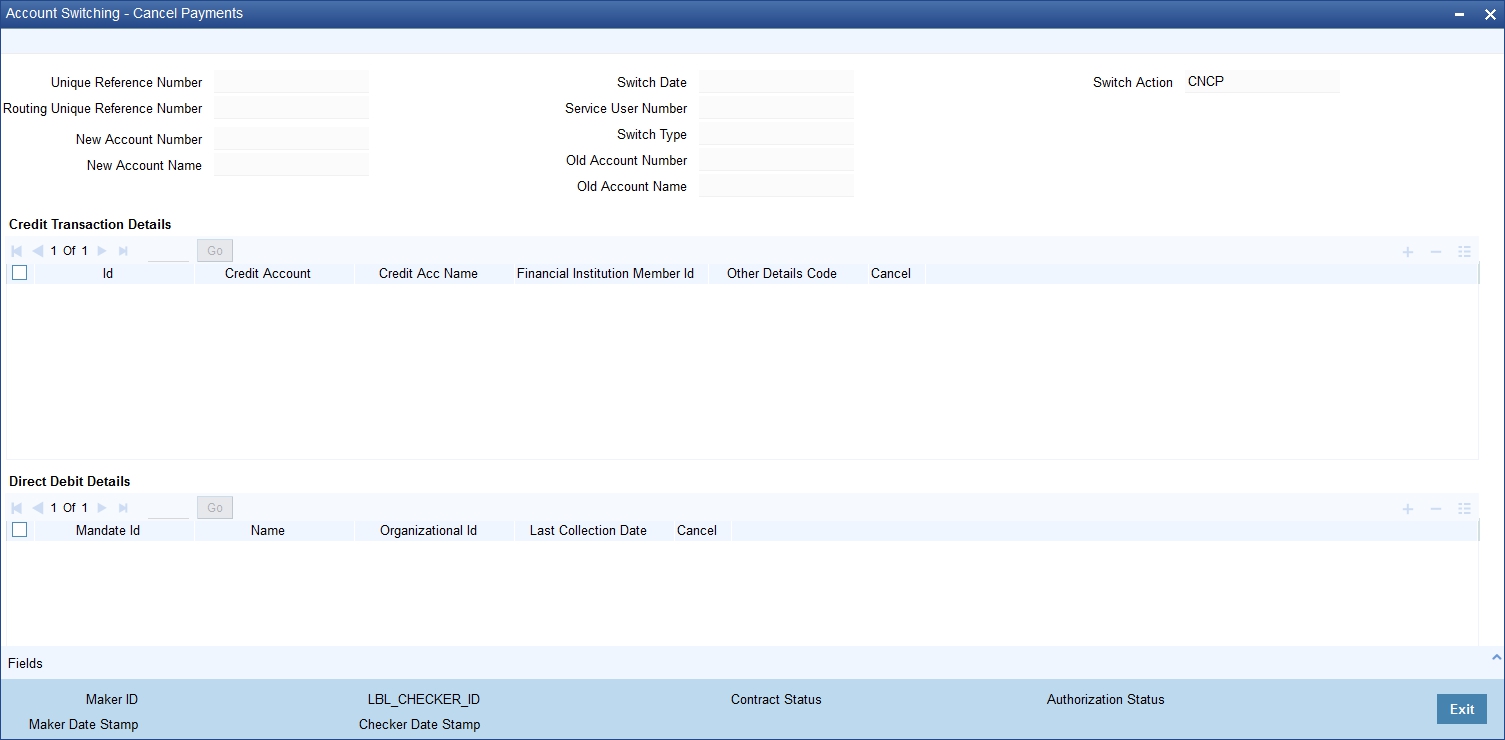
You can view the following details in this screen:
- Unique Reference Number
- Routing Unique Reference Number
- Switch Type
- Switch Date
- Service User Number
- Switch Action
- New Account Number
- New Account Name
- Old Account Number
- Old Account Name
Credit Transaction Details
The system displays the following credit transaction details:
- ID
- Credit Account
- Credit Account Name
- Financial Institution Member ID
Other Details Code
Specify the other details code for outgoing request. For incoming request, the system displays the other details code from incoming payment cancel message.
Cancel
Check this box if the payment should be cancelled by the old bank.
Direct Debit Details
The system displays the following direct debit details:
- Mandate ID
- Name
- Organization ID
- Last Collection Date
Cancel
Check this box to cancel the direct debit by the old bank.
Message ID
The system displays the message ID.
Creation Date Time
The system displays the message creation date and time.
Technical Rejection Details
The system displays the following technical rejection details:
- Response Code
- Additional Information
The system uploads technical rejection on Cancel Payment Arrangement message based on the unique reference number and switch action TRJT. To resubmit the cancel of payment arrangement message, you can mark the info response as TRJT.
10.3.14.1 Outgoing Cancel Payment Arrangements Message
You can generate the outgoing cancel payment arrangement message by configuring intra day or end of day batch process. All the authorized cancelled payments, cancel parameter enabled records with ‘Switch Action’ as CNCP will be generated through this batch process.
A message ID in the following format is generated and stored in the Account Switching Outgoing Message Browser:
- Position1 to 6 - Service User Number
- Position 7 to 8 - 2 digits year
- Position 9 to 11 - 3 digits day of year (001 to 366)
- Position 12 to 13 - 2 digits Message number. For Switch Termination Message it is 03
- Position 14 to 28 - 15 characters. Unique Reference Number by stripping the SWI and having only F or P as the first character.
- Position 29 to 35 - 6 digits running sequence number
10.3.14.2 Uploading Incoming Cancel Payment Arrangements
The incoming cancel payment arrangements message is processed from the Account Switching Service Incoming Message Browser. The message is decomposed and then uploaded to Account Switching Cancel Payments of the account branch.
10.3.15 Auto Completion for Partial Switch
The system processes the partial switch requests which are not marked for completion based on the auto completion months at the Account Switching Service bank parameters. The switch action of the request will be COMP. The switch complete message will not be generated for these requests because the Account Switching Service will automatically mark the request as completed, at the end of EOTI, on reaching the date.
10.3.16 Authorizing Account Switching Service
You can authorise account switching service through Account Switching - Authorization’ screen. You can invoke the screen by typing ‘STDASAUT’ in the field at the top right corner of the Application toolbar and clinking the adjoining arrow button.
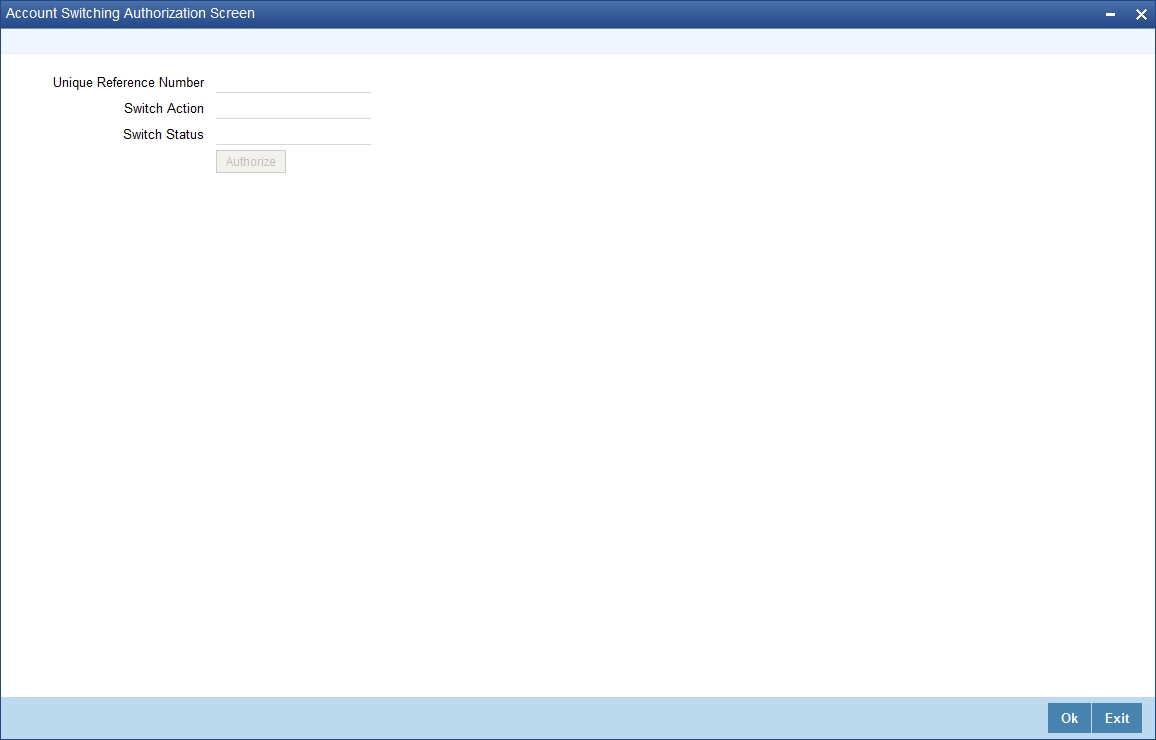
You can specify the following in this screen:
Unique Reference Number
Specify the unique reference number.
Switch Action
The system displays the action of the selected unique reference number.
Switch Status
The system displays the status of the selected unique reference number.
Click ‘Authorize’ to authorize the switch service.
10.3.17 Completing Account Switching Service
You can query a unique reference number applicable for outgoing switch workflow and notify the account switch completion status through Account Switch Completion screen. You can invoke this screen by typing ‘STDASCMP’ in the field at the top right corner of the application toolbar and click the adjoining arrow button.
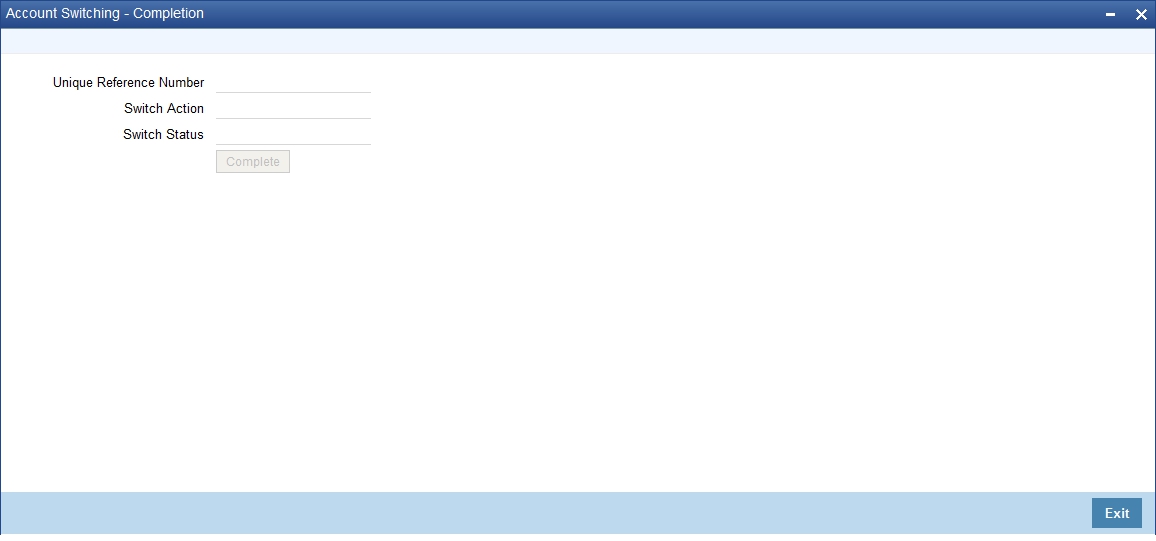
You can specify the following in this screen:
Unique Reference Number
Specify the unique reference number.
Switch Action
The system displays the action of the selected unique reference number.
Switch Status
The system displays the status of the selected unique reference number.
Click ‘Complete’ to mark the switch service as completed.
The switch action will be updated as ‘COMP’ and the switch complete message will be generated once ‘Complete’ button is clicked on the queried unique reference number.