3. Maintenances and Operations
Before you begin using the Islamic Financing module, you must maintain the following information in the system:
Bank Parameters
These are parameters that you need to specify at the bank level. These will include the following:
- Profit calculation parameters
- Amount blocks on inactive accounts
- Splitting of accounting entries for the offset leg
- Site specific maintenances
Branch Parameters
These are parameters that you need to specify at the branch level. These will determine the following:
- Batch processing during holidays
- Netting of accounting entries for accrual, liquidation and status change
- Default Settlement Accounts
- Format/Mask for generation of Account numbers etc
- The structure of the schedule
- Schedule gap treatment
In addition, you also have to maintain the following:
UDE (User Data Elements) Rules
UDEs are used to build formulae to calculate the amount of profit applicable. These include entities like Profit Rate, Amount Slab etc. that will hold values you provide. The UDEs themselves are defined at the product level but you can use these UDEs to build rules with different conditions based on which the UDE value should be arrived at.
You can maintain the UDE values at Product and Account level. You can also maintain Fixed amount UDEs in other currencies.
Repayment holiday periods
For a calendar year, you can define holiday periods for customers during which they can avail a repayment holidays.
System Data Elements (SDEs)
Information that is constantly updated by the system, for instance, the balance in an account, number of transactions processed etc. is referred to as SDEs. This information is readily available for computation of penalties, Profit or charges. You need to identify the SDEs applicable for this module.
You can maintain floating rates for a Rate Code, Currency, Amount Slab and Effective Date combination.
User Defined Policies
These are validation and operations that are performed during the life cycle of a finance.
Promotions
Promotions are special offers whereby you can offer special incentives/ concessions to customers. You can link finances to one or more promotions.
The above maintenances are discussed in detail in this chapter. Note that these maintenances are not specific to the Islamic Financing module. They can be used by Retail Lending also.
This chapter contains the following sections:
- Section 3.1, "Bank Parameters"
- Section 3.2, "Lending Branch Parameters"
- Section 3.3, "User Defined Element Rule"
- Section 3.4, "Head Office"
- Section 3.5, "User Defined Elements Cascade"
- Section 3.6, "Holiday Period Maintenance"
- Section 3.7, "System Data Elements"
- Section 3.8, "Policy Maintenance"
- Section 3.8, "Policy Maintenance"
- Section 3.9, "Standard Policies"
- Section 3.10, "Asset Types"
- Section 3.11, "Vehicle Maintenance Details"
- Section 3.12, "Credit Rating Category Maintenance"
- Section 3.13, "Credit Rating Rule Maintenance"
3.1 Bank Parameters
This section contains the following topic:
3.1.1 Maintaining Bank Parameters
You can maintain the bank parameters in the ‘Retail Lending - Bank Parameters’ screen. You can invoke this screen by typing ‘CLDBKPMT’ in the field at the top right corner of the Application tool bar and clicking the adjoining arrow button.

Here you can capture the following details:
Bank Code
Specify the code that represents your bank.
Amount Blocking for Inactive Account
Indicate whether an amount block needs to be imposed on an inactive account or not.
Include To date for Interest Calculation
If you check this option, then accrual entries will be passed from the value date + 1 till the maturity date. However, if this box is not checked, then accrual entries will be passed from the value date till the maturity date - 1.
Residual Adjustment during Auto Liquidation
Check this box to perform Excess/Lower payment adjustment during auto liquidation.This flag will be unchecked by default.
3.1.1.1 Capturing archival details for records in the Events Diary
Reference Date
This is the first date on which the archival will be initiated. If this date is NULL, no archival will be done.
Frequency
This is the frequency for archival. The options in the drop down list are:
- Daily
- Monthly
- Yearly
Unit
This is a numeric value. Let us suppose you select the frequency as Daily and Unit as 5. In this case archival will be done every 5th day.
For further details on this screen, refer ‘Lending Bank Parameters’ section in Retail Lending user manual.
3.2 Lending Branch Parameters
This section contains the following topic:
3.2.1 Maintaining Branch Parameters
You can maintain the branch parameters in the ‘Retail Lending – Branch Parameters’ screen. You can invoke this screen by typing ‘CLDBRPMT’ in the field at the top right corner of the Application tool bar and clicking the adjoining arrow button.

Branch parameters include the following:
Branch Code
You have to indicate the code of the branch for which the parameters have to be maintained. The codes of the various branches of your bank are available in the option list provided.
When you select the code, the branch name is also displayed alongside.
Process Till Next Working Day – 1
This specification will determine the day on which automatic events such accrual, liquidation etc. falling due on a holiday, should be processed. If you select this option, events scheduled for a holiday will be processed on the last working day before the holiday.
If you do not select this option, processing will be done upto the system date i.e. the current date. The automatic events due on a holiday will be processed as part of the batch program run at BOD on the next working day after the holiday.
Consider the example discussed above, if you do not check this option, the events due on 16th and 17th will be processed as part of BOD operations on 18th May ’05, which the next working day after the holidays.
Netting
Here, you need to indicate the netting preference for posting entries during accrual, liquidation and status change.
If you opt to net, the system will post a single consolidated entry for a GL and Currency combination. If you do not select this option, entries are posted individually for each account.
The GL netting status change option can also be used to indicate instalment level status change.
The Netting of Notices across Accounts can be used to indicate that for or all accounts for which the payments falls due on a particular date, the requests for invoice generation should be consolidated.
The finance accounts for which the reminder or demand note should be sent is tracked based on the status of the account. The SDE ‘Next Schedule Date’ is set up to arrive at how many no. of days in advance the payment notice should be generated. Based on the status of the finance account the corresponding payment invoice format is set up.
The Auto allocate part payment option can be used if you want to do a partial payment through auto allocation. For accounts which are marked for manual allocation of partial amount the payment can be done in bulk using the ‘Consumer Lending – Bulk Payments’ screen.
For more details on Bulk payments refer section ‘Bulk Payments’ in the ‘Operations’ chapter of Retail lending User Manual.
Settlement
The settlement accounts for processing lending transactions have to be specified here. You have to specify the Bridge GL/Account to be used for the settlement of the debit and credit legs of transactions that would be processed at your branch. You can select the accounts from the option lists provided for the same.
Intraday Jobs
Typically, accruals are processed either at BOD or EOD. However, you have the option to facilitate accruals any time during the day i.e. during the normal transaction input itself. You have to check the ‘Intraday Accrual’ option to avail this feature. If you opt for intraday accrual, you also have to specify the following:
- Intraday Job Interval: This is the interval (in hrs) at which the Intraday Job should be executed during the day.
- Num Parallel Jobs: This indicates the actual number of jobs to be processed at the same time when the Intraday Job is executed. For example, if the number of parallel jobs is 5, the system will group the accounts into 5 different jobs to be processed simultaneously by the Intraday Job. The system automatically groups the accounts based on the number of parallel jobs maintained.
Account Auto Generated
You can select this option for automatic generation of account numbers. The system generates the account numbers automatically when you create customer accounts through the ‘Account Details’ screen. If this option is not checked, you have to capture the account number yourself.
For details on creating an account, refer the ‘Account Creation’ chapter of this User Manual.
Accounting Mask Required and Account Mask
To maintain uniformity in the account numbers generated/captured across a branch, you can specify a format/mask for account numbers. If you specify that account numbers should conform to a specific format, you have to specify the mask in the ‘Account Mask’ field.
For example,
You may want the account numbers of your branch to be a combination of:
- Branch Code (3 Characters)
- Product (4 Characters)
- Currency (3 Character currency code)
- 5 digit running sequence number
The account mask in this case would be: @ (BRN)@(PROD)@(CCY)@(SEQ:5)
An example of an account number conforming to the above mask would be DOC3ROLUSD60021.
If you opt for auto generation of account numbers but do not specify a mask, the generated number will, by default, conform to the following format:
- 3 character Branch Code
- 4 character Product Code
- Date in Julian format (YYDDD)
- 4 digit running sequence number
An example of an account conforming to the above format is ‘DOCVSIM040960021’ where:
- ‘DOC’ is the Branch Code
- ‘VSIM’ is the Product Code
- ‘04096’ is the date equivalent to 5th April 2004 (04 – Year and 096 is the number of days that have elapsed in the year).
- ‘0021’ is the running sequence number.
Also, if you maintain an account mask but do not opt to auto generate the account numbers, then, during account capture you have to conform to the account mask maintained for the branch. If the account is not as per the mask, the error message is displayed as ‘Account number entered is not conforming to the account mask’.
IRR Processing
Check this option to trigger the YACR (Yield Accrual) event for the branch batch.
Accrual Entries on Holidays
This option will determine whether the accrual entries due on the holidays should be passed as of the holiday itself or as on the working day before the holiday(s)/after the holiday(s) depending on the ‘Process Till Next Working Day -1’ option.
Schedule Structure
This option is used to indicate if the schedule definitions should honor the end dates or honor the frequencies when the two contradict. The options are:
- Frequency Based
- Non-Frequency Based (the end dates contradict each other)
For example,
For a product, you can define payment schedules based on the value date of the finance and/or based on the calendar date. Assume that you have a housing finance product ‘HOME’ with the following payment schedule details:
- Unit – Monthly
- Frequency – 1
- Schedule Basis – Value Date
- Tenor – 12 months
Case 1: Schedule structure is frequency based
A housing finance is initiated on 4th April 2004. As per the above details, the following schedule dates are defaulted:
- First Due Date: 4th May 2004 (one month after the disbursement date)
- End Date: 4th Mar 2005 (in between schedules being 4th June, 4th July and so on for 11 months)
- The last schedule is always a ‘Bullet’ schedule.
Note that the schedule dates are driven by the value date of the finance. At the account level, you can, however, change the defaulted schedules. But the end dates should not contradict for the schedules.
For instance, you cannot define schedules with the following details:
First Due Date |
No of Schedules |
Frequency |
End Date |
04-MAY-2004 |
5 |
Monthly |
04-SEPT-2004 |
01-OCT-2004 |
5 |
Monthly |
01-FEB-2005 |
04-APR-2005 |
1 |
Bullet |
04-APR-2005 |
Note that for the first and second schedules, the end dates are contradicting (4th Sep and 1st Feb respectively). This is not allowed if the schedule structure is ‘Frequency Based’. The error message is displayed as ‘Input for component is not as per schedule frequency’.
Case 2: Schedule structure is non-frequency based
If the schedule structure is non-frequency based, you can define schedules with contradicting end dates (refer the schedule structure given in Case 1 above).
First Payment Schedule Gap Treatment
Here, you have to specify the manner in which you would like to treat the period/gap between the finance disbursement date and the first payment. The options are:
- Treat as Payment
- Treat as Moratorium
Insurance Renewal Before Days
Specify the number of days before the expiry of an insurance policy that the system should trigger automatic renewal. This parameter will be applicable for all transactions in the branch for which insurance is required.
Intermediate Schedule Gap Treatment
Here, you have to specify the manner in which the system should handle gaps between two schedules. The available options are:
- Create New Schedule
- Advance current schedule
- Extend previous schedule
After setting up the branch parameters, you have to save the details. Click on save icon to save the details in the system. However, the parameters take effect only after your supervisor authorizes the same.
For further details on this screen, refer section ‘Consumer Lending Branch Parameters’ in Retail Lending user manual.
Refer the Procedures User Manual for details on common operations like authorization, deletion, closure etc.
3.3 User Defined Element Rule
This section contains the following topic:
3.3.1 Defining UDE Rules
User Defined Elements (UDEs) refer to entities like Profit Rates, Amount/Tier Slabs whose value you can specify and at the same time maintain different values with different effective dates. For instance, you can indicate that profit should be calculated at five percent on a certain date and specify a higher rate effective at a later date.
The UDEs, per say, are defined at the product level and the actual values are provided for a combination of Product, Currency, UDE Rule, and Effective Date in the ‘UDE Values’ screen. This will be defaulted at the account level and you can override the same with account specific values.
You can define UDE Rules based on which the UDE Values will be picked up at the account level. UDE Rules are conditional expressions built using the SDEs like Finance Amount, Tenor, Rate, Customer Category etc. These rules can be created independently and later attached at the time of maintaining UDE Values. You can associate multiple rules and specify UDE values for each rule. You can maintain the rules in the ‘User Defined Element Rule’ screen. You can invoke this screen by typing ‘CLDUDRMT’ in the field at the top right corner of the Application tool bar and clicking the adjoining arrow button.

The following information should be captured to create a UDE Rule:
User Defined Element Rule
You have to specify a unique code consisting of a maximum of four alphanumeric characters, to identify the rule in Oracle FLEXCUBE. This is mandatory to save the record.
Condition
You can build multiple conditions for a rule. To do this, click on ’Condition’ button in the screen above. The following screen is displayed:

You can create conditions using the following:
- Fields: The SDEs that are factory shipped or maintained in the ‘System Data Elements’ screen are available in this list.
- Operators: This list includes the mathematical operators:
- Equal To
- Greater Than
- Greater Than or Equal To
- Less Than
- Less Than or Equal To
- Like
- Not Like
- Not Equal To
- Logical Operators:
- And: Use ’And’ button
- Or: Use ’OR’ button
- Value: The value of the SDE selected to define the condition should be entered here. The value may be numeric or alphanumeric, as required for the condition.
After building the condition, click ‘Accept’ button to accept the same. To remove a condition, click ’Clear’ button in the screen.
After you build the condition(s), click ‘Ok’ button in the screen. You will return to the ‘UDE Rules’ screen. The condition defined is displayed in this screen.
For example,
Assume that you want to charge profit at 12% for home finances (Product Code - HOME) where the finance amount is greater than or equal to 100, 000 and an profit rate of 10% on finances less than 100,000. You can build these conditions in the form of UDE Rules.
Rule ID |
Condition |
UDE1 |
AMOUNT_FINANCED >=100000 |
UDE2 |
AMOUNT_FINANCED<100000 |
At the time of assigning values for the UDE ‘PROFIT’ (assuming that this is the UDE defined for the product in the ‘UDE Values’ screen (discussed below), you can associate the above rules and for a product, currency, rule and effective date combination, you can specify the value as 12 and 10 respectively. Depending on the condition that the finance satisfies (whether >= 100000 OR less than 100000), the appropriate rate is picked up for profit calculation.
Refer the section titled ‘Specifying product Main details’ in the ‘Defining Product Categories and Products’ chapter of this User Manual for details on defining UDEs.
3.4 Head Office
This section contains the following topic:
3.4.1 Providing UDE Values
The actual values for the UDEs defined during product creation (in the ‘Main’ tab of the ‘Consumer Lending Product’ screen) is maintained in the ‘User Defined Elements Values Maintenance’ screen. You can invoke this screen by typing ‘CLDUDVMT’ in the field at the top right corner of the Application tool bar and clicking the adjoining arrow button.

In this screen, you can maintain values for a ‘Product + Currency + UDE Rule + Effective Date’ combination. The following details have to be captured here.
Product Code
You have to select the product for which the UDE values have to be maintained. The products offered at your bank are available for selection in the option list provided. Click option list to select a product code from the list.
Upon selection of the product code, the system displays a short description of the product in the adjacent field.
Currency Code
For the product selected, specify the relevant currency. This becomes the UDE currency and the values you capture for the UDE is expressed in this currency. The option list will include the currencies maintained in the ‘Currency Definition’ screen. You can select a relevant code from this list.
For details on ‘Currency Definition’ screen, refer the ‘Currency Maintenance’ chapter of the Core Services User Manual.
User Defined Element Rules
Here, you have to associate the relevant UDE Rule(s). The rules maintained in the ‘UDE Rules’ screen are available in the option list. For each associated rule, you can specify UDE values with different effective dates and depending on the rule that the finance satisfies, the corresponding UDE values become applicable to the finance and same are picked for Profit, Charge, Tax, Commission and Fee computation.
Note
The UDE Rule is mandatory to save the record. The system will automatically link the default rule if you do not associate a rule.
Effective Date
You have to specify the effective dates for the UDE values. This is the date on which the UDE value becomes applicable in the system. The date should be in DD-MMM-YYYY format. For a rule, you can maintain UDE values with different effective dates.
UDE ID
The UDEs defined for the selected product is automatically displayed here.
UDE Value
For each UDE displayed for the selected product, enter the UDE value. As mentioned, you can maintain values with different effective dates.
Rate Code
If you want the UDE to have a floating profit rate, select the applicable rate code from the option list. Depending on the rate code selected, the rates are picked up from the ‘Floating Rate Code Definition’ screen. In this case, the value captured for the UDE becomes the spread against the rate code.
For instance, assume that the rate code is ‘MIBOR’ and the UDE value is 2 (positive spread). If the rate picked up as per the rate code (taking into consideration the effective date, amount slab and tenor) is 5%, then the actual profit applicable would be 7% (5 + 2). Similarly, if it were a negative spread, the profit would be 3% (5 – 2).
For details on maintaining floating rate codes, refer the section titled ‘Maintaining Floating Profit Rates’ in this chapter.
Code Usage
This is applicable only if you associate a ‘Rate Code’ with the UDE. It indicates the frequency at which you want to refresh the floating rates. The options are:
- Automatic: This implies that the rates will be automatically refreshed every time a rate change occurs. Therefore, rates are reapplied to the finances as and when there is a rate change.
- Periodic: This means that the rates will be refreshed based on the Rate Revision Schedule maintained at the component level (in the ‘Components’ tab of the ‘Consumer Lending Product’ screen).
It is mandatory to specify the Rate Code usage if the rate code is maintained.
Cascade
You can change the UDE values even after creating accounts under the product. The cascade feature is used to determine the manner in which the change should be handled. If you choose to cascade (select ‘YES’), the change becomes applicable to all the existing accounts under the product. However, if you do not cascade the changes, the new UDE values become applicable only to accounts created subsequent to the change.
Maintaining Fixed Amount UDEs in other Currency
To maintain UDEs in a currency different from the finance currency, you have to maintain the values separately for each currency. At the time of finance creation, the values defined for the UDE Currency is picked up and is displayed (in the ‘Ude Value’ field of the ‘Account Details’ screen) after conversion into the finance currency equivalent.
The values, however, are displayed after conversion into the finance currency equivalent.
3.5 User Defined Elements Cascade
This section contains the following topic:
3.5.1 Applying the UDE Cascade Function
You also have the feature to change the value of a UDE for all the existing accounts under a product. However, the change will be applicable only to the existing accounts. UDE values for new accounts created under the product will be picked as per your specifications in the ‘UDE Values’ screen.
You can define new UDE values for existing accounts in the ‘UDE Cascade’ screen. You can invoke this screen by typing ‘CLDUDCMT’ in the field at the top right corner of the Application tool bar and clicking the adjoining arrow button.

The code of the login branch is displayed here. The following information is captured in this screen:
Reference
After saving the UDE cascade function, Reference will be generated by system itself.
Branch code
Input the branch code in which the relevant data is maintained.
Currency Code
Select a currency maintained for the product from the option list provided. The UDE value is applied in the currency selected here.
Product Code
Select a product for which you have to change the UDE value. The change becomes applicable to all the existing accounts under the product.
User Defined Element Effective Date
The date on which the new UDE value is brought into effect is captured here. The date format should be ‘YYYY-MM-DD’.
After you specify the effective date, the system automatically generates a unique ‘Reference’ Number.
User Defined Element Id
The option list will display the UDEs defined for the selected product. Select the UDE that requires a change in value. When you select the UDE, the ‘Old Ude Value’ is also displayed in the next field.
New User Defined Element Value
Provide the new value for the selected UDE.
3.6 Holiday Period Maintenance
This section contains the following topic:
3.6.1 Maintaining Holiday Period
You can identify certain periods in the calendar as holiday periods when customers would have other expenses and would like to avail a repayment holiday. This would typically be during Christmas/New Year or for anniversary celebrations. Although, Profit computation continues for this period, repayments are not scheduled.
You can define repayment holiday periods in the ‘Holiday Period Maintenance’ screen. You can invoke this screen by typing ‘CLDHOLMT’ in the field at the top right corner of the Application tool bar and clicking the adjoining arrow button.

The following information is captured to define a holiday period:
Period Code
You have to capture a unique code to identify the period in the system. The code can comprise of 30 alphanumeric characters.
Date From and Date To
For the period code specified, capture the holiday period i.e. the start date and end date for the holidays. The date format should be ‘YYYY-MM-DD’. It is mandatory to specify the date range to save the holiday period.
Anniversary Period
This option is used to define an anniversary period. If you check this option, the holidays will be repeated every year for the given range of dates. By default, the system checks this option.
Principal Repayment Holiday
If you check this option, the system will apply the holiday period to the principal component alone. The simple interest formula defined at the product level will not be affected. By default, this option is unchecked. However, you may modify it.
While defining a loan contract, you may apply the holiday period codes maintained using this screen.
3.7 System Data Elements
This section contains the following topic:
3.7.1 Maintaining System Data Elements
The balance in the account for which the profit has to be calculated depends on the activities that take place in the customer account over a period of time. This information is constantly updated in the system and is readily available for computation of profit or charges. Data elements of this sort are called ‘System Data Elements’ (SDEs) because the values for the SDEs are necessarily picked up by the system while applying profit. You cannot input the values for these elements.
You can capture the various SDEs in the ‘System Data Elements’ screen. You can invoke ‘Securities Security Product Definition’ screen by typing ‘CLDSDEMT’ in the field at the top right corner of the Application tool bar and clicking the adjoining arrow button.

You have to maintain the following to define a SDE:
Element ID
Capture an id to uniquely identify the SDE in the system. You can devise an Id comprising a maximum of 30 alphanumeric characters.
Function Name
Here, you have to associate the Oracle function which would calculate the SDE value internally. The values available in the option list are factory shipped. The system picks up the value computed by the function for use in profit calculation.
Data Type
This indicates the nature of the data the SDE represents. The options are:
- Character
- Number
- Date
Language Code and Language Text
Select a language for the SDE being defined. You can select a code from the option list provided. The system automatically displays the corresponding text in the language selected for the SDE.
Language Description
Here, you have to provide the description of the SDE being defined, in the language selected. The description should not exceed 30 alphanumeric characters.
System Data elements can be balances like PRINCIPAL_EXPECTED, PRINCIPAL_OVERDUE etc. Some Oracle FLEXCUBE entities required for formula generation/rule set up will be factory shipped.
The list of standard SDEs available for use are given below:
Name |
Description |
TENOR |
Duration for which the finance is applied for in days. |
CUSTOMER_CATEGORY |
Category of the customer of the finance which is maintained at the customer information file level. |
BRANCH_CODE |
Code of the branch where the finance account is opened. |
ACCOUNT_CCY |
Finance account's currency. |
LOAN_STATUS |
Status of the finance account. |
CUSTOMER_ID |
Primary customer's id for a finance account. |
NO_OF_RPMNT_SCHS |
Number of repayment schedules excluding the moratorium ones. |
INCREASED_PRINCIPAL |
Increase in the principal. |
DAYS |
Days in a month. |
YEAR |
Days in a year. |
RISK_CLASSIFICATION |
Risk classification at line level which can be used at status change. |
PREPAID_AMOUNT |
Amount that has been prepaid. |
MORA_OUTSTANDING |
Total moratorium outstanding amount. |
TOTAL_MORA_AMOUNT |
Total moratorium amount. |
INDEX_CCY |
Index currency. |
NEXT_WORKDAY |
Next working day of the branch. |
LAST_WORK_DAY |
Last working day of the branch. |
TODAY |
Today's branch date. |
TOTAL_PRINCIPAL |
Amount for which the finance is applied for. |
AMOUNT_FINANCED |
Amount for which the finance is applied for. |
PRINCIPAL |
Amount disbursed. |
INT_SUSPENSION_DATE |
Profit suspension date based on risk classification. If classification is C, then the suspension date is one year from today's date. If classification is D, then the suspension is immediate. |
COMPOUND_VALUE |
Amount compounded within a schedule and is used internally. |
RESIDUAL_DAYS |
Tenor of the finance. |
WORST_SCH |
Worst Instalment Status. |
APPLICATION_DATE |
Application date in finance origination. |
APPLICATION_SCORE |
Application score in finance origination. |
APPLICATION_TENOR |
Application tenor in finance origination. |
APPLICATION_PRINCIPAL |
Application principal amount in finance origination. |
_OVR_DAYS |
<Component> overdue days. |
_EXPECTED |
<Component> expected amount. |
_OUTSTAND |
<Component> outstanding amount. |
_CCY |
<Component> currency. |
_OVERDUE |
<Component> overdue amount. |
_INS_OVR_DAYS |
<Component> number of days between the schedule due date and the maturity date. |
_FN_NO_REPAY_SCH |
<Component> number of schedules for a component if periodic. |
NET_PRINCIPAL |
<Component> amount financed. |
_SCHODUE |
<Component> schedule amount due less amount settled. |
DAYS_BASIS |
Days in Month |
YEAR_BASIS |
Days in Year |
Projected_Amount |
Definition of moratorium formula for profit component. |
AMOUNT_DISBURSED |
Definition of moratorium formula for profit component for actual type |
UIDB_DIFFERENTIAL |
The difference in the UIDB computed and the actual profit for the post construction period. |
CUSTOMER_CREDIT_RATING |
Holds the Credit Rating information of Customer |
PROFIT_DUE |
Accumulated Profit Projected against a financing account. |
PROFIT_REALIZED |
Accumulated Profit Realized or Paid against a financing account. |
LINK_AMOUNT_SUM |
Sum of linkage amount |
PROFIT_DUE_3 |
Sum of profit due for last 3 payment periods |
PROFIT_REALIZED_3 |
Sum of profit realized for last 3 payment periods |
PRIN_OUTSTANDING_ONDFLT |
SDE for calculation of profit based on the outstanding principal |
The ‘Customer Credit Rating’ field at the Customer level will be used as a SDE CUSTOMER_CREDIT_RATING for defining status change rules. This will also be available for provision rule definition at the CI product level.
System calculates the SDE values and updates the statuses based on the product level configuration during EOD or through manual status change process.
Function SDE
Flexcube SDE functionality supports function SDE which will accept input parameters and calculate the SDE value based on the parameter passed.
a) FN_SDE_MAX_RBH_PBH (n number ) – would return the maximum percentage of RBH/PBH for past ‘n’ payment periods.
b) FN_SDE_MIN_RBH_PBH (n number) – would return the minimum percentage of RBH/PBH for past ‘n’ payment periods.
Where, RBH = Profit Sharing Realization and PBH = Profit Sharing Projected
3.8 Policy Maintenance
This section contains the following topic:
3.8.1 Maintaining User Defined Policies
User defined Policies are special validations and operations to be performed before or after a life cycle event of finance. You can maintain policies in the ‘Policy Maintenance’ screen.
You can invoke this screen by typing ‘CLDPOLMT’ in the field at the top right corner of the Application tool bar and clicking the adjoining arrow button..

Specify the following details to maintain a policy:
Policy Code and Policy Description
A policy code identifies a policy uniquely in the system. The code is used to link the policy to a product/account. You can devise a code consisting of a maximum of 20-alphanumeic characters.
Also, for the code captured, provide a brief description in not more than 35 alphanumeric characters. The description is used for information purposes only.
Policy Category
Select the category to which the policy should belong. This implies if the Policy is to be linked to an Application (Origination and API or Product setup). The two options are:
- Origination
- Servicing
3.8.1.1 Policy Details
Expression Line
You can maintain multiple expressions for a policy and each expression is identified by a unique serial number. The serial number can consist of a maximum 6 digits.
Policy Expression
Here, you have to specify the expression for the policy which when satisfied by the finance, will trigger the corresponding action. You can maintain multiple expressions and action codes under a policy. Depending on the expression that is evaluated successfully, appropriate ‘Action Id’ is triggered. However, an expression is not mandatory to define a policy.
Action Id
You have to select the action that is to be triggered when the corresponding expression becomes valid for the finance. This refers to the wrapper name that is mapped to the actual PL/SQL code that executes the policy. Select the action id from the option list provided. The values available in the list are factory shipped.
The policies defined through ‘User Policy’ screen become available for association at the ‘Product Category’ level.
For more details, refer the section titled ‘Maintaining Product Categories’ in the ‘Defining Product Categories and Products’ chapter of this User Manual.
3.9 Standard Policies
This section contains the following topic:
3.9.1 Maintaining Standard Policies
You can also categorize the policies defined through the ‘Policy Maintenance’ screen as standard policies in the ‘Standard Policies’ screen.
You can invoke this screen by typing ‘CLDSTDPL’ in the field at the top right corner of the Application tool bar and clicking the adjoining arrow button.

To maintain a standard policy, you have to specify the following in the screen:
Module
A standard policy is defined for a Module and Event combination. You have to select the module for which the policy should be applied. The option list will display the list of valid Oracle FLEXCUBE modules.
Event Code
The events defined for the selected Module are displayed in the option list provided. You may select an event from this list.
Policy Code
The policies maintained in the ‘User Policy’ screen are available in the option list provided. Select the appropriate policy for the selected Module and Event combination.
3.10 Asset Types
This section contains the following topic:
3.10.1 Maintaining Asset Types
You can capture details of different asset types for an account based on the product level maintenance. To capture such details, you need to maintain type codes for each of the asset categories that can be linked to an account. The following asset categories are available at the product level:
- Vehicle Info
- Property Info
- Goods Info
- Building Info
- Equipment Info
- Project Info
- Service Ijarah Info
For each type, you need to maintain asset type codes using the ‘Static Type Maintenance’ screen. You can invoke this screen by typing ‘CODTYPES’ in the field at the top right corner of the Application tool bar and clicking the adjoining arrow button.
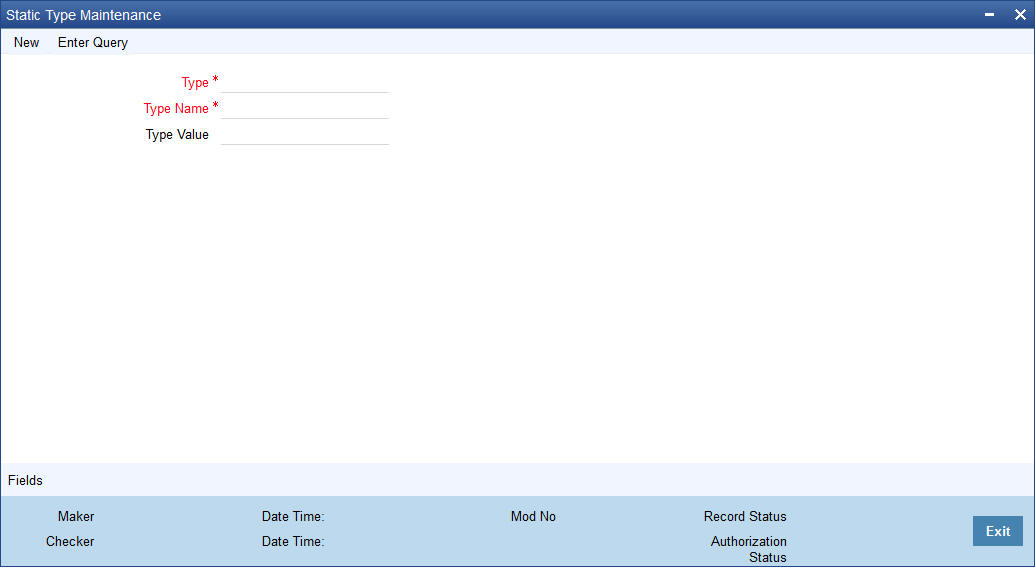
Here you need to maintain the following details:
Type
You need to define codes for the following types:
- Property
- Goods
- Area in Emirate
- City
- Brand
- Sector of Investment
- District
- Emirate
- Area in Another Country
- Collateral Type
- Asset Category
- Insurance Company
Description
Enter a brief description for the types being defined.
Value
Depending on the type, you need to specify the values that can be captured against that type. For instance, you can specify the value ‘Villa with Swimming Pool’ for the type ‘Property’.
3.11 Vehicle Maintenance Details
This section contains the following topic:
3.11.1 Maintaining Vehicle Maintenance Details
In order to process Murabaha transactions involving vehicle purchase, you need to maintain codes to identify the vehicle maker, vehicle model etc. You can maintain these details through the ‘Vehicle Details Maintenance’ screen. You can invoke this screen by typing ‘CIDVEHMA’ in the field at the top right corner of the Application tool bar and clicking the adjoining arrow button.

Here you can capture the following details:
Maker Code
Specify a code to identify the maker of a vehicle. The code can be alphanumeric and 20 characters long.
Maker Name
Specify the name of the vehicle maker. You can specify a maximum of 105 alphanumeric characters.
Model Code
Specify a code to identify the model of a vehicle. The code can be alphanumeric and 20 characters long.
Model Name
Specify the name of the model. You can specify a maximum of 105 alphanumeric characters.
3.12 Credit Rating Category Maintenance
This section contains the following topic:
3.12.1 Creating Credit Rating Category
Finance applications can be evaluated and rated on the basis of questionnaires and pre-defined answers for these questionnaires. To facilitate this, you need to maintain categories for the questions and rules which will contain sets of questions, answers and scores for the answers. The rules maintained can be attached to the Islamic CL product and defaulted during account creation.
You can create credit rating categories in the ‘Credit Rating Category Maintenance’ screen. You can invoke this screen by typing ‘STDCATMT’ in the field at the top right corner of the Application tool bar and clicking on the adjoining arrow button.

You can maintain the following details here:
Category
Specify a unique ID for the category.
Description
Enter a description for the category.
3.13 Credit Rating Rule Maintenance
This section contains the following topic:
3.13.1 Creating Credit Rating Rules
The rules for credit rating are maintained in the ‘Credit Rating Rule Maintenance’ screen. You can invoke this screen by typing ‘STDCRRMT’ in the field at the top right corner of the Application tool bar and clicking on the adjoining arrow button.

You can capture the following details here:
Rule ID
Enter a unique ID for the rule.
Description
Enter a description for the rule.
3.13.1.1 Maintaining Rule Detail
Question ID
The system displays the sequence number for the each question that you define for a set.
Category
Indicate a category for the Question ID from the adjoining option list. This is mandatory.
Question
Specify the details of the question.
3.13.1.2 Maintaining Question Detail
Possible Answer
Enter the answers that the system should allow at the time of account creation for the question you have entered earlier.
Score
Associate a score for each of the possible answers.
Click the ‘Rating’ button to specify a grade for each score range. The following screen is displayed:

You can maintain the following details in this screen:
Score Upto
Enter the upper limit of the score range.
Grade
Assign a grade for the score.