5. Defining Islamic Product Categories and Products
You may finance your customers using different types of financing like Mudaraba, Murabaha, Istisnaa, Musharaka, Wakala, Ijara etc. The different types of finances can be different ‘Product Categories’. A product category is used to distinguish between the various finances offered by the bank. Each of these finances is totally different and hence there is a need to categorize them.
Under a product category, you may have finances that may vary in features such as pricing, tenor, amount etc. Each variation of these services can, therefore, be considered as ‘Products’.
This chapter explains the procedure for setting up product categories and products for processing Islamic finances.
This chapter contains the following sections:
- Section 5.1, "Mudaraba Product Category"
- Section 5.2, "Product Maintenance"
- Section 5.3, "Account Details"
- Section 5.4, "Creating a Murabaha Account"
- Section 5.5, "Musharaka/Istisnaa Product Category"
- Section 5.6, "Wakala Product Category"
- Section 5.7, "Tawarooq Product"
5.1 Mudaraba Product Category
This section contains the following topic:
5.1.1 Creating a Mudaraba Product Category
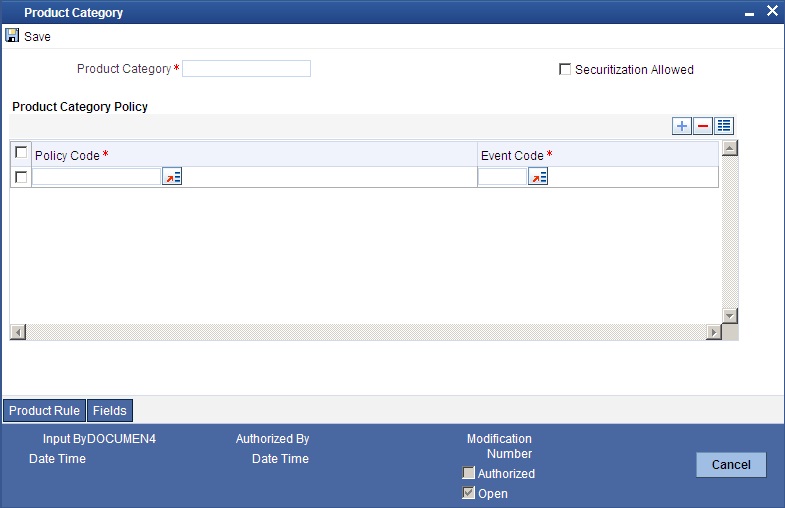
You need to create the product category using ‘Product Category’ screen.

The following details have to be captured in this screen:
Product Category
You have to specify the name of the finance service which will identify the Mudaraba category uniquely in the system. The category name can consist of a maximum of 20 alphanumeric characters. The categories maintained through this screen become available for creating products under it.
Product category is mandatory to save the record in the system.
For details on maintaining policy categories, refer the section titled ‘Maintaining Product Categories’ in the ‘Defining Product Categories and Products’ chapter of this User Manual.
5.2 Product Maintenance
This section contains the following topics:
- Section 5.2.1, "Setting up a Mudaraba Product"
- Section 5.2.2, "Preferences Tab"
- Section 5.2.3, "Fields Button"
- Section 5.2.4, "Component Tab"
- Section 5.2.5, "Setting up Accounting Entries"
5.2.1 Setting up a Mudaraba Product
You can capture Mudaraba product details in the ‘Product Maintenance’ screen. You can invoke the ‘Product Maintenance’ screen by typing ‘CIDPRMNT’ in the field at the top right corner of the Application tool bar and clicking the adjoining arrow button.

Basic details include the following:
Product Code and Description
The code you enter for a product identifies it throughout the module. You can follow your own conventions for devising the code. However, it must have a minimum of four characters.
When defining a new product, you should enter a code. This code is unique across the Islamic Financing module of Oracle FLEXCUBE. For instance, if you have used VA01 for a product in this module, you cannot use it as a product code in any other module.
You should also enter a brief description of the product. This description will be associated with the product for information retrieval.
Product Category
Select the category maintained for Mudaraba using the ‘Product Category Maintenance’ screen, from the adjoining option list.In the ‘Component’ section, you need to specify the following details:
Component Name
Define the following components for the product:
- CUST_INCENTIVE
- EXCESS_PROFIT
Description
You can add a brief description for the component that you specify for the product. For instance, you can specify ‘customer incentive’ and ‘bank’s excess profit’ for the components ‘CUST_INCENTIVE’ and ‘EXCESS_PROFIT’ respectively.
5.2.2 Preferences Tab
Click on ‘Preferences’ button in the ‘Product’ screen to move to this section of the screen.

You should maintain the following preferences for the finance product:
5.2.2.1 Liquidation Preferences
Liquidation preferences include the following:
Liquidation Mode
Choose the option ‘Manual’ for Mudaraba products.
The Islamic Financing module allows you to set up specific features like supplier grace period, advance payment and first installment charges for processing Murabaha finances. You can create a special product for Murabaha with the certain attributes.
VAMI Action
Choose the option ‘Installment Changes with Equal Profit’.
5.2.3 Fields Button

You can define User Defined Fields in ‘Product UDF Mapping’ screen (CSDPDUDF).
For details on User Defined Fields screen refer Other Maintenances chapter in Core Service User Manual.
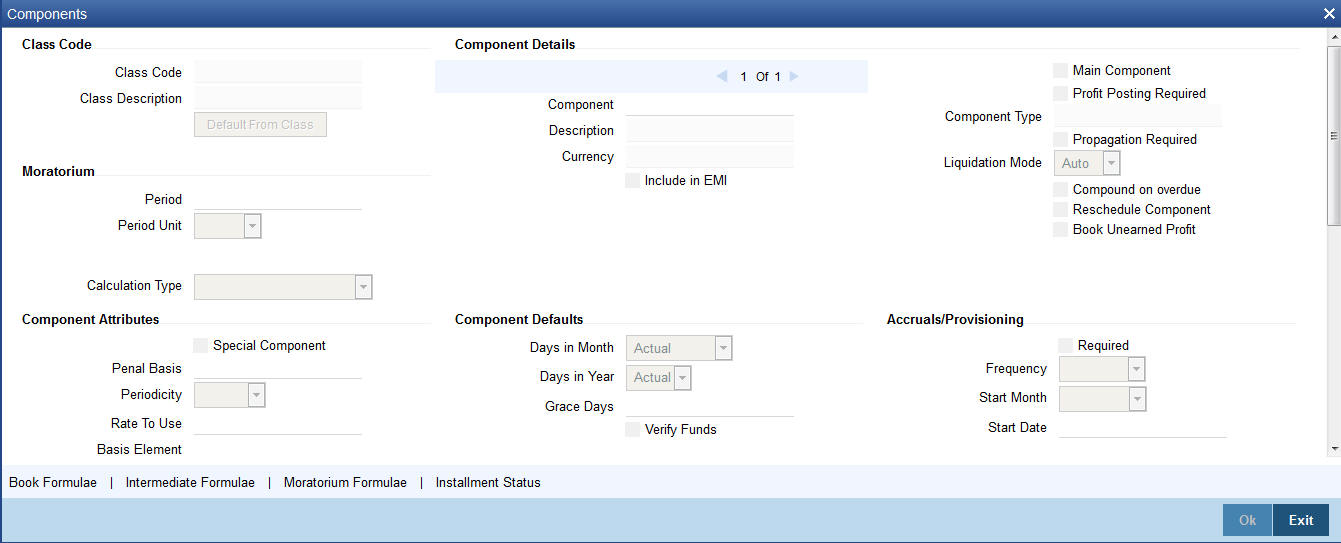
5.2.4 Component Tab
You have already maintained the components of the product in the ‘Main’ tab of the ‘Product’ screen. The features of the components are defined in the ‘Components’ tab of the screen.
5.2.4.1 Component Definition parameters
You need to specify the following details for the component ‘CUST_INCENTIVE’. This includes the following:
Calculation Type
Choose the option ‘No schedule No formula (Ad Hoc Charges)’ from the drop-down list.
Component Type
Choose the option ‘Ad Hoc Charges’ from the drop-down list.
5.2.4.2 Component Attributes
The component attributes include the following:
Balance Type
Choose the option ‘Credit’.
Similarly, you need to specify the following details for the component ‘EXCESS_PROFIT’. This includes the following:
Calculation Type
Choose the option ‘No schedule No formula (Ad Hoc Charges)’ from the drop-down list.
Component Type
Choose the option ‘Ad Hoc Charges’ from the drop-down list.
5.2.4.3 Component Attributes
The component attributes include the following:
Balance Type
Choose the option ‘Debit’.
You need to specify the following details for the profit component:
Rate Type
You need to define the notional profit rate as a flat rate. The system will then calculate the notional profit value based on this rate.
Profit Rate
You will not be able to change the profit rate.
5.2.4.4 Schedule Details
Schedule Type
Choose the option ‘Bullet’ from the adjoining drop-down list.
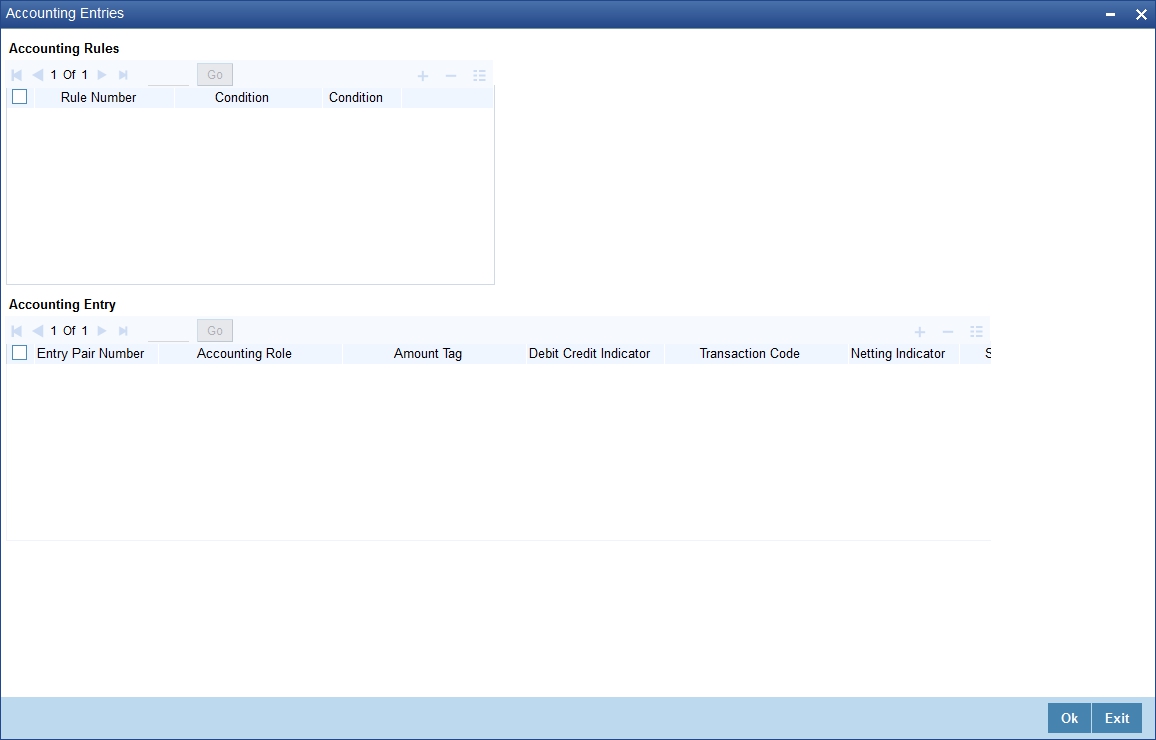
5.2.5 Setting up Accounting Entries
You can set up accounting entries through the ‘Accounting Entries’ screen.

You need to set up the following event-wise accounting entries for profit-sharing:
DSBR
Accounting Role |
Amount Tag |
Dr/Cr Indicator |
LOAN_ACCOUNT |
PRINCIPAL (Same as Amount Financed) |
Dr |
DR_SETTL_BRIDGE (Customer Settlement A/c) |
PRINCIPAL |
Cr |
ACCR
Accounting Role |
Amount Tag |
Dr/Cr Indicator |
PROFIT REC |
PROFIT_ACCR |
Dr |
PROFIT INC |
PROFIT_ACCR |
Cr |
MLIQ
Accounting Role |
Amount Tag |
Dr/Cr Indicator |
DR_SETTL_BRIDGE |
PRINCIPAL_LIQD |
Dr |
LOAN_ACCOUNT |
PRINCIPAL_LIQD |
Cr |
DR_SETTL_BRIDGE |
PROFIT_LIQD |
Dr |
PROFIT REC |
PROFIT_LIQD |
Cr |
PROFIT REC |
PROFIT_WAVD |
Cr |
PROFIT INC |
PROFIT_WAVD |
Dr |
ADCH
Accounting Role |
Amount Tag |
Dr/Cr Indicator |
DR_SETTL_BRIDGE |
EXCESS_PROFIT_ADCH |
Dr |
PROFIT INC |
EXCESS_PROFIT_ADCH |
Cr |
DR_SETTL_BRIDGE |
CUST_INCENT_ADCH |
Dr |
PROFIT INC |
CUST_INCENT_ADCH |
Cr |
5.3 Account Details
This section contains the following topics:
- Section 5.3.1, "Creating a Mudaraba Account"
- Section 5.3.2, "Payments Details Tab"
- Section 5.3.3, "Defining UDE for Supplier Grace Period and Customer Grace Period"
- Section 5.3.4, "Maintaining SDE for Staff Financing"
5.3.1 Creating a Mudaraba Account
You can create a Mudaraba account using the ‘Account Details’ screen.

You need to specify the profit sharing details between the Mudarib and Rabbul-Mal using the ‘Profit Ratio’ screen. Click ‘Profit Ratio’ button in the ‘Account Details – Main’ screen and invoke this screen.

Here you have to capture the following details:
Bank Share
Specify the percentage of profit that the bank should get in case of a profitable return on the Mudaraba account.
Customer Share
Specify the percentage of profit that the customer should get in case of a profitable return on the Mudaraba account.
5.3.1.1 Specifying Amendment Details
During the tenor of the Mudaraba account, you cannot change either the profit rate or the maturity date. On the maturity date, you can change the profit rate and make it applicable as of the value date of the account. The system then recalculates the profit for the entire tenor and makes the accrual adjustments wherever necessary.
You cannot make a principal increase as part of the VAMI functionality.
5.3.2 Payments Details Tab
You can make payments using the ‘CI Payment’ screen.

While making a payment, you need to capture the following details:
Gross Profit
Specify the total profit made out of the project/venture that was financed through the account.
Excess Profit
The system checks the gross profit against the actual amount paid (which includes Principal + Notional Profit + Bank’s share of Gross Profit Amount). Then it computes the excess profit earned as against the notional profit amount and displays the value here.
If this value is negative, you will have to specify the same value in the ‘Amount Waived’ field in the ‘CI Payment – Component Detailed’ screen for the main profit component.
Customer Incentive
Based on the gross profit specified, the system shares the gross profit amount based on the notional profit value and the bank-customer profit sharing ratio. If the bank’s share is greater than the notional profit value, you can subtract the latter from the bank’s share and give the excess amount (fully or partially) to the customer. You need to specify this amount that you wish to give the customer, in this field.
Additional Profit
Based on the customer incentive, the system calculates the additional profit as ‘Excess Profit –Customer Incentive’ and displays the value here.
If the bank’s share is less than the notional profit, you need to calculate the shortage amount vis-à-vis the notional profit and enter the amount in the ‘Amount Waived’ field in the ‘Account Details – Components’ screen for the main profit component.
5.3.2.1 Maintaining Components
You need to maintain profit component.
Component
You need to set up the following types of components:
- Principal
- Main Profit
- Others (profit, charge, compensation etc.)
In case of balloon payments being allowed, you need to set up the following additional components:
- Balloon_Principal
- Balloon_Profit
Calculation Type
Choose the options based on the component as given below:
- Main profit component - Choose the option ‘Formula with Schedule’.
- Other profit component - Choose the required option available drop-down list.
- Balloon_Principal component - Choose the option ‘Formula with Schedule’.
- Balloon_Profit component - Choose the option ‘Formula with Schedule’.
5.3.2.2 Defining Component Details
You need to specify the details as under for the main profit component:
Main Component
Check this box.
Calculation Type
Choose the option ‘Formula With Schedule’
Component Type
Select the option ‘Profit’.
Formula Type
Select the option ‘User Defined’.
For the other profit component, you need to specify the following:
Formula Type
Select the option ‘User Defined’.
Equal Profit
Check this box.
For the charge related component, you need to specify the following details:
Formula Type
Select the option ‘Simple’.
Component Type
Select the option ‘Interest’
Periodicity
Choose the option ‘Daily’.
Period Unit
Specify the value as ‘1’.
For balloon payment components, you need to maintain the following preferences.
IRR Applicable
Check this box for ‘Balloon_Principal’ and ‘Balloon_Profit’ components.
Basis Element
Choose the option ‘BALLOON_AMOUNT’ for the component ‘Balloon_Profit’,
Formula Type
Select the option ‘Simple’.
Set up the same schedules as those for the main profit component.
5.3.2.3 Moratorium Formula
You can define the grace period as a moratorium period.
To define the moratorium formula for this period, click ‘Moratorium Liq Formula’ button in the ‘Component’ tab of the screen. The ‘Moratorium Formula’ screen is displayed:
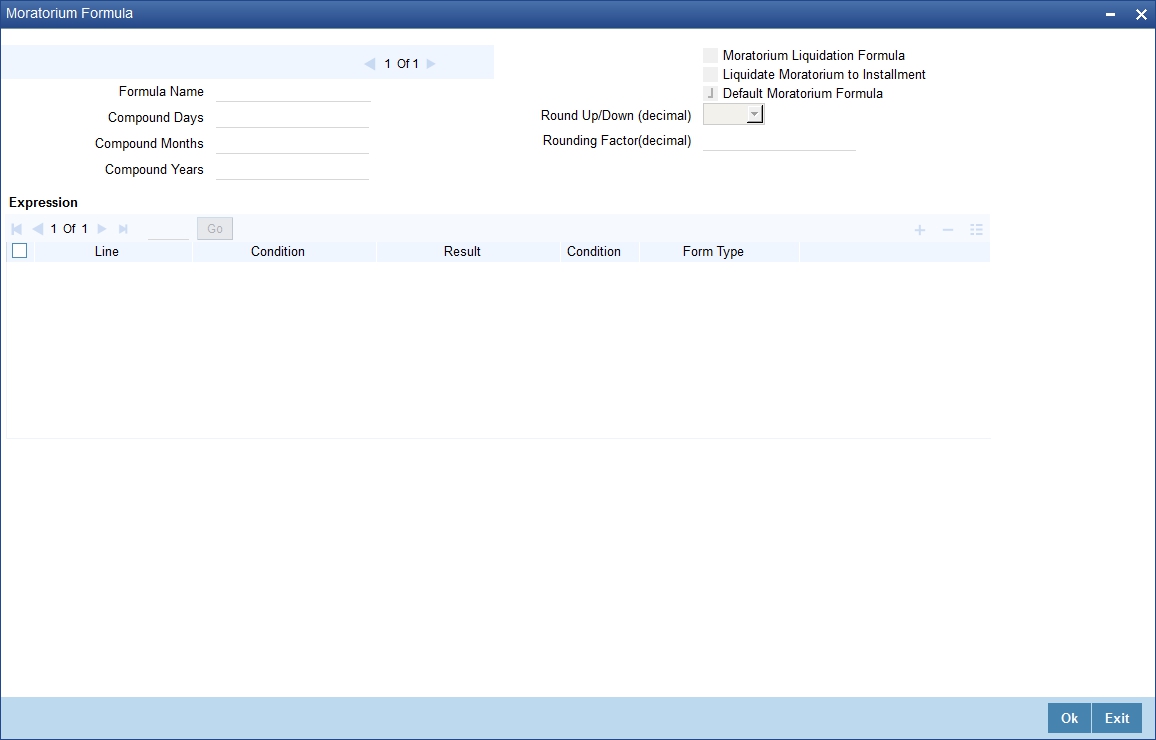
Set up the formula as TOTAL_MORA_AMOUNT/NO_OF_RPMNT_SCHS
5.3.3 Defining UDE for Supplier Grace Period and Customer Grace Period
You need to specify two effective dates for the UDE which should be used in the moratorium period - the first effective date to identify the supplier grace period (which does not have any rate) and the next date to identify the customer grace period (which has the profit rate). You can maintain the UDE in ‘UDE Value’ screen. You can modify the UDE values at the account level.
Here you need to set up the following UDEs:
- PROFIT_RATE
- MORA_INT_RATE
5.3.4 Maintaining SDE for Staff Financing
You need to define an SDE called ‘STAFF_FINANCED’ to hold the staff financed amount. You can do this using the ‘System data Elements’ screen.

Staff finance will be applicable only for the products of schedule type ‘FLAT RATE’.
Refer the chapter ‘Defining Product Categories and Products’ in this User Manual for further details about creating a product.
5.4 Creating a Murabaha Account
This section contains the following topics:
- Section 5.4.1, "Advance Payment Button"
- Section 5.4.2, "Main Tab"
- Section 5.4.3, "Capturing Staff Financing Details"
- Section 5.4.4, "Maintaining Account Class"
- Section 5.4.5, "Setting up Accounting Entries"
You can create numerous accounts under the Murabaha product using the ‘Account Details’ screen.
For a Murabaha account, you can provide the following facilities:
- Advance payment
- Supplier and customer grace period
- Charge at first installment
- Staff financing
5.4.1 Advance Payment Button
Click ‘Advance Payment’ button and invoke the ‘Advance Payment Details’ screen.

Here you can specify the following details:
Advance Payment Date
Specify the date on which payment is made to the vendor. This date cannot be equal to or greater than the finance start date. But it should be greater than previous advance payment date.
Advance Amount
Specify the amount being paid in advance on the corresponding dates. However, the sum of all the advance payments should not be greater than the net finance amount.
Profit Rate
Specify the profit rate for advance payment.
Note
You need to capture these details before you click ‘Exit’ button in the ‘Account Details – Main’ screen.
5.4.2 Main Tab
Based on the product set-up, the system picks up the UDE values to be used in the moratorium formula for the grace period. You can view the UDEs and also amend their values in the ‘Main’ tab.
5.4.2.1 Components Tab
Based on the product set-up, the system identifies the component for calculating the charge to be levied on the first installment. In the Account Details – Components’ screen, you need to specify the following details:
Special Profit Amount
Select the corresponding component and enter the charge amount in this field.
Schedule Amount
Enter the same amount against the first schedule of the component.

5.4.3 Capturing Staff Financing Details
In the ‘Account Details – Main’ screen, you need to enter the following detail:
Staff Finance
Specify the amount that needs to be disbursed as part of staff financing. This amount cannot exceed the net financed amount. This amount will be exempted from profit calculation. The system will deduct this amount from the net finance amount and then compute the profit.
5.4.4 Maintaining Account Class
To maintain a product class, the following setup needs to be made.
- For a current account class type an account class type is maintained
- The Account class should not belong to Mudarabah Account Class Type
5.4.5 Setting up Accounting Entries
You need to set up the following accounting entries:
ACCR
Accounting Role |
Amount Tag |
Dr/Cr Indicator |
COMPONENT_UID |
COMPONENT_ACCR |
Dr |
COMPONENT_INC |
COMPONENT_ACCR |
Cr |
MLIQ
Accounting Role |
Amount Tag |
Dr/Cr Indicator |
CUSTOMER A/C (DR_SETTL_BRIDGE) |
COMPONENT_LIQD |
Dr |
COMPONENT_REC |
COMPONENT_LIQD |
Cr |
COMPONENT_UID |
COMPONENT_UINR |
Dr |
COMPONENT_REC |
COMPONENT_UINR |
Cr |
UIDB
Accounting Role |
Amount Tag |
Dr/Cr Indicator |
COMPONENT_REC |
COMPONENT_UINT |
Dr |
COMPONENT_UID |
COMPONENT_UINT |
Cr |
DSBR
Accounting Role |
Amount Tag |
Dr/Cr Indicator |
LOAN ACCOUNT |
PRINCIPAL |
Dr |
OD_ BRIDGE_GL |
PRINCIPAL |
Cr |
ALIQ
Accounting Role |
Amount Tag |
Dr/Cr Indicator |
OD_BRIDGE_GL |
PRINCIPAL_LIQD |
Dr |
LOAN ACCOUNT |
PRINCIPAL_LIQD |
Cr |
DR SETTLE BRIDGE(OD Account) |
PROFIT_LIQD |
Dr |
PROFIT REC |
PROFIT_LIQD |
Cr |
Advices
Advice |
Type |
Description |
CL_ACC_SIM_ADV |
CL_ENQUIRY |
Account Simulation Advice |
CL_INIT_ADV |
CL_INIT_ADV |
Account Initiation |
CL_AMD_ADV |
CLAMDADV |
Cl Amendment Advice |
CL_INT_STMT |
CL_INT_STMT |
Interest Statement |
5.5 Musharaka/Istisnaa Product Category
This section contains the following topics:
- Section 5.5.1, "Creating a Musharaka/Istisnaa Product Category"
- Section 5.5.2, "Setting up a Musharaka/Istisnaa Product"
5.5.1 Creating a Musharaka/Istisnaa Product Category
In order to process finance transactions that involve construction of the underlying asset, you can set up a product category for Istisnaa and Musharaka under construction. Istisnaa is a housing loan with multiple disbursement schedules during the construction period. You can calculate the upfront profit booking based on the projected amount released or the profit booking based on actual disbursements.
In home finance Musharaka refers to diminishing partnership. The customer forms a partnership with the Bank for the purchase of a property. Upon acquisition, the house/property will be rented out to the Customer. The Bank receives compensation in the form of rent, which is based on a mutually agreed fair market value. The Customer will agree to buy additional shares from Bank on a monthly basis to ensure that Bank’s share reduces to zero by the end of the loan tenor.
When Musharaka is used in House under construction, the finance deal becomes a combination of Musharaka and Istisnaa agreements. The under construction period will be Istisnaa and upon completion of the house/property, the Diminishing Musharaka arrangement will take over and the Istisnaa will be terminated.
To invoke the ‘Product Category Maintenance’ screen from the Application Browser, select Islamic Financing, click on Product Category Maintenance and select Detailed under it.
5.5.2 Setting up a Musharaka/Istisnaa Product
Under the desired product category, you can set up a product to cater to the generic needs of the finance transactions of Istisnaa and Musharaka.
For processing multiple disbursements during the construction period, you need to set up disbursement schedules using the ‘Product Maintenance - Preference’ screen.
The profit amount can be calculated for the construction period and apportioned across the main profit disbursement schedules.
UDE for Construction Period UIDB
Specify the UDE from the option list, which will be used for calculation of UIDB.
You need to maintain variable rate financing for under construction period as well as post construction period.
Treatment of variable rate financing for under construction period:
- Two UDEs(Rate) will have to be used for moratorium period:
- Fixed Rate UDE- (Maintained at ceiling rate) - This UDE can be used for UIDB computation and has to be specified in ‘UDE for Construction Period UIDB’ field
- Floating Rate UDE – (Caped on ceiling rate) - This UDE can be used for schedule computation and has to be specified in Moratorium formula
Treatment of variable rate financing for post construction period:
- An additional Rebate component will have to be maintained, which will compute the Profit using the floating Rebate rate. If the rebate rate remains less than the profit rate, the difference will be given as a rebate to the customer.
- Two UDEs(Rate) will have to be used for re-payment period:
- Fixed Rate UDE- (Maintained at ceiling rate- Profit Rate) - This UDE can be used for UIDB computation as well as schedule computation. This will be used in formula for re-payment period.
- Floating Rate UDE - (Caped on Profit rate) - This UDE can be used in defining formula for Rebate component
You need to manual disbursement product with ‘Construction Period Profit Basis’ as ‘Actual’ and ‘Cap on nominal’ option should be selected.
As the repayment for these transactions is normally done after a window period post construction, you can create a moratorium period using the ‘Product Maintenance - Component’ screen.
5.6 Wakala Product Category
This section contains the following topics:
- Section 5.6.1, "Creating a Wakala Product Category"
- Section 5.6.2, "Setting up a Wakala Product"
- Section 5.6.3, "Preferences Tab"
- Section 5.6.4, "Component Tab"
- Section 5.6.5, "Setting up Accounting Entries and Accounting Roles"
- Section 5.6.6, "Creating a Wakala Account"
5.6.1 Creating a Wakala Product Category
Wakala is an agency contract, where the business is managed by an agent appointed by the owner of the principal. The bank finances the customer with advance money, for that the customer will not have to pay any profit during this period. The fee for the Wakala period will be recovered from the customer when the Wakala gets converted into a Murabaha contract. No profit, fee or charges are made during the Wakala transaction period. Normal tenor of a Wakala contract will be of one week to 10 days.
On saving the Murabaha account, the system automatically liquidates all the linked Wakala accounts and on reversal of Murabaha account, the system automatically reverses all the liquidation entries of linked Wakala accounts.
In order to process finance transactions, you can set up a product category for Wakala and Wakala to Murabaha under construction.
Product Category
You have to specify one of the names of the finance service which will identify the Wakala to Murabaha or Wakala category uniquely in the system.
5.6.2 Setting up a Wakala Product
Under the desired product category, you can set up a product to cater to the generic needs of the finance transactions of Wakala and Wakala to Murabaha. You can capture Wakala product details in the ‘Product’ screen. To invoke this screen, select Islamic Financing, choose Product and then, Detailed under it.

Product Category
Select the category maintained for Wakala transactions from the option list.
5.6.3 Preferences Tab
Click ’Preferences’ tab in the ‘Product’ screen to move to this section of the screen.
Disbursement Mode
Choose the option ‘Auto’ for the WAKALATOMURABAHA product.
5.6.4 Component Tab
Click ‘Components’ tab in the ‘Product’ screen to move to this section of the screen.
You should maintain the following preferences for the finance product:
Calculation Type
Choose the option’ No Schedule No Formula’ for the profit component from the drop down list.
Formula Type
Choose the option ‘User defined’ from the drop-down list.
Accruals Provisioning
The check box ‘Accrual required’ is disabled for the Wakala products.
Equal Profit
Check this box.
5.6.4.1 Creating the Booked Formula
You need to create the booked formula as given below:
@WAKALA (INTEREST_RATE, YEAR)

The System will perform the below validations when a Wakala Account is linked to Wakala to Murabaha Account:
- Whether the amount financed is equal for both Wakala and Murabaha accounts or not
- Whether the customer for both Wakala and Murabaha accounts are same or not
- Whether the Currency and Branch for both Wakala and Murabaha accounts are same or not
5.6.5 Setting up Accounting Entries and Accounting Roles
5.6.5.1 Accounting Roles
You need to set up the following accounting roles for the Wakala product:
Accounting Role |
Description |
WAKALA_ASSETGL |
Real Asset for Wakala account |
WAKALA_SUSPGL |
Suspense GL for Wakala-Murabaha |
5.6.5.2 Accounting Entries
You need to set up the following event-wise accounting entries for Wakala contract:
DSBR
The following accounting entries are passed for this event for Wakala product:
Accounting Role |
Amount Tag |
Dr /Cr |
WAKALA_ASSETGL |
PRINCIPAL |
Dr |
CR_SETTL_BRIDGE |
PRINCIPAL |
Cr |
The following accounting entries are passed for this event for the Murabaha product (which is under ‘WAKALA TO MURABAHA’ Product Category):
Accounting Role |
Amount Tag |
Dr /Cr |
LOAN_ACCOUNT |
PRINCIPAL |
Dr |
WAKALA_SUSPGL |
PRINCIPAL |
Cr |
MLIQ
The following accounting entries are passed for this event for the Wakala product:
Accounting Role |
Amount Tag |
Dr /Cr |
WAKALA_SUSPGL |
PRINCIPAL_LIQD |
Dr |
WAKALA_ASSETGL |
PRINCIPAL_LIQD |
Cr |
5.6.6 Creating a Wakala Account
You can create a Wakala account using the ‘Account Details’ screen. You can maintain Wakala Transaction as single disbursement.
Product Code
The Murabaha account must be booked under ‘WAKALATOMURABAHA’ product category.
5.7 Tawarooq Product
This section contains the following topics:
- Section 5.7.1, "Creating a Tawarooq Product"
- Section 5.7.2, "Components Tab"
- Section 5.7.3, "Setting up Accounting Entries"
- Section 5.7.4, "Processing Tawarooq Accounts"
5.7.1 Creating a Tawarooq Product
Tawarooq is a finance contract for buying an underlying commodity from a dealer on behalf of the customer and then at the request of the customer advising the dealer to sell the same. The sale proceeds of the disposed asset by the dealer will be paid to the customer.
As part of Tawarooq transaction the customer (counter Party) in need of money approaches a bank. The bank sells an asset to the customer which was bought from the Dealer already on a differed payment basis. The customer sells the asset to the dealer and obtains the cash from him in which commission of the dealer is levied.
You can capture Tawarooq product detils in the ‘Product’ screen. To invoke this screen, click on Islamic Financing in the Application browser, select Product and click on Detailed under it.
Product Category
Select the category maintained for Tawarooq transactions from the option list.
5.7.2 Components Tab
Click ’Components’ tab in the ‘Product’ screen to move to this section of the screen.
The Reimbursement Mode Details button is used to capture the reimbursement settlement details of the dealer account.
Click on the ‘Reimb Mode Details’ button the following screen will be launched.

In case the dealer account is different from the initial dealer, it will be captured in sale confirmation screen shown below.
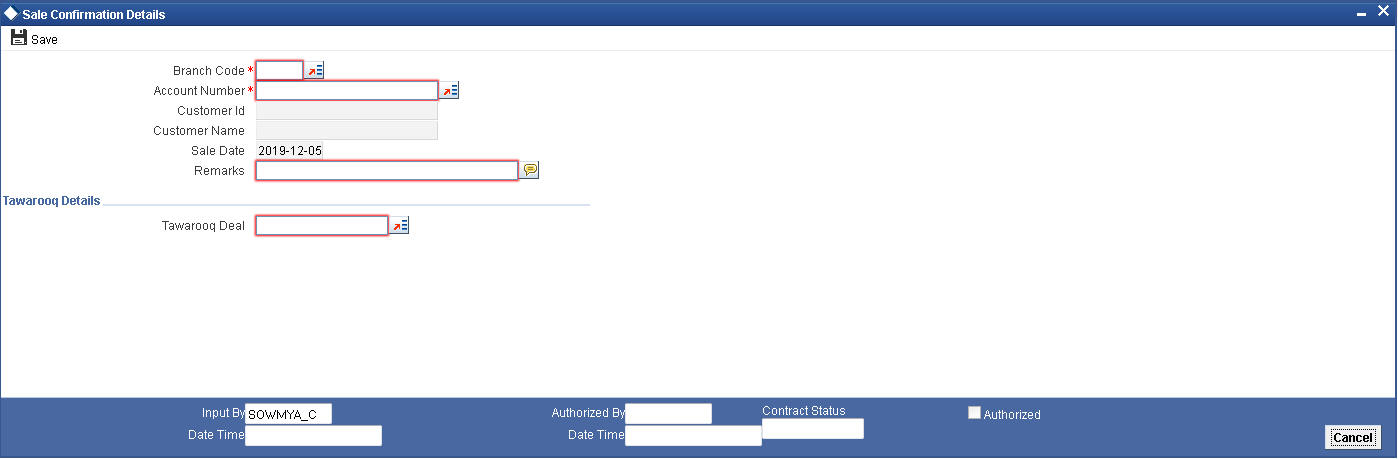
The system on triggering sale confirmation, will fire the TWSL event to indicate that the commodity can be sold to another dealer.
5.7.3 Setting up Accounting Entries
You need to set up the following event-wise accounting entries for the Tawarooq account:
BOOK
Accounting Role |
Amount TAG |
Dr/Cr Indicator |
DEALERWIPACC |
Principal |
Dr Dealer Receivable Account |
CR_SETTL_BRIDGE |
Principal |
Cr Dealer |
DSBR
Accounting Role |
Amount TAG |
Dr/Cr Indicator |
DR_SETTL_BRIDGE |
Principal |
Dr Dealer |
CR_SETTL_BRIDGE |
Principal |
Cr Customer |
LOAN_ACCOUNT |
Principal |
Dr Asset GL |
DEALERWIPACC |
Principal |
Cr Dealer Receivable Account |
DR_SETTL_BRIDGE |
CHG_INC |
Dr Customer |
CHGINC |
CHG_INC |
Cr Charge Income |
UIDB
Accounting Role |
Amount TAG |
Dr/Cr Indicator |
PROFIT_REC |
Profit _UINT |
Dr Profit Receivable |
PROFIT_UID |
Profit _UINT |
Cr Profit Upfront (UID) |
ACCR
Accounting Role |
Amount TAG |
Dr/Cr Indicator |
PROFITREC |
Profit_Accr |
Dr Profit Upfront (UID) |
PROFIT_UID |
Profit_Accr |
Cr Profit income |
ALIQ
Accounting Role |
Amount Tag |
Dr/Cr Indicator |
DR_SETTL_BRIDGE |
Principal_liqd |
Dr Customer |
LOAN_ACCOUNT |
Principal_liqd |
Cr Asset GL |
DR_SETTL_BRIDGE |
Profit_LIQD |
Dr Customer |
PROFITREC |
Profit_LIQD |
Cr Profit receivable |
Advices for Tawarooq
Advice |
Type |
Description |
CL_INIT_ADV |
CL_INIT_ADV |
Account Initiation Advice |
5.7.4 Processing Tawarooq Accounts
The processing of Tawarooq contract is done as follows:
- During disbursement, the system will compute profit and pass the accounting entry with the UIDB event. The system also disburses the amount of the asset to the customer and passes the accounting entries.
- In case of pre-payment, the system will compute the accrued interest and then adjust the balance against the principal. The Upfront Profit will also be recalculated.
- The system will not keep track of underlying asset associated with the contract.
- If the dealer account is maintained at sale confirmation, the account is picked up while passing the accounting entries for a reimbursement account, else the reimbursement account maintained at the account level will be picked up.