4. Product Maintenances and Product
Like any other module in Oracle FLEXCUBE collection module also got some collection products which can be mapped to the contracts. Collection Product can be mapped to the asset products and if any default happens during the payment, this product can be used for mapping to agent group.
For any product you create in Oracle FLEXCUBE, you can define generic attributes. For a CN product, in addition to these generic attributes, you can specifically define other attributes. These attributes are discussed in detail in this chapter.
For further information on the generic attributes that you can define for a product, please refer the following Oracle FLEXCUBE User Manuals under Modularity:
- Product Definition
- Interest
- User Defined Fields
- Settlements
In Oracle FLEXCUBE, you can maintain following details for a collections product:
- Broken Promise Fee Rule
- Accounting Roles
- Definition of Events
- Accounting entries for the event – BFEE (Broken promise Penalty Charge)
- Mapping Collection product with asset product
This chapter contains the following sections:
- Section 4.1, "Collections Product"
- Section 4.2, "Collection State Mapping"
- Section 4.3, "Queue Derivation Rule"
- Section 4.4, "Queue Assignment Pending Queue"
4.1 Collections Product
This section contains the following topics:
- Section 4.1.1, "Maintaining Collection Products"
- Section 4.1.2, "Preferences Tab"
- Section 4.1.3, "Accounting Roles Tab"
- Section 4.1.4, "Events Tab"
- Section 4.1.5, "Charges Tab"
- Section 4.1.6, "MIS Tab"
- Section 4.1.7, "Viewing the Summary of Collection Products"
4.1.1 Maintaining Collection Products
You can maintain the product details in the ‘Product Maintenance for Collection’ screen.
You can invoke this screen by typing ‘CNDPRMNT’ in the field at the top right corner of the Application tool bar and clicking on the adjoining arrow button.

You can maintain the basic information relating to collection product here.
Product Code
Specify a product code for the product you are maintaining.
Product Description
Specify a product description for the product you are maintaining.
Start Date
Specify the date from which this product should be open for contracts to be created under it.
End Date
Specify the date until which contracts should be created using this particular product.
Slogan
Specify the details that should appear in the report or an advice generated with regard to this product.
Remarks
Specify any remarks or comments regarding the product here.
4.1.2 Preferences Tab
‘Preferences’ are the attributes or terms related to core processing that you define for a product. By default, any action involving a product inherits all the attributes defined for the product. However, some attributes (preferences) that are defined during the product creation can be changed during the processing of individual collection contracts involving the product.
Click ‘Preferences’ button to invoke the Collections Product Preferences screen. Through this screen you can define the following Preferences for a product:
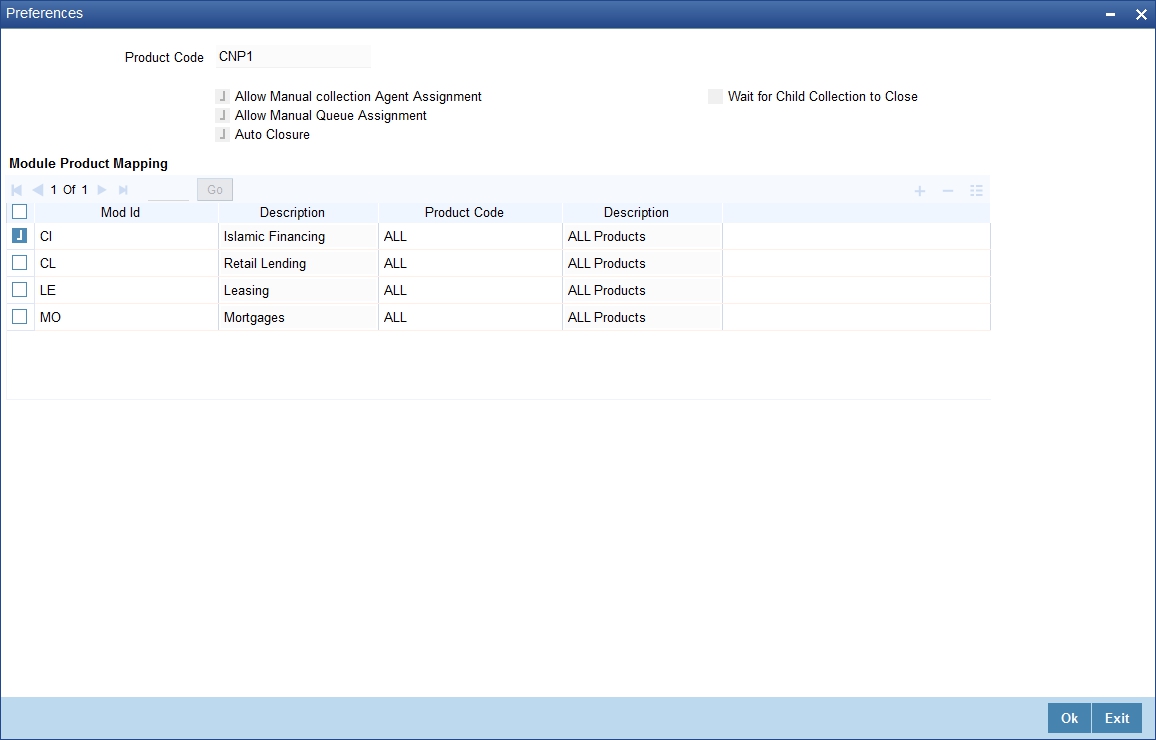
The product code you specified for the product in the product definition screen gets displayed at the top of the screen. You can provide the other attributes here:
Allow Manual Collection Agent Assignment
Select this box if the manual assignment of Collection Agents for the collections under this product has to be enabled.
Allow Manual Queue Assignment
Select this box if the manual assignment of Queues for the underlying collections has to be enabled.
Note
Manual Collection Agent and Queue assignment are not applicable when an exception is being processed from the ‘Queue Assignment Pending Queue’ screen. (CNDASGNQ)
Auto Closure
Select this box if the automatic closure of the collections should be enabled when the loan status comes to normal without any overdue.
Wait for Chile collection to Close
Check this box to indicate that the parent collection contract should wait till the child collection is closed. If this box is unchecked, then the parent contract will be closed even if the child collection is in active status.
Module Product Mapping
You can map asset products with the collections product here.
Mod Id
Select the asset module code to which you want to link the collections product. The description of the selected module code also gets displayed.
Product Code
Select the asset product code to which you want to link the collections product. The description of the selected product code also gets displayed.
4.1.3 Accounting Roles Tab
For further details on accounting role, refer to heading ‘Setting up Accounting Details for a Product’ in the Product Module.
4.1.4 Events Tab
A contract goes through different stages in its life cycle. In Oracle FLEXCUBE, the different stages a contract passes through in its life cycle are referred to as ’Events‘.
At an event, typically, you would want to post the accounting entries to the appropriate account heads and generate the required advices. While setting up a product, you can define the accounting entries that have to be posted and the advices that have to be generated, after the product is authorized.
Therefore, for the required events you have to specify the Accounting entries, Charges, Policies and Advices. To do this, click ’Events’ tab in the ‘Collections Product’ screen – the following screen is displayed.
For further information on the maintaining ‘Accounting Entries’ and Advices’ please refer the Product User Manuals
4.1.5 Charges Tab
You can refer the module ‘Charges and Fees’ module also for a complete reference on Charges details.
4.1.6 MIS Tab
For further details on MIS, refer to the heading ‘Capturing MIS Details’ for a Product in the Product Module. You can refer the module ‘Management Information System’ module also for a complete reference on MIS details.
4.1.7 Viewing the Summary of Collection Products
You can view the summary of collection products in the ‘Summary Collection Product Codes’ screen.
You can invoke this screen by typing ‘CNSPRMNT’ in the field at the top right corner of the Application tool bar and clicking on the adjoining arrow button.
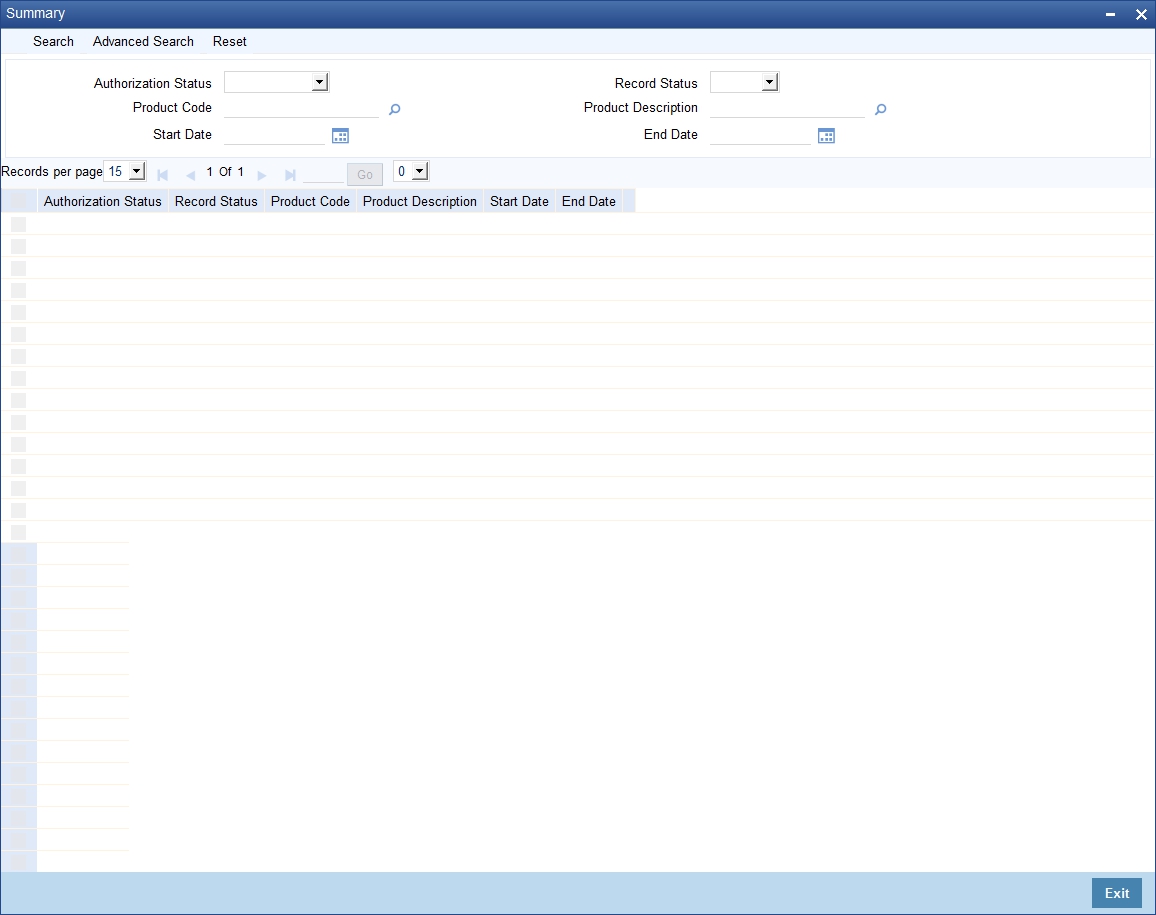
To view the summary of collection product codes, you can perform a search based on any of the following
Authorisation Status
Select the authorisation status of the collection product as:
- Authorised
- Unauthorised
Record Status
Select the record status of the collection product as:
- Open
- Closed
Product Code
Select a valid product code from the options available.
Product Description
Select a valid product code description from the options available.
Start Date
Select a valid start date of the product code from the calendar option from available
End Date
Select a valid end date of the product code from the calendar option from available
Click ‘Search’ button to view the records based on criteria you have selected. The following details of the record get displayed.
- Authorisation Status
- Record Status
- Product Code
- Product Description
- Start Date
- End Date
4.2 Collection State Mapping
This section contains the following topics:
- Section 4.2.1, "Mapping of Collection State to a Product"
- Section 4.2.2, "Viewing the Summary of Collection State to a Product"
4.2.1 Mapping of Collection State to a Product
You can assign a new state for a collection product after validating the combination of previous state and the action- result. The mapping of a collection state for a product is done for branch, product and source code combination. During the batch process the state change becomes effective.
You can invoke this screen by typing ‘CNDSTMAP’ in the field at the top right corner of the Application tool bar and clicking on the adjoining arrow button.

You can assign new state for the branch, product and source code combination here.
Branch
Specify the branch code for which the state mapping should be done. You can also specify ‘ALL’ if it applies to all branches of your bank.
Product
Specify the product code for which the state mapping should be done. You can also specify ‘ALL’ if it applies to all collection products.
Source Code
Specify a source code to maintain the state mapping if there is no product involved.
You can assign the new state here:
Previous State
Specify a valid state code maintained in the system.
Action
Select a valid action code from the option list provided.
Result
Select a valid result from the option list provided.
New state
Specify the new state of the collection product here.
You can map new state to multiple previous state of collection product.
Click add icon to add another approver to the action code being defined. To remove a particular status from the list, click delete icon.
4.2.2 Viewing the Summary of Collection State to a Product
You can view the summary of collection state mapping to product in the ‘Summary of Collection State Mapping’ screen.
You can invoke this screen by typing ‘CNSSTMAP’ in the field at the top right corner of the Application tool bar and clicking on the adjoining arrow button.

To view the summary of collection state mapping to a product, you can perform a search based on any of the following
Authorisation Status
Select the authorisation status of the collection state mapping as:
- Authorised
- Unauthorised
Record Status
Select the record status of the collection state mapping as:
- Open
- Closed
Branch
Select a valid branch for querying the collection state mapping
Source Code
Select a valid source for querying the collection state mapping
Product
Select a valid product code from the options available.
Product Description
Select a valid product code description from the options available.
Click ‘Search’ button to view the records based on criteria you have selected. The following details of the record get displayed.
- Authorisation Status
- Record Status
- Branch
- Source Code
- Product
4.3 Queue Derivation Rule
This section contains the following topics:
- Section 4.3.1, "Maintaining Queue Derivation Rule"
- Section 4.3.2, "Viewing the Summary of Collection Queue Derivation"
4.3.1 Maintaining Queue Derivation Rule
You can provide the logic for the system to assign a particular queue to a collection reference number in the ‘Queue Derivation Rule’ screen.
You can invoke this screen by typing ‘CNDQRULE’ in the field at the top right corner of the Application tool bar and clicking on the adjoining arrow button.
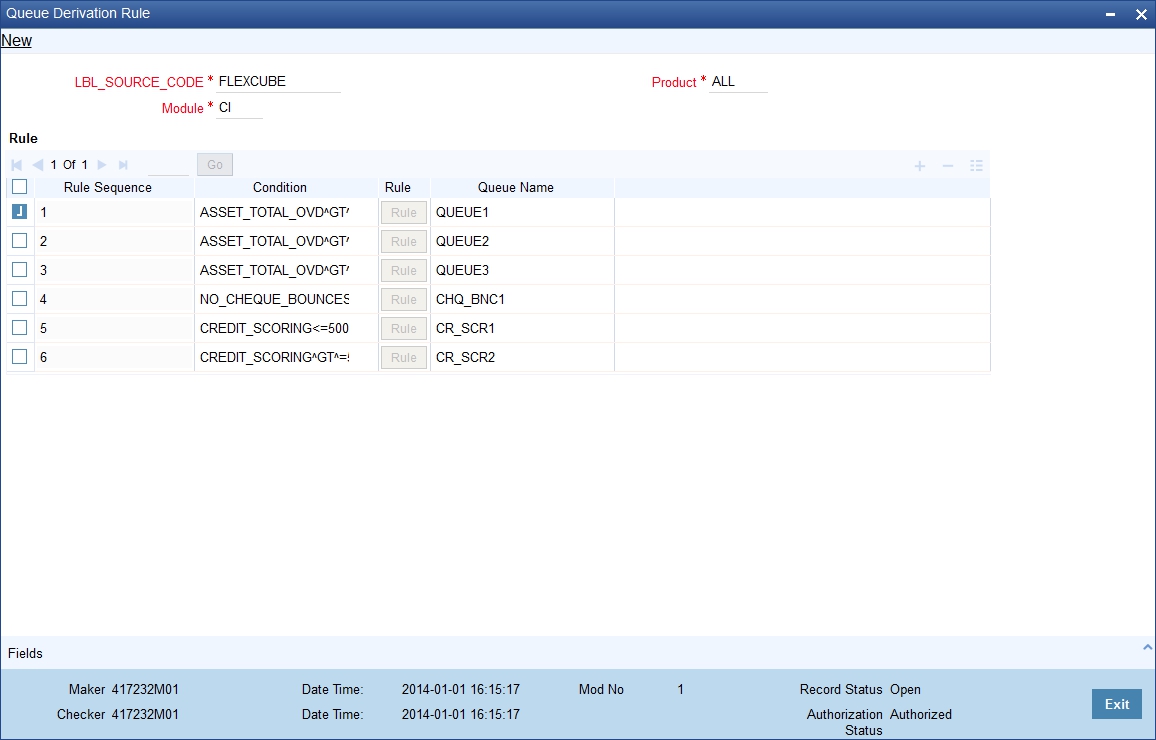
You can provide the following details here.
Source Code
Specify a source code for which the queue derivation logic has to be maintained. FLEXCUBE is applicable if you are selecting CL, CI, LE or MO modules. You can provide external source for all other cases.
Module
Specify the module for which the Queue derivation logic has to be maintained from the following list if the source code is FLEXCUBE:
- CL
- LE
- MO
- CI
Product
Specify a product code for which the queue derivation logic has to be maintained. The products of the selected module appear in the list of values.
Rule
Rule Sequence number is assigned by the system in order of the in the multiple entry block. The rules will be executed in ascending order of the rule sequence to arrive at the queue applicable.
Condition
Specify the condition using the condition screen provided for this field, which is validated during save
Queue Name
Enter the queue name for which this rule is maintained.
Click ‘Rule’ button to provide condition details for queue derivation in the ‘Condition’ screen.

You can provide the condition details here.
Elements
Select a valid system data element which can be used in the condition to form a criterion.
Condition
Specify the condition which can be used in the condition to form a criterion.
You can select the mathematical, logical options along with operators.
Value
Specify the value which can be used in the condition to form a criterion
Click ‘Accept’ to select the criterion specified here, which will be assigned for queue derivation.
4.3.2 Viewing the Summary of Collection Queue Derivation
You can view the summary of collection queue derivation in the ‘Summary of Collection Queue Derivation’ screen.
You can invoke this screen by typing ‘CNSQRULE’ in the field at the top right corner of the Application tool bar and clicking on the adjoining arrow button.
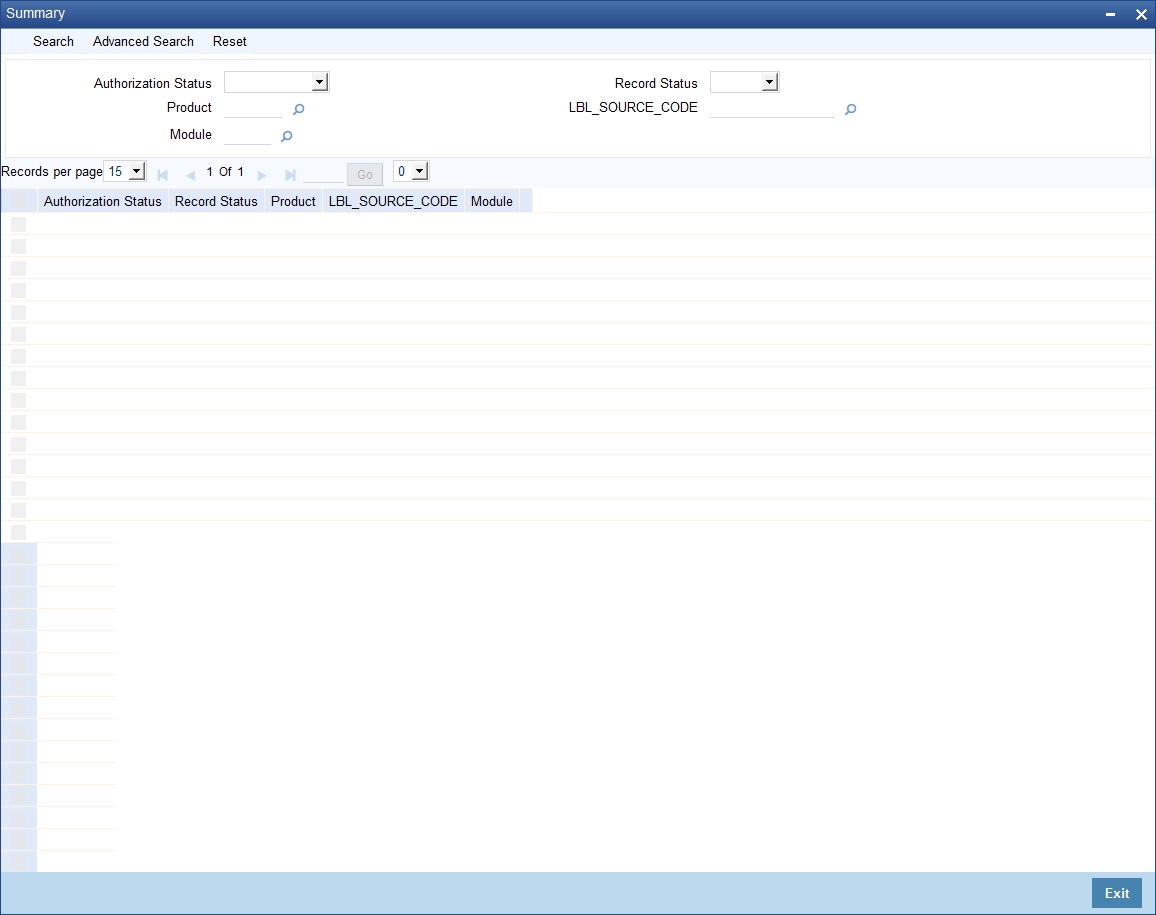
To view the summary of collection queue derivation rule, you can perform a search based on any of the following
Authorisation Status
Select the authorisation status of the queue derivation rule as:
- Authorised
- Unauthorised
Record Status
Select the record status of the queue derivation rule as:
- Open
- Closed
Source Code
Select a valid source for querying the queue derivation rule
Product
Select a valid product code from the options available.
Module
Select a valid module from the options available.
Click ‘Search’ button to view the records based on criteria you have selected. The following details of the record get displayed.
- Authorisation Status
- Record Status
- Module
- Source Code
- Product
4.4 Queue Assignment Pending Queue
This section contains the following topics:
- Section 4.4.1, "Assigning Exceptional Queues"
- Section 4.4.2, "Viewing the Summary of Collection Queue Assignment Exception"
- Section 4.4.3, "Operations on Queue Assignment Exception Record"
4.4.1 Assigning Exceptional Queues
During batch process system assigns the new collection references as per the queue derivation rule you have defined.
There can be exceptional cases during this process due to which the queue could not be assigned and in such cases, the Queue, Collection Agent Group and Collection Agent gets displayed as “##”. And in some cases, the new Queue derived based on the parameters differ from the currently assigned queues. Hence system doesn’t change the collection queue automatically you need to change the queue and the collection agent.
You can manually assign or change the queue after batch process using the ‘Queue Assignment Exception’ screen.
You can invoke this screen by typing ‘CNDASGNQ’ in the field at the top right corner of the Application tool bar and clicking on the adjoining arrow button.

You can perform query in this screen for the records for assigning new queue or rejecting.
Branch Code
Specify the branch code to perform query based on this.
Batch Processing Date
Specify the batch processing date to perform query based on this.
Collection Product
Specify the collection product to perform query based on this.
List Exceptions only
Select a specific exception case from the option available to perform query based on this.
Asset Product
Specify the asset product code to perform query based on this.
List Queue Changes only
Select the specific queue changes perform query based on this.
Asset Reference
Specify the asset reference code to perform query based on this.
Collection Reference
Specify the collection reference code to perform query based on this.
Process Exceptions
The query details get displayed in the multiple entry boxes in ‘Process Exception’ section.
After the required records have been queried, the same can be assigned or rejected upon using the two buttons “Assign New Queues” (which will accept the new queue suggested by the batch) or “Reject New Queues” (which will ignore this queue assignment suggested by the batch)
System generates Bulk Reference number during save to store the audit log
4.4.2 Viewing the Summary of Collection Queue Assignment Exception
You can view the summary of collection queue assignment exception in the ‘Summary of Collection Queue Assignment Pending’ screen.
You can invoke this screen by typing ‘CNSASGNQ’ in the field at the top right corner of the Application tool bar and clicking on the adjoining arrow button.

To view the summary of collection queue assignment exception, you can perform a search based on any of the following
Bulk Reference
Select the bulk reference number from the list of values available here.
Comments
Select a valid comment from the list of values available here.
Click ‘Search’ button to view the records based on criteria you have selected. The following details of the record get displayed.
- Bulk Reference
- Comments
4.4.3 Operations on Queue Assignment Exception Record
You can perform the following operations on action-result-next action maintenance record (if any function under the application toolbar is disabled, it means that the function is not allowed for the record):
- Create and save a new record
- Authorize the record
- Query the details of a record
- Delete the record
Refer to the manual on Common Procedures for details of these operations.