5. Defining Attributes of Teller Product
As a bank, you will offer your customers a variety of financial services. For example, you may deal in traveller’s cheques, offer loans, accept short and long term deposits, and so on.
Each of these services can be further classified. Take, for example, traveller’s cheques You can:
- buy traveller’s cheques in the local currency
- sell traveller’s cheques in the local currency
- buy traveller’s cheques in USD
- sell traveller’s cheques in USD
- buy traveller’s cheques in GBP
- sell traveller’s cheques in GBP etc
You can make a ‘product’ of each of these traveller’s cheques that you deal in. In this chapter, we shall discuss the manner in which you can define attributes specific to a Teller product.
This chapter contains the following section:
5.1 Teller Product Definition
This section contains the following topics:
- Section 5.1.1, "Creating Teller Product"
- Section 5.1.2, "Accounting Roles Button"
- Section 5.1.3, "Events Button"
- Section 5.1.4, "Branch Currency tab"
- Section 5.1.5, "Customer Button"
- Section 5.1.6, "Preferences tab"
- Section 5.1.7, "MIS Button"
- Section 5.1.8, "Charges Button"
- Section 5.1.9, "Tax Button"
- Section 5.1.10, "User-Defined Fields Button"
- Section 5.1.11, "Viewing Product Summary"
5.1.1 Creating Teller Product
You can create a Teller product in the ‘Teller Product Definition Detailed’ screen, invoked from the Application Browser. You can invoke this screen by typing ‘DEDPRMNT’ in the field at the top right corner of the Application tool bar and clicking the adjoining arrow button. In this screen, you can enter basic information relating to a teller product such as the Product Code, the Description, etc.

For any product you create in Oracle FLEXCUBE, you can define generic attributes, such as branch, currency, and customer restrictions, interest details, tax details, etc., by clicking on the appropriate button in the horizontal array of buttons in this screen. For a teller product, in addition to these generic attributes, you can specifically define other attributes. These attributes are discussed in detail in this chapter.
You can define the attributes specific to a teller product in the Data Entry Product Definition Main screen and the Data Entry Product Preferences screen. In these screens, you can specify the product type and set the product preferences respectively.
For further information on the generic attributes that you can define for a product, please refer the following Oracle FLEXCUBE User Manuals under Modularity:
- Product Definition (In the Products manual, you would also find information on setting up accounting roles and heads, accounting entries and advices for events, as well as the branch, currency and customer restrictions)
- Interest
- Charges and Fees
- Tax
- User Defined Fields
Product Code
Specify a unique code to identify the product.
Product Description
Specify a brief description for the product.
Slogan
Specify a slogan that should be used for the product.
Type
The first attribute that you define for a product is its type. You can broadly classify products into two types in the Data Entry module of Oracle FLEXCUBE - Cash and Others.
For example, you have created a product for USD traveller’s cheques called TravelUS. Assume you would like to offer this product only to customers who have an account with you and will accept payments only in cheques.
When you create TravelUS you would indicate the product type as ‘Others’.
If, on the other hand, you choose to offer the product TravelUS to anyone for a cash payment you would define the product type as ‘cash.’
Under each product type you can create any number of products.
Data Entry Product Type
Specify the Data Entry product type to which the product belongs. The adjoining option list displays all valid Data Entry product types maintained in the system. You can select the appropriate one.
Description
A brief description of the chosen Data Entry product type is displayed here.
Clearing Product Code
Specify the Clearing product to which the product belongs. The adjoining option list displays all valid Clearing product codes maintained in the system. You can select the appropriate one.
Role To Head Class
Specify the Role to Head Mapping class to which the product belongs. The adjoining option list displays all valid Role to Head class codes maintained in the system. You can select the appropriate one.
Product Group
Specify the group to which the product belongs. The adjoining option list displays all valid group codes maintained in the system. You can select the appropriate one.
Description
The system displays a description for the chosen product group.
Start Date
Specify the date from which the product should come into effect, using the adjoining calendar.
End Date
Specify the date until which the product should be effective, using the adjoining calendar.
Remarks
You can specify remarks for the product.
5.1.2 Accounting Roles Button
Click ‘Accounting Roles’ button and invoke the following screen to define accounting roles for the product you are creating. In this screen you can map accounting roles to accounting heads.

Refer the Products User Manual under Modularity for further details.
5.1.3 Events Button
Click ‘Events’ button and invoke the ‘Events’ screen. Through this screen, you can define events for transactions and also specify details of accounting entries and advices that have to be generated for the events that take place during the life cycle of transactions.

Refer the Product Definition User Manual under Modularity for further details.
5.1.3.1 Accounting Entries Button
Click ‘Accounting Entries’ button in the ‘Events’ screen and invoke the ‘Accounting Entries’ screen to define accounting entries for every event.

Refer the Product Definition User Manual under Modularity for further details.
5.1.3.2 Advices Button
Click ‘Advices’ button in the ‘Events’ screen and invoke the ‘Advices’ screen to define advices for every event.

Refer the Product Definition User Manual under Modularity for further details.
5.1.4 Branch Currency tab
Click ‘Branch Currency’ tab and invoke the ‘Branch/Currency Restriction’ screen. In this screen you have the option of allowing all the branches of your bank to use the product or restricting its use to only some branches. By default when a new product is created no branches will be disallowed.
You can also specify the currencies allowed or restricted for the product. This currency corresponds to the transaction currency. By default when a new product is created no currencies will be disallowed.

Specify the following details.
Product Code and Description
The system displays the product code and description.
Class Code
Specify the class code that you want to link to the product. The adjoining option list displays all valid class codes maintained in the system. You can select the appropriate one.
Class Description
The system displays a brief description of the chosen class.
Click ‘Default from Class’ button. The system will then pick up all preferences maintained for the selected class and display them in this screen. However, you can change the preferences for a product.
Branch Restrictions
Indicate whether you want to create a list of allowed branches or disallowed branches by selecting one of the following options:
- Allowed
- Disallowed
Currency Restrictions
Indicate whether you want to create a list of allowed currencies or disallowed currencies by selecting one of the following options:
- Allowed
- Disallowed
Branch Code
Depending on whether you have opted to create an ‘Allowed’ or ‘Disallowed’ list, you can specify the branches to be included in the list.
Branch Code
Specify the branch code that should be included in the ‘Allowed’ or ‘Disallowed’ list. The adjoining option list displays all valid branch codes maintained in the system. You can select the appropriate one.
Branch Description
Based on the branch code, the system displays a brief description of the branch.
You can maintain multiple branches in the list.
Currency Restrictions
Depending on whether you have opted to create an ‘Allowed’ or ‘Disallowed’ list, you can specify the currencies to be included in the list.
Currency Code
Specify the currency code that should be included in the ‘Allowed’ or ‘Disallowed’ list. The adjoining option list displays all valid currency codes maintained in the system. You can select the appropriate one.
Currency Description
Based on the currency code, the system displays a brief description of the currency.
You can maintain multiple currencies in the list.
5.1.5 Customer Button
Click ‘Customer’ button to invoke the ‘Customer Restrictions’ screen. In this screen you can specify the categories of customers or the customers themselves with whom you can enter into bills involving the product.

Specify the following details.
Product Code and Description
The system displays the product code and description.
Class Details
You can link a class code to the product.
Class Code
Specify the class code that you want to link to the product. The adjoining option list displays all valid class codes maintained in the system. You can select the appropriate one.
Class Description
The system displays a brief description of the chosen class.
Click ‘Default from Class’ button. The system will then pick up all preferences maintained for the selected class and display them in this screen. However, you can change the preferences for a product.
Category Restriction
Categories List
Indicate whether you want to create a list of allowed customers or disallowed customers by choosing one of the following options:
- Allowed
- Disallowed
Category
Specify the following details:
Code
Specify the customer category code that should be included in the allowed or disallowed list. The adjoining option list displays all customer category codes available in the system. You can choose the appropriate one.
Description
The system displays a brief description of the branch code.
You can choose multiple customer categories.
Exempted Customers
You can exclude certain customers belonging to the allowed/disallowed category from being part of the list.
Customer ID
Specify the customer ID that you want to exclude from the allowed/disallowed list. The adjoining option list displays all customer identification number (CIF) available in the system. You can choose the appropriate one.
Customer Name
The system displays the name of the customer.
Restriction Type
If you have maintained an allowed list, choose the option ‘Disallowed’ and vice-versa.
5.1.6 Preferences tab
When you create a product, you can specify certain operational procedures that you would like Tellers and Data Entry Supervisors to follow when they enter or ‘authorize’ transactions involving the product. These specifications are referred to as ‘Preferences’ for a product.
The ‘preferences’ that can be specified
In the Preferences screen you can define “preferences” for a product. The following are the “preferences” you can define:
- Whether certain important details relating to the transaction need
to be ‘rekeyed’ by the ‘authorizer’ of the transaction.
The details could be any of the following:
- transaction account
- offset account
- value date
- transaction amount
- instrument number
- transaction currency
- Whether the charges that you want to levy are to be collected by
default from the
- transaction amount
- offset amount
- Whether the default offset currency is the
- transaction currency or the
- local currency
- Whether bank codes (of other banks) should be entered in case of cheque transactions
- You can specify the Maximum and Minimum Transaction amount in the local currency
- The percentage of the Maximum and Minimum Exchange Rate Variance
- The Exchange Rate Type
- You can opt to verify the signature of the customer involved in a transaction exceeding a specified amount.
These preferences will apply to all transactions involving the product
In the Data Entry Product Definition screen, click ‘Preferences’ to invoke the ‘Product Preferences’ screen.

You can capture the following details:
Product Code and Description
The system displays the product code and its description from the main screen.
Transaction Authorization
Rekey Required
All transaction entered in the system should be ratified or ‘authorized’ by a user with the requisite rights. This is a security feature.
When a transaction involving a product is authorized, you can indicate, in this screen, if the transaction details need to be rekeyed by the authorizer. If you opt for rekey of details click on the button against ‘Yes’ under ‘Rekey Required’.
You can indicate which of the details that you would like the authorizer to rekey. Click on the box adjacent to any or any of the following to indicate that it should be rekeyed:
- Rekey Transaction Account
- Rekey Transaction Amount
- Rekey Offset Account
- Rekey Value Date
- Rekey Instrument Number
- Rekey Transaction Currency
Default Charge Collection Account
You can indicate if the charges are to be collected, by default, from the transaction account or the offset account involved in the transaction. Click on the button adjacent to the account which you would like to debit for the charge.
Default Offset Currency
In this field, you can specify the offset currency for transactions involving the product. The offset currency can either be the local currency or the transaction currency.
Click on the button adjacent to ‘Txn Ccy’ if you would like to specify that as the offset currency for transactions involving the product. Or, click on ‘LCY’ to indicate if the offset currency is the local currency.
Bank Code Required
You can maintain a list of banks that participate in your clearing house (refer the branch conditions table). Maintaining a list of such banks helps you track and clear cheques bank-wise, at the End of Day.
You can indicate if the Bank Code should be entered when a teller enters a cheque transaction for the product.
Online Authorization Required
Oracle FLEXCUBE gives you the option of authorizing teller transactions as and when you process them. While saving the details of a teller transaction, the system displays the Choose Authorizer screen through which you can choose the User ID of the person who has the required authorization rights. After you select the ID of the user who is to authorize the record, the details of the teller record will be made available to the user concerned. Upon authorization of the details of the record by the user concerned, the system notifies the maker of the record with an authorization notification message.
You will be allowed to authorize transactions online, only if you have enabled this option for the Teller Product linked to the particular transaction. To allow online authorization, choose the ‘OnlAuth Required’ option in the DE Product Preferences screen. Leave the box unchecked if you do not want to perform the online authorization of transactions associated with the product.
Dispenser Allowed
Enable Dispenser Allowed to indicate that data entry product being defined has to have the cash dispenser facility.
This facility will be applicable for the product only if it has been enabled for your branch in the Data Entry Branch Conditions screen.
Unpaid Clearing Transaction
Check this box to capture the reason for clearing transaction for all transactions under this product.
Transfer Type
Specify the type of transfer. The adjoining option list displays all valid transfer types available in the system. You can select the appropriate one.
Cheque Type
Select the type of cheque applicable on transactions under this product, from the adjoining drop-down list. You can choose any one of the following options:
- Normal
- Circular
- A Type
Transaction Amount Limit (LCY)
The maximum and minimum transaction amount for a product, can be defined in this screen. These limits should be specified in the local currency.
Minimum Transaction Amount
Specify the minimum transaction amount for the product. The teller cannot enter a transaction if the transaction amount is less that what you specify here.
Maximum Transaction Amount
Specify the maximum transaction amount for the product. A teller cannot enter a transaction (involving the product) if the amount exceeds the maximum transaction size that you specify here.
Rate Type
You can define an exchange rate type for every product that you create. For example, you can specify the exchange rate type as ‘TC sell rate’ for a traveller’s cheque product that you sell.
When you enter a transaction, involving the product, the exchange rate (which you maintain at the beginning of day in the currency table) corresponding to the Exchange Rate Type will be applied. This is referred to as the default exchange rate.
Click the adjoining option list and view all exchange rate types that are maintained. Double click on the Rate Type that you wish to specify for the product.
Exchange Rate Variance (%)
For a special customer or in special cases, you may want to use an exchange rate (a special rate) that is greater than the default exchange rate.
Normal Rate Variance
In this field you can specify the default or normal percentage difference of the special rate from the exchange rate. In other words, you can specify the Normal Exchange Rate Variance for a product.
Maximum Rate Variance
In this field you can specify the maximum percentage difference of the special rate from the default rate. In other words, you can specify the Maximum Exchange Rate Variance for a product.
Note
When you enter a transaction, the system will not seek an override if the Exchange Rate Variance is lower than the Normal Exchange Rate Variance that you have specified in the Minimum Exchange Rate Variance field. If the Exchange Rate Variance is between the Minimum and the Maximum Exchange Rate Variance that you have defined, the system will display an override message. The system will not store a transaction if the Exchange Rate Variance is more than the Maximum Exchange Rate Variance defined for the product.
Minimum Amount for Signature Verification
Specify the minimum amount on exceeding which a transaction should mandate signature verification.
Exchange Rate
Select the type of exchange rate to be applied for transactions under this product, from the adjoining drop-down list:
- Buy Rate
- Sell Rate
- Standard Mid Rate
Back Value Details
You can post back value dated transactions in Oracle FLEXCUBE.
Back Value Check Required
For the purpose of risk tracking, you can indicate that users should be prevented from posting a back value dated transaction in the system beyond a certain number of days. Check this box to indicate this preference.
Back Value Days
You can specify the number of days to which a transaction posted by a teller can be back-valued dated in Oracle FLEXCUBE. If the teller specifies a date that does not fall within the back value days limit (measured in calendar days i.e. this period is inclusive of holidays) maintained here, the system displays the following error message as “The value date is earlier than the Permitted value days.”
- If the message is configured as an error, you will not be able to proceed with the transaction, till you specify a date, which is within the limits maintained.
- If the override is configured as a warning, you will be able to proceed with entering the transaction, but an override is logged into the database, that the date specified does not fall within the limits maintained.
- If it is configured as a ‘ignore’ message, then no back-valuation check will be performed.
The same validations are carried out for transactions that are uploaded from external systems.
Note
If you have enabled this preference as a Branch Parameter, it will be defaulted to this screen. You will not be allowed to change it. However, if you have not maintained it as a preference for your branch, you can specify the details here. If the option is checked but you have not maintained the ‘Back Value Days’ (maintained as NULL), the system will interpret it to be ‘Zero’ days allowed (for back valued transactions).
5.1.7 MIS Button
Click ‘MIS’ button to define Management Information Details (MIS) details for the product you are defining.

Refer the User Manual on MIS under Modularity for further details.
5.1.8 Charges Button
Click ‘Charges’ button to define the charges or fees that are to be collected for transactions involving this product.

Refer the User Manual on Charges and Fees under Modularity for further details.
5.1.9 Tax Button
Click ‘Tax’ button to indicate the tax schemes that are applicable to the product you are creating.

Refer the User Manual on Tax under Modularity for further details.
5.1.10 User-Defined Fields Button

Here you can capture the following details:
Product Code and Description
The system displays the product code and its description from the main screen.
Field Number
The system displays the field number.
Field Name
Specify the name of the UDF. The adjoining option list displays all UDFs maintained in the system. You can select the appropriate one.
5.1.11 Viewing Product Summary
You can view a summary of all products maintained in the system, using the ‘Teller Product Summary’ screen.
You can invoke this screen by typing ‘DESPRMNT’ in the field at the top right corner of the Application tool bar and clicking the adjoining arrow button.
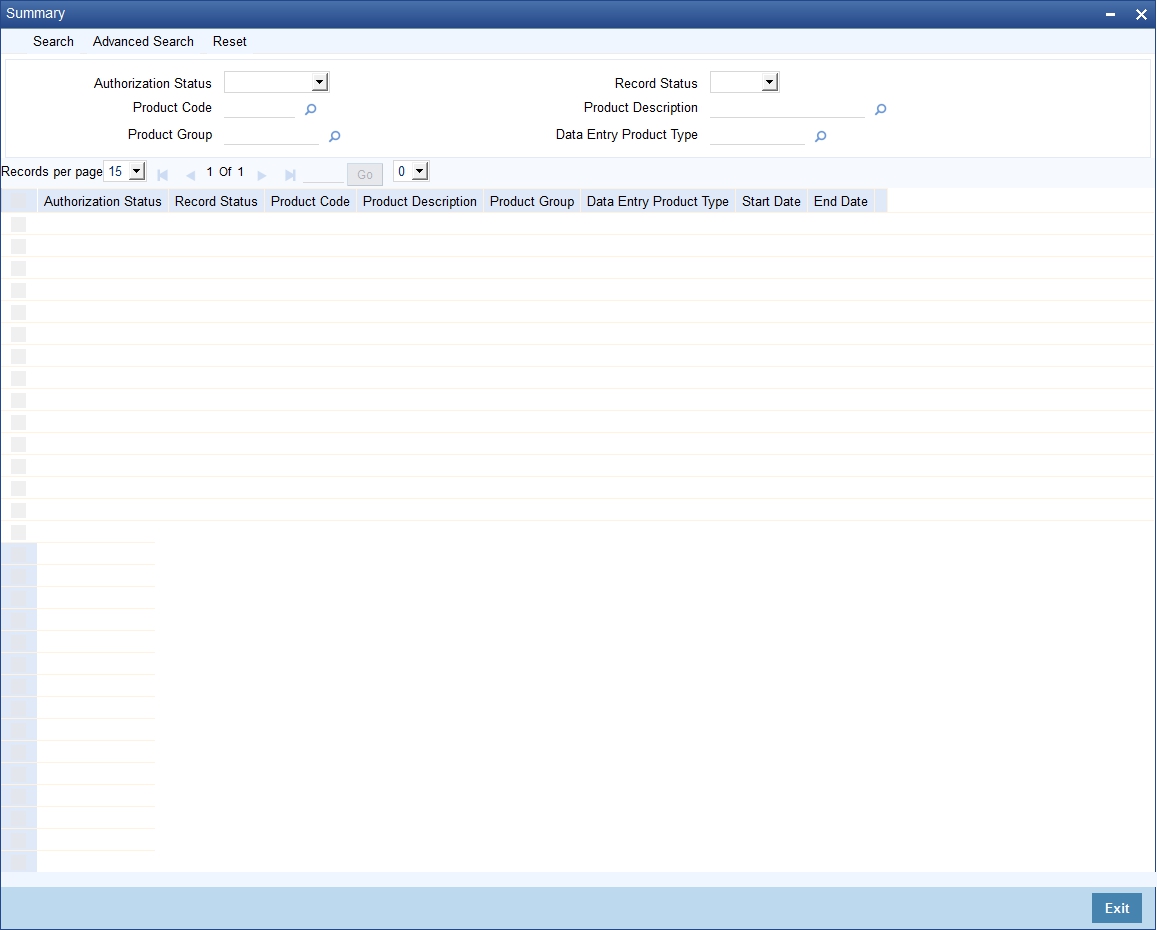
You can query on records based on any or all of the following criteria:
- Authorization Status
- Product Code
- Product Group
- Record Status
- Product Description
- Data Entry Product Type
Click ‘Search’ button. The system identifies all records satisfying the specified criteria and displays the following details for each one of them:
- Authorization Status
- Record Status
- Product Code
- Product Description
- Product Group
- Data Entry Product Type
- Start Date
- End Date
Double click on a record to view the detailed screen.