3. Maintaining Data Specific to the FX Module
Before you begin foreign exchange operations in Oracle FLEXCUBE, you must maintain certain basic information in the system. For example, you must maintain
- Forward rates
- Discounting rates
- Netting details
- Spot rates for different currencies
This data is essential for processing the foreign exchange deals that you enter into in the course of the day.
Data of this sort is referred to as ‘Static Data' because it remains constant over a period of time.
This chapter contains the following sections:
- Section 3.1, "Static Data"
- Section 3.2, "Branch Parameters"
- Section 3.3, "Forward Rates"
- Section 3.4, "Discounting Rates"
- Section 3.5, "Netting"
- Section 3.6, "Confirmation Rule Maintenance"
- Section 3.7, "Confirmation Message Matching"
3.1 Static Data
Static data which is maintained in Oracle FLEXCUBE can either be common to several modules or specific to a module. For example, data relating to exchange rates is common to modules like Foreign Exchange. Static Data that is commonly accessed by several modules is maintained in the Core Services module.
Data that is specific to a module is maintained in the module itself. For example, data relating to forward and discount rates and netting details are specific to the Foreign Exchange module. It is therefore maintained in the Foreign Exchange module.
3.1.1 Static Data specific to the FX module
You can maintain static data specific to the FX module in three different tables. They are
- Forward Rate Maintenance table
- Discounting Rate Maintenance table
- Netting Agreements table
When invoked from the Application Browser these tables will be displayed as screens. The procedure to invoke and maintain these tables is explained below.
3.2 Branch Parameters
This section contains the following topics:
- Section 3.2.1, "Maintaining Branch Parameters"
- Section 3.2.2, "Maintaining CLS preferences for the branch"
- Section 3.2.3, "Specifying UDF Values"
3.2.1 Maintaining Branch Parameters
Branch Parameters refer to some generic processing guidelines that you wish to apply to all foreign exchange contracts entered into, by a particular branch of your bank. You can define these guidelines in the ‘Foreign Exchange Branch Parameters Maintenance’ screen available in the Application Browser.
You can invoke the ‘Foreign Exchange Branch Parameters Maintenance’ screen by typing ‘FXDBRMNT’ in the field at the top right corner of the Application tool bar and clicking on the adjoining arrow button.

You can capture the following details relating to Foreign Exchange Branch Parameters Maintenance.
Branch Code
Select the code of the branch for which you are setting up the parameters.
Branch Description
The description of the selected branch code is displayed here.
3.2.1.1 Setting Revaluation Parameters
If a scheduled revaluation date for a foreign exchange contract falls on a holiday, the process of revaluation can be shifted according to either of two options that you specify:
System Date
Selecting this option will cause the revaluation process to be triggered as part of the BOD process on the next working day after the holiday.
Next Working Day – 1
If you select this option, the revaluation process is triggered as part of the EOD batch process on the working day immediately previous to the holiday on which the revaluation schedule falls.
3.2.1.2 Setting Parameters for Reversal of Revaluation Entries
Revaluation entries can be reversed in either of two ways, according to your specification:
Account Revaluation
If you select this option, revaluation entries passed during the EOD process are reversed as part of the account revaluation process on the next working day. You must ensure that the account revaluation process is run before running the contract revaluation process.
Deal Level
If you opt for deal level revaluation reversal, a BOD process reverses the contract revaluation entries posted the previous day. Revaluation entries are posted and reversed at the level of individual contracts.
You must run the revaluation reversal batch before running the contract revaluation process. Running the account revaluation process is not necessary in this case.
Note
- If you try to run the deal level revaluation reversal batch in spite of having opted for Account Revaluation as part of FX Branch Parameters definition, an error message will be displayed.
- If you have opted for deal level revaluation reversal while defining FX Branch Parameters, revaluation reversal is triggered once before liquidation of a contract. This reverses any existing entries in Exchange P&L GLs, as also forward premium/discount accruals.
Revaluation at Product
Check this box to enable the passing of a consolidated revaluation entry at the product level for all forward FX contracts under that product.
User Reference Number in Messages
If this option is checked then the user reference number will be used instead of the contract reference number in the following messages:
- MT103 Field 20
- MT202 Field 20
- Field 21 (In case of a cover, field 21 will be field 20 of the related
- MT103)
- MT300 Field 20
- Field 21
- MT304 Field 20
- Field 21
3.2.2 Maintaining CLS preferences for the branch
Continuous Linked Settlements Participant
Customers of your bank can settle their FX deals via the CLS (Continuous Linked Settlements) Bank to reduce the risks associated with such transactions. Check this box to indicate that the branch is a CLS participant.
Settlement Member
Select the BIC of the settlement member to be used for messaging purposes.
T-Copy
Check this box to indicate that T-Copy identifier is required in the MT300 Message.
If you check this box, the system will include the TPS identifier in MT300 message for CLS NDF deals. However, the system will not generate MT304 message for the message type FS_FMCONF.
Auto Confirm Continuous Linked Settlement Deals
Check this box to indicate that CLS deals should be automatically confirmed by the system.
Refer the ‘Continuous Linked Settlements’ chapter of this User Manual for details on maintaining the above preferences and the processing involved in the settlement of CLS deals.
3.2.3 Specifying UDF Values
You can associate values to all the User Defined fields created and attached to the ‘Foreign Exchange Branch Parameters’ screen. You can view the list of User Defined fields associated to this screen by clicking ‘Fields’ button on the ‘Foreign Exchange Branch Parameters’ screen.
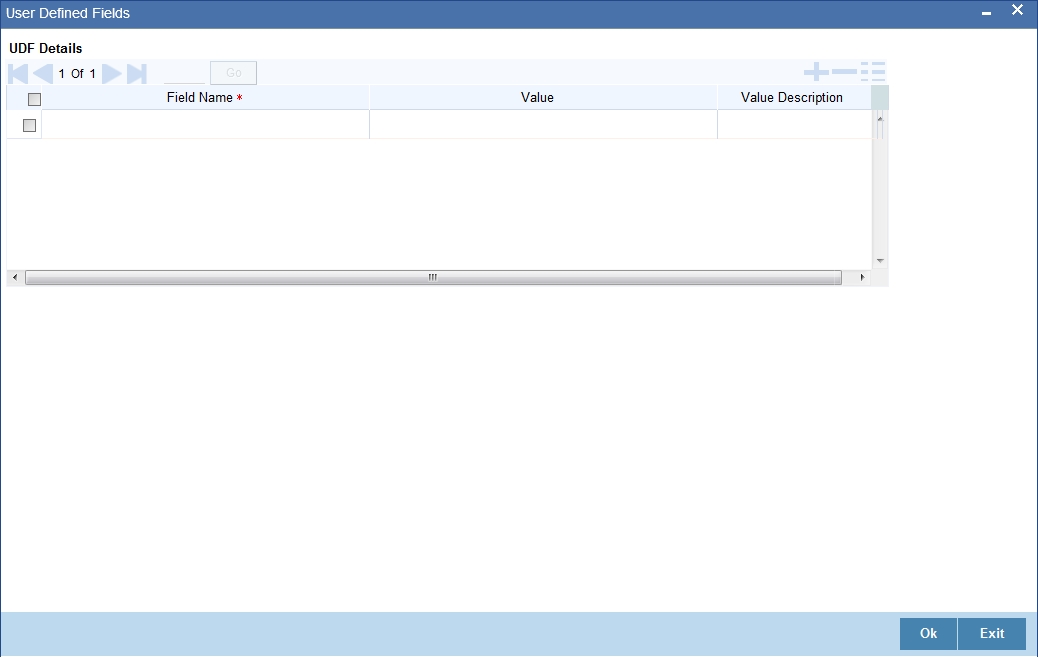
You can enter the value for the UDFs listed here in the ‘Value’ column.
For more details on how to create user Defined fields, refer chapter Creating custom fields in Oracle FLEXCUBE’ in the User Defined Fields User Manual under Modularity.
3.3 Forward Rates
This section contains the following topics:
- Section 3.3.1, "Maintaining Forward Rates"
- Section 3.3.2, "Maintaining forward Rates for Currency Pairs"
3.3.1 Maintaining Forward Rates
When you revalue a forward FX contract, using the rebate (NPV) method of revaluation, you will use an exchange rate (for the currencies involved) referred to as a ‘Forward rate’. The forward rate for a currency (for a specific period) is based on the spot rate and the prevailing interest rate.
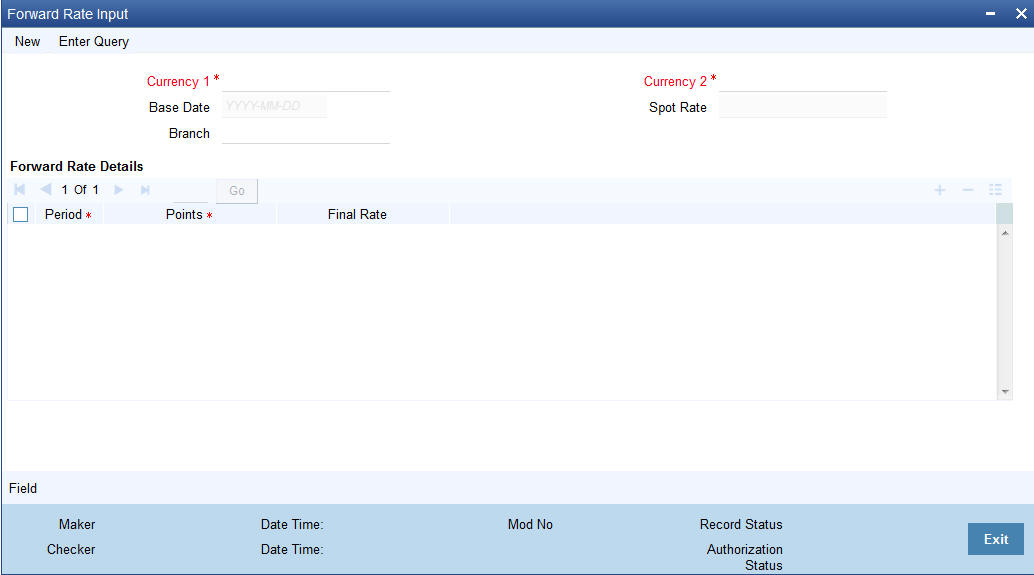
The forward exchange rates for a currency are maintained in the ‘Forward Rate Input’ screen.
You can invoke the ‘Forward Rate Input’ screen by typing CYDFWRAE in the field at the top right corner of the Application tool bar and clicking on the adjoining arrow button.
3.3.2 Maintaining forward Rates for Currency Pairs
When the ‘Forward Rates Maintenance’ screen is displayed, select ‘New’ icon in the Application tool bar or click new icon.
In this screen, you can:
- Define forward rates for a new currency pair, or
- Define forward rates for an existing currency pair but for a different base date.
Currency pair
In this screen, you must first indicate the currency pair for which you are maintaining the forward rate.
In the Currency 1 field you can invoke a list of the currencies that are maintained in your bank. Double click on a currency to choose it. This would be the first currency of the pair. In the Currency 2 field, choose the other currency that constitutes the pair.
The forward rates that you specify subsequently would apply to this currency pair.
Base Date
The forward rates which you maintain subsequently will apply to all forward FX contracts from the base date.
The current system date will be displayed in this field.
Spot rate
The spot rate for the day − for the currency pair − is displayed in this field. The forward rate would be computed using the spot rate displayed in this field.
To compute the forward rate, the premium or discount points for the currency pair (specified subsequently) would be added to or deducted from the spot rate displayed.
Period Code
You can maintain forward rates for specific tenors (in days). These tenors are referred to as ‘Periods’. For example, 30 days, 60 days, 90 days etc.
For each currency pair, you can maintain forward rates for different periods. In the Period Code column, you can enter the period codes for which you want to define forward rates.
Points
The forward rates for a currency pair should be maintained in the form of premium or discount points vis-à-vis the spot rate for the currency pair.
In the ‘Points’ column, you must specify the forward rate for the period that you specified in the previous column (for the currency pair).
The variance you specify will be applied on the Spot Rate to arrive at the Forward Rate, depending on the quotation method for the currency. The following table summarizes the method of application:
|
Direct quotation |
Indirect quotation |
Premium |
Add to the Spot Rate |
Subtract from the Spot Rate |
Discount |
Subtract from the Spot Rate |
Add to the Spot Rate |
3.4 Discounting Rates
This section contains the following topics:
- Section 3.4.1, "Maintaining Discounting Rates"
- Section 3.4.2, "Specifying UDF Values"
- Section 3.4.3, "Querying Discount Rates"
- Section 3.4.4, "Querying Based on Tenor"
3.4.1 Maintaining Discounting Rates
Discount rates are the interest rates (for a currency) that you use to compute the Net Present Value (NPV) of an outstanding FX contract.
The discounting rate for a Currency and Rate Type is maintained in the ‘FX Discounting Rate Maintenance’ screen. These discounting rates will be used when contracts in different currencies are revalued using the NPV method of Revaluation.
You can maintain discounting rates for a currency for different tenors in the ‘Discount Rates Input’ screen. You can invoke the ‘Discount Rates Input’ screen by typing ‘FXDDIRAT’ in the field at the top right corner of the Application tool bar and clicking on the adjoining arrow button.

The discount rates that you maintain are for a Currency and Rate Type combination. After you select this combination, you can proceed to set up tenors and the rates applicable to each tenor.
Currency
Select the Currency from the option list available.
Base Date
The discounting rates that you maintain subsequently will apply to FX contracts from the base date that is displayed here.
The current system date will be displayed in this field. You can change the default value. However, you can only enter a date that is the same as or later than the current system date.
Rate Type
The discount rates that you maintain are for a Currency-Rate Type combination. Select the rate type for which you are defining discounts.
Period Code
You can maintain discounting rates for the Currency – Rate Type combination for specific tenors (in days). These tenors are referred to as ‘Periods’ in Oracle FLEXCUBE.
A Period commences on the Base Date applicable to the Currency and Rate Code that you selected and ends on the date that is displayed in the Actual Date field.
For contracts involving currencies, for which you have not maintained discount rates, the rates of the discount currency specified in the Bank Parameters will be used.
You must specify the discounting rate for a period before you enter the next period.
Discounting rate
The discounting rates for different periods for a Currency and Rate Type should be maintained in the form of discount points (a percentage). The rate that you enter against each period will apply to contracts whose transaction date is between the Base Date and the Actual Date.
In the ‘Discounting Rates’ column, you must specify the discounting rate for the period code that you specified in the previous column (for a currency).
Actual Date
The system displays the actual date on which the period that you specified ends.
3.4.2 Specifying UDF Values
You can associate values to all the User Defined fields created and attached to the ‘Discounting Rate Maintenance’ screen. You can view the list of User Defined fields associated to this screen by clicking ‘Fields’ button in the ‘Discounting Rate Maintenance’ screen.
You can enter the value for the UDFs listed here in the ‘Value’ column.
For more details on how to create user Defined fields, refer chapter ‘Creating custom fields in Oracle FLEXCUBE’ in the User Defined Fields User Manual under Modularity.
3.4.3 Querying Discount Rates
While processing a contract that involves discount rates, you can query the discount rates applicable to a Currency and Rate Type combination for a specific period using the ‘Discount Rates Query’ screen. You can invoke the ‘Discount Rates Query’ screen by typing ‘FXDQIRAT’ in the field at the top right corner of the Application tool bar and clicking on the adjoining arrow button.
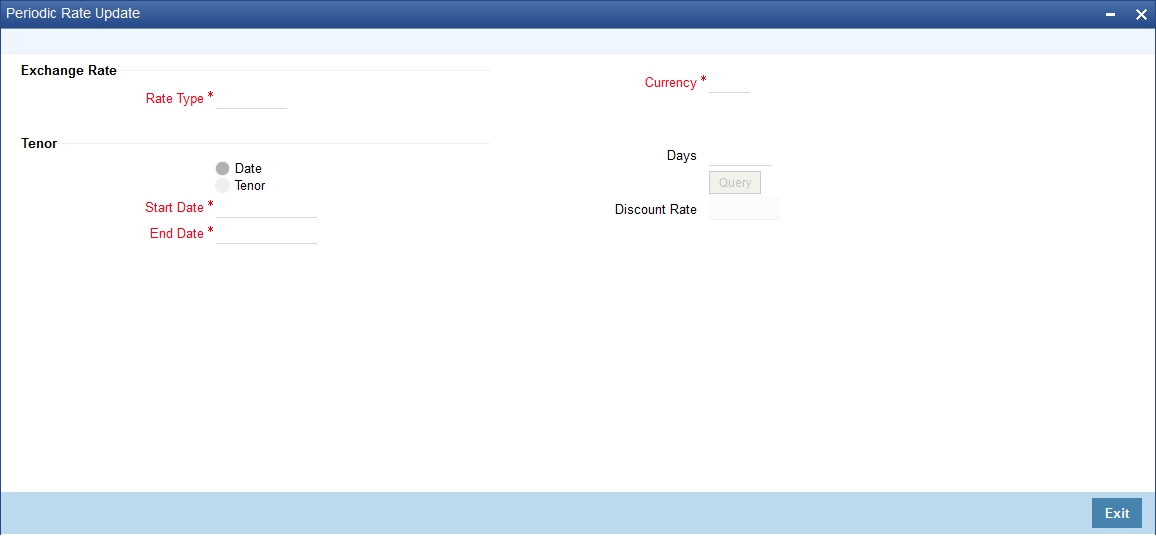
Rate Type
You can query the discount rate for a Currency and Rate Type combination. Here you need to select the Rate Type for which you are querying discount rates.
Currency
Select the currency for which you are querying the discount rates.
You can query discount rates for a Currency-Rate Type combination based on either of these:
- A date range
- Tenor
3.4.3.1 Querying Based on Dates
Start Date
Select the start date for which you want to query discounted rates.
End Date
Select the end date for which you want to query discounted rates.
3.4.4 Querying Based on Tenor
Tenor
Select this option if you want to query rates for a specific tenor.
Days
Specify the number of days for which you want details. If you indicate 10 in this field, the query will calculate the discount rates for the Currency - Rate Type combination ten days from the query date.
To execute the query, click ‘Query’ button. The discount rate for the Currency-Rate Type combination and period that you queried is displayed in the Discount Rate field.
Discount Rate
The discount rate for the currency- rate combination is displayed here.
3.5 Netting
This section contains the following topics:
- Section 3.5.1, "Netting Details"
- Section 3.5.2, "Maintaining Netting Details"
- Section 3.5.3, "Specifying UDF Values"
- Section 3.5.4, "Maintaining FX Risk Netting Details"
- Section 3.5.5, "Specifying UDF Values"
3.5.1 Netting Details
Netting is the process of offsetting the receivables with the payables for a counterparty to generate a single accounting entry in the counterparty’s account. Oracle FLEXCUBE allows you to net contracts that satisfy certain conditions. The Netting facility is useful at the time of contract settlement. You can opt to net two or more contracts at the time of settlement if the contracts are:
- Linked to the same counterparty (customer)
- Have the same Value Date and
- In the same currency (currency-wise netting) or
- Involve the same currency pair (pair-wise netting)
3.5.2 Maintaining Netting Details
To net foreign exchange deals, you must enter into a netting agreement with the counterparty concerned using the ‘Foreign Exchange Netting Agreement Maintenance’ screen..
You can invoke the ‘Foreign Exchange Netting Agreement Maintenance’ screen by typing ‘FXDNETMA’ in the field at the top right corner of the Application tool bar and clicking on the adjoining arrow button.
These details will be used to net the FX contracts that you enter into with the counterparty.
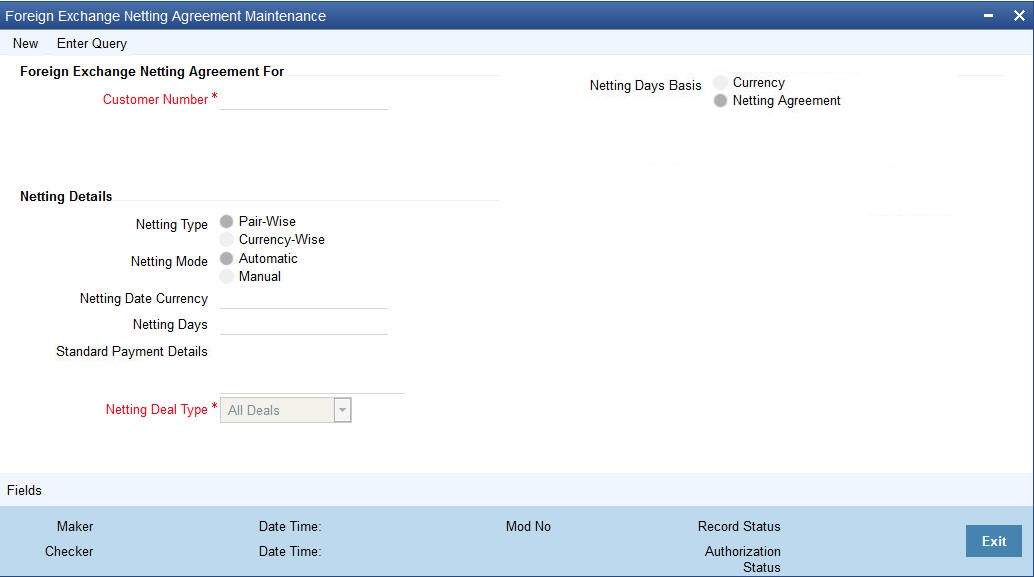
Customer Number
You must indicate the customer for whom you are maintaining netting details. The adjoining option list displays a list of all the customers maintained in the system. You can choose the appropriate one.
When you choose to net contracts at the beginning of the day, all contracts specified for netting will be netted for every customer for whom you have maintained netting details.
Netting Type
- You can net the contracts involving a customer in two different ways.
Contracts can be be netted in the following ways:Pair-wise Netting -
The FX contracts that you enter into involve ‘currency pairs’.
For example, a deal where USD 10,000 is bought against EUR 15,000 involves
a currency pair. When you choose to net contracts pair-wise the system
selects all contracts that have been specified for Pair-wise Netting
counterparty wise. Contracts that have the same currency pair, irrespective
of whether they are bought or sold, will be netted. Only those contracts
that:
- Have not already been netted, and which
- Do not belong to the status “both bought and sold netted” will be netted.
- Currency-wise Netting - When you run the Netting Process the system selects all contracts that have been specified for Currency-wise Netting counterparty wise. The value date of the bought currency leg and that of the sold currency leg are considered individually to arrive at the netting date.
The status of a contract that has been specified for currency-wise netting can be any of the following:
- Not Netted (status before netting).
- Bought Netted (sold not netted - in case of currency-wise netting where the bought leg is netted before the sold leg in case the value date of the bought currency is before that of the sold ccy).
- Sold Netted (bought not netted - in case of currency-wise netting where the sold leg is netted before the bought leg in case the value date of the sold leg is before that of the bought leg).
- Both Bought and Sold leg netted.
When the netting process is run, only contracts that have not already been netted will be netted. That is, only those contracts that do not belong to the status “both bought and sold netted” will be netted. The bought and the sold legs (bought currency and sold currency) of the contract will be netted individually. The system ensures that the leg to be netted is not already netted.
At the time of contract processing, the netting type that you specify for the customer will apply to all contracts involving the customer. You cannot change the limit netting type during Contract Booking.
Netting Mode
While specifying netting details for a customer, you should indicate how you wish to initiate the process of netting. You can choose between the following two options as the mode of netting:
- Automatic: If you choose to automate the netting process, netting is done automatically for the specified customer.
- Manual: If you choose ‘Manual’, you have to manually initiate the netting process for the customer through the ‘Manual Netting’ screen (FXDMANNT)
Netting Deal Type
Select netting deal type from the drop-down list. The list displays the following values:
- All Deals: All deals will be considered. By default, this option is selected.
- Split Netting: Netting is done based on the deal type, namely, Spot, Forward, and NDF separately. The External Payment System creates separate payment contracts based on these products.
- Net NDF/Non NDF: Netting is done for NDF and Non NDF (Spot and Forward) separately. The External Payment System creates separate payment contracts both NDF and Non NDF contracts.
When NDF contracts are netted, the system considers only those contracts for which fixing deals are already booked. The system considers both NDF forward deals and fixing spot deals while netting.
Netting Date Currency
For every currency, you can maintain a list of holidays. This list is maintained in the Core Entities module. The holiday list for a currency is used to compute the netting date for contracts. The holiday list of the currency that you specify in this field will be used to compute the netting date for contracts involving the customer.
In the Currency field you can invoke a list of the currencies that you have maintained in your bank. Double click on the currency that you want to indicate as the Netting Date Currency.
Netting Days
When you specify the netting details for a customer, you can also indicate the day on which the contracts involving the customer are to be netted. This day could be a certain number of working days before the settlement date of the contracts.
Netting Days Basis
You can specify whether Netting date should be based on netting days maintained for the Currency or the netting days maintained in the Netting Agreement for the customer. You have to choose between:
- Currency: If you opt for currency as the basis for netting days, netting days will be defaulted from the FX netting days of currency maintenance considering the specific currency and the leg being netted.
- Netting Agreement: If you opt to relate the netting days to the Netting Agreement, the netting date will be calculated taking into consideration, netting days maintained in the netting agreement for the customer irrespective of the leg being netted.
Standard Payment Details
You can enter the text of the payment details that you would like to generate along with the payment in this field.
3.5.3 Specifying UDF Values
You can associate values to all the User Defined fields created and attached to the ‘Netting Agreement’ screen. You can view the list of User Defined fields associated to this screen by clicking ‘Fields’ button on the ‘Foreign Exchange Netting Agreement Maintenance’ screen.
You can enter the value for the UDFs listed here in the ‘Value’ column.
For more details on how to create user Defined fields, refer chapter ‘Creating custom fields in Oracle FLEXCUBE’ in the User Defined Fields User Manual under Modularity.
3.5.4 Maintaining FX Risk Netting Details
For FX transactions covered by netting agreement, the limit tracking should be carried out for the netted amount for the following risks:
- Settlement Risk
- Pre-Settlement Risk
- Risk Weighted Risk
You can do this using the ‘Foreign Exchange Netting Limits Maintenance’ screen. You can invoke the ‘Foreign Exchange Netting Limits Maintenance’ screen by typing ‘FXDLMNET’ in the field at the top right corner of the Application tool bar and clicking on the adjoining arrow button.
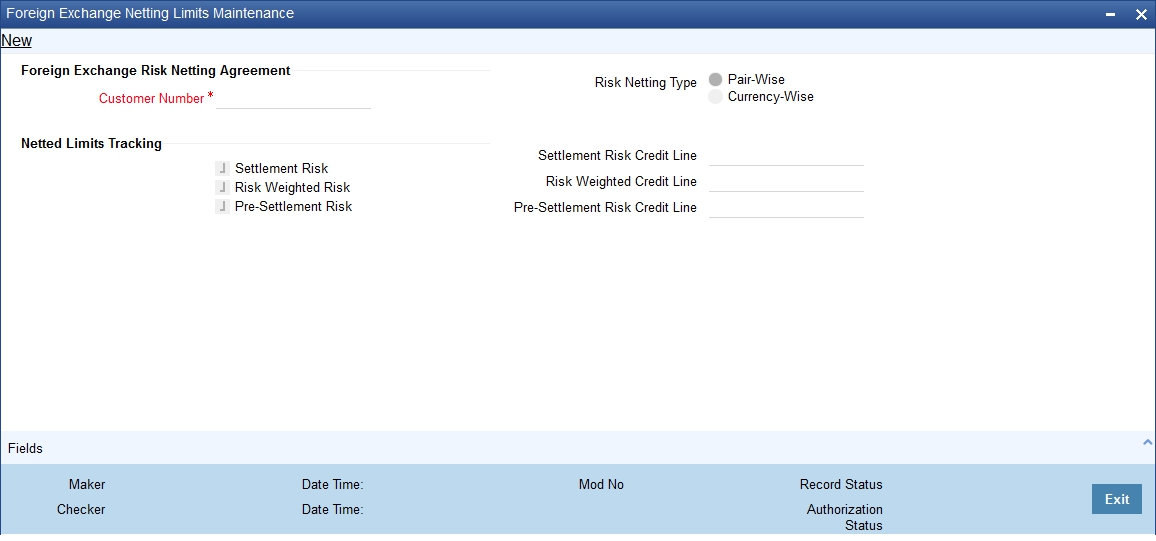
Customer Number
Specify the Customer or FX Netting group customer for which you are specifying the risk netting details. The adjoining option list displays all open and authorized CIF from Customer maintenance. You can choose the appropriate one.
Risk Netting Type
You can specify the type of risk netting to be followed for the selection of contracts. Risk netting can be one of the following:
- Pair-wise - The FX contracts with the same branch, counterparty, value date and currency pair will form a netting group. When you choose to net contracts pair-wise for counterparty, all contracts that involve the same currency pair will be netted.
- Currency-wise - You can opt to net contracts currency-wise. FX contracts that have the same branch, counterparty, value date and currency will form a netting group.In this case, contracts with different currency pairs would also be selected for netting if transactions involve the same currency.
In the Netting Type field, indicate if you would like to net contracts Currency-wise or Pair-wise. If you would like to net contracts Pair-wise, click on the button against Pair-wise. If you would like to net contracts Currency-wise choose the button against Currency-wise.
At the time of contract processing, the netting type that you specify for the customer will apply to all contracts involving the customer. You cannot override the limit netting type during contract booking.
By default, the Risk Netting Type is Currency-wise.
Settlement Risk
Select this option to specify that limit tracking is required on the netted amount for all FX being netted on the Customer. This option is unchecked by default. System considers this field as financial amendment, once amendment is done to this field.
Settlement Risk Credit Line
Select the credit line that should be used for netted settlement risk tracking from the option list provided. The list will display all valid credit lines for the counterparty.
Risk Weighted Risk
Select this option to specify that risk weighted limit tracking is required on the netted amount for all FX being netted on the Customer. This option is unchecked by default. System considers this field as financial amendment, once amendment is done to this field.
Risk Weighted Credit Line
Select the credit line that should be used for netted risk weighted limit tracking from the option list provided. The list will display all valid credit lines for the counterparty.
Pre-settlement Risk
Select this option to specify that pre-settlement limit tracking is required on the netted amount for all FX being netted on the Customer. This option is unchecked by default. System considers this field as financial amendment, once amendment is done to this field.
Pre-settlement Risk Credit Line
Select the credit line that should be used for netted pre-settlement limit tracking from the option list provided. The list will display all valid credit lines for the counterparty.
Oracle FLEXCUBE will ensure that credit lines maintained for the customer are not same. The system will support all maintenance actions like New, Unlock, Copy, Delete, Re-open and Close for this function.
Note
- All limit tracking options will be checked by default.
- Credit lines will be enabled only when the limit tracking option will be enabled.
- Credit line input is mandatory when the limit tracking options are enabled.
- During copy action, all the fields except credit lines will be copied to the new counterparty.
3.5.5 Specifying UDF Values
You can associate values to all the User Defined fields created and attached to the ‘Foreign Exchange Risk Netting Agreement’ screen. You can view the list of User Defined fields associated to this screen by clicking ‘Fields’ button in the ‘Foreign Exchange Netting Limits Maintenance’ screen.
You can enter the value for the UDFs listed here in the ‘Value’ column.
For more details on how to create user Defined fields, refer chapter ‘Creating custom fields in Oracle FLEXCUBE’ in the User Defined Fields User Manual under Modularity.
3.5.5.1 Defaulting of Credit Lines
As mentioned above, in a FX contract creation, the following credit lines are involved:
- Settlement Risk Credit Line
- Pre-Settlement Risk Credit Line
- Weighted Risk Credit Line
- Following are the possible ways to set these credit lines:
- If Track Settlement Risk box is checked and if no Settlement Risk Credit Line is provided as part of the upload, then list of valid lines maintained for the Counterparty, Product, Branch, Currency will be determined. If there exists only one line for the combination specified, then that will be defaulted.
- If Track Pre-Settlement Risk box is checked and if no Pre-Settlement Risk Credit Line is provided as part of the upload, then list of valid lines maintained for the Counterparty, Product, Branch, Currency will be determined. If there exists only one line for the combination specified, then that will be defaulted.
- If Track Weighted Risk box is checked and if no Weighted Risk Credit Line is provided as part of the upload, then list of valid lines maintained for the Counterparty, Product, Branch, Currency will be determined. If there exists only one line for the combination specified, then that will be defaulted.
- In a situation if more than one valid record exists for credit line, which has not been passed in upload, then an error will raised.
3.6 Confirmation Rule Maintenance
This section contains the following topics:
- Section 3.6.1, "Invoking Confirmation Rule Maintenance Screen"
- Section 3.6.2, "Viewing Confirmation Rule Maintenance Details"
- Section 3.6.3, "Processing FX Confirmation Message Intraday Batch"
3.6.1 Invoking Confirmation Rule Maintenance Screen
Incoming FX confirmation messages can be matched automatically based on confirmation rules maintained. You can maintain confirmation rules using ‘Confirmation Rule Maintenance’ screen. You can invoke this screen by typing ‘FXDCNFMT’ in the field at the top right corner of the Application tool bar and clicking on the adjoining arrow button.
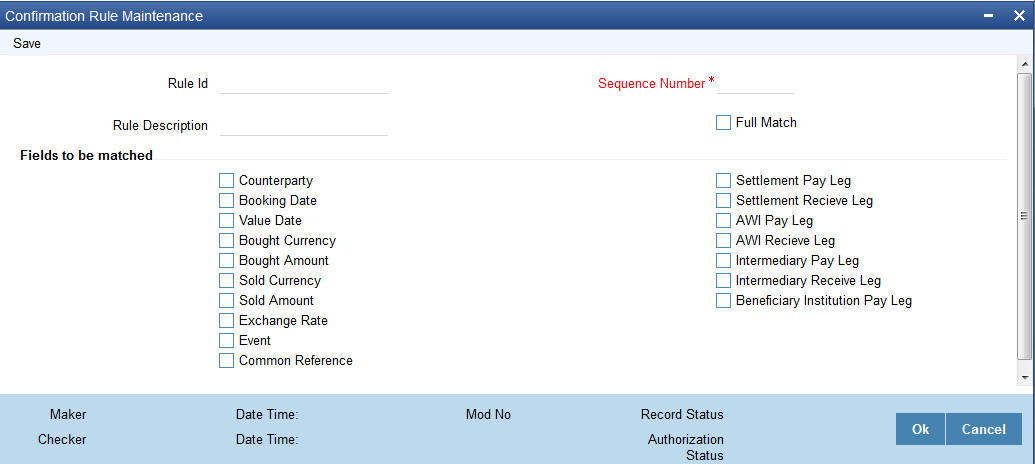
You can specify the following details:
Rule ID
Specify the unique ID for a rule.
Rule Description
Specify the description for the specified rule ID.
Sequence Number
The system displays the sequence number. You can modify this.
If there are multiple Rules, the processing for auto matching the messages will happen based on the sequence number in an ascending order.
Full Match
Check this box if the confirmation rule maintained is a Full Match Rule.
It will be mandatory to check all the above fields except the below mentioned fields if rule is to be maintained as ‘Full Match’:
- Event
- Settlement for Receive Leg
- Settlement for Pay Leg
- AWI for Receive Leg
- AWI for Pay Leg
- Intermediary Receive Leg
- Intermediary Pay Leg
- Beneficiary Institution Pay Leg
- Common Reference
You can maintain more than one rule as full match.
The system verifies the message details with the contract details based on the confirmation rules maintained. If single contract details are matched with message details for a ‘Full match’ rule then message is marked as completely matched and contract is marked as confirmed.
Fields to be matched
You can enable the following fields to match the details of an incoming SWIFT confirmation message MT300 with an existing deal in Oracle FLEXCUBE:
- Counterparty
- Booking Date
- Event
- Value Date
- Bought Currency
- Bought Amount
- Sold Currency
- Sold Amount
- Exchange Rate
- Settlement for Receive Leg
- Settlement for Pay Leg
- AWI for Receive Leg
- AWI for Pay Leg
- Intermediary Receive Leg
- Intermediary Pay Leg
- Beneficiary Institution Pay Leg
- Common Reference
If ‘Full Match’ is checked, then the following fields are mandatory:\
- Counterparty
- Booking Date
- Value Date
- Bought Currency
- Bought Amount
- Sold Currency
- Sold Amount
- Exchange Rate
If the outcome of a Full Match rule is satisfied with a single deal, then the system will mark the message as ‘Completely Matched’ and the deal as ‘Confirmed’.
If multiple contracts are matched with a ‘Full match’ rule, then the system will mark the message as ‘Partially Matched’.
Even if message and deal details are matched based on the listed fields in a rule which is not marked for Full Match, the system will mark the messages as ‘Partially Matched’. You should manually match the partially matched messages.
3.6.2 Viewing Confirmation Rule Maintenance Details
You can view FX confirmation rule details in ‘Confirmation Rule Maintenance Summary’ screen. You can invoke this screen by typing ‘FXSCNFMT’ in the field at the top right corner of the Application tool bar and clicking the adjoining arrow button.
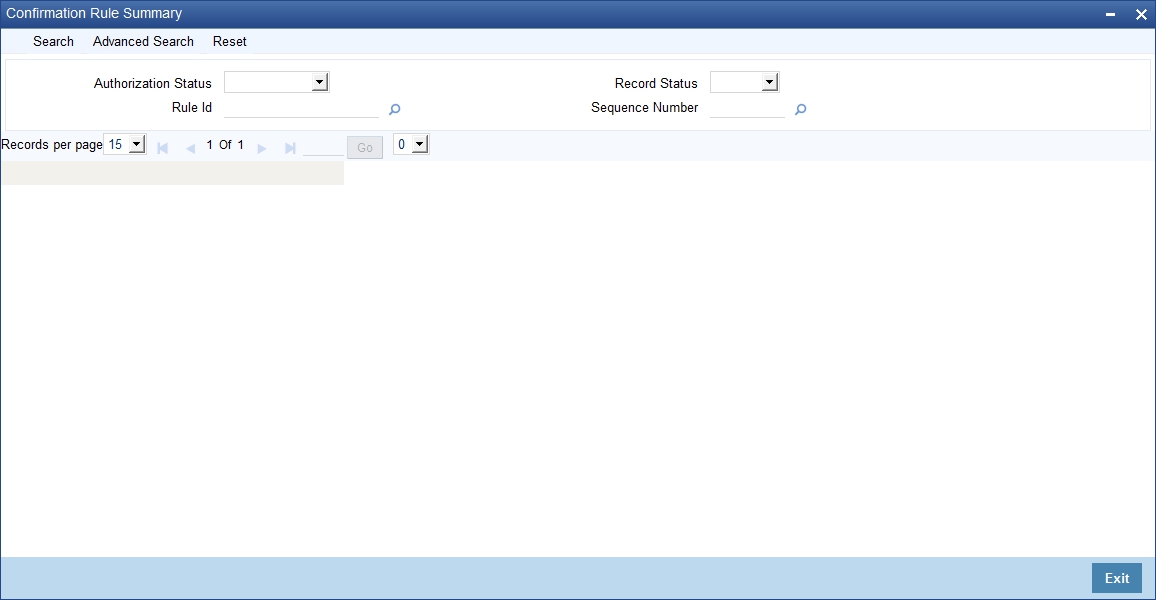
In the above screen, you can base your queries on any or all of the following parameters and fetch records:
- Authorization Status
- Rule ID
- Record Status
- Sequence Number
Select any or all of the above parameters for a query and click ‘Search’ button. The following records are displayed.:
- Authorization Status
- Record Status
- Rule ID
- Sequence Number
- Counterparty
- Booking Date
- Value Date
- Bought Currency
- Bought Amount
- Event
- Sold Currency
- Sold Amount
- Exchange Rate
- Settlement Receive Leg
- Settlement Pay Leg
- AWI Receive Leg
- AWI Pay Leg
3.6.3 Processing FX Confirmation Message Intraday Batch
The system will run an intraday batch ‘FXCONFR’ for FX Confirmation message auto matching. The upload activity in the incoming message browser will parse the message and upload it into an internal upload table, thus confirming that the format is correct. If this step is successful, the incoming browser will show the message as processed else the message will be marked for repair with an error code, which indicates the format error.
The auto confirmation batch will then use the data in the incoming message and execute the matching based on Confirmation rule set up. This batch will use the rules in the sequence defined and attempt to match the messages to a contract for fully/partially matched cases.
The matching of the incoming confirmation message details with the deal details will be done based on the matching required fields maintained for the confirmation rule. The processing will be done sequentially based on the rule codes maintained for the confirmation class for FX module.
During the auto match processing, if the details of an incoming message are matched with a single existing deal in the system based on a Full Match rule, then confirmation will be marked for the deal by triggering CONF event. The message will be marked as ‘Completely Matched’.
If multiple contracts are matched with a single message while processing a Full Match Rule, then the message will be marked as ‘Partially Matched’
Even if the message is matched while processing according to a Rule code not checked for ‘Full Match’, then the message will be marked as ‘Partially Matched’.
You should manually match the partially matched deals from ‘Manual Matching’ screen.
The system will match the Party detail fields based on BIC codes. The list of contracts against a message in case of full/partial matches will be stored and subsequently can be viewed from the ‘Manual Matching of Confirmation Messages’ screen.
While doing an auto matching the system will match an incoming message with details of latest outgoing confirmation message details of a contract.
The following fields of the FX deals will be matched against the message field values
MT 300 FX Confirmation Message field |
FX Contract field |
82A |
Counterparty BIC |
30T- |
Booking Date |
22A |
Events |
30V |
Value Date |
33B |
Bought Currency |
33B |
Bought Amount |
32B |
Sold Currency |
32B |
Sold Amount |
36 |
Deal rate |
57a Settlement for Bought Leg |
Settlement for Sold Leg |
57a Settlement for Sold Leg |
Settlement for Bought Leg |
57a Account With Institution for Bought Leg |
Account With Institution for Sold Leg |
57a Account With Institution for Sold Leg |
57a Account With Institution for Bought Leg |
58a Beneficiary Institution Pay Leg |
Branch BIC Code |
22C |
Common Reference |
56A Intermediary Bought Leg |
Intermediary Sold Leg |
56A Intermediary Sold Leg |
Intermediary Bought Leg |
3.7 Confirmation Message Matching
This section contains the following topics:
- Section 3.7.1, "Invoking Confirmation Message Matching Screen"
- Section 3.7.2, "View Message Button"
- Section 3.7.3, "View Match Details Button"
- Section 3.7.4, "Contract Button"
- Section 3.7.5, "View Message Button"
- Section 3.7.6, "Viewing Confirmation Message Matching Details"
- Section 3.7.7, "Processing of Partially Matched /Unmatched Messages"
3.7.1 Invoking Confirmation Message Matching Screen
You can query matched/partial matched/unmatched message details using ‘Confirmation Message Matching’ screen. All the Partially matched/unmatched SWIFT confirmation messages received in the system can be fetched in this screen based on the query options for further processing. You can link an unconfirmed and unmatched FX deal with a confirmation message and initiate the confirmation process. Since this is a Branch level operation, the system will display only the respective branch records. You can invoke this screen by typing ‘FXDMATCH’ in the field at the top right corner of the Application tool bar and clicking on the adjoining arrow button.

You can specify the following details:
Module
Specify the module. Alternatively, you can select module details from the option list. The list displays all valid module ID maintained in the system.
Match Reference
Specify the match reference number.
Message Reference
Specify the message reference number.
Contract Reference
Specify the contract reference number.
Message Details
Match Status
Select the match status from the drop-down list. Following are the options available:
- Null - To fetch both partially matched and unmatched records
- Partially Matched - To fetch partially matched records
- Unmatched - To fetch unmatched records
Message DCN
Specify DCN of MT300 messages in In-Browser which are Partially matched/unmatched.
Sender’s BIC Code
Specify Sender’s BIC of MT300 messages in In-Browser which are Partially matched/unmatched.
External Reference
Specify reference of MT300 messages in In-Browser which are Partially matched/unmatched.
Clicking on ‘Fetch’ button, the system will display the following details:\
- Match Reference
- Matching Status
- Message DCN
- External Reference
- Contract Reference
The system will also display the following partial match records:
- Contract Reference
- Confirmation Rule ID
- Rule Description
If a partially matched message is selected in the partial match block, then the corresponding contract reference number will get defaulted in the ‘Contract Reference’ field.
3.7.2 View Message Button
Click ‘View Message’ button in ‘Confirmation Message Matching’ screen to view the details of the message.
3.7.3 View Match Details Button
Click ‘View Match Details’ button in ‘Confirmation Message Matching’ screen to view match details based on the message and contract reference numbers, the following window is displayed:

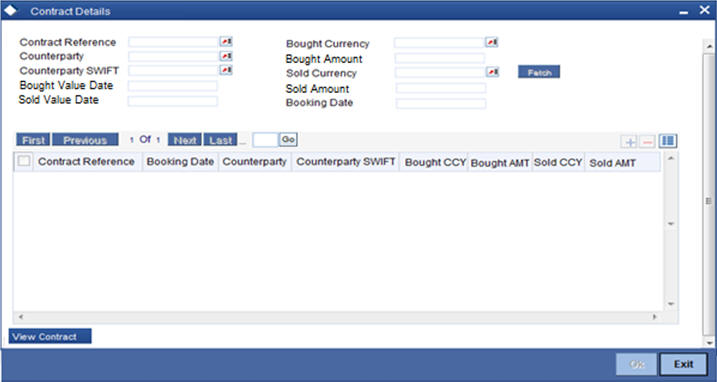
3.7.4 Contract Button
Click ‘Contract’ button in ‘Confirmation Message Matching’ screen to view the contract details.
3.7.5 View Message Button
Click ‘View Message’ button to view the details of a selected message.
3.7.6 Viewing Confirmation Message Matching Details
You can view FX confirmation message matching details in ‘Confirmation Message Matching Summary’ screen. You can invoke this screen by typing ‘FXSMATCH’ in the field at the top right corner of the Application tool bar and clicking the adjoining arrow button.
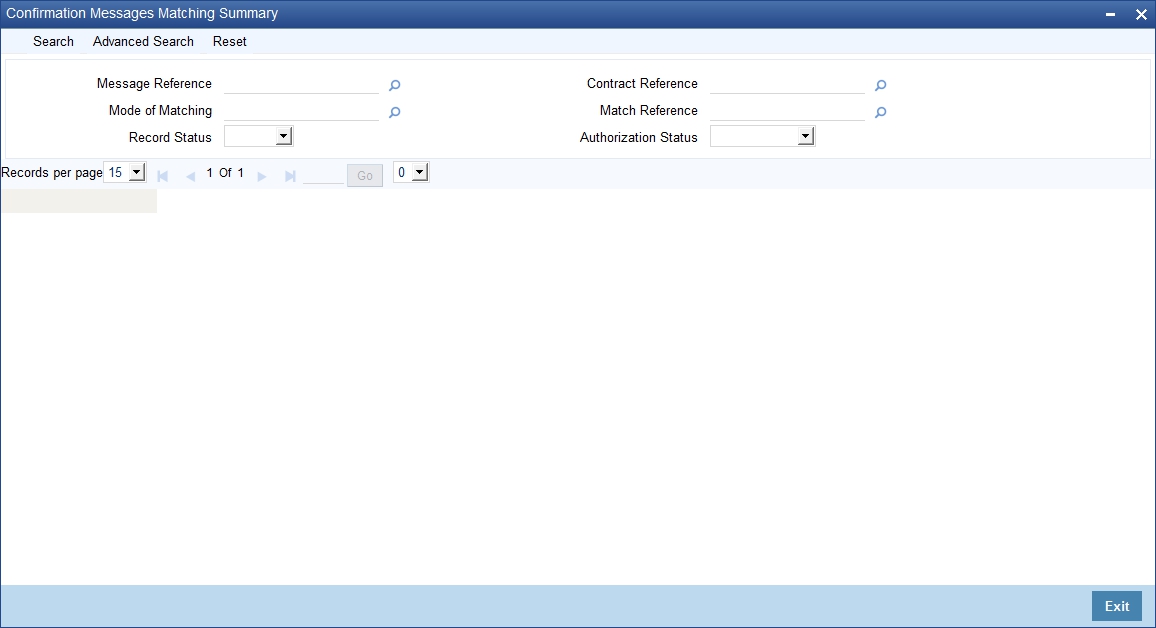
In the above screen, you can base your queries on any or all of the following parameters and fetch records:
- Module
- Message Reference
- Match Reference
- Contract Reference
- Mode of Matching
- Authorization Status
- Record Status
Select any or all of the above parameters for a query and click ‘Search’ button. The following records are displayed.:
- Match Reference
- Message Reference
- Contract Reference
- Matching Status
- Mode of Matching
- Record Status
- Authorization Status
3.7.7 Processing of Partially Matched /Unmatched Messages
For manual match of the messages, the system fetches all the partially matched and unmatched messages based on the criteria selected in manual matching screen. You can match the partially matched record from the message details screen with a selected partially matched message. The manually matched records will be updated as Active and ‘Match in Progress’. You cannot fetch this message record for another manual matching process. Once the manually matched deals are authorized, the message will be marked as ‘Completely Matched’ and for the related MM contract CONF even is triggered.
If there are any partially matched details that are not considered for matching the message , you can fetch the unconfirmed deal records in the Contract Detail sub screen.
3.7.7.1 Un-matching Matched Messages
You can un-match a matched record from MM Confirmation Message Matching Summary screen. To unauthorize and close a completely matched record, select the matched record and click Close button in the detailed screen. The system then triggers unconfirm event UCNF for the related MM contract. You cannot reopen or process the closed match records, but you can fetch the unmatched messages to initiate a new manual match process.