3. Maintaining Parameters for Islamic Integrated Liquidity Management
3.1 Introduction
You need to maintain certain parameters before you define account structures for integrated liquidity management process. They are:
- Account class
- IC – SDE Maintenance
- IP Rule Maintenance
- IP Product Maintenance
- Customer Maintenance
- Islamic Account Maintenance
- Transaction Code
- Product Event class and Accounting entries for ILM
- ILM Branch parameters Maintenance
- Group Code Maintenance
- Account Structure Maintenance
- Group Account Linkage
- Other Maintenances
This chapter contains the following sections:
- Section 3.2, "Maintaining Account Classes"
- Section 3.3, "Maintaining SDEs"
- Section 3.4, "Maintaining UDEs"
- Section 3.5, "Profit & Charges Rules"
- Section 3.6, "Product Event Class & Accounting Entries"
- Section 3.7, "Group Code Maintenance"
- Section 3.8, "Account Structures"
3.2 Maintaining Account Classes
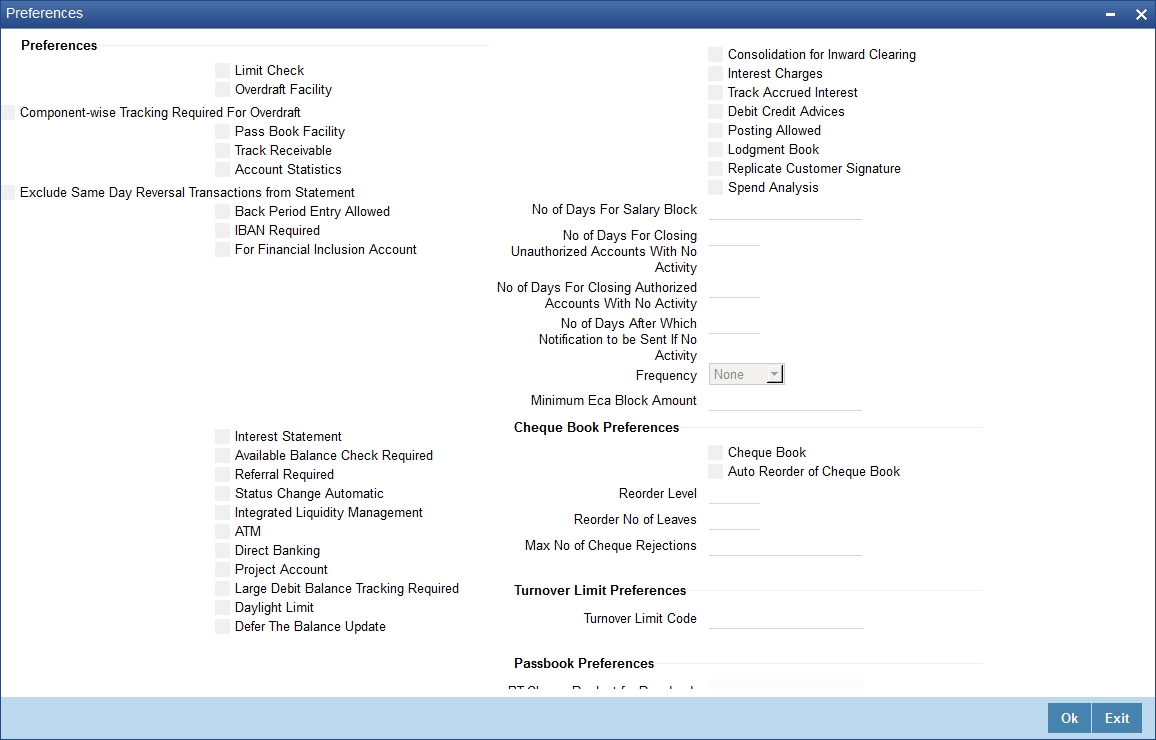
You can use the Account Class feature in Oracle FLEXCUBE to create a set of accounts which have the same characteristics. You can invoke the ‘Account Class Maintenance’ screen by typing ‘IADACCLS’ in the field at the top right corner of the Application tool bar and clicking on the adjoining arrow button. Click on the ‘Preferences’ button in the ‘Account Class Maintenance’ screen to invoke the ‘Preferences’ screen.
You are required to input the following details in this screen:
Integrated Liquidity Management
Check this option to indicate that accounts created under this Account Class should be part of an ILM Structure. If the option is checked, the system creates system accounts (internal accounts) for each account that is linked in a sweep structure and tracks the balances on both the actual accounts as well as these system accounts. It also calculates profit on these system accounts.
Note
Profit on accounts that are not part of an account structure are calculated on the actual customer account.
3.3 Maintaining SDEs
In order to calculate Profit, Oracle FLEXCUBE uses components called ‘data elements’ that provide the required data.
System Data Elements (SDEs) are values such as the balance in an account or the number of transactions in a day. This information is constantly updated in the system and is readily available for computation of Profit. These values can only be picked up by the system while applying Profit. User cannot indicate what the value of an SDE should be.
The following SDEs will be used in IC Processing:
SDE (System Data Elements) |
Description |
ILBD_ULT_DR_BAL |
Captures the book dated Debit balance of the pool header in this Data element during the IC calculation process |
ILBD_ULT_CR_BAL |
System populates the book dated Credit balance of the pool header in this data element during the IC calculation process |
ILVD_ULT_DR_BAL |
System populates the value dated Debit balance of the pool header in this data element during the IC calculation process |
ILVD_ULT_CR_BAL |
System populates the value dated Credit balance of the pool header in this variable during the IC calculation process |
ILBD_CP_DR_CONT |
This data element captures the Compensated contribution of the book dated Debit balance |
ILBD_CP_CR_CONT |
This data element captures the Compensated contribution of the book dated Credit balance |
ILVD_CP_DR_CONT |
This data element captures the Compensated contribution of the value dated Debit balance |
ILVD_CP_CR_CONT |
This data element captures the Compensated contribution of the value dated Credit balance |
ILBD_NCP_DR_CONT |
This data element captures the Non Compensated contribution of the book dated Debit balance |
ILBD_NCP_CR_CONT |
This data element captures the Non Compensated contribution of the book dated Credit balance |
ILVD_NCP_DR_CONT |
This data element captures the Non Compensated contribution of the value dated Debit balance |
ILVD_NCP_CR_CONT |
This data element captures the Non Compensated contribution of the value dated Credit balance |
3.4 Maintaining UDEs
User Data Elements (UDEs) are elements (such as Profit or Tax rate) the values for which are provided by the User. The following User Data Elements (UDE) can be specified in IP Rule Maintenance:
- Debit Rate for Sweep Balance
- Credit Rate for Sweep Balance
- Inter-Bank Rate
- Tax Rate
3.5 Profit & Charges Rules
This section contains the following topics:
- Section 3.5.1, "Creating Profit & Charges Rules"
- Section 3.5.2, "Creating Profit & Charges Products"
- Section 3.5.3, "Maintaining IP Special Conditions for Customer Accounts"
- Section 3.5.4, "IP Special Conditions"
3.5.1 Creating Profit & Charges Rules
You can use the SDEs and UDEs that you have previously defined to create formula to be used by the system for Profit calculations in the ‘Profit & Charges Rule Maintenance’ screen. You can invoke the ‘Profit & Charges Rule Maintenance’ screen by typing ‘IPDRLMNT’ in the field at the top right corner of the Application tool bar and clicking on the adjoining arrow button.

You are required to input the following detail in this screen:
Integrated LM
Choose this option if you want to use the product for Integrated Liquidity Management processing.
Integrated LM Type
Specify the type of System Account to which the product ought to be linked. It can be:
- Pool Leader: Indicates that the Rule will apply to Header accounts in a structure.
- Pool Reallocation: Indicates that the rule will apply to Parent and Child Accounts below the Header Account.
Refer the chapter ‘Annexure B – IC Rule Set-up’ in this User Manual for suggested IC rules.
3.5.2 Creating Profit & Charges Products
You can invoke the ‘Profit And Charges – Profit Product Preferences’ screen by clicking ‘Preferences’ button on the ‘Profit And Charges Product Maintenance’ screen. You can invoke the latter by ‘typing ‘ICDPRMNT’ in the field at the top right corner of the Application tool bar and clicking on the adjoining arrow button.

You can input the following details in this screen:
Integrated LM Product
Choose this option if you want to use the product for Integrated Liquidity Management processing.
Integrated LM Type
Specify the type of System Account to which the product ought to be linked. It can be:
- Pool Leader: Indicates that the Rule will apply to Header accounts in a structure.
- Pool Reallocation: Indicates that the rule will apply to Parent and Child Accounts below the Header Account.
Refer the chapter ‘Annexure A - Accounting Entries’ in this User Manual for suggested IC products.
For details on User Defined Fields screen refer Other Maintenances chapter in Core Service User Manual.
3.5.3 Maintaining IP Special Conditions for Customer Accounts
The ‘Islamic Accounts Maintenance’ screen is used to create accounts for a given Customer using the desired account class and currency combination. You can invoke the ‘Islamic Accounts Maintenance’ screen by typing ‘IADCUSAC’ in the field at the top right corner of the Application tool bar and clicking on the adjoining arrow button.
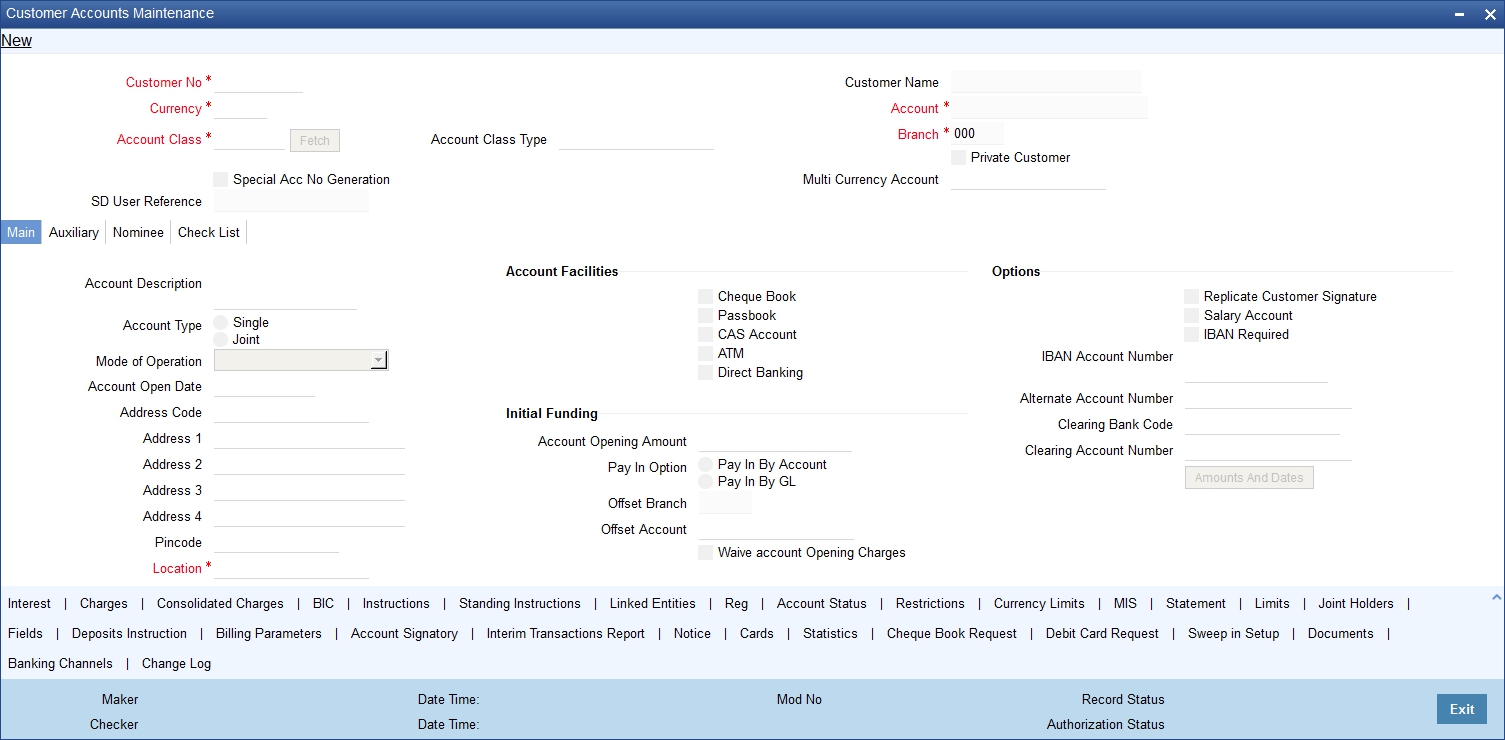
Click ‘Profit’ button in ‘Customer Account Maintenance’ screen to invoke ‘IP Special Conditions Maintenance’ sub-screen, where you can maintain IP special conditions for ILM accounts.

Note
ILM accounts need to be created with special conditions by attaching the products with effective date and UDE values.
3.5.4 IP Special Conditions
The system displays the following fields on the basis of your choice in the IP Rule and IP Product screens.
Integrated LM
The system defaults the value specified in the product screen from based on product selected from the option list.
Integrated LM Type
The system displays the value on the basis of your choice in the IP Rule and IP Product screens.
3.6 Product Event Class & Accounting Entries
This section contains the following topics:
- Section 3.6.1, "Maintaining Product Event Class & Accounting Entries"
- Section 3.6.2, "Defining Accounting Entries for Event"
- Section 3.6.3, "Associating Branch to Event Class"
3.6.1 Maintaining Product Event Class & Accounting Entries
When you define an Events Class, you choose, first of all, the set of events that would belong to the class. Events are, usually, unique to a module.
The events that you would like to include in an Events Class can be identified through the ‘Events Accounting Entries and Advices Class Maintenance’ screen. This screen is invoked from the Application Browser.
You can invoke the ‘Events Class Maintenance’ screen by typing ‘CSDACTCL’ in the field at the top right corner of the Application tool bar and clicking on the adjoining arrow button.
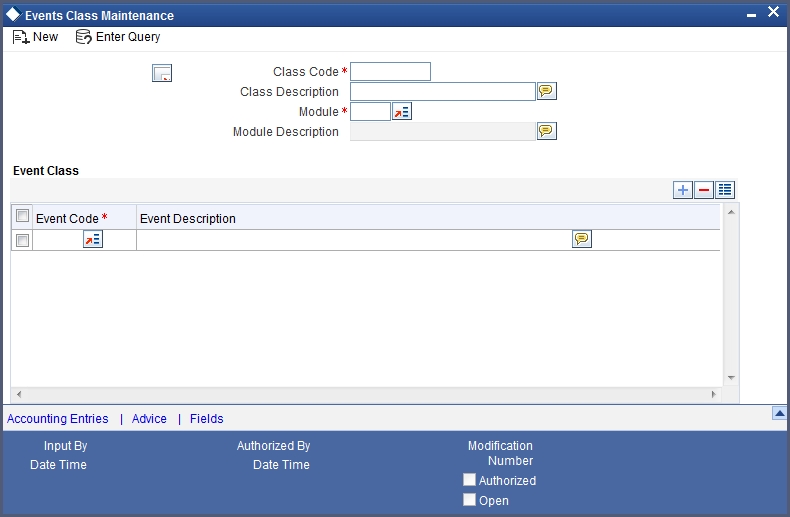
You can maintain the following details in this screen:
Class Code
An Events Class is identified with a unique Code and a Description. This indicates the name of the event class to which the events for ILM processing will be linked.
Description
You need to enter a brief description for the class code.
Module
Events are, usually, unique to a module. Specify the module as IL to define the events for Islamic Liquidity Management module.
Event Code
Specify a valid code for the event you need to maintain. The adjoining option list displays all valid codes maintained for IL events. You can select the appropriate one.
Event Description
Once you specify the class code and module, click on add icon. The system will display the events associated with the Integrated Liquidity Management module.
The following events are available for the integrated liquidity management module:
- SWBK : Sweep Booking
- RVSW: Reverse of Sweep Booking
- RALL: Reverse ALL (Book / Reverse Sweep)
3.6.2 Defining Accounting Entries for Event
You can indicate the accounting entries that should be passed at an event in the Accounting Entries section of the ‘Events Class’ screen. This section is invoked by clicking the ‘Accounting Entries’ button.
As part of the Accounting Entry details of an event, you should specify the following details:
- The accounting role
- The amount tag
- If a debit or a credit
- The transaction code
Accounting Role
If accounting entries are to be passed for an event, you have to indicate the different Accounting Roles. At an event in the life cycle of a deal, involving a product to which you associate the class, the appropriate entries will be passed under the specified Accounting Roles.
The adjoining option list displays a list of all the available accounting roles.
Amount Tag
The amount (i.e. the available balance, booking dated balance etc.) that is to be posted for an event, is referred to as the Amount Item. The tag associated with an Amount Item is the Amount Tag.
The adjoining option list displays a list of the amount tags that are maintained in the system. You can choose a tag by double clicking on it.
Debit/Credit
You have already specified the type of account to which an entry should be passed, and the tag which identifies the amount (available balance, booking dated balance etc.) that should be passed. In this field, you must indicate if the amount is to be debited from credited to the specified account. Choose the Debit or Credit indicator.
Transaction Codes
Every accounting entry in Oracle FLEXCUBE involves a Transaction Code that describes the nature of the entry. This code and its description will identify the original sweep book, reverse booking and their corresponding reversals. The Transaction Code for both legs of the transaction would be the same.
The table below illustrates the accounting entries for each event that you need to set up for the liquidity management module.
Event |
Debit/Credit Indicator |
Accounting Role |
Amount Tag |
SWBK |
DR |
CHILD |
CR_CONT |
SWBK |
CR |
PARENT |
CR_CONT |
SWBK |
CR |
CHILD |
DR_CONT |
SWBK |
DR |
PARENT |
DR_CONT |
RVSW |
DR |
PARENT |
CR_CONT |
RVSW |
CR |
CHILD |
CR_CONT |
RVSW |
DR |
CHILD |
DR_CONT |
RVSW |
CR |
PARENT |
DR_CONT |
Refer to the Modularity User Manual for further information on setting up accounting details.
3.6.3 Associating Branch to Event Class
After you define the accounting entries that need to be passed for a set of events, you need to associate the event accounting entries to the branches of your bank.
You can invoke the ‘ILM Branch Parameter Maintenance’ screen by typing ‘ILDBRPRM’ in the field at the top right corner of the Application tool bar and clicking on the adjoining arrow button.
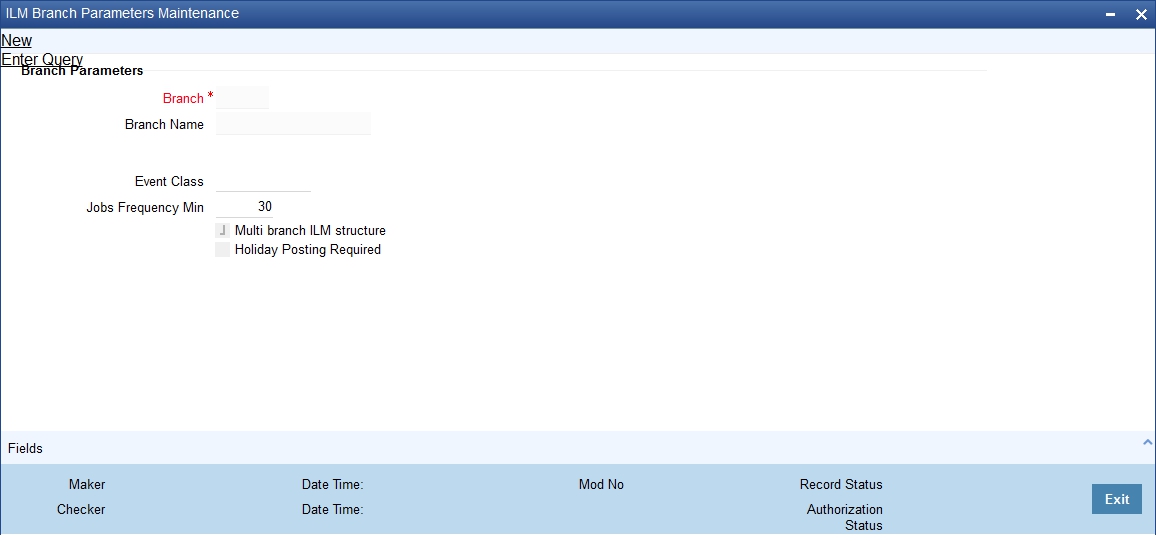
For field details refer ‘Associating Branch to Event Class’ section in ‘Maintaining Parameters for Integrated Liquidity Management’ of IL module.
Note
Branch parameters maintained for IL modules is applicable for II module and the vice versa. Hence a single maintenance in any of the both modules is sufficient.
3.7 Group Code Maintenance
This section contains the following topics:
3.7.1 Maintaining Group Code
In Oracle FLEXCUBE, you can bring together several accounts to form a ‘Group’ for ILM processing. You can then link this group code to the Header Account maintained as part of Account Structure. In Oracle FLEXCUBE, group codes allow you to uniquely identify a given account structure for ILM processing.
You can invoke the ‘Integrated Liquidity Management Group Code Maintenance’ screen by typing ‘IIDGRPCD’ in the field at the top right corner of the Application tool bar and clicking on the adjoining arrow button.
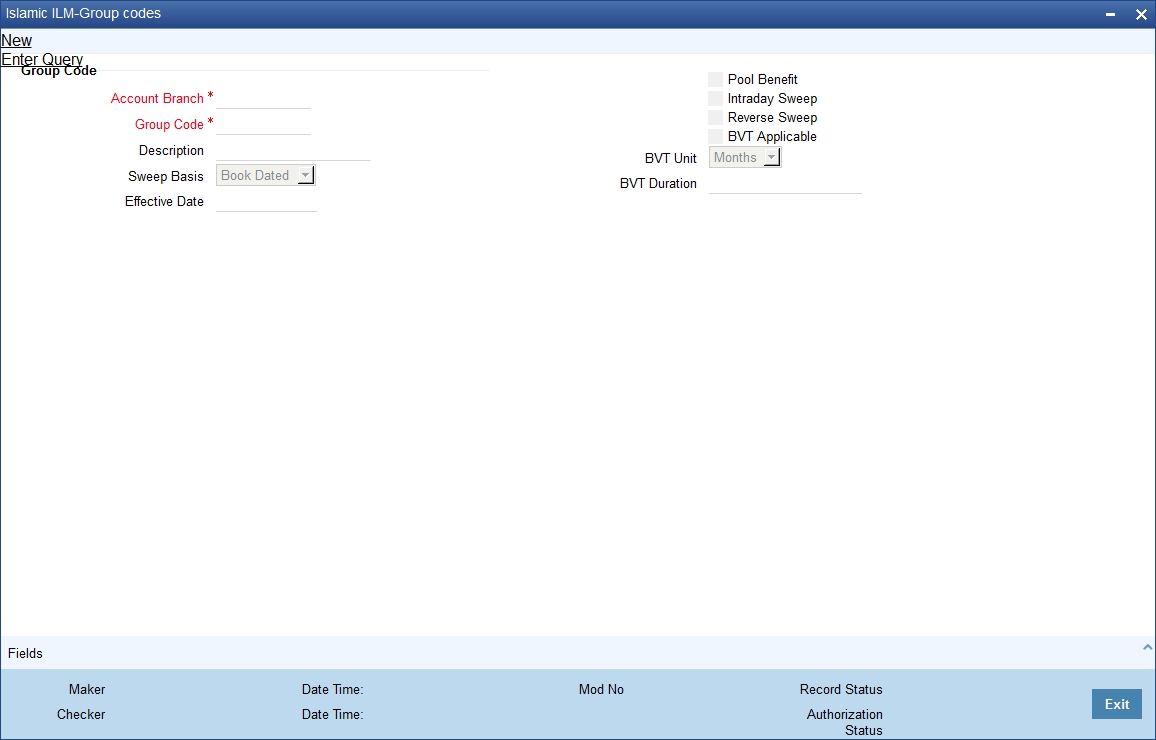
You can input the following details in this screen:
Group Code and Description
Enter a unique code to identify the group code in the system. Enter a brief description.
Effective Date
Specify the date from which the group will become active in the system. You will not be allowed to input Back Valued Dates (BVT) here.
Sweep Basis
You need to indicate if the sweep should be performed on Book Dated balance or Value Dated Balance for the entire structure falling under the group. . If BVT support is required, it must have ‘Value Dated’ option.
Pool Benefit
If you select this option, profit re-allocation is carried out for the child accounts involved in the group.
Reverse Sweep
Indicate whether reverse sweeps should be performed during BOD batch.
BVT Applicable
Specify if BVT processing is applicable for a group
BVT Unit
Indicate the unit the system should consider while calculating the BVT date. This can be Days/Months
BVT Duration
This indicates the number of BVT units allowed as back period from today’s date while calculating BVT date.
For instance, to indicate 30 Days input ‘Days’ as BVT Unit and ‘30’ in the BVT Duration fields. Similarly, to indicate 2 months, the BVT Unit should be ‘Months’ and the BVT Duration ‘2’.
Note
- If the Sweep basis is Book Dated, back value dated transaction is not allowed.
- While maintaining a new Group, the system validates if ‘ILM Applicable’ check box is checked at the branch level.
- BVT is considered only from the same day, if it’s posted on working day. If it is posted on a holiday, then the system considers BVT from the next working day. The same is applicable for BVT entries entered by the system to the account.
3.7.2 A
Note on Back Valued Transactions
The system rebooks the sweeps (in case of physical pooling) and adjusts the profit amount that had been accrued and settled in the accounts when you input a transaction with a back value date. In case of a change in the Account Structure in the interim between the Back Value Transaction (BVT) date and current date, the system uses the account structure existing on the execution days.
The following points need to be kept in mind for BVT Processing:
- It is performed only for sweeps which are value based.
- The corresponding System Account active on the Effective Date is considered for a back valued transaction to an account. (BVT for Islamic ILM is considered only when it is a working day)
- The processing involves replaying the sweep from the least date of the BVT which means that the Contributions and Pool Balances of the System Accounts are calculated afresh. The balances in all accounts of the structure are reworked and the sweeps carried out again for each of the previous sweep having the same value date.
- The value dated balances of the Parent Account as well as the Child Accounts in the Account Structure are updated
- In Customer Account Statements, only the back value transaction will be available on the date that it was posted.
The system follows the following process for replaying sweeps:
- It omits BOD processing for the least back value date only and continues till the current processing date. It then identifies the value dated balance of the current processing date for the corresponding System Account and carries out the EOD processing.
- For a particular Effective Date, it calculates Sweep Amount for the corresponding System Accounts.
- It fetches the entry posted for the BVT date from the Sweep Log and compares it with the Sweep Amount that has been calculated currently.
- If the Sweep Amounts are equal, no entry is posted.
- If the Sweep Amounts are different, it reverses the entry
that was posted for the BVT date (SWBK) and the corresponding entry that
was used during BOD to reverse the entry above
Reverse sweep booking (RSBK) - Reversal of Reverse Sweep (RSWR) entry gets posted during reversal of RVSW.
- It inputs a new entry whose booking date is the processing date of the BVT and whose value date is the BVT date. This entry is entered into the Daily Log.
- It then updates the post sweep balances for a combination of Account + Effective Date + System Account.
Note
Every time a physical sweep is executed, the system stores the credit balance and the unused OD limit in the Parent Account before and after the sweep.
3.8 Account Structures
This section contains the following topics:
- Section 3.8.1, "Maintaining Account Structures"
- Section 3.8.2, "Indicating Account Details"
- Section 3.8.3, "Maintaining Sweeping Parameters"
- Section 3.8.4, "Closing Accounts in an Account Structure"
- Section 3.8.5, "Creating Group Account Linkages"
3.8.1 Maintaining Account Structures
In Oracle FLEXCUBE, you can define a structure for the various accounts participating in the ILM process and set up a hierarchy for the accounts - establish the relationships or links among the accounts that are to be part of the Group.
You need to define the account structure and the hierarchy for ILM processing in the ‘Islamic Account Structure’ screen. You can invoke the ‘Account Structure Maintenance’ screen by typing ‘IIDSWEEP’ in the field at the top right corner of the Application tool bar and clicking on the adjoining arrow button.
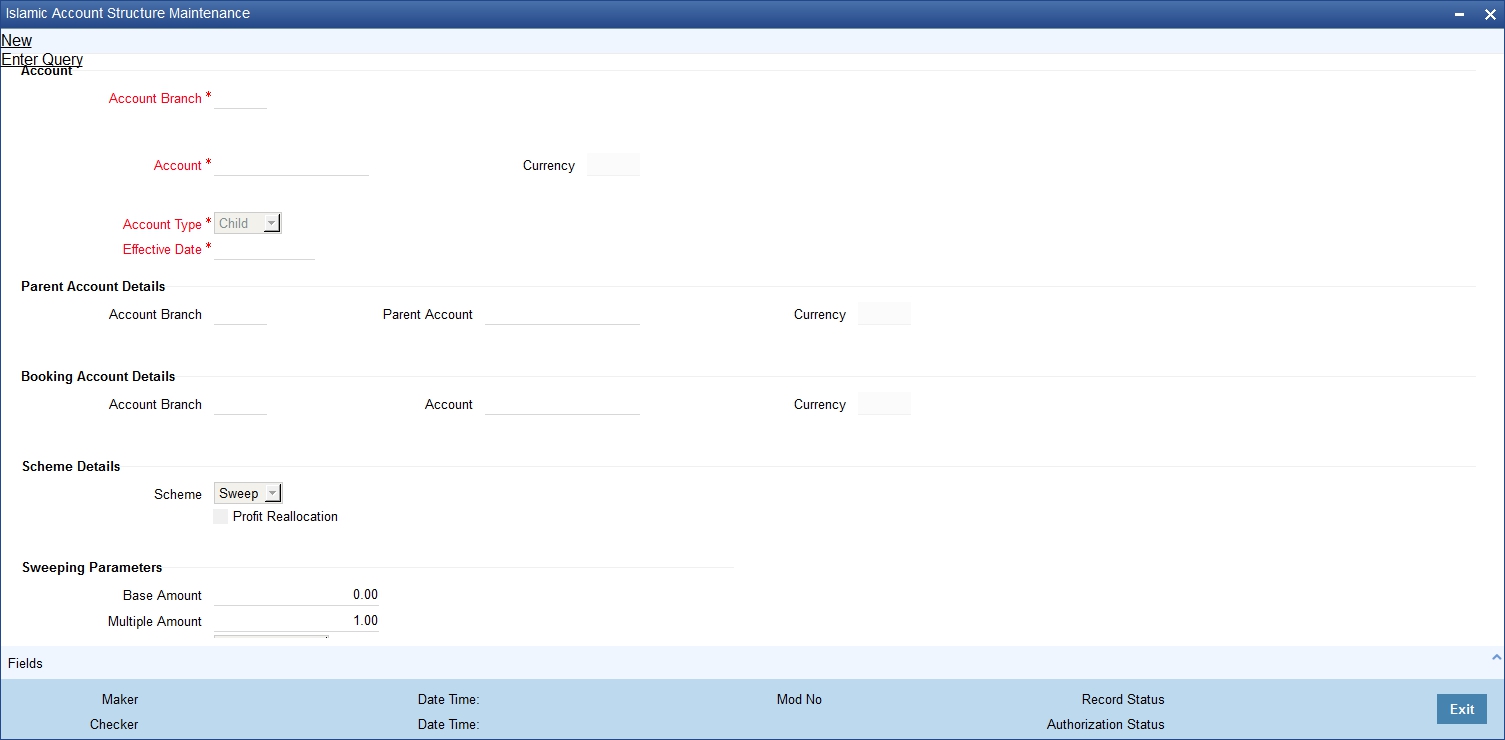
You can define the following parameters as part of maintaining the account structure for ILM processing:
3.8.2 Indicating Account Details
Specify the following details.
Account
First, you need to specify the account (main or affiliate account) which has to be part of the account structure.
Account Type
You need to indicate whether the account that you have specified is a main account or secondary account. The account type defines the relationship between the accounts.
- Select the option ‘Parent’ to indicate that the account is the main account in the hierarchy.
- Select the option ‘Child’ to indicate that the account is a secondary account in the hierarchy.
You will not be able to link the accounts at the same level in an account structure.
If you de-link a parent account from a structure or link it to another parent in the same structure, the associated child accounts linked to it will also follow the parent account.
Effective Date
You need to indicate the date from which the account structure is available in the system for ILM processing.
Parent Account
This is applicable only if you are maintaining a child account. You need to indicate the parent account for the child here.
Note
You cannot link a child account to more than one parent account.
Booking Account
You need to indicate the account to which the profit amount is to be booked during profit reallocation (after Profit is calculated).
Note
The booking account linked to the account should have the same currency as the account.
Scheme
Indicate the type of structure for which the link is being defined. The following types are possible:
- Sweep: Indicates that the level of the structure is Sweep, in which movement of funds is physical.
Profit Reallocation
Check this option to allow profit to be re-allocated to child accounts based on their contribution.
3.8.3 Maintaining Sweeping Parameters
Specify the following details.
Sweep Type
This indicates the sweep type of the parent and child account. The sweep type can be either of the following:
- Debit (Sweep Out)
- Credit (Sweep In)
- Target Balance Agreement
Base Amount
The amount depends on the sweep type that you have selected.
- If the sweep type is Debit, the Amount indicates the balance in the account that should trigger a sweep out of funds. The sweep transaction will be executed if the balance in the account becomes greater than this amount.
- If the sweep type is Credit, the Amount indicates the balance in the account that should trigger a sweep in of funds. The sweep transaction will be executed if the balance in the account goes below this amount.
- If the sweep type is Target Balance, the Amount indicates the minimum balance that is to be left behind in the Child Account after the sweep is performed. A value of zero indicates Zero Balancing sweeps.
Multiples Amount
This indicates the multiples amount in which the system performs sweeps.
3.8.3.1 Validating Account Structure
The system validates the following for account structure:
- Account must not be linked to more than one Parent Account
- Account must not participate in another account structure with different header account
- There must not be any cyclic links in the structure
- Accounts that act as a Parent Account in the structure must be explicitly maintained with the account type as Parent
- Back Dated Structure Change is disallowed
- Accounts at the same level in the structure must not be linked
- If a Parent Account is delinked from a structure or linked to another parent in the same structure, then the Child Accounts linked to it must also be delinked or linked accordingly
- If ‘Scheme’ is maintained as ‘Sweep’, then the Parent Account and Child Account must be in the same currency
- Parent and Child Account in the account structure must be in the same fund ID
- Effective date of child must be greater than or equal to parent structure
- Base amount must not be assigned to parent structure
3.8.4 Closing Accounts in an Account Structure
The following steps explain how to close an account in a given account structure. Let us assume that, in the structure shown below, we need to close account P2 and attach account C2 directly to H1.

The steps to be followed for the closure are:
- Child Account C2 is closed first (You can query to find out the child accounts of a given parent account, say P2)
- Subsequently, account P2 is closed.
- Account C2 is now freshly linked with H1.
After the structure change has been carried out, the new structure appears as shown below:
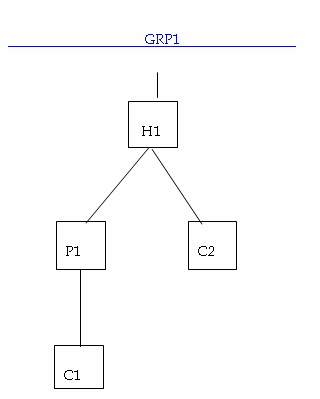
In the new structure (i.e. after the change), account C2 will have a new ‘System Account’ associated with it.
Note
BVT is not applicable for a group if any of the account structure closes and BVT falls in that period.
3.8.5 Creating Group Account Linkages
You can link the account structure to the group codes that you have maintained in the ’Islamic Account Group Linkage Maintenance’ screen. You can invoke the ’Account Group Linkage Maintenance’ screen by typing ‘IIDGRPLN’ in the field at the top right corner of the Application tool bar and clicking on the adjoining arrow button.

In this screen, you need to specify the following:
Header Account
The system will display the parent accounts maintained as part of account structure maintenance. Select the account which you want to link to the group.
Effective Date
Indicate the date on which the structure under the group should come into effect.
Group Code
Indicate the group code to which you want to link the account structure.
3.8.5.1 Validating Group Account Linkages
The system validates the following for group account linkages:
- Modification of Account Group linkage is disallowed for an effective date
- If a record has to be closed, then the structure reporting to the group code must be validated. The structure must be linked to the new group code for the effective date greater than the closure date
- Group linkage effective date must be greater than or equal to Group code effective date
- Effective date of Account structure related to group linkage must be greater than or equal to linkage effective date
For example, the following structure may be defined for a Group Code ‘GRP’
- HACC (Header Account)
- PACC1 (Child to HACC)
- CACC1 (Child to PACC1)
- PACC2 (Child to HACC)
- CACC2 (Child to PACC2)
- CACC3 (Child to PACC2)
In the above structure, PACC2 is the Child Account in the link HACC – PACC2 whereas Parent Account in PACC2 – CACC.