10. Transferring LC
10.1 LC Transfer Details
This chapter contains the following details:
- Section 10.1.1, "Specifying LC Transfer Details"
- Section 10.1.2, "Parties Tab"
- Section 10.1.3, "Documents Tab"
- Section 10.1.4, "Shipment Tab"
- Section 10.1.5, "Goods Tab"
- Section 10.1.6, "Parties Limit Tab"
- Section 10.1.7, "Advices Tab"
- Section 10.1.8, "Defining Charge Details"
- Section 10.1.9, "Viewing Event Details"
- Section 10.1.10, "Specifying Settlement Instructions"
- Section 10.1.11, "Capturing UDF Values"
- Section 10.1.12, "Previewing Messages"
- Section 10.1.13, "Remarks"
- Section 10.1.14, "Common Group Message"
- Section 10.1.15, "Note on Transfers made from Import and Export LCs"
- Section 10.1.16, "Authorizing LC Transfer"
- Section 10.1.17, "Viewing Details of Transfers made to the LC"
10.1.1 Specifying LC Transfer Details
In Oracle FLEXCUBE, you can make transfers from an LC. A transferable LC is one where at the request of the beneficiary (‘first beneficiary’) the LC is made available in whole or in part to another beneficiary (‘second beneficiary’). This is usually done where the first beneficiary is not the actual manufacturer of the goods and is sourcing it from others.
For an LC to be transferable, the LC must specifically display it to be transferable and it is different from the regular Export LC.
A transferred LC cannot be transferred at the request of a second beneficiary to any subsequent beneficiary. The first beneficiary is not considered to be a subsequent beneficiary i.e. an unutilized transferred LC can be transferred back to the first beneficiary only. This is new to UCP 600 and FCC has taken this into consideration.
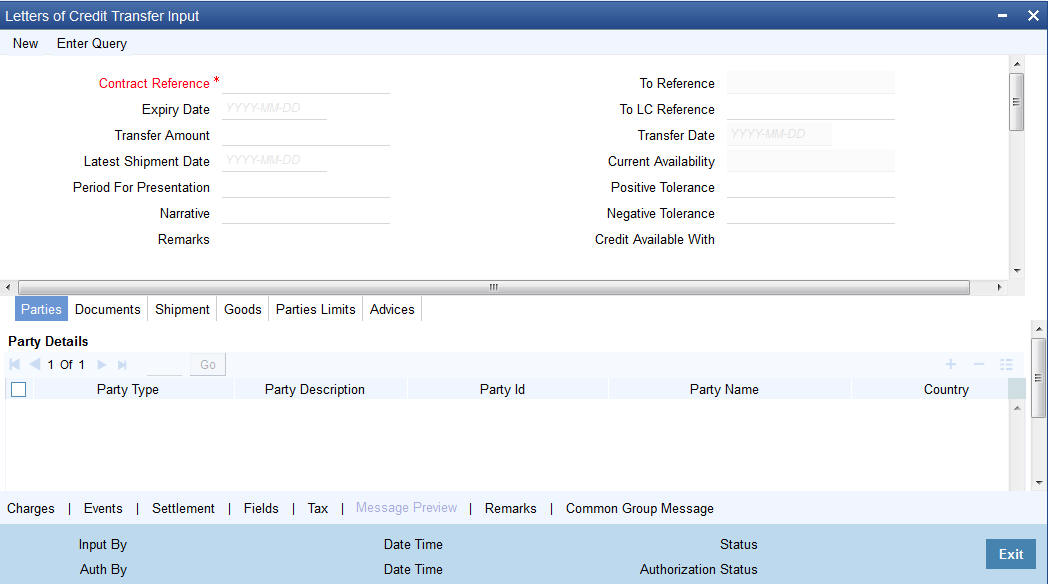
You can invoke the ‘Letters of Credit Transfer Input’ screen by typing ‘LCDTRANF’ in the field at the top right corner of the Application tool bar and clicking on the adjoining arrow button.
While transferring funds from an LC, you need to note the following conditions:
- The transferred LC will always be of the same type as the old LC and will be created under the same product
- The charges applicable to the transfer should be associated with the event TRNF defined for the product
- You can only transfer an amount that is less than or equal to the amount available under the original LC
- An Import LC can be transferred only if the Applicant and Beneficiary are customers of your bank.
Specify the following details in the ‘Letters of Credit Transfer Input’ screen.
Contract Ref No
Indicate the LC from which you want to effect the transfer. Click the adjoining option list and select a valid LC Reference. The manner in which Oracle FLEXCUBE handles a transfer is different for import and export LCs.
Refer to the title ‘A note on transfers made from Import and Export LCs’ for more details.
Transfer Amount
The transfer amount is the amount that should be transferred from the original LC. You can only transfer an amount that is less than or equal to the amount available under the original LC.
On saving the transaction after entering all the required details in the system, the system validates the value of the transfer amount against the following:
- Product transaction limit
- User Input limit
If the transaction currency and the limit currency are different, then the system converts the amount financed to limit currency and checks if the same is in excess of the product transaction limit and user input limit. If this holds true, the system indicates the same with below override/error messages:
- Number of levels required for authorizing the transaction
- Transaction amount is in excess of the input limit of the user
Expiry Date
The expiry date is the date up to which the transferred LC is valid. The expiry date of the original LC is defaulted. You can change the defaulted date. However, the expiry date cannot be earlier than the LC issue date or today's date.
Note
In the case of an export LC, the expiry date can be earlier than today's date to cater to the late receipt of the LC. However in this case you will be prompted for an override.
Latest Shipment Date
The shipment date is the latest date by which the shipment of the goods specified for the transferred LC should take place. The latest shipment date of the original LC is defaulted. You can change the defaulted date. However, the date you enter should not be earlier than the Issue Date of the LC and later than the expiry date. If the latest shipping date that you specify for an LC falls on a holiday in the LC currency, you will be prompted for an override.
It is mandatory for you to enter the Shipment date if you are processing an Import LC.
Period For Presentation
The period of presentation defined for the product - or calculated for the LC, as the case may be - will be displayed. You can change the default to suit the LC you are processing.
Narrative
The system specify the details of date after the submission of the documents.
Remarks
Specify remarks if any.
To Ref No
Specify the reference number to which the LC should be transferred.
To LC Reference
Specify the reference number to which the LC should be transferred.
Transfer Date
Specify the date of transfer.
Current Availability
The amount available on the chosen LC is displayed here.
Expiry Place
The system displays the expiry place details.
Credit Available With
The system displays the details of credit available.
Allow Substitution of Document
This option indicates that the first beneficiary can substitute the document submitted by second beneficiary for the goods transfer at a lesser price.
Conditions For Beneficiary
Specify the payment conditions for beneficiary.
Conditions For Receiving Bank
Specify the payment conditions for receiving bank.
Sanction Check Status
The system displays the sanction check status. The status can be any of the following:
- P - Pending
- X - Pending
- A - Approved
- R - Rejected
- N - Not Required
Last Sanction Check Date
The system displays the last sanction check date.
For more information on processing sanction check refer ‘Processing Sanction Check’ section in this user manual.
External Pricing
External Charge
During LC transfer for a contract for which ‘External Charges’ is enabled at product level, external charges is fetched from external pricing and billing engine.
10.1.2 Parties Tab
The ‘Parties’ tab can be used to record details related to the parties involved in the transfer. The documents, tracers and messages that are generated will be sent to all the parties concerned, based on the details you specify in this screen.

The Party Types that can be involved in the transfer of an LC are the advising Bank and the Beneficiary. You need to indicate the following details for a party type:
Specify the ‘Party Id’ for which you need to maintain specific parameters. Alternatively, you can select the ‘Customer Id’ from the adjoining option list also.
Note
BIC Code appears next to the ‘Customer Id’ only if the BIC Code is mapped with that customer number. If the BIC Code is not mapped with that customer number then the BIC Code will not appear next to the ‘Customer Id’ in the adjoining list.
- The CIF ID assigned to the party, if the party is defined as a customer in Oracle FLEXCUBE
- The name of the party (It can be 150 characters in length. However, note that only 35 characters will be included in the SWIFT messages that you generate for the transfer)
- The country to which the party belongs
- The mailing address of the party
Note the following:
- Change of parties is not allowed for the old LC contract, however, it is allowed for the new transferred LC Contract.
- The system validates for the ADB membership of the selected Bank. If the Bank is not a member of ADB and the BIC code for the Bank is maintained as ‘ADB Member’ at BIC Maintenance level, then the system displays the override message as, “Advising or Issuing Bank is not a member of ADB TFFP.”
10.1.3 Documents Tab
Click ‘Documents’ tab and specify details of documents and clauses that should accompany the goods.

There are some standard documents required under a documentary LC. In this screen you can specify the documents that are required under the LC being processed. These details will be a part of the LC instrument sent to the advising bank, the advice through bank or the beneficiary.
Documents Details
All the documents specified for the product to which the LC is linked will be defaulted to this screen. The details specified for these documents such as the document type, description, the number of copies required, the number of copies issued, the clauses specified for the document are also defaulted from the product. You can edit the description of the document that is defaulted to suit the LC you are processing.
You can add to or delete from the list of documents that are defaulted. To add a document for the LC, click add icon. Type in or select the code of the appropriate document from the list of document codes maintained in the ‘Documents Maintenance’ screen. The other details of the document will be defaulted to this screen.
To delete a document that is not required for the LC, highlight the document code and click on the delete icon.
Clauses Details
The Clauses associated with the documents that you specified for the transfer are defaulted. When you highlight a document code, all the clauses defined for the document are displayed in the Clauses window. You can add to or delete from the list of clauses that are defaulted.
To add a clause to a document for the LC, click add icon. Specify a valid clause code or select the code of the applicable clause from the list of clause codes maintained, in the Clause Maintenance screen. The description of the clause will be defaulted, based on the clause code that you select.
To delete a clause that is not required for the LC, highlight the Clause code and click delete icon.
10.1.4 Shipment Tab
Click ‘Shipment’ tab and specify details of documents shipment of the merchandise traded under an LC.

10.1.4.1 Specifying Shipping Details for an LC
There are certain standard clauses and conditions, associated with the shipment of the merchandise traded under an LC.
- The location from which the goods transacted under the LC should be shipped. In international trading parlance, this is called the Loading on board/Dispatch/Taking in charge at/from
- The destination to which the goods transacted under the LC should be sent In international trading parlance, this is called the For transportation to
- The latest date of shipment
- Besides these details, you can also specify shipping preferences
like:
- Should Trans-shipment be allowed under the LC
- Should partial shipment of the goods be allowed under the LC
- Shipping marks
- Additional shipment details
10.1.5 Goods Tab
The details of the merchandise that will be traded under the LC should be clearly specified. You have maintained various codes that have been allotted, for commodities normally traded in your country. Pick up the applicable code for the LC you are processing. The description of this code (which could be 6500 characters long), can be changed to suit the LC you are processing. You can also enter specifications such as the quality and quantity of the merchandise.

Currency
The system displays the type of currency
Pre-advice Description
If pre-advice is one of the advices for the transfer, you should enter the details of the LC briefly, as a pre-advice description. This will be a part of the pre-advice that is generated.
Typically, a pre-advice is sent by SWIFT or cable and contains brief details of the LC. This is followed by the LC instrument will contain all the details of the LC.
Specifying the Port of Loading and Discharge
You can specify the name of the airport from where the goods transacted under the LC are loaded for shipping. This is called the Port of Loading.
You can also specify the name of the destination port to which the goods transacted under LC should be sent. This is called the Port of Discharge.
Note
You can amend the value of ‘Port of Loading’ and ‘Port of Discharge’ after authorization.
Goods Details
The goods details are defaulted from LC contract on click of ‘Default’ button. The system allows you to maintain multiple goods details. The fields displays the following values:
Goods Code
The system displays the group code.
Goods Description
The system displays the goods description.
Original number Of Units
The system displays the orginal number of units.
Original Price per Unit
The system displays the original price per unit.
Available Units
The system displays the available units of the goods.
Number of Units
Specify the number of units. The system displays an error message if the value for units transferred is more than the units available.
Price Per Unit
Specify the price per unit.
10.1.6 Parties Limit Tab
You can track the limits of multiple credit lines while transferring an LC contract. Click ‘Parties Limit’ tab on ‘Letters of Credit Transfer Input’ screen.

Specify the following details:
Party Type
Specify the type of the party whose credit limits need to be tracked.
If you click ‘Default’ button, in the first row, the system defaults the party type based on the details maintained under ‘Parties’ tab of the screen. However, you need to make sure that the mandatory party details have been maintained under ‘Parties’ tab of the screen.
When you add another row to the list, you can manually select the party type as required. If you leave it blank, the system will automatically update the party type when you save the transfer details.
Customer No
Specify the customer number of the party whose credit limits need to be tracked. The option list displays the customer numbers of all the parties selected under ‘Parties’ tab. Choose the appropriate one.
Specify the ‘Customer No’ for which you need to maintain. Alternatively, you can select the 'Customer Id' from the adjoining option list also.
Note
BIC Code appears next to the ‘Customer Id’ only if the BIC Code is mapped with that customer number. If the BIC code is not mapped with that customer number then the BIC Code will not appear next to the ‘Customer Id’ in the adjoining option list.
You need to make sure that the customer number corresponds to the party type selected above. If the customer number and party type do not match, the system displays an error.
JV Parent
When you click ‘Default’ button, the system defaults the joint venture customer number of the party. This customer number is defaulted based on the details maintained in ‘Joint Venture’ sub-screen of ‘Customer Maintenance’ screen.
Liability Number
When you click ‘Default’ button, the system defaults the liability number from ‘Joint Venture’ sub-screen of ’Customer Maintenance’ screen.
Linkage Type
Specify the linkage type. The drop-down list displays the following options:
- Facility (Credit Line)
- Pool
- Collateral
- Local Collateral
Choose the appropriate one.
Linkage Reference No
Specify the reference number that identifies the facility or collateral pool. The option list displays all valid facilities and collateral pools specific to the liability. Choose the appropriate one.
In case you choose the same linkage reference for more than one record in the list, the system displays an override message. You may choose to cancel or proceed with the selection.
% Contribution
Specify the proportion of limits to be tracked for the credit line or collateral pool for the joint venture customer. When you click ‘Default’ button, the system defaults the percentage of contribution maintained under ‘Joint Venture’ sub-screen of ‘Customer Maintenance’ screen.
It is mandatory to indicate the percentage of contribution if the party is a customer under joint venture. This is not applicable to customers who are not a part of joint venture.
Note
For one joint venture, the total percentage of contribution in all applicable credit lines together cannot be more than 100%.
Amount Tag
Specify the amount tag. The system tracks the limits for non joint venture customers based on the amount tag. The amount tags applicable to export and import LC contracts are listed below:
Amount tags applicable to Export LC:
- Liability Amount
- Confirmed Amount
- Unconfirmed Amount
Amount tags applicable to Import LC:
- Liability Amount
- Undertaking Amount
- Non Undertaking Amount
Choose the appropriate one based on the type of LC contract. If you do not specify the amount tag, the system will track the limits based on the liability amount and facility.
The system verifies the amount tag against the product type. If you choose an amount tag, which is not supported by the product type, the system displays an error message.
Amount
When you click ‘Default’ button, the system defaults the amount tracked for each credit line. In case of joint venture customers, the amount is derived on the basis of the percentage of liability amount. In case of other customers, the amount is derived based on the amount tag specified above.
You can add more rows to the list of credit lines using add button. Similarly, you can remove a selected row from the list using delete button.
10.1.7 Advices Tab
An important part of processing an LC is the generation of various advices applicable for a contract.
The advices that can be generated for the events that occur during the lifecycle of an LC are defined for the product, to which the LC is linked. For example, you may have specified the following advices for a product:
- Issue of an import LC: pre-advice by SWIFT and LC instrument by mail to the advising bank, the authorization to reimburse to the reimbursing bank.
- Advice of an export LC: the acknowledgement advice to the advising bank.
- Issue of a guarantee: the guarantee instrument to the beneficiary.
The details of the advices for an event are displayed in the Advices screen. The party type to whom a specific advice should be sent is picked up automatically based on the type of LC being processed and the parties involved.
From the LC Contract Details screen click ‘Advices’ tab. The advices screen is displayed.
The advices defined for the event you are processing will be displayed. You can choose to suppress any of them. The address of the party to whom the advice is addressed to will be picked up by default, based on the media and address maintenance for the party. These can be changed if required.
For a payment message by SWIFT, you also have the option to change the priority of the message.
You can capture the following details.
Suppress
By default, all the advices that have been defined for a product will be generated for the LCs involving it. If any of the advices are not applicable to the LC you are processing, you can suppress its generation by Checking against the suppress field.
Priority
For a payment message by SWIFT, you also have the option to change the priority of the message. By default, the priority of all advices is marked as Normal. The priority of a payment message can be changed to one of the following:
- Normal
- Medium
- High
Medium
The medium by which an advice will be transmitted and the corresponding address will be picked up based on the media and address maintenance for a customer.
You can, however, change either of these while processing the LC. Typically, if changed, both of them will be changed.
After selecting the advices to be generated for the LC, click on ‘Ok’ to save it. Click ‘Exit’ or ‘Cancel’ button to reject the inputs you have made. In either case, you will be taken to the Contract Main screen.
10.1.7.1 FFT Details
Free Format Text instructions (FFTs) are a set of instructions or statements that are applicable to the LC that you process. It can be used to enter additional details related to the LC you are processing. In the LC Contract - Advices screen you can specify the FFTs that should accompany an advice, generated for an LC. When you select an advice code on this screen, the advice code together and the party type, to which it is to be sent, is displayed in the FFT section. This indicates that the FFTs that you specify will appear on the advice, which is displayed and will be sent to the party type that is displayed.
All the FFTs defined for the advice, at the product level will also be displayed. You have the option to add to or delete from the list of FFTs defaulted for an advice.
Free Format Text Code
To add an FFT to the list, click add icon. Select an FFT code from the adjoining option list that is displayed.
Text
After selecting the code that identifies the FFT you wish to attach to the advice, its description is automatically picked up and displayed. The FFT description can be changed to suit the requirements of the LC you are processing.
Single
Check this option to indicate that the FFT is a single message.
10.1.8 Defining Charge Details
Click ‘Charges’ button to invoke the following screen
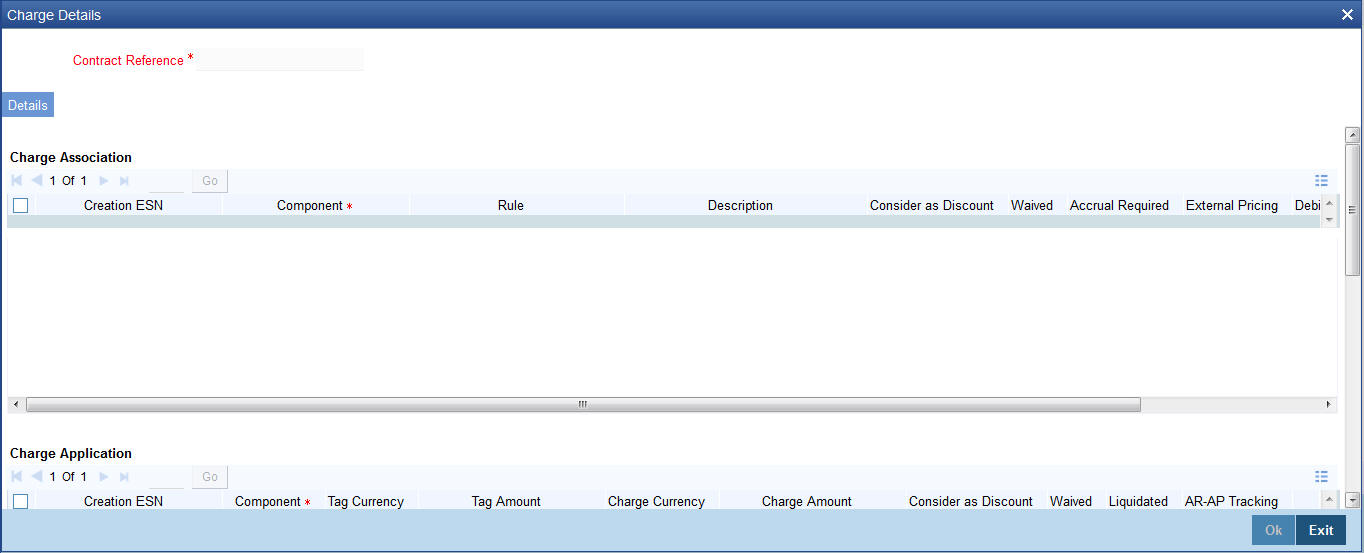
Refer the Charges and Fees User Manual under Modularity for further details about this screen.
10.1.9 Viewing Event Details
Click this button to view the details of the events and accounting entries that a contract involves.
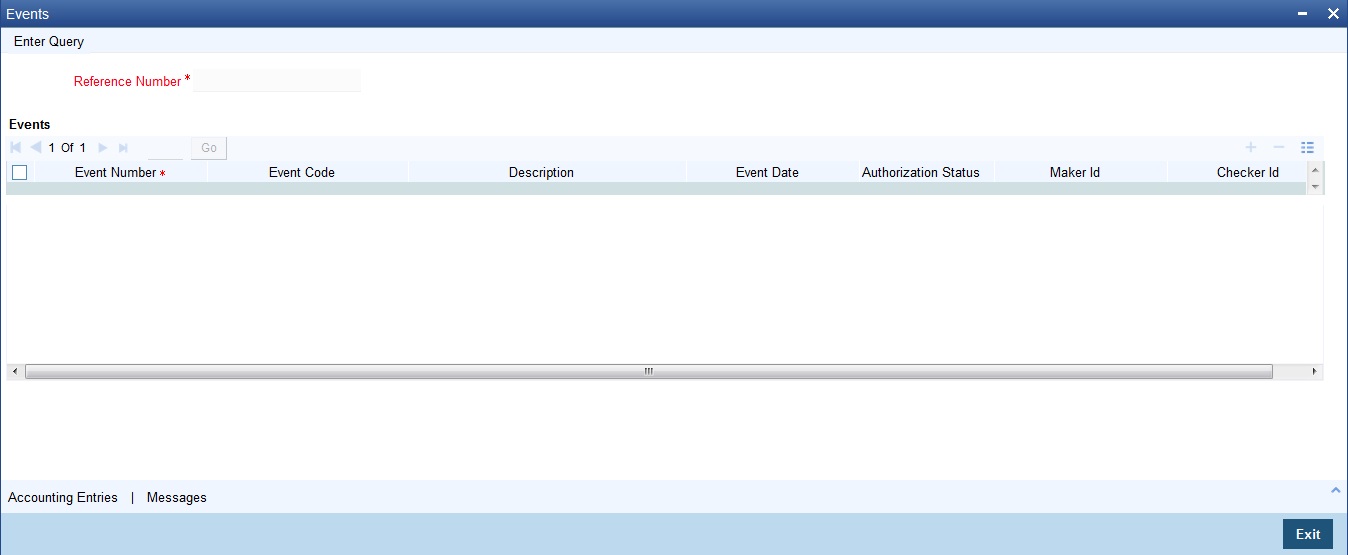
Click ‘Accounting Entries’ to view the accounting entries for the event that is highlighted. Click ‘Message’ to view the messages applicable to the event. Click on ‘Exit’ or ‘Cancel’ to go back to the ‘LC Transfer Input’ screen.
10.1.10 Specifying Settlement Instructions
Click this button to invoke the Settlement screen. Based on the details that you enter in the settlement screens the LC will be settled.

The details of these screens have been discussed in the Settlements user manual.
10.1.11 Capturing UDF Values
Click this button to specify values for the user defined fields (UDFs).
The User Defined Fields (UDFs) maintained for the linked function id are displayed here. You can specify values for them.
Refer the User Manual titled ‘User Defined Field’ for details about defining UDFs.
10.1.12 Previewing Messages
You can preview the messages or advices that will be generated for the contract using ‘Message Preview’ screen. To invoke this screen, click ‘Message Preview’ button.
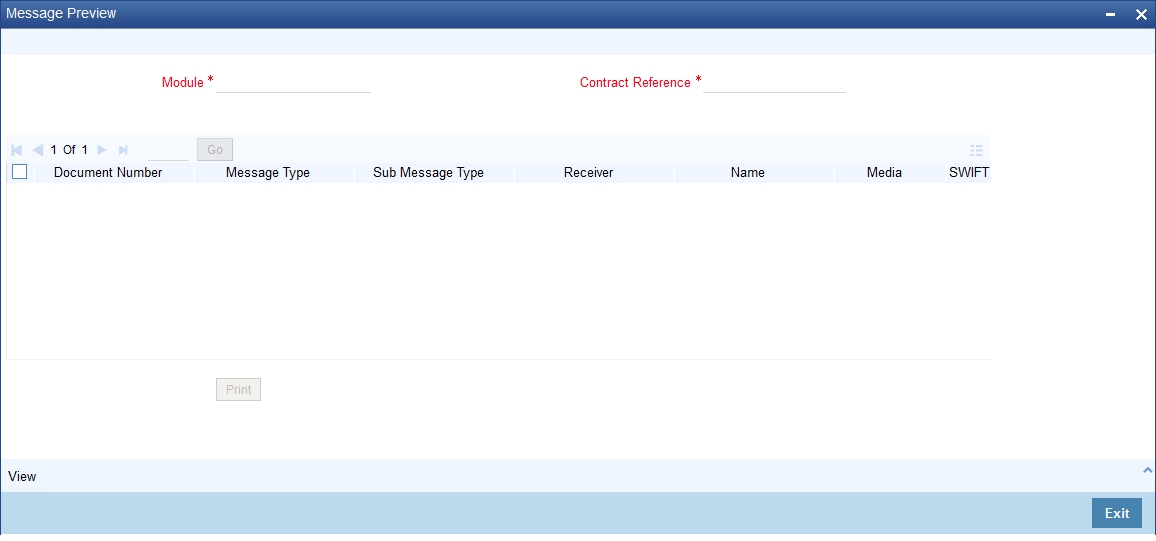
For the contract, you can view the following details of the messages:
- The document number generated for the message/advice
- Type of message generated for the event
- Customer ID of the receiver of the message/advice
- Name of the receiver of the message/advice
- Media of transmitting the message/advice (Mail/SWIFT)
- SWIFT message type of the message
- Status of the message/advice
You cannot preview the messages once the contract is authorized. The ‘Message Preview’ button will be disabled.
10.1.12.1 Viewing Message/Advice
Select a message/ advice and click ‘View’ button to view the complete message/advice. The system will display the following details in a new window.
You can view the following details:
- Reference number of the message/advice
- Document number generated for the message/advice
- Version number of the message/advice
- Receiver/sender of the message
- Type of the message
- Type of the SWIFT message
- Complete text of the message/advice
- Remarks, if any
- Reject reason, if any
- Message trailer
10.1.12.2 Printing Message/Advices
From the ‘Message Preview’ screen, you can print or spool a message/advice using ‘Print’ button. Select the message/advice and click ‘Print’ button to print the message/advice.
10.1.13 Remarks
Click Remarks button to view all the intructions captured on every transaction of the of the contract in ‘History of Remarks’ screen.
For more details on this screen refer to the section titled ‘Remarks’ in this user manual.
10.1.14 Common Group Message
You can enter details of common group messages using the Common Group Message screen. Click on ‘Common Group Message’ to open this screen.

For field descriptions of the above screen refer the section ‘Common Group Message Maintenance’ in chapter titled ‘Defining Free Format Messages’ in ‘Messaging System User Guide’.
You can enter the details of the message and the message is saved when the contract is saved.. The saved messages can be viewed in the message preview subsystem before authorization. On authorization of the contract, the message is generated. After authorization, the messages can be viewed from ‘All Messages’ subsystem and ‘Events’ subsystem.
The common group messages which are supported are listed below:
MT |
MT Name |
n90 |
Advice of Charges, Interest and OtherAdjustments |
n91 |
Request for Payment of Charges, Interest and Other Expenses |
n92 |
Request for Cancellation |
n95 |
Queries |
n96 |
Answers |
n98 |
Proprietary Message |
n99 |
Free Format |
10.1.15 Note on Transfers made from Import and Export LCs
How Transfers from Import LCs are Processed
While transferring an import LC, the original LC is modified to include the additional details of the transferred LC. For instance, the new beneficiary and new advising are added to the existing list of parties.
In Oracle FLEXCUBE, the transfer made from an LC will be taken as a new event ‘TRNF’. Availment made by the new beneficiary against the transferred LC will be tracked against the original LC.
How Transfers from Export LCs are Processed
In the case of an Export LC, a new LC will be opened for each transfer that you make from the original LC. The transfer amount will be taken as the new LC amount.
On authorizing the transfer,
- an availment to the tune of the transferred amount is made against the original LC i.e. the outstanding amount of the Original LC will be reduced by the transfer amount
- a new LC is created based on the transfer details that you specified
The transferred LC will be separated from the original LC. Availment made from the new LC will not affect the outstanding of the Original LC.
10.1.16 Authorizing LC Transfer
An LC transfer that you have entered should be authorized before the EOD is run. You can authorize the same by clicking the ‘Authorize’ icon on the Application toolbar.
Note
You cannot authorize a LC transfer from the ‘Letters of Credit Transfer Input’ screen in the following cases:
- the contract has multilevel of authorization pending, the same will be done using the ‘Multilevel Authorization Detailed’ screen
- the level of authorization is greater than or equal to ‘N’
- the ‘Nth’ or the final level of the users authorisation limit is less than the difference between amount financed and sum of the limits of all the users involved in authorizing a transaction, this case holds good when the ‘Cumulative’ field is checked in the ‘Product Transaction Limits Maintenance’ screen
- the transaction amount is greater than the authoriser’s authorisation limit if the ‘Cumulative’ field is unchecked in the ‘Product Transaction Limits Maintenance’ screen
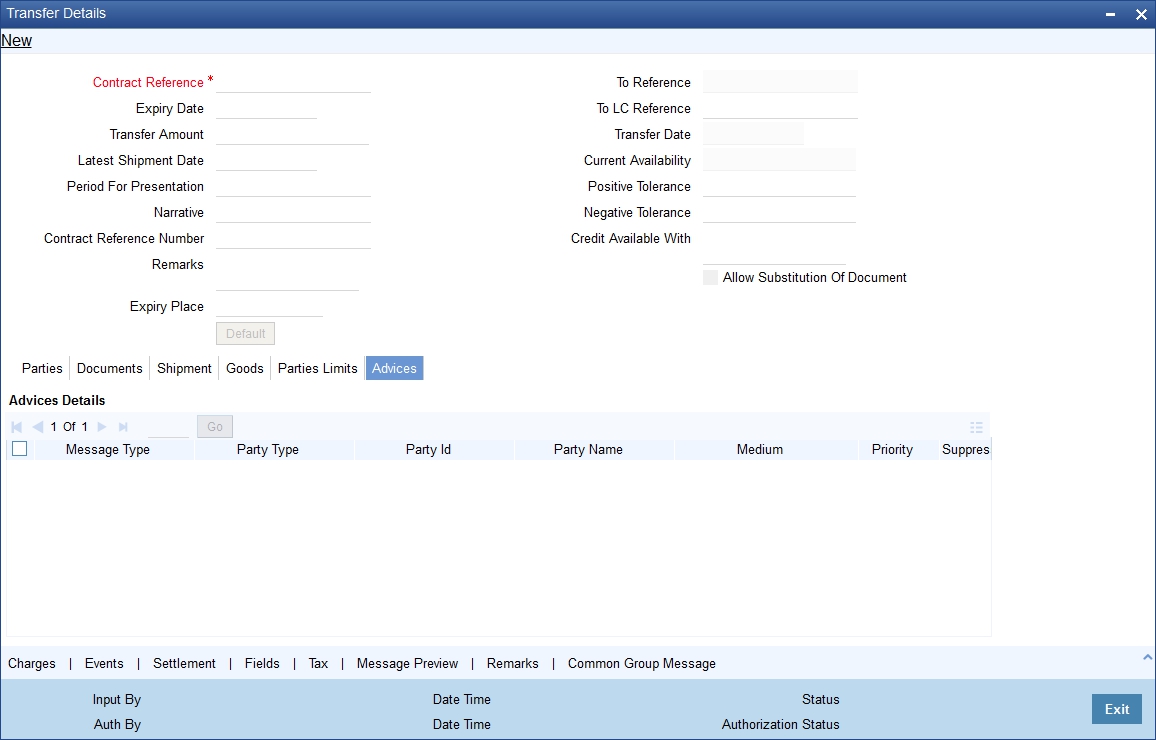
10.1.17 Viewing Details of Transfers made to the LC
Click ‘Transfer Details’ button from the LC Contract screen to view details of the transfers that were made from the LC.
![]()
The following transfer details are displayed:
- The LC from which you are transferring funds
- The transfer amount
- The transfer date
- The expiry date
- The shipment date
Click ‘Exit’ button to exit the screen. You will return to the ‘LC Contract’ screen.
Note
- Although you can initiate the transfer of an LC to more than one secondary beneficiary on behalf of the primary/original beneficiary, a secondary beneficiary can only transfer it back to the original beneficiary. The system will display an error message if a secondary beneficiary initiates a transfer with ‘Party ID’ different from that of the original beneficiary.
- The system displays an override message when more than one transfer is made for second beneficiary and ‘part shipment’ is prohibited.