3. Relationship Manager Reports
Oracle FLEXCUBE allows you to generate a number of reports for relationship managers. These reports help them analyze their performances. This chapter explains the various reports generated for RM in Oracle FLEXCUBE and the settings required for report generation.
This chapter contains the following sections:
- Section 3.1, "RM Report Parameters"
- Section 3.2, "Generating RM Reports"
- Section 3.3, "Upcoming Loan Payment Schedule Report"
- Section 3.4, "Non-performing Assets Report"
- Section 3.5, "Blacklisted Customers from Internal Bank Report"
- Section 3.6, "Blacklisted Customers from Central Bank Report"
- Section 3.7, "Overdue Schedules Report"
- Section 3.8, "Defaulted Loans from Customer-wise Report"
- Section 3.9, "Term Deposits Maturity Report"
- Section 3.10, "Term Deposits Closed Report"
- Section 3.11, "Term Deposits Opened Report"
- Section 3.12, "Term Deposits Exceeding Lien Limits Report"
- Section 3.13, "Customer Transaction beyond Threshold Amount Report"
- Section 3.14, "Inward Clearing Reject Report"
- Section 3.15, "Outward Clearing Reject Report"
- Section 3.16, "Customers with Negative Balance Report"
- Section 3.17, "Customer Utilizing below their Limit Report"
- Section 3.18, "Customers Due for Collateral Revaluation Report"
- Section 3.19, "Collaterals with Value Lesser than Utilized Limit Report"
- Section 3.20, "Customers Due for Credit Line Expiry Report"
- Section 3.21, "Period Based Business Report"
- Section 3.22, "New CASA Accounts Report"
- Section 3.23, "New Loans Accounts Report"
- Section 3.24, "New TD Accounts Report"
- Section 3.25, "Period based CASA Accounts Report"
- Section 3.26, "Period based Loan Accounts Report"
- Section 3.27, "Period based TD Accounts Report"
- Section 3.28, "Consolidated Customer Portfolio Report"
- Section 3.29, "RM Mass Amendment Failure Report"
3.1 RM Report Parameters
This section contains the following topics:
3.1.1 Generating RM Report
You can set the parameters for the generation of various relationship manager reports using ‘RM Report Parameter’ screen. To invoke this screen, type ‘STDRMPAR’ in the field at the top right corner of the Application toolbar and click the adjoining arrow button.
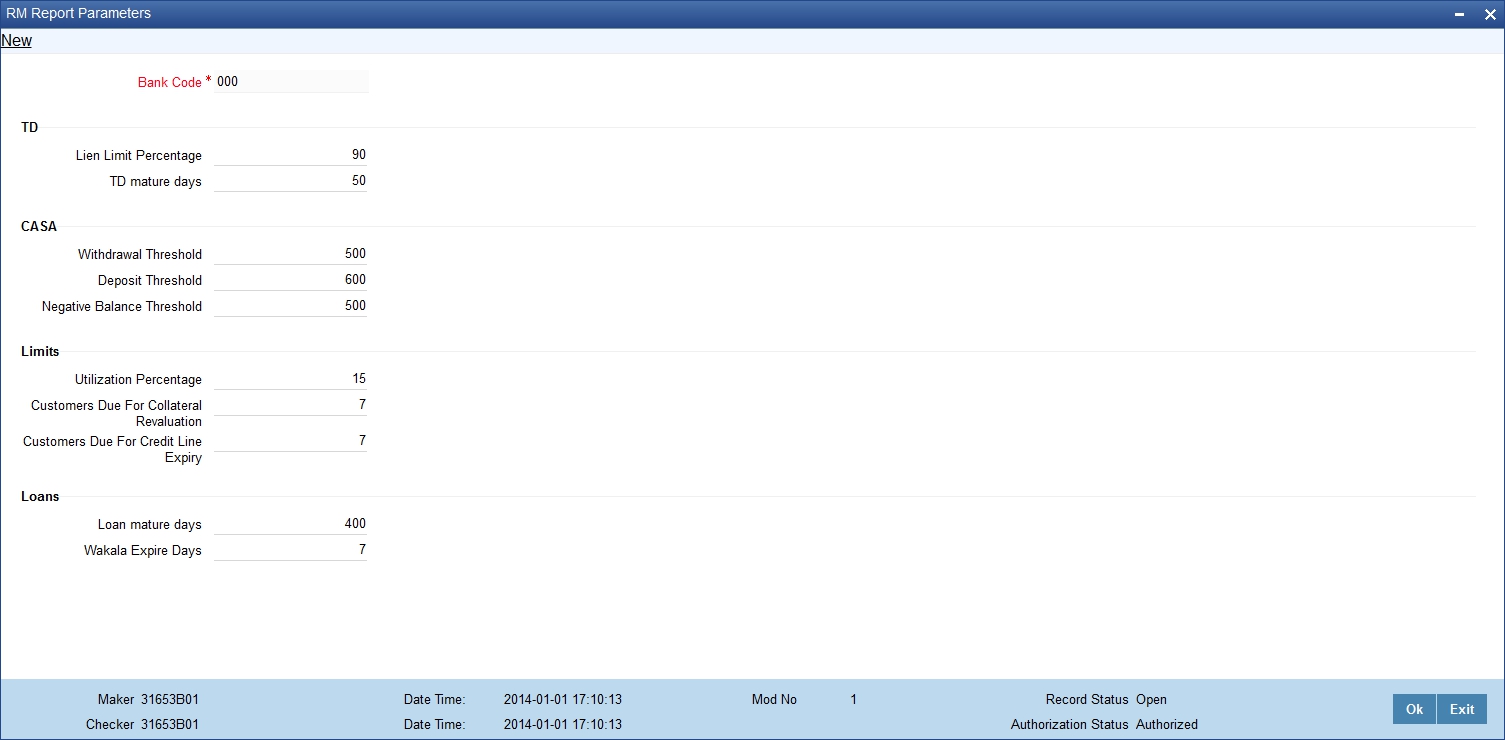
Specify the following details:
Bank Code
The system displays the bank code.
TD
You need to set the following parameters related to term deposits.
Lien Limit Percentage
Specify the lien limit percentage. If the lien of the term deposit is above this limit, the system will include the term deposit in the reports.
TD Mature Days
You can view in the user dashboard the term deposits that are close to maturity date. Specify the number of days prior to the closure date, during which the term deposit should be shown in the user dashboard.
For example, if you specify ‘6’ as the TD Mature Days, the system will start displaying the TD in the dashboard six days before its maturity date.
CASA
You need to set the following parameters related to customer accounts.
Withdrawal Threshold
Specify the withdrawal threshold. On a day, if a customer withdraws beyond this limit, the system will include the details in the report.
Deposit Threshold
Specify the deposit threshold. On a day, if a customer deposits beyond this limit, the system will include the details in the report.
Negative Balance Threshold
Specify the negative balance threshold. If a customer account balance is less than this threshold, the system will include the details in the report.
Limits
You need to set the following parameters related to limits.
Utilization Percentage
Specify the utilization percentage. If a customer utilizes his/her liability level less than the utilization limit percentage, the system will include the details in the report.
Customers Due For Collateral Revaluation
Specify the customers due for collateral revaluation value which will be considered to list the customers whose collateral revaluation is due in the next defined days.
Customers Due for Credit Line Expiry
Specify the customers due for credit line expiry value. Based on this, the system displays the customers whose credit line expiry is due in next specific number of days.
Loans
You need to set the following parameters related to loans.
Loan Mature Days
Specify the loan mature days. The user dashboard will display the loans that are maturing within the number of days specified here. This is the number of days for which the you want the dashboards to display the loans maturing within these days.
Wakala Expire Days
Specify the Wakala expire days. The loan dashboard will display the Wakala commitment contracts maturing within the number of days specified here.
Once you have defined the report parameters, save the record.
3.1.2 Viewing RM Report Parameter Summary
You can view a summary of the RM report parameters using ‘RM Report Parameter Summary’ screen. To invoke this screen, type ‘STSRMPAR’ in the field at the top right corner of the Application toolbar and click the adjoining arrow button.
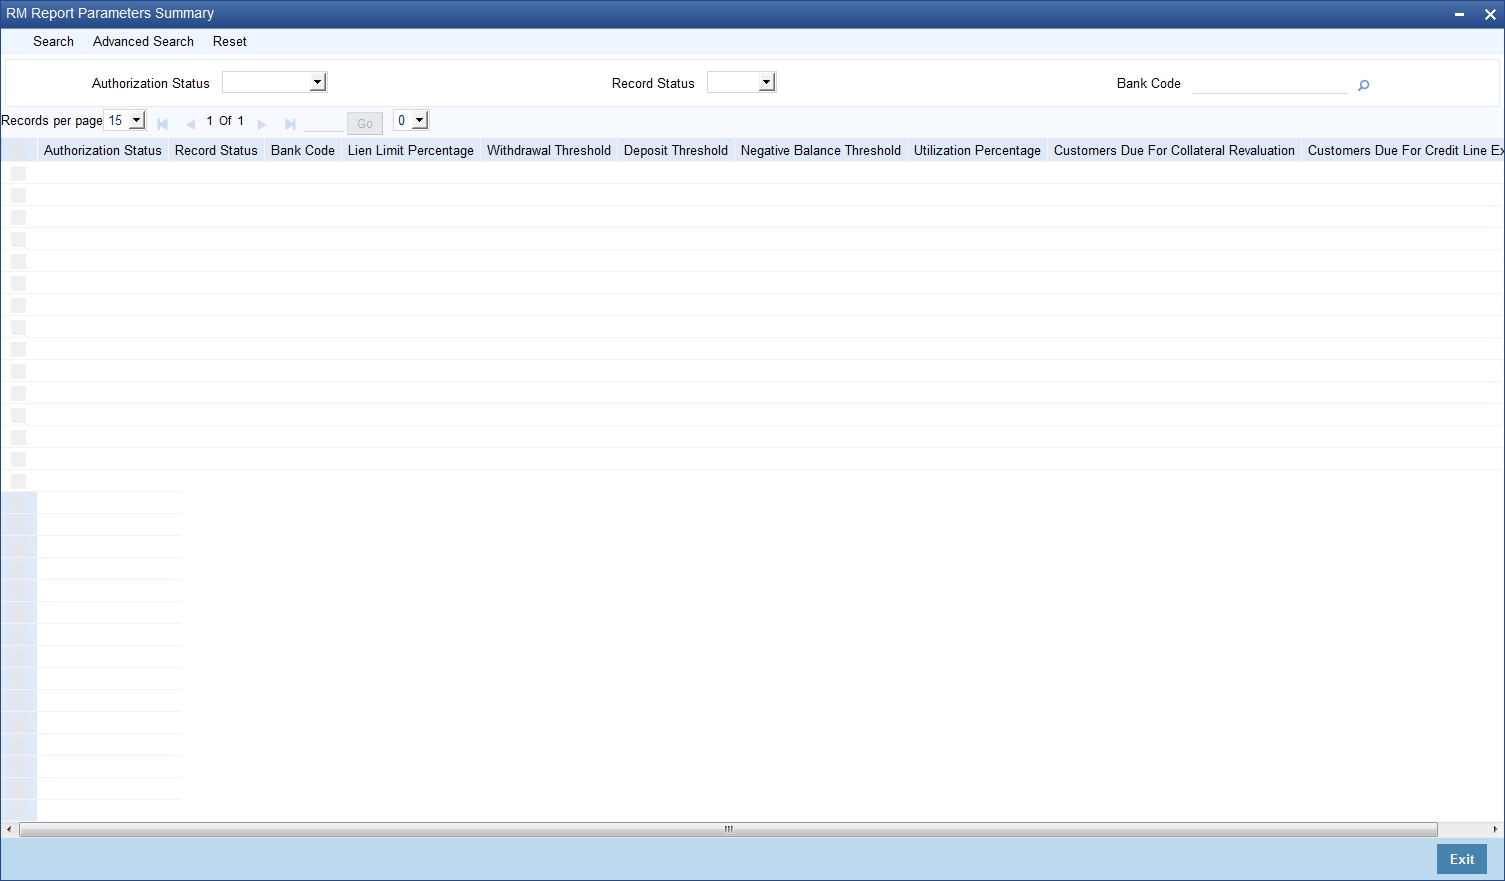
You can search for the records based on one or more of the following parameters:
- Authorization status
- Record status
- Bank code
Once you have set the search criteria, click ‘Search’ button. The system displays the records that match the search criteria. Double-click a record to view the details.
3.2 Generating RM Reports
Relationship managers can generate the following reports in Oracle FLEXCUBE.
- Upcoming loan payment schedule report
- Non-performing assets report
- Blacklisted customers from internal bank report
- Blacklisted customers from central bank report
- Overdue schedules report
- Defaulted loans from customer-wise report
- TD maturity report
- TD account closed report
- TD account opened report
- Term deposits exceeding lien limit report
- Customer transaction beyond threshold amount report
- Outward clearing reject report
- Inward clearing reject report
- Customers with negative balance report
- Customer utilizing below their limit report
- Customers due for collateral revaluation report
- Customers due for credit line expiry report
- Period based business report
- New CASA accounts report
- New loans accounts report
- New TD accounts report
- Period based CASA accounts report
- Period based loan accounts report
- Period based TD accounts report
- Consolidated customer portfolio report
- Bank parameters maintenance report
- RM mass amendment failure report
These reports are discussed in detail under the following headings.
3.3 Upcoming Loan Payment Schedule Report
This section contains the following topics:
- Section 3.3.1, "Generating Upcoming Payment Schedules Report"
- Section 3.3.2, "Contents of the Report"
3.3.1 Generating Upcoming Payment Schedules Report
You can generate a customer-wise report of upcoming loan payment schedules. To invoke ‘Upcoming Payment Schedules Report’ screen, type ‘STRCLPAY in the field at the top right corner of the Application toolbar and click the adjoining arrow button.

Specify the following details:
Branch Code
Specify the branch for which you are generating the report. The option list displays all valid branch codes maintained in the system. Choose the appropriate one.
Branch Name
Based on the branch code selected, the system displays the name of the branch.
Due Date
Specify the due date of the payment schedule. The system will generate the report of payment schedules that are due as on the date specified here.
Include Subordinates
The relationship managers can generate the upcoming payment schedules for the customers who are associated with their subordinate RMs. Check this box to include the customers assigned to your subordinate RMs. If you do not check this box, the system will generate the report only for the customers assigned to you.
Report Format
Select the format of the report. The drop-down list displays the following formats:
- HTML
- RTF
- Excel
Choose the appropriate one.
Report Output
Specify the report output type. The drop-down list displays the following options:
- Print – select this to print the report
- View – select this to view the contents of the report
- Spool – select this to spool the report for further use
Choose the appropriate one.
Printer At
Specify whether the printer is installed at the client or at a server. Choose the appropriate one from the drop-down list.
Printer
Specify the printer to print the report. The option list displays all valid printers applicable. Choose the appropriate one.
Once you have specified the above details, click ‘OK’ button. The system generates the report in the output type and format specified.
3.3.2 Contents of the Report
The upcoming loan payment schedules report contains the following details:
Header
Sr. No. |
Field Name |
Field Description |
1 |
Branch |
Branch code |
2 |
Branch Date |
Branch date |
3 |
Date & Time |
Date on which the report is generated |
4 |
User Id |
User ID |
5 |
Module |
Module code |
Body
Sr. No. |
Field Name |
Field Description |
1 |
RM ID |
Relationship manager ID |
2 |
Branch |
Branch |
3 |
Product Code |
Product code |
4 |
Product_Desc |
Product description |
5 |
Customer No |
CIF number |
6 |
Customer Name |
Customer name |
7 |
Account Number |
Loan account number |
8 |
Currency |
Loan account currency |
9 |
Amount Due |
Total due amount |
10 |
Settled Amount |
Total settled amount |
11 |
Due Date |
Scheduled due date |
3.4 Non-performing Assets Report
This section contains the following topics:
3.4.1 Generating Non-Performing Assets Report
You can generate a report of customers’ non-performing assets. This report gives the list of customer loans that are in a particular status. To invoke ‘Non-performing Assets’ screen, type ‘STRCLBAD’ in the field at the top right corner of the Application toolbar and click the adjoining arrow button.

Specify the following details:
Branch Code
Specify the branch for which you are generating the report. The option list displays all valid branch codes maintained in the system. Choose the appropriate one.
Branch Name
Based on the branch code selected, the system displays the name of the branch.
Account Status
You can generate the non-performing assets report for the accounts that are in a specific status. Specify the account status. The option list displays all valid account statuses available in the system. Choose the appropriate one.
Description
The system displays the description of the selected account status.
Include Subordinates
The relationship managers can generate the upcoming payment schedules for the customers who are associated with their subordinate RMs. Check this box to include the customers assigned to your subordinate RMs. If you do not check this box, the system will generate the report only for the customers assigned to you.
Once you have specified the above details, click ‘OK’ button. The system generates the report in the output type and format specified.
3.4.2 Contents of the Report
The non-performing assets report contains the following details:
Header
Sr. No. |
Field Name |
Field Description |
1 |
Branch |
Branch code |
2 |
Branch Date |
Branch date |
3 |
Date & Time |
Date on which report is generated |
4 |
User Id |
User ID |
5 |
Module |
Module code |
Body
Sr. No. |
Field Name |
Field Description |
1 |
RM ID |
Relationship manager ID |
2 |
Branch |
Branch |
3 |
Product Code |
Product code |
4 |
Product Desc |
Product description |
5 |
Customer No |
CIF number |
6 |
Customer Name |
Customer name |
7 |
Account Number |
Loan account number |
8 |
Currency |
Loan account currency |
9 |
Asset Value in LCY |
Asset value in local currency |
10 |
Account Status |
Account status |
3.5 Blacklisted Customers from Internal Bank Report
This section contains the following topic:
3.5.1 Generating Blacklisted Customers from Internal Bank Report
You can generate a report of blacklisted customers from internal bank and agencies. To invoke ‘Blacklisted Customers from Internal Bank’ screen, type ‘STRNSFBC’ in the field at the top right corner of the Application toolbar and click the adjoining arrow button.

For further details on the fields on this screen and the contents of this report, refer to the section ‘Report of Blacklisted Customers’ in Core Entities user manual.
3.6 Blacklisted Customers from Central Bank Report
This section contains the following topic:
3.6.1 Generating Blacklisted Customers from Central Bank Report
You can generate a report of blacklisted customers from central bank or agencies. To invoke ‘Blacklisted Customers from Central Bank’ screen, type ‘STRNSFCB’ in the field at the top right corner of the Application tool bar and click the adjoining arrow button.
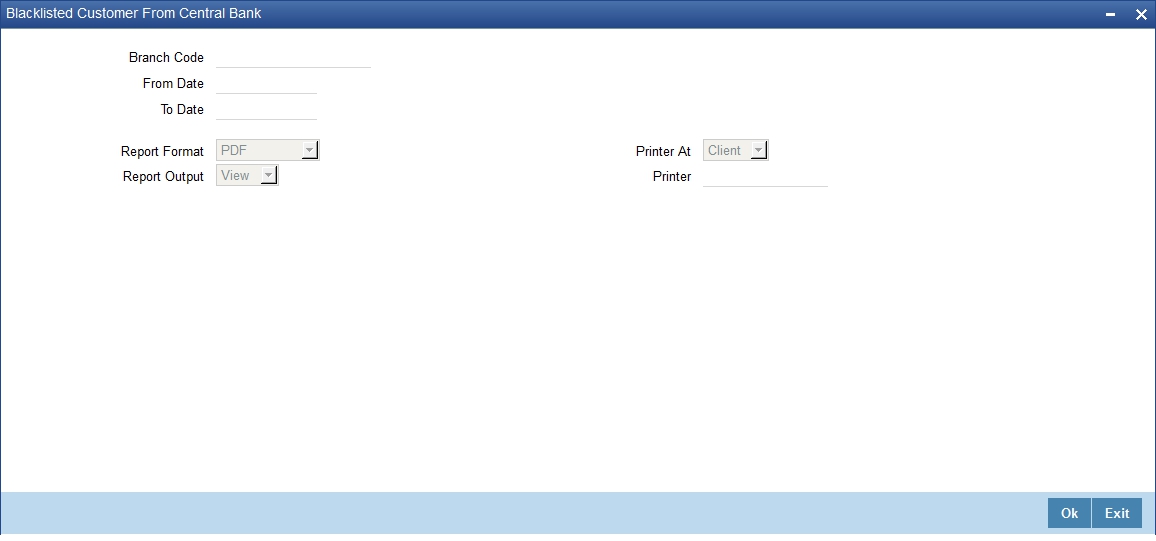
For further details on the fields on this screen and the contents of this report, refer to the section ‘Report of Blacklisted Customers’ in Core Entities user manual.
3.7 Overdue Schedules Report
This section contains the following topics:
3.7.1 Generating Overdue Schedules Report
You can generate a report of loan accounts that are overdue based on the due date. To invoke ‘Overdue Schedules Report’ screen, type ‘CLRPOSCH’ in the field at the top right corner of the Application tool bar and click the adjoining arrow button.

Specify the following details:
Overdue Report
Specify the following details:
Branch Code
Specify the branch code for which you are generating the report. The option list displays all valid branch codes maintained in the system. Choose the appropriate one.
Product Type
Specify the product type for which you are generating the report. The option list displays all valid product types maintained in the system. Choose the appropriate one.
Product Code
Specify the loan product code for which you are generating the report. The option list displays all valid loan product codes maintained in the system. Choose the appropriate one.
Currency
Specify the currency for which you are generating the report. The option list displays all valid currency codes maintained in the system. Choose the appropriate one.
Customer
Specify the customer for whom you are generating the report. The option list displays all valid customer numbers maintained in the system. Choose the appropriate one.
Value Date
Specify the following details:
From Date
Specify the start date of the value date range. Click the date button to choose an appropriate date from the calendar.
To Date
Specify the end date of the value date range. Click the date button to choose an appropriate date from the calendar.
Schedule Date
Specify the following details:
From Date
Specify the start date of the loan schedule date range. Click the date button to choose an appropriate date from the calendar.
To Date
Specify the end date of the loan schedule date range. Click the date button to choose an appropriate date from the calendar.
The relationship managers can generate the reports for the customers who are associated with their subordinate RMs. Select ‘Yes’ to include the customers assigned to your subordinate RMs. If you select ‘No’, the system will generate the report only for the customers assigned to you.
3.7.2 Contents of the Report
The overdue schedules report contains the following details:
Header
Sr. No. |
Field Name |
Field Description |
1 |
Branch |
Branch Code |
2 |
Branch Date |
Branch Date |
3 |
Date & Time |
Date on which report is generated |
4 |
User Id |
User ID |
5 |
Module |
Module Code |
Body
Sr. No. |
Field Name |
Field Description |
1 |
RM ID |
Relationship Manager ID |
2 |
Account Number |
Account Number |
3 |
Customer No |
CIF Number |
4 |
Customer Name |
Customer Name |
5 |
Status |
Account Status |
6 |
Scheduled Date |
Scheduled Due date |
7 |
Overdue Amount |
Overdue Amount |
8 |
Component |
Component Code |
9 |
Currency |
Component Currency |
10 |
Overdue Days |
Overdue Days |
3.8 Defaulted Loans from Customer-wise Report
This section contains the following topics:
- Section 3.8.1, "Generating Defaulted Loans Customer-wise Report"
- Section 3.8.2, "Contents of the Report"
3.8.1 Generating Defaulted Loans Customer-wise Report
You can generate a customer-wise report of loans that are defaulted. To invoke ‘Defaulted Loans Customer-wise’ screen, type ‘STRCLDEF’ in the field at the top right corner of the Application tool bar and click the adjoining arrow button.
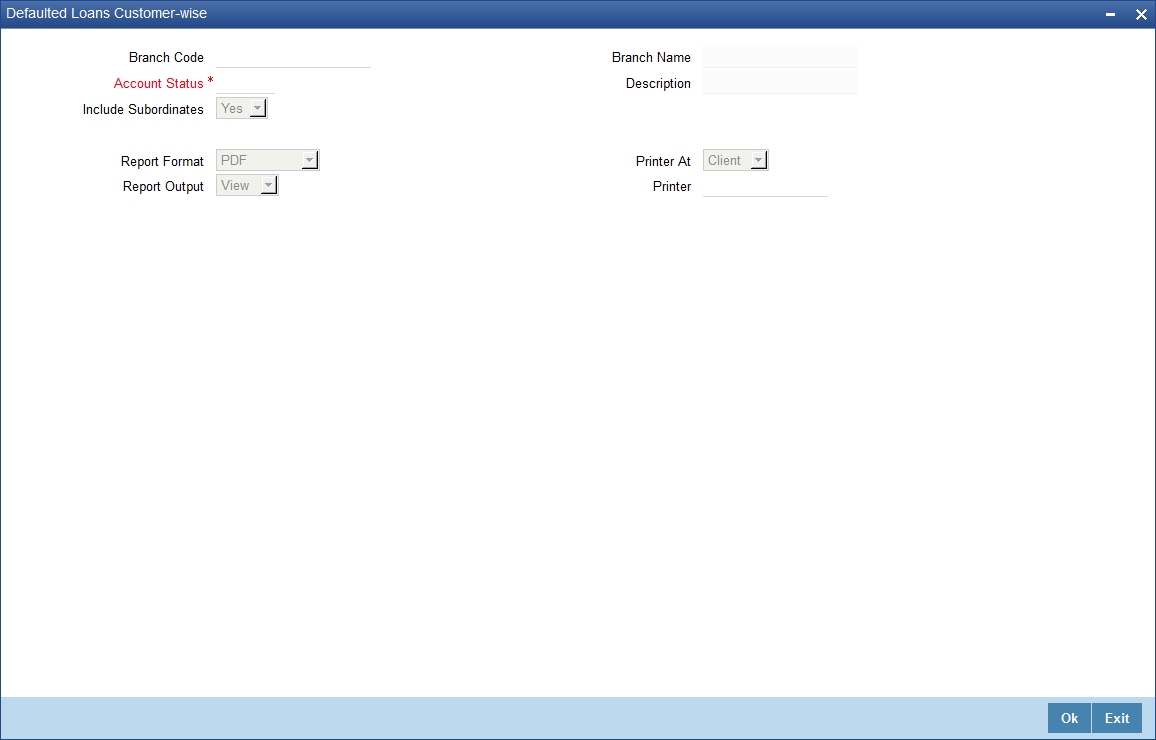
Specify the following details:
Branch Code
Specify the branch for which you need to generate the report. The option list displays all valid branch codes maintained in the system. Choose the appropriate one.
Branch Name
Based on the branch code, the system displays the branch name.
Account Status
Specify the loan account status. The option list displays all valid statuses. Choose the appropriate one.
The system generates the report of the accounts in this status.
Description
Based on the loan account status selected, the system displays the status description.
Include Subordinates
The relationship managers can generate the reports for the customers who are associated with their subordinate RMs. Select ‘Yes’ to include the customers assigned to your subordinate RMs. If you select ‘No’, the system will generate the report only for the customers assigned to you.
3.8.2 Contents of the Report
The defaulted loans report contains the following details:
Header Elements
Sr. No. |
Field Name |
Field Description |
1 |
Branch |
Branch Code |
2 |
Branch Date |
Branch Date |
3 |
Date & Time |
Date on which report is generated |
4 |
User Id |
User ID |
5 |
Module |
Module Code |
Detail Block Elements
Sr. No. |
Field Name |
Field Description |
1 |
RM ID |
Relationship Manager ID |
2 |
Branch Code |
Branch Code |
3 |
Account Number |
Account Number |
4 |
Customer No |
CIF Number |
5 |
Customer Name |
Customer Name |
6 |
Product Code |
Product Code |
7 |
Product Desc |
Product Description |
8 |
Currency |
Loan Account Currency |
9 |
Loan Amount |
Loan Financed |
10 |
Status |
Account Status |
3.9 Term Deposits Maturity Report
This section contains the following topic:
3.9.1 Generating Term Deposit Maturity Report
This report lists the term deposits that will be matured for the given period. You can generate this report using ‘TD Account Maturity Report’ screen.
To invoke this screen, type ‘TDRMATR’ in the field at the top right corner of the Application tool bar and click on the adjoining arrow button.

For further details on the fields on this screen and the contents of this report, refer to the section ‘Term Deposits Maturity Report’ in chapter Reports of the Term Deposits user manual.
3.10 Term Deposits Closed Report
This section contains the following topic:
3.10.1 Generating Term Deposits Closed Report
This report list the term deposit accounts which are closed for the given period, and that are currently on open status. You can generate this report using ‘TD Account Closed Report’ screen. To invoke this screen, type ‘TDRCLOSE in the field at the top right corner of the Application toolbar and click the adjoining arrow button.

For further details on the fields on this screen and the contents of this report, refer to the section ‘Term Deposits Closed for the Period Report’ in chapter Reports of the Term Deposits user manual.
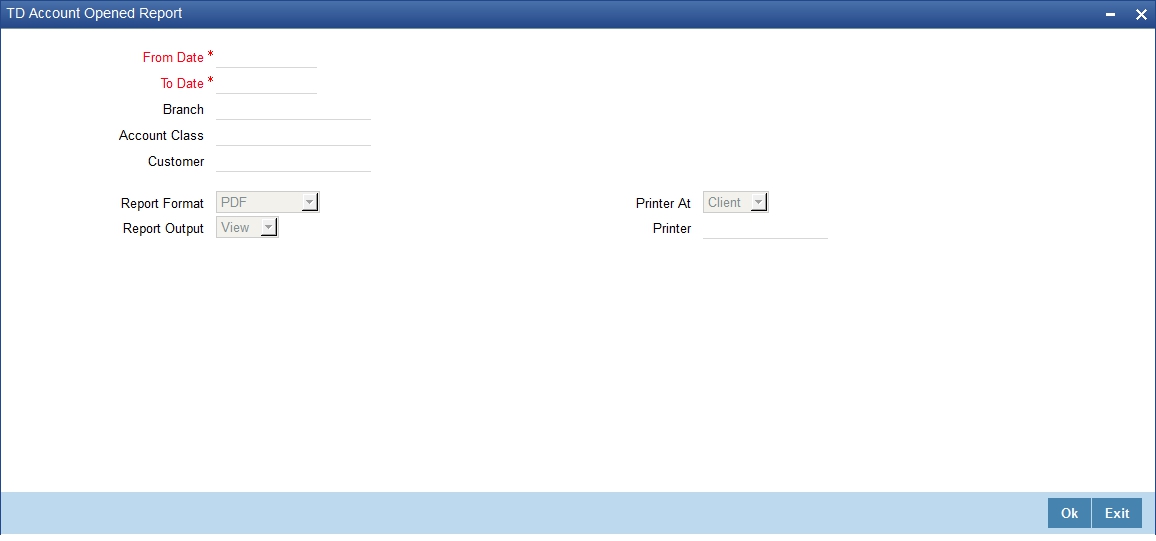
3.11 Term Deposits Opened Report
This section contains the following topic:
3.11.1 Generating Term Deposits Opened Report
This report list the term deposit accounts which are opened for the given period, and that are currently on open status.
You can generate this report using ‘TD Account Opened Report’ screen. To invoke this screen, type ‘TDROPEN’ in the field at the top right corner of the Application toolbar and click the adjoining arrow button.
For further details on the fields on this screen and the contents of this report, refer to the section ‘Term Deposits Opened for the Period Report’ in chapter Reports of the Term Deposits user manual.
3.12 Term Deposits Exceeding Lien Limits Report
This section contains the following topic:
3.12.1 Generating Term Deposits Exceeding Lien Limit Report
You can generate a report of term deposits exceeding the lien reports using ‘Term Deposits Exceeding Lien Limit’ screen. To invoke the screen, type ‘STRLELMT’ in the field at the top right corner of the application toolbar and click the adjoining arrow button.

For further details on the fields on this screen and the contents of this report, refer to the section ‘Term Deposits Exceeding Lien Limits Report’ in chapter Reports of the Term Deposits user manual.
3.13 Customer Transaction beyond Threshold Amount Report
This section contains the following topics:
- Section 3.13.1, "Generating Customer Transaction beyond Threshold Amount Report"
- Section 3.13.2, "Contents of the Report"
3.13.1 Generating Customer Transaction beyond Threshold Amount Report
You can generate a report of deposit and withdrawal transactions that are beyond the threshold defined in Oracle FLEXCUBE. To invoke ‘Customer Transaction beyond Threshold Amount Report’ screen, type ‘STRWBDTA’ in the field at the top right corner of the Application toolbar and click the adjoining arrow button.
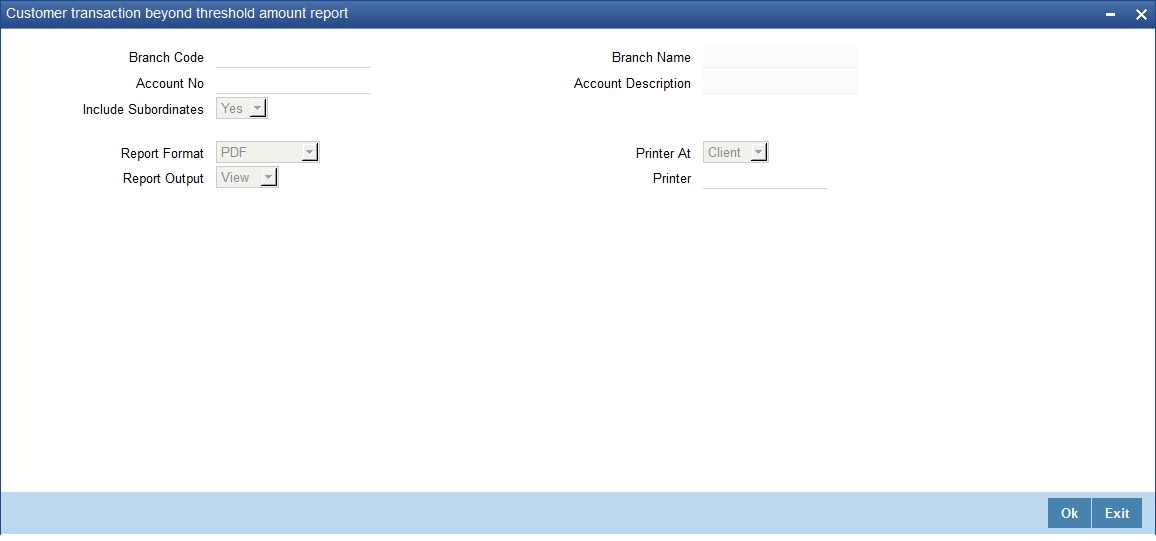
Specify the following details:
Branch Code
Specify the branch for which you are generating the report. The option list displays all valid branch codes maintained in the system. Choose the appropriate one.
Based on the branch code, the system displays the name of the branch.
Account Number
Specify the account number for which you are generating the report. The option list displays all valid account numbers available to you. Choose the appropriate one.
Based on the account number, the system displays the description of the account.
Include Subordinates
The relationship managers can generate the reports for the customers who are associated with their subordinate RMs. Select ‘Yes’ to include the customers assigned to your subordinate RMs. If you select ‘No’, the system will generate the report only for the customers assigned to you.
3.13.2 Contents of the Report
The customer transaction beyond threshold amount report contains the following details:
Header Elements
Sr. No. |
Field Name |
Field Description |
1 |
Branch |
Branch Code |
2 |
Branch Date |
Branch Date |
3 |
Date & Time |
Date on which report is generated |
4 |
User Id |
User ID |
5 |
Module |
Module Code |
Body Elements
Sr.No. |
Field Name |
Field Description |
1 |
RM ID |
Relationship Manager ID |
2 |
Customer No |
CIF Number |
3 |
Customer Name |
Customer Name |
4 |
Account Number |
Account Number |
5 |
Account Class |
Account Class |
6 |
Account CCY |
Account CCY |
7 |
Available Balance in ACY |
Available Balance in ACY |
8 |
Withdrawal Threshold |
Withdrawal Threshold |
9 |
Withdrawn Amount |
Withdrawn Amount |
10 |
Deposit Threshold |
Deposit Threshold |
11 |
Deposited Amount |
Deposited Amount |
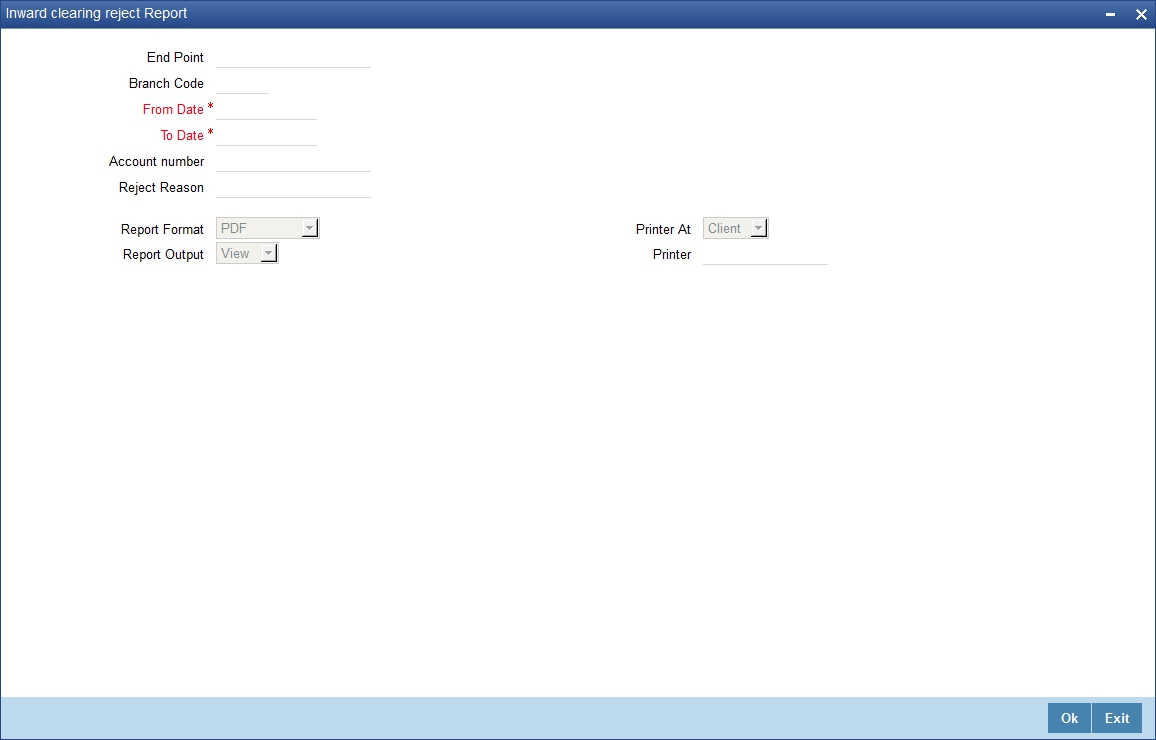
3.14 Inward Clearing Reject Report
This section contains the following topic:
3.14.1 Invoking Inward Clearing Reject Report
You can generate ‘Inward Clearing Cheque Reject Report’ with details of cheques which were rejected during inward clearing process for a given period. This report groups cheques, based on the end point, branch code, and totals provided for instrument amount.
You can invoke ‘Inward Clearing Cheque Reject Report’ screen by typing ‘CGRICLRS’ in the field at the top right corner of the Application tool bar and clicking on the adjoining arrow button.
For further details on the fields on this screen and the contents of this report, refer to the section ‘Inward Clearing Cheque Reject Report’ in chapter Reports of the Clearing user manual.
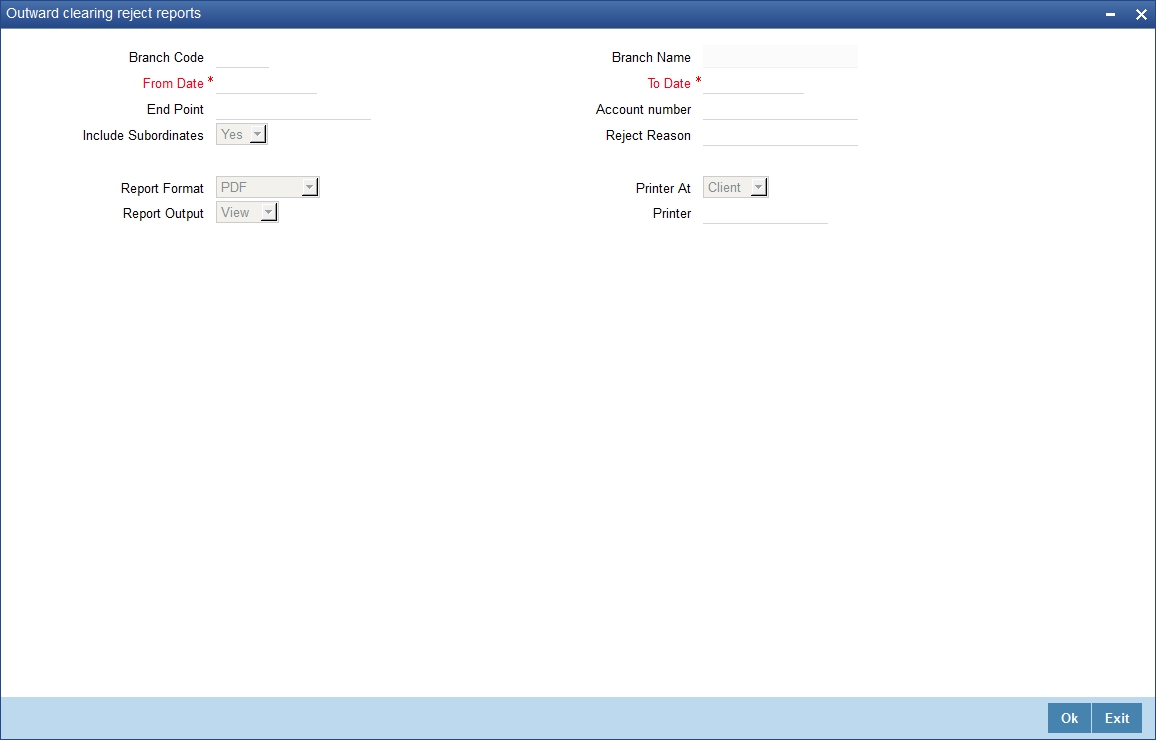
3.15 Outward Clearing Reject Report
This section contains the following topics:
3.15.1 Generating Outward Clearing Reject Report
You can generate a report of outward clearing cheque rejections using ‘Outward Clearing Reject Report’ screen. This screen gives the details of the cheques those were bounced during a given period. You can invoke ‘Outward Clearing Cheque Reject Report’ screen by typing ‘CGROCLRS’ in the field at the top right corner of the Application tool bar and clicking on the adjoining arrow button.
For further details on the fields on this screen and the contents of this report, refer to the section ‘Outward Clearing Cheque Reject Report’ in chapter Reports of the Clearing user manual.
3.16 Customers with Negative Balance Report
This section contains the following topics:
- Section 3.16.1, "Generating Customers with Negative Balance Report"
- Section 3.16.2, "Contents of the Report"
3.16.1 Generating Customers with Negative Balance Report
You can generate a report of customers whose account balance has gone below the threshold set at ‘Relationship Manager Report Parameters’ screen. To invoke ‘Customers with Negative Balance Report’ screen, type ‘STRNGBAL’ in the field at the top right corner of the application toolbar and click the adjoining arrow button.

Specify the following details:
Branch Code
Specify the branch for which you are generating the report. The option list displays all valid branch codes maintained in the system. Choose the appropriate one.
Based on the branch code, the system displays the name of the branch.
Account Class
Specify the account class for which you are generating the report. The option list displays all valid account classes applicable. Choose the appropriate one. The system will generate the report for the accounts that fall under the account class selected here.
Based on the account class selected, the system displays the description.
Account Number
Specify the account number for which you are generating the report. The option list displays all valid account numbers available to you. Choose the appropriate one.
Include Subordinates
The relationship managers can generate the reports for the customers who are associated with their subordinate RMs. Select ‘Yes’ to include the customers assigned to your subordinate RMs. If you select ‘No’, the system will generate the report only for the customers assigned to you.
3.16.2 Contents of the Report
The customers with negative balance report contains the following details:
Header Elements
Sr. No. |
Field Name |
Field Description |
1 |
Branch |
Branch Code |
2 |
Branch Date |
Branch Date |
3 |
Date & Time |
Date on which report is generated |
4 |
User Id |
User ID |
5 |
Module |
Module Code |
Body Elements
Sr. No. |
Field Name |
Field Description |
1 |
Rm Id |
Relationship Manager ID |
2 |
Customer No |
CIF Number |
3 |
Customer Name |
Customer Name |
4 |
Branch Code |
Branch Code |
5 |
Account Number |
Account Number |
6 |
Account Class |
Account Class |
7 |
Account Description |
Account Description |
8 |
Currency |
Currency |
9 |
Acy Avl Bal |
Available Balance in Account Currency |
3.17 Customer Utilizing below their Limit Report
This section contains the following topics:
- Section 3.17.1, "Generating Customer Utilizing Below their Limit Report"
- Section 3.17.2, "Contents of the Report"
3.17.1 Generating Customer Utilizing Below their Limit Report
For a customer, you can generate a report of limits utilization less than the utilization limit percentage defined in Oracle FLEXCUBE. To invoke the ‘Customer Utilizing Below their Limit’ screen, type ‘STRLIUTL’ in the field at the top right corner of the Application toolbar and click the adjoining arrow button.
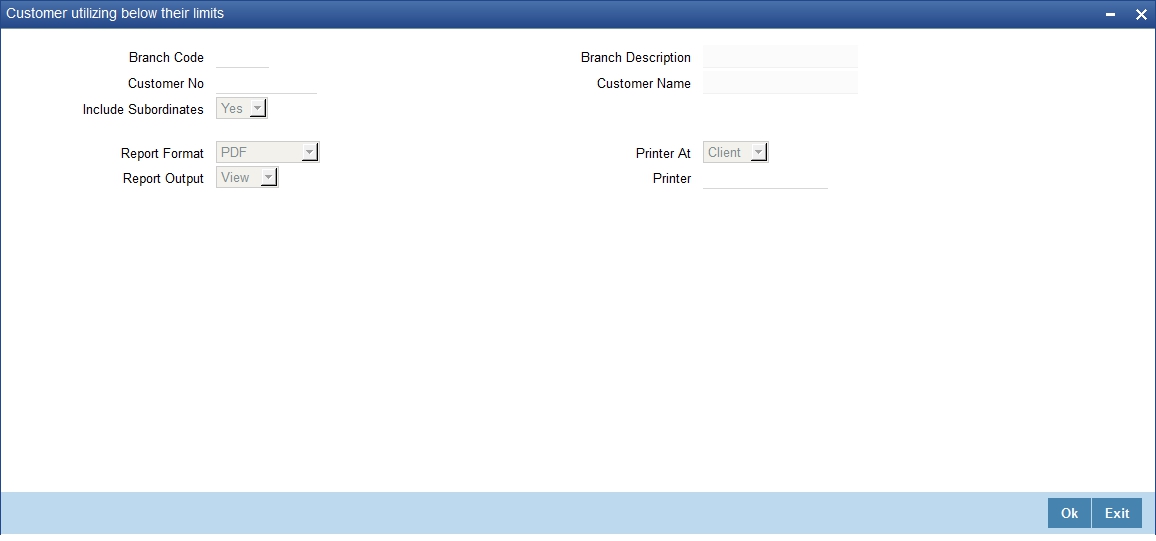
Specify the following details:
Branch Code
Specify the branch for which you are generating the report. The option list displays all valid branch codes maintained in the system. Choose the appropriate one.
Based on the branch code, the system displays the name of the branch.
Customer Number
Specify the customer number for which you are generating the report. The option list displays all valid customer numbers available to you. Choose the appropriate one.
Include Subordinates
The relationship managers can generate the reports for the customers who are associated with their subordinate RMs. Select ‘Yes’ to include the customers assigned to your subordinate RMs. If you select ‘No’, the system will generate the report only for the customers assigned to you.
3.17.2 Contents of the Report
The customer limits utilization report contains the following details:
Header Elements
Sr. No. |
Field Name |
Field Description |
1 |
Branch |
Branch Code |
2 |
Branch Date |
Branch Date |
3 |
Date & Time |
Date on which report is generated |
4 |
User Id |
User ID |
5 |
Module |
Module Code |
Body Elements
Sr. No. |
Field Name |
Field Description |
1 |
Rm Id |
Relationship Manager ID |
2 |
Branch |
Branch Code |
3 |
Customer No |
CIF Number |
4 |
Customer Name |
Customer Name |
5 |
Liability Number |
Liability Number |
6 |
Liability Name |
Liability Name |
7 |
Liability Currency |
Liability Currency |
8 |
Utilization Amount |
Utilization Amount |
9 |
Overall Limit Amount |
Overall Limit Amount |
10 |
Utilization Percentage |
Utilization Percentage |
3.18 Customers Due for Collateral Revaluation Report
This section contains the following topics:
- Section 3.18.1, "Generating Customers Due for Collateral Revaluation Report"
- Section 3.18.2, "Contents of the Report"
3.18.1 Generating Customers Due for Collateral Revaluation Report
You can generate a report of customers whose collateral value has been devalued or gone less than the utilized amount. Oracle FLEXCUBE compares the utilized amount with the collateral value and includes it in the report if the collateral value is less than the utilized amount.
To invoke ‘Customers Due for Collateral Revaluation’ screen, type ‘STRLICOR’ in the field at the top right corner of the application toolbar and click the adjoining arrow button.

Specify the following details:
Branch Code
Specify the branch for which you are generating the report. The option list displays all valid branch codes maintained in the system. Choose the appropriate one.
Based on the branch code, the system displays the name of the branch.
Customer Number
Specify the customer number for which you are generating the report. The option list displays all valid customer numbers available to you. Choose the appropriate one.
Include Subordinates
The relationship managers can generate the reports for the customers who are associated with their subordinate RMs. Select ‘Yes’ to include the customers assigned to your subordinate RMs. If you select ‘No’, the system will generate the report only for the customers assigned to you.
3.18.2 Contents of the Report
The customer limits utilization report contains the following details:
Header Elements
Sr. No. |
Field Name |
Field Description |
1 |
Branch |
Branch Code |
2 |
Branch Date |
Branch Date |
3 |
Date & Time |
Date on which report is generated |
4 |
User Id |
User ID |
5 |
Module |
Module Code |
Detail Block Elements
Sr. No. |
Field Name |
Field Description |
1 |
RM ID |
Relationship Manager ID |
2 |
Branch |
Branch Code |
3 |
Customer No |
CIF Number |
4 |
Customer Name |
Customer Name |
5 |
Liability ID |
Liability ID |
6 |
Liability Name |
Liability Name |
7 |
Collateral Code |
Collateral Code |
8 |
Description |
Description |
9 |
Collateral Currency |
Collateral Currency |
10 |
Collateral Value |
Collateral Value |
11 |
Utilization Amount |
Utilization Amount |
12 |
More Utilized |
More Utilized |
3.19 Collaterals with Value Lesser than Utilized Limit Report
This section contains the following topics:
- Section 3.19.1, "Generating Collaterals with Value Lesser than Utilized Limit Report"
- Section 3.19.2, "Contents of the Report"
3.19.1 Generating Collaterals with Value Lesser than Utilized Limit Report
You can generate a report of collaterals with value lesser than utilized limit. To invoke ‘Collaterals with Value Lesser than Utilized Limit’ screen, type ‘STRLICOL’ in the field at the top right corner of the application toolbar and click the adjoining arrow button.

Specify the following details:
Branch Code
Specify the branch for which you are generating the report. The option list displays all valid branch codes maintained in the system. Choose the appropriate one.
Based on the branch code, the system displays the name of the branch.
Customer Number
Specify the customer number for which you are generating the report. The option list displays all valid customer numbers available to you. Choose the appropriate one.
Include Subordinates
The relationship managers can generate the reports for the customers who are associated with their subordinate RMs. Select ‘Yes’ to include the customers assigned to your subordinate RMs. If you select ‘No’, the system will generate the report only for the customers assigned to you.
3.19.2 Contents of the Report
The customer limits utilization report contains the following details:
Header Elements
Sr. No. |
Field Name |
Field Description |
1 |
Branch |
Branch Code |
2 |
Branch Date |
Branch Date |
3 |
Date & Time |
Date on which report is generated |
4 |
User Id |
User ID |
5 |
Module |
Module Code |
Detail Block Elements
Sr. No. |
Field Name |
Field Description |
1 |
Branch |
Branch Code |
2 |
Customer No |
CIF Number |
3 |
Customer Name |
Customer Name |
4 |
Liability ID |
Liability ID |
5 |
Liability Name |
Liability Name |
6 |
Collateral Code |
Collateral Code |
7 |
Description |
Description |
8 |
Collateral Currency |
Collateral Currency |
9 |
Collateral Value |
Collateral Value |
10 |
Utilization Amount |
Utilization Amount |
11 |
More Utilized |
More Utilized |
3.20 Customers Due for Credit Line Expiry Report
This section contains the following topics:
- Section 3.20.1, "Generating Customers Due for Credit Line Expiry Report"
- Section 3.20.2, "Contents of the Report"
3.20.1 Generating Customers Due for Credit Line Expiry Report
You can generate a report of customers whose credit lines are due to expire during a given period. To invoke the ‘Customers Due for Credit Line Expiry’ screen, type ‘STRLIEXP’ in the field at the top right corner of the application toolbar and click the adjoining arrow button.
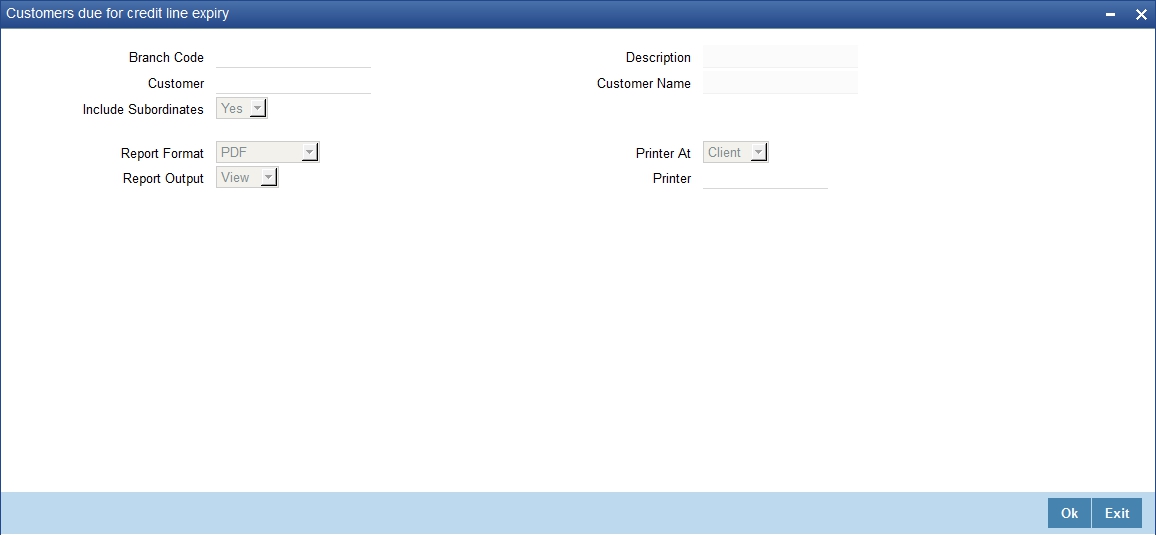
Specify the following details:
Branch Code
Specify the branch for which you are generating the report. The option list displays all valid branch codes maintained in the system. Choose the appropriate one.
Based on the branch code, the system displays the name of the branch.
Customer
Specify the customer number for which you are generating the report. The option list displays all valid customer numbers available to you. Choose the appropriate one.
Include Subordinates
The relationship managers can generate the reports for the customers who are associated with their subordinate RMs. Select ‘Yes’ to include the customers assigned to your subordinate RMs. If you select ‘No’, the system will generate the report only for the customers assigned to you.
3.20.2 Contents of the Report
This report contains the following details:
Header Elements
Sr. No. |
Field Name |
Field Description |
1 |
Branch |
Branch Code |
2 |
Branch Date |
Branch Date |
3 |
Date & Time |
Date on which report is generated |
4 |
User Id |
User ID |
5 |
Module |
Module Code |
Body Elements
Sr. No. |
Field Name |
Field Description |
1 |
RM ID |
Relationship Manager ID |
2 |
Branch |
Branch Code |
3 |
Customer No |
CIF Number |
4 |
Customer Name |
Customer Name |
5 |
Line Code |
Line Code |
6 |
Description |
Description |
7 |
Line Currency |
Line Currency |
8 |
Effective Line Amt |
Effective Line Amt |
9 |
Available Amount |
Available Amount |
10 |
Expiry Date |
Expiry Date |
3.21 Period Based Business Report
This section contains the following topics:
3.21.1 Generating Period Based Business Report
The relationship managers can generate a report of their business performance for a given period. This report contains the details of CASA, TD and loan transactions created by the relationship manager and subordinates. To invoke ‘Period Based Business Report’ screen, type ‘STRRMBUS’ in the field at the top right corner of the application toolbar and click the adjoining arrow button.
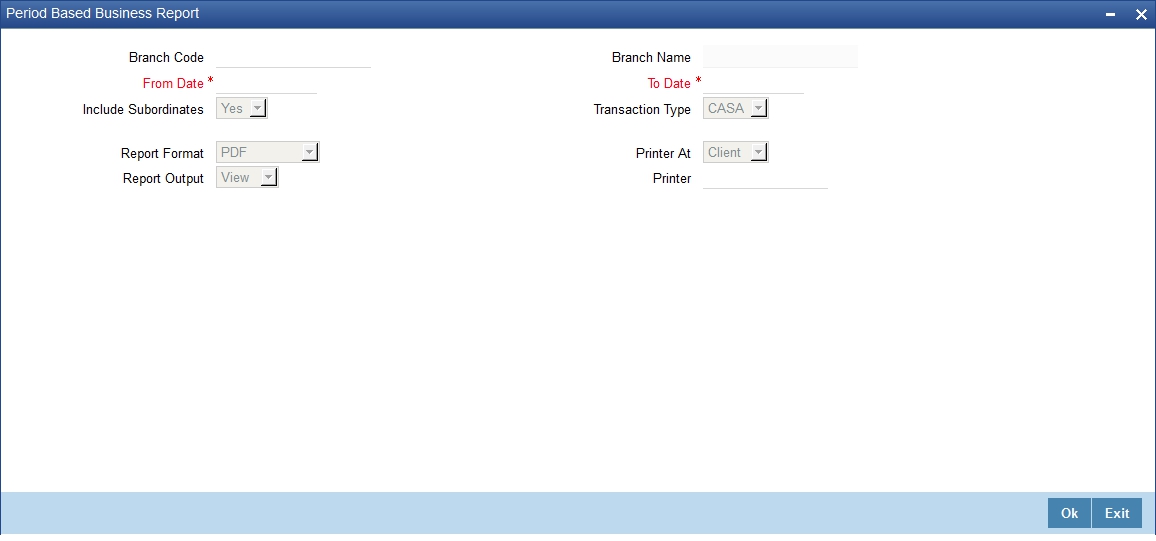
Specify the following details:
Branch Code
Specify the branch for which you are generating the report. The option list displays all valid branch codes maintained in the system. Choose the appropriate one.
Based on the branch code, the system displays the name of the branch.
From Date
Specify the start date of the report period. The business report is generated for a period that begins from this date.
To Date
Specify the end date of the report period. The business report is generated for a period that ends on this date.
Transaction Type
Specify the type of transactions that you wish to include in the report. You can generate the report for the following transaction types:
- CASA – choose this to generate the report of CASA transactions alone
- TD – choose this to generate the report for term deposit transactions alone
- Loans – choose this to generate the report for loans transactions alone
- All – choose this to generate the report for all CASA, term deposit and loans transactions
Include Subordinates
The relationship managers can generate the reports for the customers who are associated with their subordinate RMs. Select ‘Yes’ to include the customers assigned to your subordinate RMs. If you select ‘No’, the system will generate the report only for the customers assigned to you.
3.21.2 Contents of the Report
This report contains the following details:
Header Elements
Sr. No. |
Field Name |
Field Description |
1 |
Branch |
Branch Code |
2 |
Branch Date |
Branch Date |
3 |
Date & Time |
Date on which report is generated |
4 |
User Id |
User ID |
5 |
Module |
Module Code |
Body Elements (CASA)
Sr. No. |
Field Name |
Field Description |
1 |
Rm Id |
Relationship Manager ID |
2 |
Branch Code |
Branch Code |
3 |
Cust No |
Customer Number |
4 |
Customer Name |
Customer Name |
5 |
Cust Ac No |
Customer Account Number |
6 |
Acc Open Dt |
Account Opening date |
7 |
Ccy |
Account Currency |
8 |
Available Balance |
Available Balance |
Body Elements (TD)
Sr. No. |
Field Name |
Field Description |
1 |
Rm Id |
Relationship Manager ID |
2 |
Branch Code |
Branch Code |
3 |
Cust No |
Customer Number |
4 |
Customer Name |
Customer Name |
5 |
Cust Ac No |
Customer Account Number |
6 |
Account Class |
Account Class |
7 |
Date of opening |
Account open date |
8 |
TD Amount |
TD Amount |
Body Elements (Loans)
Sr. No. |
Field Name |
Field Description |
1 |
Rm Id |
Relationship Manager ID |
2 |
Branch Code |
Branch Code |
3 |
Cust No |
Customer Number |
4 |
Customer Name |
Customer Name |
5 |
Account Number |
Loan Account Number |
6 |
Product Code |
Product Code |
7 |
Product Desc |
Description |
8 |
Currency |
Account Currency |
9 |
Amount Financed |
Amount Financed |
10 |
Amount Disbursed |
Amount Disbursed |
3.22 New CASA Accounts Report
This section contains the following topics:
3.22.1 Generating New CASA Accounts Report
You can generate a report of newly created CASA accounts for the customers assigned to you and your subordinates. To invoke ‘New CASA Accounts’ screen, type ‘STRNEWCA’ in the field at the top right corner of the Application toolbar and click the adjoining arrow button.
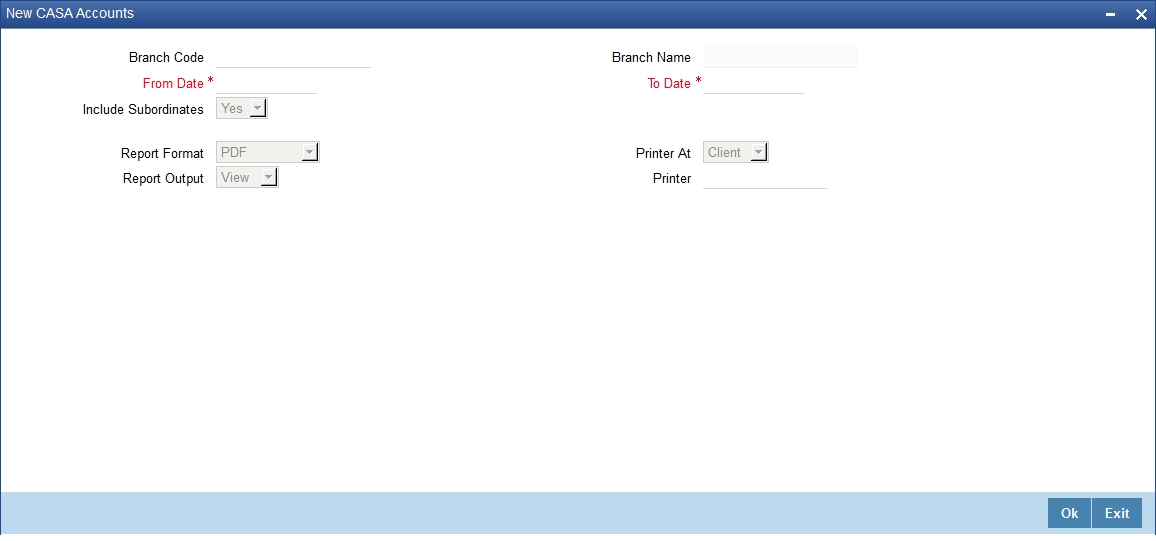
Specify the following details:
Branch Code
Specify the branch for which you are generating the report. The option list displays all valid branch codes maintained in the system. Choose the appropriate one.
Based on the branch code, the system displays the name of the branch.
From Date
Specify the start date of the report period. The business report is generated for a period that begins from this date.
To Date
Specify the end date of the report period. The business report is generated for a period that ends on this date.
Include Subordinates
The relationship managers can generate the reports for the customers who are associated with their subordinate RMs. Select ‘Yes’ to include the customers assigned to your subordinate RMs. If you select ‘No’, the system will generate the report only for the customers assigned to you.
Once you have specified the above details, click ‘OK’ button. The system generates the report which graphically represents the number of CASA accounts created during the specific period.
3.22.2 Contents of the Report
This report contains the following details:
Header Elements
Sr. No. |
Field Name |
Field Description |
1 |
Branch |
Branch Code |
2 |
Branch Date |
Branch Date |
3 |
Date & Time |
Date on which report is generated |
4 |
User Id |
User ID |
5 |
Module |
Module Code |
Body Elements
Sr. No. |
Field Name |
Field Description |
1 |
Number of Newly opened CASA Accounts |
Number of Newly opened CASA Accounts |
3.23 New Loans Accounts Report
This section contains the following topics:
3.23.1 Generating New Loans Accounts Report
You can generate a report of newly created loan accounts for the customers assigned to you and your subordinates. To invoke ‘New Loans Accounts RM-wise’ screen, type ‘STRNEWLO’ in the field at the top right corner of the Application toolbar and click the adjoining arrow button.

Specify the following details:
Branch Code
Specify the branch for which you are generating the report. The option list displays all valid branch codes maintained in the system. Choose the appropriate one.
Based on the branch code, the system displays the name of the branch.
From Date
Specify the start date of the report period. The business report is generated for a period that begins from this date.
To Date
Specify the end date of the report period. The business report is generated for a period that ends on this date.
Include Subordinates
The relationship managers can generate the reports for the customers who are associated with their subordinate RMs. Select ‘Yes’ to include the customers assigned to your subordinate RMs. If you select ‘No’, the system will generate the report only for the customers assigned to you.
Once you have specified the above details, click ‘OK’ button. The system generates the report which graphically represents the number of loan accounts created during the specific period.
This is a chart report and you cannot generate this report in HTML format.
3.23.2 Contents of the Report
This report contains the following details:
Header Elements
Sr. No. |
Field Name |
Field Description |
1 |
Branch |
Branch Code |
2 |
Branch Date |
Branch Date |
3 |
Date & Time |
Date on which report is generated |
4 |
User Id |
User ID |
5 |
Module |
Module Code |
Body Elements
Sr. No. |
Field Name |
Field Description |
1 |
Total amount financed for the new loans created |
Total amount financed for the new loans created |
3.24 New TD Accounts Report
This section contains the following topics:
3.24.1 Generating New TD Accounts Report
You can generate a report of newly created term deposit accounts for the customers assigned to you and your subordinates. To invoke ‘New TD Accounts RM-wise’ screen, type ‘STRNEWTD’ in the field at the top right corner of the Application toolbar and click the adjoining arrow button.
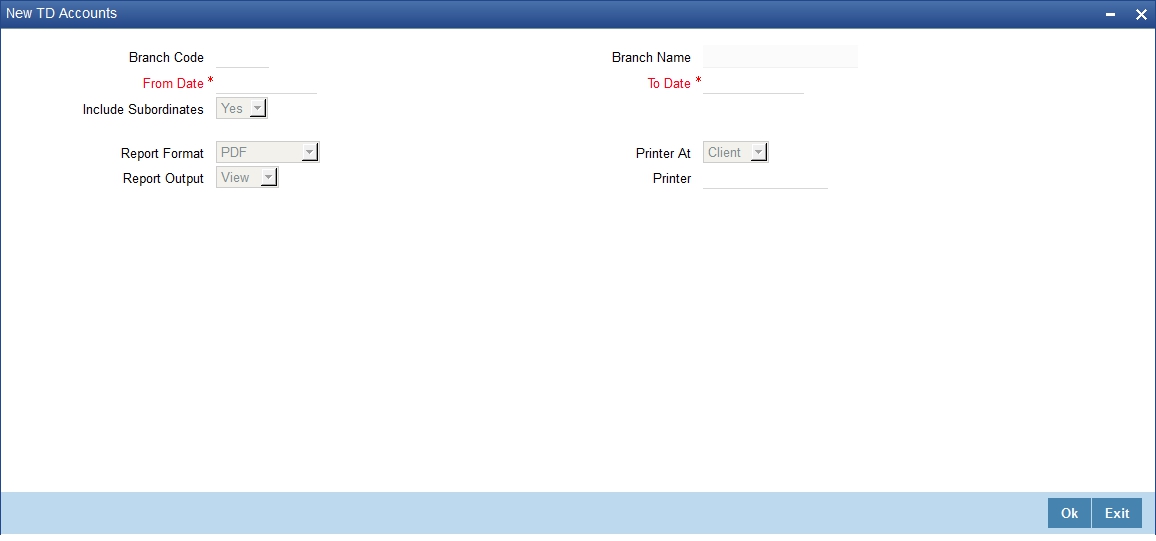
Specify the following details:
Branch Code
Specify the branch for which you are generating the report. The option list displays all valid branch codes maintained in the system. Choose the appropriate one.
Based on the branch code, the system displays the name of the branch.
From Date
Specify the start date of the report period. The business report is generated for a period that begins from this date.
To Date
Specify the end date of the report period. The business report is generated for a period that ends on this date.
Include Subordinates
The relationship managers can generate the reports for the customers who are associated with their subordinate RMs. Select ‘Yes’ to include the customers assigned to your subordinate RMs. If you select ‘No’, the system will generate the report only for the customers assigned to you.
Once you have specified the above details, click ‘OK’ button. The system generates the report which graphically represents the number of term deposit accounts created during the specific period.
This is a chart report and you cannot generate this report in HTML format.
3.24.2 Contents of the Report
This report contains the following details:
Header Elements
Sr. No. |
Field Name |
Field Description |
1 |
Branch |
Branch Code |
2 |
Branch Date |
Branch Date |
3 |
Date & Time |
Date on which report is generated |
4 |
User Id |
User ID |
5 |
Module |
Module Code |
Body Elements
Sr. No. |
Field Name |
Field Description |
1 |
Total TD amount of newly opened TD accounts |
Total TD amount of newly opened TD accounts |
3.25 Period based CASA Accounts Report
This section contains the following topics:
- Section 3.25.1, "Generating Period based CASA Accounts Reports"
- Section 3.25.2, "Contents of the Report"
3.25.1 Generating Period based CASA Accounts Reports
You can generate a report of CASA accounts that are created or closed for the customers assigned to you and your subordinates. To invoke ‘Period based CASA Accounts’ screen, type ‘STRCAPER’ in the field at the top right corner of the Application toolbar and click the adjoining arrow button.

Specify the following details:
Branch Code
Specify the branch for which you are generating the report. The option list displays all valid branch codes maintained in the system. Choose the appropriate one.
Based on the branch code, the system displays the name of the branch.
From Date
Specify the start date of the report period. The business report is generated for a period that begins from this date.
To Date
Specify the end date of the report period. The business report is generated for a period that ends on this date.
Include Subordinates
The relationship managers can generate the reports for the customers who are associated with their subordinate RMs. Select ‘Yes’ to include the customers assigned to your subordinate RMs. If you select ‘No’, the system will generate the report only for the customers assigned to you.
Once you have specified the above details, click ‘OK’ button. The system generates the report which graphically represents the number of CASA accounts created or closed during the specific period.
This is a chart report and you cannot generate this report in HTML format.
3.25.2 Contents of the Report
This report contains the following details:
Header Elements
Sr. No. |
Field Name |
Field Description |
1 |
Branch |
Branch Code |
2 |
Branch Date |
Branch Date |
3 |
Date & Time |
Date on which report is generated |
4 |
User Id |
User ID |
5 |
Module |
Module Code |
Body Elements
Sr. No. |
Field Name |
Field Description |
1 |
No of new CASA accounts |
Number of newly CASA accounts |
2 |
Accounts closed |
Number of CASA accounts closed |
3.26 Period based Loan Accounts Report
This section contains the following topics:
- Section 3.26.1, "Generating Period based Loan Accounts Report"
- Section 3.26.2, "Contents of the Report"
3.26.1 Generating Period based Loan Accounts Report
You can generate a report with the details of loan, mortgage, finance and leasing accounts of the customers assigned to you and your subordinates. This report provides information on new sanctions, disbursements, prepayments and overdue amounts of the above type of accounts.
To invoke ‘Period based Loan Accounts’ screen, type ‘STRLOPER’ in the field at the top right corner of the Application toolbar and click the adjoining arrow button.

Specify the following details:
Branch Code
Specify the branch for which you are generating the report. The option list displays all valid branch codes maintained in the system. Choose the appropriate one.
Based on the branch code, the system displays the name of the branch.
From Date
Specify the start date of the report period. The business report is generated for a period that begins from this date.
To Date
Specify the end date of the report period. The business report is generated for a period that ends on this date.
Include Subordinates
The relationship managers can generate the reports for the customers who are associated with their subordinate RMs. Select ‘Yes’ to include the customers assigned to your subordinate RMs. If you select ‘No’, the system will generate the report only for the customers assigned to you.
Once you have specified the above details, click ‘OK’ button. The system generates the report which graphically represents details of the loan, mortgage, finance and lease accounts.
This is a chart report and you cannot generate this report in HTML format.
3.26.2 Contents of the Report
This report contains the following details:
Header Elements
Sr. No. |
Field Name |
Field Description |
1 |
Branch |
Branch Code |
2 |
Branch Date |
Branch Date |
3 |
Date & Time |
Date on which report is generated |
4 |
User Id |
User ID |
5 |
Module |
Module Code |
Body Elements
Sr. No. |
Field Name |
Field Description |
1 |
New sanctions |
New loans sanctioned |
2 |
Disbursed amount |
Disbursed amount |
3 |
Pre-payments |
Prepayments made during the period |
4 |
Amount overdue |
Amount overdue |
3.27 Period based TD Accounts Report
This section contains the following topics:
- Section 3.27.1, "Generating Period based TD Accounts Report"
- Section 3.27.2, "Contents of the Report"
3.27.1 Generating Period based TD Accounts Report
You can generate a report of term deposit accounts that are created or redeemed for the customers assigned to you and your subordinates. To invoke ‘Period based TD Accounts’ screen, type ‘STRTDPER’ in the field at the top right corner of the Application toolbar and click the adjoining arrow button.

Specify the following details:
Branch Code
Specify the branch for which you are generating the report. The option list displays all valid branch codes maintained in the system. Choose the appropriate one.
Based on the branch code, the system displays the name of the branch.
From Date
Specify the start date of the report period. The business report is generated for a period that begins from this date.
To Date
Specify the end date of the report period. The business report is generated for a period that ends on this date.
Include Subordinates
The relationship managers can generate the reports for the customers who are associated with their subordinate RMs. Select ‘Yes’ to include the customers assigned to your subordinate RMs. If you select ‘No’, the system will generate the report only for the customers assigned to you.
Once you have specified the above details, click ‘OK’ button. The system generates the report which graphically represents the number of term deposit accounts created or redeemed during the specific period.
This is a chart report and you cannot generate this report in HTML format.
3.27.2 Contents of the Report
This report contains the following details:
Header Elements
Sr. No. |
Field Name |
Field Description |
1 |
Branch |
Branch Code |
2 |
Branch Date |
Branch Date |
3 |
Date & Time |
Date on which report is generated |
4 |
User Id |
User ID |
5 |
Module |
Module Code |
Body Elements
Sr. No. |
Field Name |
Field Description |
1 |
New TD Business |
Number of newly opened TD accounts |
2 |
Redemptions |
Total TD redemptions |
3.28 Consolidated Customer Portfolio Report
This section contains the following topics:
- Section 3.28.1, "Generating Consolidated Customer Portfolio Report"
- Section 3.28.2, "Contents of the Report"
3.28.1 Generating Consolidated Customer Portfolio Report
You can generate a consolidated customer portfolio report of the transactions of a customer assigned to you. This report contains the details of all CASA, term deposit and loans (CL, mortgage, finance and leasing) transactions of the selected customer.
To invoke ‘Consolidated Customer Portfolio Report’ screen, type ‘STRRNCON’ in the field at the top right corner of the Application toolbar and click the adjoining arrow button.
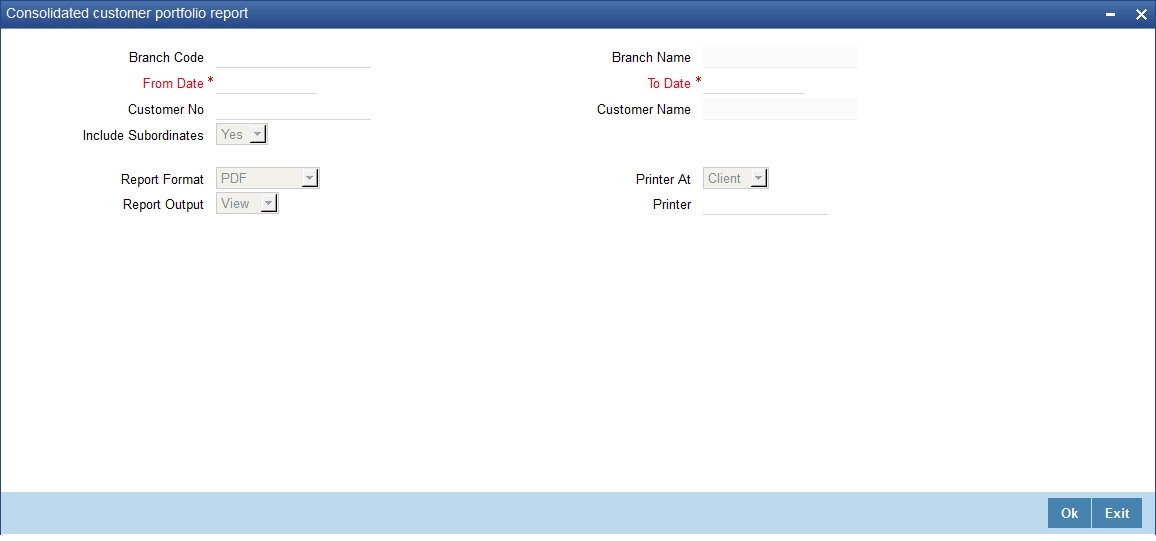
Branch Code
Specify the branch for which you are generating the report. The option list displays all valid branch codes maintained in the system. Choose the appropriate one.
Based on the branch code, the system displays the name of the branch.
From Date
Specify the start date of the report period. The business report is generated for a period that begins from this date.
To Date
Specify the end date of the report period. The business report is generated for a period that ends on this date.
Include Subordinates
The relationship managers can generate the reports for the customers who are associated with their subordinate RMs. Select ‘Yes’ to include the customers assigned to your subordinate RMs. If you select ‘No’, the system will generate the report only for the customers assigned to you.
3.28.2 Contents of the Report
This report contains the following details:
Header Elements
Sr. No. |
Field Name |
Field Description |
1 |
Branch |
Branch Code |
2 |
Branch Date |
Branch Date |
3 |
Date & Time |
Date on which report is generated |
4 |
User Id |
User ID |
5 |
Module |
Module Code |
Body Elements (CASA)
Sr. No. |
Field Name |
Field Description |
1 |
RM ID |
Relationship Manager ID |
2 |
Customer No |
Customer Number |
3 |
Branch |
Branch Code |
4 |
Opening Balance ACY |
Opening Balance ACY |
5 |
Current Balance |
Current Balance |
6 |
Total Debit |
Total Debit |
7 |
Total Credit |
Total Credit |
Body Elements (TD)
Sr. No. |
Field Name |
Field Description |
1 |
RM ID |
Relationship Manager ID |
2 |
Customer No |
Customer Number |
3 |
Branch |
Branch Code |
4 |
Account Number |
Account Number |
5 |
Opening Balance |
TD Amount |
6 |
Redemption Amount |
Redemption Amount |
7 |
TD Maturity Date |
TD Maturity Date |
8 |
TD Maturity Amount |
TD Maturity Amount |
Body Elements (Loans)
Sr. No. |
Field Name |
Field Description |
1 |
RM ID |
Relationship Manager ID |
2 |
Account Number |
Account Number |
3 |
Branch |
Branch Code |
4 |
Sanctioned Amount |
Amount Financed |
5 |
Product Code |
Product Code |
6 |
Product Description |
Product Description |
7 |
Term in Months |
Loan Term |
8 |
Amt disbursed |
Amount Disbursed |
9 |
Prepaid Amount |
Prepaid Amount |
10 |
Principal Outstanding |
Principal Outstanding |
11 |
Outstanding Interest |
Outstanding Interest |
12 |
Overdue Amount |
Overdue Amount |
13 |
Settled Amount |
Settled Amount |
14 |
Securitize Status |
Securitize Status – Yes/No |
3.29 RM Mass Amendment Failure Report
This section contains the following topics:
- Section 3.29.1, "Generating RM Mass Amendment Failure Report"
- Section 3.29.2, "Contents of the Report"
3.29.1 Generating RM Mass Amendment Failure Report
You can generate a report of relationship manager mass amendment failure using ‘RM Mass Amendment Failure Report’ screen. To invoke this screen, type ‘STRRMERR’ in the field at the top right corner of the Application toolbar and click the adjoining arrow button.
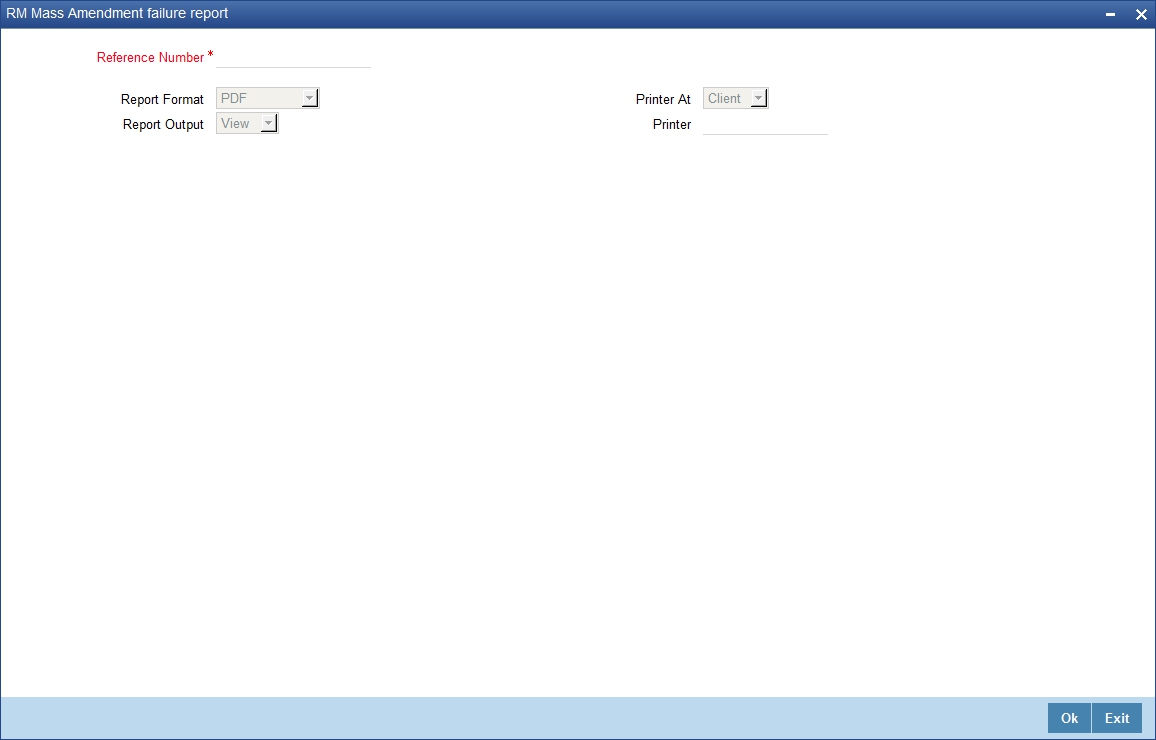
Specify the following details:
Reference Number
Specify the reference number of the RM mass amendment operation. The option list displays all valid RM mass amendment reference numbers available. Choose the appropriate one.
3.29.2 Contents of the Report
This report contains the following details:
Header Elements
Sr. No. |
Field Name |
Field Description |
1 |
Branch |
Branch Code |
2 |
Branch Date |
Branch Date |
3 |
Date & Time |
Date on which report is generated |
4 |
User Id |
User ID |
5 |
Module |
Module Code |
Body Elements
Sr. No. |
Field Name |
Field Description |
1 |
Customer No |
Customer Number |
2 |
From RM ID |
From Relationship Manager ID |
3 |
To RM ID |
To Relationship Manager ID |
3 |
Failed Reason |
Failed Reason |
4 |
Log Date |
Log Date |