2. Security Management
2.1 Introduction
This chapter contains the following sections:
- Section 2.2, "User Limit Maintenance"
- Section 2.3, "Role Branch Limits Maintenance"
- Section 2.4, "Limits Role Maintenance"
- Section 2.5, "Alerts for Users"
- Section 2.6, "Multi-Factor Authentication"
2.2 User Limit Maintenance
This section contains the following topics:
- Section 2.2.1, "Invoking User Limit Maintenance Screen"
- Section 2.2.2, "Limits Button"
- Section 2.2.3, "Tills Button"
- Section 2.2.4, "General Ledgers Button"
2.2.1 Invoking User Limit Maintenance Screen
You can maintain the user limit and till details in the ‘User Limit Maintenance’ screen. You can invoke this screen by typing ‘SMDLMTIL’ in the field at the top right corner of the Application tool bar and clicking on the adjoining arrow button.
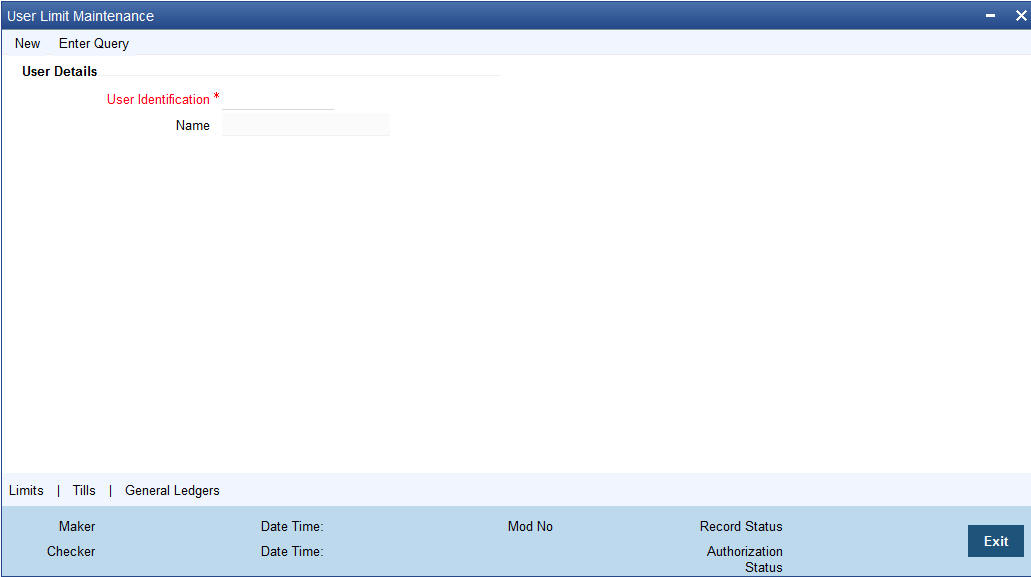
User Identification
Specify the user identification code. Alternatively, you can select the user identification code from the option list. The list displays all valid values.
Name
The system displays the name of the user.
2.2.2 Limits Button
Click ‘Limits’ button to invoke the Limits screen.
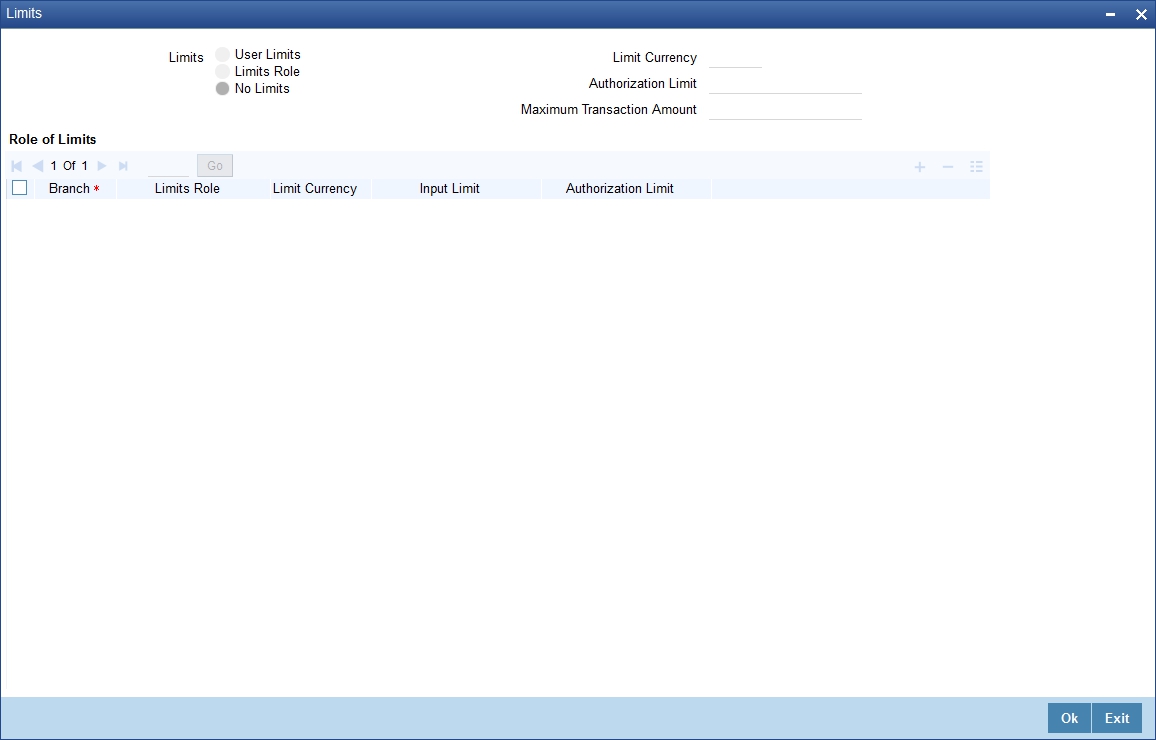
Limits
Select the limits from the following options:
- User Limits - Select this option to maintain user limits.
- Limits Role - Select this option to maintain the limits role.
- No Limits - Select this option to place no restrictions on the user.
Limit Currency
Indicate the currency in which the limits (transactions amounts) will be expressed. If a user captures a transaction in a different currency, Oracle FLEXCUBE will convert the transaction amount to the Limits Currency and then perform the validations.
Authorization Limit
Specify the maximum amount that a user (to which the limits role is associated) is allowed to process while authorizing a transaction.
If the transaction amount that the user is attempting to authorize exceeds the authorization limit maintained for the Role, the system displays an override message. Selection of the ‘OK’ button in the message window will allow the user to continue with the authorization despite exceeding the limits. If the user selects the ‘Cancel’ button, he will not be able to continue with authorizing the transaction.
Maximum Transaction Amount
Specify the maximum amount that the user can enter in a single transaction.
Role of Limits
Branch
For a user, you can assign Limit Roles specific to each branch of your bank. Depending on the branch in which the user operates, the relevant Limits Role will be made applicable. You can select the branch from the option-list available.
Limits Role
All the Limits Roles maintained at your bank will be displayed in the option-list. You can select the Roles you wish to link to the user profile. On selection of the Role, the following details get defaulted:
- Limits Currency
- Input Limit
- Authorization Limit
Note
The role limits (input and authorization) would apply to a user with which the limits role has been associated, for operations in any of the modules listed above (that is, payment transactions, single entry journal transactions, multi-offset transactions).
2.2.3 Tills Button
You can restrict the user from using certain tills maintained at your bank. Such restrictions can be specified in the ‘Tills’ screen. Click ‘Tills’ button to invoke the ‘Tills’ screen.
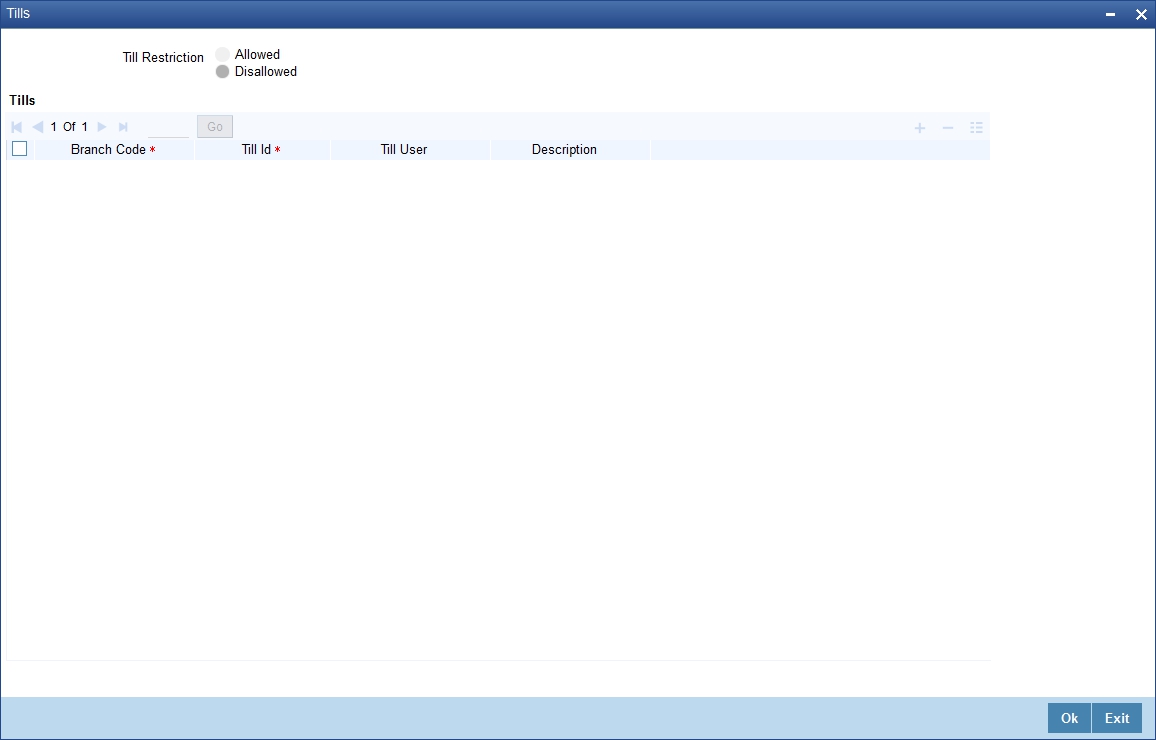
You can either allow or disallow the user from using certain tills.
- Select the option ‘Allowed’ if you want to allow the user to manage certain tills
- Select the option ‘Disallowed’ to disallow the user to manage certain tills
After choosing either the ‘Allowed’ or ‘Disallowed’ option, click add icon to add a record under the ‘Tills’ list. Into each added field select the required Till Id by clicking the adjoining option list.
2.2.4 General Ledgers Button
You can restrict the user from posting entries to certain General Ledgers (GLs) maintained in Oracle FLEXCUBE. Further, you can restrict the user from posting entries to specific node GLs and Leaf GLs. Leaf GLs maintained in the section ‘Exception Leaf GLs’ will be excluded from this restriction. Click ‘General Ledgers’ button to specify the GL restrictions.
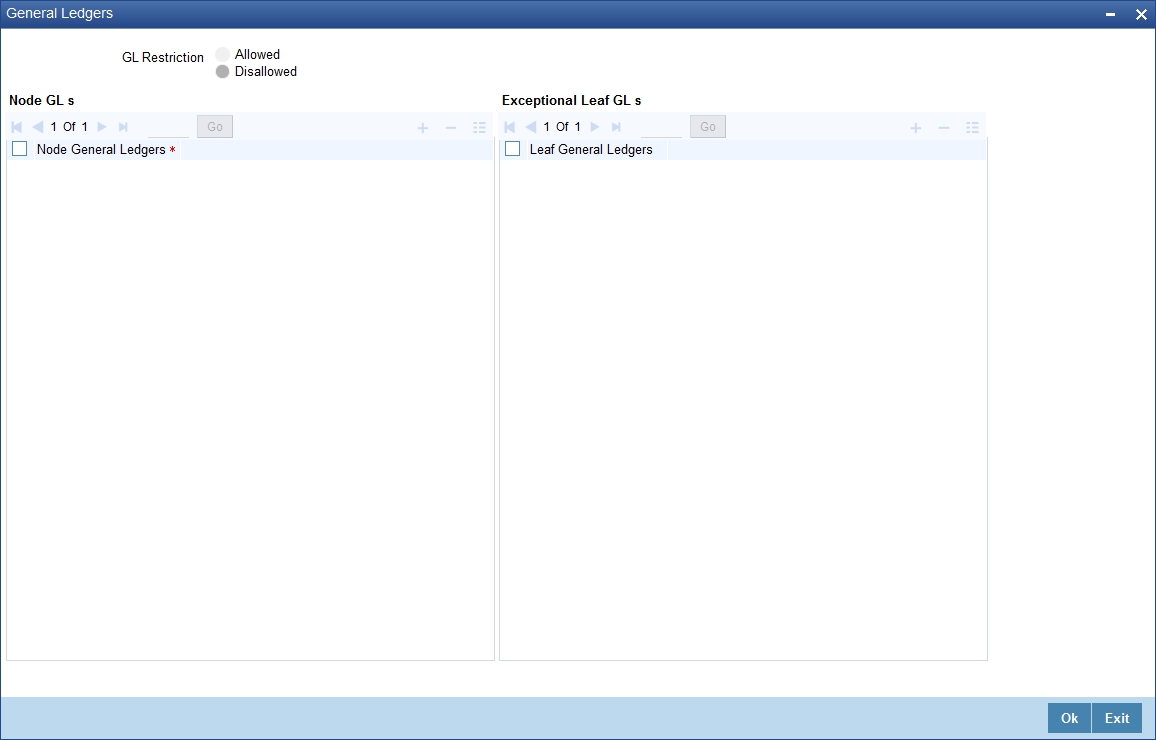
You can either allow or disallow the user from using certain GLs. Select the node GLs that you want to restrict. If you want to allow/disallow posting to some leaf GLs from the selected node GL, specify them in the Exception Leaf GLs list.
For instance, if we have a node GL 100000000 and it has four leaf GLs 100000087, 100000088, 100000089 and 100000090 and the posting is allowed only to one of the leaf GL 100000089, then you have to select GL restriction as Disallowed and give the node GL under Node GLs and the leaf node GL 100000089 under Exceptional Leaf GLs.
Similarly, if you want to allow posting to all leaf GLs under a node GL and disallow posting to some leaf GLs, then select GL Restriction as Allowed and specify the node GL under section node GLs and the leaf GLs to be disallowed under the section Exception Leaf GLs.
2.3 Role Branch Limits Maintenance
This section contains the following topics:
2.3.1 Invoking Role Branch Limits Maintenance Screen
You can maintain role branch limits in the Role Branch Limits Maintenance screen. To invoke this screen type ‘SMDRBLMT’ in the field at the top right corner of the Application toolbar and click the adjoining arrow button.
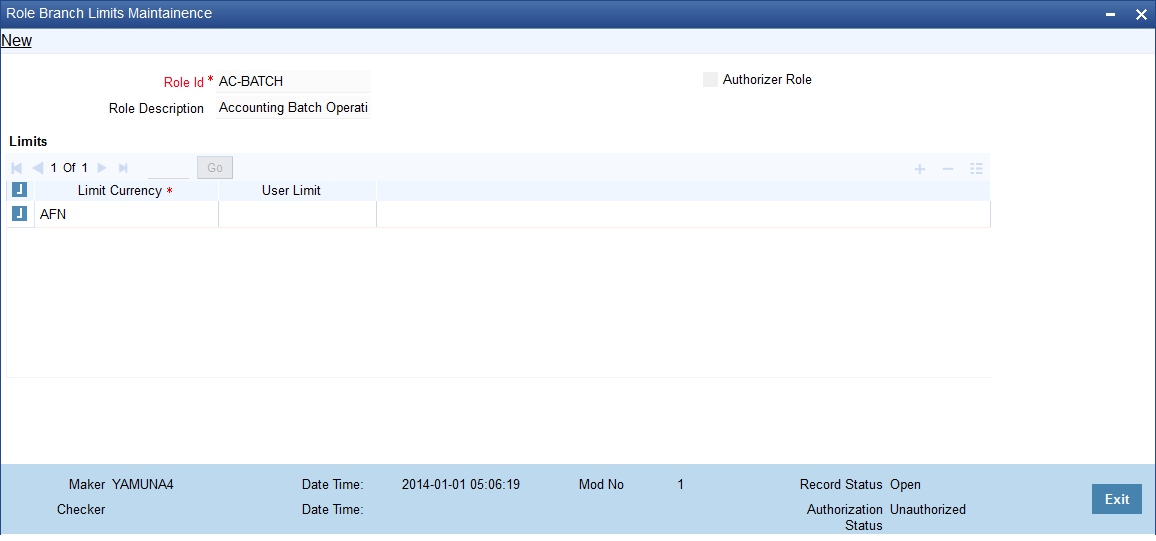
You can link a Limits Role to the User Profile. The Limits maintained for the role will be applicable to the user profile to which it is linked.
Role ID
Specify the role identification number. Alternatively you can select the role ID from the option list. The list displays all valid values.
Role Description
The system displays the role description.
Authorizer Role
Check this box to enable authorizer role.
Limit Currency
Specify the limit currency. Alternatively, you can select the currency from the option list. The limit displays all valid values.
User Limit
Specify the user specific limit.
2.4 Limits Role Maintenance
This section contains the following topics:
2.4.1 Invoking Limits Role Maintenance
Oracle FLEXCUBE allows you to place restrictions on the amount specified by a user when processing a transaction. You can also restrict users with authorization rights from authorizing transactions with amounts beyond a specific limit.
To achieve this, you can define Input Limits and Transaction Authorization Limits for a user at the time of maintaining a User Profile in Oracle FLEXCUBE. The input limits and authorization limits will be made applicable to the following types of transactions:
- Payment transactions (FTs)
- Single Entry Journal transactions
- Multi Offset transactions
- Teller transactions
Oracle FLEXCUBE allows you to maintain different Role Limits, which can then be linked to a user profile. The limits defined for the attached role will be applicable to the user profile to which it is linked. The Role Limits are maintained in the ‘Limits Role Maintenance’ screen. You can invoke this screen by typing ‘SMDRLMNE’ in the field at the top right corner of the Application tool bar and clicking on the adjoining arrow button.
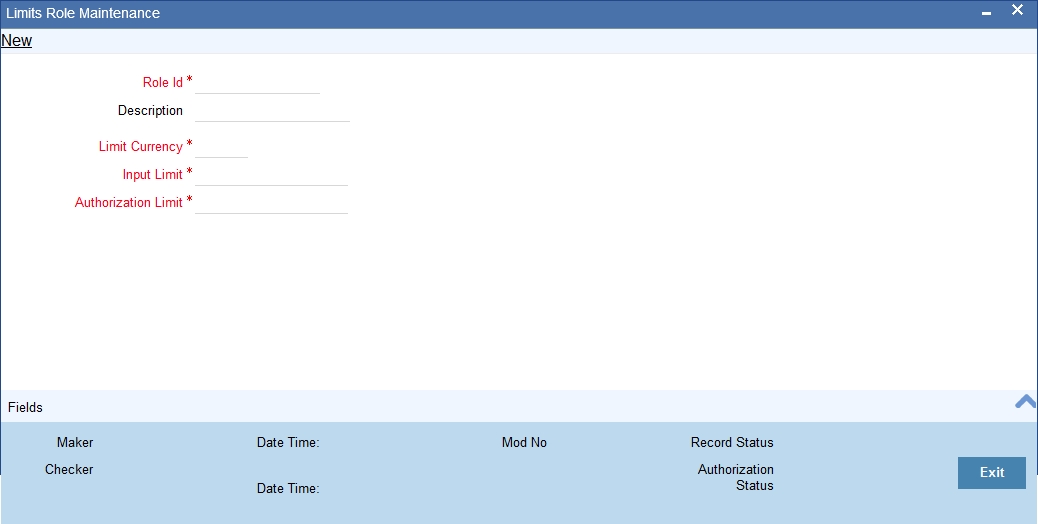
Role Identification
The Id that you specify here will uniquely identify the Role Limit throughout the system. A Role Limit is distinct from the User Role, in that the Role Limit is designated for the specific purpose of enabling you to set transaction amount processing limits that you wish to impose on a user.
Description
You can specify a brief description for the Role Limit being defined.
Limits Currency
Here you will indicate the currency in which the limits (transactions amounts) will be expressed. If a user captures a transaction in a different currency, Oracle FLEXCUBE will convert the transaction amount to the Limits Currency and then perform the validations.
Note
For currency conversions, the system will use the mid-rate of the STANDARD exchange rate type maintained in your system.
Input Limit
Specify the maximum amount that a user (to which the limits role is associated) is allowed to process while entering a transaction.
If the transaction amount exceeds the input limit maintained for the Role, the system displays an override message. Selection of the ‘OK’ button in the message window will allow the user to continue despite exceeding the limits. If the user selects the ‘Cancel’ button, he will not be able to continue with transaction processing.
Authorization Limit
Specify the maximum amount that a user (to which the limits role is associated) is allowed to process while authorizing a transaction.
If the transaction amount that the user is attempting to authorize exceeds the authorization limit maintained for the Role, the system displays an override message. Selection of the ‘OK’ button in the message window will allow the user to continue with the authorization despite exceeding the limits. If the user selects the ‘Cancel’ button, he will not be able to continue with authorizing the transaction.
Note
The role limits (input and authorization) would apply to a user with which the limits role has been associated, for operations in any of the modules listed above (that is, payment transactions, single entry journal transactions, multi-offset transactions).
The role limits maintained in the screen ‘SMDRLMNT’ are not applicable for web branch.
2.5 Alerts for Users
This section contains the following topics:
2.5.1 Defining Alerts for Users
Oracle FLEXCUBE allows you to define and send text messages to a destination user. These text messages will be displayed as an alert on the dashboard when the destination user logs in to the application. The user can then pick up the unprocessed messages and process it.
You can define the message for a destination user in the ‘User Alerts’ screen. You can invoke this screen by typing ‘SMDUSALR’ in the field at the top right corner of the Application tool bar and clicking on the adjoining arrow button.
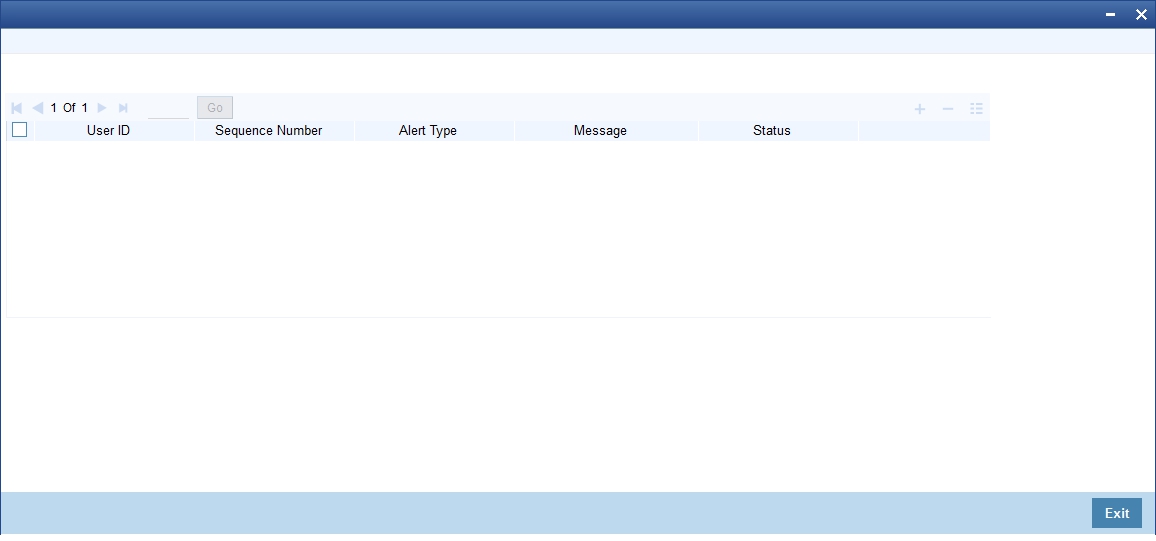
The following details are captured here:
User Id
Specify the id of the destination user to whom the message has to be sent.
Sequence No
Specify the sequence number of the message that you are defining.
Alert Type
Specify the alert type as I (Information).
Message
Specify the message that has to be sent to the destination user.
Status
Specify the status of the message as any of the following:
- P -Processed
- U -Unprocessed
After defining the message click ‘Exit’ button to exit from the screen.
For more details on how the destination user can view the alert messages refer section titled ‘Unprocessed Alerts’ in the chapter ‘Getting Started with Oracle FLEXCUBE’ in ‘Procedures’ User Manual.
2.6 Multi-Factor Authentication
This section contains the following topic:
- Section 2.6.1, "Logging into Oracle FLEXCUBE by Multi-Factor Authentication"
- Section 2.6.2, "Maintaining Multi-Factor Authentication Limits"
- Section 2.6.3, "Viewing Multi-Factor Authentication - Limit Maintenance Summary"
2.6.1 Logging into Oracle FLEXCUBE by Multi-Factor Authentication
Multi-Factor Authentication (MFA) is an authentication mode, which provides further level of authentication apart from the regular user ID and password authentication.
After successful login validation to FLEXCUBE, the system validates whether the user is enabled for MFA as maintained at the ‘User Maintenance’ (SMDUSRDF) screen. If you are MFA enabled, you are eligible for transactions greater than MFA limit and the system displays the MFA login screen and defaults the user ID.

You can specify the following details:
Multi-Factor Id
The system displays the Multi-Factor authentication ID linked to the user ID.
Multi-Factor PIN
Specify the Multi-Factor PIN for MFA.
The system generates the MFA PIN just before the authentication, which expires in a short time. The generated MFA PIN is communicated to the user in multiple ways, such as text messages sent to the user’s mobile phone or electronic devices.
The system prompts the user to input the MFA token as a second password and validates the user’s authenticity. This process reduces the risk posed by using only user ID or password mechanism. If the MFA pin is validated successfully, the user’s session is marked as ‘Multi-Factor Authenticated’. Else, it is marked as ‘Multi-Factor Not Authenticated’.
2.6.2 Maintaining Multi-Factor Authentication Limits
You can capture Multi-Factor Authentication (MFA) limits branch-wise and module-wise in the ‘Multi-Factor Authentication - Limit Maintenance’ screen. MFA limit indicates the limit above which MFA is required. The process of MFA can be determined by the parameters set at the individual user level. MFA limits can be used to authorize transactions above certain limit.
You can invoke this screen by typing ‘SMDMFALM’ in the field at the top right corner of the Application tool bar and clicking on the adjoining arrow button.
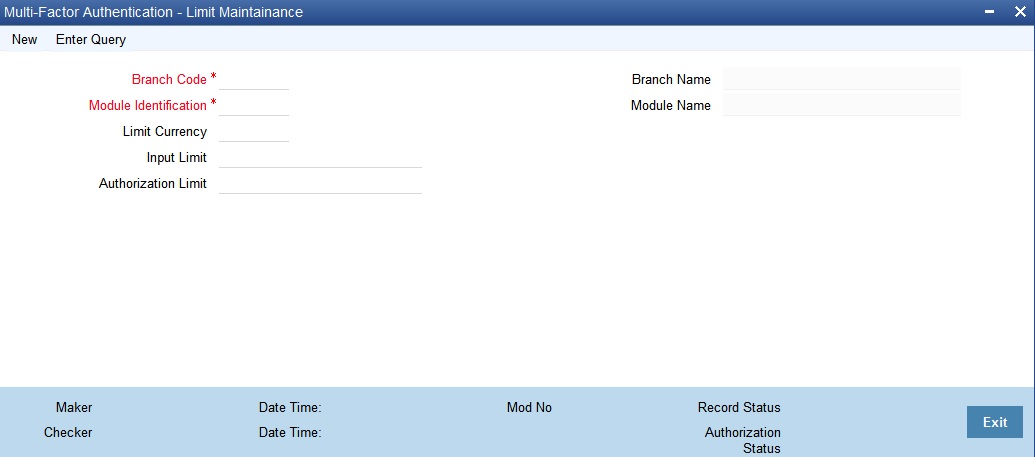
You can specify the following details here:
Branch Code
Specify the branch code for MFA limit. Alternatively, you can select the branch code from the option list. The list displays all the branches in the country maintained in the system and a value **, which indicates all branches.
Branch Name
The system displays the name of the branch code.
Module Identification
Specify the module code for MFA limit. Alternatively, you can select the module code from the option list. The list displays all the modules maintained in the system and a value **, which indicates all modules.
Module Name
The system displays name of the module for the selected module code.
Limit Currency
Specify the currency code in which the limit amount can be specified. Alternatively, you can select the currency code from the option list. The list displays all the currencies maintained in the system.
Input Limit
Specify the limit amount for input.
Authorization Limit
Specify the authorization limit amount for authorizer.
2.6.3 Viewing Multi-Factor Authentication - Limit Maintenance Summary
You can view multi-factor authentication limit maintenance in the ‘Multi-Factor Authentication - Limit Maintenance Summary’ screen. You can invoke this screen by typing ‘SMSMFALM’ in the field at the top right corner of the Application toolbar and clicking on the adjoining arrow button.
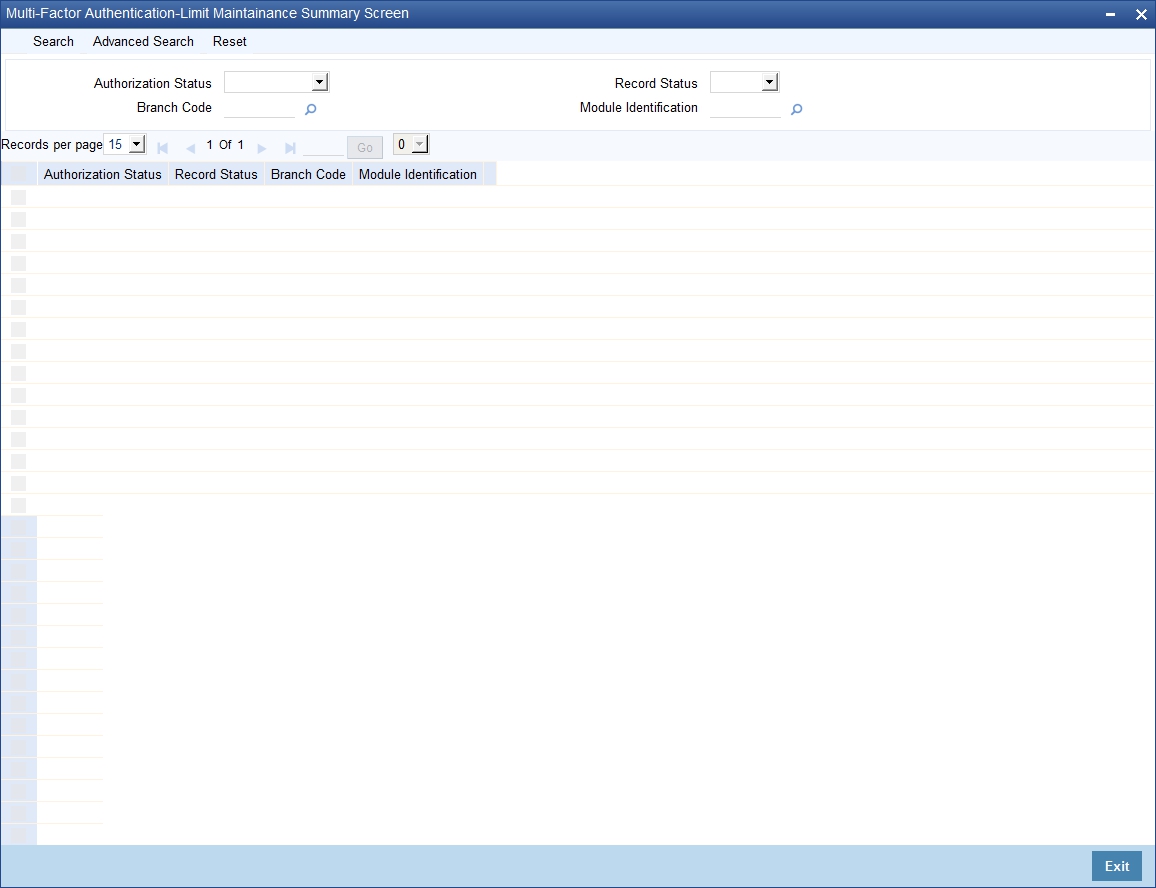
In the above screen, you can base your queries on any or all of the following parameters and fetch records:
- Authorization Status
- Branch Code
- Record Status
- Module Identification
Click ‘Search’ button. The system identifies all records satisfying the specified criteria and displays the following details for each one of them:
- Authorization Status
- Branch Code
- Record Status
- Module Identification