4. Maintaining Account Signatories
Once the CIF signatory details and signature images have been captured through the ‘CIF Signatory Details Input’ screen, they have to be attached to specific accounts.
Whenever there is a debit transaction on the account(s) for which the CIF signatory is an account signatory, you can choose to verify the signatures attached to the account signatory.
You can link a CIF signatory with one or more accounts. A customer signatory can be the lone signatory for some accounts and one among the many for some other accounts.
For instance, suppose that a corporate customer has nine accounts in your bank.
Now the requirement is that you link the MD as the lone signatory for four accounts. For the other five accounts you should maintain two other signatories (the Financial Controller and the Manager - Personnel) besides the MD.
Based on the requirement you can have four accounts with the MD as the lone signatory. The other five accounts can have two other signatories the MD being one of them.
If your customer is a company, people at various hierarchical levels will be authorized as signatories for different accounts. You have to manually allot separate signatory numbers to all the customer signatories and link them up to one or many accounts as the case may be.
Moreover you can maintain brief messages referred to as account messages. The account messages are specific to every account and convey information about the nature of the account. In addition, you can also maintain signatory messages specific to each signatory. Both these messages are displayed during verification.
This chapter contains the following sections:
- Section 4.1, "Signatory Details"
- Section 4.2, "Operations on Account Signatory Record"
- Section 4.3, "Customer Account Signatory History"
- Section 4.4, "Customer Signature View"
4.1 Signatory Details
This section contains the following topic:
4.1.1 Maintaining Signatory Details
For every account of the customer, you can capture unlimited number of customer signatories. You can also capture the minimum number of signatories required to sign on instruments for particular accounts. In addition, you can capture information to confirm whether the minimum number of signatures are necessary when a signatory with a specific title signs the instrument (for example, the Chief Executive Officer or CEO). This information will be displayed during verification.
When customer details are changed for an account the signature details of the new customer are replicated only if ‘Replicate Customer Signature’ box is checked at both ‘Customer Image and Signature Upload’ (STDCIFIS) screen and at ‘Customer Accounts Maintenance’ (STDCUSAC) level.
If you close a ‘Signature ID’ at customer level system removes the record from customer accounts maintenance (STDCUSAC). The status of replication flag at signature and account level is not checked during closure System displays the following alert message:
‘Closing the record will remove the Signature Id across Customer and Account Maintenance’ before closing the record.’
When a customer is attached/ added to an account, the signature details maintained for that customer also gets added at that account level.When a customer having a joint holder relationship with the account is de-attached/removed from the account, the signature details maintained for that customer at account level is removed.
During reopen of Signature ID, if the replication is checked then the signature will be replicated back again only to those account where the signature replication is allowed. The same will be updated in the Account signature History screen.
The maintenance of account signatory details is within the maintenance of customer account details. Hence, any operation on account signatory details should be done through the Customer Account Maintenance screen. Any operation on a stored account signatory should be done after unlocking the customer account record. You should then move to the ‘Signatory Details’ screen by clicking ‘Account Signatory’ button.
For more details on ‘Customer Account Maintenance’ screen refer to ‘Maintaining Customer Accounts’ chapter of the ‘CASA’ Module.
You can also specify the approval limit for each signatory. This is the amount up to which each signatory can approve for debit on a single instrument.
This information will be displayed during verification.
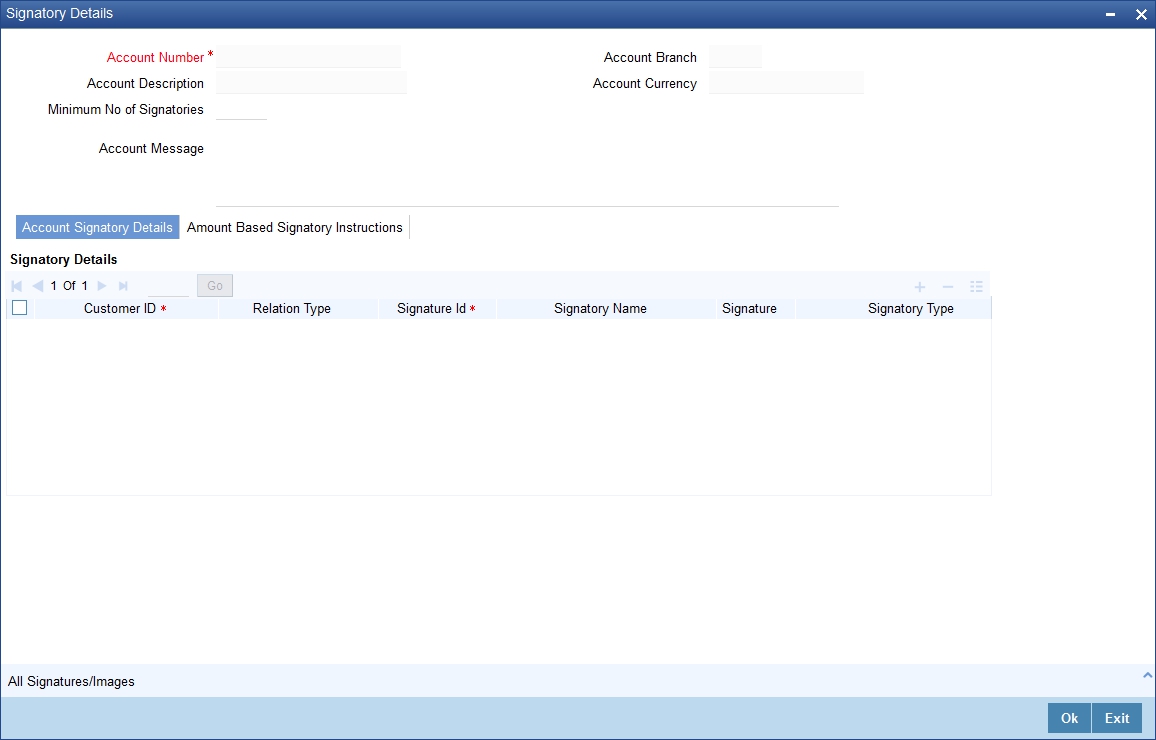
In the ‘Account Signatory Details Input’ screen you can link customer signatories to an account and make them account signatories.
Note
You can retrieve a signature for an account belonging to one particular branch from any of the other branches of your bank for which retrieval is allowed (when the customer signatory details are captured).
Linking a Customer Signatory to an Account
You can go to the ‘Account Signatory’ details screen by clicking on ‘Account Signatory’ button in the ‘Customer Accounts Maintenance’ screen.
In addition to linking customer signatories to an account, you can capture the following signature verification details for an account:
- An account message
- The minimum number of signatories required to endorse an instrument involving the account.
You can then link the customer signatories to the account. Along with this you capture the signatory name, signatory type, approval limit and the signatory message for each account signatory.
You can link a customer signatory to an account either by:
- Clicking on the option list next to the Signatory Number. A list of customer signatory numbers, whose details have been captured, will be displayed, along with their names. Pick up the signatory whom you want to make an account signatory for the account.
- Keying-in the customer Signatory Number and Name directly, if the signatory number has not been maintained through the ‘Customer Signatory Details’ screen.
Note
If the signatory ID that you specify has not been maintained, the System displays an override. On confirming the override, you will be allowed to save the signatory details. An error message is displayed if you enter a duplicate Signatory ID. Each time you capture a new Signatory ID at the account level you must identify the relationship of the signatory with the customer.
You should then specify the following details for the account signatory:
- Signatory Type – Identify the relationship of the signatory with the customer.
- Approval Limit – Specify the amount up to which the account signatory can approve limits.
- Signatory Message – Capture a message that has to be displayed when the signature is retrieved for verification.
For example, consider a case where you want to link the customer signatories of a corporate customer to specific accounts. The corporate customer has nine accounts in your bank.
Now the requirement is that you link the CEO to account number five. Click on the signatory number in the Account Signatory details screen. The option list containing the signatory numbers will be displayed. Click on the number allotted to the CEO. The signatory name will be displayed. Specify the signatory type and also whether this signatory alone is enough to endorse the instrument or if others need to endorse the instrument as well.
Specify the approval limit for that signatory and enter a relevant signatory message.
Now, consider another example where you are opening a Savings Account for a person, who is 17 years of age. In this case, the guardian of the applicant is the Customer Signatory. Since the guardian’s details have not been maintained in the CIF screen you must:
- Key-in the Customer Signatory Number
- Specify the name of the guardian as the Signatory Name
- Specify ‘Father’ as the Signatory Type
You can specify the appropriate Approval Limit and a brief signatory message as well. Once all the details have been captured you can click ‘Ok’ button. The captured details will be stored.
Capturing Account Messages
You can enter relevant information about the customer account that will be useful during verification. For instance, if a particular account always needs the CEO’s signature to allow debits you can capture this information here. This message will be displayed during verification.
Capturing Account Signatory Messages
You can capture information about particular signatories. These messages could pertain to the name, number and the type of signatory your customer is. For example you can capture a message like - ‘This signatory is a joint account holder with rights to sign instruments only up USD 8000’.
Capturing the Number of Signatories Required to Endorse an Instrument
You can specify the minimum number of signatories required to endorse an instrument pertaining to an account that results in a debit to the account. You can maintain unlimited number of signatories for an account.
Specifying the Type of Signatory
You can categorize the type of signatory your customer is. You can specify whether the signatory is an account holder, joint account holder guarantor or any other type. This information will be displayed during verification.
Specifying the Number of Signatories Required to Endorse an Instrument
You can specify whether one signatory is sufficient to endorse an instrument involving the account if the signatory whose details you are capturing has signed. For instance, assume that an account has six account signatories with the CEO being one of them. There is a debit transaction involving this account. You can opt to clear an instrument if the CEO is the lone signatory.
Approval Limit
You have to specify the approval limit for each signatory i.e. the amount up to which each account signatory has got authority to allow debit transactions for a particular account. The approval limit for each signatory will be displayed during verification.
Only while doing Data Entry or Teller transactions you have the option of displaying those signatory details with an approval limit that is greater than or equal to the transaction amount. This option is not available for any other module in Oracle FLEXCUBE.
Capturing the Signatures of ‘New’ Signatories
You may need to add new signatories while capturing the Customer Account details if the signatory CIF ID is not linked to the main customer. For example, the parent would be the signatory of a minor. Similarly, the legal attorney would be the signatory of a mentally imbalanced person. These persons would not be linked as signatories, while they would need to be added as part of the Customer Account Maintenance.
You must capture the signature of new signatories that you have captured for the account using the Scan option.
Every new signatory that you add will be available for the next account belonging to the same CIF ID.
Replication of Signature
Replication of signature at Account Signatory level happens according to the following conditions:
Sr.No |
Replicate to Account (STDCIFIS) |
Replicate Customer Signature (STDCUSAC) |
Replication of signature (Account Signatory Details) |
Remarks |
1 |
Selected |
Selected |
Yes |
As both the flags are selected. Signature should get replicated |
2 |
Selected |
Unselected |
No |
As ‘Replicate Customer Signature’ is not selected. Signature should not be replicated |
3 |
Unselected |
Selected |
No |
As ‘Replicate to Account’ is not selected. Signature should not be replicated |
4 |
Unselected |
Unselected |
No |
As both the flags are unselected. Signature should not be replicated |
4.1.1.1 Viewing Signatures/Images button
Click ‘All Signatures/Images’ button to invoke ‘Customer Signature/Image Consolidated View’ screen..

The following details will be displayed in the above screen
- Account Number
- Account Branch
- Account Description
- Account Currency
- Customer Number
- Signature Id
- Signature Name
The ‘Signature/Image’ tab displays nine signatures/Images for a signature id in a single pane with three signatures/Images in a row.
If there is more than one signature id linked to a customer account, then they would be displayed in different pages.
Each image is provided with the following buttons:
- Zoom In
- Zoom Out
- Rotate Clockwise
- Rotate Anticlockwise
- Flip Horizontal
- Flip Vertical
4.2 Operations on Account Signatory Record
This section contains the following topics:
- Section 4.2.1, "Performing Operations on Account Signatory Record"
- Section 4.2.2, "Deleting an Account Signatory Record"
- Section 4.2.3, "Modifying an Account Signatory Record"
4.2.1 Performing Operations on Account Signatory Record
Apart from defining account signatory details you can perform the following operations on an account signatory record:
- Delete account signatories
- Modify account signatories
4.2.2 Deleting an Account Signatory Record
Unlock the CIF ID for which you want to delete a signatory. Move to the Customer Accounts Maintenance screen by clicking ‘Account Signatory’ button.
You can delete an existing account signatory record only if it is yet to be authorized. Once you delete a account signatory record it will be removed from the system completely and will not be available for future use.
Note
To delete the details of an account signatory you should have the access rights to delete the CIF ID.
4.2.3 Modifying an Account Signatory Record
To make any modifications on an account signatory record, unlock the Customer Accounts table to which the signatory is attached. Click ‘Account Signatory’ button. The ‘Customer Accounts Maintenance’ screen will be displayed and you can carry out the modifications.
When you select ‘Save’ from the Actions menu in the Application toolbar or click save icon to save the modified record, the modified fields are updated. Your user ID is captured in the maker field.
The modifications you make come into effect as soon as they are made, regardless of whether they are authorized or not.
However a copy of the old record and the user ID of the person who authorized the modification will be captured for the purpose of audit trail requirements.
4.3 Customer Account Signatory History
This section contains the following topic:
4.3.1 Viewing Customer Account Signatory History
You can view the history of all the Signature/Image changes of an account in the ‘Account Signature and Image History’ screen.
You can invoke this screen by typing ‘STDASHIS’ in the field at the top right corner of the Application tool bar and clicking on the adjoining arrow button..

The following details are captured in this screen:
Account Number
Select the account number for which you want to view the signature history details, from the adjoining option list. The list displays all valid accounts maintained in the system.
Account Description
The description of the selected account is displayed here.
Branch Code
The branch to which the selected account belongs to is displayed here.
Account Currency
The currency of the selected account is displayed here.
The following details pertaining to the selected account are displayed:
- Customer ID
- Signature ID
- Signature Name
- Signature Type
- Nature of Change
- Maker ID & Date Time
- Checker ID & Date Time
- Signature
4.4 Customer Signature View
This section contains the following topics:
- Section 4.4.1, "Viewing Customer Signature"
- Section 4.4.2, "Instruction Details Button"
- Section 4.4.3, "Viewing Customer Image"
4.4.1 Viewing Customer Signature
You can view the customer account opening message from any ‘Customer Account’ field of ‘Customer Signature and Image View’ (SVDIMGVW) screen. Enter the After selecting the ‘Customer Account’ and pressing hot key (F12).
Once the user presses the hot key the system will invoke the ‘Customer Sign View’ screen to display the signatory details of the customer account of which Account Opening Message will also be a part.

Along with the customer signature and image details the screen also displays the joint account holder details.
The following details are displayed here:
- Account Number
- Account Description
- Account Branch
- Account Currency
- Account Message
- Customer ID
- Joint Holder Type
- Signature ID
- Signature Name
- Signatory Type
- Approval Limit
- Signatory Message
- Solo Sufficient
4.4.1.1 Viewing all Signatures
Click ‘All Signatures’ button to view ‘Customer Signature/Image Consolidated View’ screen.
The following details will be displayed in the above screen
- Account Number
- Account Branch
- Account Description
- Account Currency
- Customer Number
- Signature Id
- Signature Name
The ‘Signature/Image’ tab displays nine signatures/Images for a signature id in a single pane with three signatures/Images in a row.
If there is more than one signature id linked to a customer account, then they would be displayed in different pages.
Each image is provided with the following buttons:
- Zoom In
- Zoom Out
- Rotate Clockwise
- Rotate Anticlockwise
- Flip Horizontal
- Flip Vertical
4.4.2 Instruction Details Button
You can invoke the ‘Customer Instructions View’ screen by clicking the ‘Instruction Details’ button in the Customer Sign View screen.

Here you can view the following details:
- Customer Number
- Customer Name
- Instruction ID
- Instruction Description
- Instruction Date
4.4.3 Viewing Customer Image
You can view the customer images from any ‘Customer Account’ field of any screen. After selecting the ‘Customer Account’ and pressing hot key (F10).
Once the user presses the hot key the system will invoke the ‘Customer Image’ screen to display the images of the customer linked to the account.
The system will display the first image by default.