4. Defining Attributes Specific to an XP Product
In this chapter, we shall discuss the manner in which you can define attributes specific to an XP product.
This chapter contains the following sections:
4.1 Expense Processing Product Definition
This section contains the following topics:
- Section 4.1.1, "Maintaining Expense Processing Product Details"
- Section 4.1.2, "Preferences Button"
- Section 4.1.3, "Customer Button"
- Section 4.1.4, "Documents Button"
4.1.1 Maintaining Expense Processing Product Details
You can create an XP product in the XP Product Definition screen, invoked from the Application Browser. In this screen, you can enter basic information relating to a XP product such as the Product Code, the Description, etc.
You can invoke ‘XP Product Definition’ screen by typing ‘XPDPRMNT’ in the field at the top right corner of the Application tool bar and clicking the adjoining arrow button.
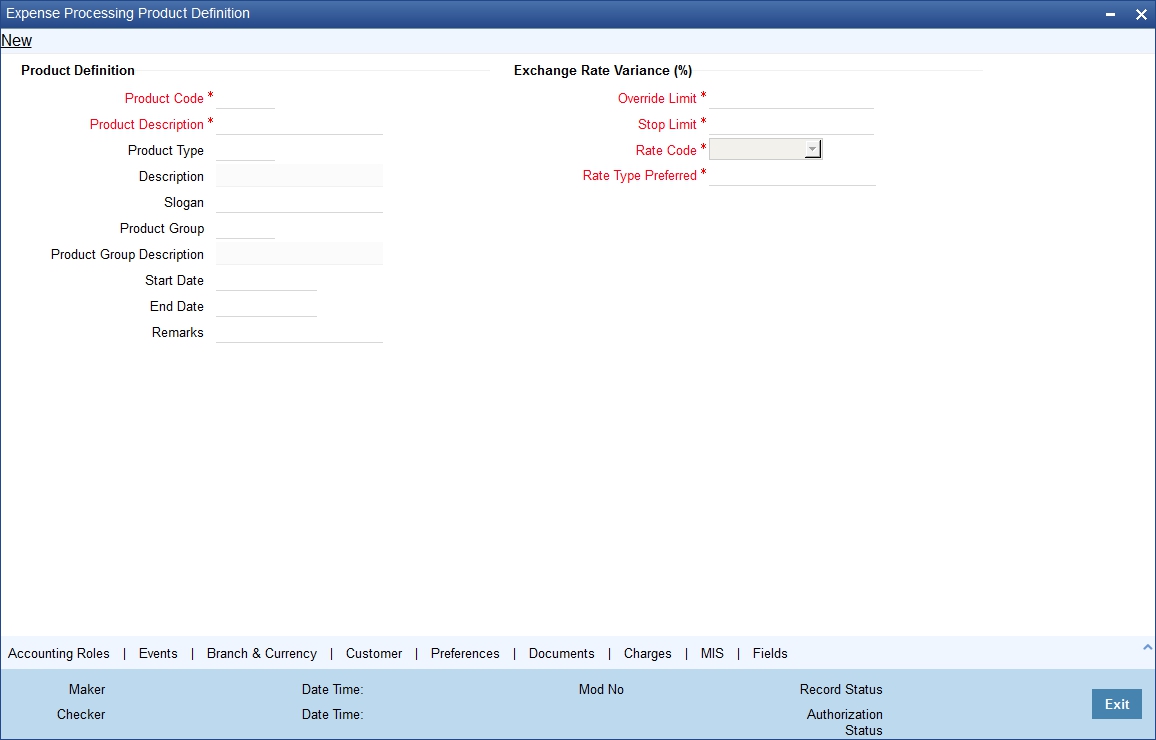
In this screen, you can enter basic information relating to a XP product such as the Product Code, the Description, etc.
For further information on the generic attributes that you can define for a product, please refer the following Oracle FLEXCUBE User Manuals under Modularity:
- Product Definition
- User Defined Fields
- Settlements
Specifying Product Details
Product Code
A product code identifies a product throughout Oracle FLEXCUBE. This code should be four characters in length. When defining a new product, you should enter a code that is unique across the different modules of Oracle FLEXCUBE.
Description
It may be difficult to recognize a product just by its code. In the Description field, therefore, suitably describe the product code so that it can be easily identified. This description will be displayed along with the code throughout Oracle FLEXCUBE.
Product Module
By default, the system will display ‘XP’ as the product module.
Description
By default, the system will display ‘Expense Processing’ in this field.
Product Type
Product categories are referred to as ‘product types’. When you create a product, you must specify the type to which it belongs. Indicate the type to which the product you are creating belongs. Click the adjoining icon and select a product type from the option list. The option list will contain all the product types maintained at your bank.
Description
The description maintained for the selected product group is displayed.
Product Slogan
Enter a punch line for the product. This slogan will be printed on the advices sent out to vendors involved in contracts entered under the product.
Product Group
Every product should be classified under a specific group. Indicate the group to which the product you are creating belongs. Select a product group from the option list. The option list will contain all the product groups maintained at your bank.
Description
The description maintained for the selected product group is displayed.
Start Date
A product can be used over a period. Here you should indicate the start date of the period.
The settlement date of contracts associated with the product should be the same as or later than the Start Date you specify for the product.
The start and end date of a product come in handy, when you define a product that is applicable for a specific period.
End Date
A product can be used over a period. Here you can indicate the end date of the period.
The settlement date of contracts involving a product should be:
- the same as or later than the Start Date
- the same as or earlier than the End Date of the product
If you do not specify an End Date, a message is displayed prompting you to indicate whether you are creating an open-ended product. In this case, the product can be used until it is closed.
Remarks
Enter additional information about the product intended for the internal reference of your bank. Your remarks will not be printed on any correspondence with the vendor.
Specifying Exchange Rate Variance Details
Override Limit
For a special customer, or in special cases, you may want to use an exchange rate (a special rate) that is greater than the exchange rate maintained for a currency pair. The variance is referred to as the Exchange Rate Variance.
When creating a product, you can express an Exchange Rate Variance Limit in terms of a percentage. This variance limit would apply to all contracts involving the product.
Stop Limit
For a special customer, or in special cases, you may want to use an exchange rate (a special rate) that is greater than the exchange rate maintained for a currency pair. The variance is referred to as the Exchange Rate Variance.
When creating a product, you can express an Exchange Rate Variance Limit in terms of a percentage. This variance limit would apply to all contracts involving the product.
Rate Code
Select the rate code from the drop down list. The available values are:
- Mid Rate
- Buy / Sell Rate
Rate Type
Specify the Rate Type. Typically, the rate type is Standard.
4.1.2 Preferences Button
Preferences are the attributes defined for a product that can be changed for contracts involving the product. You can define the preferences for a product in the ‘Expense Processing - Preferences’ screen. Click ‘Preferences’ in the ‘Expense Product Definition’ screen to invoke the ‘Expense Processing - Preferences’ screen.
By default, an expense contract acquires the attributes defined for the product with which it is associated. However, the attributes that are defined as the product’s ‘preferences’ can be changed for a contract.

By default, the product code along with a brief description that you specified for the product in the ‘XP Product Definition’ screen is displayed in the ‘Product Code’ field.
The following are the preferences that you can define for a product.
Specifying the Tenor Details
The standard tenor for a product is always expressed in days and will apply to all contracts involving the product. If you do not specify the tenor of a contract while capturing it, the standard tenor defined for the product will apply. However, the standard tenor can be changed during contract processing.
Indicating Preference for specifying Contract Level Expense GLs
This option which is set at the product level once chosen cannot be amended after the first time it is authorized. If you enable this option, you have to mandatorily specify the GL heads for various items captured in the items details screen of the contract at contract level. If a single vendor provides multiple services to your bank but different expense heads need to be charged, you will have to check against this field.
Indicating the Contract Details to be Rekeyed
All contracts entered in the system should be ratified or ‘authorized’ by a user with the requisite rights.
To ensure that the authorizer of a contract calls the correct contract, you can specify that the values of certain fields should be entered before the other details of the contract are displayed for authorization. You can make this specification when building a product by choosing the Rekey option. Your specification will apply to all contracts involving the product.
The fields for which values have to be provided at the time of authorization are called rekey fields. You can specify any or all of the following as re-key fields:
- Amount
- Currency
- Vendor
- Transaction Date
- Maturity Date
If you do not specify re-key fields, the details of the contract will be displayed immediately when the authorizer calls the contract for authorization.
Specifying the Default Exchange Rate Type
When defining a product, you can specify a default ‘exchange rate type’. For example, you can specify the exchange rate type as ‘Spot Rate’. This rate type will default to all contracts involving the product.
When you enter an expense contract, the exchange rate (maintained in the currency table) corresponding to the Exchange Rate Type specified for the product will default.
Limits Monitoring
When defining your preferences for a product, you should specify the method in which you would like to calculate the tenor for tracking limits for contracts involving the product.
The tenor calculation type can be either:
- Fixed
- Rolling
A Fixed tenor implies that a contract will be tracked by the appropriate credit line throughout its tenor. If you specify a Rolling tenor, a contract will be tracked under the appropriate lines, according to its diminishing tenor.
Specifying the Payment Mode
You have to specify the mode of payment based on which the booking amount will be paid to the vendor. This specification will get defaulted to all contracts booked under the product. The following options are available:
- Automatic - If the payment mode is automatic, the system will automatically trigger the payment on the payment date as specified at the time of capturing the contract details.
- Manual – In the manual mode, you have to make the payment manually using the ‘Payment’ screen.
Based on the payment mode, the system will process the payment in the following manner:
Automatic Processing
As stated above, in this type of payment, the system will make an auto payment of the booking amount when you book an expense contract. The payment will be triggered automatically on the payment date maintained at the contract level. By default, the current system date will be the payment date but you have the option to specify a future date also. If you specify a payment date that is less than or equal to the current system date, the system will automatically trigger the XPMT (Expense Payment) event immediately after the XBOK (Expense Booking) event.
As the XPMT event indicates a complete payment to the vendor, the system will mark the contract status as ‘Liquidated’ immediately after this event.
Note
The payment date specified at the contract level will undergo a holiday check as per the ‘Local Holiday Calendar’ maintained for your branch. If the payment date falls on a holiday, the system will generate an override message to indicate the same.
Manual Processing
In the manual mode of payment, at the time of booking the contract, the system will park the expense entries in provisional/temporary GLs. You will be required to make the payment manually through the ‘Payment’ screen.
Note
If the mode of payment is manual, you will not be allowed to capture the payment date at the contract level.
Batch processing for Auto payment
You have to execute the auto payment batch process at the beginning of each day to process all contracts having payment mode as ‘Auto’. This batch will process all pending payments as per the specification maintained for the branch. If you have specified the ‘Processing Till’ as ‘Today’ (in the Branch Parameter Maintenance screen), the system will process all pending payments for the current date alone. If the value is maintained as ‘Next working day-1’, the batch process will pick up all active contracts falling within the current date and the day before the next working date.
For instance, let us assume that the current date is 1st January 2002 and the next working day is maintained as 4th January 2002 (2nd and 3rd being holidays). Further, the ‘Processing Till’ date is specified as ‘Next working date –1’. The BOD batch process will pick up all the contracts pending payment for the period 1st Jan 2002 to 3rd Jan 2002.
The system will then trigger the XPMT event for all the selected contracts to indicate full payment. The contract status will be updated to ‘liquidated’.
Maintaining Budget Tracking Preferences
Oracle FLEXCUBE provides you with the facility to track the budget expended towards the booking amount when processing expense contracts at your branch for a given financial year. The system will track the budget against the financial year within which the transaction booking date falls. You will not be allowed to change the booking date after the authorization of the contract. Irrespective of the date of operation on the contract, the system will track the budget against the budget code that you associate during the booking of an expense contract. Budget tracking will always be done in the local currency of the branch. Foreign currency amounts will be converted to the local currency equivalents using the conversion rates maintained at your branch.
To enable this feature; you have to maintain the budget tracking details at the time of defining the preferences for an expense product.
Budget Tracking Required
The system will track the budget for the booking amount only if you enable this option. This specification will be defaulted to all the contracts booked under the product. However, you can change it at the contract level.
If you opt for budget tracking, you will have to indicate the budget code and the tracking event as well.
Budget Code
You have to indicate the budget code under which the tracking should be done. All the budget codes defined through the Budget Code Maintenance screen will be available in the option-list provided. You can select the appropriate code from this list. The selected code will be associated will all contracts processed under this product. However, you have the option to select a different budget code at the contract level.
Note
This field will be enabled only if the ‘Budget Tracking Required’ option is selected.
Tracking Event
You have to specify the event for which the budget for the booking amount should be tracked. The following options are available:
- Booking
- Payment
Note
This field will be enabled only if the ‘Budget Tracking Required’ option is selected.
Depending on the tracking event that you select, the system will track the budget as explained below.
Booking
If you select the track event as ‘Booking’, the system will track the booking amount at the following events:
- Booking of the contract (XBOK)
- Contract amendment (XAMD)
- Deletion of the contract
- Contract reversal
During the XBOK event, the system will debit the expense GL for the booking amount. Consequently, the utilized amount will increase and the available balance will decrease under the selected budget code.
At the time of contract amendment, if you increase the amount, the expense GL will be debited for the amount incremented. Similarly, if there is a decrease in the amount, the system will credit the expense GL for the amount reduced. In both the cases, the system will update the utilized amount accordingly.
Deletion and reversal of the contract will result in a decrease in the utilized amount. Consequently, there will be an increase in the available balance.
Payment
If the track event is selected as ‘Payment’, the system will track the amount paid to the vendor. The tracking will be done against the budget for the following events:
- Booking of payment
- Deletion of unauthorized payment
- Reversal of payment
4.1.3 Customer Button
Just as you can maintain branch and currency restrictions for a product, you can maintain a list of blacklisted vendors. You can specify vendor restrictions for a product in the ‘Vendor Restrictions Details’ screen. To invoke this screen, click ‘Customer’ in the ‘XP Product Definition’ screen.

By default, the product code along with a brief description that you specified for the product in the ‘XP Product Definition’ screen is displayed in the ‘Product Code’ field.
To specify the vendor IDs that you would like to disallow, identify the vendor that you would like to disallow in the ‘Vendor Identification’ field. (Only vendors you have maintained in the ‘Vendor Maintenance’ screen will appear on the option list in this field.) To add another vendor to the list, click add button again.
Click delete button to delete the highlighted vendor on the list.
4.1.4 Documents Button
Payments towards the different items of an expense contract are typically made on the basis of documents. When creating a product, you can indicate the documents that should be part of the contracts involving the product. Invoke the ‘XP Product Document Codes’ screen, to make this specification. Click ‘Documents’ in the ‘XP Product Definition’ screen to invoke the screen.
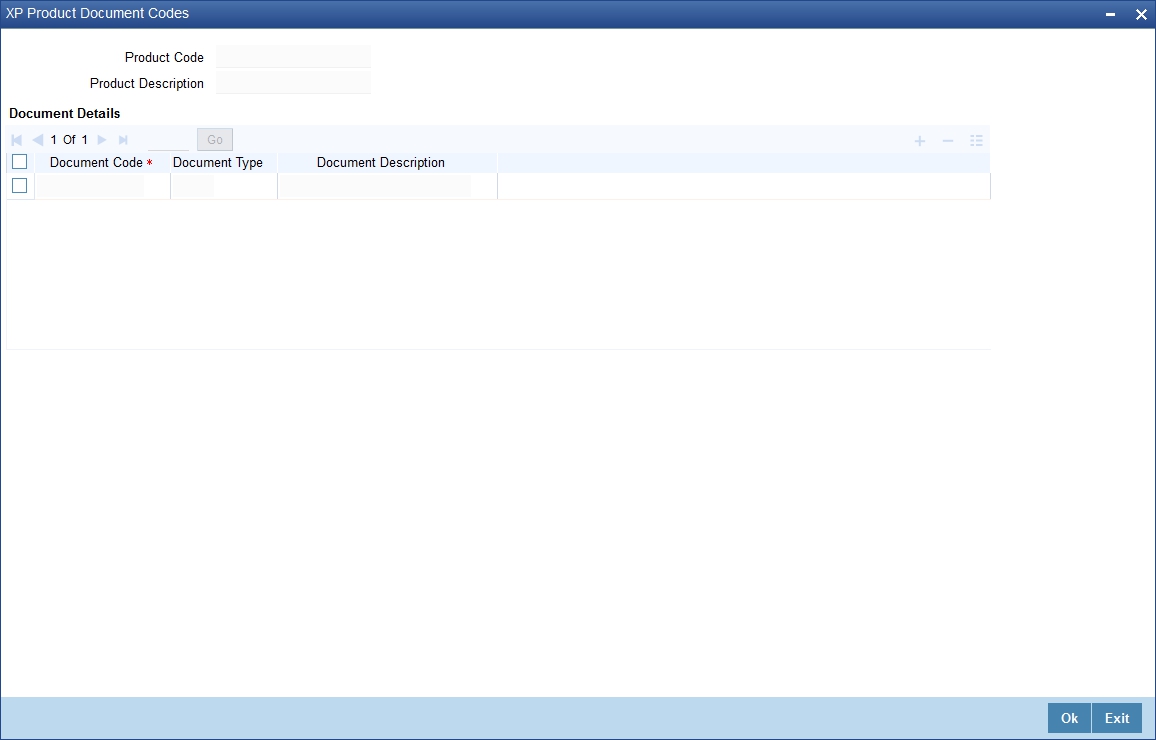
By default, the product code along with a brief description that you specified for the product in the ‘XP Product Definition’ screen is displayed in the ‘Product Code’ field.
Your specifications in this screen will default to all contracts involving the product. When processing an expense contract, however, you can choose to ignore the default altogether, or modify the default list of documents suitably.
To specify the documents that should accompany expense contracts involving the product, identify the document code in the ‘Document Code’ field. (Only documents maintained in the ‘Document Maintenance’ screen will appear on the option list in this field.) To add another document to the list, click add row icon again.