Welcome to Configuration User Guide
This user guide is designed to help you quickly get acquainted with the many functions routinely executed everyday in Oracle Banking Virtual Account Management.
This document is intended for Back Office Data Entry Clerk, Back Office Managers/Officers, Product Managers, End of Day Operators and Financial Controller users.
This section contains the following topics:
Bank Parameters
You can configure bank level parameters for a virtual account.
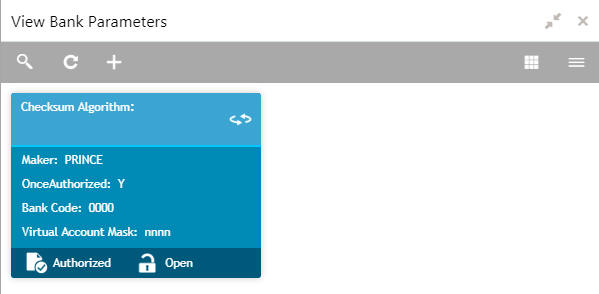
Bank Parameters Summary
The summary screen provides a list of configured bank parameters. You can configure a bank level parameter using the Bank Parameters Maintenance.
How to reach here:
Virtual Account Management > Configuration > Bank Parameters > View Bank Parameters
Field |
Description |
Checksum Algorithm |
Displays the checksum algorithm of the bank. |
Maker |
Displays the name of the user who created the record. |
Once Authorized |
Indicates if the record is authorized once or not. |
Bank Code |
Displays the bank code. |
Virtual Account Mask |
Displays the details of the virtual account mask. |
Status |
Displays the status of the record. |
Bank Parameters Maintenance
The maintenance screen allows you to configure bank level parameters.
How to reach here:
Virtual Account Management > Configuration > Bank Parameters > Create Bank Parameters
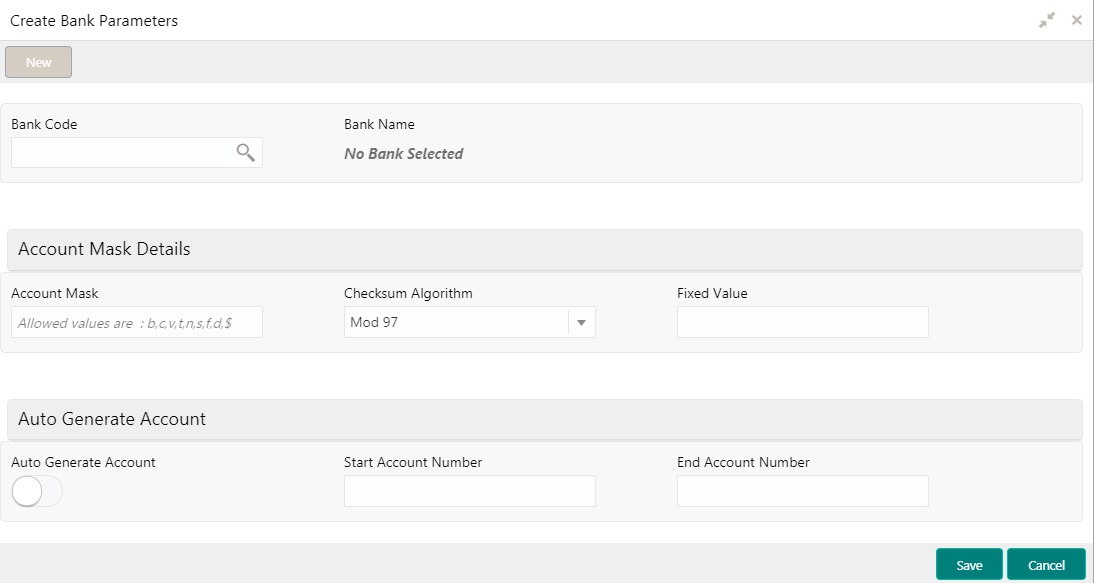
How to configure bank parameters:
- In the Create Bank Parameters screen, provide the required details:
- Bank Code: Click Search to view and select the required bank code.
- Bank Name: Based on the Bank Name selected, the information is auto-populated.
Account Mask Details
- Account Mask: Enter the account mask that consists of b, c, v, t, n, s, f, d, $ values.
- Checksum Algorithm: Select one of the required checksum algorithm from the dropdown list:
- Modulo 10: If selected, you provide mask length of 10 characters.
- Modulo 11: If selected, you can have either numeric or alphanumeric account mask. In case of numeric, D is appended to the account mask by the system and in case of alpha numeric, user must manually input D at the end of the mask.
- Modulo 11 with Weights: If selected, you can have mask with size not more than 13 characters.
- Modulo 97: If selected, you can have only numeric account mask. By default, this option is selected.
- User Defined: If selected, you can define the checksum algorithm.
- Fixed Value: Enter a fixed value, if virtual account mask contains character f. This field supports maximum of one alphanumeric character.
Auto Generate Account
- Auto Generate Account: By default, this is disabled. If enabled, system automatically generates numeric account numbers based on the range provided.
- Start Account Number: If Auto Generate Account is selected, enter a start number for the account.
- End Account number: If Auto Generate Account is selected, enter an end number for the account.
- Click Save. You can view the configured bank parameters in the Bank Parameters Summary.
Branch Parameters
You can configure various branches for the bank and maintain parameters such as IBAN, BBAN, exchange rate preferences, and more.
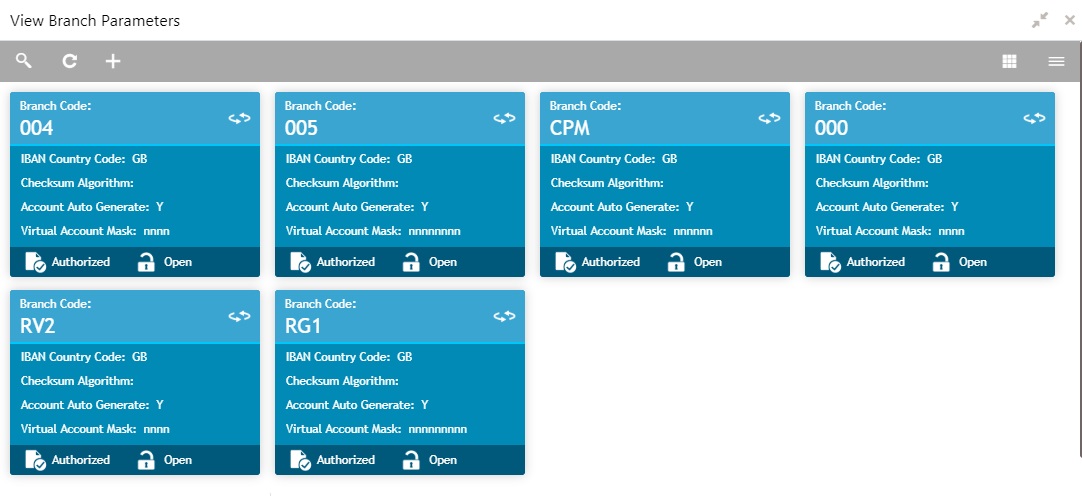
Branch Parameters Summary
The summary screen provides a list of configured branch parameters. You can configure a branch level parameter using the Branch Parameters Maintenance.
How to reach here:
Virtual Account Management > Configuration > Branch Parameters > View Branch Parameters
Field |
Description |
Branch Code |
Displays the branch code. |
IBAN Country Code |
Displays the IBAN country code.. |
Checksum Algorithm |
Displays the checksum algorithm of the branch. |
Account Auto Generation |
Indicates if the account is automatically generated. |
Virtual Account Mask |
Displays the details of the virtual account mask. |
Status |
Displays the status of the record. |
Branch Parameters Maintenance
The maintenance screen allows you to configure branch level parameters.
How to reach here:
Virtual Account Management > Configuration > Branch Parameters > Create Branch Parameters
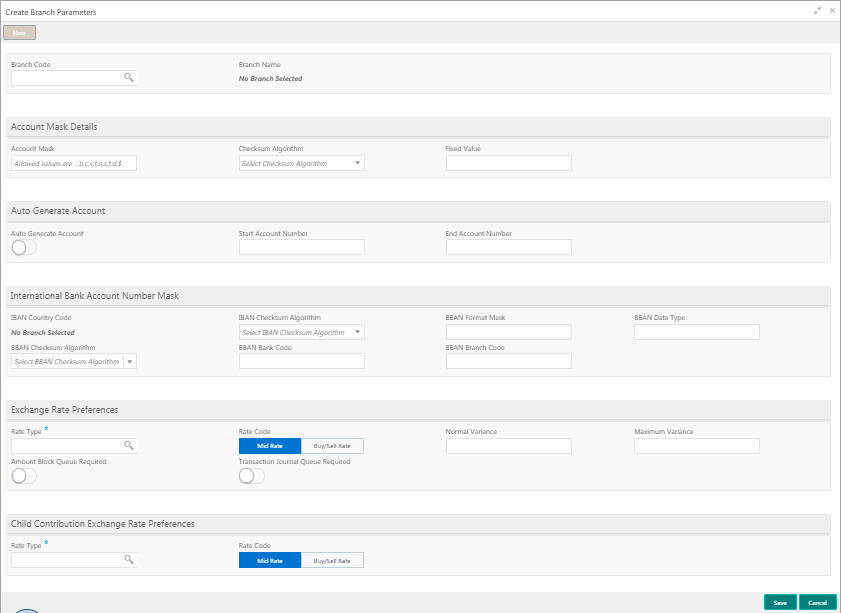
How to configure branch parameters:
- In the Create Branch Parameters screen, provide the required details:
- Branch Code: Click Search to view and select the required branch code.
- Branch Name: Based on the Branch Code selected, the information is auto-populated.
Account Mask Details
- Account Mask: Enter the account mask that consists of b, c, v, t, n, s, f, d, $ values.
- Checksum Algorithm: Select one of the required checksum algorithm from the dropdown list:
- Modulo 10: If selected, you provide mask length of 10 characters.
- Modulo 11: If selected, you can have either numeric or alphanumeric account mask. In case of numeric, D is appended to the account mask by the system and in case of alpha numeric, user must manually input D at the end of the mask.
- Modulo 11 with Weights: If selected, you can have mask with size not more than 13 characters.
- Modulo 97: If selected, you can have only numeric account mask. By default, this option is selected.
- User Defined: If selected, you can define the checksum algorithm.
- Fixed Value: Enter a fixed value, if virtual account mask contains character f. This field supports maximum of one alphanumeric character.
Auto Generate Account
- Auto Generate Account: By default, this is disabled. If enabled, system automatically generates numeric account numbers based on the range provided.
- Start Account Number: If selected, enter a start number for the account.
- End Account number: If selected, enter an end number for the account.
International Bank Account Number Mask
- IBAN Country Code: Displays a system default country code of the branch. The system validates the country code is an ISO country code, the country code of the branch, and the length of the character is 2.
- IBAN Checksum Algorithm: Select one of the required checksum algorithm from the dropdown list:
- Modulo 10: If selected, you provide mask length of 10 characters.
- Modulo 11: If selected, you can have either numeric or alphanumeric account mask. In case of numeric, D is appended to the account mask by the system and in case of alpha numeric, user must manually input D at the end of the mask.
- Modulo 11 with Weights: If selected, you can have mask with size not more than 13 characters.
- Modulo 97: If selected, you can have only numeric account mask. By default, this option is selected.
- User Defined: If selected, you can define the checksum algorithm.
- BBAN Format Mask: Enter the BBAN format mask details. You can enter a maximum length of 30 characters. The mask must be one of the following characters:
- b - BBAN Bank Code
- s - BBAN Branch Code
- z - Virtual Account Number
- l - Virtual Account Number
- d - BBAN Check Digit
- i - Real Customer Number
- h - 1, as there is no joint holder
- t - Virtual Account Code
- BBAN Data Type: Enter the BBAN data type details. The list displays the following character set:
- n- Number
- a- Alphabet
- c- Alphanumeric
- BBAN Checksum Algorithm: Select the BBAN checksum algorithm from the dropdown list.
- BBAN Bank Code: Enter the BBAN bank code details.
- BBAN Branch Code: Enter the BBAN branch code details.
Exchange Rate Preferences
- Rate Type: Click Search to view and select the required rate type.
- Rate Code: Select one of the options:
- Mid Rate: If selected, indicates the rate code for exchange rate preferences is mid rate.
- Buy/Sell Rate: If selected, indicates the rate code for exchange rate preferences is buy/sell rate.
- Normal Variance: Enter a normal variance details.
- Maximum Variance: Enter a maximum variance details. Maximum variance can have a maximum value of 100.
- Amount Block Queue Required: By default, this is disabled. If enabled, indicates the amount block queue.
- Transaction Journal Queue Required: By default, this is disabled. If enabled, indicated the transaction journal queue.
Child Contribution Exchange Rate Preferences
- Rate Type: Click Search to view and select the required rate type.
- Rate Code: Select one of the options:
- Mid Rate: If selected, indicates the rate code for child contribution exchange rate preferences is mid rate.
- Buy/Sell Rate: If selected, indicates the rate code for child contribution exchange rate preferences is buy/sell rate.
- Click Save. You can view all the configured branch parameters in the Branch Parameters Summary.
Entity Mask Configuration
You can configure entity mask ID for a bank.
Entity Mask Configuration Summary
The summary screen provides a list of configured entity mask ID. You can configure entity mask ID using the Entity Mask Configuration Maintenance.
How to reach here:
Virtual Account Management > Configuration > Entity Mask Configuration > View Entity Mask Configuration
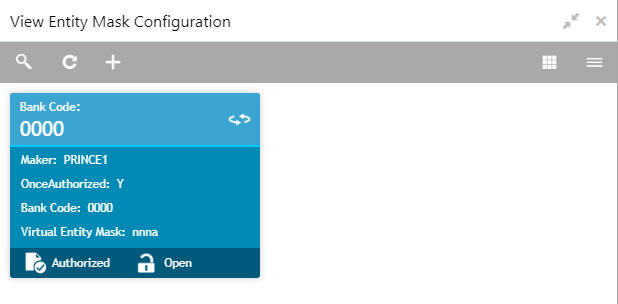
Field |
Description |
Bank Code |
Displays the bank code. |
Maker |
Displays the name of the user who has configured the bank details. |
Once Authorized |
Indicates if the record is authorized once or not. |
Virtual Entity Mask |
Displays the details of the virtual entity mask. |
Status |
Displays the status of the record. |
Entity Mask Configuration Maintenance
The maintenance screen allows you to configure entity mask ID for a bank.
How to reach here:
Virtual Account Management > Configuration > Entity Mask Configuration > Create Entity Mask Configuration
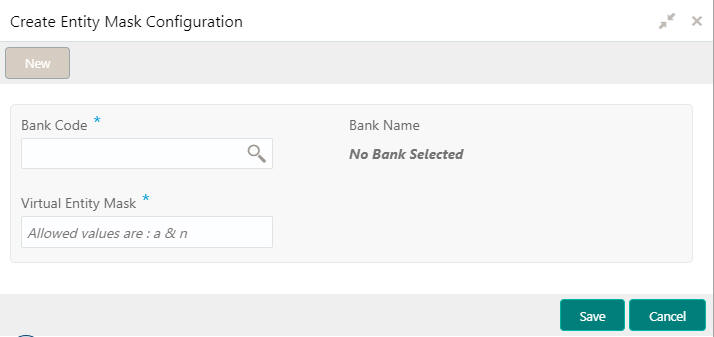
How to configure an entity mask:
- In the Create Entity Mask Configuration screen, provide the required details:
- Bank Code: Click Search to view and select the required bank code.
- Bank Name: Based on the Bank Code selected, the information is auto-populated.
- Virtual Entity Mask: Enter the virtual entity mask. You can input a combination of alpha and/or numeric characters. You can enter up to a maximum of 12 characters. You can use the following identifiers to define the mask:
- b: User input alpha characters
- n: User input numbers
- Click Save. You can view the configured entity mask details in the Entity Mask Configuration Summary.
External DDA System
The transactions into virtual account through transaction journal service, results in posting entries to real account. The external DDA (Demand Deposit Accounts) system interacts with the external DDA for posting entries and calling out other services on DDA. OBVAM can be configured to work with the DDA systems in a synchronous or asynchronous manner for transaction posting to the real account.
External DDA System Summary
The summary screen provides a list of configured external DDA system. You can configure an external DDA system using the External DDA System Maintenance.
How to reach here:
Virtual Account Management > Configuration > External DDA System > View External DDA System
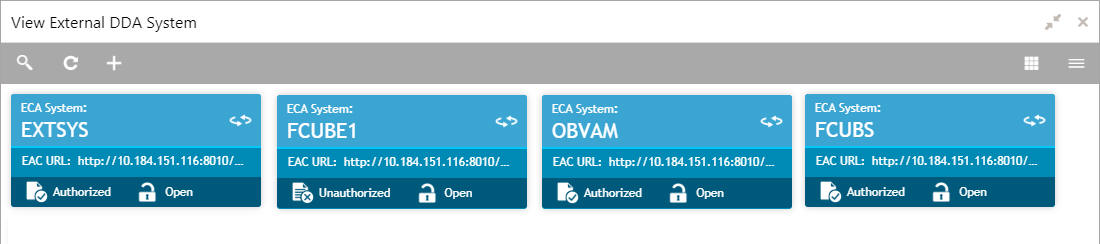
Field |
Description |
ECA System |
Displays the external credit approval system details. |
EAC URL |
Displays the external account check URL details. |
Status |
Displays the status of the record. |
External DDA System Maintenance
The maintenance screen allows you to configure an external DDA system.
How to reach here:
Virtual Account Management > Configuration > External DDA System > Create External DDA System
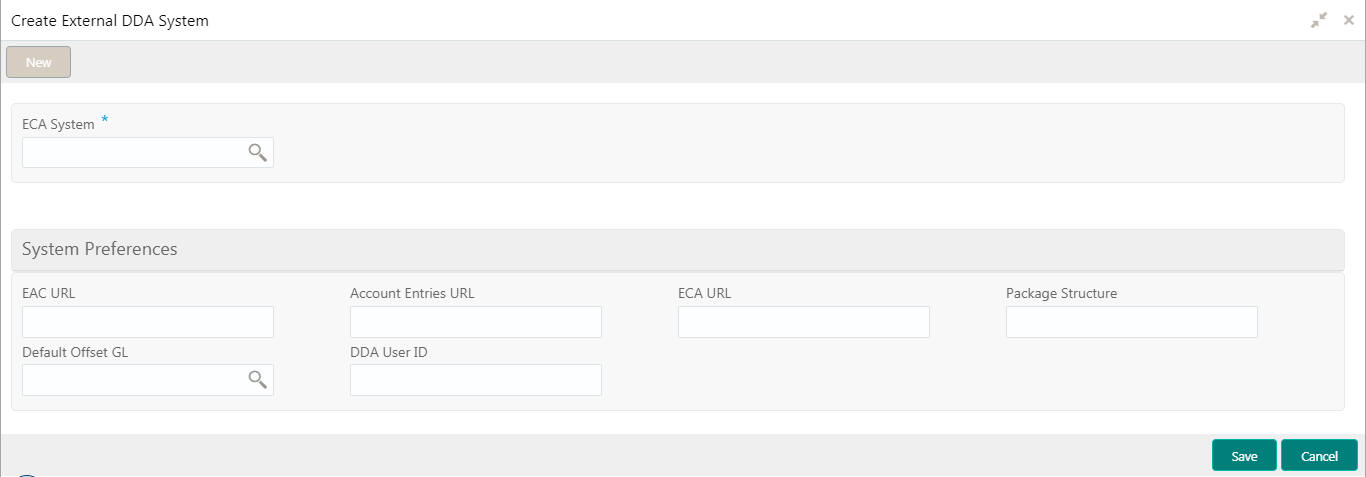
How to configure an external DDA system:
- In the Create External DDA System screen, provide the required details:
- ECA System: Click Search to view and select the required ECA system.
System Preferences
- EAC URL: Enter the external account check URL details.
- Account Entries URL: Enter the account entries URL details.
- ECA URL: Enter the external credit approval URL details.
- Package Structure: Enter the package structure details.
- Default Offset GL: Click Search to view and select the default offset general ledger.
- DDA User ID: Enter a demand deposit account user ID.
- Click Save. You can view the configured external DDA system details in the External DDA System Summary.
Inter-DDA General Ledger
You can configure inter-DDA (Demand Deposit Accounts) preference that is used for multi-DDA transactions.
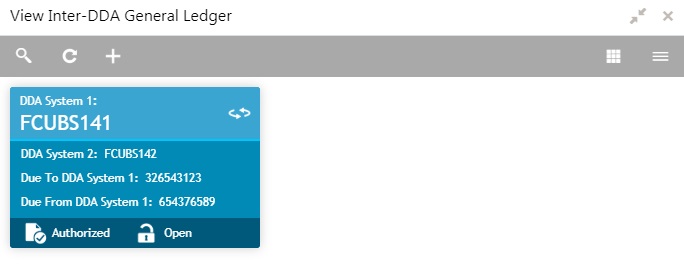
Inter-DDA General Ledger Summary
The summary screen provides a list of configured inter-DDA general ledger. You can configure an inter-DDA general ledger using the Inter-DDA General Ledger Maintenance.
How to reach here:
Virtual Account Management > Configuration > Inter-DDA General Ledger > View Inter-DDA General Ledger
Field |
Description |
DDA System 1-2 |
Displays the DDA system 1-2 details. |
Due To DDA System 1 |
Displays the general ledger for which a credit entry is passed. |
Due From DDA System 1 |
Displays the general ledger for which a debit entry is passed. |
Status |
Displays the status of the record. |
Inter-DDA General Ledger Maintenance
The maintenance screen allows you to configure an inter-DDA general ledger.
How to reach here:
Virtual Account Management > Configuration > Inter-DDA General Ledger > Create Inter-DDA General Ledger
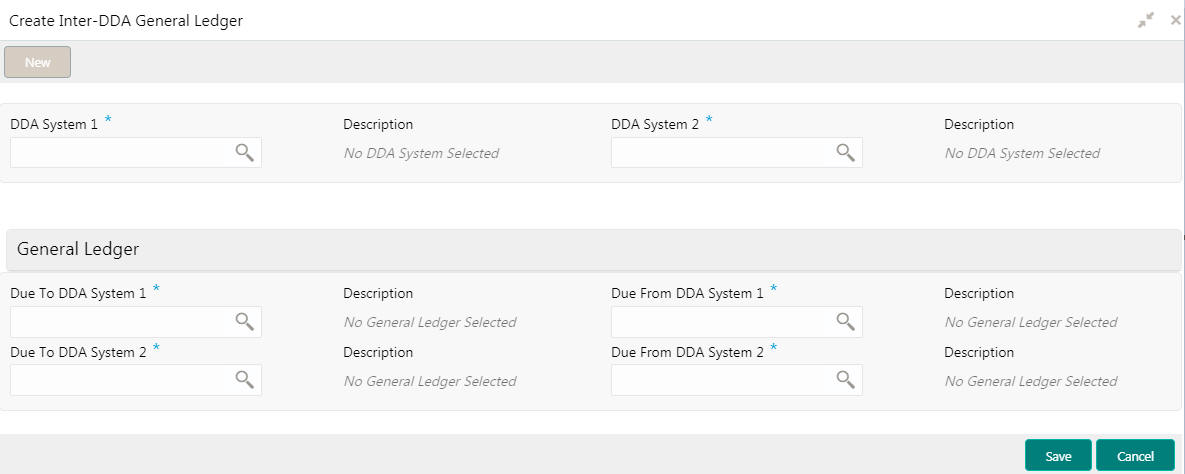
How to configure an inter-DDA general ledger:
- In the Create Inter-DDA General Ledger screen, provide the required details:
- DDA System 1-2: Click Search to view and select the required DDA system pair.
- Description: Based on the DDA System selected, the information is auto-populated.
General Ledger
- Due To DDA System 1-2: Click Search to view and select the general ledger for which a credit entry is passed.
- Description: Based on the general ledger selected, the information is auto-populated.
- Due From DDA System 1-2: Click Search to view and select the general ledger to which a debit entry is passed.
- Description: Based on the general ledger selected, the information is auto-populated.
- Click Save. You can view the configured inter-DDA general ledger details in the Inter-DDA General Ledger Summary.
Interest Calculation Preferences
You can configure a standalone interest calculation system.
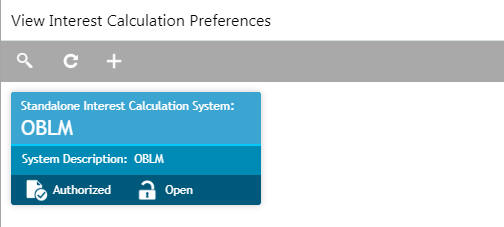
Interest Calculation Preferences Summary
The summary screen provides a list of configured interest calculation preferences. You can configure an interest calculation preferences using the Interest Calculation Preferences Maintenance.
How to reach here:
Virtual Account Management > Configuration > Interest Calculation Preferences > View Interest Calculation Preferences
Field |
Description |
Standalone Interest Calculation System |
Displays the standalone interest calculation details. |
System Description |
Displays the description. |
Status |
Displays the status of the record. |
Interest Calculation Preferences Maintenance
The maintenance screen allows you to configure interest calculation system.
How to reach here:
Virtual Account Management > Configuration > Interest Calculation Preferences > Create Interest Calculation Preferences
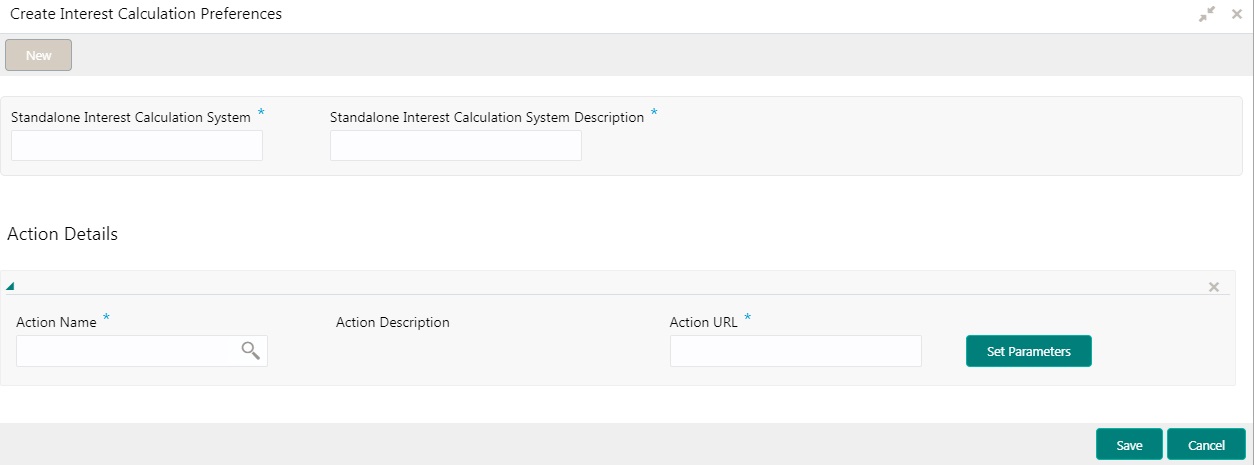
How to configure an interest calculation preference:
- In the Create Interest Calculation Preferences screen, provide the required details:
- Standalone Interest Calculation System: Enter a standalone interest calculation.
- Standalone Interest Calculation System Description: Enter a description for the standalone interest calculation system.
Action Details
- Click + to add a row and provide the required details:
- Action Name: Click Search to view and select the required action name.
- Action Description: Based on the Action Name selected, the information is auto-populated.
- Action URL: Enter an action URL.
- Click Set Parameters to define parameters for the action. The Set Parameters pop-up screen appears.
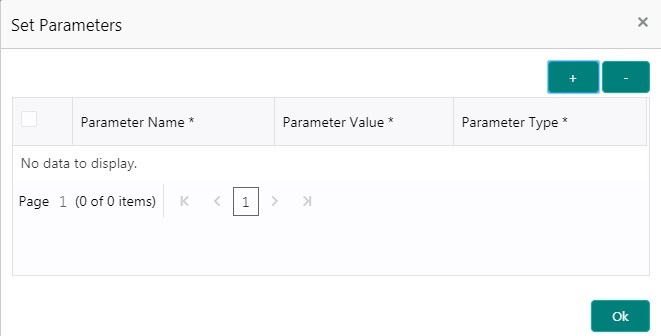
- Click + to add a row and provide the required details:
- Parameter Name: Enter a name for the parameter.
- Parameter Value: Enter a value for the parameter.
- Parameter Type: By default, parameter type appears as Headers.
- Click Ok to close and navigate back to the Create Interest Calculation Preferences screen.
- Click Save. You can view the configured interest calculation preferences details in the Interest Calculation Preferences Summary.
Liquidity Management Preferences
You can configure liquidity management system. OBVAM is integrated with Oracle Banking Liquidity Management as a liquidity management and interest engine.
Liquidity Management Preferences Summary
The summary screen provides a list of configured liquidity management preferences. You can configure a liquidity management preferences using the Liquidity Management Preferences Maintenance.
How to reach here:
Virtual Account Management > Configuration > Liquidity Management Preferences > View Liquidity Management Preferences
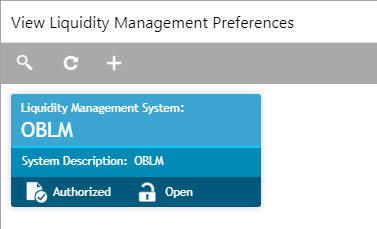
Field |
Description |
Liquidity Management System |
Displays the liquidity management system details. |
System Description |
Displays the description. |
Status |
Displays the status of the record. |
Liquidity Management Preferences Maintenance
The maintenance screen allows you to configure liquidity management.
How to reach here:
Virtual Account Management > Configuration > Liquidity Management Preferences > Create Liquidity Management Preferences
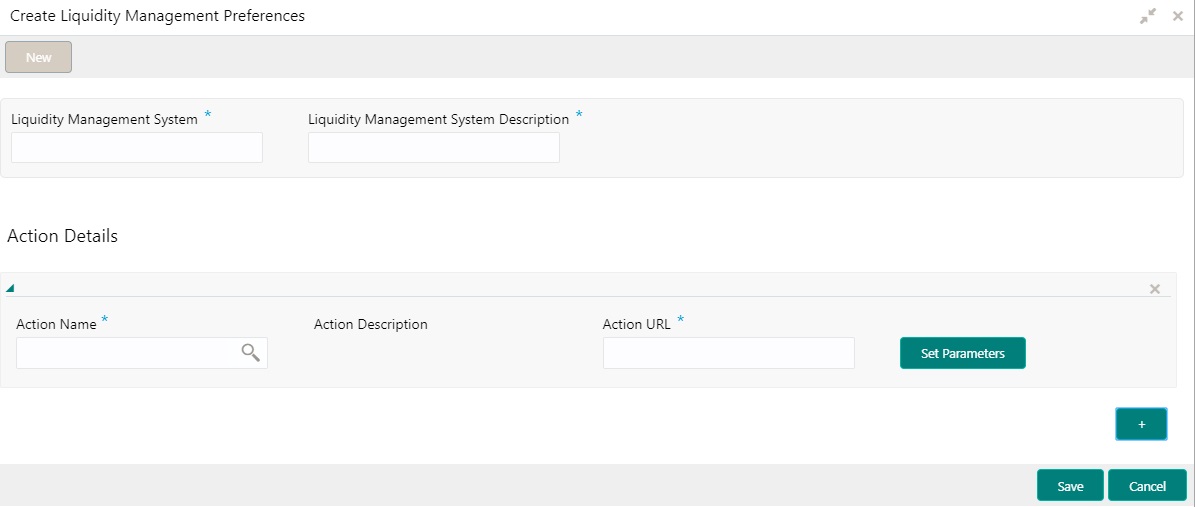
How to configure a liquidity management preference:
- In the Create Liquidity Management Preferences screen, provide the required details:
- Liquidity Management System: Enter the liquidity management details.
- Liquidity Management System Description: Enter a description for the liquidity management system.
- Click + to add a row and provide the required details:
- Action Name: Click Search to view and select the required action name.
- Action Description: Based on the Action Name selected, the information is auto-populated.
- Action URL: Enter an action URL.
- Click Set Parameters to define parameters for the action. The Set Parameters pop-up screen appears.
- Click + to add a row and provide the required details:
- Parameter Name: Enter a name for the parameter.
- Parameter Value: Enter a value for the parameter.
- Parameter Type: By default, parameter type appears as Headers.
- Click Ok to close and navigate back to the Create Liquidity Management Preferences screen.
- Click Save. You can view the configured liquidity management preferences details in the Liquidity Management Preferences Summary.