3 Implementing Fleet Management Security
This chapter reviews Fleet Management security features.
Authorization Privileges
Overview
Setting Authorization privileges establishes strict access control, explicitly enabling or restricting the ability to do something with a computer resource.
User authorization privileges are configured in the Fleet Management Administration module. Fleet Management uses a simple authorization model, where each user belongs to one more user group, and the user gets all the privileges assigned to the user group(s). Alternatively, you can use the Active Directory for authentication/authorization. In the Active Directory mode, the Microsoft Windows user is used to login into Fleet Management
Adding a User Group
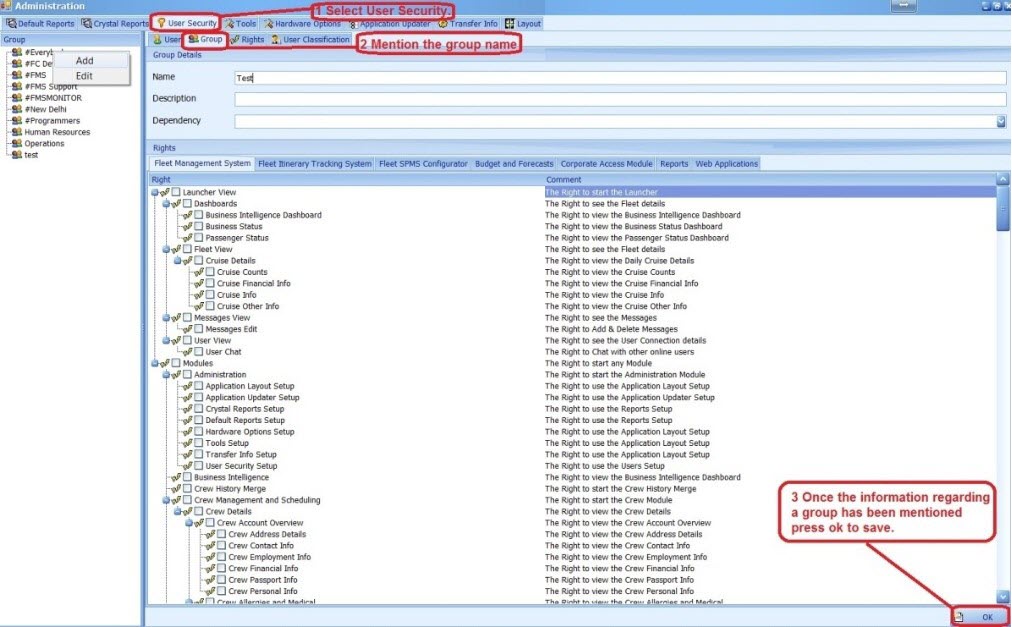
Figure 3-1 User Group
-
Select the Group tab under User Security, and then right-click on the left vertical pane
-
Select Add and enter the group name, description and dependency.
-
Select the checkboxes for the desired user rights, and then click OK. The Administrator can select various modules a user should have access in the new group as shown in below example
Adding a User
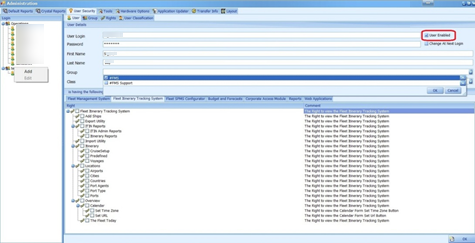
Figure 3-2 User Access
-
Select the User tab under User Security and then right-click on the group name in the left pane.
-
Select Add and enter the user login, password, first name and last name.
- Select the drop-down menu of the group section and click OK
Note:
You have the option to an enable/disable a user using the User Enabled check box shown in the above figure
Audit Trail / Application Activity Log
Figure 3-3 Activity Log window
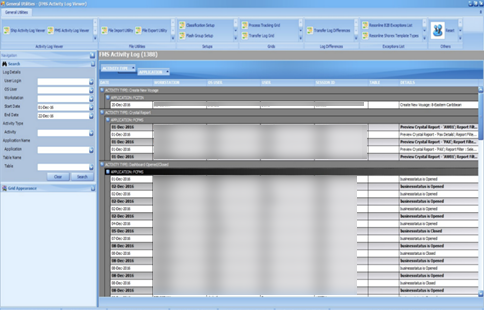
Fleet Management logs the important activities performed in the applications. The search panel lets you select different criteria like user, operating system user, workstation, date range, activity type, application, and table. The main grid shows the activity and the required details.
Fleet Management Encryption Manager
Fleet Management Encryption Manager is a tool that encrypts and stores sensitive information in which the customer can choose the type of sensitive data to encrypt and store. The Encryption Manager uses Microsoft-managed Rijndael encryption algorithm to encrypt the data. It is Symmetric Encryption using a single encryption key for both encryption and decryption. The encryption keys are stored securely in the FidelioBK DB user, and you need to connect to the FidelioBK user on startup to obtain the encryption keys.
Fleet Management customers are instructed not to transfer and store any credit card data. If customers choose to do so, this is then categorized under the Payment Application Data Security Standard (PA-DSS) scope and customers need to get themselves certified on their own.
Encryption
Figure 3-4 Encryption Tab
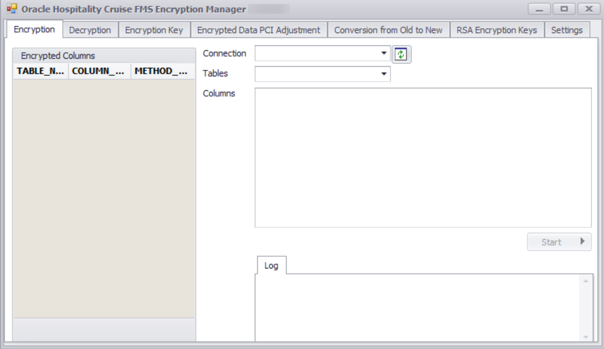
To encrypt the selected tables/columns, go to the Encryption tab. The Encryption tab shows a list of tables/columns encrypted on the left, and the options to select a Connection, Tables and Columns on the right.
Decryption
Figure 3-5 Decryption Tab
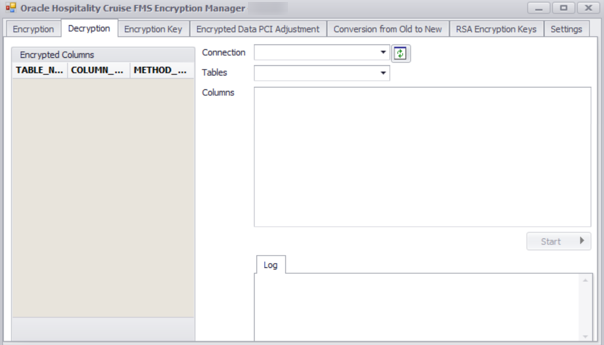
To decrypt any encrypted tables/columns, go to the Decryption tab as shown below. The Encryption tab shows a list of tables/columns encrypted on the left, options to select Connection, Tables and Columns to decrypt.
Encryption Key
Figure 3-6 Encryption Key Tab
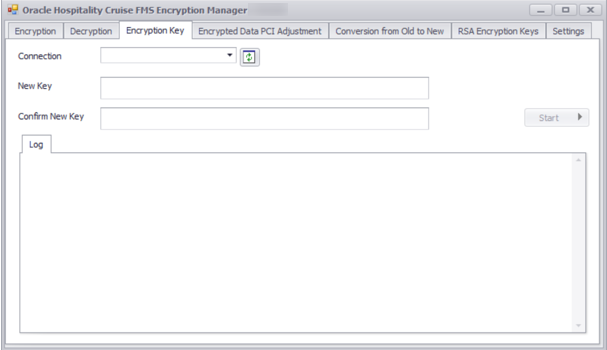
Fleet Management Encryption Manager also rotates the data encryption key using the Encryption Manager. To rotate with a new key, go to the Encryption Key tab as shown below. The Encryption Key Tab shows options to select Connection, enter New Key and click Start.
Encryption Manager is a batch tool that reads a batch at a time and encrypts/decrypts the data. A log is generated in both encryption/decryptions to indicate the progress. We can also configure it to generate a debug log, which has more detailed and is helpful in troubleshooting.