4 Manage Item Lists
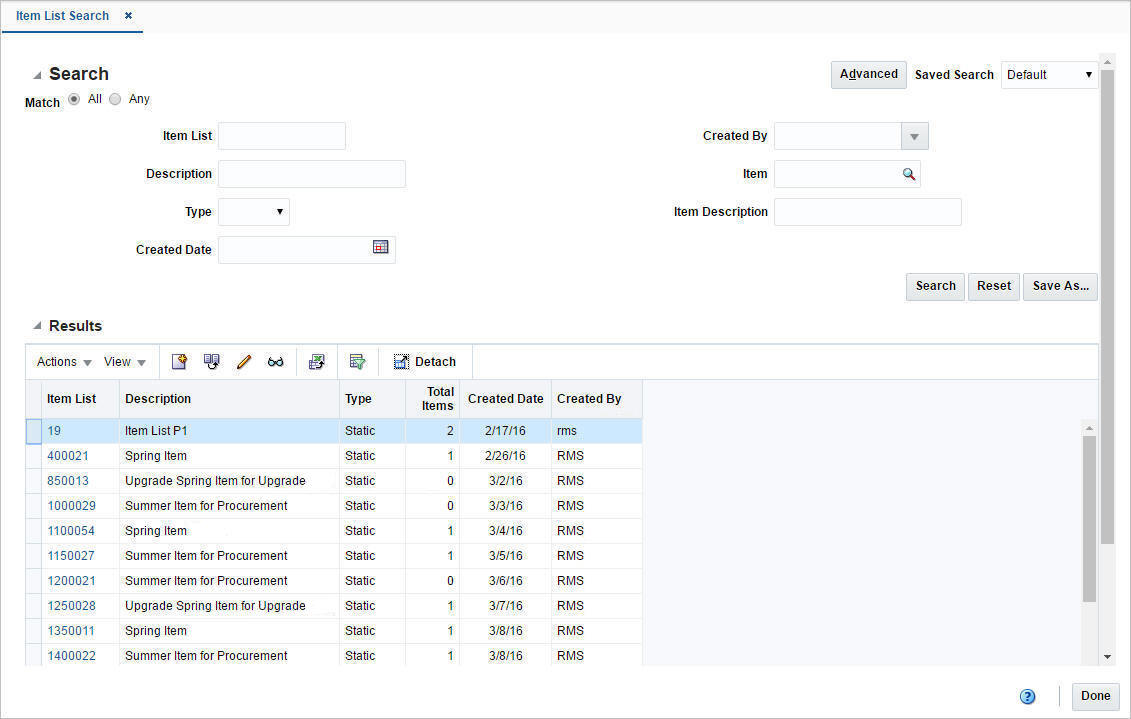
The Manage Item Lists option opens the Item List Search page. In the Item List Search page you can perform the following actions.
-
Search for an item list by various search criteria
-
View the entered search results
-
View an item list
-
Create an item list
-
Create an item list from an already existing item list
-
Edit an item list
You can access the Item List Search page from the Task menu, select Foundation Data > Items > Manage Item Lists. The Item List Search page appears.
The Item List Search page contains the following sections.
-
Search
For more information about how to search for an item list, see the Searching for an Item List section.
Searching for an Item List
To search for an item list:
-
From the Task menu, select Foundation Data > Item > Manage Item Lists. The Item List Search page appears.
-
You can search for an item list by using basic or advanced search criteria, depending on the requirement. The basic mode is the default search mode.
-
Click Advanced to access the search section in advanced mode.
-
Click Basic to return to the basic mode.
-
Searching for an Item List Through the Basic Search Criteria
To search for an item list by using basic search criteria:
-
Enter, select or search for one or all of the following basic search criteria.
Table 4-1 Item List Search - Basic Search Criteria and Description
Fields Description Match option
Check radio button All or Any.
All - only item lists matching all entered search criteria are shown.
Any - item lists matching any of the entered search criteria are shown.
Item List
Enter the item list ID.
Description
Enter the item description.
Type
Select a type from the list.
Created Date
Enter a created date or use the Calendar icon to select a date.
Created By
Select the desired user from the list.
Item
Enter or search for an item.
Item Description
Enter the item description.
-
Click the Saved Search list to select one of the saved search criteria. Selecting a saved search populates the search section with the saved search criteria. If the run automatically function is enabled for the search, the search is executed immediately.
You can also personalize your saved searches by selecting Personalize. The Personalized Saved Searches page appears.
For more information about the Personalized Saved Search, see Personalize Saved Search in the Oracle® Retail Merchandising Do the Basics User Guide.
-
Click Search. The item lists that match the search criteria are displayed in the Results section.
-
Click Reset to clear the search section and results.
-
Click Save As... to save the current search criteria. The Create Saved Search page appears.
For more information about how to save your search criteria, see Create Saved Search in the Oracle® Retail Merchandising Do the Basics User Guide.
-
Click Done to close the page.
Searching for an Item List Through Advanced Search Criteria
To search for an item list by using advanced search criteria:
-
To search by using advanced search criteria, enter or select one or all of the advanced search criteria.
Table 4-2 Item List Search - Advanced Search Criteria and Description
Fields Description Item List
Enter the item list ID.
Description
Enter the item description.
Type
Select a type from the list.
Created Date
Enter a created date or use the Calendar icon to select a date.
Created By
Select the desired user from the list.
Item
Enter or search for an item.
Item Description
Enter the item description.
Division
Enter, select or search for the division.
Group
Enter, select or search for the group.
Department
Enter, select or search for the department.
Class
Enter, select or search for the class.
Subclass
Enter select or search for the subclass.
-
To narrow down the search, use the list next to the search fields. For example, determine, if the entered value should be equal or not equal to the search result.
-
Click the Saved Search list to select one of the saved search criteria. Selecting a saved search populates the search section with the saved search criteria. If the run automatically function is enabled for the search, the search is executed immediately.
You can also personalize your saved searches by selecting Personalize. The Personalized Saved Searches page appears.
For more information about the Personalized Saved Search, see Personalize Saved Search in the Oracle® Retail Merchandising Do the Basics User Guide.
-
Click Search. The item lists that match the search criteria are displayed in the Results section.
-
Click Reset to clear the search section and results.
-
Click Save As... to save the current search criteria. The Create Saved Search page appears.
For more information about how to save your search criteria, see Create Saved Search in the Oracle® Retail Merchandising Do the Basics User Guide.
-
Click Add Fields to add more fields for the advanced search. To remove the field from the search, click the x right next to the field.
-
Click Reorder to change the order of the available search fields. The Reorder Search Fields page appears.
-
Select the desired search field and use the up and down arrows to rearrange the order of the fields.
-
Click OK to confirm the new order of the fields and close the page.
-
Click Cancel to reject any changes and close the page.
-
-
Click Done to close the page.
Results
The Results section lists the retrieved item lists. The Results table shows the following columns by default.
-
Item List ID
-
Description
-
Type
-
Total Items
-
Created Date
-
Created By
Create an Item List
The Create Item List option opens the Item List page. In the Item List page you can create, edit, and view basic information about an item list.
You can indicate whether the item list is static or dynamic. The ID of the user who created the item list and the date on which it was created are displayed in this page. The number of items that make up the item list are also displayed. You can use this page for mass change or mass creation.
The Item List page contains the following sections.
-
Note:
This section is only available, if the Data Level Security is enabled.
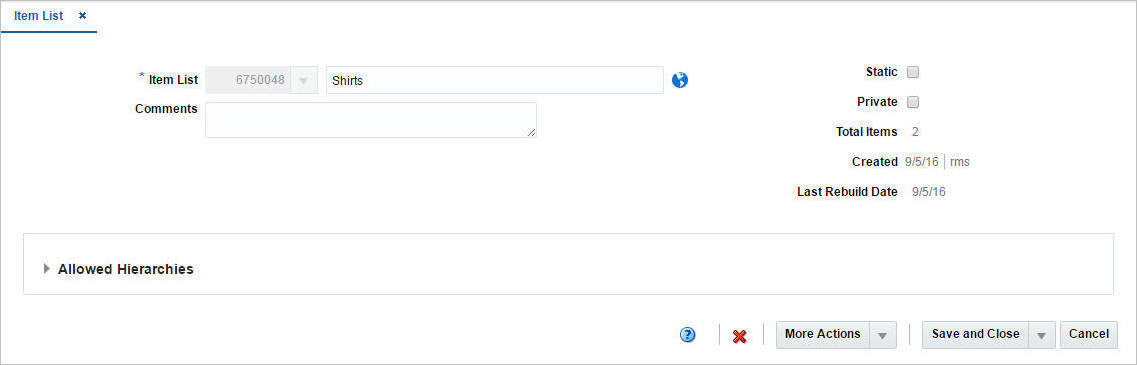
Item List Header
The Item List header contains the following fields.
Table 4-3 Item List Header - Fields and Description
| Fields | Description |
|---|---|
|
Item List |
The Item List field displays the generated item list ID. Enter the item list description in the field next to the item list ID. |
|
Comments |
Enter comments for the item list, if necessary. |
|
Static checkbox |
Select the Static checkbox to indicate that the item list cannot be rebuilt. |
|
Private checkbox |
Select the checkbox to indicate that the user level security for an item list is enabled. Only the user who created the item list can select the list for transactions. |
|
Created |
Displays the user who created the list as well as the date the list was created. |
|
Last Rebuild Date |
Displays the date of the last rebuild of the item list. |
Allowed Hierarchies
The Allowed Hierarchies section displays organizational and merchandising hierarchies from which the items can be part of the item list. This section is only available, if the Data Level Security is enabled.
The table displays the following columns by default.
-
Department ID and name
-
Class ID and name
-
Subclass ID and name
Creating Item Lists
To create an item list, follow the steps below.
-
From the Task menu, select Foundation Data > Items > Create Item List. The Item List page appears.
-
The Item List field displays the generated list ID. Enter the description for the item list in the field next to the item list ID.
-
In the Comments field, enter comments for the list, if necessary.
-
Select the Static checkbox, as necessary.
Note:
If you create a static item list, you cannot rebuild the list on demand. -
Select the Private checkbox to indicate whether the user level security for an item list is enabled or disabled.
If the user level security is enabled, only the person who created the item list can select the list for transactions.
-
The Total Items field, lists the total number of items on the item list.
-
If the Allowed Hierarchy section is enabled. Add a merchandise hierarchy to the item list, for which the list is available.
Note:
This section is only available, if the Data Level Security is enabled. -
In the Area field, enter, select or search for the organizational value for which you have access.
-
Then select Actions > Add, or use the Add icon. The Allowed Merchandise Hierarchy page appears.
-
In the Group Type field, select a group type from the list.
-
In the Department field, enter, select or search for a department.
-
In the Class field, enter, select or search for a class.
-
In the Subclass field, enter, select or search for a subclass.
-
Then choose one of the following options.
-
Click OK to save the hierarchy and close the page.
-
Click OK and Add Another to add additional merchandise hierarchies.
-
Click Cancel to reject all entries and close the page.
-
-
-
Then add items to the list. Select More Actions > Items. The Item List Items page appears.
For more information about how to add items to an item list, see the Adding Items to Item Lists, step 6.
-
Add item criteria to the list, if necessary. Select More Actions > Criteria. The Item List Criteria page appears.
For more information about how to add item list criteria, see the Adding Item List Criteria section, step 6.
-
Then choose one of the following options.
-
Click Save and Close to save your entries and close the Item List page.
-
Click Save and Create Another to create additional item lists.
-
Click Cancel to reject all entries and close the Item List page.
-
Item List Criteria Page
The Item List Criteria page allows you to add, delete and view the criteria by which items are grouped on an item list.
The Item List Criteria page contains the following sections.
-
Item List Criteria Header
The Item List Criteria header displays the item list ID and description.
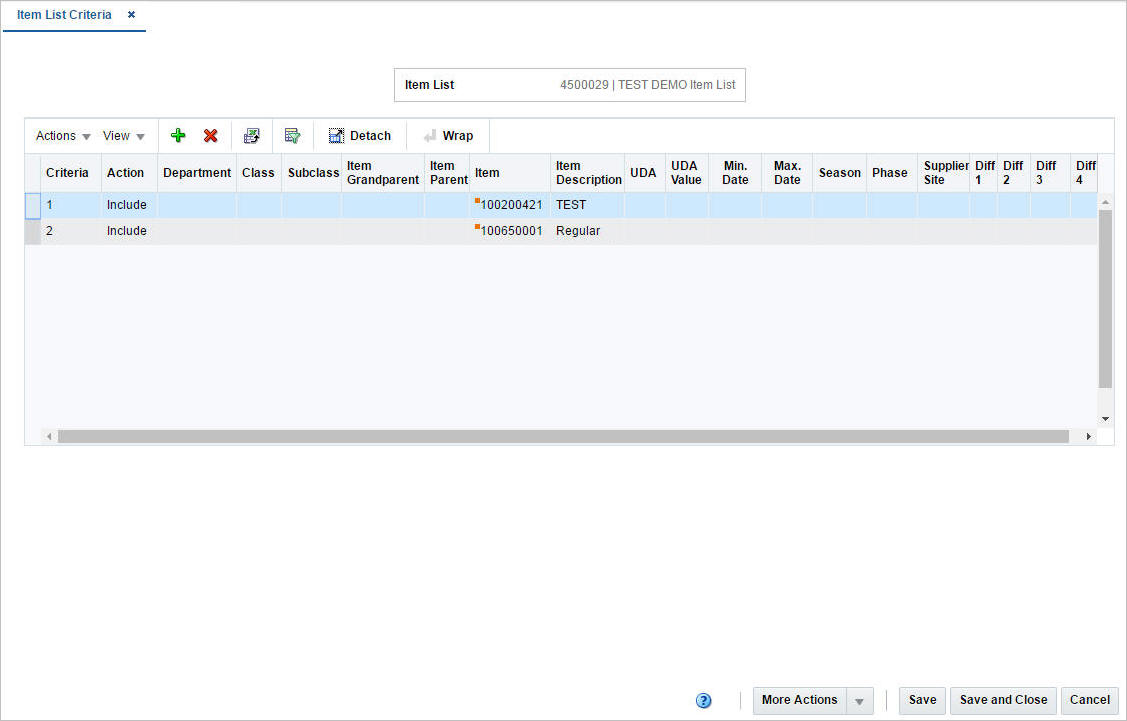
Item List Criteria Table
The Item List Criteria table displays the already defined criteria.
Adding Item List Criteria
To add criteria to an item list, follow the steps below.
-
From the Tasks menu, select Foundation Data > Items > Manage Item Lists. The Item List Search page appears.
-
Enter or select search criteria as desired to make the search more restrictive.
-
Click Search. The item lists that match the search criteria are displayed in the Results section.
-
In the Item List column, click the item list ID link, or mark a record and select Actions > Edit, or use the Edit icon. The Item List page appears.
-
Select More Actions > Criteria. The Item List Criteria page appears.
-
Select Actions > Add, or use the Add icon. The Add Criteria page appears.
-
Select Include/Exclude to indicate that items meeting the criteria should be included/excluded from the item list.
-
In the Merchandise Type field, select the merchandise type from the list.
-
In the Department, Class and Subclass field, enter, select or search for the corresponding IDs.
-
In the Season field, enter, select or search for the season. The Phase field enables.
-
In the Phase field, enter, select or search for the phase.
-
In the UDA (User-defined Attributes) field, enter, select or search for the attribute.
-
In the Supplier Site field, enter, select or search for the supplier site.
-
In the Purchase Type field, select purchase type from the list.
-
In the Diff 1-4 fields, enter, select or search for the desired differentiators.
-
Use the Calculate Item List Count icon to calculate the total of items matching the selected criteria and how many items are already part of the current item list.
-
Then choose one of the following options.
-
Click OK to include/exclude the items with the selected criteria to/from the item list and close the page.
-
Click OK and Add Another to include/exclude additional criteria.
-
Click Cancel to reject all entries and close the page.
-
-

Item List Items Page
The Item List Items page allows you to maintain and view the item details for an item list. You can add or remove items individually to/from an item list. Item lists may contain any type of items. However, you cannot add items below transaction level to the item list.
The Item List Items page contains the following sections.
-
Item List Items Header
The Item List Items header displays the item list ID and description.
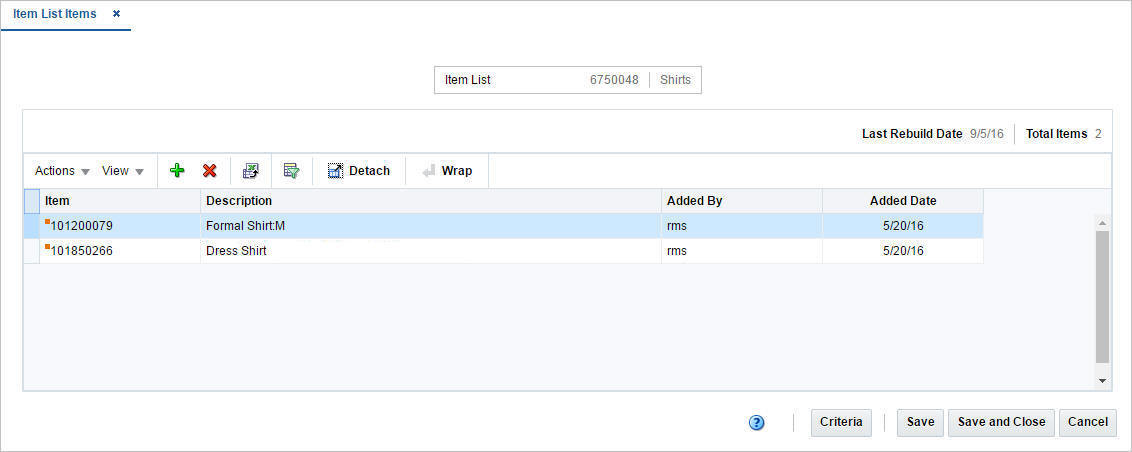
Item List Items Table
The table displays the items of the selected item list.
Adding Items to Item Lists
To add an item to an item list, follow the steps below.
-
From the Tasks menu, select Foundation Data > Items > Manage Item Lists. The Item Search List page appears.
-
Enter or select search criteria as desired to make the search more restrictive.
-
Click Search. The item lists that match the search criteria are displayed in the Results section.
-
In the Item List column, click the item list ID link, or mark a record and select Actions > Edit, or use the Edit icon. The Item List page appears.
-
In the table, select More Actions > Items. The Item List Items page appears.
-
Select Actions > Add, or use the Add icon. The Add Items page appears.
-
From the Add Items page, you can add items by item, by parent item, or by uploading a data file containing the list of items.
-
Parent Item – enter, select or search for the desired parent item.
-
Item – enter, select or search for the desired item.
-
Upload List – use the browse button to select and upload a previously created data file that contains the items you want to include.
Note:
The upload list must be created and saved as a .csv file.
-
-
Then choose one of the following options.
-
Click OK to add the item to the list and close the page.
-
Click OK and Add Another to add additional items to the list.
-
Click Cancel to reject all entries and close the page.
-
Rebuild Item Lists
To rebuild a location list, follow the steps below.
-
From the Tasks menu, select Foundation Data > Items > Manage Item Lists. The Item List Search page appears.
-
Enter or select search criteria as desired to make the search more restrictive.
-
Click Search. The item lists that match the search criteria are displayed in the Results section.
-
In the Item List column, click the item list ID link, or mark a record and select Actions > Edit, or use the Edit icon. The Item List page appears.
-
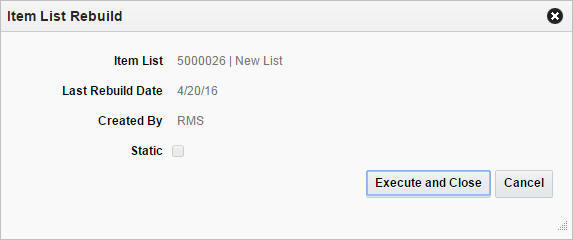
Select More Actions > Rebuild. The Item List Rebuild page appears. The item list details are displayed.
-
Then choose one of the following options.
-
Click Execute and Close to rebuild the selected item list and close the page.
-
Click Cancel to reject all entries and close the page.
-
Use Item Lists
Update VAT Rates
The Change VAT Rates page allows you to edit a VAT code for multiple items by item list.
-
From the Tasks menu, select Foundation Data > Items > Manage Item Lists. The Item List Search page appears.
-
Enter or select search criteria as desired to make the search more restrictive.
-
Click Search. The item lists that match the search criteria are displayed in the Results section.
-
Select a record in the table.
-
Then select Actions > Mass Change > VAT Rates. The Change VAT Rates page appears.
-
Enter the necessary data.
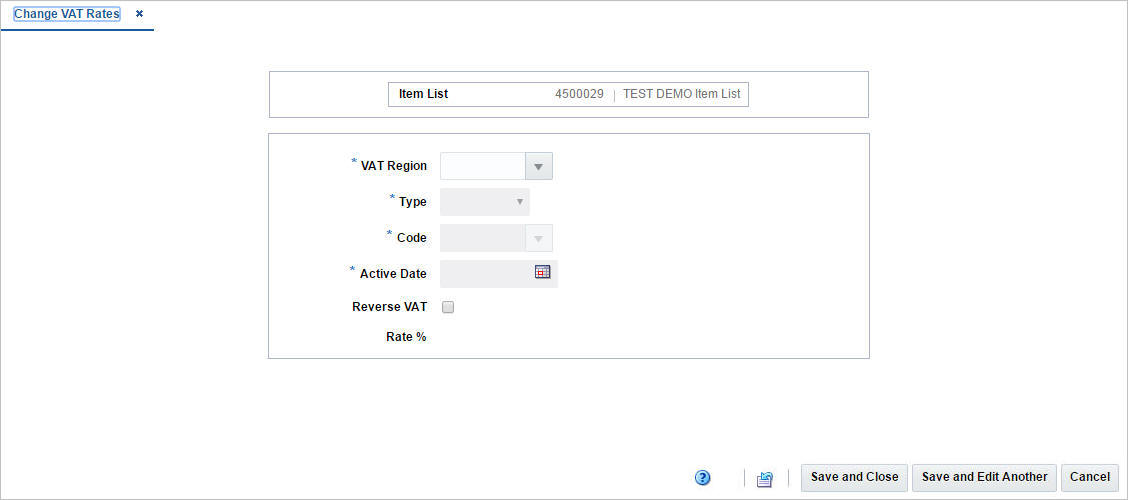
The page contains the following fields.
Table 4-4 Change VAT Rates - Fields and Description
| Fields | Description |
|---|---|
|
VAT Region |
Enter, select or search for a VAT region ID. This field is a required field. |
|
Type |
Select the desired type from the list. This field is a required field. |
|
Code |
Enter, select or search for the desired VAT code. This field is a required field. |
|
Active Date |
Enter an active date on which the VAT code becomes effective or use the Calendar icon to select a date. This field is a required field. |
|
Reverse VAT checkbox |
Select the checkbox, if the reverse charge VAT is applicable for the item. |
|
Rate % |
Displays the VAT in percentage. |
Update User Defined Attributes
The Change UDAs page allows you to mass update the user defined attributes for all items in an item list.
The Change UDAs page contains the following sections.
-
Header
The header contains the item list ID and description.
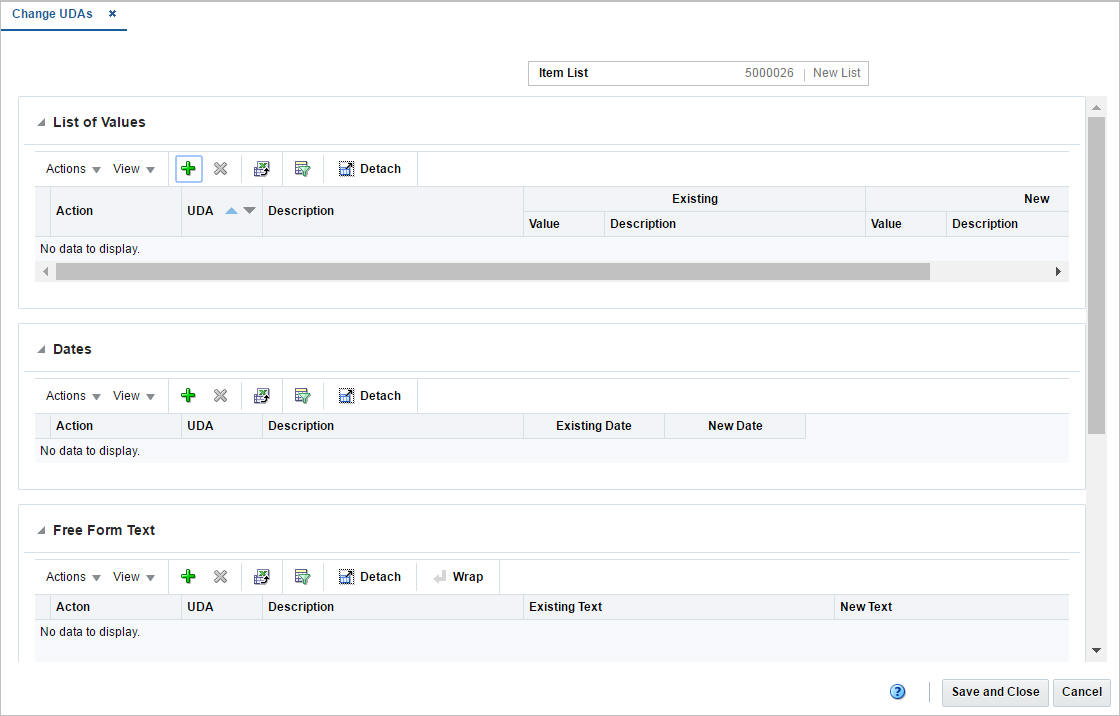
List of Values
This section displays the user defined values for the item list.
Dates
This section contains the user defined dates for the item list.
Free Form Text
The Free Form Text section displays the user defined text for the item list.
Adding User Defined Values
To add, change, or delete UDAs, follow the steps below
-
From the Tasks menu, select Foundation Data > Items > Manage Item Lists. The Item List Search page appears.
-
Enter or select search criteria as desired to make the search more restrictive.
-
Click Search. The item lists that match the search criteria are displayed in the Results section.
-
Select a record in the table.
-
Then select Actions > Mass Change > User Defined Attributes. The Change UDAs page appears.
-
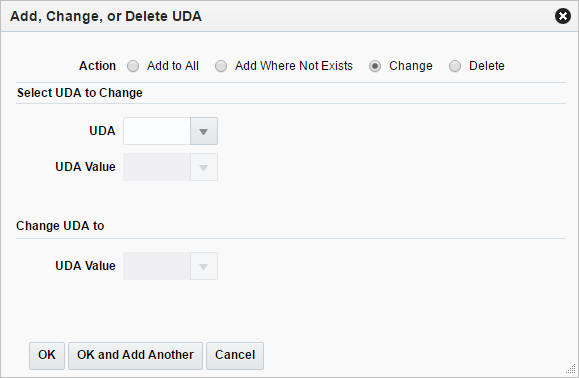
In the List of Values section select Actions > Add, or use the Add icon. The Add, Change, or Delete UDA page appears.
-
Select one of the following actions
-
Add All
Adds the attribute to all items of the selected item list.
-
Add Where Not Exists
Adds the attribute only to items where the attribute does not yet exist.
-
Change
Changes the attribute for the items on the item list.
-
Delete
Deletes the attribute from all items on the item list.
-
-
In the UDA field, enter, select or search for the desired attribute.
-
In the UDA Value field, enter, select or search for the value.
-
Then choose one of the following options.
-
Click OK to update the attribute in the item list.
-
Click OK and Add Another to update the attribute and add additional ones.
-
Click Cancel to reject all entries and close the page.
-
-
Adding Dates for User Defined Attributes
To add, change or delete dates for user defined attributes, follow the steps below.
-
In the Dates section, select Actions > Add, or use the Add icon. The Add, Change, or Delete page appears.
-
Select one of the following actions
-
Add All
Adds the date to all attributes.
-
Add Where Not Exists
Adds the date only to attributes where no date yet exists.
-
Change
Changes the dates for the selected attribute.
-
Delete
Deletes the date from the selected attribute.
-
-
In the UDA field, enter, select or search for the desired attribute.
-
In the Date field, enter the desired date or use the Calendar icon to select a date.
-
Then choose one of the following options.
-
Click OK to update the date in the item list.
-
Click OK and Add Another to update the date and add additional ones.
-
Click Cancel to reject all entries and close the page.
-
-
Adding Text for User Defined Attributes
To add, change, or delete text for user defined attributes, follow the steps below.
-
In the Free Form Text section, select Actions > Add, or use the Add icon. The Add, Change, or Delete page appears.
-
Select one of the following actions
-
Add All
Adds the text to all items on the item list.
-
Add Where Not Exists
Adds the text only to items on the item list where no text yet exists.
-
Change
Changes the text for the items on the selected item list.
-
Delete
Deletes the text from all items of the selected item list.
-
-
In the UDA field, enter, select or search for the desired attribute.
-
In the Text field, enter the desired text.
-
Then choose one of the following options.
-
Click OK to update the text for the items of the list.
-
Click OK and Add Another to update the text and add additional ones.
-
Click Cancel to reject all entries and close the page.
-
-
Changing Seasons
The Change Seasons page allows you to change the seasons and phases for all items in an item list. You can add, change, or delete existing seasons and phases.
The Change Season page contains the following sections.
-
Header
The header displays the item list ID and description.
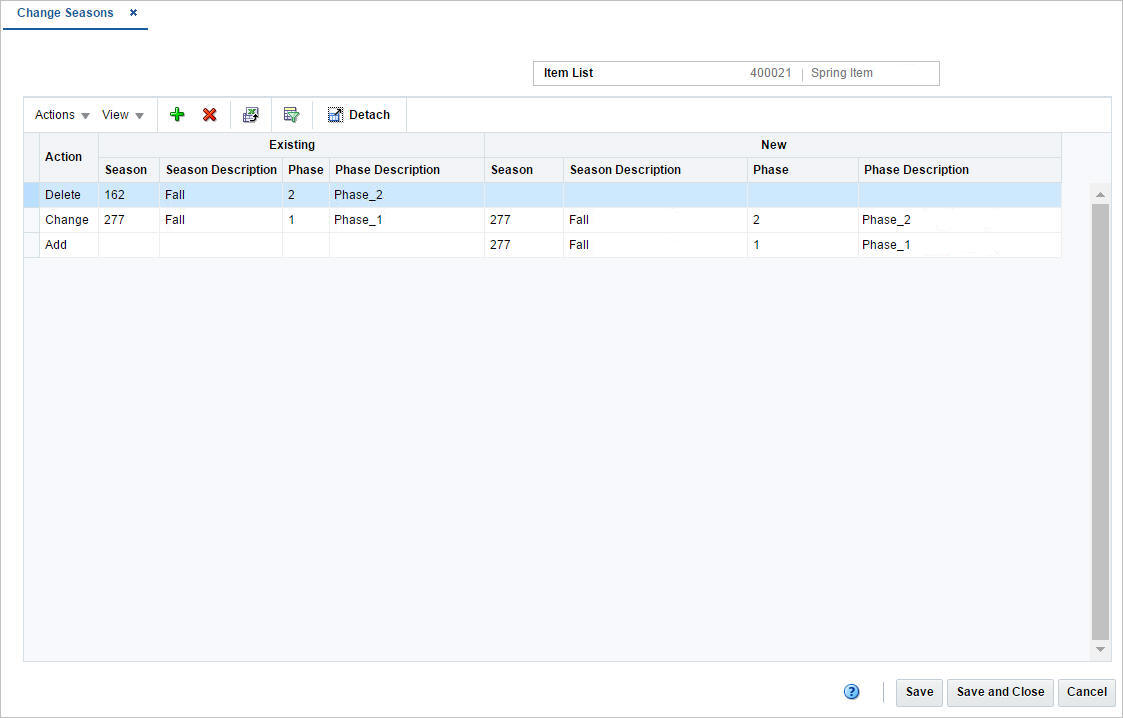
Change Seasons Table
The table displays the actions to be performed, the existing seasons and phases to be changed or deleted as well as the new seasons and phases to be added for all items on the item list.
Maintaining Seasons and Phases
To maintain seasons and phases for an item list, follow the steps below.
-
From the Tasks menu, select Foundation Data > Items > Manage Item Lists. The Item Search page appears.
-
Enter or select search criteria as desired to make the search more restrictive.
-
Click Search. The item lists that match the search criteria are displayed in the Results section.
-
Select a record in the table.
-
Then select Actions > Mass Change > Seasons/Phases. The Change Seasons page appears.
Adding Seasons and Phases
To add a season and phase, follow the steps listed below.
-
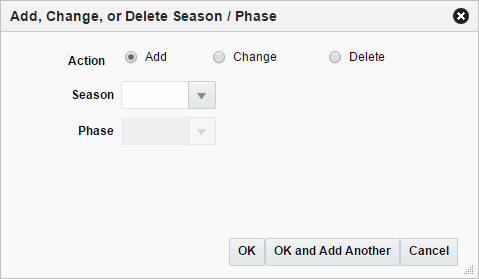
Select Actions > Add or use the Add icon. The Add, Change, or Delete Season/Phase page appears.
-
Select Add.
-
In the Season field, enter, select or search for the season you want to add.
-
In the Phase field, enter, select or search for the phase you want to add.
-
Then choose one of the following options.
-
Click OK to save the changes and close the page.
-
Click OK and Add Another to maintain additional entries.
-
Click Cancel to reject all entries and close the page.
-
Changing Seasons and Phases
To change a season/phase, follow the steps below.
-
Select Actions > Add or use the Add icon. The Add, Change, or Delete Season/Phase page appears.
-
Select Change.
-
Select a Season/Phase you want to change.
-
In the Season field, enter, select or search for the season you want to change.
-
In the Phase field, enter, select or search for the phase.
-
-
Then select a new season/phase.
-
In the Season field, enter, select or search for the season you want to change.
-
In the Phase field, enter, select or search for the phase.
-
-
Then choose one of the following options.
-
Click OK to save the changes and close the page.
-
Click OK and Add Another to maintain additional entries.
-
Click Cancel to reject all entries and close the page.
-
Deleting Seasons and Phases
To delete a season and phase, follow the steps listed below.
-
Select Actions > Add or use the Add icon. The Add, Change, or Delete Season/Phase page appears.
-
Select Delete.
-
In the Season field, enter, select or search for the season you want to delete.
-
In the Phase field, enter, select or search for the phase you want to delete.
-
Then choose one of the following options.
-
Click OK to save the changes and close the page.
-
Click OK and Add Another to maintain additional entries.
-
Click Cancel to reject all entries and close the page.
-
Scheduled Item Maintenance
The Scheduled Item Maintenance page is used to view or edit lists of item list/location list links. After linking an item list with a location list, you may specify a date to use the item/location list as part of a scheduled item maintenance update.
Item lists are set up by selecting items either individually or by a group characteristic.At any time you may add items to or delete items from an item list. Item lists may also be linked with Location Lists using the Scheduled Item Maintenance page.
You can add items to a list one by one, or you can enter criteria in order to group the items. It becomes much simpler to apply changes to multiple items when the items are grouped on an item list.
The item list feature allows you to create, copy, edit, view, and use a group of items that are identified by one ID.
Creating a Schedule
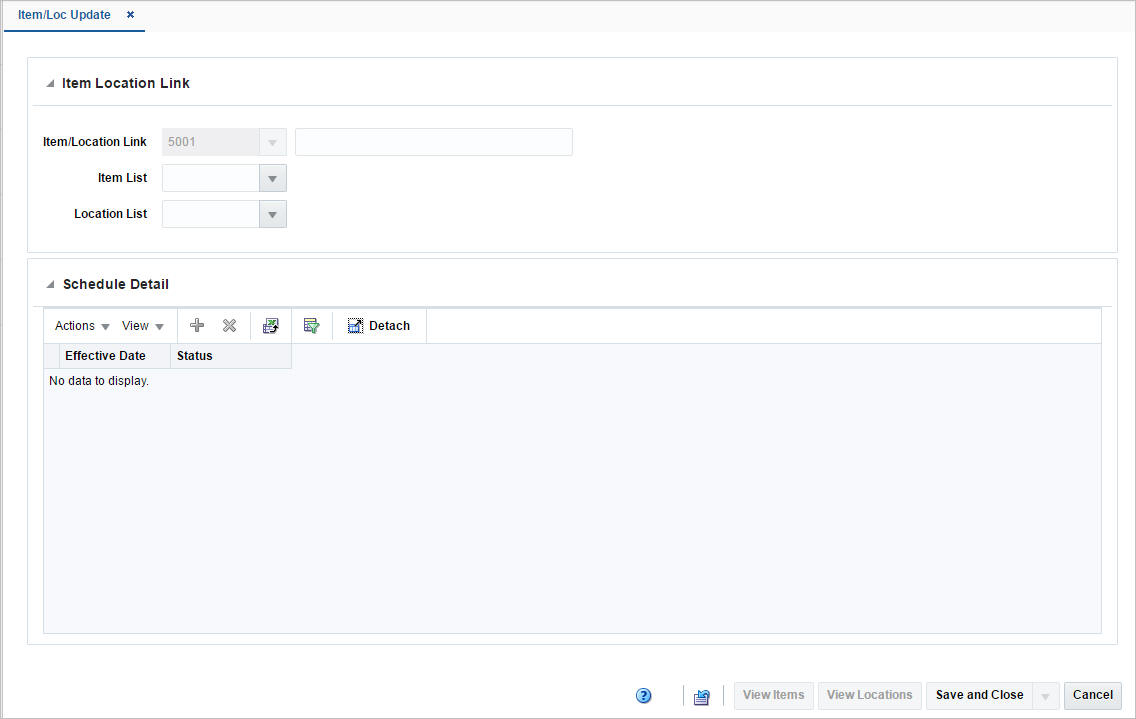
The Item/Loc Update page allows you to maintain and view lists of item list/location list links. After linking an item list with a location list, a date to use the item/location list as part of a scheduled item maintenance update should be specified.
To add an item/loc list link:
-
From the Tasks menu, select Items > Scheduled Item Maintenance > Create Scheduled Item Update. The Item/Loc Update page appears.
-
In the Item Location Link section, enter the following:
-
In the Item/Location Link ID field, enter a name for the link you are creating. The ID number will be created by Merchandising.
-
In the Item List field, enter, select or search for an item list.
-
In the Location List field, enter, select or search for a location list.
Note:
You will only be able to add item and location lists that do not have user security, or are created by you. -
Adding Schedule Detail
To add schedule detail:
-
From the Tasks menu, select Items > Scheduled Item Maintenance > Create Scheduled Item Update. The Item/Loc Update page appears.
-
In the Item/Loc Update page, go to Schedule Detail section.
-
From the Actions menu, select Add or click the Add icon
 . The Schedule Detail page appears.
 -
In the Effective Date field, enter the date for this link to become effective in Merchandising or use the Calendar icon to select a date.
-
In the Status field, select the status that will be applied to this link on the effective date.
-
Then choose one of the following options.
-
Click OK to add the schedule detail to the table and close the page.
-
Click OK and Add Another to add additional effective dates.
-
Click Cancel to reject all entries and close the page.
-
Manage Item/Loc Update Page
To maintain an item/loc list link:
-
From the Tasks menu, select Items > Scheduled Item Maintenance > Manage Scheduled Item Updates. The Item/Loc Update page appears.
-
In the Item Location Link section, enter the following details:
-
In the Item/Location Link ID field, enter a name for the link you are creating. The ID number will be created by Merchandising.
If you enter the item/location link, the item list, the location list and scheduled details default to the values of the item/location link.
-
In the Item List field, enter an item list ID, select or search for an ID.
-
In the Location List field, enter a location list ID, select or search for an ID.
Note:
You will only be able to add item and location lists that do not have user security, or created by you. -
-
In the Schedule Detail section the effective dates and statuses are displayed.
For more information about the Item/Loc Update page, see the Scheduled Item Maintenance section.