7 Notifications
Notifications bring events within the application to your attention.
See the following examples:
-
A simple, informative message indicating a long-running process has completed
-
A message indicating a critical exception has occurred
-
The store create request failed
Notification Badge
The Notification Badge displays the number of unread notifications for the user in the sidebar menu. The Notification Badge displays '99+', when there are more than 99 notifications.
The notification count is periodically refreshed at regular intervals. This interval is determined by a system-configured value.
Notification Sidebar
When you click the Notification icon, the Notifications Sidebar is shown displaying the most recent set of unread notifications (depending on the filter set).
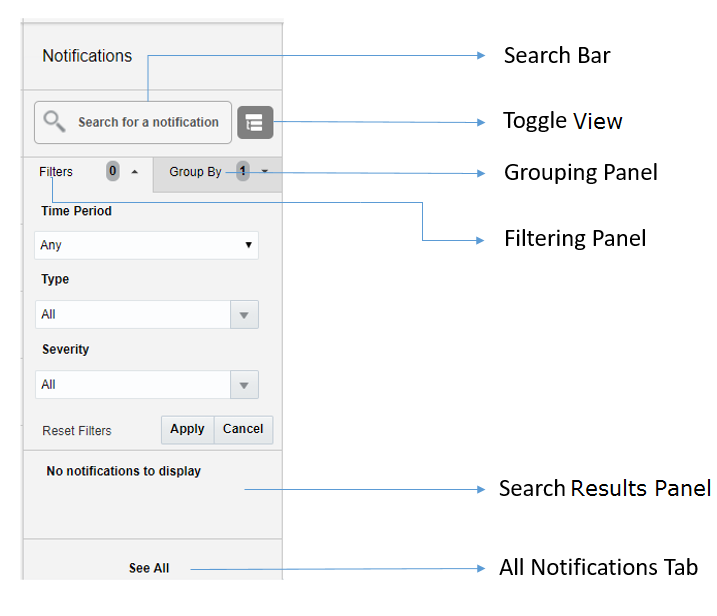
Each component of the Notifications Sidebar is discussed in detail in the following sections:
Search Bar
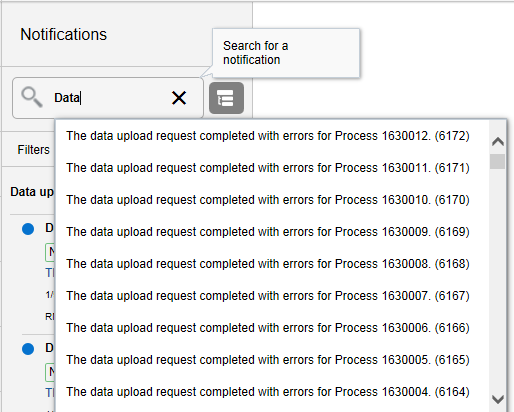
A search bar at the top of the panel allows for searching through notifications. The search bar has auto-suggest enabled, so it displays notifications as the user types.
Right next to the search bar is the 'List/Group' view toggle button. This causes the Notification results to be displayed either in a flat or grouped view.
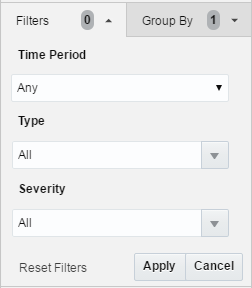
Filtering Panel
The Filtering Panel allows you to filter notifications based on Creation time, Severity and Type.
The values for the Time Periods and Severity components are pre-seeded constants. The Type drop-down lists all the notification types available in the system.
When you click the Apply button, notifications that match the criteria are shown in the Results Panel.
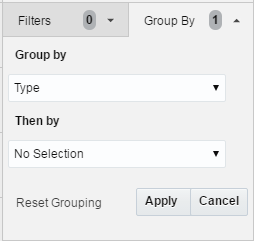
Grouping Panel
This panel allows you to group notifications based on different attributes.
The values of the 'Group by' and the 'Then by' components are pre-seeded.
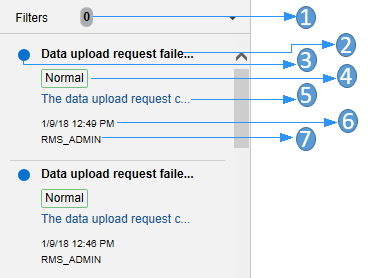
Results Panel - List View
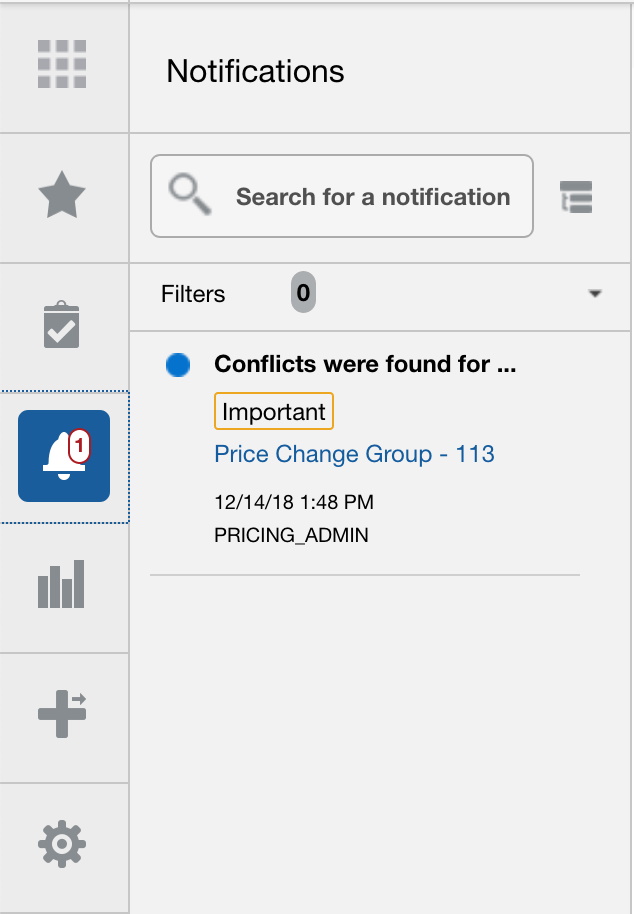
When no selection is made in the Grouping Panel, the Results Panel displays notifications in a list format.
The image below shows a simple search without any filtering or grouping.
-
Indicates that no filtering was done.
-
Notification Type - A description of the Type is displayed.
-
Read/Unread - A blue icon
 is shown next to the notification if it is unread.
 -
Notification Severity - A colored label indicating the severity of the notification is shown.
-
Description - The description associated with the notification. If the notification was designed to launch into a relevant flow, then this is displayed as a link. Otherwise, the description is rendered as plain text.
-
Creation Time - A timestamp that shows the date and time at which the notification was created.
-
User name - Creator of the notification.
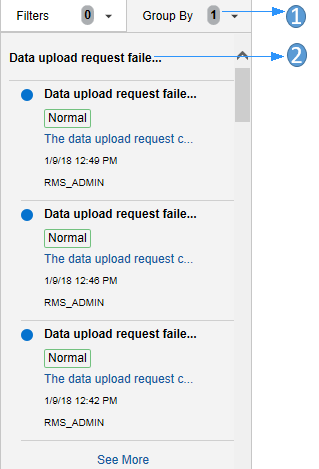
Results Panel - Grouped View
Notifications are displayed in a grouped format within the Results Panel, when the Group By drop-down in the Grouping Panel is selected.
Notifications are displayed in groups with three notifications shown for each group.
-
Indicates the Group-By drop-down is selected on the Grouping Panel.
-
The value of the Group-By attribute. In this example, the results were grouped by Notification Type. Hence the Notification Type is shown as the header of the group.
For each group, three notifications are shown followed by a 'See More' link. When you click this link, up to 25 notifications are displayed for that group.
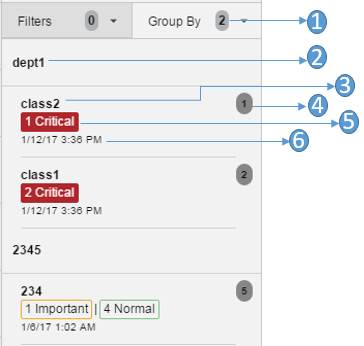
Results Panel - Summarized View
Notifications are summarized as shown in this example, when both the Group By and the Then By drop-downs in the Grouping Panel are selected.
The summary view displays various groups and within them subgroups based on the selections on the Grouping Panel. For each subgroup, a count of the notifications within that subgroup, grouped by severity is displayed.
The example below depicts a grouping by department, then by class.
-
Indicates that both options on the Grouping Panel have been selected.
-
First level of grouping is by Department. Here the first department shown is 'dept1'.
-
The subgroup within department 'dept1'. In this example, this is the Class name.
-
The number of notifications within that combination of Group and Subgroup.
-
A grouping by severity of all notifications within that combination of Group and Subgroup.
-
The timestamp of the most recent notification of that combination of Group and Subgroup.
All Notifications Tab
The All Notifications tab is shown when you click the 'See All' link at the bottom of the Notifications side panel.
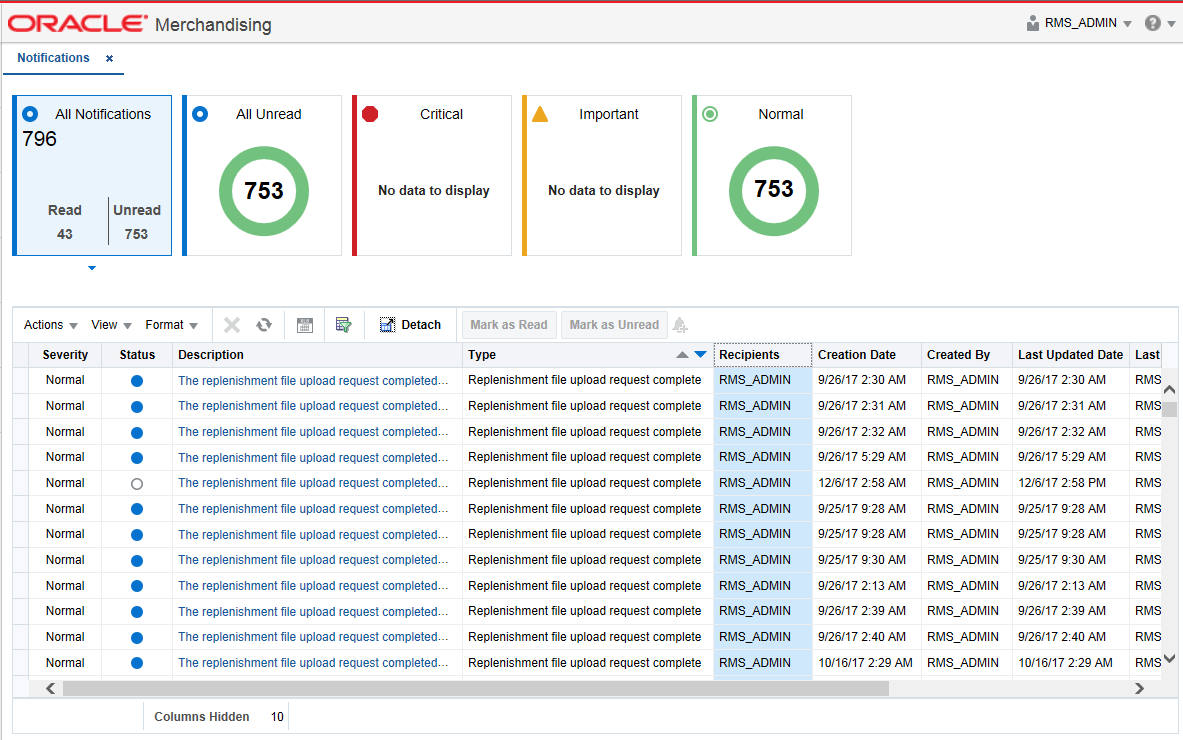
This tab lists all the Notifications for the logged-in user, regardless of whether they are in Read or Unread status. Information tiles display a break-up of the total notifications by severity. Clicking these tiles refreshes the table below to display only those notifications that are relevant to that tile.
You can perform the following operations from this tab.
-
Delete
 - The table allows for multiple selection and hence multiple notifications can be deleted at a time. Use the row header to select the row.
 -
Refresh
 - This refreshes the list of notifications in the table.
 -
Mark as Read - Multiple Unread Notifications can be marked as Read by clicking this button.
-
Mark as Unread - Multiple Read Notifications can be marked as Unread by clicking this button.
-
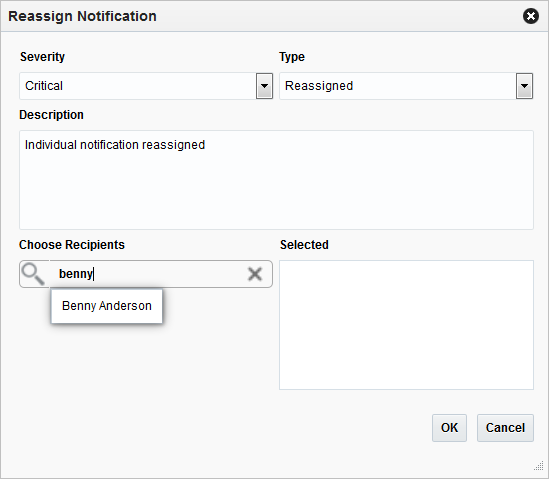
Reassign Notifications
 - Notifications can be reassigned to individual recipients or a group by clicking the Reassign Notifications icon. On selecting a row in the All Notifications table, and clicking the icon, the reassign notification popup is displayed. The Type is set to Reassigned by default, and the Severity and Description are pre-populated from the selected row; you can then change any of these values and assign the notification to one or more recipients.
The All Notifications table displays the following columns:
-
Notification Severity - A colored label indicating the Notification Severity.
-
Status - If the status is unread, an icon
is shown. Otherwise it is blank. -
Description - The description of the notification itself.
-
Type - The description of the Notification Type for the notification.
-
Recipients - In case of individual notifications, this column contains the user ID of the user to whom the notification is assigned. When the notification is assigned to multiple users, it displays the text 'Multiple' and enables a context popup which lists all the recipients. This field is empty when the notification is assigned to a group associated with a type.
-
Creation Date - Timestamp showing the date and time of creation.
-
Created By - User ID of the user who created the notification.
-
Last Updated Date - Timestamp showing the date and time when the last update was made.
-
Last Updated By - User ID of the user who last updated the notification.
-
Application ID - Unique identifier that identifies the application. Not visible by default.
-
Department - The Department associated with the notification. Not visible by default.
-
Class - The Class associated with the notification. Not visible by default.
-
Subclass - The Subclass associated with the notification. Not visible by default.
-
Location - The Location associated with the notification. Not visible by default.
-
Supplier - The Supplier associated with the notification. Not visible by default.
-
Performance - The Performance value associated with the notification. Not visible by default.
-
Brand - The Brand associated with the notification. Not visible by default.
-
Rollup Count - The Rollup Count associated with the notification. Not visible by default.
-
Additional Information - Refers to the Additional Information attribute associated with the notification. Not visible by default.
