4 Upload/Download from Spreadsheet
There is one method for uploading Price Changes into the Pricing system:
Upload from a Spreadsheet
The Upload Price Changes window provides the ability to upload price changes via spreadsheet. In this process, the user uploads price change events using a spreadsheet (.ods file). The template for the spreadsheet should be configured using the Template Configuration screen in RMS. A standard template is available to the user for uploading price change events. The template that is explained in this document is the standard template that is available in Cloud Pricing.
Perform the following procedure to upload price changes via spreadsheet:
-
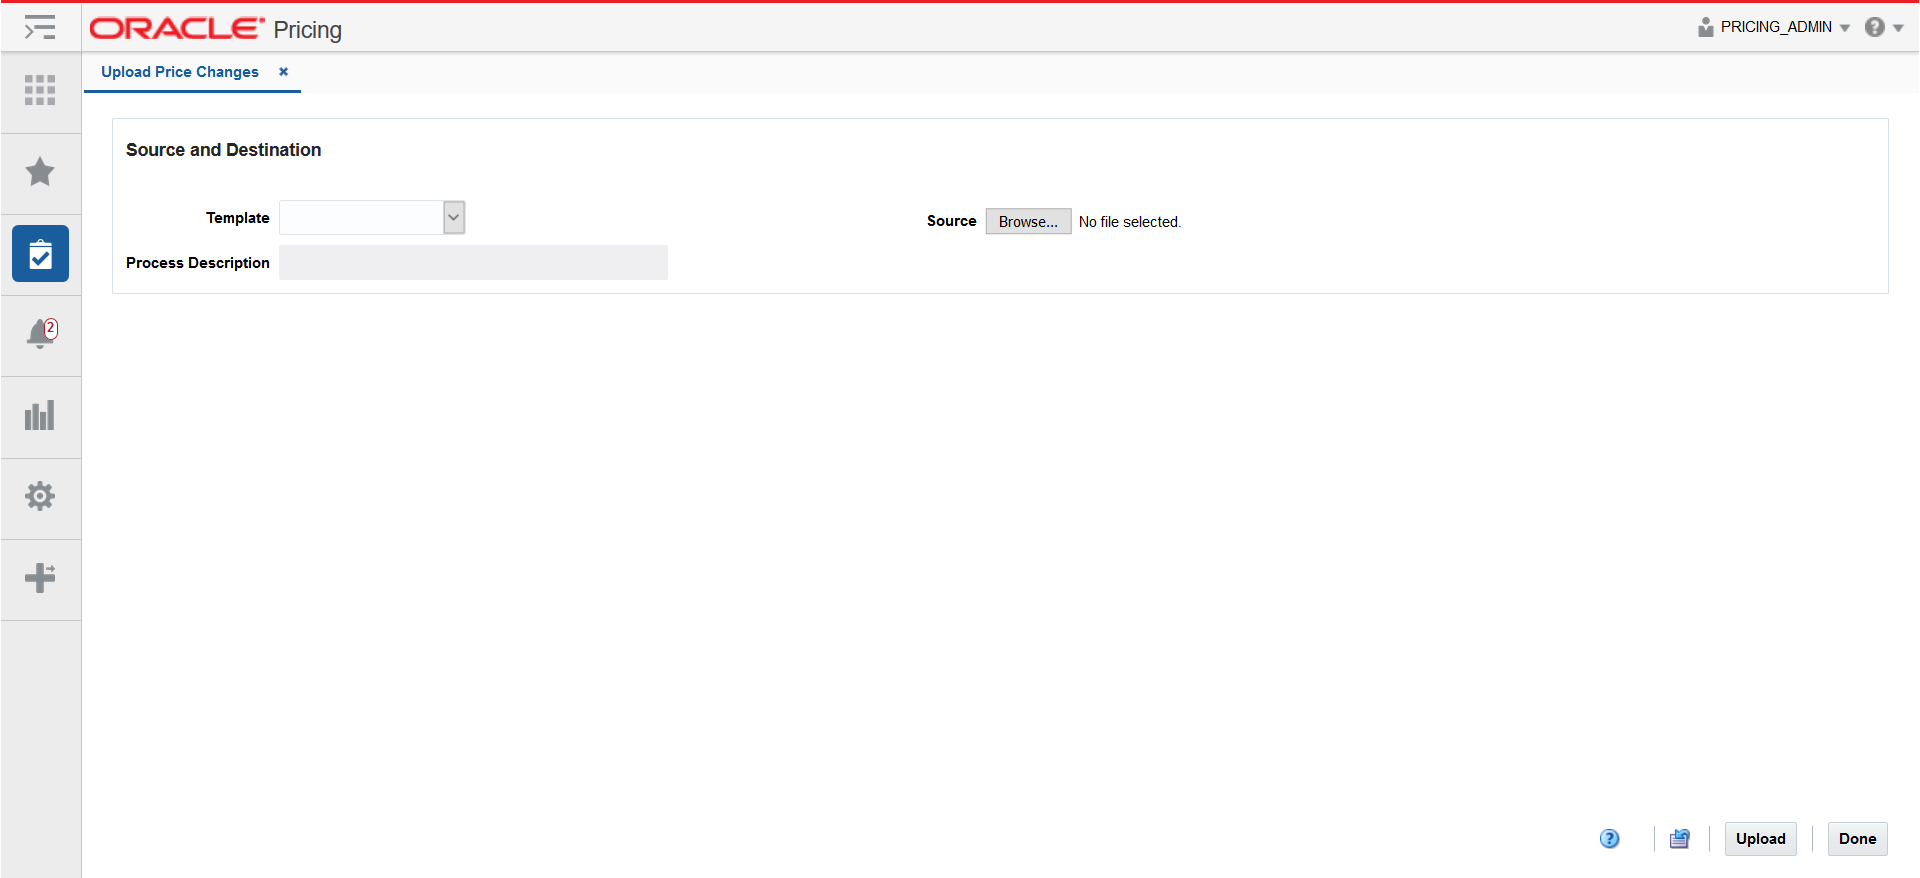
From the Tasks menu, select Upload Price Changes under Price Changes. The Upload Price Changes tab opens.
-
In the Template field, select Price Changes.
-
The Process Description field displays the default process name with the date and timestamp. You can edit the name of the upload process in this field.
-
In the Source field, click the Browse button to locate the spreadsheet file you want to upload and click Open.
-
Select one of the following options:
-
Click Upload to upload the file. If errors occur during the upload process, you will get a notification.
-
Click the Revert icon to clear out the screen inputs.
-
-
Click Done to close the Upload Price Changes window.
Download Price Changes
Perform the following procedure to download price changes:
-
Perform a search for the price change group(s) that you want to update. See "Search for a Price Change Group" for more information.
-
From the search results pane, select the Price Change Group(s) you wish to download.
-
Select the Download Selected option from the Action Menu.
-
Select the Price Change template. This will automatically populate the Process Description field (which you can then change).
-
Select OK.
-
Open the file or save it on your system.
View Issues
The Data Loading Status window allows you to view the status of the upload and download processes happening in Pricing, so that you can rectify the issues associated with the upload/download process.
The window allows you to drill down to the errors or warnings associated with a selected upload/download request.
You can access the Data Loading Status window from the Task menu, select Foundation Data > Review Status. The Data Loading Status window appears.
The Data Loading Status window contains the following sections.
Table
The table displays the process, process description, file name, template category and type, destination, action date and time, status and the user, who initiated the process.
Table - Actions Menu and Icons
Use the Actions Menu and icons to apply actions to the table. You can perform the actions listed below.
Table 4-1 Data Loading Status Table - Actions Menu/Icons and Description
| Actions Menu/Icons | Description |
|---|---|
|
Delete and Delete icon |
You can delete a process by using the following steps:
|
|
Export to Excel and Export to Excel icon |
You can export the records in the table to a Microsoft Excel spreadsheet by selecting Actions > Export to Excel or by using the Export to Excel icon |
|
View Issues and View Issues button |
To view the warnings and errors associated with a selected upload/download request:
|
Data Loading Status - View Menu and Icons
You can customize the view of the table by using the options in the View Menu.
Table 4-2 Table Data Loading Status - View Menu/Icons and Description
| View Menu/Icons | Description |
|---|---|
|
Columns |
You can manage which of the columns will be shown in the table by clicking the Show All and Manage Columns options. |
|
Detach and Detach icon |
You can view the table in the application in a separate window by clicking Detach or by using the Detach icon |
|
Sort |
You can sort columns by the following options:
|
|
Reorder Columns |
You can reorder columns by clicking the Reorder Columns option. |
|
Query by Example and Query by Example icon |
You can filter the items by one or multiple column values by clicking the Query by Example option or by using the Query by Example icon |
Data Loading Status Toolbar
The toolbar contains the following icons and buttons.
Table 4-3 Data Loading Status Toolbar - Icons/Buttons and Description
| Icons/Buttons | Description |
|---|---|
|
Help icon |
You can access the online help for a particular page by clicking the Help icon |
|
Refresh icon |
You can refresh the window by clicking the Refresh icon. All entries are reset and not saved. |
|
Save |
Click Save to save the entered records. |
|
Save and Close |
Click Save and Close to save the entered records and close the window. |
|
Cancel |
Click Cancel to reject all entries and close the window. |
|
Done |
If you open the window in view mode, the Done button is displayed. Click Done to close the window. |