3 Define Audit Rules
As a retailer, you may want to supplement the validation built into Sales Audit by defining your own audit rules. You can define these rules based on transaction data or totals using the Rule Definition module of Sales Audit.Because rules are associated with specific errors, you must define the errors and their impacts before you create the audit rules you need. These definitions can disable exports to the impacted system until all errors concerning the system are corrected, or they can disable the export of a particular transaction until it is corrected based on the option selected.When you create an audit rule, it is initially in the Worksheet Status. You can view, run, modify, and test the rule. Errors created by rules in Worksheet Status are stored in the Error Worksheet table. Once you are satisfied that the rule works correctly, you can submit it and then later approve it.Rules are executed each time you choose to run the re-total or the audit process using the Sales Audit user interface.
This chapter contains the following topics to help you understand and manage audit rules in Sales Audit:
Create Rules
Sales Audit uses rules to perform custom data validation against transactions and totals. Audit rules use POS/OMS transaction data and totals during the automated and interactive audit process. When a rule is broken, an exception error is thrown; that error must be edited or overwritten by the auditor.
Sales Audit comes with standard, pre-configured rules. You can also define rules needed for your business.
The Rule Maintenance wizard allows you to create and update a rule definition. Each window in the wizard has a text box to the right that displays help text for each field.
Define Basic Information for Rules
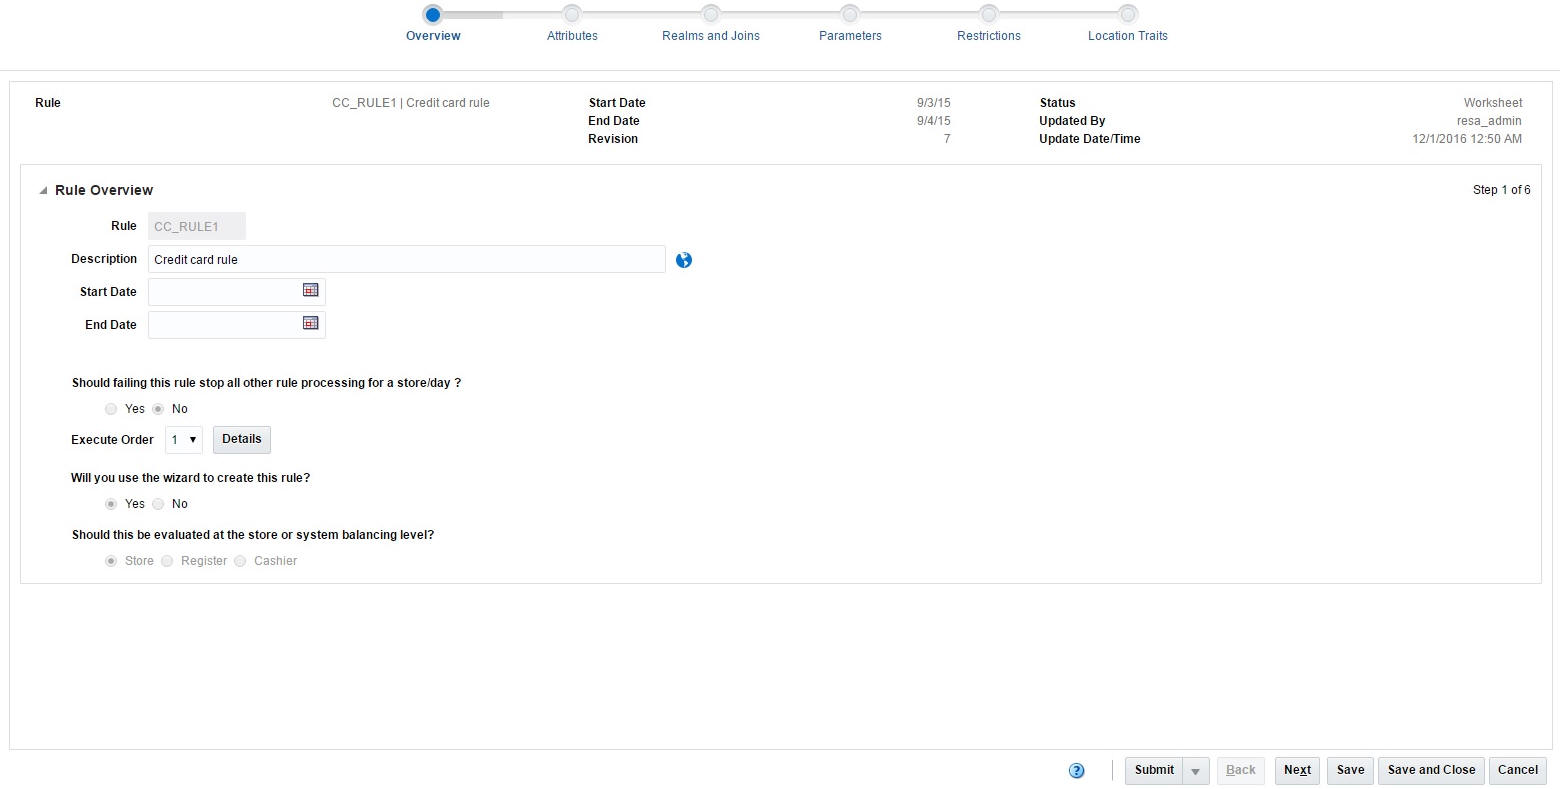
The Overview window allows you to define basic information for a rule. You can enter the following information using the Rule Overview window:
| Field | Description |
|---|---|
| Rule | A unique ID and a description for the rule. |
| Start Date and End Date | The period for which the rule is active. |
| Status | The status (Worksheet, Approved, Submitted, Disabled, or Deleted) of the rule. |
| Revision | The revision number for the rule. The revisions are tracked by the system. |
| Updated By | User ID of the person who updates the rule. This field is recorded by the system and you cannot edit it. |
| Update Date/Time | The date and time when the rule was last updated. |
| Should failing this rule stop all other rule processing for a store/day? | Use this field for rules that determine whether basic data exists for a store/day. For example, there can be a rule that determines whether a basic piece of data is missing. In case the basic information is missing, it would not make sense to continue flagging errors that confuses the auditor. |
| Execute Order | Use this field to determine the order in which rules are processed. Rules are placed into various execute groups. Within groups, rules are executed in alphabetical order. |
| Will you use the wizard to create this rule? | Use this field to specify whether you are defining the rule using the rule definition wizard, or through a manually written rule definition function.
Note: Selecting No is supported for on-premise implementations of Sales Audit only. |
| Should this be evaluated at the store or system balancing level? | Use this field to specify whether the rules are evaluated at store, register, or cashier level. |
Define Rule Attributes
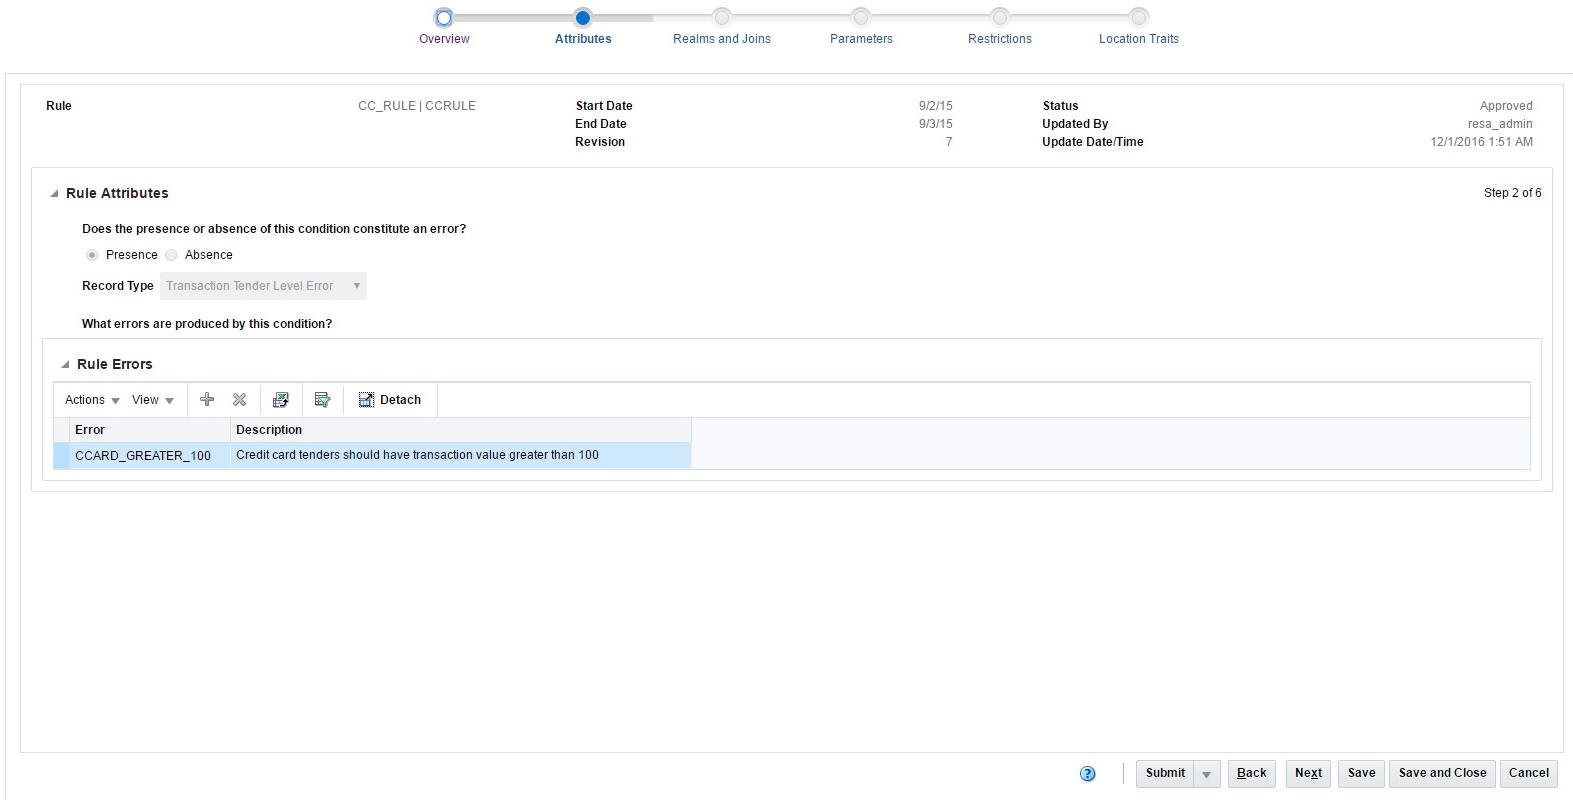
The Rule Attributes window allows you to define characteristics of the rule.
| Field | Description |
|---|---|
| Does the presence or absence of this condition constitute an error? | Specify whether the rule triggers an error when a constraint condition is met (presence) or when the data does not exist in the data set (absence). |
| Record Type | Specify the kind of record that errors are associated with. |
| Rule Errors | You can choose to associate any predefined errors with the rule. You can view details about all errors by clicking the Error Details button. |
Define Realms and Joins
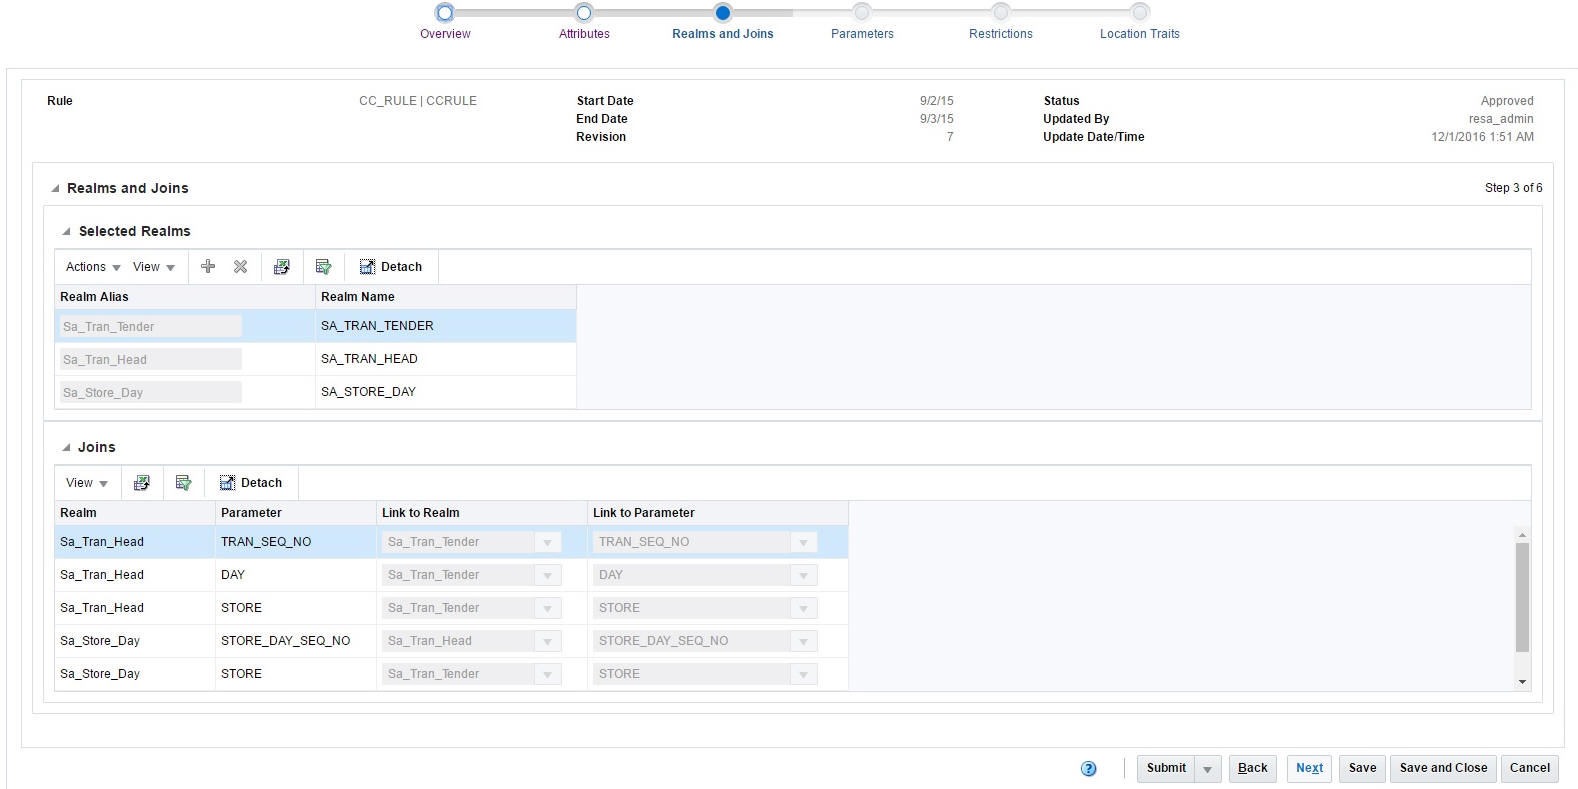
The Selected Realms section allows you to add existing realms (tables) to the rule. The list of available realms is displayed in the window, this list also includes the views created for each total.
Availability of realms to be added to the rule is determined by whether possible joins exist with the realms that are already added to the rule definition.
In general, you should add the general/parent tables, and then add the specific/child tables. If at any time, a realm that you want to use is unavailable, you should remove the realms already added to the rule, and try again in another order.
The Joins section displays how the realms are joined together. These joins are based on metadata defined in the system.
Define Parameters
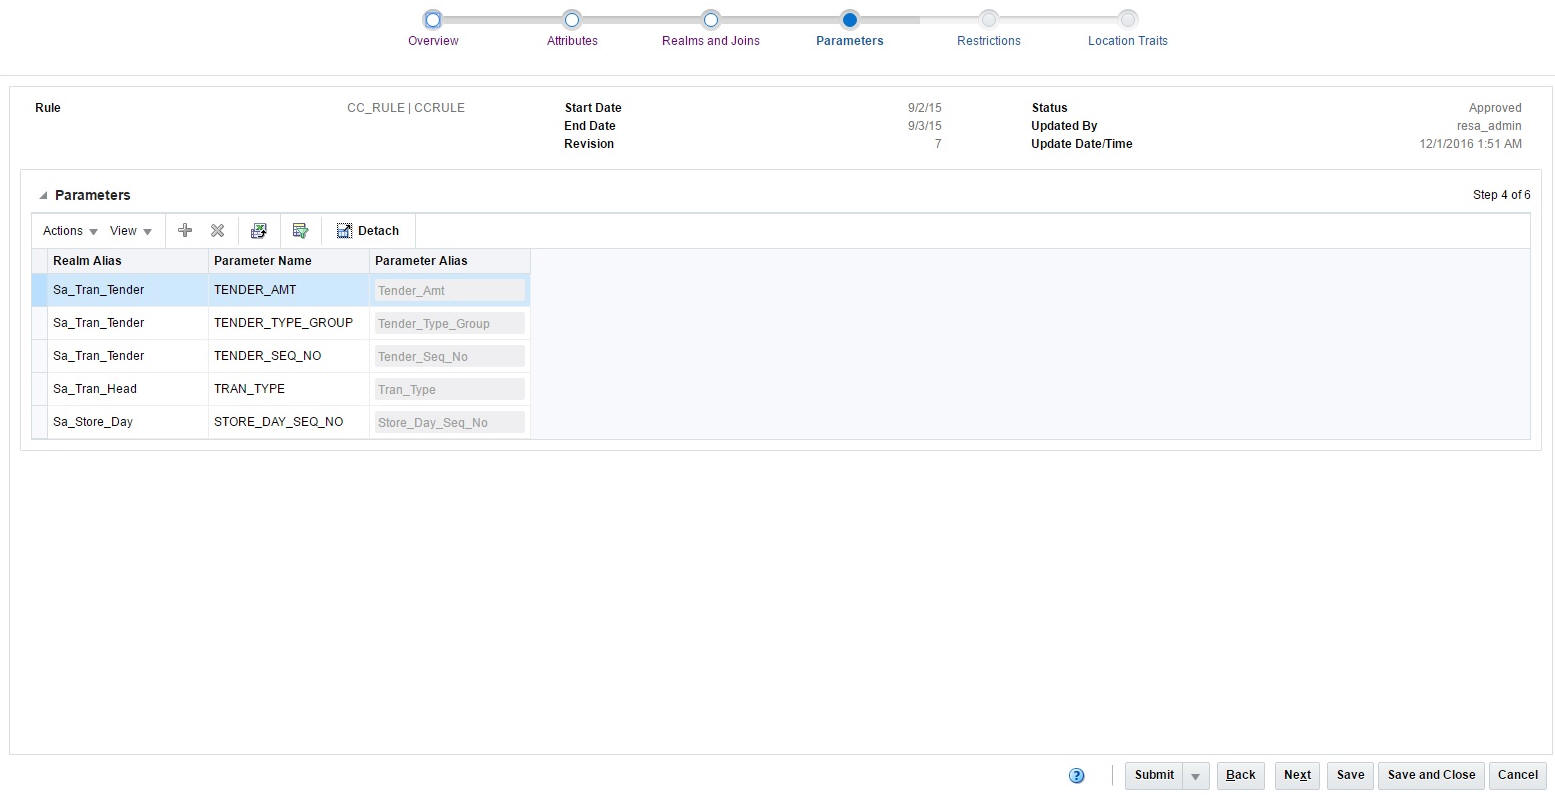
The Parameters window allows you to choose the parameters for the rule. You can only choose parameters (columns) that are available in one of the realms that were previously added to the rule. You should add all parameters that you need to use in defining the constraint conditions on the rule. The system uses the parameters needed to log the errors against the correct day and record type.Begin by choosing one of the realms. The parameter list then displays a list of all of the parameters (columns) that belong to the selected realm (table/view). You must choose the parameter that you need to count or sum and any other parameters that may be used to limit the data set.
Define Restrictions
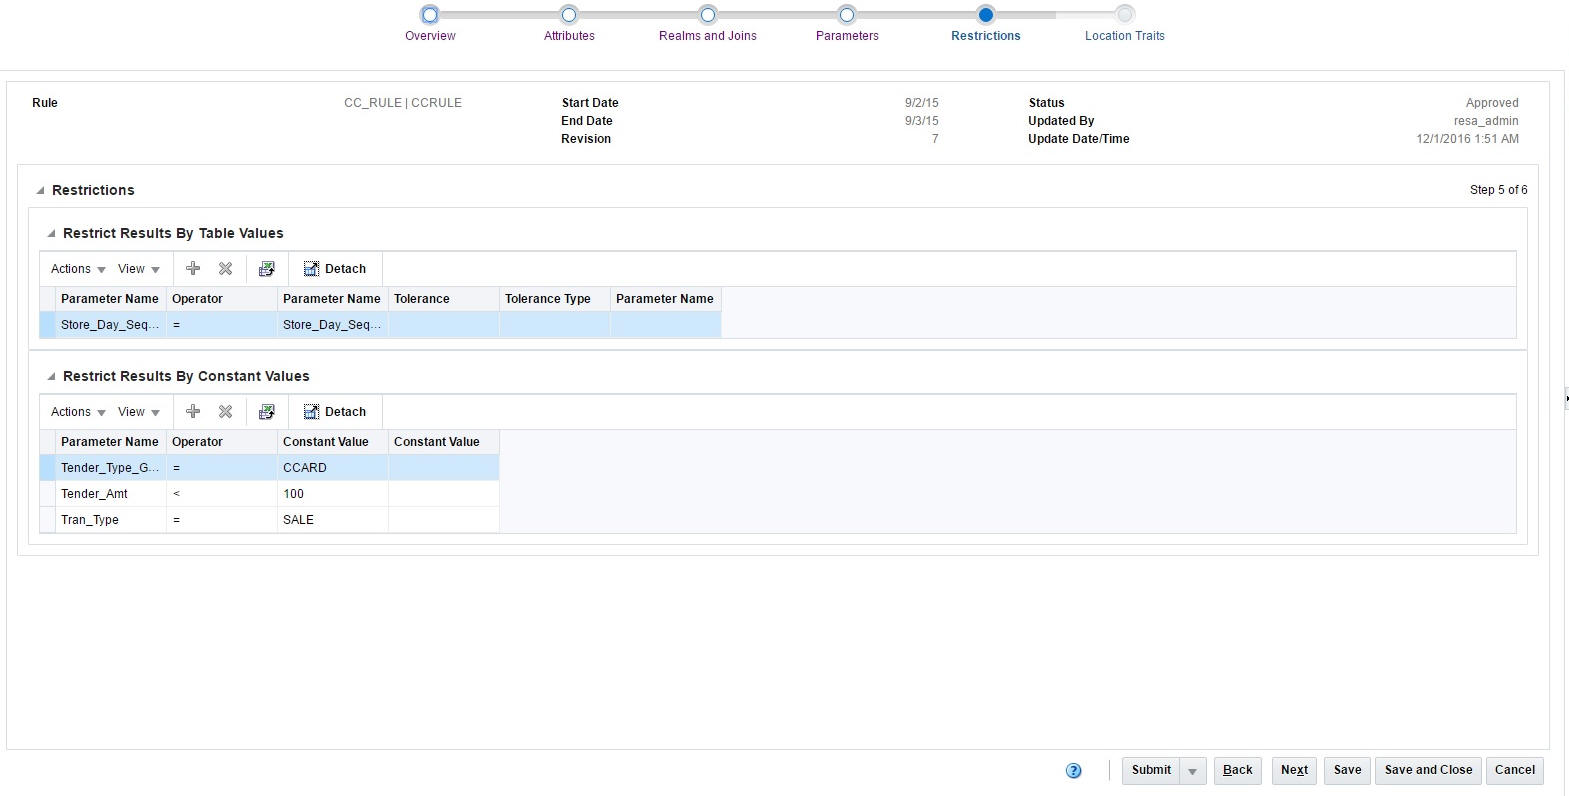
The Restrictions window allows you to limit the data set that is included in the rule. You can only define these restrictions (constraint conditions) using the parameters that were previously added to the rule.
Define Location Traits

The Location Traits window allows you to associate rules with location traits which link a group of stores. Once the association is specified, the rule is applied only for those stores. If the rule is based on a total, you can execute the rule only for stores for which the total is calculated.
Create Rule Calculation Definition
To create a rule calculation definition:
-
From the Tasks menu, select Foundation Data > Create Audit Rule. The Rule Maintenance window appears.
-
In the Rule field, enter the ID and description of the rule definition.
-
In the Start Date and End Date fields, enter the dates for which the rule definition is effective.
-
Click Next to navigate through the wizard. For more information on the various fields on each window of the Rule Maintenance wizard, see Create Rules.
-
Click Save to create the rule calculation definition.
Manage Rules
You can use the following procedures to manage audit rules in Sales Audit:
Edit Rules
To edit a rules calculation definition:
-
From the Tasks menu, select Foundation Data > Manage Audit Rules. The Audit Rule Search window appears.
-
Search for and retrieve the rules calculation definition in Edit mode. The Rule Calculation Definition Wizard window appears.
-
Once the changes are complete, click Finish to save your changes and close the window.
View Rules
To view a rule calculation definition:
-
From the Tasks menu, select Foundation Data > Manage Audit Rules. The Audit Rule Search window appears.
-
Enter additional criteria as desired to make the search more restrictive.
-
Click Search. The rules that match the search criteria are displayed in the Audit Rule Search window.
-
If you want to view the details of any rule definition, click the rule definition and select Actions > View.
The Rules Definition Wizard appears. You can only view all the details of the rules definition in this window.

Update Rule Status
The default status of a defined rule is Worksheet.You can change the status of the rules calculation definition based on the following actions:
-
Submit for approval
You can submit a rule calculation definition using the Submit option, this changes the status to Submitted.
-
Approve a rules calculation definition
Once a rules calculation definition is submitted for approval, you can approve it by changing the status of the rule to Approved by using the Approve option.
-
Disable a rules calculation definition
You can disable a rule calculation definition by changing the status to Disabled by using the disable option.
-
Delete a rules calculation definition
You can delete a rules calculation definition by changing the status to Deleted by using delete option.
To change the status of a rules definition calculation:
-
From the Tasks menu, select Foundation Data > Manage Audit Rule. The Audit Rules Search window appears.
-
Search for and retrieve the rules calculation definition in Edit mode. The Rules Calculation Definition Wizard window appears.
Note:
While submitting a rules calculation definition for approval, restrict the search to the rules in Worksheet status. -
Click the drop-down arrow next to the Submit button and select Submit, Approve, Disable, or Delete. You are prompted for confirmation.
-
Click Yes. The status is changed to Submitted, Approved, Disabled, or Deleted respectively.
-
Click Save to save your changes and close the window.