merchant Management
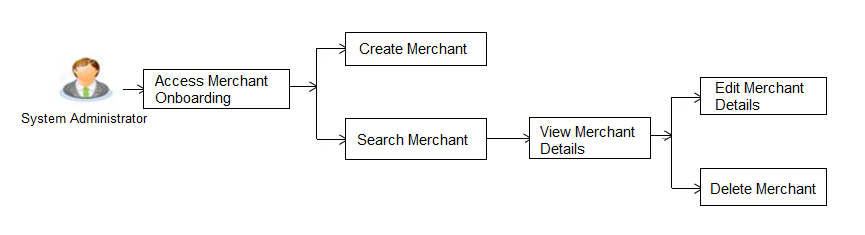
Merchant Onboarding facilitates the system administrator to set up and maintain merchants using the channel banking platform. This, in turn, enables the users to initiate merchant based payments using the channel banking facility. This is also helpful in maintaining merchant which will act as a payment aggregator for sourcing funds from external sources to the wallet account.
Using this option, the system administrator can create and maintain merchant details in the application. Administrators can map the CASA![]() Current Account or Savings Accounts are operative accounts through which account holders perform day to day operations such as deposits and withdrawal of money. account of the merchant, to enable the merchant payments. The system administrator can also select the required remittance type to be mapped for the merchant payments while creating a merchant.
Current Account or Savings Accounts are operative accounts through which account holders perform day to day operations such as deposits and withdrawal of money. account of the merchant, to enable the merchant payments. The system administrator can also select the required remittance type to be mapped for the merchant payments while creating a merchant.
The remittance type can be
Pre-requisites
- Transaction access is provided to the System Administrator
- Approval rule set up for System Administrator to perform the actions
- Checksum type and checksum algorithm is maintained
- Enterprise roles are maintained in the application
- Merchant’s account is maintained in the host system
Workflow
Features Supported In Application
The following features are available for merchant maintenance:
![]() How to reach here:
How to reach here:
System Administrator![]() Administrator is a set of individuals that administer the applicant/Affiliate entity. For example, Accountants, Authorized Signatories for organizations, Power of Attorney for individuals. Dashboard > Onboarding > Merchant Onboarding > Merchant Management
Administrator is a set of individuals that administer the applicant/Affiliate entity. For example, Accountants, Authorized Signatories for organizations, Power of Attorney for individuals. Dashboard > Onboarding > Merchant Onboarding > Merchant Management
OR
System/ Bank Administrator Dashboard > Toggle Menu > Onboarding > Merchant Management
Merchant Management - Search
From this screen, the administrator is able to search existing merchant maintenances based on the search parameters provided. On being displayed the search results based on the search criteria defined, the administrator is able to view the details of any merchant maintenance by selecting a record.
To search merchant:
- Navigate to the Merchant Management screen.
|
Field Name |
Description |
|---|---|
|
Merchant ID |
Enter the unique ID of the merchant whose details you want to view. |
|
Merchant Description |
Enter the description of the merchant whose details you want to view. |
- In the Merchant Id field, enter the unique id of the merchant.
OR
In the Merchant Description field, enter the description of the merchant. - Click Search. The Merchant Management screen with search results appears based on the search parameters.
OR
Click if you want to reset the search parameters.
OR
Click if you want to cancel the transaction.
OR
Click to create another merchant maintenance.
|
Field Name |
Description |
|---|---|
|
Merchant ID |
The facility to search for a specific merchant maintenance record on the basis of the unique ID/key assigned to the merchant by the bank. |
|
Merchant Description |
The facility to search for a specific merchant maintenance based on the description of the merchant. |
|
Search Results The following details are displayed per merchant record which are retrieved based on the search criteria identified in the fields defined above. |
|
|
Merchant Id |
The unique ID/key assigned to the specific merchant by the bank. |
|
Merchant Description |
The description of the merchant corresponding to the merchant Id. |
- To view the details of a specific merchant, click the record. The Merchant Management - View screen appears.
Merchant Management – Outward Remittance
Outward remittance involves the transfer of money from the merchant’s accounts to other accounts through various channels. The Merchant Management screen allows the system administrator to view, create, edit and delete the merchant details.
Merchant Management – Outward Remittance - View
On selecting a specific merchant record by clicking on the link provided on the merchant description, the screen displaying the details of the selected merchant is displayed.
|
Field Name |
Description |
|---|---|
|
Remittance Type |
The type or remittance mapped to the merchant. The remittance type can be:
|
|
Merchant Id |
The unique ID/ key assigned to the merchant by the bank. |
|
Merchant Description |
The description of the merchant. |
|
QR Code |
Click the QR code link to view the QR code assigned to the merchant. |
|
Accounts |
|
|
Credit Account Details |
|
|
Account Type |
The type of account associated with the merchant, e.g. CASA. |
|
Account Number |
The merchant’s account number. |
|
Service Charge Account Details |
|
|
Define another account for service charge |
This checkbox is selected if the merchant has another account defined for service charge. |
|
Account Type |
The service charge account type associated with the merchant e.g. CASA account. This field appears if Define Account number for service charge check box is selected. |
|
Account Number |
The merchant’s account number. This field appears if Define Account number for service charge check box is selected. |
|
Default customer's debit account number as request parameter |
This check box is selected if the customer’s debit account number is defaulted as request parameter. |
|
Response Redirections |
|
|
Success URL |
The URL for sending the response of the transaction if it is a successful transaction. |
|
Failure URL |
The URL for sending the dynamic response of the transaction if it is a failed transaction. |
|
Checksum Details |
|
|
Checksum Type |
The checksum type. |
|
Checksum Algorithm |
The checksum algorithm. |
|
Security Key |
Input the security key. Field will be displayed if a value is selected in checksum algorithm. |
- Click the QR Code link to view the QR Code of the merchant. A pop-up screen with QR code appears.
You can also download the QR Code so as to send it to the merchant through offline mode. - Click to edit merchant details. The user is directed to the Merchant Management - Edit screen.
OR
Click Back to navigate to the previous screen.
OR
Click to cancel the transaction.
OR
Click to delete the merchant maintenance.
QR code
The QR code is displayed if the system administrator clicks on the QR code link on the Merchant Maintenance details screen. The administrator is provided with the facility to download the QR code so as to send it to the merchant through any offline mode.
- Click
 to download the QR Code image of the merchant.
Merchant Management – Outward Remittance - Create Merchant
The system administrator can create a new merchant so that the bank’s customers can make payments to the merchant using channel banking or by scanning the QR code of the Merchant without entering merchant account details. The QR code is generated once the merchant is created by the bank administrator.
To create a merchant:
- In the Merchant Maintenance screen, clickCreate. The Merchant Management - Create screen appears.
|
Field Name |
Description |
|---|---|
|
Select Remittance Type |
The type or remittance to be mapped to the merchant. The remittance type can be:
|
|
Merchant Id |
Specify a unique ID by which the merchant will be identified |
|
Merchant Description |
Enter a description of the merchant. |
|
Accounts |
|
|
Credit Account Details |
|
|
Account Type |
Specify the type of account i.e. CASA account, associated with the merchant. |
|
Account Number |
Specify the merchant’s credit account number. |
|
Service Charge Account Details |
|
|
Define another account for service charge |
The option to define another account of the merchant. |
|
Account Type |
Select the type of service charge account being added e.g. CASA account. This field appears only if you select the Define another Account for service charge check box. |
|
Account Number |
Enter the merchant’s service charge account number to be added. This field appears if you select the Define another Account for service charge check box. |
|
Default customer's debit account number as request parameter |
Select this box to enable defaulting the customers debit account number from request parameter. |
|
Response Redirections |
|
|
Success URL |
Specify the URL for sending the response of the transaction if it is a successful transaction. |
|
Failure URL |
Specify the URL for sending the response of the transaction if it is a failed transaction. |
|
Checksum Details |
|
|
Checksum Type |
Specify the checksum type. |
|
Checksum Algorithm |
Specify the checksum algorithm. |
|
Security Key |
Input the security key. This field appears if a value is selected in checksum algorithm. |
- In the Merchant Id field, enter the ID of the merchant.
- In the Merchant Description field, enter the description of the merchant.
- From the Account Type list under the section Credit Account Details, select the appropriate account type.
- In the Account Number field, enter the account number of the merchant corresponding to the account type selected.
- In the Response Redirections section, enter the valid URL in the Success URL field.
- In the Response Redirections section, enter the valid URL in the Failure URL field.
- Click to save the Merchant details.
OR
Click to cancel the transaction.
OR
Click Back to navigate to the previous screen. - The Review screen appears, verify the details, and click to confirm the details.
OR
Click to make changes if any.
The administrator is directed to Merchant Management - Create screen with values in editable form.
OR
Click to cancel the operation and to navigate back to ‘Dashboard’. - The success message appears along with the status of the transaction.
Click .
Merchant Management – Outward Remittance - Edit
The system administrator can edit the details of any merchant maintained in the application. In order to edit the details of any merchant, the user must select the Edit option provided on Merchant Maintenance – View (details) page of the specific merchant.
To edit a merchant details:
- Navigate to the Merchant Management screen and in the Merchant Id field, enter the unique id of the merchant whose details you want to edit.
OR
In the Merchant Description field, enter the description of the merchant whose details you want to edit. - Click Search. The search results appear based on the search parameters defined.
OR
Click if you want to reset the search parameters.
OR
Click if you want to cancel the transaction.
OR
Click to create a new merchant maintenance.
- Select the merchant record of which details you want to edit, by selecting the link provided on the merchant description. The Merchant Management - View screen appears.
- Click the option available on the Merchant Management – View screen to edit merchant details. The administrator is directed to the Merchant Management - Edit screen.
|
Field Name |
Description |
|---|---|
|
Select Remittance Type |
The type or remittance mapped to the merchant. The remittance type can be:
|
|
Merchant ID |
The unique ID assigned to the merchant by the bank This field cannot be edited. |
|
Merchant Description |
The description of the merchant. This field is editable |
|
Accounts |
|
|
Credit Account Details |
|
|
Account Type |
The type of account associated with the merchant, e.g. CASA. This field is editable. |
|
Account Number |
The merchant’s credit account number. This field is editable. |
|
Service Charge Account Details |
|
|
Define another account for service charge |
This check box is checked if the merchant has another account defined for service charge. This field is editable. |
|
Account Type |
The service charge account type associated with the merchant e.g. CASA account. This field is editable. This field appears if Define Account number for service charge check box is selected. |
|
Account Number |
The merchant’s credit account number. This field is editable. This field appears if Define Account number for service charge check box is selected. |
|
Default customer's debit account number as request parameter |
This checkbox is checked if the customer’s debit account number is defaulted as request parameter. This field is editable. |
|
Response Redirections |
|
|
Success URL |
The URL for sending the response of the transaction if it is a successful transaction. |
|
Failure URL |
The URL for sending the response of the transaction if it is a failed transaction. |
|
Checksum Details |
|
|
Checksum Type |
The checksum type. This field is editable. |
|
Checksum Algorithm |
The checksum algorithm. This field is editable. |
|
Security Key |
Input the security key. This field is editable. This field appears only if a value is selected in checksum algorithm |
- Update the required fields, click to save the changes.
OR
Click to cancel edit of the merchant maintenance.
OR
Click to navigate to the previous screen. - The Review screen appears, verify the details and click to confirm the details.
OR
Click to make the changes if any.
The administrator is directed to Merchant Management – Edit screen with all values (other than Merchant ID) in editable form
OR
Click to cancel the operation and navigate back to ‘Dashboard’. - The success message appears along with the status of the transaction. Click .
Merchant Management – Inward Remittance
Inward remittance refers to money being received to merchant's account/s from the various channels.
Using this maintenance System/Bank administrator can save the details of Payment aggregator which will act as a medium for transferring the funds to user’s wallet account from the external source (Credit card/ Debit card/ Net banking). The Merchant Management screen allows the system administrator to view, create, edit and delete the inward merchant details.
Merchant Management – Inward Remittance - View
On selecting a specific merchant record by clicking on the link provided on the merchant description, the screen displaying the details of the selected inward remittance merchant is displayed.
|
Field Name |
Description |
|---|---|
|
Remittance Type |
The type or remittance mapped to the merchant. The remittance type can be:
|
|
Merchant Id |
The unique ID/ key assigned to the merchant by the bank. |
|
Merchant Description |
The description of the merchant. |
|
Accounts |
|
|
Debit Account Details |
|
|
Account Type |
The type of account associated with the merchant, Only CASA type of accounts are supported. |
|
Account Number |
The merchant’s account number. |
|
Response Redirections |
|
|
Redirection URL |
The URL for sending the response of the transaction for redirection. |
|
Success URL |
The URL for sending the response of the transaction if it is a successful transaction. |
|
Failure URL |
The URL for sending the response of the transaction if it is a failed transaction. |
|
Checksum Details |
|
|
Checksum Type |
The checksum type. |
|
Checksum Algorithm |
The checksum algorithm. |
|
Security Key |
Input the security key. Field will be displayed if a value is selected in checksum algorithm. |
- Click to edit merchant details. The user is directed to the Merchant Management - Edit screen.
OR
Click Back to navigate to the previous screen.
OR
Click to cancel the transaction.
OR
Click to delete the merchant maintenance.
Merchant Management – Inward Remittance - Create Merchant
The system administrator can create a new inward remittance merchant so that the bank’s customers can receive payments in their wallet using the merchant ( payment aggregator) using channel banking.
To create a merchant:
- In the Merchant Maintenance screen, clickCreate. The Merchant Management - Create screen appears.
|
Field Name |
Description |
|---|---|
|
Select Remittance Type |
The type or remittance to be mapped to the merchant. The remittance type can be:
|
|
Merchant Id |
Specify a unique ID by which the merchant will be identified |
|
Merchant Description |
Enter a description of the merchant. |
|
Accounts |
|
|
Debit Account Details |
|
|
Account Type |
Specify the type of account associated with the merchant, Only CASA type of accounts are supported. |
|
Account Number |
Specify the merchant’s credit account number. |
|
URL |
|
|
Redirection URL |
Specify the URL for sending the response of the transaction for redirection. |
|
Success URL |
Specify the URL for sending the response of the transaction if it is a successful transaction. |
|
Failure URL |
Specify the URL for sending the response of the transaction if it is a failed transaction. |
|
Checksum Details |
|
|
Checksum Type |
Specify the checksum type. |
|
Checksum Algorithm |
Specify the checksum algorithm. |
|
Security Key |
Input the security key. This field appears if a value is selected in checksum algorithm. |
- In the Merchant Id field, enter the ID of the merchant.
- In the Merchant Description field, enter the description of the merchant.
- From the Account Type list under the section Account Details, select the appropriate account type.
- In the Account Number field, enter the account number of the merchant corresponding to the account type selected.
- In the Redirection URL field, enter the valid URL.
- In the Success URL field, enter the valid URL.
- In the Failure URL field, enter the valid URL.
- Click to save the Merchant details.
OR
Click to cancel the transaction.
OR
Click Back to navigate to the previous screen. - The Review screen appears, verify the details, and click to confirm the details.
OR
Click to make changes if any.
The administrator is directed to Merchant Management - Create screen with values in editable form.
OR
Click to cancel the operation and to navigate back to ‘Dashboard’. - The success message appears along with the status of the transaction.
Click .
Merchant Management – Inward Remittance - Edit
The system administrator can edit the details of any inward remittance merchant maintained in the application. In order to edit the details of any merchant, the user must select the Edit option provided on Merchant Maintenance – View (details) page of the specific merchant.
To edit a merchant details:
- Navigate to the Merchant Management screen and in the Merchant Id field, enter the unique id of the merchant whose details you want to edit.
OR
In the Merchant Description field, enter the description of the merchant whose details you want to edit. - Click Search. The search results appear based on the search parameters defined.
OR
Click if you want to reset the search parameters.
OR
Click if you want to cancel the transaction.
OR
Click to create a new merchant maintenance.
- Select the merchant record of which details you want to edit, by selecting the link provided on the merchant description. The Merchant Management - View screen appears.
- Click the option available on the Merchant Management – View screen to edit merchant details. The administrator is directed to the Merchant Management - Edit screen.
|
Field Name |
Description |
|---|---|
|
Select Remittance Type |
The type or remittance mapped to the merchant. The remittance type can be:
|
|
Merchant ID |
The unique ID assigned to the merchant by the bank This field cannot be edited. |
|
Merchant Description |
The description of the merchant. This field is editable |
|
Accounts |
|
|
Debit Account Details |
|
|
Account Type |
The type of account associated with the merchant, Only CASA type of accounts are supported. This field is editable. |
|
Account Number |
The merchant’s credit account number. This field is editable. |
|
URL |
|
|
Redirection URL |
The URL for sending the response of the transaction for redirection. |
|
Success URL |
The URL for sending the response of the transaction if it is a successful transaction. |
|
Failure URL |
The URL for sending the response of the transaction if it is a failed transaction. |
|
Checksum Details |
|
|
Checksum Type |
The checksum type. This field is editable. |
|
Checksum Algorithm |
The checksum algorithm. This field is editable. |
|
Security Key |
Input the security key. This field is editable. This field appears only if a value is selected in checksum algorithm |
- Update the required fields, click to save the changes.
OR
Click to cancel edit of the merchant maintenance.
OR
Click to navigate to the previous screen. - The Review screen appears, verify the details and click to confirm the details.
OR
Click to make the changes if any.
The administrator is directed to Merchant Management – Edit screen with all values (other than Merchant ID) in editable form
OR
Click to cancel the operation and navigate back to ‘Dashboard’. - The success message appears along with the status of the transaction. Click .
Merchant Management - Delete
The System administrator can delete any merchant maintained in the application.
To delete a merchant:
- Navigate to the Merchant Management screen and in the Merchant Id field, enter the unique ID of the merchant whose maintenance you want to delete
OR
In the Merchant Description field, enter the description of the merchant whose maintenance you want to delete. - Click Search. The search results appear based on the search parameters defined.
OR
Click if you want to reset the search parameters.
OR
Click if you want to cancel the transaction.
OR
Click to create another merchant maintenance.
- Select the merchant record whose maintenance you want to delete, by selecting the link provided on the merchant description. The Merchant Management - View screen appears.
- Click the option available on the Merchant Management – View screen.
The application displays a message asking the applicant to confirm deletion.
- Click to delete the merchant. A confirmation page appears with a success message and the status of deletion.
OR
Click if you do not wish to delete ATM / Branch. - Click .
FAQs
![]() Who can create or edit merchants?
Who can create or edit merchants?
![]() Can I specify the account number which is not held within this Bank?
Can I specify the account number which is not held within this Bank?
![]() When will the newly added merchants be available to customers?
When will the newly added merchants be available to customers?
![]() What is the significance of defining separate account numbers for service charge account?
What is the significance of defining separate account numbers for service charge account?